


The throttle body is one of the most overlooked components in a vehicle’s engine system — until it fails. Seven common mistakes consistently ruin throttle bodies across all vehicle types: using the wrong cleaning chemicals, neglecting the air filter, skipping periodic cleaning, ignoring early warning signs, improper installation, skipping ECU recalibration, and installing low-quality aftermarket parts. Each of these errors degrades airflow control, disrupts the air-fuel mixture, and sets off a chain of increasingly expensive engine problems that could have been entirely avoided.
Recognizing the symptoms of a damaged throttle body early is what separates a $20 fix from a $600 replacement. When carbon deposits build up or sensors are damaged, drivers experience rough idle, sluggish acceleration, unexpected stalling, and illuminated check engine lights — symptoms that worsen rapidly when left unaddressed. Understanding what these signs mean and which mistake caused them gives car owners the power to act before small issues become catastrophic failures.
Proper throttle body maintenance is not complicated, but it does require doing the right things in the right order. throttle body cleaning, performed at the correct interval with the correct products, prevents the majority of damage cases. Knowing when cleaning is sufficient — and when replacement is the only option — can save hundreds of dollars and weeks of unreliable driving.
Beyond the standard mistakes and maintenance tips, certain engine configurations and environmental conditions create unique throttle body risks that most guides never cover. Turbocharged engines, E85 fuel systems, cold climates, and the fundamental differences between drive-by-wire and cable-driven throttle systems all introduce specialized failure modes. Next, this article addresses every layer of throttle body damage — from the most common beginner mistakes to the rare scenarios that trip up even experienced mechanics.
What Exactly Does a Throttle Body Do — And Why Does Damage Matter?
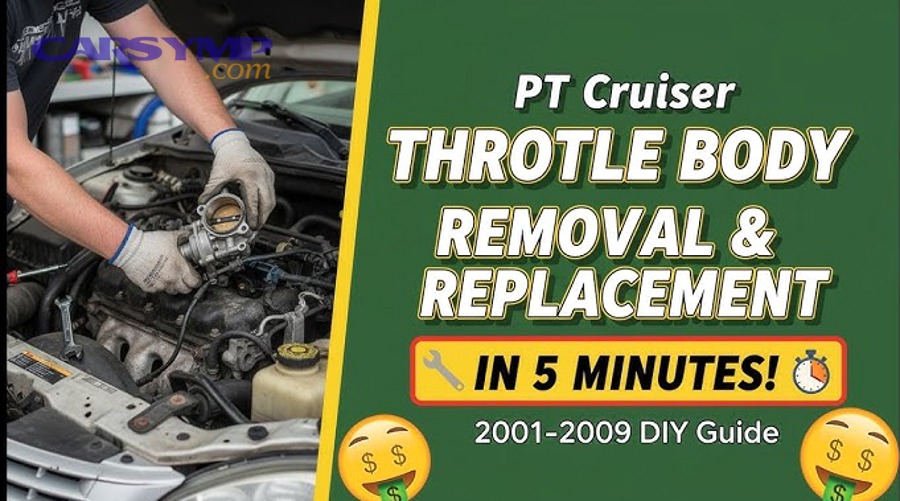
The throttle body is a precision air-control valve positioned between the air filter and the intake manifold, featuring a butterfly valve that regulates the volume of air entering the engine to maintain the correct air-fuel ratio at all RPM ranges.
To better understand why damage matters so deeply, it helps to trace exactly what happens when this component begins to fail.
How Does a Throttle Body Control Engine Performance?
The throttle body controls engine performance by acting as the primary gatekeeper for airflow into the combustion chamber. When a driver presses the accelerator pedal, a signal is sent — either mechanically through a cable or electronically through the Engine Control Unit (ECU) — to open the butterfly valve. The wider the valve opens, the more air enters the engine. The ECU then calculates the precise amount of fuel to inject in order to match that airflow, creating the combustion event that produces power.
Sitting at the center of this process is the Throttle Position Sensor (TPS), which continuously reports the butterfly valve’s exact angle to the ECU. If carbon deposits coat the valve or the sensor becomes contaminated, the TPS sends inaccurate readings. The ECU, receiving false data, injects either too much fuel (running rich) or too little (running lean). Both conditions cause misfires, reduced fuel economy, and long-term damage to components further down the engine — including the catalytic converter, spark plugs, and oxygen sensors.
Is a Damaged Throttle Body Dangerous to Drive With?
Yes, driving with a damaged throttle body is genuinely dangerous for three critical reasons: it can trigger limp mode with severely restricted power, it can cause sudden stalling in active traffic, and it can produce unpredictable acceleration responses that make the vehicle unreliable in emergency situations.
Specifically, modern drive-by-wire vehicles are programmed with a failsafe response. When the ECU detects that the throttle body is sending inconsistent or out-of-range signals, it activates limp mode — a protective state that caps engine output at roughly 30–40% of normal power. While this protects the engine, it also means the vehicle may be unable to merge onto a highway, climb a steep grade, or respond normally when avoiding a hazard. On cable-driven systems without this electronic protection, a stuck or partially obstructed butterfly valve can cause the engine to hold an unintended RPM, making the car difficult to control at low speeds. Neither scenario is one a driver wants to encounter without warning.
What Are the 7 Common Mistakes That Ruin Your Throttle Body?
There are 7 core mistakes that ruin throttle bodies, each categorized by whether the damage is chemical, mechanical, electronic, or behavioral — and every single one is preventable with the right knowledge.
Specifically, each mistake below is examined through three lenses: what the mistake actually involves, the mechanism by which it causes damage, and the concrete action that prevents it.
Mistake #1 — Using the Wrong Cleaning Products on the Throttle Body
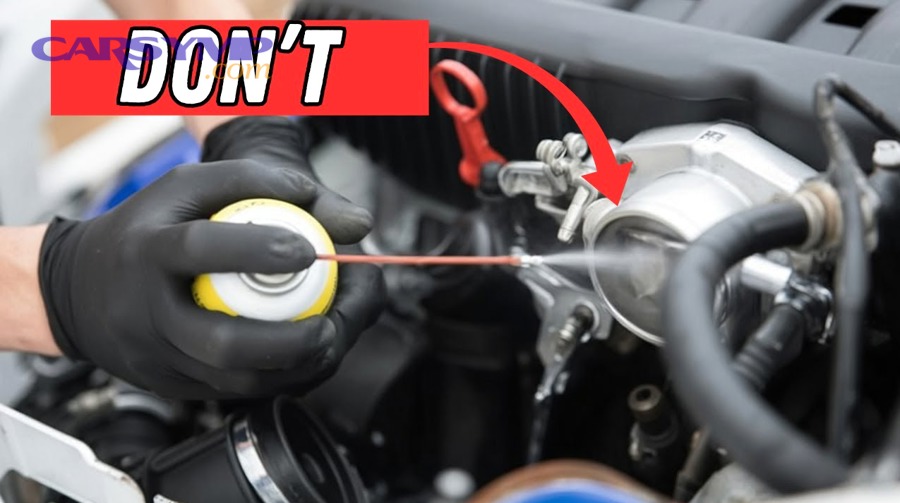
Using the wrong cleaning products is one of the fastest ways to cause immediate, irreversible damage to a throttle body. Many car owners reach for brake cleaner, carburetor cleaner, or general-purpose degreasers because they are cheaper and already on the shelf. These solvents are far too aggressive for throttle body applications.
The problem is most severe on modern electronic throttle bodies, which integrate the TPS and actuator motor directly into the housing. Harsh chemical solvents dissolve the protective coatings on plastic sensor components, degrade rubber seals inside the valve shaft, and strip the factory-applied anti-corrosion treatment from the aluminum bore. Once these coatings are gone, carbon buildup accelerates dramatically, and sensor readings become permanently erratic.
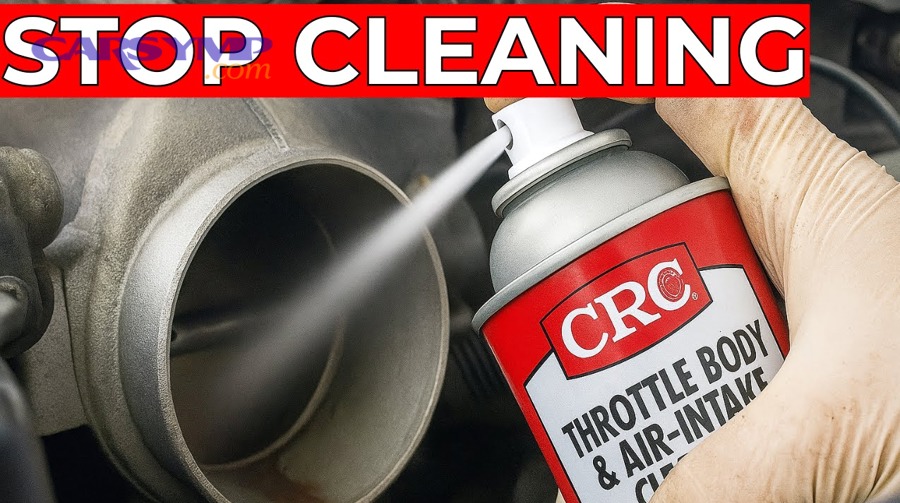
The correct product to use is a dedicated throttle body cleaner — a formulation specifically designed to dissolve carbon deposits and oil residue without harming sensors, plastics, or coatings. When cleaning, the ignition should be off and the battery disconnected on drive-by-wire systems to prevent the actuator from moving during the process. A soft-bristle brush, not a metal wire brush, should be used to agitate deposits on the valve plate.
Mistake #2 — Neglecting or Never Replacing the Air Filter
Neglecting the air filter is the single most common upstream cause of throttle body contamination. The air filter’s entire purpose is to prevent airborne dirt, dust, pollen, and debris from entering the intake tract. When it becomes clogged or is simply never replaced, two damaging things happen simultaneously.
First, unfiltered particles bypass the restriction and enter the throttle body bore, where they adhere to the slightly oily surface left by blow-by vapors. Over time, these particles combine with carbon and oil mist to form the hardened deposits known as coking. Second, a heavily restricted air filter creates a partial vacuum in the intake, which draws more crankcase oil vapor through the PCV (Positive Crankcase Ventilation) system than the engine was designed to handle. This excess oil mist coats the interior of the throttle body far faster than normal operating conditions would produce.
Most manufacturers recommend replacing the engine air filter every 15,000 to 30,000 miles, though vehicles driven in dusty environments — construction sites, gravel roads, agricultural areas — should inspect the filter every 10,000 miles or sooner. A clean air filter is the cheapest throttle body protection available.
Mistake #3 — Skipping Periodic Throttle Body Cleaning
Skipping periodic throttle body cleaning allows carbon and oil deposits to accumulate to the point where they physically restrict the butterfly valve’s range of motion. This process, called coking, is gradual and silent — which is exactly why so many drivers skip the maintenance until symptoms force their hand.
Coking creates a rough, uneven surface inside the throttle bore. As the deposit layer thickens, it narrows the effective opening even when the valve is fully open, reducing peak airflow. At idle — where the valve is barely cracked open — even a thin carbon ring around the bore’s edge can represent a significant percentage of the total available airflow. This is why rough idle and low idle are typically the first symptoms of a neglected throttle body. The engine cannot receive enough air at low throttle to maintain stable combustion.
The table below provides a Throttle body cleaning cost estimate for budgeting cleaning based on approach.
| Method | Estimated Cost | Notes |
|---|---|---|
| DIY cleaning (products only) | $10 – $30 | Requires throttle body cleaner, soft brush, safety gloves |
| Professional cleaning (labor + products) | $50 – $100 | Recommended for drive-by-wire systems requiring relearn |
| Combined with tune-up service | Often included | Ask your service advisor |
Most manufacturers and independent mechanics recommend cleaning every 30,000 to 45,000 miles, though vehicles with high oil consumption or lots of city driving benefit from cleaning every 20,000 miles.
Mistake #4 — Ignoring Early Warning Symptoms
Ignoring early warning symptoms is the mistake that turns a $25 cleaning job into a $400 replacement. The throttle body communicates distress through a very consistent set of early signals, and every one of them has a root cause that is still inexpensive to address at the early stage.
The most common early warning signs include:
- Rough or hunting idle — the engine RPM rises and falls rhythmically at a stop
- Hesitation on acceleration — a brief stumble or flat spot when pressing the pedal from a stop
- Check engine light — particularly with codes P0121, P2119, or P2135
- Slightly increased fuel consumption — the ECU compensating for inaccurate airflow data
- Occasional stalling — especially when decelerating to a stop
Each of these symptoms, when caught early, points to either carbon buildup (cleanable) or a beginning sensor drift (adjustable). When ignored, the carbon hardens to a lacquer-like consistency that resists standard cleaning, the sensor drift crosses the ECU’s error threshold permanently, and the valve begins to stick — requiring full replacement. According to diagnostic data compiled by the National Institute for Automotive Service Excellence (ASE), throttle body-related fault codes that are addressed within the first 5,000 miles of onset result in cleaning-only resolutions over 80% of the time. Beyond that window, replacement becomes the dominant outcome.
Mistake #5 — Improper Throttle Body Installation or Over-Tightening
Improper installation — whether during a DIY replacement or at an under-equipped shop — introduces mechanical damage that no amount of cleaning can fix. The two most common installation errors are over-tightening the mounting bolts and reusing a damaged or compressed throttle body gasket.
Over-tightening the mounting bolts applies uneven stress across the throttle body’s aluminum flange. Aluminum is significantly softer than the steel bolts used to secure it, and excess torque causes the flange to warp subtly. This warping breaks the seal between the throttle body and the intake manifold, creating a vacuum leak. A vacuum leak allows unmetered air to enter the engine downstream of the throttle body and Mass Air Flow (MAF) sensor. Since this air is never counted by the ECU, the engine runs lean without any corrective command — causing misfires, rough idle, and elevated combustion temperatures.
The correct approach is to always use a torque wrench, follow the OEM-specified torque value (typically 71–106 inch-pounds for most passenger vehicles, though this varies by make and model), and install a new gasket with every throttle body removal. A $2 gasket and 10 minutes of care prevent a problem that can mimic a full throttle body failure on any diagnostic scan.
Mistake #6 — Skipping ECU Recalibration After Cleaning or Replacement
Skipping the throttle body relearn procedure after cleaning or replacement is a mistake that leaves drivers confused — the new or freshly cleaned component is functionally fine, but the car idles poorly, hunts for RPM, or responds sluggishly. The hardware is correct; the software has not caught up.
The ECU stores a learned idle position for the throttle body’s butterfly valve based on accumulated operating data. When the throttle body is cleaned or replaced, the physical position of the valve at idle changes — even slightly. The ECU, still operating from its old learned values, commands the valve to a position that no longer matches the engine’s actual needs. The result is an erratic idle that can last from a few minutes to several days of driving while the ECU slowly self-corrects.
When cleaning won’t help but recalibration will: if a vehicle idles poorly immediately after a professional cleaning with no evidence of remaining deposits, the relearn procedure was skipped. Many vehicles can perform a self-relearn by simply idling for 10–20 minutes after the battery is reconnected. However, vehicles equipped with advanced electronic throttle control — particularly those from GM, BMW, Mercedes-Benz, and many Asian manufacturers after 2010 — require a proprietary scan tool to execute the throttle body adaptation procedure. Skipping this step on those platforms causes persistent idle faults that trigger unnecessary diagnostic charges.
Mistake #7 — Using Low-Quality or Incompatible Aftermarket Parts
Using a low-quality or incompatible aftermarket throttle body introduces a new set of problems at the moment of installation. The aftermarket throttle body segment contains a wide range of quality tiers — from reputable performance brands that exceed OEM specifications to low-cost, unbranded units with inconsistent bore tolerances, undersized actuator motors, and sensors that operate outside the voltage range the ECU expects.
The most critical incompatibility issue is sensor signal range. The ECU is calibrated to receive a specific voltage sweep from the TPS as the valve travels from fully closed to fully open. If an aftermarket unit’s TPS operates on a slightly different voltage range, the ECU interprets the signal as a fault code immediately — often P2135 (Throttle/Pedal Position Sensor/Switch A/B Voltage Correlation). Alternatively, a throttle body with a bore size that does not match the intake manifold creates a step in the airflow path, generating turbulence that reduces volumetric efficiency and causes inconsistent MAF readings.
OEM throttle bodies remain the safest choice for daily-driver vehicles under warranty or where long-term reliability is the priority. Performance aftermarket units from established brands — such as BBK, JET, or FAST — are appropriate for modified vehicles where increased airflow is a deliberate tuning goal, provided the ECU is recalibrated to match.
What Are the Warning Signs That Mistakes Have Already Damaged Your Throttle Body?
There are 6 primary warning signs that throttle body damage has already occurred: rough or erratic idle, hesitation during acceleration, check engine light activation, poor fuel economy, engine misfires, and unexpected stalling — and the specific combination of symptoms present often identifies which mistake caused the damage.

However, the severity and timing of symptoms vary significantly between early-stage and advanced damage, making it important to understand what each symptom signals about the extent of the problem.
What Does a Rough or Erratic Idle Indicate About Throttle Body Health?
A rough or erratic idle is the earliest and most consistent indicator that the throttle body is compromised, because idle is the operating condition where the butterfly valve is nearest to fully closed — making any restriction or inaccuracy in valve position proportionally most impactful.
At idle, the throttle body opens only a few degrees from fully closed. In this position, even a 1–2 mm carbon deposit around the bore’s perimeter represents a meaningful percentage of the total available airflow gap. The engine hunts — alternately receiving slightly more or slightly less air than needed — and the RPM oscillates in response. Drivers describe this as the engine “surging,” “shuddering,” or “feeling like it wants to stall.” In more advanced cases, particularly when the idle air control valve is also affected, the engine will stall completely when decelerating to a stop, requiring a restart.
This symptom is directly caused by Mistake #3 (skipping cleaning) and worsens dramatically when Mistake #4 (ignoring early warnings) compounds it over time.
Which OBD-II Fault Codes Are Linked to Throttle Body Damage?
OBD-II fault codes provide the most precise diagnostic window into throttle body health. The table below maps the codes most directly associated with throttle body damage to their likely root causes, helping owners and technicians prioritize the correct repair action.
| OBD-II Code | Description | Most Likely Cause |
|---|---|---|
| P0121 | TPS Circuit Range/Performance | Carbon buildup or sensor drift |
| P0221 | Throttle Position Sensor B Circuit | Sensor failure or wiring fault |
| P2119 | Throttle Actuator Control Body Range | Actuator motor wear or binding valve |
| P2135 | TPS A/B Voltage Correlation | Incompatible aftermarket unit or dual-sensor fault |
| P0506 | Idle Air Control RPM Low | Severe carbon restriction at idle position |
To retrieve these codes, an OBD-II scanner is plugged into the diagnostic port located beneath the dashboard on the driver’s side — universally present on all vehicles manufactured after 1996. A code alone does not confirm a failed throttle body; it confirms an out-of-range condition in that circuit. A mechanic should always perform a visual inspection for carbon buildup and a live-data voltage sweep of the TPS before condemning the component.
How Can You Prevent Throttle Body Damage Through Proper Maintenance?
Throttle body damage is prevented through 4 core maintenance practices: replacing the air filter on schedule, cleaning the throttle body at the correct interval with the correct products, performing the ECU relearn after any service, and using OEM-quality components for any replacement.
To begin applying these practices correctly, it is essential to establish both timing and technique for the two most actionable items: cleaning frequency and cleaning procedure.
How Often Should You Clean Your Throttle Body to Prevent Buildup?
The standard recommendation for throttle body cleaning is every 30,000 to 45,000 miles under normal driving conditions, though several factors warrant more frequent service regardless of mileage.
Vehicles should be cleaned sooner if any of the following apply:
- The engine oil consumption is higher than 1 quart per 2,000 miles (increases oil mist in the intake)
- The majority of driving is stop-and-go urban traffic (prevents the engine from reaching full operating temperature, accelerating coking)
- The vehicle is used in dusty or high-particulate environments
- Early symptoms — rough idle or hesitation — appear before the mileage threshold
Conversely, vehicles driven primarily on highways at sustained speeds, with regular oil changes and a clean air filter, can often extend cleaning intervals toward the 45,000-mile mark without issue. The most reliable indicator is a visual inspection: remove the air intake hose from the throttle body inlet and illuminate the bore with a flashlight. If the butterfly valve plate has a visible dark ring of deposit around its edge, cleaning is overdue regardless of mileage.
What Is the Correct Step-by-Step Process for Safe Throttle Body Cleaning?
Safe throttle body cleaning is accomplished in 6 steps, using the right products and precautions, with an expected outcome of restored idle quality and improved throttle response within one drive cycle after the ECU relearn.
- Turn off the engine and allow it to cool completely. Working on a hot engine risks burns and causes throttle body cleaner to evaporate before it can dissolve deposits.
- Disconnect the negative battery terminal on drive-by-wire vehicles. This prevents the actuator from activating and prevents ECU fault codes from being logged during the cleaning process.
- Remove the air intake hose from the throttle body inlet by loosening the hose clamp. On some vehicles, a mass air flow sensor is integrated into this hose — handle it carefully and avoid spraying cleaner directly onto it.
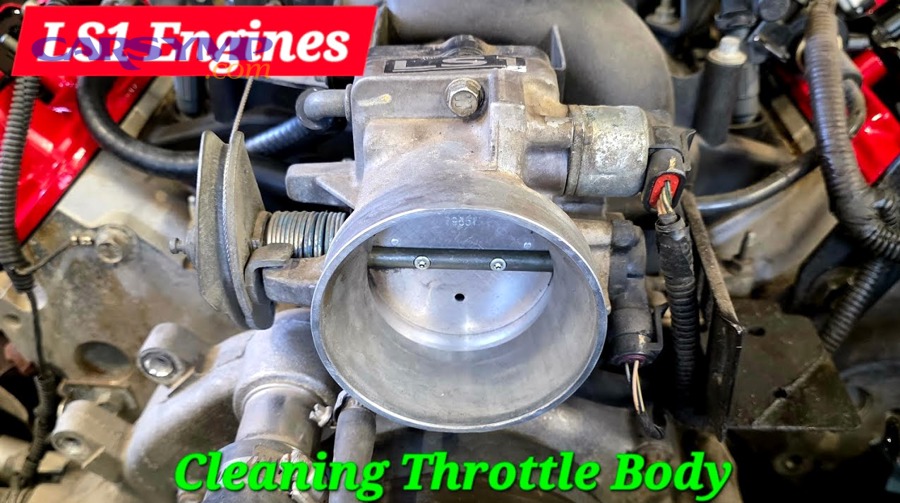
- Apply throttle body cleaner to a clean microfiber cloth or soft-bristle brush — do not spray directly into the bore on electronic throttle bodies, as overspray can reach the actuator motor and TPS. Manually hold the butterfly valve open with a clean finger or pencil eraser.
- Wipe the bore walls, valve plate, and valve edges in circular motions. Reapply cleaner and repeat until the cloth comes away clean. For stubborn lacquer deposits, allow the cleaner to dwell for 60–90 seconds before agitating.
- Reconnect everything, reconnect the battery, and perform the idle relearn procedure specific to the vehicle. For most vehicles, this involves starting the engine cold and allowing it to idle undisturbed for 10–20 minutes. For vehicles requiring a scan tool relearn, consult the manufacturer’s service data.
When cleaning won’t help: if the butterfly valve has visible scoring, the valve shaft has lateral play when wiggled by hand, fault codes persist after a thorough cleaning and relearn, or the actuator fails to hold idle position, cleaning is no longer the solution. At that point, the component requires replacement.
Is It Better to Clean or Replace a Damaged Throttle Body?
Cleaning wins when damage is limited to carbon buildup and the sensors remain functional; replacement is the correct choice when physical damage, sensor failure, or persistent fault codes remain after a thorough cleaning and proper relearn procedure.

The decision between these two paths depends on a clear-eyed assessment of what the inspection reveals, not on the age of the vehicle alone.
How Much Does Throttle Body Cleaning Cost vs. Full Replacement?
Throttle body cleaning cost estimates range from under $30 for a DIY cleaning to over $600 for a full OEM replacement with labor on certain vehicles. The table below outlines the realistic cost ranges at each intervention level to help owners plan their repair budget accordingly.
| Service | DIY Cost | Professional Cost | Notes |
|---|---|---|---|
| Throttle body cleaning (products) | $10 – $30 | $50 – $100 | Most cost-effective first step |
| Throttle body replacement (aftermarket) | $50 – $150 (parts) | $150 – $300 (parts + labor) | Quality varies significantly |
| Throttle body replacement (OEM) | $100 – $350 (parts) | $250 – $600+ (parts + labor) | Best long-term reliability |
| ECU relearn (scan tool required) | $0 (self-relearn) | $50 – $150 (dealer/shop) | Required after replacement on many vehicles |
A $20 can of throttle body cleaner applied at 30,000 miles prevents the scenario where accumulated damage forces a $400 replacement at 80,000 miles. More importantly, catching damage early also prevents secondary costs — spark plug fouling, oxygen sensor replacement, and catalytic converter damage — that a chronically misfiring engine will eventually cause.
Should You Choose OEM or Aftermarket When Replacing a Throttle Body?
OEM throttle bodies are the best choice for reliability and sensor compatibility; quality aftermarket units are appropriate for performance builds with ECU tuning, but budget aftermarket parts should be avoided entirely.
The core distinction comes down to what the ECU expects. An OEM throttle body is manufactured to the same electrical and mechanical specifications as the original component. The TPS voltage sweep, actuator response speed, and bore diameter all match the ECU’s calibrated parameters exactly. Installation is followed by a straightforward relearn, and the component typically carries a manufacturer warranty.
Aftermarket units from reputable performance brands — such as BBK Performance or Holley — offer larger bore diameters and improved flow characteristics that benefit modified engines with increased air demand. However, these units are only appropriate when the ECU has been reflashed or tuned to accommodate the new airflow profile. Installing a performance throttle body on a stock-tune ECU produces lean conditions, idle instability, and fault codes because the ECU expects its original flow calibration. Budget aftermarket units introduce unpredictable tolerances, and the cost savings at purchase are consistently erased by diagnostic time, relearn failures, and premature re-replacement.
Are There Special Throttle Body Risks Unique to Certain Engine Types or Conditions?
Yes, there are 4 specialized throttle body risk scenarios that standard maintenance guides overlook: turbocharged and supercharged engines that accumulate deposits faster, E85 ethanol fuel systems that corrode throttle body materials, cold climates where throttle body icing mimics mechanical failure, and the fundamentally different failure modes of drive-by-wire versus cable-driven throttle systems.
Moreover, understanding these scenarios prevents misdiagnosis — particularly in cases where a perfectly functional throttle body is condemned because a mechanic did not account for the operating environment.
Do Turbocharged and Supercharged Engines Damage Throttle Bodies Faster?
Yes, forced induction engines damage throttle bodies faster than naturally aspirated engines for two primary reasons: dramatically increased oil mist exposure and higher mechanical stress on the butterfly valve and actuator under boost pressure.
Turbocharged engines generate significantly more crankcase pressure than naturally aspirated designs, which pushes additional oil vapor through the PCV system into the intake tract. This oil vapor coats the throttle body bore and valve plate with a thin film that acts as an adhesive for carbon particles. Combined with the higher intake air temperatures present in non-intercooled systems, this film bakes into hardened lacquer deposits far more rapidly.
Specifically, performance vehicles with modified boost levels — particularly those running more than 15 PSI of positive pressure — should plan throttle body inspections every 15,000 miles rather than the standard 30,000-mile interval. Catch-can systems installed in the PCV line are a highly effective preventive measure, intercepting oil vapor before it reaches the throttle body and reducing deposit accumulation by a substantial margin.
How Does Ethanol Fuel (E85) Accelerate Throttle Body Corrosion?
Ethanol fuel accelerates throttle body corrosion because ethanol is both hygroscopic — meaning it actively absorbs moisture from the atmosphere — and mildly corrosive to aluminum alloys and certain rubber compounds used in throttle body construction.
In flex-fuel vehicles running E85 regularly, moisture absorbed by the ethanol blend condenses inside the intake tract during cold starts and low-temperature operation. This moisture, combined with the mild acidity of ethanol combustion byproducts, attacks the aluminum bore surface and degrades the rubber seals around the valve shaft. Over time, this produces pitting on the bore wall and causes the valve shaft seals to swell and crack — both of which generate the same symptoms as carbon damage but cannot be resolved by cleaning alone.
Owners of flex-fuel vehicles using E85 frequently should inspect the throttle body bore annually for early signs of pitting or corrosion and apply a thin coat of approved throttle body protectant after each cleaning. Returning to E10 gasoline periodically also reduces moisture accumulation in the intake system.
Can Cold Weather and Throttle Body Icing Mimic Damage Symptoms?
Yes, throttle body icing in cold climates can produce symptoms that are nearly identical to mechanical damage — specifically rough idle, hesitation on cold start, and intermittent stalling — but the cause is entirely environmental and resolves without any component repair.
Throttle body icing occurs when ambient temperatures drop below freezing and moisture in the incoming air freezes on the cold metal surfaces of the butterfly valve and bore. The ice restricts airflow in exactly the same way carbon deposits do, causing the engine to stumble and stall during the first few minutes of cold-weather operation. As the engine warms and heat migrates into the throttle body housing, the ice melts and the symptoms disappear completely — leaving no fault codes and no detectable damage.
The practical risk here is misdiagnosis. A technician presented with a complaint of “rough cold start that goes away after a few minutes” who does not account for ambient temperature conditions may recommend an unnecessary cleaning or, worse, an unnecessary replacement. Cold-climate drivers can distinguish icing from damage by documenting whether symptoms are strictly correlated with sub-freezing temperatures and whether the vehicle runs perfectly once fully warmed. If both conditions are true, icing — not damage — is the cause.
How Is Throttle Body Damage Different in Drive-By-Wire vs. Cable-Driven Systems?
Drive-by-wire and cable-driven throttle systems fail through entirely different mechanisms: cable-driven systems fail mechanically through cable stretch, linkage wear, and corrosion, while drive-by-wire systems fail electronically through actuator motor degradation, sensor drift, and ECU communication breakdown.
In a cable-driven system, the physical cable connecting the accelerator pedal to the throttle body butterfly valve is the critical wear component. Over time, the cable stretches, creating pedal play and a delayed throttle response. The throttle shaft itself — a mechanical pivot point — develops wear and lateral slop, allowing uncontrolled air entry around the shaft. These failures are gradual, predictable, and typically repaired by cable adjustment, cable replacement, or throttle body shaft bushing replacement.
Drive-by-wire systems, by contrast, have no cable. The butterfly valve is moved entirely by an electric actuator motor mounted on the throttle body housing, commanded by the ECU based on pedal position sensor input. When the actuator motor begins to fail — typically from brush wear inside the motor or from moisture ingress — the valve response becomes inconsistent. The ECU detects the discrepancy between the commanded position and the actual TPS reading and activates failsafe/limp mode. Unlike cable failures, which are mechanical and visible, actuator motor failures produce fault codes before any external symptom is apparent — making regular OBD-II health checks particularly valuable for drive-by-wire vehicles over 100,000 miles.
Understanding this distinction matters most during diagnosis: a cable-driven system that stalls can be assessed with a visual inspection of the cable and linkage, while a drive-by-wire system presenting the same symptom requires a scan tool and live sensor data to diagnose correctly. Applying cable-system diagnostic logic to a drive-by-wire vehicle — or vice versa — consistently leads to wasted time and unnecessary parts replacement.