


When your car won’t start and you hear clicking noises, the pattern of those clicks reveals whether you’re dealing with a battery problem or a starter motor failure. A single loud click typically indicates a faulty starter motor, starter solenoid, or starter relay that cannot engage the engine, while rapid clicking sounds point to a weak or dead battery that lacks sufficient power to crank the engine. Understanding this distinction helps you diagnose the problem accurately and decide between a simple jump-start or professional repair.
The root causes behind each clicking pattern stem from different failure points in your vehicle’s electrical starting circuit. Rapid clicking occurs when your battery has enough charge to activate the starter solenoid repeatedly but insufficient amperage to turn the starter motor, creating a rapid on-off cycle. Conversely, a single click happens when the starter motor itself has failed mechanically, when the solenoid cannot engage due to internal damage, or when the battery is so severely depleted it can only produce one weak attempt before giving up entirely.
Knowing whether you can fix the problem yourself or need a mechanic depends on correctly identifying the source of the clicking. Battery-related issues causing rapid clicks often respond to DIY solutions like jump-starting, cleaning corroded terminals, or tightening loose cable connections. Starter motor problems producing single clicks usually require professional diagnosis and replacement, as the starter assembly sits deep within the engine compartment and demands specialized tools to remove and install.
Cost considerations vary dramatically between battery and starter repairs, making accurate diagnosis financially important. A new battery costs between $100-$300, while starter motor replacement ranges from $300-$600 including labor, meaning a misdiagnosis could lead you to spend double what’s necessary. Below, we’ll explore exactly how to distinguish these clicking patterns, diagnose the failing component, and determine your best course of action.
What Do Single Click and Rapid Clicks Mean When Your Car Won’t Start?
Single clicks and rapid clicks represent two distinct mechanical failures in your car’s starting system, with each sound revealing a different electrical problem. A single loud click indicates the starter solenoid attempted to engage once but failed to turn the starter motor, while rapid clicking sounds occur when the solenoid rapidly cycles on and off due to insufficient battery power. To better understand these diagnostic clues, let’s examine what’s happening mechanically during each type of click.

What Does a Single Click Sound Indicate?
A single loud click when you turn the key or push the start button means the starter solenoid activated once but the starter motor failed to crank the engine. This distinctive sound occurs because the solenoid—an electromagnetic switch that connects battery power to the starter motor—received enough voltage to engage but couldn’t complete the starting sequence. The click you hear is the solenoid plunger attempting to push the pinion gear forward to mesh with the engine’s flywheel.
Several specific conditions produce this single click pattern. Most commonly, the starter motor itself has failed internally due to worn brushes, damaged armature windings, or seized bearings that prevent rotation even when power flows to it. The starter relay might also be malfunctioning, creating high resistance that blocks adequate current from reaching the starter motor despite the solenoid activating. In some cases, a severely depleted battery—one reading below 9 volts—can produce just one faint click because it lacks even enough power for the solenoid to cycle multiple times.
When you experience a single click, the starter assembly is usually receiving the “start” command from your Ignition switch and neutral safety switch checks properly, but something prevents the mechanical cranking action. The solenoid may be stuck in a partially engaged position, or the starter motor’s internal components may have degraded to the point where they can no longer overcome the engine’s compression resistance. This differs fundamentally from electrical power shortage issues that cause rapid clicking.
What Does Rapid Clicking Sound Indicate?
Rapid clicking sounds—often described as a chattering or machine-gun-like noise—indicate your battery has insufficient power to sustain starter motor operation, causing the solenoid to rapidly engage and disengage. This occurs when the battery voltage drops below the threshold needed to keep the solenoid closed and the starter motor turning, creating a cycle where the solenoid pulls in, the voltage drops further under load, the solenoid releases, voltage momentarily recovers, and the cycle repeats several times per second.
The mechanical source of this rapid clicking is the starter solenoid attempting to hold its contacts closed while simultaneously the starter motor tries to draw several hundred amperes of current. When your battery cannot supply this current—whether due to age, discharge, or internal failure—the voltage sags dramatically the moment the high-current load connects. This voltage drop causes the solenoid to release, which disconnects the load, allowing voltage to recover slightly, which triggers another engagement attempt, creating the distinctive rapid clicking pattern.
Specifically, you’re hearing the solenoid plunger rapidly moving back and forth, with each forward movement producing an audible click as metal contacts meet. The pinion gear attached to the starter motor may also be chattering against the flywheel teeth without enough force to engage fully. This happens at frequencies ranging from 3-10 clicks per second depending on how weak your battery is. A battery that’s only slightly weak might produce slower, more distinct clicks, while a nearly dead battery generates faster, higher-pitched clicking.
The rapid clicking pattern almost always points to the battery side of the starting system rather than the starter motor itself. Your starter motor is actually capable of working, but it’s being starved of the electrical current it needs. Even if your battery shows 12 volts on a voltmeter when disconnected, it may lack the cold-cranking amps (CCA) needed to deliver the 200-400 amperes required for starting under load. This is why rapid clicking so reliably indicates battery problems rather than starter failure.
How Do You Diagnose Battery Problems vs Starter Problems?
Battery problems win for rapid clicking diagnosis, starter problems are best identified through single click patterns, and alternator issues reveal themselves through post-jump-start behavior. To accurately diagnose which component has failed, you need a systematic approach that tests electrical flow at different points in the starting circuit. More specifically, the diagnostic workflow starts with identifying the clicking pattern, then proceeds to visual inspection, voltage testing, and finally jump-start verification.

How Can You Tell If Your Battery Is Causing the Clicking?
Your battery is causing the clicking if you hear rapid clicks, see corroded or loose terminals, measure voltage below 12.4 volts, or find the jump-start resolves the issue completely. The most reliable immediate indicator is the clicking pattern itself—rapid succession clicks almost always mean insufficient battery power rather than starter failure. However, confirming battery failure requires checking several specific attributes of your battery’s condition.
Visual inspection of your battery terminals provides crucial diagnostic information. Look for white, blue, or greenish powdery buildup around the terminal posts and cable clamps, which indicates corrosion that creates electrical resistance. This corrosion acts as an insulator, blocking current flow even if the battery itself holds adequate charge. Additionally, check whether the cable clamps move when you try to wiggle them—loose connections prevent the hundreds of amperes needed for starting from flowing to the starter motor.
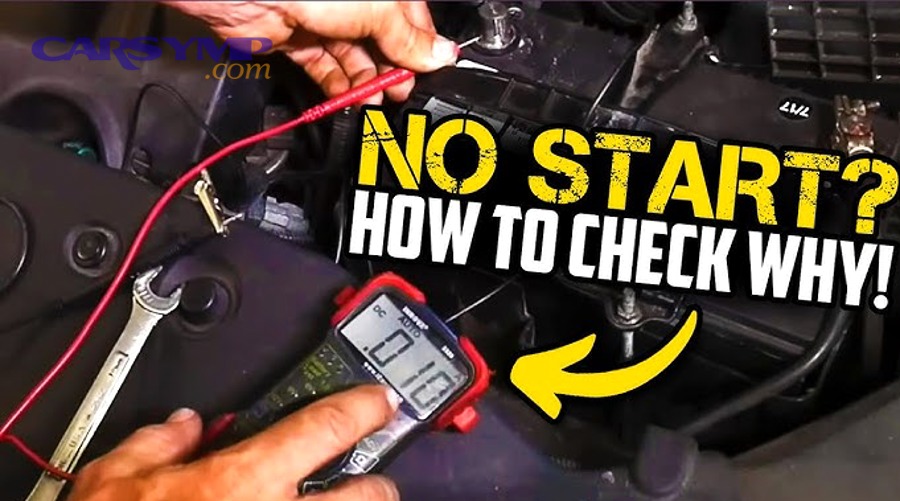
Voltage testing with a multimeter delivers definitive battery diagnosis. Place the multimeter probes on the battery terminals with the engine off; a healthy, fully charged battery should read 12.6 volts or higher. A reading between 12.4-12.6 volts indicates partial discharge, while anything below 12.4 volts confirms the battery lacks sufficient charge. More importantly, perform a load test by having someone attempt to start the car while you watch the voltmeter—if voltage drops below 9.6 volts during cranking attempt, the battery has failed internally and cannot deliver adequate current.
The jump-start test provides the clearest distinction between battery and other electrical problems. If your car starts immediately after jump-starting and continues running normally, the battery was definitely your problem. Remove the jumper cables after the engine runs for a few minutes—if the vehicle continues running smoothly, you’ve confirmed the battery simply needed recharging. However, if you disconnect the jumper cables and the engine immediately dies, your alternator has failed and isn’t generating power to keep the electrical system running.
Battery age offers additional diagnostic context. Most automotive batteries last 3-5 years depending on climate and usage patterns. If your battery is approaching or exceeding three years old, age-related capacity loss becomes the most likely explanation for starting problems. Cold weather accelerates battery failure, so if you experience clicking during winter months with an older battery, replacement is almost certainly needed rather than just a recharge.
Headlight behavior correlates strongly with battery condition. Turn on your headlights before attempting to start—if they shine brightly but dim significantly or go out completely when you turn the key, you’ve confirmed the battery has voltage but cannot sustain current flow under load. This dim-when-cranking pattern is a classic signature of battery failure, distinguishing it from starter problems where headlights typically maintain consistent brightness.
How Can You Tell If Your Starter Motor Is Failing?
Your starter motor is failing if you hear one single loud click, jump-starting doesn’t resolve the issue, accessories work normally but the engine won’t crank, or tapping the starter temporarily fixes the problem. The single click pattern is the most distinctive indicator—it means the solenoid activated successfully but the motor itself couldn’t turn. This fundamental difference from rapid clicking immediately points diagnosis toward the starter assembly rather than battery capacity.
The jump-start test reveals starter failure through a negative result. When you connect jumper cables to a car with a dead battery, the external power source allows immediate starting. However, if you properly jump-start your vehicle and it still produces only a single click without cranking, you’ve eliminated the battery as the problem. The external power supply proves adequate voltage and current are available, meaning the failure lies within the starter motor, starter solenoid, or associated wiring.
Working accessories combined with no-crank conditions strongly suggest starter failure. Turn on your headlights, radio, power windows, and interior lights—if all these electrical components function normally or at full brightness, your battery is adequately charged. When the battery passes this test but the engine still won’t crank when you turn the key, the starter motor has almost certainly failed mechanically. This pattern indicates electrical power is flowing through the system correctly until it reaches the failed starter component.
The tap test provides field diagnosis of starter motor problems. Locate your starter motor (usually near where the engine and transmission meet) and tap it firmly several times with a hammer or wrench handle while someone attempts to start the car. If this percussion causes the starter to suddenly work, you’ve confirmed the motor has worn internal components—typically brushes that have lost contact with the commutator. The tapping temporarily shifts these parts back into contact, but the problem will recur and worsen until you replace the starter.
Starter age and mileage provide probabilistic diagnosis. Most starter motors last 100,000-150,000 miles under normal conditions, though harsh weather, frequent short trips, and hard-start conditions accelerate wear. If your vehicle has exceeded 100,000 miles and exhibits single-click symptoms, starter replacement becomes the statistically likely solution. Starters don’t typically fail suddenly—they often show warning signs like slow cranking, intermittent no-starts, or grinding noises before complete failure.
The ignition switch and neutral safety switch checks eliminate alternative explanations for single clicks. Shift your transmission through all gear positions while attempting to start—if the car starts in one position but not others, the neutral safety switch is preventing starter engagement rather than the starter itself failing. Similarly, try turning accessories on and off with the key in different positions to verify the ignition switch is sending proper signals through the starting circuit.
What Role Does the Alternator Play in Clicking Problems?
The alternator plays an indirect but critical role in clicking problems by failing to recharge the battery during operation, which eventually leads to battery depletion and rapid clicking. While the alternator doesn’t directly cause clicking when you attempt to start a cold engine, a failing alternator gradually drains battery capacity over days or weeks, creating the weak battery condition that produces rapid clicks. Understanding alternator involvement helps you determine whether battery replacement alone will solve your problem or whether you need additional repairs.
The alternator’s primary function is generating electrical current while the engine runs, simultaneously powering your vehicle’s electrical systems and recharging the battery. A healthy alternator produces 13.8-14.4 volts while the engine idles, continuously restoring the energy your battery expended during the previous start. When the alternator fails or operates below capacity, your battery gradually discharges with each start and each use of electrical accessories, eventually reaching the depleted state that causes rapid clicking.
Post-jump-start behavior reveals alternator failure through a specific pattern. After successfully jump-starting your vehicle, let it run for 5-10 minutes, then disconnect the jumper cables. If the engine continues running smoothly, drive directly to an auto parts store for testing. However, if the engine immediately dies, runs roughly, or the battery warning light illuminates on your dashboard, the alternator has failed completely. A failed alternator cannot generate the 40-100 amperes needed to keep the engine running and electrical systems operating, causing the vehicle to deplete the jump-start energy within minutes.
Voltage testing while the engine runs provides definitive alternator diagnosis. With the engine at idle, measure voltage across the battery terminals—it should read between 13.8-14.4 volts if the alternator is charging properly. Readings below 13.5 volts indicate undercharging, while readings above 14.8 volts suggest overcharging that will damage your battery. Rev the engine to 2000 RPM and watch for voltage increase; a healthy alternator will boost output slightly, while a failing unit shows no change or voltage decrease.
According to automotive electrical system studies, alternator failure causes battery-related starting problems in approximately 15-20% of no-start situations where rapid clicking occurs. The alternator itself doesn’t click or make starting noises, so many vehicle owners incorrectly assume a new battery alone will solve their problem. However, installing a new battery without addressing an underlying alternator failure results in the new battery discharging within days or weeks, creating repeated rapid clicking problems and premature battery failure.
What Are the Root Causes of Each Clicking Pattern?
There are two distinct groups of root causes: rapid clicking stems from five battery-related power shortage issues including dead batteries, corroded terminals, loose connections, failing alternators, and parasitic drain, while single clicking originates from four starter assembly failures including faulty starter motors, bad solenoids, failed relays, and poor ground connections. To understand why your specific vehicle is clicking, you need to identify which failure point in the electrical starting circuit has created insufficient current flow or mechanical engagement problems.

What Causes Rapid Clicking Noises?
Rapid clicking noises are caused by insufficient battery current flow, primarily from dead or weak batteries, corroded terminals blocking electrical pathways, loose cable connections creating resistance, failing alternators that haven’t recharged the battery, parasitic electrical drain from accessories left on, and battery age combined with extreme temperature exposure. Each of these causes creates the same fundamental problem: the battery cannot deliver the 200-400 amperes required to turn the starter motor against engine compression.
Dead or weak batteries represent the most common cause of rapid clicking, accounting for approximately 60-70% of these starting failures. Battery capacity naturally degrades through repeated charge-discharge cycles, with internal plate sulfation reducing the active surface area available for chemical reactions. When you attempt to start your car, a degraded battery might show 12 volts on a voltmeter but collapse to 8-9 volts under the heavy current load, triggering the rapid clicking cycle. Cold weather dramatically accelerates this problem—a battery at 32°F has only about 65% of its starting capacity compared to 80°F conditions.
Corroded battery terminals create electrical resistance that blocks current flow as effectively as a weak battery. The white or greenish powder that forms on terminal posts and cable clamps is primarily lead sulfate and copper oxide, both of which act as insulators. Even a thin layer of corrosion can increase resistance enough to drop voltage by 1-2 volts during starting attempts, transforming an otherwise healthy battery into one that produces rapid clicks. This corrosion typically forms when battery acid vapors react with the metal terminals in the presence of moisture and contaminants.
Loose battery cable connections produce intermittent contact that appears similar to corrosion effects. Vibration from driving gradually loosens the bolt that clamps each cable to its battery terminal, creating microscopic gaps in the metal-to-metal connection. These gaps force electrical current to arc across tiny air spaces, generating heat and resistance that reduces available amperage. You can often identify loose connections by wiggling the cable clamps—if they move independently of the battery posts, you’ve found a source of rapid clicking.
Failing alternators cause rapid clicking indirectly by failing to maintain battery charge during operation. The alternator contains a voltage regulator, rotating electromagnets, and diodes that convert mechanical rotation into electrical current. When diodes fail, bearings seize, or the voltage regulator malfunctions, charging output drops below the 13.8-14.4 volt range needed to replenish battery charge. Over several days or weeks of driving with a failing alternator, your battery gradually depletes until it can no longer generate enough power for starting, resulting in rapid clicking.
Parasitic electrical drain depletes batteries during periods when the vehicle sits unused. Modern vehicles maintain power to security systems, computer modules, and memory functions even with the ignition off, typically drawing 25-75 milliamperes constantly. However, malfunctions like interior lights staying on, aftermarket stereos maintaining full power, or faulty modules can increase this drain to several hundred milliamperes. At 200 milliamperes, a typical battery discharges completely in about 10 days, leaving you with rapid clicking when you return to your parked vehicle.
Battery age and extreme temperature exposure combine to accelerate capacity loss beyond normal degradation rates. Batteries older than three years have reduced cold-cranking amp ratings due to cumulative sulfation and active material shedding from the plates. Summer heat above 90°F accelerates internal chemical reactions that consume water and damage plate structures, while winter cold below 32°F slows chemical reactions and increases internal resistance. A three-year-old battery exposed to extreme temperatures year-round may retain only 50-60% of its original cranking capacity, making rapid clicking increasingly likely.
What Causes a Single Click Noise?
A single click noise is caused by starter motor mechanical failure from worn brushes or internal damage, bad starter solenoid unable to maintain engagement, starter relay failure blocking current transmission, severe battery depletion too weak for multiple engagement attempts, and poor ground connections preventing current return paths. Unlike rapid clicking where power shortage is the issue, single clicks indicate that either the starter assembly has failed mechanically or electrical current cannot complete its circuit through the starting system.
Faulty starter motors produce single clicks when internal components wear beyond functional limits. The starter motor contains carbon brushes that press against a rotating commutator to deliver current to the electromagnetic field coils. Over 100,000-150,000 miles, these brushes wear down from constant friction until they lose firm contact with the commutator, creating high resistance or intermittent connection. When you turn the key, the solenoid engages with a single click, but the worn brushes cannot conduct enough current to spin the motor, leaving the engine uncranked. Additionally, the starter motor’s bearings can seize, armature windings can fail, or the Bendix drive mechanism can stick, all causing single-click symptoms when the starter clicks but won’t start.
Bad starter solenoids create single clicks through mechanical engagement failure. The solenoid contains a heavy-duty electromagnet that pulls a plunger forward when energized, simultaneously closing high-current contacts and pushing the pinion gear toward the flywheel. If the solenoid contacts have burned or pitted from thousands of starting cycles, they may not conduct current properly even when mechanically engaged, producing a click without cranking. The return spring may also weaken, allowing the plunger to stick in a partially engaged position where it clicks once but doesn’t complete the circuit. Solenoid failure becomes increasingly likely after 7-10 years of service regardless of mileage.
Starter relay failure blocks proper current transmission from the battery to the starter solenoid, creating single-click conditions. The starter relay acts as an electrical switch that uses a small current from the ignition switch to control the large current flowing to the starter. When relay contacts corrode, the electromagnetic coil fails, or internal connections break, the relay either doesn’t close at all or closes with such high resistance that insufficient current reaches the starter. You might hear a single click from the relay itself attempting to engage without successfully transmitting power to the starter assembly.
Severe battery depletion causes single faint clicks rather than rapid clicking when voltage falls below approximately 9 volts. At this critically low voltage, the battery retains just enough energy to activate the solenoid once but cannot sustain the attempt or cycle repeatedly. The solenoid pulls in with a weak, singular click, voltage collapses completely under even that minimal load, and the system goes silent. This condition typically occurs after leaving headlights on overnight or when a battery has reached complete failure. The single nature of this click distinguishes it from the multiple rapid clicks produced by moderately weak batteries.
Poor ground connections prevent current from completing its return path to the battery negative terminal, effectively creating an open circuit that produces single clicks. The ground cable connects your battery’s negative terminal to the engine block and chassis, providing the return pathway for the hundreds of amperes flowing through the starter motor. Corrosion, looseness, or damage at any ground connection point increases resistance in this critical pathway. When you attempt starting, the solenoid may engage with a single click, but the high resistance prevents adequate current flow through the complete circuit, stopping the starter motor from turning even though the positive side delivers power normally.
Can You Fix Clicking Problems Yourself or Do You Need a Mechanic?
You can fix rapid clicking problems yourself through jump-starting, terminal cleaning, and connection tightening in about 70% of cases, but single clicking problems require professional diagnosis and starter replacement in approximately 80% of situations. The key distinction lies in whether the root cause involves simple electrical connectivity issues you can address with basic tools, or complex mechanical failures inside the starter assembly requiring specialized equipment. To determine your approach, evaluate the clicking pattern, your mechanical skill level, available tools, and safety considerations.

What DIY Steps Can You Take for Rapid Clicking Issues?
DIY steps for rapid clicking include jump-starting following proper polarity and safety procedures, cleaning corroded battery terminals with wire brushes and baking soda solution, tightening loose battery cable connections to manufacturer torque specifications, checking for parasitic drain sources like interior lights or trunk accessories, obtaining free battery testing at auto parts stores, and knowing when these fixes provide temporary versus permanent solutions. Most vehicle owners with basic mechanical aptitude can complete these steps in 30-60 minutes using simple hand tools.
Jump-starting procedure requires careful attention to safety and proper cable connection sequence to avoid electrical damage or injury. First, position the good vehicle close enough that jumper cables reach both batteries without vehicles touching. Turn off all accessories, lights, and ignition on both vehicles. Connect the red positive cable to the dead battery’s positive terminal, then connect the other red cable end to the good battery’s positive terminal. Connect the black negative cable to the good battery’s negative terminal, then connect the final black cable to an unpainted metal surface on the dead vehicle’s engine block—not directly to the negative battery terminal—to minimize spark risk near battery gases. Start the good vehicle, let it run for 2-3 minutes to charge the dead battery, then attempt starting the disabled vehicle. If successful, keep it running for at least 20 minutes to recharge, or drive directly to a repair facility for testing.
Cleaning corroded battery terminals restores proper electrical contact and often eliminates rapid clicking immediately. Disconnect the negative cable first, then the positive cable, taking photos of the connection orientation if needed. Mix one tablespoon of baking soda with one cup of water to create a neutralizing solution for battery acid. Pour this solution over the corroded terminals and cable clamps, allowing it to fizz and bubble for 1-2 minutes. Use a wire brush or dedicated battery terminal brush to scrub away all white, green, or blue corrosion from both the battery posts and the inside surfaces of the cable clamps. Rinse with clean water, dry thoroughly with a cloth, and apply a thin layer of dielectric grease or petroleum jelly to prevent future corrosion. Reconnect the positive cable first, then the negative cable, tightening each firmly but not over-torquing to avoid cracking the terminal.
Tightening loose battery cable connections requires only a wrench and takes less than five minutes. Use a 10mm or 8mm wrench (depending on your vehicle) to tighten the bolt on each cable clamp until the clamp grips the battery terminal firmly. The clamp should not rotate or move independently of the battery post when you try to twist it. However, avoid over-tightening, which can crack the battery terminal or damage the cable clamp threads—snug plus a quarter turn is generally sufficient. After tightening, attempt to lift each cable away from the battery; properly secured cables won’t budge. This simple fix resolves rapid clicking in approximately 10-15% of cases where vibration had gradually loosened connections.
Checking for parasitic drain sources helps identify why your battery repeatedly discharges between uses. Start by ensuring all obvious accessories are off: interior lights, trunk light, glove box light, radio, and any aftermarket electronics. Many vehicles have courtesy lights that stay on for several minutes after closing doors—verify these turn off completely. If you suspect parasitic drain but cannot identify the source, perform a simple overnight test: fully charge your battery, note the voltage (should be 12.6+ volts), disconnect the negative cable to isolate the battery, and measure voltage again the next morning. A drop of more than 0.1 volts suggests parasitic drain requiring further investigation with an ammeter or professional diagnosis.
Free battery testing at auto parts stores provides professional-grade diagnosis without cost, helping you confirm whether DIY fixes have succeeded or replacement is needed. Most major auto parts retailers offer free battery testing using electronic analyzers that measure cold-cranking amps, state of charge, and internal resistance. The test takes 2-3 minutes and generates a printout showing whether your battery passes, needs charging, or requires replacement. This service helps you avoid buying an unnecessary battery if your problem was simply corrosion or loose connections, or confirms that battery replacement is genuinely needed before investing $100-300.
When DIY fixes work versus when they don’t reveals important patterns. If cleaning terminals and tightening connections eliminate rapid clicking permanently, you’ve successfully addressed connectivity problems. If jump-starting works but clicking returns within days, your battery has lost capacity or your alternator isn’t charging properly, requiring replacement of one or both components. If none of these DIY steps reduce or eliminate clicking, you’re likely dealing with a failed battery that cannot hold charge regardless of connection quality, or the problem may actually involve starter or alternator components requiring professional attention.
When Should You Call a Professional Mechanic?
You should call a professional mechanic when jump-starting doesn’t resolve single clicking problems, when rapid clicking persists after new battery installation, when you need starter motor replacement requiring engine component removal, when alternator testing and replacement exceed DIY capability, when electrical system wiring shows damage or complexity beyond basic repairs, and when recent battery purchases are under warranty requiring professional diagnosis for claims. Professional intervention becomes necessary when specialized diagnostic equipment, technical expertise, or physical access to deeply buried components exceeds typical homeowner resources.
Jump-start failure with single clicking indicates starter assembly problems beyond DIY repair scope. When you properly connect jumper cables from a known-good power source and still hear only one click without cranking, you’ve eliminated battery capacity as the issue. This confirms the starter motor, solenoid, or related components have failed mechanically. Starter replacement requires crawling under the vehicle, disconnecting electrical connections, removing mounting bolts (often in difficult-to-reach positions), and potentially removing other components blocking access. Most mechanics complete this work in 1-2 hours, while DIY attempts often take 4-6 hours with greater risk of dropped parts, incorrect installation, or electrical damage.
Repeated clicking problems despite new battery installation signal deeper electrical system issues requiring professional diagnosis. If you’ve installed a fresh battery but experience rapid clicking within days or weeks, three scenarios are likely: your alternator isn’t charging (requiring alternator replacement), parasitic drain is depleting the battery overnight (requiring systematic electrical testing), or the “new” battery was defective or incorrect for your vehicle. Professional mechanics use specialized tools like electrical system analyzers, oscilloscopes, and amp meters to pinpoint these problems efficiently rather than replacing parts through trial and error.
Starter motor replacement costs justify professional service for most vehicle owners when considering labor complexity. DIY starter replacement on some vehicles requires removing intake manifolds, exhaust components, or transmission bell housing access panels to reach the starter mounting location. The starter assembly weighs 10-15 pounds and must be maneuvered through tight spaces while supporting it to prevent dropping and damage. Professional mechanics have lifts for safe underneath access, impact tools for seized bolts, and experience with vehicle-specific complications. The $150-300 labor charge often proves worthwhile compared to the physical difficulty, time investment, and risk of complications inherent in DIY attempts.
Alternator testing and replacement require skills and tools beyond basic DIY capability. While the alternator itself is often accessible in the engine compartment, testing requires a carbon pile load tester or professional-grade multimeter capable of measuring AC ripple voltage and full load output. Replacement involves disconnecting the serpentine belt, electrical connections, and mounting bolts, then properly tensioning the new belt during installation. Incorrect belt tension causes premature bearing failure, while improper electrical connections can damage the vehicle’s computer systems. Additionally, some modern vehicles require computer reprogramming after alternator replacement to recalibrate charging parameters.
Electrical wiring issues demand professional diagnosis when you encounter melted insulation, multiple damaged wires, or problems in the vehicle’s main wiring harnesses. Unlike simple terminal corrosion, damaged wiring within protective looms requires proper diagnostic procedures to identify fault locations without creating additional shorts or damage. Professionals use wiring diagrams, multimeters, and systematic testing to isolate problems, then repair connections using proper solder joints, heat-shrink tubing, and electrical tape rather than makeshift fixes that may create fire hazards or future failures.
Warranty considerations make professional diagnosis mandatory for recent battery purchases. Most automotive batteries carry warranties ranging from 1-5 years with free replacement clauses if the battery fails prematurely. However, warranty claims require professional testing documentation showing the battery itself failed rather than being drained by other problems. Auto parts stores and dealerships provide this testing free as part of warranty processing. Attempting DIY diagnosis without this documentation may void your warranty, costing you $100-300 for a replacement that would have been free with proper professional verification.
According to automotive repair industry data compiled by the Automotive Service Association, professional diagnosis typically costs $50-150 for electrical system problems but saves vehicle owners an average of $200-400 by identifying the correct failed component on the first attempt rather than replacing multiple parts through trial-and-error DIY diagnosis. The Safe-to-drive and tow decision guidance follows this pattern: if rapid clicking occurs but you successfully jump-start the vehicle, you can drive directly to a repair facility but should avoid shutting off the engine; if single clicking persists after jump-start attempts, the vehicle needs towing to prevent stranding and potential damage from repeated starter engagement attempts.
How Much Do Battery and Starter Repairs Typically Cost?
Battery-related fixes cost between $0-$300 with terminal cleaning at the low end and premium battery replacement at the high end, while starter motor repairs range from $300-$600 including parts and labor with additional costs for difficult access locations. The total expense depends on your vehicle make and model, the specific component that failed, labor rates in your geographic area, and whether you choose OEM or aftermarket replacement parts. Understanding these cost ranges helps you budget appropriately and evaluate whether repair quotes you receive fall within normal market rates.

What Is the Cost Range for Battery-Related Fixes?
Battery-related fixes cost $0 for DIY terminal cleaning, $20-50 for shop terminal service, $100-200 for standard replacement batteries, $200-300 for premium AGM batteries, and testing services are typically free at most auto parts stores. The wide cost range reflects the dramatic difference between simple connectivity repairs versus complete battery replacement, and between economy versus premium battery technologies. Additionally, some luxury and European vehicles require specific battery types and computer programming that increase costs to $400-500.
Terminal cleaning costs nothing if you perform it yourself using household materials like baking soda and a wire brush. The materials cost under $5 at hardware stores, and the 15-minute procedure requires no special skills. If you prefer professional service, most repair shops charge $20-50 for terminal cleaning as part of a battery service that includes inspection, load testing, and connection verification. This modest fee often prevents the need for battery replacement when corrosion was the only problem, representing excellent value for drivers who lack time or tools for DIY work.
Standard battery replacement costs $100-200 for most passenger vehicles, covering both the battery and installation labor. Economy batteries at the lower end of this range typically carry 1-2 year warranties and provide adequate performance for temperate climates and normal use. Mid-range batteries priced around $150-180 offer 3-year warranties and better cold-cranking amp ratings for reliable winter starting. Installation labor adds $0-30 depending on the retailer—many auto parts stores include free installation with battery purchase, while dealerships and independent shops charge separately. Some vehicles with batteries located in the trunk, under seats, or in wheel wells require additional labor charges of $50-100 due to access difficulty.
Premium AGM (Absorbed Glass Mat) batteries cost $200-300 but deliver superior performance for vehicles with high electrical demands, start-stop systems, or extreme climate exposure. AGM batteries feature fiberglass mat separators that hold electrolyte against the lead plates, providing faster recharging, deeper discharge tolerance, and longer service life (4-6 years typical). Vehicles with extensive electronics, aftermarket audio systems, or frequent short-trip usage benefit significantly from AGM technology despite the higher initial cost. The extended lifespan often makes AGM batteries cost-effective compared to replacing economy batteries every 2-3 years.
Battery testing services cost nothing at virtually all auto parts retailers, providing professional diagnosis without financial commitment. Stores like AutoZone, O’Reilly Auto Parts, and Advance Auto Parts offer free testing using computerized analyzers that measure cold-cranking amps, voltage, and internal resistance. The 3-5 minute test generates a printout indicating whether your battery passes, needs charging, or requires replacement. This free service helps you avoid unnecessary battery purchases when jump-starting and terminal cleaning might suffice, potentially saving you $100-300. However, be aware these stores naturally have a business interest in battery sales, so consider getting a second opinion if the test result surprises you.
Labor costs for battery replacement vary significantly by service provider and vehicle type. Quick-lube chains and auto parts stores typically charge $0-20 for straightforward installations taking 10-15 minutes. Independent repair shops charge $30-75 for the same service. Dealerships command $50-100 for battery replacement due to higher labor rates, though they’re sometimes necessary for vehicles requiring computer reprogramming after battery replacement. Exotic vehicles, some German cars, and certain hybrid models need battery registration or adaptation procedures that add $50-200 to the total cost, as the vehicle’s computer must learn the new battery’s characteristics for optimal charging.
What Is the Cost Range for Starter Motor Repairs?
Starter motor repairs cost $300-$600 for complete replacement including parts and labor, with starter relay replacement at $50-$200, diagnosis fees of $50-$150, and potential towing expenses of $75-$200 if the vehicle cannot start. The Starter replacement cost estimate breaks down to $150-$350 for the starter assembly itself and $150-$250 for labor, though this varies considerably based on starter accessibility and vehicle complexity. Some vehicles with starters buried behind engine components or requiring special tools for removal can reach $800-$1,000 in total repair costs.
Complete starter replacement represents the most common repair scenario when single clicking occurs. The starter motor assembly costs $150-$250 for most domestic and Asian vehicles using aftermarket parts, while OEM (Original Equipment Manufacturer) parts cost $250-$350. European and luxury vehicles command $300-$500 for the starter unit alone due to specialized designs and lower production volumes. Remanufactured starters—professionally rebuilt cores—cost 20-30% less than new units while carrying similar warranties, making them popular cost-effective choices. Labor for starter replacement typically requires 1.5-2.5 hours at shop rates of $80-$150 per hour, adding $150-$250 to the parts cost.
Starter relay replacement costs significantly less than full starter replacement when the relay is the failed component. The relay itself costs $15-$50 depending on vehicle make, and replacement requires only 15-30 minutes of labor ($20-$75). However, diagnosing relay failure versus starter motor failure requires electrical testing that may add a diagnostic fee. Some vehicles integrate the starter relay into other modules or fuse boxes, increasing parts costs to $100-$150. This potential savings underscores the value of accurate diagnosis before authorizing repairs—misdiagnosing a $40 relay problem as a $500 starter problem wastes significant money.
Diagnosis fees of $50-$150 apply at most independent repair shops and dealerships before any repair work begins. This charge covers the mechanic’s time performing electrical tests, starter circuit voltage drop tests, and verification of the actual failed component. Many shops waive or credit this fee toward repair costs if you proceed with recommended services. While this upfront cost may seem frustrating when you’ve already identified clicking symptoms, professional diagnosis prevents replacing wrong components and often identifies multiple problems simultaneously, such as a weak battery plus failing starter that both need attention.
Towing costs add $75-$200 to your total expense if the vehicle won’t start and you need professional transport to a repair facility. Roadside assistance programs through insurance, vehicle manufacturers, or memberships like AAA often include free towing within certain mileage limits (typically 5-100 miles). Without coverage, private tow truck services charge $50-100 base fees plus $2-7 per mile. Given that starter failures leave vehicles completely immobile, factoring towing into your budget planning makes sense. Some mobile mechanics offer on-site diagnosis and even starter replacement in your driveway, potentially saving towing costs but typically charging premium rates for mobile service.
Labor cost variation by vehicle accessibility significantly impacts total repair expense. Vehicles with top-mounted starters accessible from the engine bay typically require only 1-1.5 hours of labor. However, starters located underneath the vehicle, behind exhaust manifolds, or integrated with transmission bell housings require 3-4 hours of labor as mechanics must remove blocking components, work in cramped spaces, and reinstall everything properly. Some GM trucks, certain BMWs, and various other vehicles fall into this difficult-access category, pushing total costs toward $800-$1,000 despite using standard-priced starter assemblies.
The starter replacement cost estimate for your specific vehicle varies based on these factors: domestic vehicles typically run $350-$500 total, Asian imports cost $400-$550, European vehicles range $500-$750, and luxury or exotic cars may exceed $800-$1,000. To obtain accurate pricing, request quotes from multiple repair facilities specifying your exact year, make, and model. Many shops provide free estimates over the phone or through online forms, allowing comparison shopping. Additionally, ask whether quotes include both parts and labor, warranty coverage on the replacement starter (typically 1-3 years), and any additional fees for diagnostics or shop supplies.
How Can You Prevent Battery and Starter Problems Before They Happen?
You can prevent battery and starter problems through five key maintenance practices: testing battery voltage every six months and before seasonal changes, cleaning terminals quarterly or at first sign of corrosion, minimizing short trips that prevent full battery recharging, protecting batteries from extreme temperatures, tracking battery age and replacing proactively at 3-5 years, and addressing hard-start conditions immediately to avoid starter damage. These preventive measures cost minimal time and money compared to roadside breakdowns and emergency repair bills ranging from $300-$600.
What Regular Maintenance Extends Battery Life?
Regular maintenance extends battery life by 1-3 years through voltage testing every six months using a multimeter to catch capacity decline early, terminal cleaning quarterly with wire brushes and baking soda solution to prevent corrosion buildup, avoiding short trips under three miles that don’t allow full recharging, protecting batteries from temperature extremes using insulation blankets in winter and parking in shade during summer, tracking battery age and replacing proactively at three years in hot climates or five years in moderate climates, and maintaining proper fluid levels in non-sealed batteries. These practices address the primary degradation mechanisms that shorten battery lifespan.
Voltage testing schedule prevents unexpected failures by revealing gradual capacity decline before complete battery death. Test your battery voltage with a multimeter at least twice yearly—spring and fall are ideal timing for seasonal preparation. A healthy battery should read 12.6-12.8 volts with the engine off. Record these readings in your phone or vehicle maintenance log to track trends over time. If voltage drops below 12.4 volts, charge the battery fully and retest; persistent low readings indicate capacity loss requiring replacement soon. Additionally, test after any extended vehicle storage period (2+ weeks) to verify the battery maintained charge during inactivity.
Terminal cleaning frequency depends on climate and driving conditions but should occur quarterly for most vehicles. Coastal environments, high-humidity areas, and regions using road salt accelerate corrosion formation, requiring monthly inspection and cleaning as needed. The cleaning process takes only 10-15 minutes: disconnect cables (negative first), mix baking soda and water (1 tablespoon per cup), apply to corroded areas, scrub with a wire brush, rinse with clean water, dry thoroughly, apply dielectric grease, and reconnect cables (positive first). This simple routine prevents the high-resistance connections that cause starting problems and premature battery failure.
Short trip avoidance protects battery longevity because trips under three miles don’t allow sufficient alternator charging time to replenish the energy used during starting. Each engine start consumes approximately 100-130 cold-cranking amps for 2-3 seconds. The alternator requires 10-15 minutes of running time at moderate engine speed to fully restore this energy plus power all electrical accessories. Frequent short trips create a gradual net discharge pattern that sulfates battery plates prematurely, reducing capacity and lifespan. If your daily routine involves multiple short trips, consider combining errands into one longer trip weekly, or use a battery maintainer overnight periodically to restore full charge.
Temperature protection dramatically affects battery lifespan—heat accelerates degradation while cold reduces available capacity. Summer temperatures above 90°F increase internal chemical reaction rates, consuming water through evaporation and degrading active plate material. Park in covered or shaded areas when possible, and consider battery insulation blankets designed to moderate temperature extremes. Winter temperatures below 32°F reduce battery capacity by 35-50% while simultaneously increasing the cranking power required to start cold engines. Battery blankets or heaters for extreme climates (below 0°F) maintain adequate temperature for reliable starting. According to battery manufacturer data, a battery operating consistently at 77°F lasts about 4 years, while the same battery at 95°F lasts only 2 years.
Battery age tracking enables proactive replacement before failure strands you. Mark your battery purchase date on the battery case with permanent marker, or photograph the receipt and store it digitally. Most batteries display a date code stamp indicating manufacture date, though codes vary by manufacturer. Replace batteries at three years in hot climates (southern states, desert regions), four years in moderate climates, and five years maximum regardless of location. Proactive replacement costs the same $100-200 as emergency replacement but occurs at your convenience rather than during roadside breakdowns. Some vehicle owners replace batteries during annual inspections just before warranty expiration, maximizing warranty value while ensuring reliability.
How Do You Maintain Your Starter Motor for Longevity?
You maintain starter motor longevity by avoiding excessive cranking attempts beyond 10-15 seconds continuously, addressing hard-start conditions immediately rather than compensating with extended cranking, keeping engine maintenance current to reduce cranking resistance from poor compression or fuel delivery, protecting electrical connections from moisture and corrosion, and understanding climate effects where extreme cold increases starter load while heat accelerates electrical component degradation. Unlike batteries which require active maintenance, starters benefit most from proper usage patterns and avoiding the conditions that cause premature wear.
Excessive cranking avoidance is critical because starter motors are designed for brief intermittent operation rather than continuous running. Crank the engine for no more than 10-15 seconds per attempt, then wait 30-60 seconds before trying again. Continuous cranking overheats the starter motor windings, potentially melting insulation and causing short circuits. The heat generated during cranking dissipates during the waiting periods between attempts. If your engine doesn’t start after three 10-second cranking attempts, stop and diagnose the underlying problem rather than continuing to crank. Persistent cranking often indicates fuel delivery, ignition, or compression problems that no amount of starter operation will overcome.
Hard-start conditions require immediate attention because compensating with extended cranking accelerates starter wear dramatically. If your engine cranks slowly, requires multiple attempts to start, or only starts after cranking for extended periods, the root cause may be failing spark plugs, weak fuel pressure, dirty fuel injectors, or low compression. Each of these problems forces the starter motor to work harder and longer than designed, generating excessive heat and mechanical stress. Address the underlying engine problem promptly rather than accepting the hard-start condition as normal. One month of hard starts can inflict wear equivalent to a year of normal operation.
Engine maintenance currency reduces starter load by ensuring optimal compression, efficient combustion, and proper fuel delivery. Fresh spark plugs ignite fuel mixtures reliably on the first compression cycle, minimizing cranking time. Clean fuel injectors deliver precise fuel quantities that start easily. Proper valve timing from a maintained timing belt or chain ensures strong compression that aids rather than fights starting. Conversely, worn spark plugs, clogged injectors, or jumped timing significantly increase the mechanical resistance the starter must overcome, shortening its service life. Following manufacturer-recommended maintenance intervals for these engine components indirectly protects your starter motor.
Electrical connection protection prevents voltage drop and corrosion at the starter’s power supply and ground connections. The thick cable connecting your battery positive terminal to the starter solenoid carries hundreds of amperes during cranking. Inspect this cable annually for damaged insulation, corrosion at connection points, or looseness. Similarly, verify the ground strap connecting the engine block to the chassis remains tight and corrosion-free. Apply dielectric grease to these connections during inspection to prevent moisture intrusion. Poor connections force the starter to operate with reduced voltage, working harder to achieve the same cranking speed and generating excessive heat.
Climate protection considerations vary by region. Extreme cold below 0°F increases engine oil viscosity dramatically, creating mechanical resistance that forces starters to draw 2-3 times normal current. Consider using engine block heaters in extreme cold climates to reduce starting load. Synthetic oils with low-temperature flow ratings reduce cold-start resistance compared to conventional oils. Conversely, extreme heat above 100°F accelerates degradation of electrical insulation and lubricants within the starter motor. While you cannot modify climate, understanding these effects helps explain why starters in Arizona and Minnesota may require replacement at lower mileages than those in moderate climates.
What Warning Signs Should You Watch For?
Warning signs include slow cranking that progressively worsens over weeks, dimming headlights that correlate with electrical load, intermittent starting issues that occur more frequently over time, electrical accessory malfunctions like flickering interior lights or weak horn sounds, dashboard warning lights particularly the battery/charging symbol, and unusual starter noises including grinding, whirring, or high-pitched squealing beyond normal clicking. Recognizing these early indicators allows you to schedule convenient repairs rather than experiencing complete starting system failure at inopportune times.
Slow cranking progression provides the most reliable early warning of impending battery or starter failure. Normal cranking sounds vigorous and purposeful, rotating the engine at 150-250 RPM. As batteries age or starters wear, cranking speed gradually decreases to 100-150 RPM—the engine still starts but sounds labored and takes noticeably longer. This slow cranking typically worsens progressively over 2-8 weeks before complete failure occurs. If you notice this pattern, especially during the first start of the day when the battery is coolest and weakest, plan for battery or starter service within the next month to avoid unexpected breakdown.
Dimming headlights during starting attempts or electrical load activation signal insufficient charging system capacity or high-resistance connections. Turn on your headlights in a dark area and observe their brightness while attempting to start the engine. Healthy electrical systems maintain nearly constant headlight brightness during cranking. Significant dimming or flickering indicates either battery weakness, poor cable connections, or alternator undercharging. Similarly, headlights that dim noticeably when you activate power windows, blower motor, or rear defrost suggest the alternator cannot meet electrical demands, meaning the battery is gradually discharging and will eventually cause starting problems.
Intermittent starting issues that occur with increasing frequency represent perhaps the most frustrating warning sign because they’re difficult to diagnose during brief repair shop visits. Your car starts normally for weeks, then suddenly requires two or three cranking attempts one morning, then works fine for several more days before repeating the pattern. This intermittent behavior typically indicates starter motor brushes wearing to the point where they only contact the commutator reliably in certain rotational positions, or internal solenoid contacts beginning to fail. Track these episodes—if they occur more than twice monthly or show increasing frequency, starter replacement is imminent.
Electrical accessory malfunctions often accompany developing battery or charging system problems because these components share the same electrical supply. Notice whether your horn sounds weak, power windows operate slowly, interior lights seem dim, or the radio loses presets frequently. These symptoms indicate voltage fluctuations or insufficient current supply that may not yet affect starting but suggest broader electrical system weakness. Combined with any clicking or slow cranking, these accessory issues strengthen the diagnosis of battery, alternator, or connection problems requiring attention.
Dashboard warning lights, particularly the battery symbol or “check charging system” message, provide direct confirmation of electrical system problems. Modern vehicles monitor charging system voltage continuously; the warning light illuminates when voltage drops below approximately 13 volts or exceeds 15 volts during operation. Never ignore this warning—it indicates your alternator has failed or is failing, meaning your battery is discharging while you drive and will soon leave you stranded. If this light appears, drive directly to a repair facility without shutting off the engine if possible. Turning off the engine may prevent restarting until the alternator is replaced.
Unusual starter noises provide specific diagnostic clues about the type of failure developing. Grinding sounds indicate the starter pinion gear is not meshing properly with the flywheel teeth, suggesting worn Bendix drive mechanism or damaged flywheel ring gear. Whirring or free-spinning sounds mean the starter motor is running but the pinion gear isn’t engaging the flywheel at all, indicating solenoid problems. High-pitched squealing suggests worn starter bushings or bearings. While clicking alone indicates the problems discussed earlier in this article, these other abnormal sounds warrant immediate professional diagnosis before complete starter failure occurs.
Are There Special Considerations for Electric and Hybrid Vehicles?
Electric and hybrid vehicles have special considerations including dual battery systems with both high-voltage traction batteries and conventional 12-volt auxiliary batteries, clicking diagnosis differences where traditional starter motor problems don’t apply but 12-volt battery failures still occur, safety precautions requiring extreme caution around high-voltage orange cables and components, computer system dependency where 12-volt battery failure prevents the entire vehicle from operating despite full traction battery charge, and manufacturer-specific jump-start restrictions that prohibit conventional jump-starting on some models. These unique characteristics require modified diagnostic and repair approaches compared to conventional gasoline vehicles.
Dual battery systems in hybrids and EVs create confusion about which battery causes clicking problems. The large high-voltage battery (200-400+ volts) powers the electric drive motor and propulsion system but doesn’t directly crank a starter motor since EVs have no traditional engine. However, both hybrids and EVs contain a conventional 12-volt auxiliary battery that powers accessories, computers, displays, and vehicle startup systems. When this 12-volt battery fails or discharges, you’ll hear clicking exactly like a conventional vehicle when you push the start button, even though the traction battery shows full charge. The clicking sound comes from relays attempting to close circuits that energize the vehicle’s computer systems and, in hybrids, potentially start the gasoline engine.
Clicking diagnosis in EVs differs from conventional vehicles because pure electric vehicles have no starter motor to fail. If your EV produces clicking when you press the start button, the 12-volt auxiliary battery has failed, connections have corroded, or a relay in the startup circuit has malfunctioned. You cannot have a “starter motor problem” in a pure EV, simplifying diagnosis somewhat. However, hybrids combine both systems—they can experience both 12-volt battery clicking and traditional starter motor failure that prevents the gasoline engine from starting even when the 12-volt system functions properly. This dual possibility requires more careful diagnosis in hybrid vehicles.
Safety precautions around high-voltage systems are absolutely critical and potentially life-threatening if ignored. Never touch, disconnect, or work near orange-colored high-voltage cables or components marked with high-voltage warning labels. These systems carry 200-400+ volts of direct current that can cause fatal electrocution or severe burns. When jump-starting or replacing the 12-volt battery in a hybrid or EV, work only on the clearly marked 12-volt battery (usually located in the engine bay, trunk, or under rear seats) and never touch high-voltage components. If you’re uncertain about component identification, call professional assistance—mishandling high-voltage systems can kill you instantly.
Computer system dependency in modern EVs and hybrids means a failed 12-volt battery disables the entire vehicle regardless of traction battery charge. The 12-volt system powers the vehicle’s computers, which must boot up and communicate before the high-voltage system energizes. Without 12-volt power, the computers remain offline, the main contactors that connect the traction battery won’t close, and the vehicle becomes completely inoperable despite potentially having 200+ miles of range in the traction battery. This frustrating scenario surprises many EV owners who assume their “fully charged” vehicle should operate, but the 12-volt auxiliary battery is equally critical for basic operation.
Manufacturer-specific jump-start restrictions prohibit conventional jump-starting procedures on certain EV and hybrid models. Some manufacturers specify you must never connect jumper cables directly to the 12-volt battery terminals due to sensitive electronics that could be damaged by voltage spikes during connection or disconnection. Instead, these vehicles provide designated jump-start terminals under the hood, clearly marked in the owner’s manual. Other manufacturers recommend calling roadside assistance rather than jump-starting at all, as their systems require specific procedures or equipment. Always consult your owner’s manual before attempting to jump-start any EV or hybrid—improper procedures can cause thousands of dollars in electrical system damage even if you’re trying to help.
According to hybrid and electric vehicle reliability data from organizations like Consumer Reports, 12-volt auxiliary batteries in EVs and hybrids typically last only 2-4 years compared to 3-5 years in conventional vehicles, possibly due to different charge-discharge patterns and the constant power draw from vehicle computers even when parked. This shorter lifespan means EV and hybrid owners should replace their 12-volt batteries more frequently and consider the battery a routine maintenance item rather than waiting for failure. Proactive replacement every 3 years prevents the inconvenience of vehicle shutdown despite having what appears to be a “fully charged” vehicle ready to drive.