

Starter Clicks But Won’t Start: 7 Causes & Fixes for Car Owners
When you turn your key and hear clicking sounds but your car won’t start, the problem typically stems from one of seven common causes: a weak or dead battery, corroded battery cables, a failing starter solenoid, a worn-out starter motor, bad ground connections, a faulty ignition switch, or a malfunctioning starter relay. Each cause produces specific symptoms that help you identify the root issue and determine whether you can fix it yourself or need professional help.
The clicking noise you hear comes from the starter solenoid attempting to engage the starter motor, but without enough electrical current to complete the cranking process. Understanding whether you hear a single loud click or rapid clicking sounds provides crucial diagnostic information—single clicks often indicate a starter motor or solenoid problem, while rapid clicks typically point to insufficient battery power. This distinction helps you narrow down the troubleshooting process and avoid replacing parts unnecessarily.
Battery-related issues account for approximately 75% of all click-no-start situations, making battery testing your logical first step. However, starter motor failures, corroded connections, and electrical system problems also create identical symptoms, requiring systematic diagnosis to identify the actual culprit. Knowing how to test each component saves you time and money while preventing the frustration of trial-and-error repairs.
Beyond immediate fixes, understanding preventive maintenance and how environmental factors affect your starting system helps you avoid future breakdowns. Next, let’s explore exactly what happens when your starter clicks but won’t start and how to diagnose each potential cause.
What Does It Mean When Your Starter Clicks But Won’t Start?
When your starter clicks but won’t start, the starter solenoid is engaging but lacks sufficient electrical current to turn the starter motor and crank the engine. This clicking sound indicates that some electrical power reaches the starting system, but not enough amperage flows through the circuit to rotate the heavy starter motor and spin your engine.
To better understand this problem, you need to know how the starting system works. When you turn your ignition key or push the start button, electrical current flows from your battery through the ignition switch to the starter relay and then to the starter solenoid. The solenoid acts as a powerful electromagnetic switch that performs two functions: it pushes the starter drive gear forward to mesh with your engine’s flywheel, and it closes heavy-duty contacts that allow high-amperage current to flow to the starter motor itself.
The clicking noise occurs when the solenoid receives enough voltage to activate its electromagnetic coil and attempt engagement, but the system cannot deliver the 150-300 amps typically required to spin the starter motor under load. Think of it like trying to start a lawn mower with weak arms—you can pull the cord, but you cannot generate enough force to turn the engine over. Similarly, your electrical system initiates the starting sequence but cannot provide adequate power to complete it.

Several specific conditions create this click-no-start scenario. A battery with sufficient voltage to activate the solenoid (around 9-10 volts) but insufficient amperage capacity cannot deliver the burst of current needed for cranking. Corroded battery terminals or loose cable connections create high electrical resistance that allows some current through but blocks the heavy flow required by the starter motor. A worn starter motor with damaged brushes or bearings might draw excessive current, overwhelming what the battery can supply. Bad ground cable causing click-no-start symptoms occurs when the return path for electrical current degrades, preventing the completion of the high-amperage circuit.
The starting system operates on principles of electrical load and resistance. Your battery must not only provide voltage (electrical pressure) but also amperage (electrical volume or flow). The starter motor represents one of the highest electrical loads in your entire vehicle, drawing more current during cranking than your headlights, radio, and air conditioning combined. When any component in this circuit fails or degrades, the system cannot handle this massive electrical demand, resulting in the characteristic clicking without starting.
Is Your Battery Dead or Is It the Starter Motor?
Your battery is likely the problem if you hear rapid clicking, your headlights dim significantly when attempting to start, or electrical accessories lose power during cranking, while the starter motor is probably faulty if you hear a single loud click, headlights maintain brightness, or you occasionally hear grinding noises. Understanding this distinction saves you from replacing the wrong component and wasting money on unnecessary repairs.

Specifically, these diagnostic steps help you differentiate between battery and starter problems. Turn on your headlights before attempting to start your car—if the lights dim dramatically or go out completely when you turn the key, your battery lacks sufficient charge or capacity. This simple test works because both the headlights and starter draw power from the same source, and a weak battery cannot supply both simultaneously. Conversely, if your headlights maintain normal brightness during cranking attempts while you hear clicking, the battery likely provides adequate power, pointing toward starter motor or solenoid failure.
How Do You Test Your Battery to Rule It Out?
Battery voltage drop test for starter issues requires measuring voltage at multiple points during the starting attempt. Use a digital multimeter set to DC voltage and check your battery terminals with the engine off—a healthy battery should read 12.4 to 12.7 volts when fully charged. Anything below 12.0 volts indicates a discharged battery that needs charging or replacement. However, static voltage alone does not tell the complete story because a battery can show proper voltage but still lack the amperage capacity to crank an engine.
Perform a cranking voltage test by having someone attempt to start the car while you monitor the multimeter connected to the battery terminals. The voltage should not drop below 9.6 volts during cranking. If voltage plummets to 8 volts or lower, your battery cannot deliver adequate current under load, even if it showed acceptable voltage when sitting idle. This phenomenon occurs when internal battery plates deteriorate, reducing the battery’s ability to produce high current output despite maintaining surface voltage.
Battery terminal corrosion creates another common problem that mimics a dead battery. White, blue, or green crusty buildup on your terminals acts as an insulator, blocking current flow and creating the same symptoms as a depleted battery. Clean terminals with a wire brush and a mixture of baking soda and water, ensuring you disconnect the negative cable first and reconnect it last to prevent sparks. After cleaning, coat terminals with dielectric grease or petroleum jelly to prevent future corrosion.
Load testing provides the most accurate battery assessment but requires specialized equipment available at most auto parts stores. A load tester applies a controlled electrical load equivalent to the starting system’s demands while monitoring voltage stability. A battery that maintains at least 9.6 volts under a load equal to half its cold-cranking amp (CCA) rating for 15 seconds passes the test. Many auto parts retailers perform this test free of charge, giving you definitive answers about battery condition.
How Can You Tell If the Starter Motor Is Bad?
Starter motor failure produces distinct symptoms that differ from battery problems. A single loud click when you turn the key suggests the solenoid engages successfully but the motor itself cannot turn. This occurs when the motor’s internal components—such as brushes, commutator, or armature windings—wear out or fail. Unlike the rapid clicking of a weak battery, this solitary clunk indicates mechanical or electrical failure within the starter motor assembly itself.
The Tap test myth and what it indicates has circulated among mechanics for decades. Lightly tapping the starter motor housing with a hammer or wrench while someone tries to start the car sometimes temporarily restores function. This works because worn starter brushes can stick in their holders or fail to make proper contact with the commutator. Tapping can jostle these components back into position momentarily. However, this represents a temporary fix only—if tapping makes your car start, your starter motor needs replacement soon because the underlying wear continues to worsen.
Intermittent starting problems that worsen over time strongly indicate starter motor degradation. You might experience several days of normal starting followed by random click-no-start events. As the starter motor’s internal components deteriorate, they make increasingly inconsistent contact, creating unpredictable behavior. Hot weather can exacerbate this issue because heat expands metal components, sometimes causing worn brushes to lose contact altogether.
Unusual noises during cranking provide additional diagnostic clues. A grinding sound suggests the starter drive gear fails to properly mesh with the flywheel ring gear, often due to worn teeth on either component or a failing solenoid that does not fully engage the drive mechanism. A whirring sound without engine cranking indicates the starter spins but the drive gear does not engage the flywheel at all. These sounds require immediate attention because continued attempts to start can damage the flywheel, creating a much more expensive repair.
What Are the 7 Common Causes of a Clicking Starter?
There are seven main causes of a clicking starter: weak or dead battery, corroded or loose battery cables, failing starter solenoid, worn-out starter motor, bad ground connection, faulty ignition switch, and malfunctioning starter relay, based on the electrical path and mechanical components involved in the starting system. Each cause creates similar clicking symptoms but requires different diagnostic approaches and repair solutions.
Understanding these causes in order of likelihood helps you troubleshoot efficiently. Battery-related issues—including the battery itself, cable connections, and ground problems—account for the majority of click-no-start situations and should be investigated first. Starter component failures, including the solenoid and motor, represent the next most common category. Control circuit problems involving the ignition switch and starter relay occur less frequently but can produce identical symptoms, making systematic testing essential.
Cause #1: Is Your Battery Too Weak to Crank the Engine?
A weak or discharged battery cannot provide the 150-300 amps required to turn the starter motor and crank your engine, even though it might have enough power to activate the solenoid and create clicking sounds. Battery capacity diminishes over time due to internal plate sulfation, loss of electrolyte, and chemical degradation, particularly when batteries approach or exceed their typical 3-5 year lifespan.
Cold weather dramatically impacts battery performance because chemical reactions inside the battery slow down at lower temperatures, reducing available power output. A battery loses approximately 35% of its strength at 32°F (0°C) and up to 60% at 0°F (-18°C). Simultaneously, cold engine oil becomes thicker and increases cranking resistance, requiring more power to start the engine. This double impact explains why cars that start fine in summer often fail in winter, even with the same battery.
Parasitic electrical drains accelerate battery discharge when your car sits unused. Modern vehicles maintain various electronic systems even when parked—alarm systems, clock, radio memory, and computer modules—that slowly draw current. Normally, these draws amount to 25-50 milliamps and a healthy battery easily compensates during regular driving. However, a faulty component like a glove box light that stays on or a trunk light with a bad switch can drain 500 milliamps or more, depleting your battery in just a few days.
Short trips prevent your alternator from fully recharging the battery after startup. Starting your engine consumes significant battery power, and the alternator needs 20-30 minutes of driving to restore that energy. If you primarily make 5-10 minute trips, your battery operates in a constant state of partial discharge, gradually weakening until it can no longer crank the starter motor effectively.
Cause #2: Are Your Battery Cables Corroded or Loose?
Corroded or loose battery cables create high electrical resistance that blocks the flow of high amperage to your starter motor, even when your battery holds a full charge. Corrosion appears as white, blue, or green crusty deposits on battery terminals and cable ends, chemically forming when battery acid vapors react with the metal connectors. This corrosion acts as an insulator, dramatically reducing the electrical connection’s ability to conduct the massive current required for starting.
Cable connections can loosen over time from engine vibration, thermal expansion and contraction cycles, and improper installation. A connection that appears tight might have only partial contact between the cable lug and battery post, creating a high-resistance junction. When you attempt to start your car, the connection allows enough current through to engage the solenoid (which requires relatively little power) but cannot pass the hundreds of amps needed to spin the starter motor.
Internal cable damage presents a less visible problem. Battery cables contain multiple copper strands bundled together and covered with insulation. Over years of use, corrosion can creep under the insulation and attack these internal strands, reducing the cable’s current-carrying capacity without obvious external signs. A cable that looks fine on the outside might have 50-70% of its copper strands corroded away internally, creating the same symptoms as a bad connection.
The positive cable runs from the battery to the starter motor and often includes multiple connection points along its path, each representing a potential failure point. The negative cable connects the battery to the engine block or chassis, providing the critical ground path for current to return. Both cables must maintain perfect integrity because the starter circuit requires complete loop—current flows from the battery positive terminal, through the starter motor, through the engine block and ground cable, and back to the battery negative terminal.
Cause #3: Is Your Starter Solenoid Failing?
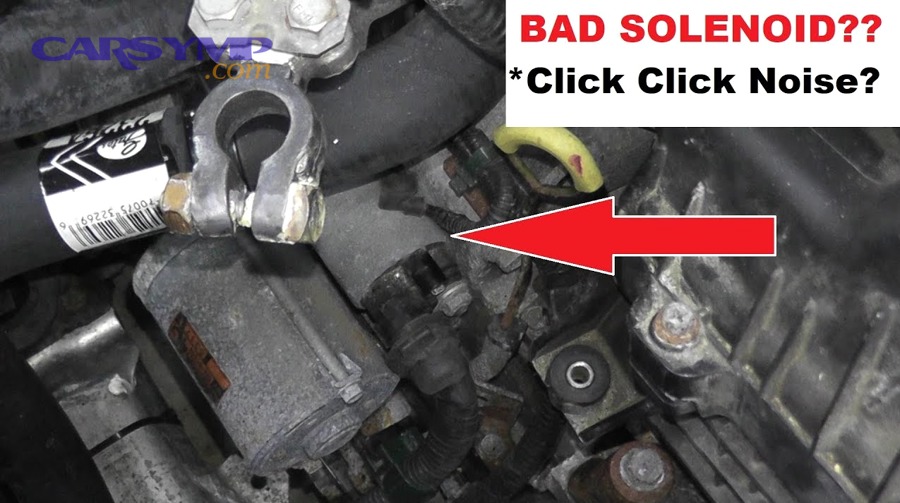
A failing starter solenoid engages its electromagnetic coil and produces a clicking sound but cannot close the heavy-duty contacts that deliver high current to the starter motor, or it cannot maintain engagement long enough to complete the cranking process. The solenoid contains two sets of contacts and windings: a pull-in winding that draws the plunger and drive gear forward, and a hold-in winding that maintains engagement. When these components wear out, the solenoid might partially function while failing to complete its job.
Starter relay and solenoid troubleshooting requires understanding their distinct roles. The solenoid mounts directly on the starter motor and performs both mechanical and electrical functions—it pushes the drive gear into mesh with the flywheel while simultaneously closing high-current contacts. Some vehicles use a separate starter relay mounted in the fuse box that acts as a lower-current switch controlling the solenoid. When diagnosing, you must identify which component your vehicle uses and test accordingly.
Heat accelerates solenoid degradation because the component sits directly on the starter motor, often in the hot engine compartment. Repeated thermal cycling causes the internal contacts to pit and wear, developing high-resistance areas that cannot pass adequate current. You might notice the problem worsens after driving when engine heat soaks into the starter area, but the car starts fine when cold. This temperature-dependent failure strongly suggests solenoid contact deterioration.
Contact welding represents another solenoid failure mode where the high-current contacts fuse together from electrical arcing and heat. This causes the starter to continue running after you release the key, creating a dangerous condition. If you ever experience a starter that will not disengage, immediately disconnect the battery to prevent starter motor burnout and potential fire risk.
Cause #4: Is Your Starter Motor Worn Out?
A worn-out starter motor cannot generate sufficient torque to crank your engine even when receiving adequate electrical power, often producing a single click as the solenoid engages but the motor fails to turn. Internal components including brushes, commutator, armature windings, and bearings deteriorate over time from normal wear, heat exposure, and the mechanical stress of cranking against engine compression.
Brushes and commutator wear creates the most common starter motor failure. The brushes are spring-loaded carbon blocks that press against the spinning commutator, transferring electrical current to the armature windings. Over thousands of starts, these brushes wear down—typically rated for 5,000 to 10,000 starts—eventually becoming too short to maintain proper contact pressure. When brushes wear excessively, they create intermittent connections that sometimes work and sometimes fail, producing the unpredictable starting problems many drivers experience.
Bearing failure causes the armature shaft to bind or wobble, preventing smooth rotation. The starter motor contains bushings or ball bearings at each end of the armature shaft that support extremely high rotational forces during cranking. When these bearings wear, the armature drags against the housing, increases friction dramatically, and might seize completely. This condition often produces a burning electrical smell from the excessive current draw as the motor struggles against mechanical resistance.
Armature winding degradation occurs when the electromagnetic coils inside the starter motor develop shorts or open circuits from heat damage, vibration, or age. These windings create the magnetic fields that produce rotational force, and any electrical fault within them reduces motor power output. A partially damaged armature might turn the motor slowly or erratically, requiring multiple attempts to start the engine. Complete winding failure results in no motor rotation at all, just the solenoid click.
Cause #5: Are You Getting a Bad Ground Connection?
A bad ground connection prevents the completion of the electrical circuit required for starter operation, blocking the return path for current flowing from the battery through the starter motor back to the battery negative terminal. The ground cable connects the battery negative terminal to the engine block or chassis, and this connection must carry the same high current as the positive cable—150-300 amps during cranking—making it equally critical despite receiving less attention during troubleshooting.
Ground cable corrosion typically occurs where the cable bolts to the engine block or chassis. These connection points accumulate dirt, oil, rust, and oxidation over years of exposure, creating an insulating layer between the cable lug and the grounding surface. Even a thin coating of corrosion dramatically increases electrical resistance, restricting current flow and producing the same clicking symptoms as a weak battery or bad positive connection.
Multiple ground paths exist in your vehicle’s electrical system, and a bad ground can affect more than just starting. The engine block connects to the chassis through flexible ground straps—braided cables that allow engine movement while maintaining electrical continuity. If these straps corrode or break, the starter circuit loses its ground path. You might notice other electrical anomalies like flickering lights, erratic gauge readings, or electronic module glitches that accompany the starting problem, all indicating ground circuit degradation.
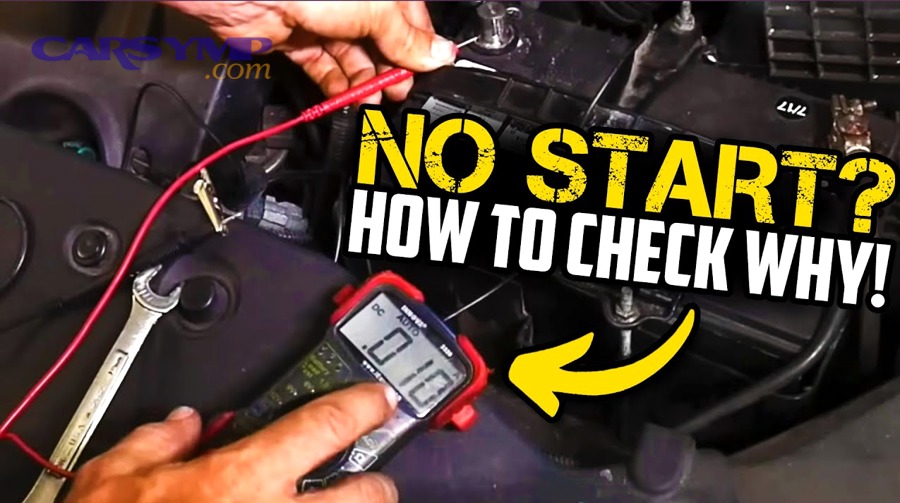
Testing ground connections requires checking voltage drop across the ground path. DIY starter circuit test with multimeter procedures involve connecting the multimeter between the battery negative terminal and the starter motor housing with the meter set to DC volts. When someone attempts to start the car, you should see less than 0.5 volts. Higher readings indicate resistance in the ground circuit, pointing to corroded connections, damaged cables, or broken ground straps that need cleaning or replacement.
Cause #6: Is Your Ignition Switch Faulty?
A faulty ignition switch fails to send the electrical signal that activates the starter relay or solenoid when you turn the key or push the start button, interrupting the control circuit before power ever reaches the starter system. The ignition switch serves as the command center for starting, controlling a low-current circuit that triggers the high-current starter components. When this switch wears out or fails, nothing downstream can function regardless of battery or starter condition.
Ignition switch and neutral safety switch checks should be performed together because they work in series—both must close simultaneously to complete the starting circuit. The ignition switch can fail mechanically (the key tumbler or push-button mechanism breaks) or electrically (internal contacts wear out). Mechanical failures often show warning signs like difficulty turning the key, a key that sticks, or a button that feels mushy or unresponsive before complete failure occurs.
Electrical contact wear inside the ignition switch creates intermittent starting problems that frustrate owners and mechanics alike. The switch might work perfectly for weeks, then suddenly fail for no apparent reason, and later resume normal operation. This happens because worn contacts make inconsistent connection, sometimes allowing current through and sometimes blocking it. Thermal expansion from engine heat can worsen the problem, causing the switch to fail when hot but work when cold.
Bypassing the ignition switch for testing requires locating the starter signal wire—typically a smaller gauge wire running to the starter solenoid or relay—and temporarily applying battery voltage directly to this wire while the ignition is on. If the starter engages when you bypass the switch but not when using the key or button, the ignition switch has failed. This test requires caution because it bypasses safety interlocks designed to prevent starting in gear, creating potential safety hazards if performed improperly.
Cause #7: Is Your Starter Relay Not Working?
A malfunctioning starter relay cannot close its contacts to send power from the battery to the starter solenoid, breaking the electrical chain between the ignition switch and the starter motor. Many modern vehicles use a relay to control the starter circuit because relays allow a small current from the ignition switch to control a larger current flowing to the starter solenoid, reducing wear on the ignition switch and allowing more efficient circuit design.
Starter relays typically mount in the under-hood fuse box or power distribution center, often sharing space with relays for cooling fans, fuel pumps, and other high-current accessories. The relay contains an electromagnetic coil that, when energized by the ignition switch, pulls contacts together to complete the circuit to the starter solenoid. Like any electromechanical device, relays fail from contact wear, coil burnout, or environmental factors like moisture intrusion and heat exposure.
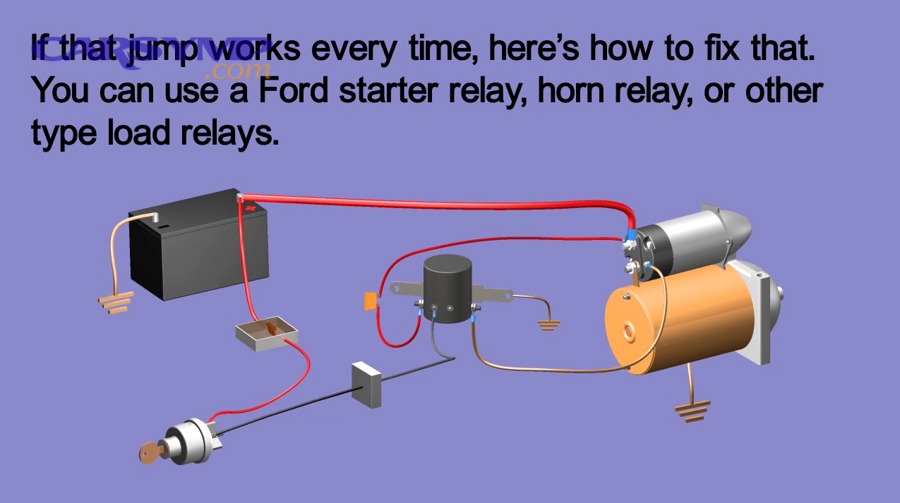
Testing relay operation involves swapping it with an identical relay from another circuit in the same fuse box. Many vehicles use the same relay design for multiple purposes—the horn relay, fuel pump relay, or cooling fan relay might be identical to the starter relay. Simply swap the suspected starter relay with a known-good relay from another circuit and attempt to start the car. If the car starts with the swapped relay, you have confirmed relay failure and identified a simple, inexpensive fix.
Audible clicking from the relay location during starting attempts indicates the relay receives the signal from the ignition switch but might not be closing its contacts fully or passing adequate current. You can sometimes feel a relay click when holding it during operation—a good relay produces a solid, definite click while a failing relay might click weakly or buzz. However, the absence of clicking does not necessarily mean the relay is bad; the ignition switch signal might not reach the relay, requiring systematic testing of the entire control circuit.
What Is the Difference Between Single Click and Rapid Clicking?
A single loud click indicates the starter solenoid engages successfully but the starter motor cannot turn, typically pointing to starter motor failure, solenoid contact failure, or severe mechanical binding, while rapid clicking suggests insufficient battery power or high-resistance connections that cannot maintain solenoid engagement. This diagnostic distinction helps you focus troubleshooting efforts on the most likely cause without wasting time testing unrelated components.
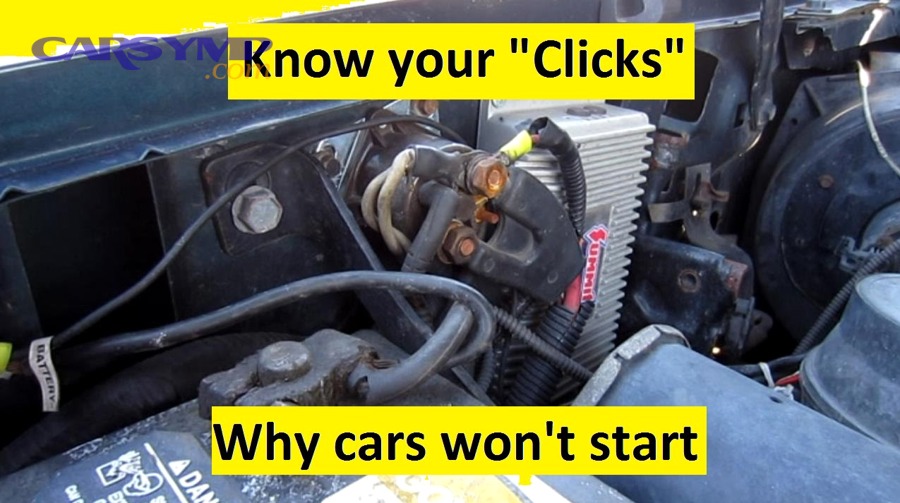
Single click vs rapid clicks diagnosis follows this logic: the solenoid requires approximately 10-20 amps to engage its electromagnetic coil and produce a click, while the starter motor needs 150-300 amps to crank the engine. When you hear one solid click, the battery provides enough power to activate the solenoid, but either the solenoid contacts fail to close properly, the starter motor cannot turn due to internal failure, or something mechanically blocks rotation. The single click represents successful solenoid engagement without subsequent motor rotation.
Rapid clicking occurs when the battery or connections cannot sustain even the relatively modest current required to keep the solenoid engaged. The solenoid attempts to close, draws current, causes voltage to drop, releases, voltage recovers, tries again, creating a rapid-fire clicking pattern. This cycle repeats many times per second, producing the characteristic machine-gun sound that almost always indicates severe battery weakness or connection problems. Each click represents an unsuccessful attempt to pull in and hold the solenoid, with the system repeatedly resetting as voltage collapses and recovers.
The speed and character of rapid clicking provides additional information. Very rapid, consistent clicking with 5-10 clicks per second strongly suggests battery depletion. Slower, more irregular clicking might indicate corroded connections that create variable resistance, sometimes allowing more current through than other times. The clicking might slow down or speed up as you hold the key, reflecting changing voltage levels as the battery attempts to recover between starting attempts.
How Do You Fix a Starter That Clicks But Won’t Start?
Fix a clicking starter by first testing and charging or replacing the battery, then cleaning all battery connections and ground cables, testing the starter solenoid and motor, checking the ignition switch and relay, and replacing failed components based on systematic diagnosis. This methodical approach prevents replacing parts unnecessarily and ensures you address the actual problem rather than guessing at solutions.
The diagnostic flowchart follows electrical current from source to load: start with the battery as your power source, trace through all connections to the starter as the load, and test each component in sequence. This systematic process identifies the failure point efficiently. Skip steps only when symptoms clearly indicate a specific problem—for example, if headlights maintain full brightness during cranking attempts, you can reasonably skip battery testing and focus on starter components.
What Are the Quick Fixes You Can Try First?
Clean battery terminals and cable connections before testing anything else because this simple fix resolves approximately 30-40% of clicking starter problems and takes only 5-10 minutes. Disconnect the negative cable first, then the positive, and use a wire brush to clean both battery posts and cable terminals until you see bright, shiny metal. Corrosion acts as an insulator that creates exactly the same symptoms as a dead battery, and many people waste money replacing perfectly good batteries when cleaning connections would solve the problem.
Attempt a jump-start using another vehicle or portable jump starter to quickly determine if battery weakness causes your problem. Connect jumper cables with both engines off: positive to positive, negative to a clean ground point on the disabled vehicle’s engine block rather than directly to the battery negative terminal. Start the helper vehicle, let it run for 2-3 minutes to charge the dead battery, then attempt to start the disabled vehicle. If it starts readily with a jump but showed clicking before, your battery needs charging or replacement.
The tap test on the starter motor sometimes provides temporary relief for a starter with worn brushes. Locate the starter motor—typically on the lower engine block where the transmission bolts to the engine—and firmly tap its housing with a hammer or wrench while someone tries to start the car. If this works, plan for starter replacement soon because the underlying wear will cause repeated failures. Never strike the starter with excessive force, which can damage internal components or crack the housing.
Check the security of all cable connections by attempting to wiggle and rotate battery cables and ground connections. Loose connections might feel tight but lack adequate metal-to-metal contact. Remove, clean, and retighten all connections, ensuring you torque battery terminals to manufacturer specifications—typically 70-100 inch-pounds. Over-tightening can crack battery posts while under-tightening leaves loose connections that create high resistance.
How Do You Replace a Faulty Starter Motor?
Replacing a starter motor requires disconnecting the battery, removing the old starter, installing the new unit, and reconnecting all electrical connections in about 1-3 hours depending on vehicle accessibility. Most starter motors mount with two or three bolts on the engine block or transmission bell housing, but access varies dramatically between vehicles—some allow easy reach from above, while others require raising the vehicle and working from underneath.
Start by disconnecting the battery negative cable to prevent accidental shorts during the replacement process. Locate all electrical connections on the starter: a large battery cable connecting to the main terminal, a smaller wire or connector for the solenoid signal, and possibly a ground wire. Photograph these connections before removal to ensure correct reinstallation. Remove the electrical connections first, then support the starter motor—they weigh 8-15 pounds and will drop when the bolts release—before removing mounting bolts.
The replacement starter should match your original exactly in terms of mounting bolt pattern, electrical connections, and drive gear tooth count. Aftermarket starters vary in quality; premium brands like Bosch, Denso, or ACDelco typically provide reliability comparable to original equipment, while budget options might fail prematurely. Consider spending extra for a starter with a warranty of at least 3 years or lifetime warranty if available, protecting your investment against premature failure.
Installation reverses removal but requires attention to several critical points. Ensure the starter drive gear properly aligns with the flywheel before tightening bolts—misalignment causes the starter to sit at an angle, leading to grinding noises and premature wear. Torque mounting bolts to specification, typically 30-40 foot-pounds, tight enough to prevent movement but not so tight that you risk stripping aluminum threads in the engine block. Reconnect electrical connections exactly as photographed, ensuring the battery cable connection receives a tight, corrosion-free contact.
When Should You Call a Professional Mechanic?
Call a professional mechanic when diagnostic testing exceeds your skill level or tool availability, when the starter location requires extensive disassembly of other components, when safety concerns exist, or when repeated repairs fail to solve the problem. Complex electrical diagnosis involving multiple potential causes, intermittent failures, or problems requiring specialized test equipment justifies professional help, saving you time and preventing costly mistakes from incorrect diagnosis.
Vehicle-specific complications make some starter replacements impractical for DIY work. Front-wheel-drive vehicles often hide the starter behind the engine, requiring removal of the air intake, cooling system components, or even motor mounts to access it. Some luxury and European vehicles require computer reprogramming or reset procedures after starter replacement. If preliminary research indicates your vehicle requires more than basic hand tools and jack stands, professional service becomes more practical than struggling with inadequate access or equipment.
Safe-to-drive and tow decision guidance depends on whether your car runs or not. If you managed to start the car after repeated attempts, clicking starter symptoms indicate imminent complete failure—you might make it home or to a repair shop, but you risk becoming stranded at any time. Consider having the vehicle towed rather than driving if you face critical appointments, bad weather, or unsafe locations where breakdown would create serious problems. When the starter fails completely and the car will not start at all, towing becomes necessary.
Warranty considerations affect the decision to attempt DIY repairs. Many new and certified pre-owned vehicles include powertrain warranties covering the starter motor. Attempting your own repairs might void warranty coverage, making an unsuccessful DIY attempt more expensive than simply using the warranty for free or low-cost professional repair. Check your warranty status before deciding whether to repair yourself or use professional service.
How Much Does It Cost to Fix a Clicking Starter?
Fixing a clicking starter costs between $50 for cleaning battery connections to $150-$200 for battery replacement, $100-$200 for solenoid replacement, or $300-$600 for complete starter motor replacement including parts and labor, depending on the specific cause and whether you perform the repair yourself or hire a professional. Understanding these cost ranges helps you budget appropriately and evaluate repair quotes for reasonableness.

Battery replacement represents the most common fix, with costs varying by battery type and quality. Standard lead-acid batteries for most vehicles range from $100-$200, while premium AGM (Absorbed Glass Mat) batteries for vehicles with start-stop systems or heavy electrical demands cost $200-$350. Professional installation typically adds $20-$40 for labor, though many retailers install batteries free with purchase. DIY installation saves this labor cost but requires basic tools and proper disposal of the old battery at a recycling center.
Starter motor replacement costs depend heavily on labor accessibility. The starter motor itself costs $125-$300 for most vehicles, with premium brands and performance starters reaching $400-$500. Labor charges range from $75-$150 for easily accessible starters requiring 30-60 minutes of work, up to $200-$400 for difficult installations requiring 2-4 hours. Luxury vehicles, trucks, and SUVs generally incur higher parts and labor costs than compact cars and sedans.
Starter solenoid replacement may be possible separately on some vehicles, costing $50-$100 for the part plus $50-$100 labor, offering savings compared to complete starter replacement. However, many modern starters integrate the solenoid into the assembly without separate replacement capability, forcing whole-unit replacement even when only the solenoid fails. Check with your mechanic or parts supplier about solenoid availability for your specific vehicle before assuming you can replace it separately.
Labor rates vary significantly by geographic location and shop type. Dealership service departments typically charge $120-$200 per hour, independent repair shops $80-$120 per hour, and budget chains $60-$90 per hour. While dealerships cost more, they employ technicians trained specifically on your vehicle brand and use OEM (original equipment manufacturer) parts. Independent shops often provide the best value, offering quality work with aftermarket or OEM parts at competitive prices. Get quotes from multiple shops before committing to expensive repairs.
The following table summarizes typical repair costs for clicking starter problems:
| Problem | DIY Parts Cost | Professional Parts + Labor | Repair Time |
|---|---|---|---|
| Battery terminal cleaning | $5-10 (supplies) | $20-30 | 15-30 min |
| Battery replacement | $100-350 | $120-400 | 30-60 min |
| Battery cable replacement | $25-75 | $75-200 | 30-90 min |
| Ground cable repair | $15-40 | $60-150 | 30-60 min |
| Starter solenoid | $50-100 | $150-250 | 1-2 hours |
| Starter motor | $125-300 | $300-600 | 1-3 hours |
| Ignition switch | $50-150 | $150-350 | 1-2 hours |
| Starter relay | $15-30 | $50-100 | 15-30 min |
This cost breakdown helps you make informed decisions about repair approaches and evaluate whether quotes you receive fall within reasonable ranges for your specific problem.
How Can You Prevent Starter and Battery Problems?
Prevent starter and battery problems by maintaining battery charge through regular driving, cleaning terminals every 6 months, testing battery condition annually, protecting electrical connections from corrosion, and addressing starting issues promptly before minor problems escalate into major failures. Preventive maintenance costs far less than emergency repairs and significantly extends the lifespan of your starting system components.
After repair: confirming charging and battery health ensures your new or repaired starting system functions properly and the underlying problem won’t recur. After replacing a battery, starter, or making repairs, verify that your alternator properly charges the battery by measuring voltage with the engine running—it should read 13.8-14.4 volts, indicating the alternator replaces the energy used during starting. Lower voltage suggests alternator problems that will quickly kill your new battery.
What Maintenance Keeps Your Starting System Healthy?
Battery testing every 6-12 months identifies deteriorating batteries before they fail completely, allowing planned replacement rather than emergency roadside situations. Most auto parts stores perform free battery testing using load testers or electronic analyzers that assess both voltage and amperage capacity. Test before winter since cold weather accelerates battery failure, and replace marginal batteries proactively if they show capacity below 75% of their rating.
Terminal cleaning prevents the corrosion buildup that creates high-resistance connections and click-no-start symptoms. Twice yearly, disconnect battery cables and clean both posts and cable terminals with a wire brush until shiny metal appears. Apply a thin coating of dielectric grease, petroleum jelly, or anti-corrosion spray to terminals after reconnecting them to prevent future corrosion. This simple 10-minute task every six months prevents the majority of connection-related starting problems.
Drive your vehicle regularly for at least 20-30 minutes to allow the alternator sufficient time to recharge the battery after starting and power all electrical systems. Cars driven only for short trips or left sitting for weeks at a time develop weak batteries because the alternator cannot fully recharge them. If you cannot drive regularly, consider using a battery maintainer—a low-current charger that keeps the battery at optimal charge during storage—to prevent discharge-related damage.
Electrical system inspection should occur during routine maintenance, with mechanics checking connections, testing alternator output, and looking for signs of damage or excessive wear. Loose alternator belts reduce charging efficiency, corroded connections increase resistance, and damaged wiring creates electrical faults. Addressing these issues during regular service prevents them from causing starting failures later.
How Does Cold Weather Affect Your Starter and Battery?
Cold weather reduces battery capacity by 35-60% while simultaneously increasing the power required to start your engine due to thicker oil and increased mechanical resistance, creating the perfect conditions for click-no-start failures. At 32°F (0°C), a fully charged battery provides only about 65% of its normal cranking power, and this drops to 40% at 0°F (-18°C). Meanwhile, engine oil becomes more viscous, requiring 2-3 times more power to rotate the engine compared to summer starting.
Block heaters and battery warmers mitigate cold-weather starting problems by maintaining temperature in critical components. An engine block heater warms the coolant and engine block, keeping oil thinner and reducing cranking resistance. Battery warmers wrap around the battery case, maintaining temperature above freezing to preserve capacity. Installing these accessories and using them overnight when temperatures drop below 20°F (-7°C) significantly improves cold-weather starting reliability.
Battery replacement before winter prevents cold-weather failures. If your battery is 3-4 years old and shows marginal test results during summer or fall, replace it before winter arrives rather than risking failure during the coldest months. A battery that starts your car acceptably in September might fail completely in January due to the combined effects of age and temperature, leaving you stranded during the worst possible conditions.
Parking in a garage, even an unheated one, moderates temperature extremes and improves starting reliability. A garage typically maintains temperatures 10-20°F warmer than outside air, significantly improving battery capacity and reducing oil viscosity. If garage parking is unavailable, parking in areas blocked from wind and facing south to catch sunlight provides modest temperature benefits.
Can Your Car’s Anti-Theft System Cause Clicking Without Starting?
Anti-theft systems can prevent starting and sometimes produce clicking sounds if the system activates incorrectly or fails to recognize your key, though immobilizer-related no-starts typically prevent any starter engagement rather than causing clicking. Modern vehicles use electronic immobilizers that require the key to transmit the correct security code before allowing the fuel system and ignition to operate. When immobilizer problems occur, the engine typically cranks normally but fails to fire, different from the clicking symptom indicating starter system problems.
However, some vehicle security systems incorporate starter interrupt features that cut power to the starter circuit when the system activates. These systems might produce clicking if partial power reaches the starter while the security system blocks full operation. Symptoms include a security warning light on the dashboard, no response from the starter, or intermittent clicking sounds. Resetting typically requires following manufacturer-specific procedures like turning the key to accessory position for 10 minutes, then off for 5 seconds, repeating three times.
Key fob battery replacement solves many modern starting problems because low fob batteries prevent the vehicle from recognizing your key’s security code. Many push-button start vehicles require sufficient fob battery power to authenticate the key, and weak fob batteries cause no-start conditions even though the car battery is fully charged. Most fobs show warning messages or symbols when battery power drops low, giving you time to replace the battery before complete failure. Keep spare fob batteries and know how to replace them to avoid being stranded by this simple problem.
Aftermarket alarm systems occasionally interfere with factory starting systems, especially when installed incorrectly or when components fail. These systems splice into factory wiring to control starting, lighting, and other functions, creating potential failure points. If you experience starting problems soon after alarm installation or after alarm malfunction, have the alarm system inspected and potentially removed to determine if it causes the issue. Choose reputable installers and quality alarm systems to minimize these risks.
What Other Safety Switches Can Prevent Your Car From Starting?
Neutral safety switches on automatic transmission vehicles and clutch safety switches on manual transmission vehicles prevent starting unless the transmission is in Park/Neutral or the clutch pedal is fully depressed, protecting against dangerous starts while in gear. These switches sometimes fail or misadjust, preventing starting even when the transmission is correctly positioned, creating symptoms identical to starter system failures including clicking sounds in some cases.
The neutral safety switch mounts on the transmission and uses linkage or electrical signals to determine shifter position. When you place the shifter in Park or Neutral, the switch closes a circuit allowing the starter to engage. Switch failure, linkage misadjustment, or internal contact wear can leave the circuit open even in Park, preventing starting. You might notice the symptom improves by moving the shifter through positions or jiggling it in Park, indicating neutral safety switch problems rather than starter failures.
Testing the neutral safety switch involves bypassing it temporarily while ensuring the vehicle cannot move—set the parking brake, block wheels, and never perform this test in gear. Locate the switch connector, typically a multi-wire plug on the transmission, and jump the starter signal wires according to your vehicle’s wiring diagram. If the car starts with the switch bypassed, the switch needs adjustment or replacement. This test requires caution because it defeats a safety system designed to prevent starting in gear.
Clutch safety switches on manual transmissions prevent starting unless the clutch pedal is fully depressed, using a simple button-type switch mounted near the clutch pedal pivot. These switches fail mechanically or electronically over time, and adjustment drift can prevent the pedal from fully activating the switch even when you press it to the floor. Symptoms include intermittent starting problems that improve when you press the clutch pedal harder or pump it several times before starting. Adjusting or replacing the switch solves this problem inexpensively, restoring normal starting function.


