


A soft brake pedal after brake service occurs primarily because air enters the hydraulic system during component replacement, and preventing this issue requires proper bleeding techniques applied in the correct sequence, maintaining reservoir fluid levels, and avoiding common mistakes like pushing pistons back with open bleeder valves. DIY mechanics can eliminate this frustrating problem by understanding how air infiltrates brake lines during pad and rotor replacement and by mastering the seven essential bleeding methods that range from simple gravity bleeding to advanced ABS system purging.
Understanding why brake pedals feel spongy immediately after service work reveals the critical relationship between hydraulic pressure and air compressibility. When mechanics replace brake pads, retract caliper pistons, or install new rotors, they inadvertently create pathways for air to enter the sealed brake system. This air prevents the incompressible brake fluid from building the hydraulic pressure necessary for firm pedal feel and safe stopping power.
The seven essential bleeding techniques provide DIY mechanics with a comprehensive toolkit for addressing different scenarios and vehicle configurations. From the traditional two-person manual method to sophisticated pressure bleeding systems, each technique serves specific purposes and offers distinct advantages for eliminating trapped air pockets. Understanding when and how to apply gravity bleeding, vacuum bleeding, reverse bleeding, and ABS cycling ensures complete air removal regardless of where trapped bubbles hide within the brake system.
Recognizing common mistakes before they compromise brake system integrity separates successful brake service from frustrating rework. Opening bleeder valves at the wrong time, allowing the master cylinder reservoir to run empty, pushing brake pedals to the floor during bleeding, and following incorrect bleeding sequences all introduce or trap air within brake lines. Next, we’ll examine exactly why brake pedals lose firmness during service and how the hydraulic system’s design makes it vulnerable to air contamination.
Why Does Brake Pedal Feel Soft After Brake Service?
Brake pedals feel soft after service because air enters the hydraulic brake system during component replacement, creating compressible pockets that prevent proper pressure buildup when brake fluid cannot transmit force effectively through air bubbles. This problem stems from the fundamental difference between how liquids and gases behave under pressure—brake fluid transmits force instantly because it cannot compress, while air compresses easily and absorbs pedal force without moving brake components.

To better understand this phenomenon, consider how the hydraulic brake system functions as a closed circuit of incompressible fluid. The brake system operates on Pascal’s principle, where pressure applied to confined fluid transmits equally throughout the system. When a driver presses the brake pedal, the master cylinder piston pushes brake fluid through steel and rubber brake lines to the calipers at each wheel. This fluid pressure forces caliper pistons outward, clamping brake pads against rotors to create the friction that stops the vehicle. The entire system depends on brake fluid’s incompressibility to transmit force instantly and proportionally from pedal to pads.
Air disrupts this precise hydraulic transmission because gases compress under pressure while liquids do not. When air bubbles exist anywhere in the brake lines, master cylinder, calipers, or ABS modulator, pressing the brake pedal first compresses these air pockets before building enough pressure to move brake components. This compression creates the characteristic spongy or soft brake pedal feel that requires excessive pedal travel and multiple pumps to achieve adequate braking force. Each air bubble acts as a cushion that absorbs pedal effort, making the brake system feel mushy and unresponsive.
What Happens to the Brake System During Pad and Rotor Replacement?
During pad and rotor replacement, mechanics must retract caliper pistons to accommodate new, thicker brake pads, which forces brake fluid backward through the system and lowers the reservoir level, creating opportunities for air to enter at multiple points. The caliper piston retraction process reverses the normal fluid flow direction, pushing old fluid—which may contain moisture and debris—back toward the master cylinder reservoir. As pistons retract fully into their caliper bores, the brake fluid level in the reservoir rises noticeably, sometimes approaching the maximum fill line.
This fluid displacement creates several vulnerabilities in the system. First, if mechanics remove the reservoir cap during service without immediately replacing it, atmospheric air can enter directly into the brake fluid. Second, when the reservoir level drops during bleeding or if fluid spills during caliper removal, air can enter through the master cylinder ports. Third, opening bleeder valves to ease piston retraction—a common but problematic practice—creates a direct pathway for air to enter the caliper. Fourth, disconnecting brake lines from calipers or replacing brake hoses exposes the hydraulic system completely to atmospheric contamination.
The physical process of pushing pistons back into calipers generates significant pressure that can damage master cylinder seals if mechanics use excessive force. Proper technique requires slow, controlled piston retraction using a C-clamp or specialized piston tool while monitoring the reservoir for overflow. Mechanics who rush this process or use pneumatic tools to force pistons back risk not only introducing air but also pushing contaminated fluid past master cylinder seals, potentially causing internal seal damage that leads to persistent soft pedal issues even after proper bleeding.
How Does Air Enter the Brake Lines During Service?
Air enters brake lines through five primary pathways during service: open bleeder valves during piston retraction, reservoir exposure when the cap is removed, fluid level drops below the master cylinder ports, loose or disconnected brake line fittings, and through microscopic gaps in deteriorated rubber brake hoses. Each entry point presents different risks and requires specific preventive measures to maintain hydraulic system integrity.
The bleeder valve pathway represents the most common source of air introduction during brake service. Many mechanics incorrectly open bleeder valves before retracting caliper pistons, believing this prevents forcing dirty fluid back into the ABS system. While this concern has merit, the open bleeder creates a direct air entry point as the piston retracts and creates negative pressure in the caliper. This negative pressure literally sucks air past the bleeder valve threads or through the bleeder hole itself. The correct approach involves retracting pistons with bleeder valves closed, then immediately bleeding fresh fluid through each caliper to flush out any contaminated fluid pushed backward.
Reservoir exposure creates air entry risks whenever mechanics remove the cap without immediately replacing it or when they allow the fluid level to drop during bleeding procedures. The master cylinder reservoir connects directly to the brake system through two ports—one for the front brake circuit and one for the rear circuit. If the fluid level falls below these port openings, air enters directly into the brake lines. This commonly occurs when mechanics bleed multiple wheels without monitoring and refilling the reservoir between each wheel, or when they remove calipers without first clamping off the brake hose to prevent fluid loss.
Brake line fittings and connections provide additional air entry points, particularly at banjo bolts, flare fittings, and rubber-to-metal transition points. When mechanics loosen or remove these connections to replace brake hoses or disconnect calipers, air immediately enters the system. Even properly tightened fittings can develop microscopic leaks that allow air infiltration without visible fluid leakage—a phenomenon known as a “one-way leak” where air enters during system relaxation but seals under pressure. Deteriorated rubber brake hoses compound this problem by developing internal cracks that permit air passage while still containing brake fluid, effectively breathing air in and out as the brake system cycles through pressure changes.
What Are the 7 Essential Bleeding Techniques to Prevent Soft Brake Pedal?
The seven essential bleeding techniques are gravity bleeding, manual two-person bleeding, pressure bleeding, vacuum bleeding, reverse bleeding, ABS system bleeding, and master cylinder bench bleeding, each designed to address specific air removal challenges and vehicle system configurations. These methods range from simple, equipment-free approaches suitable for routine pad replacement to sophisticated procedures requiring specialized tools for complete system contamination or ABS module air pockets.
Understanding when to apply each technique maximizes efficiency and ensures complete air removal. Simple gravity bleeding works effectively after routine brake pad replacement when minimal air has entered the system, while pressure bleeding provides professional-grade results for more extensive service work. Vacuum bleeding excels at removing stubborn air pockets trapped in caliper high points, and reverse bleeding offers the most thorough solution when air has contaminated the entire system including the master cylinder. ABS system bleeding becomes necessary whenever air reaches the anti-lock brake modulator, and bench bleeding prevents air from entering the system in the first place when installing a new master cylinder.
How Does the Gravity Bleeding Method Work?
Gravity bleeding relies on the natural downward flow of brake fluid under atmospheric pressure to push air out through open bleeder valves without requiring pumping or special equipment. This method works best after minor brake service like pad replacement where only small amounts of air have entered the calipers, and it requires patience as fluid flows slowly compared to pressurized methods. The technique involves opening each bleeder valve in sequence and allowing brake fluid to drip naturally until all air bubbles cease emerging, typically taking 15-30 minutes per wheel.
To perform gravity bleeding properly, start by filling the master cylinder reservoir to the maximum line with fresh brake fluid. Working on one wheel at a time, attach a clear plastic tube to the bleeder valve and submerge the tube’s opposite end in a container partially filled with brake fluid—this prevents air from being sucked back into the system. Open the bleeder valve approximately one-half to three-quarters of a turn, then allow gravity to pull fluid through the brake line. Watch the fluid flowing through the clear tube for air bubbles, which appear as small spheres or foam within the fluid stream.
The gravity bleeding process demands constant reservoir monitoring because the fluid level drops steadily as brake fluid flows out through the bleeder valves. Check and refill the reservoir every five minutes to prevent air from entering through the master cylinder ports. Begin with the wheel farthest from the master cylinder—typically the right rear on most vehicles—and progress to the left rear, right front, and finally left front. This sequence follows the longest-to-shortest brake line path, ensuring air naturally rises and exits through each successive bleeder valve. When the fluid stream shows no air bubbles for 30-60 seconds, close the bleeder valve firmly before removing the plastic tube to prevent air from entering during disconnection.
Gravity bleeding offers several advantages for DIY mechanics working alone on routine brake service. The method requires no assistant, no pumping that might damage master cylinder seals, and no expensive equipment beyond clear plastic tubing and a catch container. However, gravity bleeding cannot remove air trapped in high points above bleeder valves, struggles with air pockets in ABS modulators, and takes significantly longer than pressurized methods. For these reasons, gravity bleeding works best as a preventive technique immediately after pad replacement rather than as a solution for existing soft brake pedal problems.
What Is the Manual Two-Person Bleeding Technique?
The manual two-person bleeding technique requires one person to pump and hold the brake pedal while a second person opens and closes bleeder valves in a coordinated sequence that uses pedal pumping to pressurize the system and force air out. This traditional method provides effective air removal for most brake service scenarios and requires no special equipment, but it demands careful coordination between both people and strict adherence to proper pedal stroke limits to avoid master cylinder damage.
Proper execution begins with the “pump person” pressing the brake pedal slowly and gently three to five times, building pressure in the system with each stroke, then holding the pedal down with firm, steady pressure. The “bleeder person” then opens the bleeder valve while the pedal is held down, allowing pressurized fluid and trapped air to escape into a clear tube submerged in a catch container. As fluid flows out, the pedal sinks toward the floor, and the pump person maintains firm pressure without pumping. Once fluid flow stops—usually within three to five seconds—the bleeder person closes the valve tightly before the pump person releases the pedal.
Critical to this technique is limiting pedal travel during the pumping phase. Never push the brake pedal fully to the floor, as this forces the master cylinder piston into the unused portion of its bore where corrosion, debris, and seal damage zones exist. Pressing beyond normal pedal travel can score the master cylinder bore or flip internal seals, causing internal fluid bypass that creates a permanently soft pedal requiring master cylinder replacement. Instead, pump the pedal to only one-half to two-thirds of its total travel, building pressure without exceeding the master cylinder’s normal operating range.
The bleeding sequence follows the same longest-to-shortest principle as gravity bleeding: right rear, left rear, right front, left front on most vehicles. At each wheel, repeat the pump-hold-open-close cycle five to ten times until the fluid emerging from the bleeder valve shows no air bubbles and flows as a solid stream. Between each wheel, check and refill the master cylinder reservoir to prevent introducing air through the reservoir ports. The pump person should call out “pumping” when building pressure, “holding” when ready for bleeder opening, and “pedal going down” as fluid exits, while the bleeder person responds with “opening” when cracking the valve and “closed” when tightening it.
Manual bleeding effectiveness depends on proper communication and timing. Opening the bleeder valve before the pedal is fully pumped wastes the pressure stroke, while closing the valve late allows air to be drawn back into the system as the pedal returns. Similarly, releasing pedal pressure before the bleeder valve closes can pull air past the bleeder threads. Despite these coordination challenges, the manual two-person method remains the most common bleeding technique because it works reliably, costs nothing beyond basic supplies, and allows mechanics to feel the brake pedal characteristics improving as air is purged from the system.
How to Use a Pressure Bleeder for Professional Results?
A pressure bleeder uses compressed air or CO2 to maintain constant pressure on the brake fluid reservoir, forcing fluid through the entire brake system and pushing air out through opened bleeder valves without requiring pedal pumping or an assistant. This professional-grade tool delivers the most consistent and thorough bleeding results by maintaining 15-35 PSI of continuous pressure that moves fluid through brake lines faster than manual methods, making it ideal for complete brake system service, brake line replacement, or stubborn air pocket removal.
Setting up a pressure bleeder begins with selecting the correct reservoir adapter cap that fits your vehicle’s master cylinder. These adapters create an airtight seal on the reservoir opening and include a pressurized fluid chamber that replaces the standard reservoir cap. Fill the pressure bleeder tank with fresh brake fluid matching your vehicle’s specification—typically DOT 3 or DOT 4 for most passenger vehicles. Thread the adapter onto your reservoir, ensuring the gasket seats properly to prevent air leaks, then connect the pressure bleeder tank to the adapter via its pressure hose. Pump or charge the bleeder to the manufacturer’s recommended pressure, usually 15-20 PSI for most systems, and verify no air bubbles rise from the adapter connections.
With pressure applied to the system, work through each wheel in the standard bleeding sequence without touching the brake pedal. At each bleeder valve, attach a clear hose to catch expelled fluid and open the valve approximately three-quarters of a turn. The pressurized system immediately forces fluid through the lines and out the bleeder, creating a strong, steady stream. Watch for air bubbles in the discharged fluid, and keep the bleeder open until the stream runs clear and bubble-free—typically 15-30 seconds per wheel depending on how much air was trapped. Close each bleeder valve while fluid still flows to prevent air from entering, then move to the next wheel. The constant pressure from the bleeder automatically refills brake lines behind the expelled fluid, ensuring no air gaps form between bleeding points.
Pressure bleeding offers significant advantages over manual methods for DIY mechanics willing to invest in the equipment. The technique eliminates the need for an assistant, prevents master cylinder seal damage from excessive pedal pumping, maintains consistent pressure that pushes air out more effectively, and automatically keeps the reservoir filled to prevent air introduction from low fluid levels. The continuous pressure also forces air out of high points above bleeder valves where gravity bleeding fails. However, pressure bleeders require careful pressure monitoring to avoid exceeding system limits—never exceed 35 PSI as excessive pressure can damage rubber brake components, blow out seals, or rupture brake hoses. Always verify the pressure bleeder adapter seals completely before applying pressure, as leaks waste brake fluid and fail to pressurize the system properly.
Professional mechanics favor pressure bleeding for its speed and reliability, often completing four-wheel bleeding in under 10 minutes compared to 30-45 minutes for manual methods. The investment in a quality pressure bleeder system—typically $60-200 depending on features—pays dividends for DIY mechanics who perform regular brake service on multiple vehicles or who want professional-quality results without the coordination challenges of manual bleeding.
When Should You Use Vacuum Bleeding?
Vacuum bleeding applies negative pressure at each bleeder valve using a hand-pump or electric vacuum tool to pull brake fluid and trapped air from the calipers toward the bleeder rather than pushing fluid from the master cylinder. This technique excels at removing stubborn air pockets trapped in caliper high points above bleeder valves where gravity and pressure methods struggle, making it particularly valuable for calipers with unfavorable bleeder valve positioning or for systems where air has become trapped in difficult-to-reach locations.
The vacuum bleeding process reverses the normal fluid flow direction. Attach a vacuum bleeder tool to the bleeder valve using an appropriate adapter or rubber cone that creates an airtight seal around the valve. Open the bleeder valve while applying vacuum pressure—typically 15-20 inches of mercury (inHg) for hand-pump models or higher for electric units. The negative pressure pulls fluid from the master cylinder reservoir, through the brake lines, and out through the bleeder valve into the vacuum tool’s collection chamber. Watch the fluid flowing through the tool’s clear chamber for air bubbles, continuing to apply vacuum until the fluid stream runs completely clear.
Vacuum bleeding requires careful reservoir monitoring because the suction effect draws fluid from the reservoir faster than gravity or manual methods. Check fluid levels every 15-20 seconds during active vacuum bleeding, and refill the reservoir immediately when it drops to the halfway point. Never allow the reservoir to run empty during vacuum bleeding, as the vacuum pressure will draw massive amounts of air directly from the reservoir into the brake lines, severely contaminating the system. For this reason, some mechanics prefer using an assistant to continuously monitor and refill the reservoir while the primary technician operates the vacuum bleeder.
The technique works best when combined with caliper repositioning for maximum air removal effectiveness. After initial vacuum bleeding shows reduced air bubbles, tap the caliper body firmly with a rubber mallet to dislodge trapped air pockets from internal passages and high points. Rotate or raise the caliper if possible to position the bleeder valve at the absolute highest point, then apply vacuum again to pull out air that was previously trapped. Some calipers have bleeder valves positioned on the bottom or side rather than the top, making them prone to trapping air above the bleeder location—vacuum bleeding combined with caliper manipulation addresses this design limitation.
Vacuum bleeding limitations include the potential to draw air past bleeder valve threads if vacuum pressure is too high or if bleeder valves are corroded and don’t seal properly. This introduces new air into the system rather than removing existing air, making the soft pedal problem worse. Additionally, vacuum bleeding cannot effectively address air trapped in ABS modulators or master cylinders, requiring supplementary bleeding methods for these components. Despite these limitations, vacuum bleeding provides an invaluable tool for the specific challenge of removing air pockets from caliper high points that resist other bleeding methods.
What Is Reverse Bleeding and When Is It Necessary?
Reverse bleeding pushes brake fluid from the calipers toward the master cylinder using a specialized tool that forces fluid upward through the bleeder valves, directly opposing the normal fluid flow direction to purge air bubbles that rise naturally toward the reservoir. This technique becomes necessary when the entire brake system has been contaminated with air—particularly the master cylinder—or when repeated conventional bleeding fails to restore firm pedal feel, as reverse bleeding forcibly displaces air upward rather than attempting to push it downward against its natural buoyancy.
The reverse bleeding process requires a pressure-fed fluid injector tool or a modified pressure bleeder with appropriate fittings. Connect the fluid supply to the bleeder valve at the right rear wheel (farthest from the master cylinder), ensuring an airtight seal between the tool and the valve. Open the bleeder valve, then slowly apply pressure—typically 5-10 PSI initially, increasing gradually to 15-20 PSI—to force fresh brake fluid backward through the brake line toward the master cylinder. As fluid flows in reverse, it pushes air bubbles ahead of it in their natural rising direction, forcing them upward into the master cylinder reservoir where they escape to atmosphere.
Watch the master cylinder reservoir closely during reverse bleeding as fluid level rises and air bubbles emerge. The reservoir will overflow if not monitored, so use a suction tool or turkey baster to remove excess fluid as it rises. The emerging fluid often appears dark or contaminated compared to the fresh fluid being injected at the bleeder valve, indicating successful flushing of old fluid and air from the system. Continue reverse bleeding at the first wheel until the reservoir shows only fresh, clean fluid with no air bubbles emerging, then close the bleeder valve before releasing pressure.
Progress through all four wheels in reverse sequence—right rear, left rear, right front, left front—reverse bleeding each one until clean, air-free fluid emerges at the reservoir. This technique provides the most thorough system purge possible because it not only removes air but also flushes the entire system with fresh fluid, replacing old contaminated fluid that may have absorbed moisture. After completing reverse bleeding, perform a final conventional bleed at each wheel to ensure no air remains from the reverse bleeding process itself and to establish proper fluid flow direction throughout the system.
Reverse bleeding proves particularly valuable when air has entered the master cylinder during brake service, as conventional bleeding struggles to remove master cylinder air pockets. The upward fluid flow directly attacks these pockets, forcing them out through the reservoir rather than attempting to push them downward through brake lines. However, reverse bleeding requires specialized equipment not typically available to home mechanics, and improper technique can introduce additional air or overflow the reservoir, contaminating the brake system with spilled fluid that may damage paint or rubber components.
How to Bleed ABS/VSA Systems to Eliminate Hidden Air?
ABS system bleeding requires activating the anti-lock brake modulator to open internal valves and allow air trapped in the modulator assembly to escape, as conventional bleeding cannot reach air pockets isolated within the ABS pump, accumulator, or control valves. Most modern vehicles equipped with ABS need modulator activation whenever air enters the brake system during service, but many DIY mechanics overlook this critical step, leading to persistent soft pedal complaints even after thorough conventional bleeding.
Three methods exist for bleeding ABS systems: scan tool activation, controlled ABS triggering through emergency braking, and gravity bleeding with extended time periods. The scan tool method provides the most controlled approach, using manufacturer-specific diagnostic software to command the ABS module into a bleed mode that cycles internal valves and activates the pump. This electronically-controlled cycling opens all internal passages, allowing trapped air to flow from the modulator into the brake lines where conventional bleeding can remove it. Professional mechanics prefer this method because it provides precise control and works on all ABS-equipped vehicles, but it requires expensive dealer-level scan tools or aftermarket diagnostic equipment that costs $500-3,000, putting it beyond most DIY budgets.
The controlled ABS triggering method offers a free alternative that works on many vehicles, though it carries some risk and doesn’t work for all ABS system designs. Drive the vehicle to an empty parking lot or safe area with good traction, accelerate to 25-30 MPH, then brake hard enough to activate the ABS system—you’ll feel the characteristic pedal pulsation and hear the modulator pump activating. This ABS activation cycles the modulator valves and pump, potentially moving trapped air from the modulator into the brake lines. Immediately after triggering ABS, return to your service area and bleed all four wheels using conventional methods, as the ABS activation may have repositioned air bubbles where bleeding can remove them. Repeat this drive-activate-bleed cycle three to four times for maximum effectiveness.
Some ABS systems, particularly those with complex multi-channel designs or integrated stability control, cannot be properly bled without scan tool activation. These systems use additional valves and accumulators that remain closed during normal brake operation and ABS activation, trapping air indefinitely unless electronically commanded to open. Vehicle-specific service manuals indicate whether scan tool bleeding is mandatory or optional for particular models. Honda vehicles with VSA systems, Toyota vehicles with VSC, and many European vehicles with ESP systems often fall into the scan-tool-required category.
For DIY mechanics without scan tool access facing persistent soft pedal after conventional bleeding, the extended gravity bleeding approach sometimes succeeds where other methods fail. Leave bleeder valves open on all four wheels simultaneously and allow gravity bleeding to continue for 8-12 hours or overnight. This extended period occasionally allows air trapped in ABS modulators to migrate slowly upward into brake lines where it can escape through the open bleeder valves. While not guaranteed to work, this method costs nothing beyond time and brake fluid, making it worth attempting before paying a shop for scan tool-based ABS bleeding.
What Is Bench Bleeding the Master Cylinder?
Bench bleeding refers to pre-bleeding a new master cylinder before installation by removing air from its internal passages while the unit is held in a vise or bench-mounted position, preventing air from entering the brake system when the master cylinder connects to the vehicle. This preventive technique eliminates the primary source of air introduction during master cylinder replacement and significantly reduces the time and effort required for subsequent vehicle-level bleeding.
The bench bleeding process begins immediately after removing a new master cylinder from its packaging. Secure the master cylinder in a sturdy vise using protective jaw covers to prevent damage to the aluminum or cast iron body—never clamp directly on the reservoir or mounting flange. Thread bleeder fittings or short sections of brake line into the master cylinder outlet ports, then route clear plastic tubes from these fittings back into the reservoir to create a closed recirculation loop. Fill the reservoir with fresh brake fluid matching your vehicle’s specification, ensuring the fluid level covers all reservoir ports.
Slowly press the master cylinder piston using a wooden dowel or large screwdriver, watching fluid and air bubbles flow through the clear return tubes into the reservoir. The first several strokes typically produce large air bubbles as air purges from the master cylinder’s internal passages. Continue pressing and releasing the piston in smooth, deliberate strokes—approximately one stroke every two seconds—until no air bubbles emerge from the return tubes and only clear fluid circulates. This usually requires 15-25 strokes depending on master cylinder design and internal passage complexity.
Once air-free fluid flows consistently, maintain piston pressure while quickly removing one bleeder fitting, plugging that outlet port with your finger or a rubber plug to prevent air from entering. Release the piston pressure, remove the second bleeder fitting, and immediately plug that port as well. Keep both ports plugged until ready to connect brake lines during installation. Some master cylinders include built-in check valves that prevent backflow, allowing you to remove bleeder fittings without plugging ports, but maintaining positive pressure or plugging ports provides extra insurance against air entry.
Bench bleeding requires only 5-10 minutes but prevents hours of frustration trying to bleed air from a master cylinder after installation. When a master cylinder is installed with air in its internal passages, that air proves extremely difficult to remove through conventional bleeding because the master cylinder sits at the system’s highest point and air naturally rises into it. Bench bleeding eliminates this problem entirely by ensuring only air-free fluid enters the brake system from the moment of installation. Professional mechanics consider bench bleeding mandatory procedure for master cylinder replacement, and many parts warranties require proof of bench bleeding to cover defective units.
What Are the Critical Steps to Take Before Bleeding Brakes?
Critical pre-bleeding steps include inspecting brake hoses for deterioration and swelling, testing bleeder valves for corrosion and function, verifying master cylinder condition, selecting the correct brake fluid type, and ensuring the reservoir is filled with fresh fluid that matches system specifications. These preparatory measures prevent common bleeding failures, reduce the risk of introducing contamination, and ensure the bleeding process can proceed smoothly without interruption for repairs or parts replacement.
Pre-bleeding preparation separates successful brake service from frustrating comebacks and rework. Mechanics who rush into bleeding without proper inspection often discover mid-process that corroded bleeder valves break off, deteriorated brake hoses collapse under pressure, or contaminated fluid requires complete system flushing. Taking 15-20 minutes for thorough pre-bleeding inspection and preparation saves hours of troubleshooting and prevents the safety hazards associated with incomplete bleeding or compromised brake components.
How to Properly Inspect Brake Components Before Service?
Brake component inspection before bleeding must evaluate brake hoses for swelling, cracking, and age-related deterioration, bleeder valves for corrosion and seizure, and master cylinder for external leaks or internal seal damage, as any of these failures will compromise bleeding effectiveness or create new problems after service. Begin the inspection at each wheel by examining rubber brake hoses under good lighting, looking for surface cracks, bulges, or soft spots that indicate internal liner breakdown—hoses showing any of these symptoms require replacement before attempting to bleed the system.
Brake hoses deserve particular attention because internal deterioration often occurs without visible external symptoms. Flex each rubber hose through its full range of motion, feeling for stiffness, resistance, or cracking at the crimp points where rubber meets metal fittings. Hoses older than seven years should be replaced regardless of appearance, as the rubber compound degrades over time even without visible damage. Internal liner separation creates a one-way valve effect where brake fluid flows toward the caliper normally but restricts return flow, causing brakes to drag and creating pressure imbalances that prevent proper bleeding. During inspection, look for brake hose swelling—a condition where the rubber expands under pressure like a balloon, absorbing hydraulic pressure that should reach the caliper and creating soft brake pedal feel even with completely air-free fluid.
Bleeder valve inspection prevents the common frustration of broken or seized bleeders discovered mid-bleeding. At each wheel, spray penetrating oil on bleeder valve threads 30 minutes before service, allowing the lubricant to penetrate corrosion. Test each bleeder valve by attempting to loosen it approximately one-eighth turn using a properly-sized flare nut wrench or six-point box wrench—never use adjustable wrenches or pliers that round off bleeder valve hexes. If a bleeder valve resists loosening or feels like it might break, stop immediately and apply additional penetrating oil, use gentle heat from a propane torch to expand the caliper body, or plan to replace the caliper rather than risk breaking the bleeder valve. A broken bleeder valve renders the caliper useless and requires replacement, turning a simple bleeding job into a major repair.
Master cylinder inspection focuses on seal integrity and fluid contamination. Remove the reservoir cap and examine the fluid for discoloration, debris, or rubber particles that indicate seal deterioration. Fresh brake fluid appears clear to slightly amber, while contaminated fluid looks dark brown or black and may contain visible particles. Check the area around the master cylinder body for fluid seepage indicating external seal leaks, and inspect the brake booster connection point where the master cylinder mounts—fluid in this area suggests internal master cylinder seal failure. Press the brake pedal with the engine off and hold firm pressure for 30 seconds; the pedal should remain firm without slowly sinking, as pedal sink indicates internal master cylinder bypass requiring replacement before bleeding will be effective.
What Type of Brake Fluid Should You Use?
Brake fluid selection must match the vehicle manufacturer’s specified DOT classification—typically DOT 3, DOT 4, or DOT 5.1 for modern vehicles—as different formulations have incompatible chemical bases, varying boiling points, and different hygroscopic properties that affect brake system performance and component longevity. Using incorrect brake fluid or mixing different types causes seal swelling, reduces boiling points, creates corrosion, and can result in complete brake system failure, making fluid specification adherence critical for safe brake service.
DOT 3 and DOT 4 brake fluids share a glycol-ether base chemistry and can be mixed if necessary, though this practice is discouraged because it reduces the overall boiling point to that of the lower-specification fluid. DOT 3 fluid features a minimum dry boiling point of 401°F and a wet boiling point (after moisture absorption) of 284°F, making it suitable for most standard passenger vehicles with moderate braking demands. DOT 4 fluid provides higher boiling points—minimum 446°F dry and 311°F wet—making it preferable for vehicles with heavier braking loads, performance applications, or those equipped with ABS systems that generate additional heat. DOT 5.1 fluid offers even higher boiling points (minimum 500°F dry, 356°F wet) while maintaining glycol-ether base compatibility with DOT 3 and DOT 4, positioning it as the premium choice for high-performance vehicles and demanding applications.
Never confuse DOT 5.1 with DOT 5 fluid—these are completely different and incompatible products despite similar names. DOT 5 fluid uses a silicone base rather than glycol-ether, making it incompatible with standard brake systems designed for DOT 3/4/5.1 fluids. DOT 5 does not absorb moisture (non-hygroscopic), which sounds advantageous but actually creates problems in standard brake systems where moisture inevitably enters through seals and hoses—instead of distributing throughout the fluid, water pools in low points, causing concentrated corrosion. DOT 5 also aerates easily, creating foam and air bubbles during bleeding and under hard braking. Use DOT 5 only in specialized applications specifically designed for it, such as vintage military vehicles or show cars with long-term storage requirements.
Brake fluid’s hygroscopic nature—its tendency to absorb atmospheric moisture—makes using fresh, sealed fluid essential for effective bleeding and long-term brake system health. Once a brake fluid container opens, moisture absorption begins immediately, with humidity levels determining absorption rates. Opened brake fluid stored in a garage typically becomes saturated with moisture within 6-12 months, significantly reducing its boiling point and effectiveness. Always purchase brake fluid in the smallest container size practical for your service needs, use fluid directly from a freshly-opened sealed container, and discard partially-used containers after 6-12 months. During bleeding, keep the master cylinder reservoir cap installed except when adding fluid to minimize atmospheric exposure.
The moisture absorption characteristic explains why brake fluid requires periodic replacement regardless of mileage—typically every 2-3 years for most vehicles. As brake fluid absorbs moisture over time, its boiling point drops progressively, eventually reaching levels where normal braking heat causes the fluid to boil, creating vapor pockets that compress under pressure exactly like air bubbles. This phenomenon, called “vapor lock,” produces soft brake pedal that worsens with repeated hard braking and recovers after cooling—symptoms identical to air in the system but requiring complete fluid replacement rather than bleeding to resolve. During pre-bleeding inspection, use brake fluid test strips to measure moisture content, replacing fluid showing 3% or higher moisture content regardless of bleeding procedure needs.
How Can You Verify Complete Air Removal After Bleeding?
Complete air removal verification requires three tests: pedal feel assessment for firmness without sponginess, the pump test to confirm the pedal doesn’t firm up with repeated pumping, and a pressure hold test to verify the pedal maintains position under sustained pressure for 30 seconds without sinking. These verification procedures confirm that the hydraulic system operates properly with no compressible air remaining, preventing the frustration of discovering soft brake pedal after completing service and test driving the vehicle.
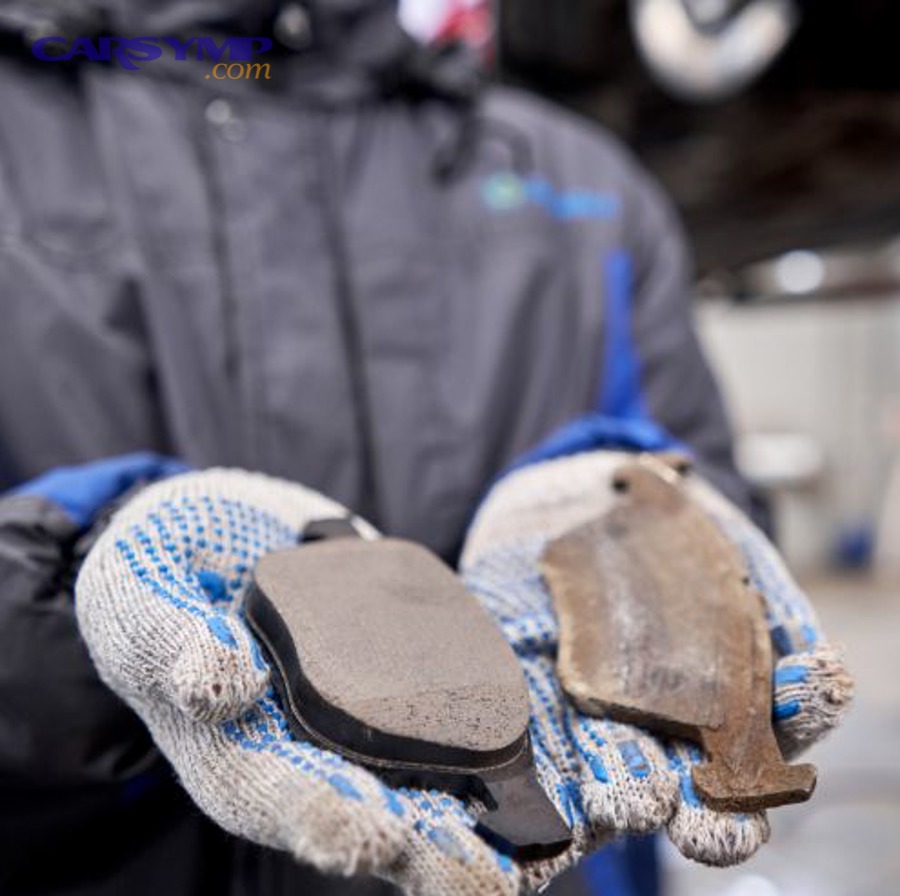
Proper verification testing prevents premature service completion and ensures safe brake operation. Many mechanics stop bleeding as soon as clear fluid emerges from bleeder valves without air bubbles, but this doesn’t guarantee complete air removal from the entire system—air may still hide in ABS module issues and pedal feel can seem acceptable at first but deteriorate after driving. Systematic verification testing catches these situations before releasing the vehicle, maintaining both safety standards and professional reputation.
What Does a Properly Bled Brake Pedal Feel Like?
A properly bled brake pedal feels firm and solid from the first press without requiring multiple pumps, offers consistent resistance throughout its travel with approximately 1-1.5 inches of free play before encountering firm resistance, and stops approximately 2-3 inches from the floor with moderate foot pressure. This firm, consistent pedal feel indicates the hydraulic system contains only incompressible brake fluid with no air pockets that would create sponginess or excessive travel before engaging the brakes.
To properly assess pedal feel, perform the test with the engine running to activate the brake booster on power-assisted vehicles. With the engine at idle, press the brake pedal slowly and deliberately with moderate foot pressure—approximately 30-40 pounds of force similar to normal braking pressure. The pedal should feel firm almost immediately after the small amount of free play, requiring progressively more force to push farther but never feeling spongy, mushy, or like pressing on a foam cushion. Release the pedal completely, wait three seconds, then press again—the pedal feel should be identical to the first press without requiring multiple pumps to build firmness.
Compare the bled pedal feel to how the brakes felt before service began. The pedal should feel equal to or firmer than pre-service operation—if the pedal feels softer after bleeding than before service, air remains in the system or a component has failed during service. Pay attention to pedal travel distance, measuring mentally or physically from released position to the point where firm resistance begins. Excessive travel (pedal moving more than one-third of the distance to the floor before feeling firm) indicates either remaining air, improperly adjusted rear brakes on vehicles with drum rears, or worn brake pads that need replacement.
The pedal feel assessment also reveals master cylinder problems that bleeding cannot fix. Press and hold the pedal with moderate pressure for 5-10 seconds—a properly functioning master cylinder maintains steady pedal position without any slow sinking motion. If the pedal slowly sinks toward the floor under sustained pressure, the master cylinder has internal seal damage causing fluid bypass, and no amount of bleeding will create firm pedal feel. This condition requires master cylinder replacement, as internal seals cannot be reliably repaired in the field.
How to Perform the Pedal Pump Test?
The pedal pump test involves rapidly pumping the brake pedal five to seven times in quick succession and observing whether pedal firmness changes from the first pump to subsequent pumps, as increasing firmness with each pump indicates air remains in the system that compresses on the first press but builds pressure with multiple pumps. A properly bled brake system produces identical firm pedal feel on the first pump and all subsequent pumps because incompressible fluid transmits pressure immediately without requiring multiple strokes to compress air pockets.
To execute the pump test accurately, turn off the engine to eliminate brake booster assistance that might mask pedal feel changes. With the engine off, rapidly press and release the brake pedal five to seven times using moderate pressure and quick strokes—approximately one pump per second. Focus carefully on how the first pump feels compared to the fifth or sixth pump. If the first pump feels soft or travels farther before encountering resistance, but subsequent pumps feel progressively firmer and require less travel, air remains in the hydraulic system. The compression of air during the first pump builds pressure that the subsequent pumps maintain, creating the illusion of firm brakes that disappears once the pedal fully releases and pressure dissipates.
The pump test reveals air location through pedal behavior patterns. Air trapped in brake lines or calipers typically shows dramatic improvement from first to fifth pump, with the pedal feeling nearly soft on the first press but becoming quite firm by the fifth. Air in the master cylinder produces more subtle firmness increases that continue beyond 10-15 pumps as air compresses gradually in the master cylinder chambers. Air in the ABS modulator creates inconsistent pump test results where firmness improvement varies between test cycles as air shifts within the modulator’s complex internal passages.
A passing pump test produces consistent pedal feel across all five to seven pumps without improvement or changes. The first pump should feel just as firm and travel the same distance as the last pump. If your brake system passes this test, proceed to the pressure hold test for final verification. If the pump test reveals progressive firmness improvement, return immediately to bleeding procedures, focusing on the brake circuit showing symptoms—if all wheels pump up equally, air likely resides in the master cylinder or ABS modulator requiring specialized bleeding techniques.
Should the Pedal Firmness Change After Driving?
Pedal firmness should remain constant after driving, maintaining the same firm feel during the first brake application after starting the vehicle as it showed immediately after bleeding, although new brake pads may feel slightly less firm during the initial 50-100 mile bed-in period before full friction material transfer occurs. Any pedal firmness reduction after driving indicates either air remaining in the system that redistributes during vehicle operation, a brake component failure developing under heat and pressure, or a leak that allows air to enter while preventing visible fluid loss.
The pad bed-in phenomenon deserves understanding to avoid false air-in-system conclusions. New brake pads require a break-in period during which the friction material transfers a thin layer onto the rotor surface, creating the optimized friction interface that produces maximum braking force. During the first 50-100 miles with new pads, pedal feel may seem slightly softer than it will become after bed-in, and braking force may feel weaker. This is normal and temporary, improving progressively as the pads bed in through gentle braking applications. To properly bed new pads, perform 8-10 gentle stops from 40-50 MPH down to 15-20 MPH with 30-second cooling intervals between stops, avoiding aggressive braking or complete stops that can glaze the pad surface.
If pedal firmness deteriorates noticeably after the first drive following bleeding—becoming softer within the first few miles or after sitting overnight—air remains in the system or a one-way leak is drawing air during pressure relaxation cycles. This symptom pattern indicates air that hasn’t fully purged, often trapped in high points within calipers or in the ABS modulator. Return to bleeding procedures, focusing on techniques that address trapped air: vacuum bleeding with caliper repositioning for caliper air, scan tool activation for ABS modulator air, or reverse bleeding if air has migrated into the master cylinder.
Progressive pedal softening over days or weeks after initially firm post-bleeding pedal feel signals either a very slow fluid leak or degraded brake hoses that expand under pressure. Check carefully for fluid leaks at all bleeder valves, brake line fittings, caliper piston seals, and master cylinder seals. If no leaks are visible, suspect brake hose deterioration—the hose rubber expands under pressure like a balloon, absorbing hydraulic pressure that should move the caliper pistons. Hose expansion doesn’t create a soft pedal immediately but causes progressive firmness loss as the expansion worsens with each brake application. Replace brake hoses older than seven years as preventive maintenance, and replace any hose showing the slightest surface cracking, bulging, or softness regardless of age.
What Common Mistakes Cause Soft Pedal After Brake Service?
Common mistakes causing soft pedal after brake service include bleeding in incorrect sequence, allowing the master cylinder reservoir to run empty during bleeding, pushing the brake pedal completely to the floor during manual bleeding, and opening bleeder valves before retracting caliper pistons instead of after. These errors either introduce new air into the system or fail to remove existing air effectively, resulting in spongy brake feel despite proper bleeding technique application.

Understanding these mistakes before beginning brake service allows DIY mechanics to avoid problems rather than troubleshoot them afterward. Each error follows a logical cause-and-effect relationship that makes sense once explained, but contradicts the instinctive approaches many home mechanics attempt based on incomplete understanding of hydraulic brake system operation. Preventing these mistakes requires conscious attention to procedural details that might seem insignificant but critically impact bleeding effectiveness.
Is Bleeding in the Wrong Sequence a Problem?
Bleeding in wrong sequence significantly reduces air removal effectiveness because it attempts to force air bubbles through longer brake lines before removing air from shorter lines, allows previously-bled wheels to become re-contaminated with air pushed from subsequently-bled wheels, and works against air’s natural tendency to rise toward the highest points in the hydraulic system. The correct bleeding sequence follows the longest-to-shortest brake line principle—typically right rear, left rear, right front, left front on most vehicles—ensuring air purges progressively from farthest to nearest points relative to the master cylinder.
The physics behind proper sequence stems from how air behaves in brake lines. Air bubbles naturally rise within brake fluid, migrating toward high points in the system where they accumulate. When bleeding starts at the wheel with the shortest brake line (closest to the master cylinder), the bleeding process pushes fresh fluid and any air bubbles backward through the system toward the longer brake lines. This air then becomes trapped in those longer lines or in wheels that haven’t been bled yet. When the mechanic eventually bleeds those wheels, the air pushed there from earlier bleeding must travel back through the entire system to exit, often failing to purge completely.
Starting at the furthest wheel eliminates this problem by progressively working air toward the master cylinder reservoir where it can escape. As fluid flows from the reservoir through the longest brake line to the right rear wheel during bleeding, any air in that line flows out through the open bleeder valve. Moving next to the left rear wheel allows any air displaced from the right rear to flow through the relatively short cross-over line to the left rear and exit there. The front wheels bleed last, catching any air pushed forward from rear bleeding and removing it before completing the service.
Vehicle-specific variations exist that require checking service manual specifications. Some vehicles use diagonal split brake systems where the master cylinder has one circuit for the right front and left rear, and a second circuit for the left front and right rear. These systems require a modified bleeding sequence: right rear, left front, left rear, right front. European vehicles often employ this diagonal configuration for improved braking stability if one circuit fails. Other vehicles with complex ABS systems or brake proportioning valves may specify unique sequences that address their specific hydraulic routing. When in doubt, consult the vehicle-specific service manual for the recommended bleeding sequence rather than assuming the standard right rear to left front pattern applies.
What Happens If You Let the Reservoir Run Empty?
Allowing the master cylinder reservoir to run empty during bleeding introduces massive amounts of air directly into the brake system through the reservoir ports, instantly contaminating both front and rear brake circuits and requiring complete system re-bleeding from the beginning. The reservoir connects to the brake system through two ports at its base—one feeding the front brake circuit and one feeding the rear circuit—and these ports sit approximately 1/4 to 1/2 inch above the reservoir bottom. When the fluid level drops below these port openings, air enters the hydraulic system faster than bleeding can remove it.
The reservoir empty mistake typically occurs during prolonged bleeding sessions when the mechanic focuses on bleeder valves and catch containers without monitoring fluid level. Each time a bleeder valve opens and fluid flows out, the reservoir level drops proportionally. On vehicles with smaller reservoirs, bleeding three or four wheels without refilling can exhaust the available fluid, especially if significant amounts of air are being purged that increases total fluid volume expelled. Some mechanics exacerbate this problem by using pressure bleeders set too high or by pumping the brake pedal excessively, both of which consume fluid faster than gravity bleeding.
Preventing reservoir empty requires disciplined fluid level monitoring throughout the bleeding process. Check the reservoir level before bleeding each wheel, and refill immediately if the level drops to the halfway point. During active bleeding—particularly when using pressure or vacuum methods that move fluid quickly—check the reservoir every 15-30 seconds. Keep a dedicated container of fresh brake fluid at the work area with a funnel ready for immediate refilling. Some mechanics mark the reservoir exterior with tape at the minimum safe level as a visual reminder, while others use clear tubing connected to a fluid bottle that continuously drips into the reservoir, maintaining level automatically.
If the reservoir runs empty during bleeding, stop immediately and refill before any additional air enters. Do not assume that bleeding a few more seconds will clear the newly-introduced air—it won’t. The air from an empty reservoir enters at the system’s highest point (the master cylinder) where it tends to remain trapped. Resume bleeding at the wheel furthest from the master cylinder and progress through the complete sequence again. If the reservoir was empty for more than a few seconds, consider reverse bleeding or bench bleeding the master cylinder to remove air that likely entered the master cylinder body itself, as this air proves extremely difficult to remove through conventional bleeding.
Can Pushing the Pedal to the Floor Damage the Master Cylinder?
Pushing the brake pedal completely to the floor during bleeding can damage master cylinder seals by forcing the piston through its normal travel range into an unused bore section where rust, corrosion pits, and debris accumulate, potentially scoring the piston seals or flipping them inside out. This damage creates internal master cylinder bypass where brake fluid leaks past the piston seals from the pressure chamber back to the reservoir, preventing pressure buildup and causing permanently soft brake pedal that no amount of bleeding can correct.
The master cylinder bore contains precision-honed cylindrical surfaces where the piston seals slide during normal brake operation. Under typical driving conditions, the brake pedal travels approximately 40-60% of its total stroke, meaning the master cylinder piston moves through only a portion of the available bore length. The unused section at the end of the bore—beyond where the piston normally travels—accumulates corrosion over time, particularly in the presence of moisture-contaminated brake fluid. This corrosion creates rough spots and deposits that can catch piston seals, tearing them or causing them to fold over (flip) when forced past these obstructions.
The seal damage mechanism occurs instantly when the piston seal encounters a corrosion ridge or pit. The primary seal, which is a flexible rubber component with a precisely-shaped cross-section, slides smoothly over the polished bore surface during normal operation. When forced into the corroded section, the seal edge catches on rough spots, either tearing the seal material or pushing the seal backward so it folds inside out. A flipped seal no longer provides a sealing surface against the bore, allowing pressurized fluid to leak past it back toward the reservoir. Similarly, a torn seal creates a leak path that prevents pressure buildup no matter how tightly the system is bled.
Preventing master cylinder damage during manual bleeding requires limiting pedal stroke to no more than 50-75% of total travel. Instruct the person pumping the pedal to press slowly to the normal braking resistance point—the position where the pedal would stop during moderate street braking—then maintain that position without pushing farther. This keeps the piston within its normal wear area where the bore remains polished and seal-friendly. If using the pump-and-hold method, pump gently to build pressure rather than aggressively pumping to maximum stroke depth. Professional mechanics sometimes place a wood block under the brake pedal during bleeding to create a physical stop that prevents excessive pedal travel, eliminating the risk of absentminded full-stroke pumping.
The age and mileage of the vehicle affects master cylinder damage risk. Newer vehicles with low mileage and recent brake fluid service have minimal bore corrosion, making full-stroke pumping less risky though still not recommended. Vehicles over five years old or with over 75,000 miles, particularly those that have never had brake fluid flushed, almost certainly have significant bore corrosion in the unused sections. On these vehicles, a single full-stroke pump can cause immediate and permanent seal damage requiring master cylinder replacement. When working on older vehicles, the conservative approach uses pressure bleeding rather than manual bleeding to avoid pedal actuation altogether, or limits manual bleeding to very gentle pedal strokes with strict travel limits.
Why You Should Never Open Bleeder Valve Before Pushing Caliper Pistons Back?
Opening bleeder valves before retracting caliper pistons creates a direct air entry pathway as piston retraction generates negative pressure in the caliper that literally sucks air past the bleeder valve threads or through the bleeder valve hole itself, introducing the exact contamination that bleeding should prevent. The correct procedure requires retracting caliper pistons with bleeder valves closed, then bleeding fresh fluid through the system afterward to flush any contaminated fluid pushed backward toward the master cylinder.
The negative pressure phenomenon occurs because retracting caliper pistons displaces brake fluid backward through the brake line toward the master cylinder reservoir. When pistons retract with the bleeder valve closed, this backward-flowing fluid simply raises the reservoir level as it returns. When pistons retract with the bleeder valve open, however, the retraction creates a vacuum effect in the caliper similar to pulling back a syringe plunger—this vacuum draws air from outside the system through the open bleeder valve, filling the caliper with air instead of allowing fluid to return to the reservoir. The mechanic then inadvertently pushes this trapped air throughout the brake system when reconnecting everything and bleeding.
Some mechanics intentionally open bleeder valves during piston retraction to avoid pushing old, contaminated brake fluid back through the ABS modulator where debris might damage sensitive internal valves. While this concern has some merit—particularly on vehicles with contaminated fluid or rusty brake components—the practice introduces more problems than it solves by guaranteeing air contamination. The better approach retracts pistons slowly with bleeder valves closed, pushing old fluid back through the system gently to minimize debris movement, then immediately performs thorough bleeding with fresh fluid to flush the system. If brake fluid appears severely contaminated (black color, visible debris, rust particles), consider replacing it with complete system flushing rather than attempting to isolate old fluid through bleeder-open piston retraction.
Proper caliper piston retraction technique uses a large C-clamp or specialized piston retraction tool to slowly compress pistons into their bores while monitoring the master cylinder reservoir for overflow. Position the C-clamp with one pad on the caliper body and the other on the back of the brake pad or directly on the piston (use a wood block to protect piston surface), then slowly tighten the clamp to push the piston inward. Watch the reservoir and stop periodically to remove excess fluid with a turkey baster or fluid evacuator if the level approaches the maximum line. Retract pistons fully so new, thicker brake pads fit over the rotor, but avoid excessive force that might damage piston seals or caliper internals.
After retracting all caliper pistons with bleeder valves closed, immediately bleed the brake system using your preferred method to flush fresh fluid through all brake lines. This post-retraction bleeding serves two purposes: removing any air that might have entered through minor system openings during brake pad removal, and flushing old fluid pushed backward by piston retraction out through the bleeder valves. If concerned about ABS modulator contamination, bleed each caliper until fresh, clean fluid emerges from the bleeder—typically requiring 50-100ml per wheel—ensuring complete old fluid removal without introducing air contamination.
What Should You Do If Brake Pedal Remains Soft After Proper Bleeding?
If brake pedal remains soft after proper bleeding, diagnose hidden air pockets in calipers above bleeder valves, test for brake hose internal expansion under pressure, check for one-way leaks that allow air entry without visible fluid loss, and evaluate master cylinder for internal bypass through seal failure. These persistent soft pedal causes indicate problems beyond simple air in the lines, requiring component-level diagnosis and replacement rather than additional bleeding attempts.
Persistent soft pedal after thorough bleeding frustrates DIY mechanics because it contradicts the expected result—proper bleeding should restore firm pedal feel if air was the only problem. When bleeding fails to firm up the pedal despite following correct procedures, the root cause extends beyond trapped air to component failures or unusual conditions that bleeding cannot address. Systematic diagnosis through the following scenarios identifies the actual problem and guides appropriate repairs.
How to Diagnose Hidden Air Pockets in Calipers?
Hidden air pockets in calipers occur when air becomes trapped in internal passages above the bleeder valve location, preventing conventional bleeding from reaching and removing these bubbles because air naturally rises while bleeding attempts to push it downward. This problem particularly affects calipers with bleeder valves positioned on the caliper bottom or side rather than at the absolute highest point, as these designs create air collection zones that bleeding cannot access through normal flow paths.
Diagnosing caliper air pockets starts with the pump test performed at each individual wheel. Raise the vehicle and secure it on jack stands, then remove one wheel to access the caliper. Press the brake pedal five to seven times rapidly while watching the caliper—look for uneven piston movement where one piston extends farther or faster than its pair on dual-piston calipers, indicating air trapped on one side. Listen for air bubbles moving inside the caliper during pedal pumping—a subtle gurgling or crackling sound suggests air pockets shifting within internal passages. If pedal feel firms up significantly with pumping but returns to soft after sitting overnight, air is almost certainly trapped somewhere in the hydraulic system with calipers being the most likely location.
The caliper repositioning technique forcibly moves trapped air to where bleeding can remove it. With the bleeder valve still closed, remove the caliper mounting bolts and lift the caliper off the rotor, supporting it with a bungee cord or wire to prevent stress on the brake hose. Rotate the caliper so the bleeder valve points straight upward, then tap the caliper body firmly with a rubber mallet or the plastic handle of a screwdriver. This tapping dislodges air bubbles clinging to internal passage walls, allowing them to rise to the bleeder valve. Hold the caliper in this rotated position and open the bleeder valve—air previously trapped below now escapes through the upward-pointing bleeder. Continue bleeding in this position until only clear, bubble-free fluid emerges.
For particularly stubborn air pockets, combine caliper repositioning with vacuum bleeding. With the caliper rotated to position the bleeder valve highest, connect a vacuum bleeder tool and apply 15-20 inHg of suction while continuing to tap the caliper body. The combination of repositioning, mechanical agitation from tapping, and vacuum suction typically dislodges even the most stubborn air pockets. Some mechanics hang calipers overnight with bleeders pointed upward, allowing air to migrate naturally to the bleeder valve location before final bleeding, though this extends service time considerably.
Caliper design variations create different air-trapping tendencies. Fixed calipers with multiple pistons on each side often trap air between piston bores in cross-drilled passages. Floating calipers with a single piston typically have simpler internal passages but may trap air above the piston if the bleeder valve sits below piston centerline. Performance calipers with multiple bleed points offer the advantage of accessing different internal passages, potentially requiring bleeding at all bleeder positions to fully purge trapped air. Check caliper manufacturer documentation or service manuals for specific bleeding recommendations on high-performance or unusual caliper designs.
What Is Brake Hose Internal Expansion and How to Detect It?
Brake hose internal expansion occurs when the rubber inner liner of a brake hose deteriorates, allowing the hose to balloon outward under hydraulic pressure instead of maintaining rigid shape, absorbing pressure that should reach the caliper and creating soft brake pedal feel identical to air-in-system symptoms. This condition develops gradually as brake hoses age, making it particularly insidious because the pedal feel deteriorates slowly rather than suddenly, and because the hose may show no visible external damage despite severe internal degradation.
Detecting brake hose expansion requires pressure testing under actual brake operation conditions since the expansion only occurs under hydraulic pressure. With the engine running to activate the brake booster, press and hold the brake pedal with firm, steady pressure—approximately 50-60 pounds of force similar to moderate braking. While maintaining pedal pressure, have an assistant carefully examine each brake hose, looking for any visible swelling, bulging, or diameter increase. A healthy brake hose maintains constant diameter under pressure, while a deteriorated hose visibly balloons, most commonly at areas where the rubber is older or has been exposed to more heat from the brake components.
The comparison test provides more definitive diagnosis. With the brake pedal released, measure or carefully observe the brake hose diameter at several points along its length. Apply firm brake pedal pressure and immediately re-measure or observe the same points—any measurable diameter increase indicates expansion. Even 1-2mm of expansion significantly reduces hydraulic efficiency, as the expanding hose absorbs pressure like a balloon rather than transmitting it to the caliper. Some mechanics use calipers or micrometers to measure hose diameter before and during brake application for objective comparison, though visual observation usually suffices to detect expansion severe enough to cause soft pedal.
The age-based replacement strategy prevents brake hose expansion before it causes problems. Rubber brake hoses deteriorate from multiple stresses including heat cycles from braking, exposure to road salt and moisture, ozone degradation from atmospheric exposure, and flexing during suspension movement. Industry standards recommend brake hose replacement every 7-10 years regardless of appearance or mileage, as internal liner degradation occurs invisibly while external rubber may look acceptable. Vehicle manufacturers often specify shorter intervals—5-7 years—for vehicles in severe service conditions including high-humidity climates, winter salt exposure, or frequent hard braking. When encountering persistent soft pedal after proper bleeding on vehicles with original brake hoses over seven years old, replace all brake hoses as a diagnostic and preventive measure.
Brake hose replacement immediately after bleeding provides definitive confirmation if expansion was the cause. Install new brake hoses using proper torque specifications on all fittings—typically 11-13 ft-lbs for banjo bolts and 12-18 ft-lbs for flare nut fittings depending on size. Bleed each new hose installation point to remove air introduced during hose replacement. After bleeding, test pedal feel—if hose expansion was causing the soft pedal, the feel should improve dramatically with new hoses even without additional bleeding. If pedal feel remains unchanged after hose replacement, the problem lies elsewhere, but the new hoses provide long-term reliability regardless.
Could You Have a One-Way Leak in the System?
A one-way leak allows air to enter the brake system during pressure relaxation but seals under pressure, creating the frustrating scenario where no visible fluid leak exists yet air continuously recontaminates the system after bleeding. These leaks typically occur at brake line flare fittings where microscopic imperfections create a gap that atmospheric pressure can penetrate during system relaxation but that seals tightly under hydraulic pressure, at caliper piston seals that allow air passage in one direction, or at damaged bleeder valve threads that permit air infiltration.
Diagnosing one-way leaks requires careful observation during multiple brake cycles. Bleed the brake system thoroughly using proper technique until the pedal feels completely firm. Drive the vehicle for 10-15 minutes with normal braking, then recheck pedal feel. If the pedal softens noticeably within hours or days despite no visible fluid loss, a one-way leak likely exists. Inspect all brake line flare fittings—the connections where steel brake lines connect to rubber hoses, the master cylinder, and the ABS modulator—looking for any signs of moisture, corrosion, or imperfect sealing. Even fittings that appear tight may leak air if the flare surfaces have corrosion, damage, or improper seating.
The pressure decay test helps identify one-way leak locations. With the brake system properly bled and pedal feeling firm, apply moderate brake pressure and hold for 30 seconds, observing pedal position. A healthy system maintains constant pedal position, while a one-way leak allows the pedal to sink slowly as air enters through the leak point and system pressure drops. If pedal sink occurs, work through the brake system systematically: disconnect one brake circuit at a time by clamping off brake hoses, then repeat the pressure test. When clamping a particular circuit stops the pedal sink, the one-way leak exists in that circuit.
Flare fitting leaks require careful repair attention. Do not simply tighten fittings excessively, as over-tightening damages the flare and makes leaks worse. Instead, disconnect the fitting, inspect both the male flare on the brake line and the female flare seat in the component for damage, corrosion, or debris. Clean both surfaces with fine sandpaper or a flare seat cleaning tool, removing any corrosion or deposits. Examine the flare itself—if the brake line flare shows cracks, crushing, or deformation, cut off that section of brake line and create a new flare using a proper double-flaring tool. Reconnect the fitting with proper torque (typically 10-15 ft-lbs depending on size), then retest.
Caliper piston seal one-way leaks prove more difficult to diagnose and repair. The piston seal, which sits in a groove machined into the caliper bore, creates the hydraulic seal that prevents fluid from leaking past the piston. When this seal develops minor damage—a small tear or crack—it may seal adequately under pressure but allow air to enter as pressure releases and the seal relaxes. Unfortunately, diagnosing seal leaks requires process of elimination, as no direct test exists short of caliper disassembly. If pedal softens repeatedly after proper bleeding and no other leak sources can be identified, rebuild or replace suspect calipers, focusing first on those with highest mileage or showing minor piston seal seepage.
How to Test for Master Cylinder Internal Bypass?
Master cylinder internal bypass occurs when the piston seal that separates the pressure chamber from the reservoir chamber fails, allowing pressurized brake fluid to leak past the seal back into the reservoir instead of maintaining pressure in the brake lines. This creates soft brake pedal that cannot be corrected through bleeding because the hydraulic system cannot build or maintain pressure regardless of how air-free the fluid is.
The definitive test for internal bypass involves the pressure hold test performed with the engine off to eliminate brake booster assistance. Pump the brake pedal three to four times to deplete any vacuum assist reserve, then press the pedal firmly with approximately 50 pounds of force—enough pressure to simulate moderate braking. Hold this steady pressure and observe the pedal position carefully for 30-60 seconds. A healthy master cylinder maintains constant pedal position without any movement, while an internally bypassing master cylinder allows the pedal to slowly sink toward the floor as pressurized fluid leaks past the failed seal back into the reservoir.
The rate of pedal sink indicates bypass severity. Minor seal wear causes slow pedal creep over 30-60 seconds—the pedal may sink 1/4 to 1/2 inch during a one-minute hold. Severe seal failure produces rapid pedal sink where the pedal visibly moves toward the floor within 5-10 seconds, often reaching the floor completely if pressure is maintained. Any pedal sink under sustained pressure indicates master cylinder replacement is necessary, as internal seals cannot be reliably repaired in most modern master cylinders. Some rebuild kits exist for specific master cylinder designs, but replacement with a new or remanufactured unit provides more reliable long-term performance.
Understanding what causes internal bypass helps prevent future failures. The most common cause is pushing the brake pedal to the floor during bleeding, forcing the piston past its normal wear area into corroded bore sections that damage seals. Age and contaminated brake fluid contribute to seal deterioration, as moisture in old fluid degrades rubber compounds and promotes internal corrosion that roughens bore surfaces. High-mileage master cylinders naturally experience seal wear from millions of brake applications, making failure more likely after 100,000-150,000 miles even with proper maintenance.
When pressure hold testing reveals internal bypass, replace the master cylinder before attempting any additional bleeding. Installing a new master cylinder requires bench bleeding to remove air from its internal passages before installation. Connect the new master cylinder to the brake lines, ensuring proper torque on all fittings, then bleed the entire brake system starting at the wheel furthest from the master cylinder. The combination of a new, properly functioning master cylinder and thorough bleeding should restore firm pedal feel if internal bypass was the problem. If soft pedal persists even with a new master cylinder and complete bleeding, look to other components like brake hoses, calipers, or ABS modulator for remaining problems.