

8 Common Causes of a Soft Brake Pedal + How to Fix It (Car Owners Guide)
A soft brake pedal typically results from air in the brake lines, brake fluid leaks, or a failing master cylinder—these three issues account for the majority of spongy pedal complaints. When you press your brake pedal and it sinks toward the floor with little resistance, or when you need to pump it several times to build pressure, your vehicle’s hydraulic braking system has lost its ability to maintain proper pressure. This compromised braking performance isn’t just inconvenient—it’s a serious safety hazard that requires immediate attention. Understanding the root causes helps you diagnose the problem quickly and determine whether you can tackle the repair yourself or need professional brake service.
Diagnosing a soft brake pedal requires a systematic approach to identify which component has failed. The diagnostic process involves simple tests like checking brake fluid levels, performing the pump test to detect air in the system, and conducting visual inspections for leaks. Each cause produces distinctive symptoms that help narrow down the culprit—air in brake lines creates a pedal that firms up when pumped, while master cylinder failure typically causes the pedal to slowly sink when held at a stoplight. Recognizing these patterns allows you to move from symptom to solution efficiently.
Fixing a soft brake pedal depends entirely on the underlying cause, with solutions ranging from bleeding the brakes to remove trapped air, to replacing failed components like the master cylinder or damaged brake hoses. Some repairs are straightforward DIY projects for mechanically inclined car owners, while others require specialized tools and professional expertise. The Repair cost estimate for common causes varies widely—bleeding brakes might cost $80-$150 at a shop, while master cylinder replacement can run $300-$600 including parts and labor. Knowing what to expect helps you budget appropriately and avoid unnecessary expenses.
Prevention is equally important as repair when it comes to maintaining firm brake pedal feel. Regular brake fluid changes every two years, proper bleeding techniques during brake service, and routine inspections can prevent most soft pedal issues before they develop. To begin, let’s examine exactly what a soft brake pedal feels like and whether it’s safe to continue driving with this condition.
What Does a Soft Brake Pedal Feel Like?
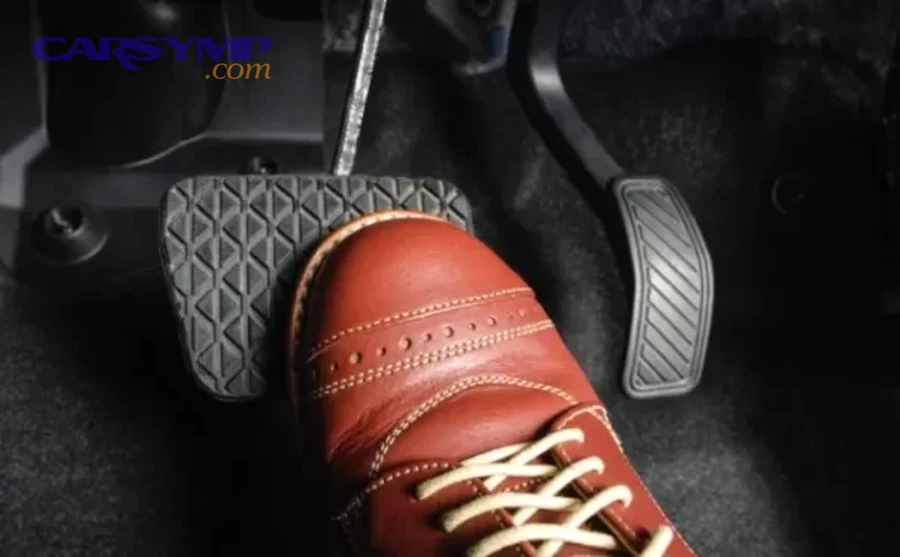
A soft brake pedal feels spongy, mushy, or lacks the firm resistance you normally experience when braking, often sinking noticeably toward the floor before the brakes engage. Unlike a properly functioning brake pedal that provides immediate pushback and stops within the first few inches of travel, a compromised pedal feels like you’re pressing into foam rubber or stepping on a cushion. The pedal may travel halfway to the floor or more before you feel any braking force, and in severe cases, it might go all the way to the floor with minimal stopping power.
Specifically, drivers describe this sensation in several ways that all point to the same hydraulic pressure problem. Some notice the pedal feels “soft” from the very first touch, with no initial firmness at all. Others report a pedal that starts firm but then gradually sinks further down when held under constant pressure, particularly noticeable when stopped at a traffic light. Many drivers find themselves pumping the brake pedal multiple times to build up enough pressure for effective stopping—a clear sign that air has entered the brake lines or fluid is bypassing somewhere in the system.

The experience differs dramatically from other brake problems. A hard brake pedal that requires excessive force to push suggests a failed brake booster, while a pulsating pedal during braking typically indicates warped rotors. The soft, spongy sensation specifically points to issues within the hydraulic system—the network of fluid-filled lines, cylinders, and valves that multiply your foot pressure into the clamping force needed to stop your vehicle.
Is a Soft Brake Pedal the Same as a Spongy Brake Pedal?
Yes, a soft brake pedal and a spongy brake pedal are the same condition described using interchangeable terminology. Both terms refer to a brake pedal that lacks normal firmness and provides inadequate resistance when pressed. Mechanics, automotive technicians, and manufacturers use “soft,” “spongy,” and “mushy” interchangeably to describe this hydraulic pressure loss symptom. The underlying mechanical problem remains identical regardless of which term you use—the brake system cannot maintain the hydraulic pressure necessary for proper operation.
The choice of terminology often reflects regional preferences or individual experience rather than technical distinctions. Some drivers prefer “spongy” because it better captures the springy, compressible feeling of the pedal under their foot. Others use “soft” to describe the lack of firmness compared to normal brake feel. Technical service bulletins and repair manuals typically use “soft brake pedal” as the standard diagnostic term, while everyday conversations might include variations like “mushy brakes” or “brakes feel like mashed potatoes.”
Understanding this equivalence matters when researching your symptoms or communicating with mechanics. If you search for “spongy brake pedal causes” or “soft brake pedal diagnosis,” you’ll find the same information addressing identical root causes—air in brake lines, brake fluid leaks, master cylinder failure, contaminated fluid, and worn components. Don’t let the terminology variation confuse you; they all describe the same dangerous condition requiring immediate attention.
Can You Still Drive with a Soft Brake Pedal?
No, you should not continue driving with a soft brake pedal except to reach the nearest safe location for repair, as this condition severely compromises your ability to stop safely. While your brakes may still function to some degree, the extended stopping distances and unpredictable pedal behavior create dangerous situations, especially in emergency braking scenarios. A soft pedal indicates your brake system has already failed partially—whether due to air contamination, fluid leaks, or component failure—and the condition will likely worsen, potentially leading to complete brake failure.
The Safe-to-drive guidance with soft pedal depends on severity, but erring on the side of caution is always wise. If your pedal sinks to the floor or requires pumping to build any pressure, you have a critical brake system failure that demands immediate attention—do not drive the vehicle. If the pedal feels slightly softer than normal but still provides adequate stopping power, you may carefully drive to a repair facility, avoiding highways and heavy traffic, while maintaining extra following distance. However, even in less severe cases, treating this as an urgent safety issue is the appropriate response.
The risks of driving with compromised brakes extend beyond the obvious stopping distance concerns. Air in brake lines symptoms and fixes become critical when that air bubble relocates during aggressive braking or changes in elevation, potentially causing sudden brake failure at the worst possible moment. Brake fluid leaks progressively worsen as you continue using the brakes, accelerating the loss of hydraulic pressure. Master cylinder failure signs often appear gradually, but the final failure can occur suddenly and without warning. Every trip you take with a soft brake pedal increases your accident risk exponentially, endangering yourself, your passengers, and other road users.
What Causes a Soft Brake Pedal?
There are eight common causes of a soft brake pedal: air in the brake lines, brake fluid leaks, failed master cylinder, contaminated brake fluid, worn brake hoses, corroded brake lines, worn brake pads or calipers, and brake booster issues. These problems all disrupt the hydraulic pressure system that translates your foot pressure into braking force. While air in the system ranks as the most frequent culprit, accurately diagnosing which specific cause affects your vehicle requires understanding how each problem manifests and which symptoms distinguish one from another.
Let’s explore each cause in detail, examining the mechanisms behind the failure, the distinctive symptoms that help identify each problem, and why these issues compromise your braking performance. Understanding these Soft/spongy brake pedal causes empowers you to communicate effectively with mechanics and make informed decisions about repairs.
1. Air in the Brake Lines
Air in the brake lines occurs when air bubbles enter the sealed hydraulic system, compressing under pressure instead of transmitting force like incompressible brake fluid does. Brake systems rely on Pascal’s principle—pressure applied to an incompressible fluid transmits equally throughout the system. When you press the brake pedal, the master cylinder pushes brake fluid through the lines to the calipers and wheel cylinders, creating the pressure that clamps the brake pads against the rotors or forces the brake shoes against the drums. This system works flawlessly only when filled completely with fluid.
Air contamination destroys this principle because air compresses easily. When air bubbles occupy space in your brake lines, pressing the pedal first compresses those bubbles before building any pressure in the system. You feel this as a spongy, soft pedal that requires significantly more travel before the brakes engage. The larger the air pocket, the softer the pedal feels and the more distance it travels before creating braking force.

Air enters the brake system through several pathways. Opening the brake system during repairs—replacing brake pads, calipers, or brake lines—allows air in if proper bleeding procedures aren’t followed. Brake fluid leaks create entry points where air infiltrates as fluid escapes. Extremely low brake fluid levels expose the master cylinder’s internal ports to air, which then gets pumped into the lines. Overheating brake fluid until it boils creates vapor bubbles that behave like air pockets. Even microscopic air infiltration through deteriorating brake hoses can accumulate over time.
The diagnostic signature of air in brake lines is distinctive—pumping the pedal several times makes it temporarily firmer. Each pump compresses the air bubbles slightly and pushes fluid past them, building some pressure in the system. However, this firmness disappears after the pedal is released and pressed again normally. If your brake pedal exhibits this pump-to-firm behavior, air in the system is almost certainly your problem. The solution involves bleeding the brakes to force the air out and replace it with fresh fluid—a process detailed later in this guide.
2. Brake Fluid Leaks
Brake fluid leaks allow hydraulic fluid to escape from the sealed system, creating air entry points and reducing the total fluid volume available to build pressure. Even small leaks significantly impact brake pedal feel because the system requires a specific fluid volume to move the pistons in your calipers or wheel cylinders the distance needed for effective braking. When fluid escapes, the master cylinder’s piston must travel farther to push enough remaining fluid to achieve braking—resulting in excessive pedal travel and soft feel.
Leaks develop at numerous locations throughout the brake system. The master cylinder itself can leak internally through worn seals, allowing fluid to bypass the piston instead of pushing through the brake lines, or externally through the reservoir seals or piston seals, leaving visible fluid around the master cylinder body. Brake lines develop leaks where rust creates pinholes in the steel tubing, particularly in areas exposed to road salt and moisture. Flexible rubber brake hoses crack and deteriorate with age, especially at the crimped end fittings where they connect to the hard lines.
Brake calipers leak from the piston seals when corrosion damages the smooth cylinder walls or the seals themselves deteriorate. Wheel cylinders in drum brake systems fail similarly, allowing fluid to seep past the piston cups. Even seemingly minor connections like bleeder valves and banjo bolt fittings can develop leaks if not properly tightened or if their sealing washers have degraded. Each potential leak point represents a place where Brake fluid leak diagnosis for soft pedal should focus during inspection.
Identifying leaks requires systematic inspection. Check the brake fluid reservoir first—if the level is significantly low or dropping over time, fluid is escaping somewhere. Look for wet spots, fluid trails, or dark stains on brake components, brake lines, and around wheel wells. Brake fluid feels slippery and slightly oily, and it typically appears clear to light amber when fresh, darkening to brown as it ages. Have a helper press the brake pedal while you inspect connections and flexible hoses—some leaks only appear under pressure.
Internal master cylinder leaks are harder to detect visually because the fluid bypasses internally rather than escaping outside. The telltale sign is a pedal that slowly sinks to the floor when held under steady pressure, even though no external fluid loss is visible and the reservoir level remains adequate. This indicates fluid is flowing backward past worn master cylinder seals instead of maintaining pressure in the brake lines. ABS module issues and pedal feel can also create internal leak symptoms when the ABS hydraulic unit develops seal failures, though this occurs less frequently than master cylinder problems.
3. Failed or Failing Master Cylinder
Master cylinder failure occurs when internal seals wear out, crack, or become damaged, allowing brake fluid to bypass the piston instead of being forced through the brake lines under pressure. The master cylinder serves as the heart of your hydraulic brake system—it contains one or more pistons that push brake fluid into the brake lines when you press the pedal. Most modern vehicles use tandem master cylinders with two separate pistons and fluid chambers, one for the front brakes and one for the rear, providing a safety backup if one circuit fails.

Internal seal failure manifests in a characteristic way. When you press the brake pedal and hold it steady, such as while stopped at a traffic light, the pedal slowly sinks toward the floor over several seconds. This happens because the damaged seals allow pressurized brake fluid to leak backward past the piston instead of maintaining pressure in the brake lines. Each time you release and reapply the pedal, it initially feels somewhat normal, but then begins sinking again when held under steady pressure. This progressive sinking under constant pressure is the signature master cylinder failure sign.
Several factors cause master cylinder seal damage. Age and heat cycles degrade the rubber seals over time, making them brittle and less effective at sealing. Contaminated brake fluid containing moisture or debris erodes seal material. Perhaps most commonly, pushing the brake pedal all the way to the floor during brake bleeding or when trying to build pressure with a soft pedal can damage the seals. The master cylinder piston normally travels only partway down the bore during regular braking. The unused portion of the bore develops corrosion and deposits over years of service. Forcing the piston into this corroded area with a full-stroke pedal press tears the seals on the rough surface.
External master cylinder leaks are easier to spot—brake fluid appears around the master cylinder body, particularly where it mounts to the brake booster or at the reservoir connection points. Fluid may drip down onto the brake booster or run down the firewall. Sometimes the leak is internal to the brake booster itself, with brake fluid entering the vacuum chamber and being drawn into the engine through the vacuum line, though this is relatively uncommon.
Diagnosing master cylinder failure involves several tests. With the engine off, pump the brake pedal several times to deplete vacuum assist, then hold steady pressure on the pedal. If it slowly sinks toward the floor over 15-30 seconds, the master cylinder is likely failing. Check for external leaks around the master cylinder body and reservoir. If you suspect master cylinder problems but see no external leaks and the pedal sink test is inconclusive, a pressure test using specialized equipment can definitively diagnose internal bypass.
4. Contaminated or Old Brake Fluid
Contaminated or old brake fluid loses its ability to transmit hydraulic pressure effectively due to moisture absorption, debris accumulation, or chemical breakdown. Brake fluid is hygroscopic—it actively absorbs moisture from the air through microscopic pores in rubber brake hoses and even through the reservoir cap seal. This moisture contamination causes multiple problems that degrade brake performance and contribute to soft pedal feel.
Water in brake fluid dramatically lowers the boiling point. Fresh DOT 3 brake fluid boils around 401°F (205°C), but with just 3% water contamination, the boiling point drops to approximately 284°F (140°C). During heavy braking—descending mountain roads, repeated hard stops, or performance driving—brake components can easily reach temperatures where moisture-contaminated fluid begins to boil. Boiling fluid creates vapor bubbles that compress like air, causing sudden brake pedal softness and potentially complete brake failure during the exact moment you need maximum braking performance.

Beyond moisture, brake fluid accumulates debris from normal system wear. Microscopic metal particles from brake cylinders, rubber particles from deteriorating seals, and rust from corroded brake lines all contaminate the fluid over time. This debris can score cylinder walls, damage seals, and clog small passages in ABS modules and brake calipers. The contamination appears as darkening fluid color—fresh brake fluid ranges from clear to light amber, while heavily contaminated fluid turns dark brown or black.
Chemical breakdown occurs as brake fluid ages and is exposed to extreme temperatures. The glycol-based compounds in DOT 3, 4, and 5.1 fluids degrade, becoming acidic and corrosive. This acidity attacks metal brake components and rubber seals, accelerating wear and creating the conditions for leaks and failures. The degraded fluid may develop a burnt smell and visibly darken.
One particularly problematic contamination scenario involves mixing incompatible brake fluid types. DOT 5 silicone-based brake fluid will not mix with DOT 3, 4, or 5.1 glycol-based fluids. When mixed, the fluids separate, gel up, or create sludge that clogs brake lines and damages seals. Brake hoses and seals designed for glycol fluids can swell, distort, or fail when exposed to silicone fluid. If you suspect wrong fluid type in your system—perhaps a previous owner or repair shop made this mistake—a complete system flush and component inspection becomes necessary.
Contamination diagnosis starts with checking fluid color and condition. Open the brake fluid reservoir and examine the fluid—if it appears dark brown or black rather than clear or light amber, it’s overdue for replacement. Use a brake fluid test strip (available at auto parts stores) to measure moisture content and boiling point—if moisture exceeds 3% or boiling point has dropped significantly, replacement is necessary. Most manufacturers recommend changing brake fluid every two years regardless of mileage, specifically to prevent moisture contamination issues.
5. Worn or Damaged Brake Hoses
Worn or damaged brake hoses compromise brake pedal feel through swelling, internal deterioration, or cracks that allow air infiltration without visible fluid leakage. Brake hoses are the flexible rubber connections between the hard brake lines mounted to the vehicle frame and the brake calipers or wheel cylinders that move with the suspension and steering. These hoses must flex thousands of times as your wheels turn and your suspension travels up and down, while containing brake fluid under pressures exceeding 1,000 PSI during hard braking.
Brake hose swelling and internal collapse represents one of the most insidious causes of soft brake pedal. The hoses contain a braided fabric reinforcement layer between inner and outer rubber layers. As hoses age, this reinforcement deteriorates, allowing the rubber to expand outward like a balloon when pressurized. During braking, instead of transmitting all the hydraulic pressure to the calipers, the swollen hoses absorb some of that pressure by expanding. You feel this as a soft, spongy pedal because your pedal travel is being wasted inflating the hoses rather than pushing the brake pads against the rotors.
Internal hose deterioration creates an even stranger problem. The inner rubber liner can separate from the reinforcement layer and break into pieces that partially block the hose. These fragments act like check valves—allowing fluid to flow one direction but restricting or blocking return flow. This can cause brakes to drag or lock up because fluid flows to the caliper but can’t easily return. More relevant to soft pedal diagnosis, the deteriorated inner liner becomes porous, allowing air molecules to infiltrate through the hose wall without any fluid leaking out. This air contamination gradually accumulates in the brake lines, creating soft pedal feel that returns shortly after bleeding the brakes.
Visible cracks in the outer rubber indicate advanced deterioration. Check where the hose crimps to the metal fittings at each end—this high-stress area commonly develops cracks. Look for weather checking (fine surface cracks), bulges, or soft spots in the hose body. Fluid seepage through cracks appears as wet spots or staining on the hose exterior.
Diagnosing brake hose problems requires both visual inspection and functional testing. With the vehicle safely supported and someone pressing the brake pedal, watch each brake hose carefully. Hoses should not expand noticeably or bulge when pressure is applied—any visible swelling indicates replacement is necessary. Check the age of your brake hoses by looking for a date code molded into the rubber (typically showing month and year of manufacture). Hoses older than 10 years should be considered suspect even if they appear visually acceptable, as rubber degrades over time regardless of use.
The solution for brake hose problems is straightforward replacement. Many enthusiasts upgrade to stainless steel braided brake lines, which eliminate the swelling problem through their non-expanding steel mesh construction. These braided lines provide firmer pedal feel and better brake modulation, though they cost more than standard rubber hoses. Whether you choose OEM rubber replacement hoses or upgrade to braided lines, replacing aged or damaged brake hoses often dramatically improves soft pedal feel while enhancing overall braking performance.
6. Corroded or Damaged Brake Lines
Corroded or damaged brake lines develop leaks through rust holes, physical damage, or internal restriction that compromises hydraulic pressure and creates soft brake pedal feel. Brake lines are the steel tubing that routes brake fluid from the master cylinder to each wheel, typically running along the vehicle’s frame rails and undercarriage where they’re exposed to road salt, moisture, and debris. These harsh conditions make brake line corrosion one of the most common brake system failures in areas with winter road salt use or high humidity.
Rust forms on steel brake lines from the outside in. Salt-laden moisture attacks the protective coating and begins corroding the steel tubing. The corrosion often starts at mounting brackets and clips where moisture accumulates and the protective coating is worn through by vibration. As rust penetrates deeper, it creates pinholes that allow brake fluid to leak out. These leaks may be tiny at first, creating slow drips that go unnoticed until the brake fluid level drops significantly. Under heavy braking pressure, even small holes can release enough fluid to cause noticeable pedal softness and extended stopping distances.
The corrosion damage isn’t always obvious. Rust can create a crusty exterior that hides the extent of internal damage. Sometimes a brake line that looks merely surface-rusted on the outside has corroded completely through the wall thickness in spots. Tapping or flexing a heavily rusted brake line during inspection might cause it to crack or break—a dramatic demonstration of how compromised the line has become.
Internal restriction from rust and debris represents another failure mode. As brake lines corrode internally, rust particles and scale buildup can partially block the line. This restriction prevents adequate fluid flow to the calipers, resulting in soft pedal feel and reduced braking effectiveness. Unlike external leaks that are somewhat visible, internal restriction can be difficult to diagnose without specialized testing equipment or systematic elimination of other causes.
Inspecting brake lines requires getting underneath the vehicle with good lighting. Look for any rust discoloration, crusty buildup, wet spots, or visible damage to the lines. Pay special attention to the rear brake lines along the rear axle and trailing arms—these areas suffer worst from road spray and salt. Check where lines pass through body panels or mounting brackets, as these contact points often corrode first. Run your hand along brake lines (wearing gloves) to feel for rough, crusty areas that indicate advanced corrosion—but be careful, as sharp rust edges can cut.
Replacing corroded brake lines involves cutting out the damaged section and installing new pre-formed lines or fabricating new lines from bulk brake line tubing using a flaring tool. Many vehicles have replacement brake lines available as complete assemblies that run the entire length needed, simplifying installation. Nickel-copper alloy brake lines resist corrosion better than traditional steel and represent an excellent upgrade when replacing corroded lines. Proper flaring technique is critical for safe brake line connections—poorly formed flares will leak and can fail catastrophically under pressure.
7. Worn Brake Pads or Calipers
Worn brake pads or calipers create soft brake pedal feel by requiring excessive fluid movement to achieve braking or by leaking fluid past damaged caliper seals. While worn brake pads don’t directly cause soft pedal in the same way that air or fluid leaks do, severely worn pads contribute to the problem by forcing the caliper pistons to extend farther out of their bores to make contact with the rotors. This extended piston travel requires more brake fluid volume to be displaced from the master cylinder, effectively using up pedal travel before braking force develops.
Brake pad wear progresses from full thickness (typically 10-12mm of friction material when new) down toward the backing plate (0mm of friction material). As the pads wear down, the caliper pistons must push farther to compensate for the reduced pad thickness. When pads wear to 2-3mm or less, the calipers operate at nearly maximum piston extension. At this point, the brake system’s fluid capacity is stretched thin—the master cylinder must push significantly more fluid volume to move the worn pads into contact with the rotors. You may notice the brake pedal requires more travel before braking begins, and the pedal may feel slightly softer overall.

Caliper problems create more direct soft pedal issues. Brake caliper pistons seal against the caliper bore with square-cut rubber seals. These seals can become damaged by corrosion, heat, or contaminated brake fluid, allowing fluid to leak past the piston. External caliper leaks appear as brake fluid on the caliper body, inner wheel surface, or ground beneath the wheel. Internal leaks are less obvious—the piston seal allows fluid to bypass without leaving visible leakage, causing soft pedal similar to master cylinder failure.
Seized or partially seized caliper pistons create uneven braking and can contribute to pedal travel issues. When a caliper piston won’t retract properly, it holds the brake pad in constant contact with the rotor, generating heat and accelerating wear. The opposite problem—a piston that won’t extend properly due to corrosion or contamination—means that caliper doesn’t contribute its full braking force, requiring more pedal pressure and travel to achieve the desired stopping power.
Diagnosing brake pad wear is straightforward—most vehicles allow visual inspection through the wheel spokes, or you can remove the wheel for better access. Measure the remaining friction material thickness at the thinnest point. If any pad measures less than 3mm, replacement is necessary. Many pads include wear indicators—metal tabs that contact the rotor and create a squealing noise when pads wear to replacement thickness.
Caliper inspection requires removing the wheel and examining the caliper body for leaks, corrosion, and proper piston movement. With the wheel off and caliper still mounted, have someone gently press the brake pedal while you watch the piston extend—it should move smoothly without binding. Check for fluid seepage around the piston dust boot. After releasing the pedal, the piston should retract slightly (pulled back by the square-cut seal). Seized or sticky pistons require caliper rebuilding or replacement.
8. Brake Booster or Pushrod Issues
Brake booster or pushrod problems cause soft brake pedal feel through excessive clearance between the brake booster’s pushrod and the master cylinder piston or through loss of vacuum assist. The brake booster (also called vacuum booster or power brake unit) uses engine intake vacuum to multiply the force you apply to the brake pedal, making it possible to generate the 1,000+ PSI of hydraulic pressure needed for effective braking with just moderate pedal pressure. When the booster or its pushrod adjustment fails, brake pedal feel changes dramatically.
Excessive pushrod gap creates a specific soft pedal symptom. The pushrod transfers motion from the brake booster to the master cylinder piston. This pushrod must have a small clearance gap (typically .020 inches or about half a millimeter) between its tip and the master cylinder piston when the brake pedal is at rest. This gap ensures the master cylinder piston fully returns to its rest position, allowing the compensating port to open and prevent pressure buildup in the system. If the gap becomes too large—often from incorrect installation during master cylinder replacement—you experience excessive pedal travel before the pushrod contacts the master cylinder piston and braking begins. This feels like a soft, mushy initial pedal feel followed by normal braking once the gap is taken up.
Conversely, insufficient pushrod gap (the pushrod is too long) prevents the master cylinder piston from fully retracting. This blocks the compensating port, trapping pressure in the brake system and causing the brakes to drag. While this doesn’t create soft pedal, it causes severe overheating, rapid brake wear, and potential brake failure—mentioning it here helps you understand why proper pushrod adjustment matters critically for safe brake operation.
Brake booster failure itself creates a different problem than soft pedal—it creates a hard pedal that requires excessive force to push. When the vacuum booster loses vacuum due to a torn diaphragm, failed check valve, or vacuum leak, you lose the power assist that normally multiplies your pedal force. The pedal becomes extremely hard and difficult to push, though the brakes will still work if you push hard enough. This hard pedal condition is the opposite of soft pedal, but it’s worth understanding because some drivers confuse the two issues when describing symptoms to mechanics.
However, some ABS module issues and pedal feel problems can create soft pedal symptoms when the ABS hydraulic control unit develops internal leaks or seal failures. Modern ABS systems contain multiple valves, accumulators, and pump components that can deteriorate over time. These internal ABS leaks are relatively uncommon but can cause soft pedal that’s difficult to diagnose because the leak is internal to the ABS unit, not visible externally.
Diagnosing pushrod adjustment requires removing the master cylinder and measuring the gap between the pushrod and the master cylinder piston. Most manufacturers specify the exact gap—typically .015 to .025 inches. Adjustable pushrods include a threaded adjuster and locknut that allows precise gap setting. Some boosters have fixed-length pushrods that require selecting the correct part number for your specific vehicle. Always verify pushrod adjustment after master cylinder replacement to prevent soft pedal from excessive gap or brake drag from insufficient gap.
Testing brake booster function involves a simple vacuum check. With the engine off, pump the brake pedal several times to deplete stored vacuum. The pedal should become progressively firmer with each pump. Now hold the pedal down and start the engine—the pedal should sink slightly as vacuum builds and the booster provides assist. If this doesn’t occur, check the vacuum hose connection to the booster for cracks or disconnection. Test the booster’s one-way check valve by running the engine for a minute, turning it off, and waiting several minutes before pressing the brake pedal—you should feel one or two power-assisted pedal strokes before the stored vacuum depletes. If power assist disappears immediately, the check valve is faulty.
How Do You Diagnose Which Cause Is Creating Your Soft Brake Pedal?
Diagnosing the specific cause of your soft brake pedal requires four systematic tests: the brake pump test to detect air, checking brake fluid level and condition, visual inspection for leaks, and optionally the brake system blockage test to isolate which brake circuit contains air. This methodical approach eliminates guesswork and quickly narrows down the culprit from among the eight possible causes. Starting with the simplest tests and progressing to more complex diagnostics saves time and prevents unnecessary part replacement.
Below, each diagnostic method is explained with step-by-step procedures that anyone can perform with minimal tools. Understanding what each test reveals about your brake system’s condition helps you decide whether you can fix the problem yourself or need professional brake service.
The Brake Pump Test – Does the Pedal Get Firmer?
The brake pump test determines whether air in the brake lines is causing your soft pedal by checking if the pedal becomes firmer with repeated pumping. To perform this test, start with the engine off and the brake pedal at rest. Press and release the brake pedal rapidly 5-7 times using moderate pressure—don’t pump slowly or forcefully, just quick, deliberate strokes. Pay careful attention to how the pedal feels with each successive pump stroke.
If air is present in the brake lines, each pump stroke will make the pedal noticeably firmer and higher than the previous stroke. The first pump might feel very soft and sink nearly to the floor, the second pump will feel slightly firmer, the third firmer still, and by the fifth or sixth pump the pedal should feel relatively firm and high. This progressive firming happens because each pump stroke compresses the air bubbles slightly and pushes fluid past them, temporarily building pressure in the system. When you release the pedal and press again normally after pumping, it returns to the original soft feel because the compressed air re-expands.
This pump-to-firm behavior provides near-definitive evidence of air in brake lines symptoms and fixes being your primary issue. The solution in this case is bleeding the brakes to remove the air—a procedure covered in detail in the next section. The pump test is so reliable for detecting air that mechanics use it as their first diagnostic step whenever confronted with soft brake pedal complaints.
Conversely, if pumping the brake pedal produces no improvement in firmness—the pedal remains equally soft through multiple pumps—then air is unlikely to be your problem. Instead, suspect a brake fluid leak, failed master cylinder, or severely worn brake components. A pedal that slowly sinks to the floor when held under steady pressure after pumping suggests master cylinder failure or a significant leak somewhere in the system.
One important variation: if your brake pedal firms up when pumping with the engine off, but then becomes soft again when you start the engine, this points to a brake booster problem rather than air in the lines. The booster should maintain its firmness when vacuum is applied; if it goes soft when the engine starts, the booster or its pushrod adjustment may be faulty.
Check Brake Fluid Level and Condition
Checking brake fluid level and condition provides critical diagnostic information about leaks, contamination, and overall system health. The brake fluid reservoir is typically located on top of the master cylinder near the firewall on the driver’s side of the engine compartment. The reservoir is made of translucent plastic with “MIN” and “MAX” level marks molded into the side, allowing you to check fluid level without opening the cap.

Normal brake fluid level sits between the MIN and MAX marks, typically closer to MAX in a healthy system. As brake pads wear down over thousands of miles, the brake fluid level gradually drops because the caliper pistons extend farther to compensate for the thinner pads, holding more fluid in the calipers rather than in the reservoir. This gradual decline is normal—a slow drop from MAX toward MIN over 20,000-30,000 miles simply indicates brake pad wear.
However, a significantly low fluid level—at or below the MIN mark—or a rapid drop in level over weeks or months indicates a leak somewhere in the system. Brake fluid doesn’t evaporate or get consumed, so any loss must be leaking out. If your reservoir is low and your brake pedal is soft, you almost certainly have a leak that needs immediate attention. Add brake fluid to bring the level up to MAX, then carefully inspect all brake components for the leak source.
Fluid condition tells another story. Fresh brake fluid appears clear to light amber, similar to cooking oil or light honey. Dark brown or black fluid indicates contamination from age, heat damage, or debris accumulation. This discoloration means the fluid has absorbed moisture, degraded chemically, or accumulated wear particles—all reasons to flush and replace it. Fluid that appears cloudy or has visible particles floating in it is severely contaminated and needs immediate replacement.
To check fluid condition more thoroughly, remove the reservoir cap (clean around the cap first to prevent dirt from entering the system). Examine the fluid’s color and clarity—it should look clean and transparent. Dip a clean white paper towel into the fluid and let a drop soak in—the color will be more apparent against the white background. If the fluid appears dark or dirty, flushing the entire brake system should be part of your repair plan regardless of what’s causing the soft pedal.
Check for the correct brake fluid type, which is typically printed on the reservoir cap. Most vehicles use DOT 3 or DOT 4 glycol-based brake fluid, while some European vehicles specify DOT 4 or DOT 5.1. Never use DOT 5 silicone fluid unless specifically required by the manufacturer—it’s incompatible with glycol fluids and will damage the system if mixed. If you suspect incorrect fluid was added previously, prepare for a complete system flush and possibly replacement of rubber components that may have been damaged.
Visual Inspection for Leaks
Visual inspection for leaks systematically examines every brake component for wetness, staining, or visible fluid seepage that indicates where brake fluid is escaping from the system. This inspection requires getting under the vehicle safely, so use proper jack stands if raising the car, or inspect from underneath if you have access to a lift. Never rely on a jack alone for support—brake fluid leaking on you is unpleasant, but a vehicle falling on you is fatal.
Start at the master cylinder and work your way toward each wheel, following the brake lines. At the master cylinder, look for wetness around the cylinder body where it mounts to the brake booster, around the reservoir where it connects to the cylinder body, and at the brake line connections. Brake fluid feels slippery and slightly oily—if you see wetness, touch it with a gloved finger to confirm it’s fluid rather than water or oil from another system.
Follow the brake lines from the master cylinder along the frame rails toward each wheel. Look for wet spots, drips, or rust staining around line connections, unions, and junction blocks. The proportioning valve or ABS modulator connections are common leak points—examine these carefully. Check where flexible brake hoses connect to the hard lines, paying special attention to the crimped end fittings where leaks often develop.
At each wheel, remove the wheel to inspect the brake components thoroughly. Examine the brake hose from its connection point down to the caliper or wheel cylinder. Look for cracks, bulges, or fluid seepage. Check the caliper or wheel cylinder body for wetness—fresh leaks appear wet and shiny, while older leaks leave crusty deposits where dried brake fluid has accumulated dust and debris.
For a more definitive leak check, have someone press and hold the brake pedal while you watch for leaks under pressure. Some leaks only appear when the system is pressurized, so this technique often reveals leaks that aren’t visible with the pedal at rest. Watch flexible hoses carefully—they may bulge or seep only under pressure. Check all connection points and bleeder valves, as these can weep small amounts of fluid that accumulate over time.
One tricky leak scenario involves the brake fluid entering the brake booster through a failed master cylinder rear seal. This internal leak allows fluid to seep into the vacuum chamber of the booster, where it’s drawn into the engine through the vacuum line and burned. You won’t see any external fluid loss, but the reservoir level drops, and you might notice the engine running slightly rough at idle from ingesting brake fluid. Check the vacuum hose from the booster to the engine for brake fluid residue or wetness—this indicates the master cylinder rear seal has failed.
Document every leak you find—photograph it if possible or at least note its location. Some vehicles may have multiple leak points that all need addressing. Understanding where fluid is escaping helps you estimate repair costs and decide whether to tackle the repairs yourself or seek professional brake service.
The Brake System Blockage Test
The brake system blockage test isolates whether air is trapped in the front or rear brake circuits by selectively blocking portions of the system and observing how pedal feel changes. This advanced diagnostic technique helps narrow down where air is hiding when you’ve bled the brakes but soft pedal persists, or when you want to avoid bleeding the entire system if air is only in one circuit. The test requires basic tools and a helper, along with suitable blocking clamps or vice grips with protective padding.
To perform the test, you’ll use soft-jaw clamps (or regular vice grips with layers of cloth or rubber to prevent hose damage) to selectively pinch off flexible brake hoses. Never clamp hard brake lines—only flexible rubber hoses can be temporarily clamped without damage. The process works by preventing fluid flow to specific brake circuits, allowing you to test how the remaining circuit affects pedal feel.
Start by safely supporting the vehicle and removing all wheels for access to the brake hoses. Locate the flexible brake hoses at each wheel—these connect the hard lines to the calipers or wheel cylinders. First, clamp off both front brake hoses, preventing fluid from reaching the front brakes. Have your helper press the brake pedal several times and report on pedal firmness. If the pedal becomes noticeably firmer with the front brakes blocked, air is likely trapped in the front brake circuit. If the pedal remains soft, the air is likely in the rear circuit.
Next, remove the clamps from the front hoses and instead clamp off the rear brake hoses. Again have your helper test pedal firmness. If the pedal improves dramatically with the rear brakes blocked, air is in the rear circuit. If it remains soft, air is in the front circuit or possibly in the master cylinder itself.
This technique works because blocking a circuit filled with air removes that compressible air from the hydraulic system, leaving only the fluid-filled portion. The incompressible fluid in the remaining circuit provides firm pedal feel. When you release the clamps and restore the full system, the air-contaminated circuit returns and the pedal goes soft again. This tells you exactly where to focus your bleeding efforts.
Important cautions apply when using this test. Never drive with any brake hoses clamped—this test is for stationary diagnosis only. Don’t leave hoses clamped for extended periods, as this could damage the hose structure. Use gentle clamping pressure—just enough to block fluid flow, not enough to collapse or damage the hose. Always inspect hoses after unclamping to ensure you haven’t created cracks or damage.
For stubborn air pockets that won’t bleed out through normal procedures, this test helps you identify which specific caliper or wheel cylinder is holding trapped air. Sometimes air gets trapped in high points within calipers, particularly in calipers with complex internal passages or bleeder valves that aren’t located at the highest point in the caliper. Once you’ve isolated which circuit and which wheel contains air, you can focus your bleeding efforts there, possibly removing the caliper and repositioning it to allow air to escape, or using more aggressive bleeding techniques like pressure bleeding or vacuum bleeding.
How Do You Fix a Soft Brake Pedal?
Fixing a soft brake pedal requires implementing the appropriate repair for the specific cause you’ve diagnosed: bleeding the brakes to remove air, replacing the master cylinder if it has failed, repairing brake fluid leaks, or flushing contaminated fluid from the system. Each repair addresses a different failure mode, and correctly matching the repair to your diagnosed problem ensures you fix the issue rather than wasting time and money on unnecessary work. The repair cost estimate for common causes ranges from under $100 for DIY brake bleeding to $800+ for professional master cylinder replacement with brake line repairs on severely corroded systems.
Below are detailed procedures for each major repair, including How to bleed brakes to restore pedal firmness, when and how to replace a failed master cylinder, methods for fixing various types of leaks, and the procedure for completely flushing contaminated brake fluid. Each section provides enough detail for confident DIY repair while also explaining what to expect if you choose professional brake service.
How to Bleed Your Brakes to Remove Air
Bleeding your brakes removes trapped air from the hydraulic system by forcing fresh brake fluid through the brake lines until all air bubbles are expelled through the bleeder valves. This procedure is the primary solution when air in brake lines is your diagnosed problem, and it’s also necessary after replacing any brake component that required opening the hydraulic system. Two main bleeding methods exist—the traditional two-person method and one-person methods using vacuum or pressure bleeding tools—each with advantages depending on your tools and help availability.
The two-person traditional bleeding method remains the most reliable and commonly used technique. You’ll need a helper, a clear plastic tube that fits snugly over the bleeder valve, a container to catch old brake fluid, a box-end wrench that fits the bleeder valves (typically 8mm, 10mm, or 3/8″), and fresh brake fluid matching your vehicle’s specification. Start by topping off the brake fluid reservoir to the MAX line—critical because running the reservoir dry during bleeding introduces more air into the system.
Begin bleeding at the wheel farthest from the master cylinder, following the sequence: right rear, left rear, right front, left front (though some vehicles specify different sequences—consult your service manual). At the first wheel, clean around the bleeder valve to prevent dirt from entering when you open it. Attach the clear plastic tube to the bleeder valve, with the other end submerged in brake fluid in your catch container. This submerged end prevents air from being sucked back into the system.

Have your helper sit in the driver’s seat. The procedure follows a specific rhythm: Helper presses the brake pedal slowly and firmly to the floor and holds it there. They announce “down” when the pedal reaches the floor. You open the bleeder valve approximately 1/2 to 3/4 turn while the pedal is held down. Brake fluid and air bubbles will flow through the tube into your catch container. Watch for bubbles—they appear as froth or distinct bubbles in the fluid stream. When fluid stops flowing and the pedal is at the floor, close the bleeder valve snugly. Only after you announce “closed” should your helper release the pedal to the up position.
Repeat this cycle 5-10 times at each wheel, or until you see no more air bubbles in the fluid stream—only clear, bubble-free fluid flows out. Critical: Never let the pedal up while the bleeder is open, as this sucks air back into the system. Always close the bleeder before releasing the pedal. Check and refill the reservoir frequently—every 3-4 pedal pumps—to prevent it from running dry.
After bleeding all four wheels in sequence, check the brake pedal feel. It should be firm and high, with no sponginess. If the pedal remains soft, repeat the bleeding process, paying extra attention to the wheel(s) where you saw the most air bubbles. Sometimes stubborn air pockets require multiple bleeding cycles to fully purge.
For vehicles equipped with ABS, you may need to activate the ABS pump and valves using a scan tool to bleed trapped air from the ABS modulator. Air can become trapped in the ABS hydraulic unit’s internal valves and accumulator, where it won’t purge through normal bleeding. Professional-grade scan tools include an ABS bleeding function that cycles the ABS pump and opens internal valves, allowing this trapped air to escape. If you’ve bled all four wheels thoroughly but pedal remains soft, ABS module air trapping may be your issue—this typically requires professional service with appropriate scan tools.
One-person bleeding methods offer alternatives when you don’t have a helper. Vacuum bleeding uses a hand-operated vacuum pump attached to the bleeder valve to pull fluid through the system. These kits (available at auto parts stores for $20-50) work well, though they require frequent reservoir monitoring since the vacuum pull can drain the reservoir quickly. Pressure bleeding uses a pressurized tank connected to the brake fluid reservoir that forces fluid through the system—extremely effective but requires a more expensive pressure bleeder tool ($100-300). Gravity bleeding—simply opening bleeder valves and letting gravity drain fluid through—works but takes considerable time and may not fully purge all air.
Regardless of method, always bench bleed a new master cylinder before installation. This crucial step removes air from the master cylinder’s internal passages before it’s installed on the vehicle. Clamp the master cylinder in a vise (protecting it with soft jaws or wood blocks), fill both fluid chambers, and use wooden dowels or bleed fittings to repeatedly push the pistons while watching for bubbles. Continue until no air bubbles emerge from the outlet ports. Installing a master cylinder that hasn’t been bench bled almost guarantees soft pedal and extensive bleeding difficulties.
When to Replace the Master Cylinder
Replace the master cylinder when you’ve diagnosed internal seal failure through the pedal sink test, when you see brake fluid leaking from the master cylinder body, or when the cylinder shows physical damage or severe corrosion. Master cylinder replacement is one of the more expensive brake repairs ($300-600 professionally, $100-250 DIY for parts), but it’s absolutely necessary when the cylinder fails—no amount of bleeding, adjustment, or fluid changes will fix worn internal seals or a damaged cylinder bore.
The clearest replacement indicator is the pedal sink test result. With the engine off and vacuum depleted from several pedal pumps, press and hold firm, steady pressure on the brake pedal. If the pedal slowly sinks toward the floor over 15-30 seconds despite no visible external leaks and adequate fluid level, the master cylinder’s internal seals are bypassing. This internal leak allows pressurized fluid to flow backward past the piston seals instead of being held in the brake lines, making it impossible to maintain hydraulic pressure.
External leaks from the master cylinder appear as brake fluid around the cylinder body, particularly at the rear seal where it mounts to the brake booster, at the reservoir connection, or at the brake line fittings. Any external master cylinder leak requires replacement—these seals cannot be reliably repaired in most modern master cylinders. Some older vehicles used rebuildable master cylinders with replaceable seal kits, but most modern cylinders are sealed units that must be replaced as an assembly.
Physical damage such as a corroded or scored cylinder bore also mandates replacement. If you’ve removed the master cylinder for inspection (or during other repairs) and notice scoring, pitting, or corrosion inside the bore where the piston seals ride, the cylinder must be replaced. These surface imperfections tear the seals and prevent proper sealing, causing internal bypass and soft pedal even with new seals.
The replacement procedure requires careful attention to detail. Start by using a turkey baster or brake fluid syringe to remove as much old fluid from the reservoir as possible—this minimizes fluid loss and mess when disconnecting brake lines. Disconnect the brake lines from the master cylinder using a line wrench (not a standard open-end wrench, which will round off the soft brass fittings). Expect some brake fluid spillage—have rags ready and protect painted surfaces, as brake fluid damages paint. Remove the two mounting nuts that secure the master cylinder to the brake booster, then remove the cylinder.
Before installing the new master cylinder, critically important: bench bleed it. This removes all air from the new cylinder’s internal passages. Use the bench bleeding kit typically included with the new cylinder, or fabricate your own using short pieces of brake line that thread into the cylinder’s outlet ports and loop back into the reservoir. Mount the cylinder securely, fill both chambers with fresh brake fluid, and use a wooden dowel or large screwdriver to slowly press the pistons fully into the bore, then release. Repeat this process 15-20 times, watching the fluid in the reservoir for bubbles. Continue until no bubbles emerge—this indicates all internal air has been purged.
Install the bench-bled master cylinder onto the brake booster, being careful not to damage the pushrod seal. Thread the brake lines into the cylinder ports by hand first to avoid cross-threading, then tighten with a line wrench to the specified torque (typically 10-15 ft-lbs—don’t overtighten or you’ll strip the soft brass threads). Fill the reservoir to the MAX line with fresh brake fluid.
Now bleed the entire brake system starting from the wheel farthest from the master cylinder, following the procedure described in the previous section. Even though you bench-bled the master cylinder, some air will have entered the brake lines when you disconnected them, so thorough system bleeding is necessary. After bleeding, verify firm pedal feel and check all connections for leaks with the pedal held under pressure.
If you’re replacing the master cylinder because you damaged the internal seals by pushing the pedal to the floor during bleeding or when trying to pump up a soft pedal, learn from this mistake. Preventing soft pedal after brake service requires proper technique—never push the brake pedal all the way to the floor during bleeding or any other procedure. The master cylinder piston normally travels only the middle portion of the bore during regular braking. The unused portions at the extreme ends of the bore accumulate corrosion and deposits over years. Forcing the piston into these corroded areas with full-stroke pedal pumps tears the seals on the rough surface, causing the very failure you’re trying to diagnose or fix. Always use gentle, partial pedal strokes during bleeding and diagnostic procedures.
Fixing Brake Fluid Leaks
Fixing brake fluid leaks requires identifying the exact leak location, then implementing the appropriate repair: tightening loose fittings, replacing damaged brake lines or hoses, rebuilding or replacing leaking calipers or wheel cylinders, or addressing master cylinder leaks through replacement. Each leak source demands a different repair approach, and thoroughness matters—a brake system is only as strong as its weakest point, so any remaining leaks will continue causing soft pedal even after you’ve fixed others.
For leaks at threaded fittings and connections, start with the simplest fix—proper tightening. Brake line fittings use specialized flare fittings that seal metal-to-metal at the flare. These connections should be snug but not overtightened. Use the correct tool—a line wrench (also called a flare nut wrench) rather than a standard open-end wrench. Line wrenches surround five of the six sides of the nut, providing better grip and preventing the soft brass fittings from rounding off. Tighten fitting nuts to approximately 10-15 ft-lbs of torque—firm but not excessively tight. If a fitting continues leaking after proper tightening, inspect the flare. Damaged, cracked, or improperly formed flares must be cut off and re-flared, or the entire line section replaced.
Bleeder valve leaks usually indicate damaged valve seats or cross-threaded valves from improper installation or overtightening. Replace leaking bleeder valves—they’re inexpensive and readily available. Clean the threads in the caliper or wheel cylinder with a thread chaser before installing the new bleeder. Apply a tiny amount of anti-seize compound to the threads (not Teflon tape, which can contaminate the brake fluid) and tighten snugly. Bleeder valves should be snug when closed but not gorilla-tight—they’re not structural components and overtightening can crack the caliper or wheel cylinder body.
Brake line replacement addresses leaks from corroded or damaged hard lines. For short damaged sections, you can cut out the bad portion and splice in new line using double-flare unions and short sections of pre-flared brake line. For more extensive corrosion, replace the entire line run from the master cylinder or ABS module to the affected wheel. Pre-bent brake line kits are available for many vehicles, featuring the correct bends, fittings, and length. For custom routing or vehicles without pre-bent kits, purchase bulk brake line tubing (typically 3/16″ or 1/4″ steel or nickel-copper alloy) and fabricate the line yourself using a double-flare tool.
Proper flaring technique is absolutely critical for safe brake lines. Brake systems use double flares (also called inverted flares or SAE flares) that fold the tubing end back on itself, creating a strong, leak-resistant seal. Single flares are insufficient and dangerous for brake systems—they will fail under the high pressures generated during braking. Use a quality double-flare tool and follow the manufacturer’s instructions precisely. The flare must be perfect—any cracks, splits, or irregularities mean cutting off that end and re-flaring. Test your work by connecting the fitting and checking for leaks under pressure before finalizing the installation.
Brake hose replacement fixes leaks from cracked, damaged, or deteriorated flexible hoses. Always replace brake hoses in pairs (both fronts or both rears) to ensure even performance, even if only one is visibly leaking. Replacement involves disconnecting the hose from the hard line (usually with a line wrench on a threaded fitting) and removing the hose from its mounting bracket clips, then unbolting it from the caliper or wheel cylinder (typically using a banjo bolt with copper sealing washers). Install the new hose in reverse order, ensuring it’s not twisted or kinked. The hose should hang in a natural curve without tension or sharp bends. Use new copper sealing washers at the banjo bolt connection—reusing old washers often results in leaks. Torque the banjo bolt to specification (typically 18-25 ft-lbs depending on vehicle).
Caliper and wheel cylinder leaks require rebuilding or replacement. Rebuilding involves disassembling the caliper or wheel cylinder, inspecting the bore for corrosion or scoring, installing new seals and boots from a rebuild kit, and reassembling. This cost-effective approach works when the bore is in good condition—smooth and free of pitting or corrosion. If the bore shows any scoring, pitting, or corrosion, replacement is necessary. Most modern calipers are relatively inexpensive to replace ($50-150 per caliper for most vehicles) and replacement is often more cost-effective than rebuilding when you factor in time and the risk of rebuild failure. Wheel cylinders for drum brakes are inexpensive ($15-40 each) and usually warrant replacement rather than rebuilding.
After repairing any leak, bleed the affected brake circuit (at minimum) or the entire brake system (recommended) to remove any air that entered during the repair. Top off the brake fluid reservoir and verify firm pedal feel before road testing. During the test drive, make several gentle stops to verify proper brake function, then make a more aggressive stop from higher speed in a safe area to confirm full braking capability. Monitor the repair area for several days afterward to ensure no new leaks develop.
Flushing and Replacing Contaminated Brake Fluid
Flushing and replacing contaminated brake fluid removes moisture-laden, degraded, or debris-contaminated fluid from the entire brake system and replaces it with fresh fluid to restore proper hydraulic function and prevent corrosion. This procedure should be performed every two years as preventive maintenance, or immediately when you diagnose contaminated fluid as contributing to your soft brake pedal issue. Complete brake fluid replacement costs $80-150 at a shop or $20-40 DIY for fluid alone.
The flush procedure is essentially the same as bleeding the brakes, but with the specific goal of replacing all the old fluid rather than just removing air. You’ll need 1-2 quarts of fresh brake fluid matching your vehicle’s specification (check the reservoir cap or owner’s manual—typically DOT 3, DOT 4, or DOT 5.1 for most vehicles). Never use DOT 5 silicone fluid unless specifically required, as it’s incompatible with the glycol-based fluids used in most vehicles and will damage seals and create gel-like contamination if mixed.
Start by removing as much old fluid from the master cylinder reservoir as possible using a turkey baster or fluid syringe. Dispose of old brake fluid properly—it’s toxic and should never be poured down drains or onto the ground. Most auto parts stores and service stations accept used brake fluid for recycling. Refill the reservoir with fresh fluid to the MAX line.
Follow the same bleeding sequence described earlier: right rear, left rear, right front, left front (or your vehicle’s specified sequence). At each wheel, attach a clear tube to the bleeder valve with the other end submerged in a catch container. Have your helper pump the brake pedal while you open and close the bleeder valve, watching the fluid color in the clear tube. Initially, dark, contaminated fluid will flow out. Continue bleeding at each wheel until you see fresh, clean, light-colored fluid flowing through the tube with no trace of the dark old fluid.
This typically requires bleeding a significant volume of fluid through each wheel—perhaps 8-12 oz per wheel or more depending on how contaminated the system was and how long the brake lines are. Monitor the reservoir constantly and refill with fresh fluid frequently—never let it run dry or you’ll introduce air into the system. The process can consume an entire quart or more of fresh fluid for a complete flush on vehicles with long brake lines or ABS systems.
For severely contaminated systems or when flushing to remove incorrect fluid type, multiple flush cycles may be necessary. Complete one full flush cycle at all four wheels, then drive the vehicle briefly (100-200 feet in a safe area) to circulate fluid through the ABS modulator and any internal passages that don’t flow during stationary bleeding. Return and perform a second flush cycle. This two-cycle approach ensures contamination in hidden pockets gets flushed out.
After flushing, verify firm brake pedal feel and perform a thorough test drive with progressive braking intensity. Fresh brake fluid should provide noticeably improved pedal feel compared to moisture-contaminated or degraded fluid—the pedal should feel firm, responsive, and consistent through multiple brake applications.
Document the flush date on a service sticker under the hood or in your maintenance records. This helps you stay on schedule for the next flush in two years. Regular brake fluid maintenance prevents the moisture accumulation and contamination that contribute to soft brake pedal, corrosion, and expensive component failures.
How Do You Prevent a Soft Brake Pedal from Happening Again?
Preventing soft brake pedal recurrence requires three key maintenance practices: replacing brake fluid every two years, performing annual brake system inspections, and using proper bleeding techniques during any brake service. These preventive measures address the root causes before they develop into soft pedal problems—moisture contamination, component wear, and service-induced air introduction. Following this maintenance schedule costs far less than repeatedly diagnosing and repairing soft pedal issues, and it ensures your brakes remain at peak safety and performance.
Beyond scheduled maintenance, understanding which practices prevent problems helps you work with your mechanic or perform DIY brake work correctly. Below, we’ll cover the specific maintenance intervals and inspection procedures that keep your hydraulic brake system functioning properly for years.
How Often Should You Replace Brake Fluid?
Replace brake fluid every two years or 24,000 miles regardless of mileage or brake system condition, as moisture absorption begins immediately and accelerates brake fluid deterioration even without visible symptoms. This preventive replacement interval is recommended by most vehicle manufacturers and brake system experts, though many car owners neglect this service because it’s not as obvious as oil changes or tire rotations. Unlike engine oil that visibly darkens and breaks down, brake fluid degradation happens invisibly inside the sealed hydraulic system, making time-based replacement critical for preventing problems before they occur.
The two-year interval is specifically chosen based on brake fluid’s hygroscopic nature—the rate at which glycol-based DOT 3, 4, and 5.1 fluids absorb atmospheric moisture. Even in sealed brake systems, moisture infiltrates through microscopic pores in rubber brake hoses, past reservoir cap seals, and through the natural permeability of system components. Research shows that DOT 3 brake fluid typically absorbs approximately 2% moisture by volume in the first year of service and 3% by the second year, reaching levels where boiling point has dropped dangerously low and corrosion accelerates significantly.
According to a study by the Society of Automotive Engineers published in their technical paper series, brake fluid moisture content averaging 3-4% reduces the boiling point from approximately 401°F (205°C) when dry to around 284°F (140°C) when wet, making brake fade and vapor lock significantly more likely during heavy braking. This same moisture promotes internal corrosion of steel brake lines, aluminum ABS components, and cast iron wheel cylinders, creating the rust and debris that contaminate the fluid and damage seals.

Some manufacturers specify longer intervals—Honda and Toyota, for example, sometimes list brake fluid replacement at 3 years or 36,000 miles. However, brake system engineers generally agree that two years represents the optimal balance between preventing moisture damage and avoiding excessive maintenance costs. If you live in high-humidity climates, drive in mountainous terrain with extensive brake use, or regularly tow heavy loads, consider annual brake fluid replacement for maximum protection.
You can test your brake fluid’s condition between scheduled replacements using inexpensive brake fluid test strips (available at auto parts stores for $5-10). These strips change color based on moisture content or copper content (copper from brake line corrosion dissolves in the fluid as it degrades). If test strips indicate high moisture or copper levels before your two-year interval, perform an early fluid flush. Consider this testing particularly important for vehicles that see infrequent use—moisture absorption continues even when the car sits unused, so a vehicle driven only a few thousand miles per year still needs two-year fluid replacement.
When having brake fluid replaced, ensure the service includes a complete flush of the entire system, not just replacing the reservoir fluid. Some quick-lube shops offer brake fluid “exchange” services that only replace fluid in the reservoir and master cylinder without flushing the lines and calipers—this leaves the majority of the contaminated fluid in the system and provides minimal benefit. A proper flush replaces fluid at all four wheels until fresh, clean fluid flows from each bleeder valve, as described in the flushing procedure section above.
What Maintenance Checks Prevent Brake Problems?
Annual brake system inspections prevent most brake problems by identifying worn components, developing leaks, and degraded fluid before they cause soft brake pedal or brake failure. These inspections should examine brake pad thickness, rotor condition, brake line and hose integrity, caliper and wheel cylinder function, brake fluid level and condition, and overall system integrity. Performing these checks yourself during tire rotations or oil changes, or having them done during annual service, catches problems early when they’re easier and less expensive to fix.
Start with brake pad inspection at least annually or every 10,000 miles. Most vehicles allow visual pad inspection through the wheel spokes without removing the wheel—look through the spokes at the brake caliper and measure the visible friction material thickness. Pads typically start with 10-12mm of friction material when new. Replace them when they reach 3mm or less remaining thickness. If you can’t see the pads clearly through the wheels, remove each wheel for direct inspection. While the wheels are off, inspect the rotors for scoring, heat cracks, or excessive rust, and measure rotor thickness with a micrometer if you have concerns.
Brake line and hose inspection should examine all visible portions of steel brake lines for rust, corrosion, or damage. Look for flaking rust, crusty buildup, or any wet spots indicating leaks. Check where lines mount to the body or frame—mounting clips can trap moisture and accelerate corrosion. Inspect flexible brake hoses for cracks (particularly at the crimped end fittings), bulges, softness, or any signs of deterioration. Replace any hose showing these symptoms, and consider replacing all brake hoses if they’re more than 10 years old regardless of appearance—rubber degrades with time even without visible symptoms.
Check brake fluid level and condition at every oil change or at least every few months. The fluid level should remain between MIN and MAX marks—a slow, gradual decline is normal as brake pads wear, but rapid drops indicate leaks. Open the reservoir cap (clean the area first to prevent dirt entry) and examine the fluid color and clarity. Fresh fluid appears clear to light amber; dark brown or black fluid needs replacement. Use brake fluid test strips periodically to check moisture content and copper levels—high readings mean flush the system even if the fluid looks acceptable.
Caliper and wheel cylinder inspection during brake service checks for proper piston movement, seal integrity, and absence of leaks. When replacing brake pads, always inspect the caliper slide pins to ensure they move freely—seized slide pins cause uneven braking and accelerated wear. Clean and lubricate slide pins with appropriate high-temperature brake grease during every pad replacement. Check dust boots on caliper pistons and wheel cylinders for cracks or tears—damaged boots allow contaminants in and moisture out, leading to piston corrosion and seal failure.
Listen and feel for brake problems during everyday driving. Squealing or grinding noises indicate worn brake pads (squealing from the wear indicator tab, grinding from metal-to-metal contact after the pads are worn through). Pulsation during braking suggests warped rotors. Pulling to one side during braking indicates uneven braking force from seized calipers, contaminated pads, or brake system imbalance. Address these symptoms promptly before they develop into more serious problems.
Create a maintenance log documenting brake service history—when pads were replaced, when fluid was flushed, when new rotors or calipers were installed. This history helps you stay on schedule for preventive maintenance and provides valuable information when diagnosing problems. Many modern vehicles have this information logged in the vehicle’s computer system, but keeping your own paper or digital record ensures continuity across service providers and ownership changes.
Consider upgrading to higher-performance brake components during regular replacement cycles if appropriate for your driving needs. Stainless steel braided brake lines eliminate the swelling problem of rubber hoses and provide firmer pedal feel. Premium brake pads designed for your specific driving style (daily commuting vs. spirited performance driving) can improve stopping performance and pad life. Higher-quality brake fluid (DOT 4 vs. DOT 3, or DOT 5.1 for even higher boiling points) provides better moisture resistance and performance in demanding applications.
What Are Common Mistakes That Cause Soft Brakes After Repair?
Common mistakes causing soft brakes after repair include incomplete bleeding that leaves air trapped in the system, failing to bench bleed the master cylinder before installation, using incorrect bleeding sequence, and damaging master cylinder seals by pushing the pedal to the floor during bleeding. These preventable errors frustrate DIY mechanics and even occasionally plague professional technicians who rush through brake service without proper attention to detail. Understanding these mistakes and how to avoid them ensures your brake repairs succeed the first time rather than requiring repeated attempts to achieve firm pedal feel.
Let’s examine each common post-repair problem, why it occurs, and how to prevent it. These insights transform brake service from a frustrating guessing game into a systematic process that delivers reliable results.
Why Do Brakes Feel Soft After Bleeding?
Brakes feel soft after bleeding primarily because air remains trapped in the system, typically in the ABS hydraulic unit, at high points within calipers, or in brake lines with unusual routing that prevents air from escaping through bleeder valves. Even when you’ve followed standard bleeding procedures and seen clear, bubble-free fluid flowing from all four bleeders, stubborn air pockets can hide in locations that don’t purge through normal bleeding. This leftover air continues causing the compressible, spongy pedal feel despite your bleeding efforts.
ABS module air entrapment is the most common cause of persistent soft pedal after bleeding. Modern ABS systems contain complex hydraulic control units with multiple internal valves, accumulators, and passages. During normal bleeding, these internal passages don’t flow fluid—the ABS valves remain closed and the pump doesn’t run. Air trapped inside the ABS module stays there, unaffected by conventional bleeding at the wheels. This air only escapes when you activate the ABS pump and open the internal valves using a scan tool’s ABS bleeding function.
Professional shops use scan tools that communicate with the ABS module, commanding it to cycle the pump and open all internal valves while bleeding proceeds at the wheels. This forces trapped air out of the ABS unit and through the brake lines to the bleeder valves. Without this ABS activation, air remains locked inside the module, causing soft pedal that persists despite thorough bleeding. If you’ve bled your brakes multiple times with proper technique but pedal remains soft, ABS-trapped air is the likely culprit, and professional service with scan tool access may be necessary.

Caliper air pockets occur when bleeder valves aren’t located at the absolute highest point in the caliper. Some caliper designs place the bleeder valve on the inboard side or at a location where internal passages create pockets above the bleeder. Air rises to these high points and won’t flow downward to the bleeder during normal bleeding. The solution involves removing the caliper, repositioning it so the bleeder valve is at the highest point, then bleeding. Sometimes simply rotating the caliper 180 degrees while bleeding, or gently tapping the caliper with a rubber mallet to dislodge air bubbles, can help stubborn air escape.
Brake line routing can create high points and loops where air accumulates. Lines running over frame rails, suspension components, or up and down around obstacles can trap air at peaks in the line. Gravity and normal bleeding can’t purge air from these locations because the air would have to flow downhill to reach the bleeder. Sometimes loosening a brake line fitting at a high point and allowing air to escape there, then retightening and continuing normal bleeding, resolves the issue. In extreme cases, temporarily removing and repositioning sections of brake line to eliminate high points may be necessary.
Insufficient bleeding volume is another common mistake. Some mechanics bleed until they see clear fluid with no bubbles, thinking that’s sufficient. However, air can be dispersed as microscopic bubbles throughout the fluid, not visible as distinct large bubbles. Bleeding at least 4-6 oz of fluid through each wheel, or until you’ve completely replaced the fluid in that brake circuit with fresh fluid, ensures all air is purged. More is better—err on the side of bleeding too much rather than too little.
Can You Damage Your Master Cylinder While Bleeding Brakes?
Yes, you can damage your master cylinder while bleeding brakes by pushing the brake pedal all the way to the floor, which forces the master cylinder piston into the unused, corroded portion of the cylinder bore and tears the seals on the rough surface. This damage occurs because the master cylinder piston normally travels only the middle portion of the bore during everyday braking—typically the middle 1-2 inches of a 3-4 inch bore. The unused portions at the extreme ends of the piston travel accumulate corrosion, rust, and deposits over years of service since the piston never contacts these areas during normal operation.
When you push the pedal all the way to the floor during bleeding—whether pumping vigorously to build pressure or holding the pedal down while someone opens the bleeder—the piston travels into these corroded end zones. The sharp edges of corrosion and rust pits act like tiny knives, cutting and tearing the rubber piston seals as they’re forced across the damaged surface. Once torn, the seals allow pressurized brake fluid to bypass the piston, flowing backward instead of being forced into the brake lines. The result is the exact soft, sinking brake pedal symptom you were trying to fix through bleeding.
This problem particularly affects older vehicles (10+ years) and vehicles that have been sitting for extended periods, as these have had more time to develop bore corrosion. The irony is cruel—you attempt to fix soft brakes by bleeding them, damage the master cylinder seals through improper technique, and create soft brakes that are now worse than before. Many mechanics have learned this lesson the hard way after “helping” a customer by bleeding their brakes, only to create a master cylinder failure that wasn’t present before the service.
Preventing this damage requires disciplined bleeding technique. Never push the brake pedal more than halfway to the floor during bleeding. Use gentle, short-stroke pedal pumps that keep the piston in the middle of its travel range where the bore is polished and smooth from regular use. If you need to build pressure during bleeding, use multiple gentle partial-stroke pumps rather than one hard full-stroke push. This technique protects the master cylinder seals while still effectively bleeding the brakes.
Some professional technicians use a pedal stop or block of wood positioned to prevent full pedal travel during bleeding. This mechanical limiting device ensures the helper can’t accidentally push the pedal too far even if they forget the restriction. For one-person vacuum or pressure bleeding methods, this concern doesn’t apply since the pedal isn’t being operated—another advantage of these bleeding approaches beyond not requiring a helper.
If you’ve already damaged the master cylinder through full-stroke bleeding, the seals are torn and the cylinder must be replaced—there’s no repair for this damage. Consider it an expensive lesson in proper bleeding technique. The replacement provides an opportunity to install a new, properly functioning master cylinder, but always bench bleed it before installation and use correct pedal travel discipline during the subsequent system bleeding.
Do You Need Special Equipment to Bleed ABS Brakes?
Yes, bleeding ABS brakes properly requires a scan tool with ABS bleeding functionality to activate the ABS pump and cycle internal valves, which releases air trapped in the ABS hydraulic unit that won’t purge through conventional wheel bleeding. While you can bleed the brake lines and calipers using standard methods, air trapped inside the ABS module’s complex internal passages remains there during conventional bleeding because the ABS valves stay closed and the pump doesn’t run. This trapped air causes persistent soft brake pedal despite thorough bleeding at all four wheels.
Professional-grade scan tools costing $500-$5,000+ include ABS service functions that connect to the vehicle’s diagnostic port and communicate with the ABS control module. These tools command the ABS system into a special service mode where it cycles the pump, opens all internal valves, and purges air from the hydraulic unit. The scan tool typically instructs you to perform specific bleeding sequences—bleeding certain wheels while the tool runs the ABS pump, then bleeding other wheels with valves in different positions—to completely purge air from every passage in the ABS system.
Some vehicles have manual ABS bleeding procedures that don’t require a scan tool. These typically involve specific sequences of brake pedal pumping, ignition key cycling, or jumping diagnostic connectors to activate the ABS pump. Consult your vehicle’s factory service manual to determine if such a procedure exists for your make and model. However, these manual procedures are less common in newer vehicles, which increasingly require scan tool access for ABS bleeding.

For DIY mechanics without scan tool access, several options exist. Many auto parts stores offer free scan tool use to customers who purchase parts there—inquire whether their tools include ABS bleeding capability. Some independent repair shops will perform just the ABS bleeding function for a nominal fee ($20-40) if you’ve already bled the rest of the system yourself. Purchasing an entry-level DIY scan tool with ABS functions ($150-300) makes sense if you plan to do your own brake work long-term, as it pays for itself after just a few uses compared to professional service costs.
Alternatively, you can skip the ABS bleeding on some vehicles without consequences, particularly if your brakes feel mostly firm and you’ve never had ABS activate (brake lines contain all the fluid, ABS module is empty except during ABS activation). However, for vehicles where ABS has recently activated—hard braking on slippery surfaces, emergency stops—or where you’ve experienced soft pedal symptoms, ABS bleeding becomes necessary to fully restore firm pedal feel.
Understanding when ABS bleeding is truly required versus when it’s optional helps you make cost-effective service decisions. If you’ve replaced a master cylinder, brake lines, or any component that fully opened the hydraulic system, ABS bleeding is strongly recommended. If you’re simply performing preventive fluid flushing or replaced pads without opening the hydraulic system, ABS bleeding might be unnecessary. If in doubt, bleed conventionally first and assess pedal feel—if it’s soft despite thorough bleeding, ABS-trapped air is likely present and scan tool access becomes necessary.
What’s the Correct Brake Bleeding Order for Your Vehicle?
The correct brake bleeding order for most vehicles is right rear, left rear, right front, left front—starting from the wheel farthest from the master cylinder and progressing toward the closest wheel. This sequence ensures air moves progressively toward the bleeder valves rather than potentially being pushed deeper into the system. The principle behind this sequence is simple: start where air has the farthest to travel (longest brake line with most volume where air can hide), and work toward the shortest brake line (least volume, easiest to purge).
However, some vehicles use different bleeding sequences based on their specific hydraulic system design. Vehicles with diagonal split brake systems—where one master cylinder circuit operates the right front and left rear, while the other circuit operates the left front and right rear—may specify a different sequence. Some European vehicles and certain performance cars use this diagonal split for safety redundancy. For these vehicles, the correct sequence might be right rear, left front, left rear, right front—bleeding diagonally across the vehicle.
Vehicles with combination hydraulic systems where the master cylinder has different bore sizes or configurations may specify starting with certain wheels based on which circuit is more prone to air entrapment. Some trucks and SUVs with rear load-sensing proportioning valves have unique bleeding sequences that account for these valves’ positions in the hydraulic circuit. Always consult your vehicle’s factory service manual or a reliable repair database (AllData, Mitchell, or manufacturer-specific information) to verify the correct sequence for your specific year, make, and model.
The consequences of using incorrect bleeding sequence range from minor inefficiency to significant air-trapping problems. At minimum, wrong sequence means you might need to bleed multiple times to fully purge air. At worst, incorrect sequence can push air deeper into areas where it becomes harder to remove, prolonging the bleeding process and potentially requiring ABS scan tool intervention to clear stubborn pockets.
A simple memory device for standard sequence: “Farthest First” means starting at the wheel physically farthest from the master cylinder (typically right rear) and working toward closest (typically left front). For diagonal systems: “Cross Country” reminds you to bleed diagonally across the vehicle. When in doubt and unable to access the correct specification, using the standard farthest-first sequence works adequately for most vehicles, even if not technically optimal.
Document the bleeding sequence you used along with the volume of fluid bled from each wheel. This record helps if you need to repeat bleeding or troubleshoot persistent soft pedal—you’ll know exactly what procedure you followed and can identify whether sequence was the problem. Professional technicians typically note bleeding sequence, fluid amount per wheel, and final pedal feel in service records for future reference.
For comprehensive brake service including component replacement and complete fluid flushing, performing the bleeding sequence twice—once to purge initial air and contaminated fluid, then driving briefly and bleeding a second time—ensures the most complete air removal and fluid replacement. The brief drive circulates fluid through all system passages including those that don’t flow during stationary bleeding, allowing any remaining air to migrate to locations where it can be purged during the second bleeding cycle.
Maintaining firm brake pedal feel requires understanding the hydraulic system’s complexities and committing to regular maintenance. The eight common causes of soft brake pedal—air in lines, fluid leaks, master cylinder failure, contaminated fluid, worn hoses, corroded lines, worn components, and booster issues—each have distinctive symptoms that guide diagnosis. By systematically testing your brakes, identifying the specific cause, and implementing the correct repair with proper technique, you can restore firm, responsive braking and ensure your safety on the road.
Remember that brake systems deserve respect and careful attention. These components stand between you and accidents every time you drive, making preventive maintenance and prompt repair of any soft pedal condition non-negotiable. Whether you perform your own brake service or work with a trusted professional, following the procedures and maintenance schedules outlined in this guide keeps your brakes operating at peak performance for years to come. For more automotive diagnostic guides and repair information, visit carsymp.com for comprehensive resources on maintaining your vehicle’s safety systems.


