


Replacing a timing belt is one of the most consequential maintenance jobs on any car with a rubber-belt-driven engine — and the gap between doing it yourself and paying a shop is substantial. On average, a DIY timing belt replacement costs between $100 and $350 in parts alone, while a professional shop charges anywhere from $500 to over $2,000 for the same job when labor is included. That means a capable home mechanic can realistically save $300 to $900 on a single service interval — real money, especially on vehicles that require replacement every 60,000 to 105,000 miles.
Whether that savings is actually achievable depends heavily on the individual car owner’s skill level, the engine design in their specific vehicle, and whether they have access to the right tools. Not every timing belt job is equal: a straightforward inline-four engine might take an experienced DIYer a single afternoon, while a transverse-mounted V6 can demand a full weekend and several hundred dollars in specialty tools. Understanding these variables before making a decision is the difference between a successful repair and a very expensive mistake.
Beyond the basic cost comparison, smart car owners also need to think about scope — specifically, whether to replace the water pump, tensioner, and idler pulleys at the same time. Bundling these components into a single service eliminates the risk of paying for the same labor twice in the near future, and it changes the total cost calculation for both the DIY path and the shop path in ways that aren’t immediately obvious from a single quote.
The long-term picture is equally important. A shop replacement comes with a labor warranty and zero personal risk; a DIY job offers significant savings but zero margin for error on interference engines, where a single misaligned tooth can turn a routine maintenance item into catastrophic engine damage worth thousands of dollars. To better understand exactly where the money goes — and where it doesn’t — the sections below break down every layer of this cost comparison in detail.
What Is the Real Cost Difference Between DIY and Shop Timing Belt Replacement?
DIY timing belt replacement wins on upfront cost, with parts-only totals of $100–$350 versus shop totals of $500–$2,000+, because labor — not the belt itself — accounts for 60–75% of what a professional shop charges.
Specifically, the labor component is what makes timing belt replacement cost so much higher at a shop than the raw materials would suggest. Shops bill between $80 and $150 per hour depending on location and shop type, and a timing belt job typically requires 3 to 8 hours of labor depending on the vehicle. A car owner doing the same work themselves pays only for parts — and that gap is where the savings live.

The table below summarizes the core cost ranges for each approach, giving car owners a clear baseline before diving into the variables that shift those numbers higher or lower.
| Cost Component | DIY | Shop (Independent) | Shop (Dealer) |
|---|---|---|---|
| Parts / Kit | $100–$350 | $150–$400 (marked up) | $200–$500 (OEM) |
| Labor | $0 | $240–$900 | $400–$1,200 |
| Total Estimate | $100–$350 | $500–$1,200 | $700–$2,000+ |
| Water Pump Add-on | +$40–$90 parts | +$100–$300 total | +$150–$400 total |
How Much Does a Timing Belt Replacement Kit Cost for DIY?
A timing belt kit for DIY use is a category of replacement parts — not a single component — and understanding what the kit includes is critical to pricing the job correctly.
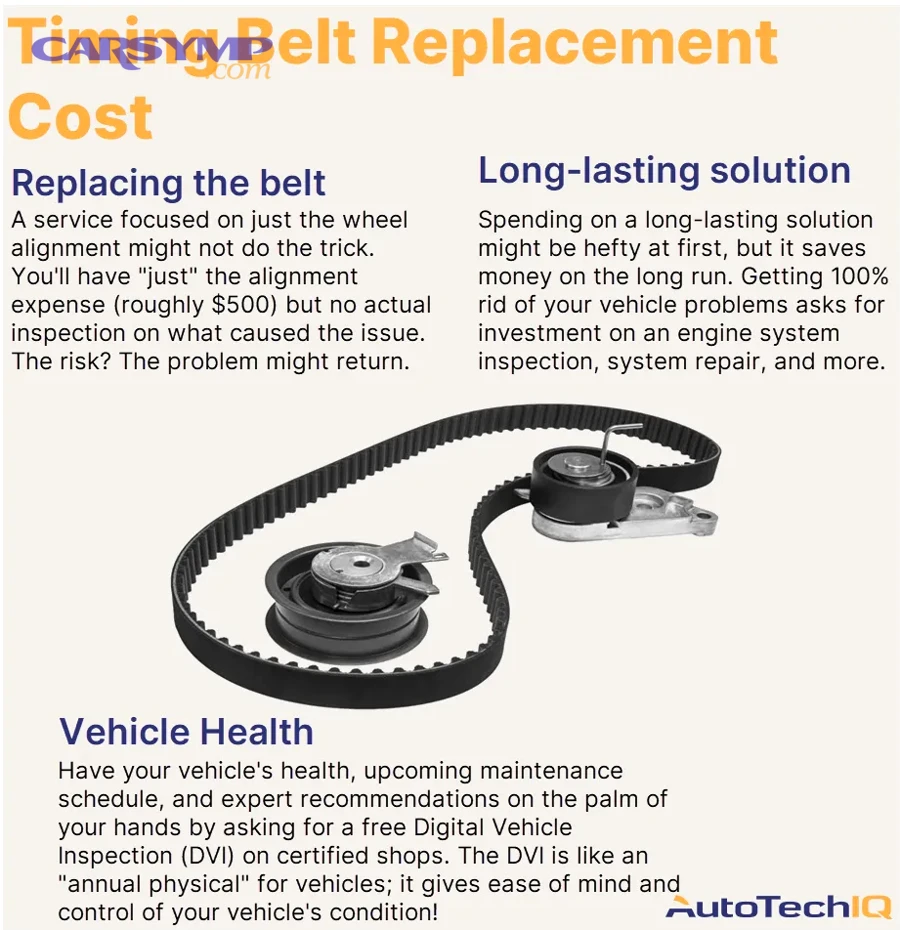
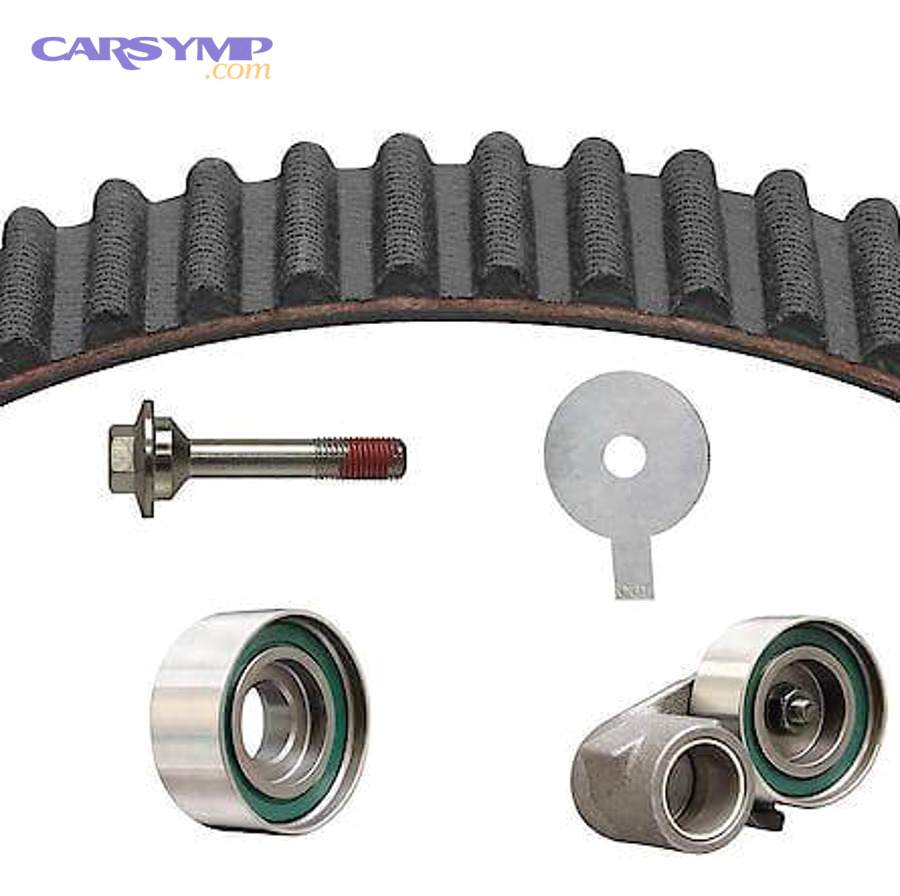
A standard timing belt kit includes the belt itself, two to three idler pulleys, and a tensioner. Higher-tier kits also include camshaft and crankshaft seals, a water pump, and gaskets. Timing belt kit vs belt-only pricing is one of the first decisions a DIYer faces, and the answer is almost always to buy the full kit rather than the belt alone. A belt-only purchase might save $50 to $80 upfront, but skipping the tensioner and pulleys — components with similar wear lifespans — means risking a secondary failure before the next replacement interval, which requires tearing the engine down again anyway.
Kit pricing breaks down into three tiers based on brand and quality:
- Budget aftermarket kits (generic brands): $100–$150. Adequate for low-mileage or older vehicles where longevity is less critical, but quality control varies widely.
- Mid-range kits (Dayco, ACDelco): $180–$280. Reliable performance for most daily drivers. These brands are commonly used by independent shops as well.
- OEM-equivalent kits (Gates, Aisin, INA, NTN, KOYO): $300–$350+. These are the brands most commonly specified as original equipment by manufacturers and are the safest choice for any vehicle where the engine design leaves no room for belt failure, particularly interference engines.
For Japanese-branded vehicles such as Toyota, Honda, and Subaru, the Aisin brand is frequently the original equipment manufacturer for the timing system. For domestic vehicles from Ford, GM, and Chrysler, Gates and ACDelco are widely regarded as the most reliable aftermarket equivalents.
How Much Do Shops Charge for Timing Belt Replacement?
There are three main categories of shop pricing for timing belt replacement — dealerships, independent specialists, and national chains — and each charges differently based on labor rate structure and parts sourcing.
Dealer pricing typically runs $800 to $2,000 or more and reflects a 20 to 40 percent labor rate premium over independent shops. That premium comes from higher overhead, OEM parts specification, and certified technicians familiar with the specific make and model. Independent shops — particularly those specializing in specific brands — generally price the same job at $500 to $1,200 and often use the same OEM-equivalent parts a dealer would specify. National chains occupy the middle ground but can vary significantly in quality of execution.
Typical service time and downtime at a professional shop is one business day for most vehicles, which is a practical advantage over DIY for car owners who cannot afford to be without transportation for a weekend. A shop’s booked time for the job follows the manufacturer’s flat-rate labor guide: compact inline-four engines are typically billed at 3 to 4 hours, while transverse V6 configurations — which require more disassembly to reach the timing cover — are billed at 5 to 8 hours. That difference in labor hours alone can add $400 to $600 to a shop quote, which is why vehicle selection matters so much when evaluating whether DIY is financially worthwhile.
What Factors Make Shop Pricing Higher or Lower?
Shop pricing for timing belt replacement varies based on five main factors: vehicle make and model, geographic labor rates, bundled component scope, parts quality specification, and shop type — and each one can shift the final invoice by hundreds of dollars.
Vehicle make and model is the largest single variable. An engine with a tight transverse layout requires removing engine mounts, accessory brackets, and sometimes performing a partial engine lift just to access the timing cover. This adds labor hours directly to the bill. By contrast, a longitudinally mounted inline-four with an accessible timing cover is a straightforward job that keeps labor costs near the low end of the range.
Geographic labor rates create significant price variation even for identical vehicles. A shop in a major metropolitan area with a higher cost of living will bill $130 to $150 per hour, while a rural independent shop may charge $75 to $90 per hour for the same quality of work. This means the same timing belt job on the same vehicle can cost $400 more simply based on zip code.
Component bundling is where shop quotes often diverge most dramatically from initial estimates. Shops commonly recommend — and many require as part of their service package — replacing the water pump, camshaft seals, crankshaft seal, and serpentine belt at the same time. While this increases the upfront cost by $150 to $400, it is genuinely sound advice: these components share the same service access point, and replacing them together eliminates future re-labor costs. Taxes, shop supply fees, and waste disposal typically add another 5 to 12 percent on top of the parts-and-labor subtotal.
Can a Car Owner Actually Save Money by Replacing a Timing Belt Themselves?
Yes, a car owner can save money with DIY timing belt replacement — specifically $300 to $900 in avoided labor — but only if they have prior mechanical experience, engine-appropriate tools, and are working on a non-interference or accessible engine where a timing error is recoverable.
However, that “yes” carries a critical qualifier. The financial logic of DIY timing belt work depends entirely on execution quality. On an interference engine — which describes the majority of modern vehicles — a belt installed one tooth off on the camshaft gear does not produce a rough idle. It produces bent valves, broken pistons, and engine repair bills ranging from $3,000 to $6,000 or more. A single catastrophic failure erases a decade of DIY savings instantly. This is not a repair that forgives experimentation.
What Skills and Tools Does a DIY Timing Belt Replacement Require?
DIY timing belt replacement requires three core competencies — engine disassembly experience, precise timing mark alignment, and access to torque specifications — plus a specific set of tools that vary by vehicle platform.
On the skill side, a successful DIYer must be comfortable removing accessory belts, harmonic balancers, timing covers, and in many cases engine mounts and ancillary brackets. They must understand how to read a factory service manual, interpret timing marks on camshaft and crankshaft gears, and apply torque specifications accurately using a calibrated torque wrench. These are not beginner-level tasks. Someone whose prior experience tops out at brake pad replacement is not an appropriate candidate for this job.
The required tool list is specific and non-negotiable:
- Torque wrench (capable of reaching crankshaft bolt specifications, often 100–180 ft-lbs)
- Harmonic balancer / crankshaft pulley puller (required to remove the main pulley on most engines)
- Camshaft alignment / locking tools (vehicle-specific; prevents camshaft rotation during belt installation)
- Socket set, breaker bar, and pry tools (for engine mount and cover removal)
- Service manual or verified digital teardown specific to the exact engine code
Typical service time and downtime for a first-time DIYer on a moderately accessible engine runs 6 to 10 hours across a single weekend. An experienced home mechanic familiar with the engine can complete the same job in 3 to 4 hours. Neither estimate accounts for sourcing parts delays or unexpected discoveries during disassembly, such as a leaking seal that adds scope to the job.
Is DIY Timing Belt Replacement Worth It Compared to Paying a Shop?
DIY wins on immediate cost savings for experienced mechanics on accessible engines; a professional shop is the better choice for interference engine vehicles, first-time mechanics, or any situation where the tool investment approaches the labor savings.
The comparison is not purely financial — it is also a risk-adjusted calculation. The table below helps car owners map their own situation to the most cost-effective decision.
| Factor | DIY Verdict | Shop Verdict |
|---|---|---|
| Skill level: beginner | ❌ High risk of engine damage | ✅ Recommended |
| Skill level: intermediate (some engine work) | ⚠ Possible with service manual | ✅ Safer choice |
| Skill level: experienced (prior timing work) | ✅ Strong savings potential | Optional |
| Interference engine | ⚠ High-consequence errors | ✅ Recommended |
| Non-interference engine | ✅ Lower risk profile | Optional |
| Tools already owned | ✅ Maximizes savings | N/A |
| Tools need to be purchased | ⚠ Reduces net savings by $100–$200 | ✅ May be comparable cost |
| Warranty desired | ❌ No warranty on DIY | ✅ 12mo/12,000mi typical |
The water pump decision reinforces this calculus. On any engine where the water pump is belt-driven, replacing it simultaneously adds only $40 to $90 in parts cost for a DIYer — and the labor cost is already absorbed. Skipping the water pump to save $60 in parts risks a pump failure within the same service interval, which would require the entire job to be performed again. According to data compiled by RepairPal, timing belt replacement bundled with a water pump replacement averages $882 to $1,285 at professional shops — a figure that underscores how much of the total cost is labor, not parts.
How Does DIY vs. Shop Cost Compare Across Different Vehicles?
Vehicle type is the single most important variable in the DIY vs. shop cost comparison: an inline-four engine in a compact sedan can be a $150 DIY job, while a transverse V6 in a minivan can demand 8 hours of shop labor and exceed $1,500 in total cost.
This variation is not marginal — it can represent a 10-fold difference in cost exposure between the easiest and hardest vehicles to work on. Understanding where a specific vehicle falls on this spectrum is the first step any car owner should take before deciding whether DIY is financially realistic.
Which Vehicles Are the Cheapest and Easiest for DIY Timing Belt Replacement?
There are three broad vehicle categories for DIY timing belt accessibility — easy, moderate, and difficult — based on engine orientation, bay access, and the number of components that must be removed to reach the timing cover.
Easy DIY candidates are vehicles with longitudinally mounted inline-four or inline-six engines in relatively open engine bays. Classic examples include older Honda Civics and Accords (pre-2012 four-cylinder models), early 2000s Toyota Camry four-cylinder engines, and most Subaru EJ-series engines (with the caveat that Subaru’s horizontally opposed layout requires a specific process but is well-documented in the DIY community). On these vehicles, a full timing belt kit costs $150 to $250, and a competent DIYer can complete the job in half a day. Shop cost for the same job ranges from $450 to $700 — a savings of $300 to $500 for DIY.
Moderate DIY candidates include front-wheel-drive vehicles with transverse inline-four engines where the timing cover is accessible from the front or side of the engine bay without requiring mount removal. Many Mazda, Mitsubishi, and older Hyundai four-cylinder platforms fall here. Kit cost is similar ($180–$300), but the job takes longer — typically 5 to 7 hours for a first-time DIYer — and a few specialty tools may be needed.
Difficult or shop-recommended vehicles are primarily those with transverse V6 engines in compact or mid-size platforms. The Honda Odyssey, Chrysler/Dodge minivans with the 3.5L V6, and many Toyota Sienna configurations require removing the engine mount, potentially lifting the engine, and dismantling significant portions of the front accessory drive before the timing cover is even visible. Shop labor alone on these vehicles can run 6 to 8 hours, and the procedural complexity makes DIY genuinely high-risk for anyone without prior experience on that specific platform.
The price difference between vehicle categories can be dramatic. A Honda Civic four-cylinder DIY job might total $160 in parts versus a $550 shop bill. The equivalent Honda Odyssey V6 — despite being the same brand — requires $250 in parts for DIY but commands $1,100 to $1,400 at an independent shop and up to $1,800 at a dealer, simply because of the labor hours the engine layout demands.
Does DIY or Shop Replacement Cost More Over the Long Term?
Over the long term, consistent error-free DIY replacement on an accessible engine saves $600 to $1,800 across two to three service intervals — but a single failure event on an interference engine eliminates those savings entirely and typically results in a net loss compared to professional service.
The lifecycle cost comparison requires thinking across multiple replacement intervals. Most vehicles with timing belts require service every 60,000 to 105,000 miles, which translates to replacement every 5 to 10 years for average drivers. Over a vehicle’s useful life, a car owner might face two to three timing belt services. At a DIY savings of $300 to $600 per interval, cumulative savings reach $600 to $1,800 — a meaningful number.
However, the risk structure is asymmetric. A shop job that carries a 12-month/12,000-mile warranty provides a financial backstop if something goes wrong during or after the service. A DIY job carries no such protection. More critically, on an interference engine, an installation error does not produce a warning; it produces immediate and catastrophic internal damage. The cost to replace a cylinder head with bent valves on a typical four-cylinder engine ranges from $1,500 to $3,500. On a V6 with dual overhead camshafts, a full engine rebuild or replacement can exceed $6,000. A car owner who saves $500 on a DIY job and then suffers engine failure due to a belt installed off by a single tooth has not saved money — they have spent $5,500 more than a shop job would have cost.
The long-term calculus therefore favors DIY only for mechanics who can honestly assess their own capability, have performed timing work before, are working on a non-interference or well-documented engine, and are not relying on the vehicle as their sole transportation during the repair window.
What Hidden Variables Can Wipe Out Your DIY Timing Belt Savings?
Four hidden variables can partially or completely eliminate DIY timing belt savings: interference engine risk, the belt-driven water pump overlap opportunity, specialty tool costs, and engine layout complexity — none of which appear in a basic parts-versus-labor comparison.
These factors represent the gap between theoretical savings and actual savings. A car owner who calculates “$800 shop quote minus $200 in parts equals $600 saved” without accounting for these variables may find that their real savings are $200 — or negative — once the full picture is visible. To better understand each one, the sections below address them individually.
Does Having an Interference Engine Change the DIY Risk Calculation?
Yes, having an interference engine fundamentally changes the DIY risk calculation, because a timing installation error on an interference engine causes immediate catastrophic valve-to-piston contact that destroys the engine — whereas the same error on a non-interference engine is recoverable.
An interference engine is one in which the pistons and valves share the same physical space within the cylinder at different points in the combustion cycle. When the timing belt keeps the crankshaft and camshaft synchronized, the system works perfectly. When that synchronization is lost — even by a single gear tooth — the valves are open at the wrong moment and the rising piston strikes them directly. The result is bent or broken valves, damaged piston crowns, and in severe cases, cracked cylinder walls. This type of damage is not a repair; it is a rebuild or an engine replacement.
Non-interference engines, by contrast, have sufficient clearance between pistons and valves that a timing error produces a non-starting engine or rough running — unpleasant and inconvenient, but not destructive. The car owner has the opportunity to diagnose, re-align, and correct the installation.
The practical implication is significant: interference engine status should be verified before any car owner commits to a DIY timing belt job. The majority of modern engines — particularly those designed for fuel efficiency with high compression ratios — are interference designs. Honda, Toyota, Subaru, Audi, and Volkswagen platforms are predominantly interference configurations. A quick lookup of the specific engine code against the manufacturer’s service data or a reputable automotive database will confirm the design. For interference engine vehicles, the margin for DIY error is exactly zero, and this fact alone is sufficient reason for many car owners to route the job to a professional shop regardless of the cost savings available.
Should You Replace the Water Pump at the Same Time — and Does It Affect DIY vs. Shop Value?
Yes, replacing the water pump simultaneously with the timing belt always improves the value calculation for both DIY and shop service, because the labor to expose the water pump is already fully paid for during timing belt replacement — making the pump itself the only incremental cost.
On vehicles where the water pump is driven by the timing belt — which includes a large proportion of Honda, Toyota, Subaru, and Mitsubishi platforms — the pump sits directly behind the timing cover. To install the new belt, the mechanic has already removed every component needed to access the water pump. Adding the pump replacement to the scope of work at that point costs a DIYer only the price of the part: $40 to $90 for a quality aftermarket pump, or $80 to $150 for an OEM unit.
For shop customers, the math is equally compelling. A shop that charges $100 to $300 to add a water pump to a timing belt service is billing almost entirely for the part, not the labor, because the access labor is shared. Declining the water pump to save $100 to $150 upfront is a false economy: if the pump fails 18 months and 20,000 miles later, the shop must perform the entire timing belt disassembly again to reach it — and that second labor charge will be the full rate, not a discounted add-on.
The only scenario where skipping the water pump is genuinely defensible is when it is known to be recently replaced (documented receipt within the past 30,000 miles) or when the vehicle uses an externally mounted, serpentine-driven pump rather than a timing-belt-driven one.
What Specialty Tools Do DIYers Underestimate — and How Much Do They Actually Cost?
Specialty tool requirements for timing belt replacement are the single most commonly underestimated cost in DIY planning, because the required camshaft locking and alignment tools are vehicle-platform-specific, non-improvised, and can cost $30 to $200 for a set that may only ever be used once.
Unlike general automotive tools that transfer across jobs and vehicles, camshaft locking tools are designed around the specific geometry of a single engine family. A set of cam lock pins for a Honda K-series engine will not work on a Toyota 2AZ-FE. This means a DIYer replacing the timing belt on a vehicle they have not worked on before must identify, source, and purchase or borrow the correct platform-specific tool — and factor that cost into their actual savings calculation.
The practical options for managing this cost are:
- Purchase the tool outright ($30–$200): Sensible if the owner plans to keep the vehicle long enough for a second timing belt interval or if the tool works across a family of engines they own.
- Rent or borrow from a parts store ($0 with deposit): AutoZone, O’Reilly Auto Parts, and Advance Auto Parts offer tool loan programs where the customer pays a deposit that is fully refunded upon return. Availability varies by location and tool type, but cam lock tools for common platforms are increasingly available through these programs.
- Improvise using documented community methods ($0): For some engine families, the DIY community has documented reliable no-tool methods using TDC (top dead center) marking and zip-tie techniques. These are engine-specific and must be verified against reputable sources — not assumed to be universal.
A DIYer who must purchase a $150 specialty tool for a one-time job on a vehicle they plan to sell within two years has reduced their effective savings from $600 to $450 before accounting for any other variables. When tool cost is combined with the time investment, the real hourly “wage” of DIY timing belt work on a difficult vehicle can be lower than it appears on paper.
How Does Engine Layout (Transverse vs. Longitudinal) Affect Whether DIY Is Realistic?
Engine layout — specifically whether the engine is mounted transversely (sideways) or longitudinally (front-to-back) — is the primary mechanical variable that determines how difficult, time-consuming, and physically demanding a DIY timing belt job will be.
On a longitudinally mounted engine, the timing belt is positioned at the front of the engine facing forward toward the radiator. Access is generally straightforward: remove the accessory belts, the crankshaft pulley, and the timing cover, and the belt and associated components are directly visible and accessible. This is the classic configuration found in rear-wheel-drive vehicles and many older front-wheel-drive platforms, and it is the layout that most DIY timing belt tutorials assume.
On a transverse engine — which is the standard configuration for the vast majority of modern front-wheel-drive and all-wheel-drive vehicles — the engine is rotated 90 degrees so that the timing belt faces the firewall or the wheel well rather than forward. This creates a cascade of access problems: the timing cover may be partially behind the engine mount, components must be removed from underneath the vehicle as well as from the top, and in many cases the engine must be supported on a floor jack and the mount unbolted entirely before the cover can be removed.
For transverse V6 engines in particular — as found in the Honda Odyssey, Chrysler Pacifica, and Toyota Sienna — the job complexity is high enough that even experienced DIYers frequently describe the process as a full weekend commitment with multiple points of difficulty. The practical rule is this: before committing to any DIY timing belt job, search for a video teardown specific to the exact engine code — not just the vehicle model. If the first step involves removing the engine mount, the DIYer should honestly assess whether the labor savings justify the complexity and risk before proceeding.
According to data from Car Talk’s cost analysis, shop labor for complex transverse engine timing belt jobs can reach 8 hours at $80 to $150 per hour — meaning that the labor savings available to a DIYer on these vehicles is largest in absolute terms, but so is the skill and time investment required to capture them.