


Verifying your timing belt after replacement is the single most critical step that separates a successful DIY job from a catastrophic engine failure. The process involves confirming that the crankshaft and camshaft timing marks are correctly aligned, that belt tension meets manufacturer specifications, and that the engine passes a live performance test before returning to normal use. Done correctly, post-replacement verification protects your engine from bent valves, misfires, and irreversible internal damage — outcomes that can cost thousands of dollars to repair.
To complete this verification, you will need a specific set of tools, a clear understanding of your engine’s timing mark locations, and a systematic approach to both static alignment checks and live engine testing. Most DIY mechanics who experience problems after a timing belt replacement do so not because of poor installation, but because they skipped or rushed the verification phase. Understanding exactly which tools are required — and why each one matters — is the foundation of a safe, confident check.
Once the static alignment is confirmed and the engine turns over cleanly by hand, the next phase shifts to live engine performance testing. This means listening carefully on first startup, scanning for OBD-II fault codes related to camshaft and crankshaft correlation, and in some cases running a compression test to rule out valve damage. Each test layer adds a level of certainty that the job was completed correctly.
Beyond the core verification steps, there are common mistakes that even experienced DIY mechanics make — including ignoring the effect of Variable Valve Timing (VVT) systems, misidentifying interference engine risks, and failing to understand how timing chain re-verification differs from belt re-verification. This guide covers every layer of the process in sequence, from definition to diagnosis to advanced edge cases, so you leave with complete confidence in your work.
What Is Timing Belt Verification and Why Does It Matter After Replacement?
Timing belt verification is a post-installation confirmation process — a structured series of alignment checks and functional tests that confirm a newly installed belt is correctly synchronized between the crankshaft and camshaft before the engine is returned to operation.
To better understand why this matters, it helps to consider what the timing belt actually does. The timing belt is the mechanical link that keeps the crankshaft and camshaft rotating in precise coordination. The crankshaft drives the pistons up and down, while the camshaft controls the opening and closing of the intake and exhaust valves. If these two components fall out of sync by even a single tooth on the sprocket, the valves and pistons can occupy the same space at the same time — a collision that happens in milliseconds and causes immediate, severe engine damage.
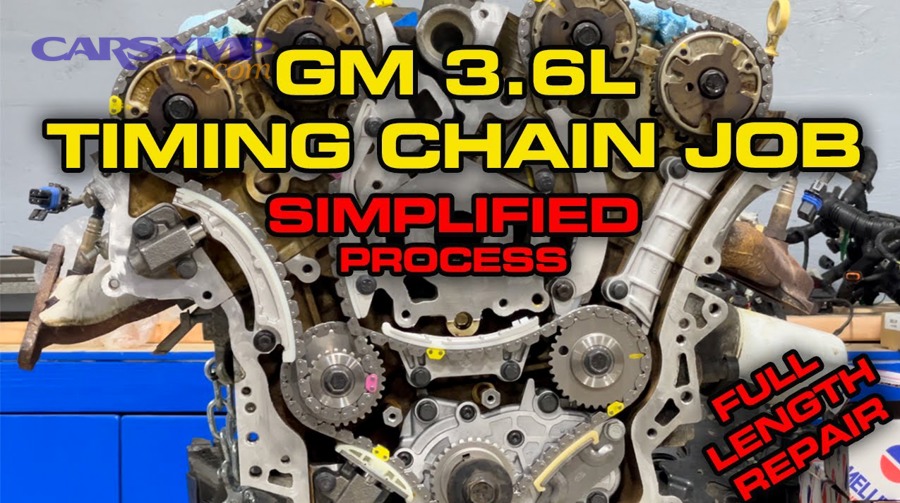
Verification is not a redundant step — it is the quality control checkpoint that confirms the installation was successful. Even when a belt is installed by someone with prior experience, factors such as a slipping tensioner, a sprocket that was rotated during reinstallation, or a belt that seated improperly on a tooth can all introduce timing errors that are invisible to the eye but devastating to the engine.
What Happens If You Skip Timing Verification After Replacement?
No, skipping timing belt verification after replacement is not safe — it risks immediate valve-to-piston contact, progressive misfire damage, and complete engine failure, particularly on interference engines, for at least three critical reasons.
Specifically, the most serious risk is what happens on interference engines — engines where the path of the piston overlaps with the path of the valves when timing is incorrect. On these engines, a belt that is off by even one tooth can cause the piston to strike an open valve at high speed the moment the engine fires. The result is bent or broken valves, a damaged piston crown, and in severe cases a cracked cylinder head. This type of damage is not repairable with a simple part swap — it typically requires a full engine rebuild or replacement.
Even on non-interference engines, skipping verification introduces the risk of rough running, poor fuel economy, and Check Engine Light codes that are expensive and time-consuming to diagnose after the fact. A timing error that is caught during verification takes minutes to correct. The same error discovered after a failed startup can take hours — and hundreds of dollars — to trace back to its source.
Is a Timing Belt Verification Different From a Timing Belt Inspection?
Yes, timing belt verification and timing belt inspection are two distinct processes — verification confirms correct post-installation alignment, while inspection assesses the physical condition of an existing belt to determine whether replacement is needed.
More specifically, a timing belt inspection is performed before replacement. During an inspection, a mechanic looks at the existing belt for Signs timing belt is due or failing — including visible cracks across the belt’s surface, fraying along its edges, missing or worn teeth, glazing on the inner surface, or oil contamination. These are the indicators that tell you the belt needs to come out. Verification, by contrast, happens after the new belt is installed and has nothing to do with belt condition — it is entirely about alignment, tension, and synchronized rotation. Confusing these two processes leads mechanics to either inspect a belt they just installed (unnecessary) or skip verification entirely because they assume “I just put it in, it must be right” (dangerous).
What Tools Do You Need to Verify Timing Belt Alignment After Replacement?
There are 6 essential tool categories needed to verify timing belt alignment after replacement: a crankshaft turning tool, manufacturer-specific timing lock pins, a torque wrench, an OBD-II scanner, a compression tester, and the vehicle’s official service manual — each serving a non-interchangeable function in the verification process.

Beyond the tools themselves, the service manual is the most important resource in the process. Every engine has unique timing mark locations, alignment reference points, tensioner torque specifications, and rotation procedures. No online guide — including this one — can substitute for the factory procedure specific to your engine code. Before purchasing any tools, download or obtain the service manual for your exact make, model, and engine variant.
The table below summarizes the core tools, their purpose in the verification process, and when each is used:
| Tool | Purpose | When Used |
|---|---|---|
| Crankshaft turning tool / breaker bar | Rotate engine to TDC by hand | Static alignment check |
| Cam/crank locking pin set | Lock camshaft and crankshaft at TDC | Before belt installation and during verification |
| Torque wrench | Confirm tensioner bolt torque to spec | After belt and tensioner installation |
| Timing light | Dynamic confirmation of ignition timing | After first startup |
| OBD-II scanner | Read camshaft/crankshaft correlation codes | Immediately after first startup |
| Compression tester | Confirm no valve damage occurred | If hard rotation or resistance was felt during hand-turn test |
Do You Need Special Tools for Timing Belt Verification on a DOHC Engine?
Yes, DOHC (Dual Overhead Cam) engine timing belt verification requires additional specialized tools — specifically a dual cam locking tool set — because two camshafts must be locked and verified simultaneously, doubling the alignment complexity compared to a SOHC engine.
On a SOHC (Single Overhead Cam) engine, you lock one camshaft and one crankshaft. On a DOHC engine, both the intake cam and the exhaust cam must be held at their exact TDC position at the same time while the belt is installed. If either cam rotates even fractionally during belt installation, one bank of valves will be out of time while the other is correct — a condition that produces a rough idle, misfires on specific cylinders, and a P0016 or P0017 fault code. For DOHC verification, cam locking tools that are specific to your engine family are not optional — they are the only way to guarantee both shafts hold position during the two-rotation hand-turn test that follows.
Can You Verify Timing Belt Alignment Without a Timing Light?
Yes, you can perform the initial post-replacement timing verification without a timing light by using the static mark alignment method — visually confirming that all timing marks align correctly at TDC — though a timing light remains valuable for dynamic confirmation after startup.
The static method works by rotating the crankshaft to TDC, then visually inspecting whether the timing marks on each sprocket align with their respective reference marks on the engine block and cylinder head. This is the primary method used for post-installation verification and is the technique described throughout this guide. A timing light is used after the engine is running to confirm ignition timing, which is a separate — though related — check. For the purpose of verifying belt alignment after a timing belt replacement, the static method combined with the two-rotation test provides sufficient confirmation of correct installation in the majority of standard passenger vehicles.
How Do You Verify Timing Belt Alignment Step by Step After Replacement?
Verifying timing belt alignment after replacement follows a 4-stage static process — setting TDC, checking all timing marks, performing the two-rotation hand-turn test, and confirming belt tension — which together confirm correct crankshaft-to-camshaft synchronization before first startup.

This section is the operational core of the entire verification process. Each stage must be completed in order, and no stage should be skipped based on assumption. The most common error in post-replacement verification is performing the steps out of sequence — specifically, checking tension before confirming mark alignment, which can mask an off-by-one-tooth error behind what feels like a correctly tensioned belt.
How Do You Set the Engine to Top Dead Center (TDC) for Timing Verification?
Setting the engine to Top Dead Center (TDC) means rotating the crankshaft — using a breaker bar or crankshaft turning tool on the crankshaft bolt — until the TDC mark on the crankshaft pulley aligns exactly with the fixed pointer or reference mark on the engine block.
Specifically, TDC refers to the position where the piston in cylinder number one is at the highest point of its compression stroke. This is the universal reference position for all timing mark checks. To reach TDC, remove the spark plugs first — this dramatically reduces the resistance of rotating the engine by hand, protects the new belt from unnecessary strain, and allows you to feel the difference between compression stroke TDC (correct) and exhaust stroke TDC (incorrect). Once the crankshaft pulley mark aligns with the pointer, verify you are on the compression stroke by confirming there is resistance from compression in cylinder one (use a finger over the spark plug hole to feel positive pressure as you approach TDC). Once confirmed, this position is your locked baseline for all subsequent mark checks.
How Do You Check Timing Marks on the Crankshaft and Camshaft After Belt Installation?
With the engine at TDC on cylinder one’s compression stroke, the crankshaft sprocket timing mark must align with the reference notch or arrow on the engine block, and each camshaft sprocket timing mark must align with the corresponding reference mark on the cylinder head — simultaneously, with zero deviation.
More specifically, consult your service manual to identify the exact location and appearance of each timing mark for your engine. Some engines use a line etched into the sprocket that must align with a cast arrow on the block; others use a hole in the sprocket that must align with a pin hole in the head. The format varies by manufacturer, but the principle is identical: all marks must align at the same moment when the engine is at TDC. If the crankshaft mark is aligned but one camshaft mark is off by one tooth, the belt must come off and be re-indexed. An off-by-one-tooth error — even though it looks minor visually — represents approximately 15–20 degrees of cam advance or retard, which is sufficient to cause misfires, loss of power, rough idle, and in interference engines, valve contact. Do not rationalize an imperfect alignment. If it is not exact, it is not correct.
How Do You Perform the Two-Rotation Hand-Turn Test After Timing Belt Replacement?
The two-rotation hand-turn test involves rotating the crankshaft two full clockwise revolutions — 720 degrees — by hand using the crankshaft bolt, then rechecking all timing marks to confirm they return to exact alignment at TDC, validating that the belt is correctly indexed across its entire length.
The logic behind two full rotations is rooted in the four-stroke engine cycle. One complete engine cycle — intake, compression, power, exhaust — requires two full crankshaft revolutions. By rotating through this complete cycle by hand, you confirm that no timing mark discrepancy appears at any point during operation, not just at the initial TDC position. Rotate slowly and deliberately. If you feel any abnormal resistance, binding, or a distinct hard stop during rotation, stop immediately — do not force through it. Abnormal resistance during hand rotation is the most critical warning sign that valves and pistons are making contact, indicating a serious timing error that must be corrected before the engine is started. If rotation is smooth throughout both revolutions and all marks return to their correct positions, the belt alignment has passed static verification.
How Do You Verify Timing Belt Tension Is Correct After Installation?
Correct timing belt tension is confirmed by checking the tensioner position, verifying the tensioner bolt is torqued to the manufacturer’s specification, and confirming the belt does not deflect more than the service manual’s stated allowance under thumb pressure at the midpoint of the longest belt run.
Tension that is too loose allows the belt to skip teeth under load — particularly at high RPM or during cold starts — causing immediate timing errors. Tension that is too tight accelerates wear on the belt, the tensioner bearing, and the idler pulley bearings, and can cause the belt to snap prematurely. Most modern engines use a hydraulic or spring-loaded automatic tensioner, which sets belt tension automatically when the locking pin is removed after installation. For these systems, confirm that the tensioner’s index mark or pointer falls within the acceptable range indicated on the tensioner body itself. On older engines with manual tensioners, use the thumb-press deflection test and compare the deflection distance to the specification in the service manual, then tighten the tensioner bolt to the specified torque using a calibrated torque wrench. Reviewing the Timing belt kit components you installed — including tensioner, idler, and water pump if included — ensures every component in the kit was correctly installed before considering the tension check complete.
How Do You Test Engine Performance After Timing Belt Replacement?
Testing engine performance after timing belt replacement involves three sequential live tests — a careful first-startup auditory and visual check, an OBD-II diagnostic scan for fault codes, and a compression test if any warning signs appeared during the hand-turn test — producing a complete confirmation of correct engine function.
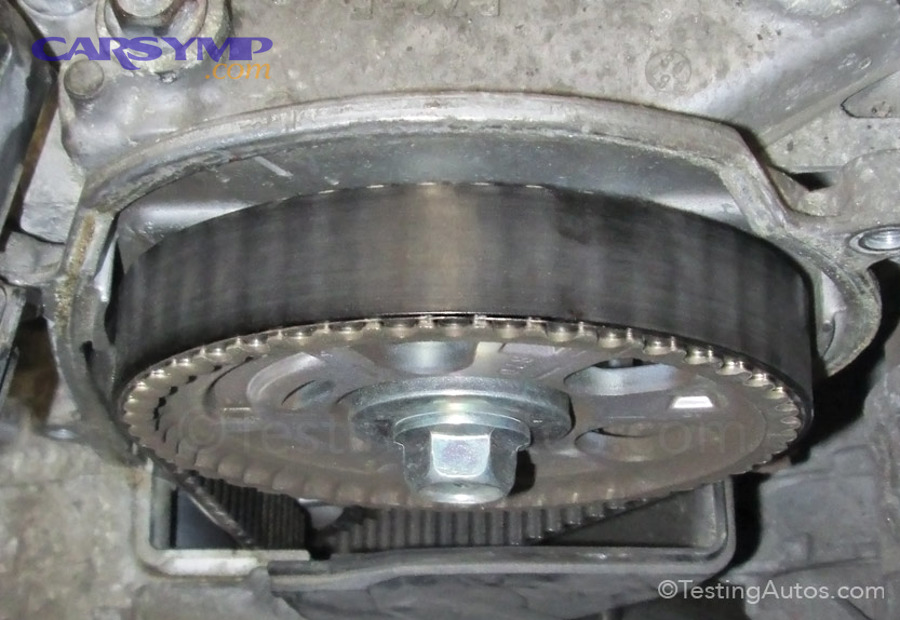
This phase transitions from the static world of timing marks and torque specs into real-world engine operation. Even an engine that passes every static verification check can reveal a problem on first startup that was not detectable by eye or hand. The performance testing phase catches those problems early — while they are still diagnosable and correctable — rather than after they have caused further damage.
What Should You Listen and Watch for When Starting the Engine for the First Time After Timing Belt Replacement?
On first startup after timing belt replacement, you should listen for smooth, steady idle and watch for stable RPM — while being alert to ticking, knocking, rough idle, or immediate stall, each of which indicates a specific type of timing or mechanical problem that requires immediate investigation.
Specifically, a rhythmic ticking sound from the valve train area on startup can indicate that the camshaft timing is slightly off, causing a valve to open incompletely or at the wrong moment. A deep knocking sound suggests more serious piston-related contact. A rough, uneven idle that does not smooth out after 30–60 seconds of warm-up points to a timing offset on one or more cylinders. An engine that starts and immediately stalls typically indicates that the crankshaft and camshaft are significantly out of phase. In all of these cases, shut the engine off immediately — do not allow the engine to continue running in an attempt to “see if it gets better.” Running a mistimed engine causes progressive damage to valve seats, cam lobes, and piston tops. The correct response is to return to the static verification steps, re-examine all timing marks, and identify the source of the problem before attempting another startup.
Do not rev the engine hard on the first startup. Allow it to idle and warm gently for the first 5–10 minutes. This gives the new belt, tensioner, and pulleys time to settle under normal operating conditions before being subjected to load.
Should You Run a Compression Test After a Timing Belt Replacement?
Yes, you should run a compression test after a timing belt replacement specifically when you felt abnormal resistance during the hand-turn test, heard unusual sounds during the two-rotation process, or suspect that an incorrect timing position may have caused valve-to-piston contact.
A compression test is performed by removing all spark plugs, threading a compression tester into each spark plug hole one at a time, cranking the engine for 4–5 seconds per cylinder, and recording the pressure reading. Compare each cylinder’s reading to the manufacturer’s minimum and standard specification. Healthy cylinders on a well-maintained engine will all show readings within approximately 10–15% of each other. A cylinder showing significantly low compression — particularly if it is cylinder one, where TDC was set — is a strong indicator of a bent or damaged valve. Two adjacent cylinders showing equally low compression may indicate a head gasket issue, while a single cylinder with zero compression after a timing belt replacement almost always points to valve damage from timing contact. A compression test adds less than 20 minutes to the overall job and provides definitive evidence of valve health that no other test can replicate.
Should You Use an OBD-II Scanner After a Timing Belt Replacement?
Yes, you should use an OBD-II scanner immediately after the first startup following a timing belt replacement, because cam-to-crank correlation fault codes — particularly P0016 and P0017 — are the most direct electronic confirmation that timing alignment is incorrect.
These codes are generated by the Engine Control Module (ECM) when the signals from the crankshaft position sensor and camshaft position sensor do not match the expected relationship. In plain terms: if the ECM sees the crankshaft at TDC but the camshaft signal does not arrive at the expected moment, it logs a fault. This is exactly the electronic symptom of a belt that is off by one or more teeth. Scanning for codes immediately after first startup — even if the engine appears to be running normally — catches subtle timing errors that the human ear may not detect in the first few minutes of operation. Clear any pre-existing codes before the replacement so that any new codes that appear after startup are directly attributable to the timing belt work. If the scan shows no fault codes and the engine idles smoothly, you have electronic confirmation to accompany your mechanical verification.
What Are the Most Common Timing Verification Mistakes DIY Mechanics Make?
There are 5 common timing verification mistakes DIY mechanics make: skipping the two-rotation test, accepting an off-by-one-tooth alignment, failing to re-check marks after tensioner release, ignoring VVT system state, and not clearing fault codes before the replacement — each of which can invalidate an otherwise correct installation.

Understanding these mistakes is as important as knowing the correct steps. Most DIY timing belt replacement risks are not in the mechanical difficulty of the job itself — a moderately experienced DIY mechanic can complete the physical replacement competently. The risks concentrate in the verification phase, where confidence in the installation leads to shortcuts that allow errors to slip through.
How Do You Know If Your Timing Is Off by One Tooth After Replacement?
Your timing is likely off by one tooth after replacement if the engine starts and runs but exhibits a rough idle, slightly elevated or unstable RPM, reduced throttle response, or a P0016/P0017 fault code — symptoms that are subtle enough to ignore initially but damaging enough to cause long-term valve train wear.
Specifically, a one-tooth timing error is the most dangerous type of misalignment precisely because it does not always produce an immediate catastrophic failure. The engine runs — but it runs wrong. On most four-cylinder engines, one tooth of offset on the camshaft sprocket represents approximately 7–10 degrees of timing error. This is enough to shift the valve timing so that valves are opening and closing slightly late or early relative to piston position, reducing compression efficiency and causing the ECM to compensate with fuel and ignition timing corrections that were never designed to be permanent. To confirm and correct a one-tooth error, remove the belt, rotate the camshaft sprocket one tooth in the direction that brings the timing mark into correct alignment, reinstall the belt, and repeat the full verification sequence from TDC setup through the two-rotation test.
Does a New Timing Belt Need to Be Re-Verified After the First 500 Miles?
Yes, a new timing belt should be re-inspected — though not fully re-verified — after the first 500 to 1,000 miles of operation, specifically on engines with manual tensioners, because new belts undergo an initial break-in stretch that can reduce tension below the minimum specification.
On engines equipped with hydraulic or spring-loaded automatic tensioners, the tensioner compensates for this initial stretch automatically, and no re-inspection is typically required. However, on older vehicles with manually adjusted tensioners — common in late 1990s and early 2000s Japanese and European models — the initial stretch of a new belt can be measurable. During the re-inspection, check that the belt deflection at the midpoint of the longest free span still falls within the specification range. If deflection has increased beyond the allowable limit, re-tension the belt to specification and re-torque the tensioner bolt. This 500-mile check is a routine part of a complete timing belt kit components service on these older platforms, and takes less than 30 minutes with the engine cold.
What Is the Difference Between Timing Belt Verification and Timing Chain Re-Verification After Replacement?
Timing belt verification focuses on sprocket-mark alignment and manual belt tensioning, while timing chain re-verification centers on chain stretch measurement, hydraulic tensioner function, and phaser position — making them distinct processes that share the same goal but require different tools, checks, and failure-mode awareness.
This distinction matters because many DIY mechanics who have experience with timing belt systems assume the verification process transfers directly to chain-driven engines. It does not. The mechanical differences between a belt and a chain produce entirely different failure modes, different verification checkpoints, and different consequences when verification is skipped or performed incorrectly.
Is Timing Chain Verification After Replacement the Same as Timing Belt Verification?
No, timing chain verification after replacement is not the same as timing belt verification — while both share the TDC alignment check and two-rotation hand-turn test, chain verification additionally requires confirming hydraulic tensioner function, checking chain stretch, and in some engines verifying VVT phaser lock position, none of which apply to belt systems.
The core similarity is the TDC alignment check: both systems require the crankshaft and camshaft(s) to align at their reference marks when the engine is at cylinder one TDC on the compression stroke. The two-rotation test also applies to both. However, a timing chain cannot skip teeth in the same way a belt does — instead, a chain that is worn stretches over time, causing the cam timing to gradually retard. The tensioner on a chain system is hydraulically operated in most modern engines and must be confirmed to be functioning and holding pressure after installation. If the tensioner bleeds down, the chain will have excess slack immediately on startup — producing a characteristic rattling sound from the front of the engine on cold starts. This sound is the chain-equivalent of a belt alignment error and requires immediate investigation.
How Does Variable Valve Timing (VVT) Affect Timing Verification After Belt Replacement?
Variable Valve Timing (VVT) systems significantly complicate post-replacement timing verification because the VVT phaser — a hydraulically controlled cam-advance mechanism mounted on the camshaft sprocket — can be in an indeterminate position during static verification, causing what appears to be an alignment error when the timing is actually correct.
This is one of the rarest and most misunderstood sources of verification confusion in modern DIY timing belt replacement. On engines equipped with VVT, the camshaft sprocket is not rigidly fixed to the camshaft — it is connected through a phaser that can advance or retard the cam by 20–40 degrees depending on oil pressure commands from the ECM. During a belt replacement with the engine off and no oil pressure, the phaser defaults to a specific mechanical position — usually fully retarded. Before performing the static alignment check, you must confirm that the phaser is locked in its base (fully retarded) position. Most manufacturers provide a specific procedure for this, which may include inserting a phaser lock pin or simply confirming the phaser is against its mechanical stop. Failing to account for VVT phaser position is a leading cause of post-replacement P0011, P0012, P0021, and P0022 fault codes — cam timing codes that are generated not because the belt is wrong, but because the phaser was in an uncontrolled position during verification.
Does Valve Clearance Need to Be Checked After a Timing Belt Replacement?
Yes, valve clearance should be checked after a timing belt replacement specifically on engines that use shim-type or bucket-type valve adjustment systems, or on any engine where resistance was felt during the hand-turn test — because both scenarios indicate the possibility that valve-to-piston contact or cam lobe wear may have altered the valve clearance beyond specification.
On modern hydraulic lash adjuster (HLA) engines — which covers the majority of vehicles built after the mid-1990s — valve clearance is self-adjusting and does not require a manual check as part of routine timing belt service. However, on older engines with mechanical valve adjustment (common on Honda, Toyota, and Subaru engines of earlier generations), valve clearance directly affects engine timing behavior. If the belt was replaced on an engine that had already accumulated significant cam lobe wear, the clearances may be outside specification even though the belt alignment is correct. In this context, a valve clearance check is not redundant — it is a separate diagnostic step that confirms the entire valve train is functioning correctly, not just the belt that drives it.
How Is Post-Replacement Timing Verification Different on a Diesel Engine vs. a Gasoline Engine?
Diesel engine timing verification is more complex than gasoline engine verification because it requires confirming not only camshaft-to-crankshaft alignment but also injection pump timing — a third synchronized component that has no equivalent in gasoline engine systems.
On a gasoline engine, the timing belt drives two components: the crankshaft (via the belt itself) and the camshaft(s) (via the cam sprocket). Verification confirms these two are synchronized. On a diesel engine, the timing belt typically drives three components: the crankshaft, the camshaft, and the high-pressure injection pump. The injection pump has its own timing mark and its own locking pin, and must be locked at its correct TDC position before the belt is removed and after the new belt is installed. An injection pump that is advanced or retarded by even a small amount will cause hard starting, excessive smoke, rough running, or injector damage — symptoms that closely mimic a cam timing error and can be difficult to distinguish without returning to the static verification procedure. DIY timing belt replacement risks on diesel engines are therefore higher than on equivalent gasoline engines, and the service manual procedure for the specific injection pump type must be followed exactly, including whether the pump lock pin must be removed before or after tensioner release.
According to guidance published by the Gates Corporation — one of the leading manufacturers of timing belt systems — proper timing belt installation and verification on both gasoline and diesel engines requires following the OEM-specified rotation direction, locking sequence, and tensioner release procedure, and confirms that skipping any step in the verification process is the primary cause of premature belt failure and engine damage in the aftermarket service segment.