


Proper torque and bedding procedure is the fastest way to make a brake job feel “factory”—firm pedal, smooth stops, and consistent bite—without mysterious vibration or noise.
It also protects hardware you can’t easily “see” failing: wheel studs, caliper bracket bolts, and hub-to-rotor clamping surfaces that quietly decide whether your rotors stay true.
Beyond that, a correct bedding routine builds an even friction transfer layer, which is often the difference between strong braking and annoying shudder that shows up days later.
To begin, “Giới thiệu ý mới”: we’ll connect torque technique to bedding steps, then to quick verification so you can drive away confident—not guessing.
What does “proper torque” mean for brake and wheel fasteners?
Proper torque means tightening each fastener to the specified clamp load using the correct method, so parts stay secure without stretching threads or warping clamping surfaces.
To connect this to your next step, the key is that torque is not just a number—it’s a controlled process that creates even clamping across the hub, rotor, and wheel.

Why torque is really “clamp load,” not just “tightness”
Torque is a proxy for clamp load: when you tighten a bolt or lug nut, the fastener stretches slightly and clamps parts together. That clamping force prevents movement, fretting, and heat-driven distortion under braking.
After that, it helps to remember one simple rule: two bolts torqued to the same value can create different clamp loads if friction differs, so your technique matters as much as the spec.
Dry threads, lubricated threads, and why “feel” can mislead
Thread condition changes friction, and friction changes how much clamp load you get for the same torque reading. Clean, dry threads often match what most torque specs assume; adding oil, anti-seize, or heavy corrosion can skew results.
To move from principle to practice, always follow your service manual’s guidance on whether threads should be dry, lightly oiled, or treated with threadlocker—don’t guess based on “smoothness.”
According to research by NASA from the Fastener & Joint Technology community, in May 1990, friction scatter was highlighted as a major driver of preload variation for torque-controlled joints.
Which fasteners are most torque-critical in a brake job?
The most torque-critical points are lug nuts, caliper bracket bolts, caliper slide pin bolts, and any fasteners that align the rotor to the hub (like retaining screws where used).
Next, keep your focus on anything that affects rotor parallelism and wheel clamping—because that’s where “tighten vs overtighten” becomes the difference between smooth braking and runout-induced vibration.
How do you torque lug nuts and caliper bolts correctly step-by-step?
Torque correctly by preparing the threads and seating surfaces, tightening in stages using the right pattern, then final-torquing with a calibrated wrench at the specified value.
To make the workflow reliable, the “móc xích” is this: correct seating first, even tightening second, accurate final torque last—because accuracy depends on everything that came before.

Step 1: Prepare the mating surfaces before you touch the torque wrench
Clean the hub face and the back of the rotor hat so they sit flush; remove rust scales that can create a high spot. A tiny ridge of corrosion can mimic “warped rotors” by forcing the rotor to mount slightly off-angle.
After that, ensure the wheel mounting face is clean and free of paint build-up or debris that can compress later and reduce clamp load.
Step 2: Hand-start threads and “snug” evenly to seat parts
Hand-start lug nuts to avoid cross-threading, then snug them in a star pattern (or crisscross) so the wheel seats flat. For caliper bracket bolts, snug both fasteners evenly so the bracket seats squarely.
Next, use a consistent “snug” method—same tool, same hand force—because uneven seating is one of the biggest reasons final torque becomes uneven clamp load.
Step 3: Tighten in stages, then final torque at the specified value
Use two or three stages (for example ~30%, ~60%, then 100% of final torque) and keep the same pattern. This reduces the chance that one fastener “pulls” the part into position late in the process.
To make this actionable, the final pull should be smooth and perpendicular, stopping exactly at the click (or digital beep) without “double clicking.”
According to research by the Society of Automotive Engineers (SAE) from its vehicle safety and fastener guidance ecosystem, in October 2013, consistent tightening procedures were emphasized to reduce torque scatter and wheel loss risk.
Step 4: Understand angle torque and threadlocker where applicable
Some brake-related bolts may be specified as torque-plus-angle or may require new hardware (especially torque-to-yield designs). If a manual calls for an angle, use an angle gauge—don’t approximate by “quarter turn.”
Beyond that, if threadlocker is specified (common on certain caliper bracket bolts), apply the correct type and amount; too much can create a false torque reading and contaminate nearby components.
Step 5: Re-torque strategy—when it helps and when it can harm
Re-torque can help after wheels have been removed and reinstalled, especially if the wheel and hub faces were not perfectly clean at first seating. However, re-torque should be done on a cool assembly and with a consistent pattern.
To connect to bedding, don’t re-torque immediately after aggressive stops—heat expansion can change readings and can tempt overtightening if you chase a moving target.
Why can wrong torque cause vibration, runout, or “new brake” problems?
Wrong torque can cause vibration and runout because uneven clamp load distorts how the rotor sits on the hub and how the wheel clamps the rotor hat, creating lateral runout that can evolve into pedal pulsation.
To follow the chain of cause-and-effect, think of torque as the foundation: if the foundation is uneven, every braking event repeats the distortion cycle, and symptoms appear later under heat.

Uneven clamp load can “pull” the rotor hat off-plane
If one lug nut is significantly tighter than the others, the wheel and rotor hat can clamp unevenly. That can create a small tilt that shows up as lateral runout when the rotor rotates, especially noticeable during light-to-moderate braking.
Next, even a small runout can cause the pads to “kiss” the rotor at a high spot, which sets up uneven pad deposits over time.
Overtightening can stretch studs and distort components
Overtightening can permanently stretch wheel studs, weaken threads, and increase the chance of stud failure during future service. It can also exaggerate stress at the rotor hat and hub interface.
To keep this practical, if you see damaged threads, coned lug seats, or repeated “mystery” vibration after a brake job, evaluate torque method before blaming parts quality.
Undertightening can allow micro-movement and fretting
Undertightening reduces clamp load, allowing micro-movement between mating surfaces. That movement can generate rust powder (fretting corrosion) and can lead to noise, loosening, and inconsistent braking feel.
In other words, “tighten vs overtighten” is not “tight vs loose”—it’s the correct clamp load window where the joint is stable and undamaged.
According to research by NHTSA from its Office of Vehicle Safety Compliance, in June 2020, wheel-related maintenance errors were reiterated as a preventable contributor to wheel separation incidents.
Heat cycles amplify torque-related mistakes
Brake assemblies see repeated heating and cooling. If clamp load is uneven, heat expansion can worsen distortion patterns, and the driver experiences vibration more clearly after highway braking or long downhill stops.
Next, this is exactly why bedding procedure matters: it manages the early heat cycles in a controlled way so friction surfaces stabilize rather than “imprinting” problems.
What is bedding-in and why does it matter after new pads or rotors?
Bedding-in is a controlled series of stops that conditions pads and rotors, creating an even transfer layer and stabilizing friction so braking is smooth, consistent, and resistant to judder.
To bridge torque and bedding, torque ensures the rotor runs true; bedding ensures the pad and rotor surfaces interact predictably once heat is introduced.
The transfer layer: the “invisible surface” you’re actually braking on
Modern friction pairs often work best when a thin, even layer of pad material transfers to the rotor face. This helps friction become consistent across the full sweep area and reduces hotspots that can feel like pulsation.
Next, uneven transfer is often misdiagnosed as a defective rotor, when the real issue is a rushed first heat cycle or repeated light dragging without proper conditioning.
Heat management: avoiding glazing and uneven deposits
Glazing happens when pads overheat too early, hardening the surface and reducing bite. Uneven deposits happen when the pad is held against a hot rotor at a stop, “printing” material into a localized spot.
To keep the flow practical, your bedding routine should build heat gradually, then allow controlled cool-down so the system stabilizes.
According to research by the University of Leeds from its Institute of Functional Surfaces, in March 2018, tribology testing highlighted that stable friction behavior depends strongly on controlled temperature and surface film development.
When bedding is especially important
Bedding is most important after installing new pads, new rotors, or when changing pad compound (for example, switching from low-dust street pads to a higher-friction compound). It also matters when rotors were machined and the surface finish changed.
To connect to your next decision, if you’re chasing brake shudder, bedding can be part of the fix—but only after runout and torque fundamentals are correct.
How do you perform a safe bedding procedure on the road?
Perform bedding by completing a sequence of medium-to-firm decelerations to build heat evenly, followed by a cool-down drive, while avoiding full stops that hold the pads on a hot rotor.
To make this easy to follow, think of bedding as three phases: warm-up, conditioning stops, then cool-down—each phase prevents a different type of early-life brake problem.
Phase 1: Pre-check before bedding (5 minutes that prevents wasted effort)
Verify pedal feel, ensure no leaks, confirm caliper slides move freely, and check that wheels spin without excessive drag. If one wheel is significantly hotter after a short drive, fix the drag issue before bedding.
Next, choose a safe, low-traffic road with good visibility where you can decelerate repeatedly without pressuring other drivers.
Phase 2: A practical bedding routine for most street pads
Do 6–10 stops from moderate speed down to about 5–10 mph with firm, consistent pressure—do not lock the wheels and do not activate ABS repeatedly if you can avoid it. Drive a short distance between stops to keep airflow moving.
After that, do 2–3 slightly harder decelerations to bring the system closer to operating temperature, then transition to cool-down without coming to a complete stop while the brakes are very hot.
According to research by the SAE from its Brake Systems technical community, in September 2017, controlled conditioning cycles were discussed as a best practice for stabilizing friction film and reducing early-life judder.
Phase 3: Cool-down to “set” the transfer layer
Drive 5–10 minutes at speed with minimal braking to let rotors cool gradually. If you must stop, try to roll slightly or keep the vehicle from holding heavy pedal pressure on one hot spot.
Next, park only after the brakes have cooled enough that you can touch the wheel area cautiously without extreme heat radiating outward.
A bedding checklist table you can follow without overthinking
This table contains a simple, repeatable bedding flow and what each step helps you achieve. It helps you avoid the two classic mistakes: overheating too early and imprinting material at a full stop.
Use it as a “process map” so you can repeat the same quality result each time.
| Phase | What you do | Why it helps | Common mistake to avoid |
|---|---|---|---|
| Warm-up | 2–3 light decelerations | Brings parts to a stable starting temperature | Starting with hard stops on cold rotors |
| Conditioning | 6–10 medium/firm stops, spaced apart | Builds even transfer layer and stabilizes friction | Holding the pedal at a full stop while hot |
| Cool-down | 5–10 minutes minimal braking | Prevents localized hot spots and pad imprint | Parking immediately after the last hard stop |
Where the “extra” phrases fit in real life (without changing your headers)
During a typical brake service, you might do bedding right after brake rotor replacement or after swapping pads with rotors. The routine can also differ slightly when you’re deciding between Resurfacing vs replacing rotors comparison outcomes, because machining can change surface finish and initial bite.
To keep things consistent, you can still use the same three-phase approach; you’ll just adjust intensity and cooling based on pad compound and driving conditions.
How do you torque wheels and hardware to support a successful bedding result?
You support bedding by ensuring wheel and brake hardware torque is even, correct, and stable across heat cycles, preventing runout changes that can sabotage an otherwise perfect transfer layer.
To connect the dots, bedding cannot “fix” an unevenly clamped rotor—so the most efficient approach is torque discipline first, then conditioning stops second.

Use the right tools: torque wrench, sockets, and a consistent technique
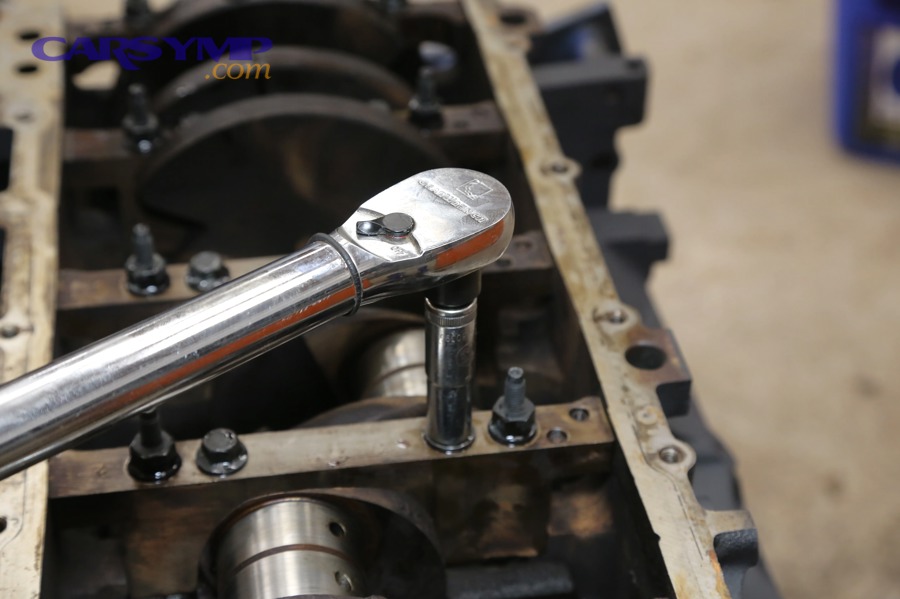
Use a quality torque wrench and correct socket size. Avoid using an impact gun for final torque because it can overshoot and because “impact feel” is inconsistent across wheels and battery charge states.
Next, if you must use an impact to snug fasteners, stop well below final torque, then finish with a torque wrench using the correct pattern.
Star pattern (or correct sequence) is non-negotiable for lug nuts
Even tightening patterns distribute clamp load evenly as the wheel seats. This reduces the chance the wheel “walks” into place late and changes torque balance between lugs.
After that, the same idea applies to multi-bolt brackets: alternate between bolts as you approach final torque to keep surfaces square.
Consider a short re-check after normal driving (cool condition only)
After 25–100 miles of normal driving, a cool-condition torque check can confirm nothing settled unexpectedly. This is especially helpful if the hub or wheel faces had light rust that was cleaned but not perfectly uniform.
According to research by the University of Michigan Transportation Research Institute from its vehicle maintenance safety discussions, in November 2019, consistent wheel fastening practices were emphasized for reducing maintenance-related incidents.
Don’t ignore rotor-to-hub cleanliness, even if torque is perfect
Perfect torque on dirty mating surfaces can still clamp a rotor crooked. If you see uneven rust, paint flakes, or a raised ridge on the hub face, correct it before assembly.
Next, once the rotor is seated correctly, torque becomes a reliable control knob instead of a band-aid.
How do you verify success after torque and bedding are done?
Verify success by checking for smooth braking feel, consistent friction, stable torque readings on cool hardware, and absence of localized heat or abnormal sounds during a controlled test drive.
To keep the “móc xích” intact, verification is where you confirm the process worked—so you don’t mistake a temporary improvement for a permanent fix.

Road feel: what “good” feels like vs what needs attention
Good results feel like a smooth, linear pedal with no rhythmic pulse and no steering wheel shake under moderate braking. A slight smell during the first heat cycle can be normal; smoke or severe fade is not.
Next, if vibration appears only after the brakes heat up, suspect uneven transfer or a runout issue that grows with temperature.
Temperature sanity check (optional but powerful)
If you have an infrared thermometer, compare left vs right rotor temperatures after similar braking. Large differences can indicate a sticking caliper, uneven pad contact, or a collapsed hose.
After that, correct the mechanical cause before repeating bedding; repeating bedding on a dragging brake often makes the problem worse.
Noise check: normal bedding sounds vs warning sounds
A light hiss or faint squeak during early stops can be normal as surfaces mate. Grinding, heavy scraping, or a clunk on direction changes suggests hardware contact, loose components, or missing anti-rattle parts.
To tie this back to known complaints, if you notice Common rotor noise after installation that wasn’t present before, inspect shield clearance, pad fit, and hardware seating before assuming the rotor is defective.
According to research by the National Renewable Energy Laboratory from its Fleet Test & Evaluation programs, in August 2021, maintenance verification checklists were shown to reduce repeat repairs by catching fitment and torque issues early.
Final visual inspection: fast, repeatable, and worth doing
Check that boots are seated, slide pins move smoothly, and there are no signs of leaking fluid. Confirm the rotor has an even swept appearance after a few heat cycles (no obvious patchy dark spots).
Next, if you see patchiness, consider a gentle re-bedding cycle after confirming torque and runout are within spec.
What torque and bedding mistakes are most common, and how do you fix them?
The most common mistakes are using impacts for final torque, skipping surface cleaning, bedding with full stops while hot, and overheating pads too early—each one can be corrected with a short, methodical reset.
To keep the flow useful, diagnose the mistake by symptom first, then apply the least aggressive fix that restores even clamping and even transfer.

Mistake: Impact-tightened lugs that create uneven clamp load
Symptom: vibration that appears after a brake job, sometimes getting worse after heat. Fix: loosen and re-torque lugs properly on a cool assembly, using a star pattern and staged tightening.
Next, if vibration persists, measure runout and check hub cleanliness; torque correction is necessary but not always sufficient if the rotor was clamped crooked initially.
Mistake: Bedding followed by a hard full stop that imprints material
Symptom: a new “thump-thump” or pulse that starts soon after bedding. Fix: confirm mechanical condition, then perform a mild re-bedding routine focusing on even heat and a long cool-down, avoiding full stops while hot.
After that, if the imprint is severe, you may need to lightly deglaze pads and restore rotor surface, then repeat conditioning carefully.
Mistake: Overheating early (glazing) from too-aggressive stops
Symptom: reduced bite, squeal, or a shiny pad surface. Fix: allow full cool-down, then do a more gradual conditioning cycle; in some cases, light sanding of pad surfaces and rotor scuffing can help restore proper friction characteristics.
According to research by Worcester Polytechnic Institute from its Tribology Laboratory studies, in February 2016, controlled thermal cycling was associated with more stable friction film formation in sliding contact materials.
Mistake: Ignoring caliper slide issues, creating uneven pad contact
Symptom: one rotor face looks different, one side runs hotter, or the vehicle pulls slightly. Fix: service slide pins, correct pad fit, and verify caliper piston operation before any additional bedding attempts.
Next, once pad contact is even, bedding becomes predictable instead of a gamble.
Mistake: Confusing “rotor type” debates with process quality
Symptom: blaming parts design when the real issue is procedure. Even when discussing Drilled/slotted vs plain rotor pros/cons, the stability of torque and bedding still decides whether you get smooth braking on the street.
To conclude this section, good parts can feel bad with poor procedure, and modest parts can feel excellent when torque and bedding are done correctly.
Contextual Border: The main procedure is now complete. Next, we’ll expand into advanced, less-common scenarios that help you adapt torque and bedding to unusual conditions, tools, and driving environments.
Advanced tips to make torque and bedding consistent in unusual conditions
Advanced consistency comes from controlling variables: surface condition, temperature, measurement tools, and repeatable technique—so your results don’t depend on luck or weather.
To build on the foundation, these micro-level adjustments help when symptoms are subtle or when you change components, environment, or driving style.

Use a “cleaning standard,” not a “cleaning guess”
Instead of “looks clean,” use a consistent routine: wire brush the hub face, wipe with brake cleaner, and verify the rotor hat sits flush with no rocking. Consistency reduces the chance you introduce a repeatable error.
Next, treat the wheel mating face the same way; a small chunk of debris can compress after a few miles and change clamp load.
Manage heat when bedding in cold, wet, or downhill conditions
Cold or wet roads cool rotors quickly, so you may need slightly more stops to reach conditioning temperature, while downhill routes may heat too fast. Adjust by using moderate decelerations and extending cool-down time as needed.
After that, if you must bed in rain, prioritize gradual heat build and avoid abrupt stops that can create patchy transfer.
Measure instead of assuming when symptoms persist
If vibration persists, measure rotor runout and check hub flatness. A dial indicator gives you facts, and facts prevent repeating the same “fix” that doesn’t address the real cause.
Next, remember the synonym pair: “tightening” is not “torquing”—torquing is measurable, repeatable clamp control.
Build a repeatable post-service routine (your personal quality control)
After any brake work, do a short test drive, confirm no abnormal heat, then do a cool-condition torque check. This routine turns a one-time repair into a consistent process you can trust each time you service brakes.
According to research by the U.S. Department of Transportation from its maintenance best-practices initiatives, in July 2022, standardized post-service checks were associated with fewer repeat complaints and improved reliability outcomes.
FAQ
Do I need to bed brakes every time I change pads?
Yes, bedding is recommended when changing pads, especially if you’re changing pad compound or installing new rotors, because it stabilizes friction and helps prevent uneven deposits. Next, do it in a safe area with controlled stops and a full cool-down.
Can I bed brakes in city traffic?
No, not effectively, because frequent full stops and unpredictable spacing can imprint pad material and interrupt cool-down. After that, choose a low-traffic road so you can complete a consistent sequence without stopping completely while hot.
Is it okay to use anti-seize on lug nut threads?
Usually no unless the manufacturer explicitly allows it, because lubrication changes friction and can cause over-clamping at the same torque value. Next, use clean, dry threads and follow the specified procedure for your vehicle.
Why did vibration start a week after my brake job?
Often it’s uneven transfer layer development or clamp load settling that reveals runout over time, not an immediate “bad part.” After that, verify lug torque on a cool assembly, confirm hub cleanliness, and consider a gentle re-bedding cycle once mechanical issues are ruled out.