


If you’re asking when to replace pads with rotors, the practical answer is: replace them together only when the rotor cannot safely accept new pads or cannot bed them evenly. In every other case, new pads can work on serviceable rotors—provided you inspect, measure, and prep the friction surface correctly.
Many drivers also want to avoid repeat labor, comebacks, noise, and vibration. That means looking beyond pad thickness and focusing on the rotor’s condition: surface finish, thickness, runout, heat damage, and how evenly it will transfer friction material during break-in.
Another common concern is deciding fast—at home, in a shop lobby, or with a quote in your inbox. The goal is a simple decision tree you can apply to any vehicle, from daily commuters to heavier SUVs and pickups.
Tiếp theo, we’ll break the decision into clear “replace vs reuse” rules, then show you how to confirm the call with a quick inspection and a few measurements—so your next brake job feels smooth, quiet, and predictable.
Do you always need to replace rotors when you replace pads?
No—you do not always need new rotors with new pads, as long as the existing rotors meet thickness/runout limits, have a healthy friction surface, and can bed new pads evenly without causing vibration or noise. Tuy nhiên, skipping rotor evaluation is what turns a “pad job” into squeal, pulsation, or early pad wear.
To connect the dots, think of pads and rotors as a matched friction pair: pads provide the friction material, and rotors provide the heat sink and the flat, stable surface. If the rotor is stable and within spec, new pads can form a consistent transfer layer. If the rotor is unstable, thin, or damaged, new pads will inherit the problem—and amplify it.

In real-world terms, you can reuse rotors when:
- The rotor thickness is above the minimum service specification and wear is even.
- The surface is smooth enough (no deep grooves, no hard spots, no severe rust ridges in the pad-swept area).
- Pedal feel is stable (no pulsation) and the steering wheel doesn’t shake under braking.
- The rotor can be cleaned/prepped properly for new pad bedding.
Ngược lại, you should replace rotors when the rotor is below minimum thickness, shows cracking/heat checking, has severe scoring, has major thickness variation, or produces vibration that persists after proper cleaning and wheel torque practices.
What rotor conditions force you to replace pads and rotors together?
You should replace pads and rotors together when the rotor’s condition makes safe, even pad contact impossible: below-minimum thickness, cracking, severe heat damage, or surface damage that new pads cannot “wear in” safely. Bên cạnh đó, pairing new pads with a rotor that is already compromised often causes immediate noise, uneven transfer, and repeat work.
To keep the decision fast, group the “must-replace” rotor conditions into four buckets. Cụ thể, if your rotor falls into any bucket, don’t gamble—replace it.
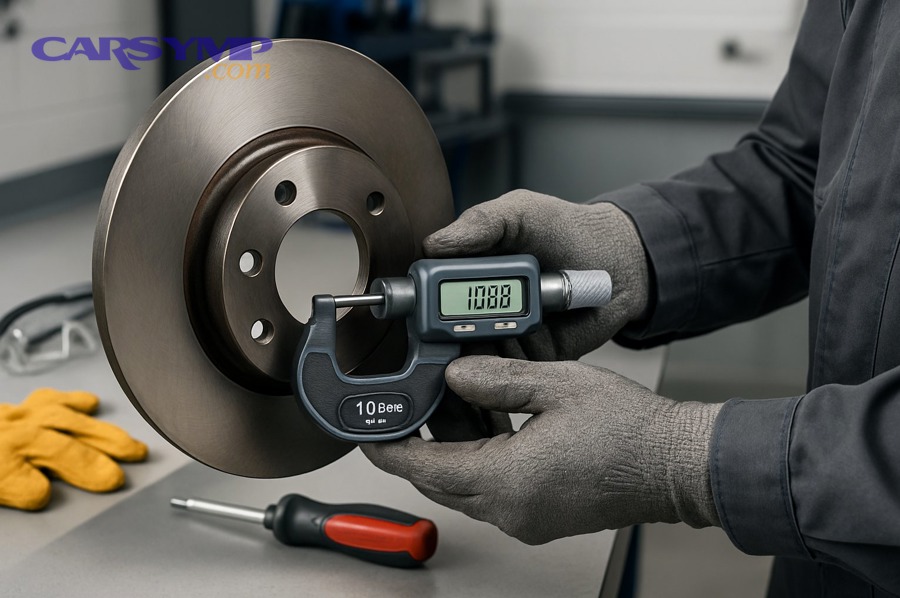
1) Rotor is at or below minimum thickness
Replace if any measured spot is at/under the minimum spec (or will be after machining). Thin rotors have less thermal capacity and can overheat faster, which accelerates pad glazing and increases the odds of cracking. For example, an OEM bulletin outlines that if a rotor is at or below minimum specification, it should be replaced, and if it’s above spec, it can be reused for pad service depending on condition.
2) Cracks, heat checking, or hard spots
Replace if you see cracks radiating from holes/edges, heat-check lines across the swept area, or “blue/purple” discoloration from repeated overheating. These defects usually won’t “clean up” with pads, and resurfacing may not remove the heat-affected layer enough to prevent vibration returning.
3) Deep grooves, heavy scoring, or rust ridges in the pad path
Light grooves can be acceptable, but deep scoring that catches a fingernail, or heavy rust ridges that reduce pad contact area, will cause uneven bedding. That unevenness shows up as noise, steering shimmy, and rapid pad taper.
4) Measurable thickness variation or persistent pulsation
Brake pulsation often comes from rotor thickness variation. If you can’t correct it with proper prep, wheel torque discipline, and (when allowed) resurfacing within spec, replacement is the more reliable fix.
How do thickness and measurement rules decide “replace or reuse”?
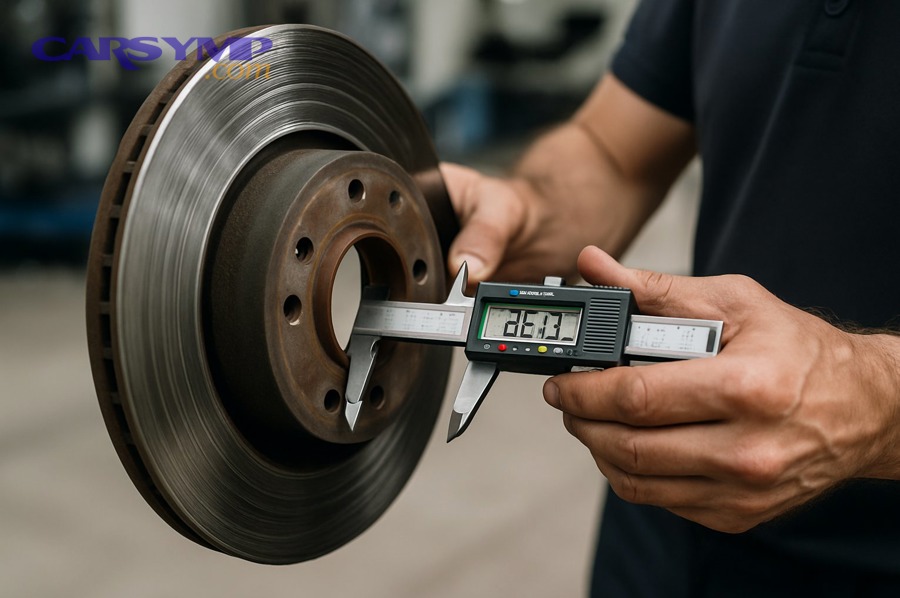
The simplest method is a 3-step how-to: measure thickness at multiple points, compare the lowest reading to minimum spec, and confirm the rotor is stable (runout/variation) before installing new pads. Để bắt đầu, treat the lowest measurement as the truth—one thin spot can overheat and distort under load.
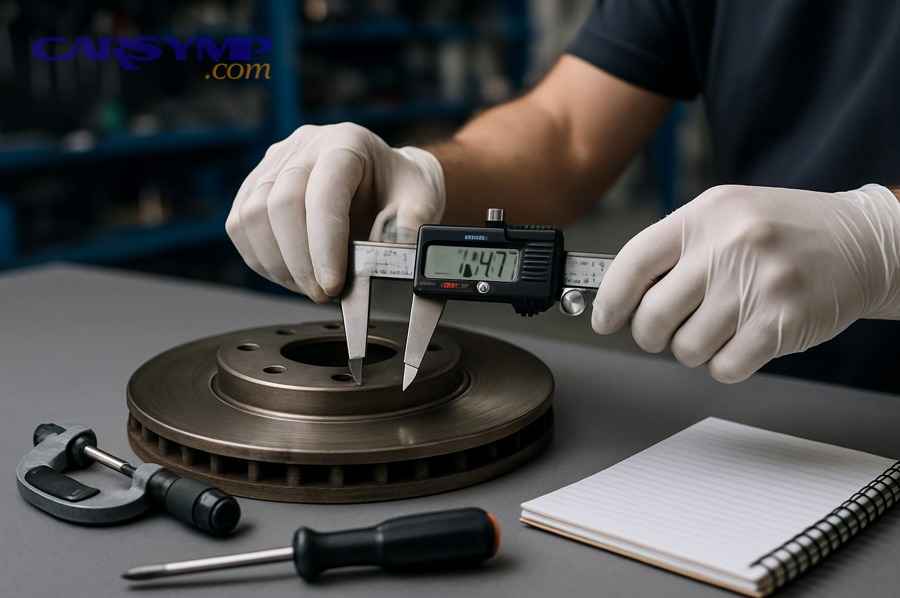
Next, use a consistent measuring pattern. A service procedure bulletin describes measuring rotor thickness at multiple points around the rotor (for example, 8 points every 45 degrees) and recording the results to decide whether the rotor should be machined or replaced.
Step 1: Find the minimum thickness (the non-negotiable limit)
Manufacturers set a minimum thickness because the rotor must maintain structural strength and enough mass to absorb and shed heat. If your rotor is at/under that limit, replacement is the correct call, regardless of how “smooth” it looks.
Step 2: Measure at multiple points (don’t trust one reading)
Measure in the pad-swept area, away from the outer lip and inner hat. Record each reading. Big differences across the same rotor suggest thickness variation, which new pads will not cure—they will simply mirror it.
Step 3: Interpret the pattern (even wear vs localized damage)
If all points are above minimum and reasonably consistent, you’re usually safe to reuse. If one quadrant is thinner, investigate sticking calipers, seized slide pins, or uneven pad pressure before you put new friction material on the rotor.
This table summarizes the “replace vs reuse” logic so you can decide in minutes. The table contains common measurement outcomes and what each outcome means for a pad service decision.
| What you measure/see | What it usually means | Best decision for new pads |
|---|---|---|
| All thickness readings above minimum, small variation | Rotor can manage heat and contact evenly | Reuse rotor with surface prep |
| Any reading at/under minimum thickness | Rotor has insufficient mass/strength | Replace rotor (and install new pads) |
| Large thickness differences around the rotor | Thickness variation → likely pulsation | Resurface if allowed & still above spec, otherwise replace |
| Deep scoring, heavy rust ridges, cracks, heat spots | Surface cannot bed evenly or is heat-damaged | Replace rotor (and new pads) |
What signs suggest the disc is worn or distorted, not just the pads?
If you feel pedal pulsation, steering shake, or a rhythmic “thump” under braking, the disc is often the limiting factor—because those symptoms typically reflect uneven rotor thickness, runout, or heat damage rather than pad thickness alone. Quan trọng hơn, new pads on a distorted disc usually make the symptoms show up sooner, not later.
To keep your diagnosis grounded, match each symptom to what it implies about contact, heat, and friction transfer. Cụ thể hơn, ask: “Is the pad failing, or is the rotor preventing stable pad contact?”
Pulsation that increases with speed
This pattern often points to thickness variation. The pad is grabbing harder in thicker spots and softer in thinner spots, which translates into pedal feedback.
Steering wheel shake mainly during braking
Front disc irregularities often transmit into the steering wheel. While suspension play can mimic it, a consistent “brake-only” shake strongly suggests rotor-related instability.
Grinding or metal-on-metal noise
Grinding usually means pads are worn through to backing plates or there’s debris embedded. If the rotor is gouged deeply, you’re likely in “replace pads with rotors” territory because the new pad won’t have a clean, flat mating surface.
Blue/purple discoloration and a burnt smell after braking
That’s a heat story. Overheated discs can develop hard spots and uneven friction characteristics, which can create judder even if thickness is technically above minimum.
Here’s the key “móc xích”: once you suspect the disc is distorted, move immediately from symptom to measurement. The faster you confirm thickness and stability, the faster you avoid wasting fresh pads on a rotor that cannot behave.
How does pad change timing affect rotor life and brake feel?
Pad timing matters because new pads need a stable surface to build an even transfer layer, and rotors need enough thermal capacity to handle the bedding process without overheating. Tuy nhiên, if you install new pads on a rotor that’s already rough, glazed, or uneven, the new pads can deposit material in patches, creating noise and vibration that feels like “warped rotors.”
To understand the mechanism, think in two layers: the mechanical layer (flatness, thickness, smoothness) and the chemical/friction layer (transfer film). When either layer is unstable, the brake system becomes inconsistent.
Early pad replacement can protect rotors—if you do it correctly
If pads are replaced before they run extremely low, the rotor is less likely to be chewed up by backing plates, and you preserve surface quality. That means you’re more likely to reuse rotors safely.
Late pad replacement often “forces” rotor replacement
Once you reach grinding, the rotor is usually scored deeply. Even if it’s still thick enough, the surface damage may be too severe to bed new pads quietly, so replacing rotors becomes the reliable path.
Uneven pad wear is a rotor warning sign, not just a pad issue
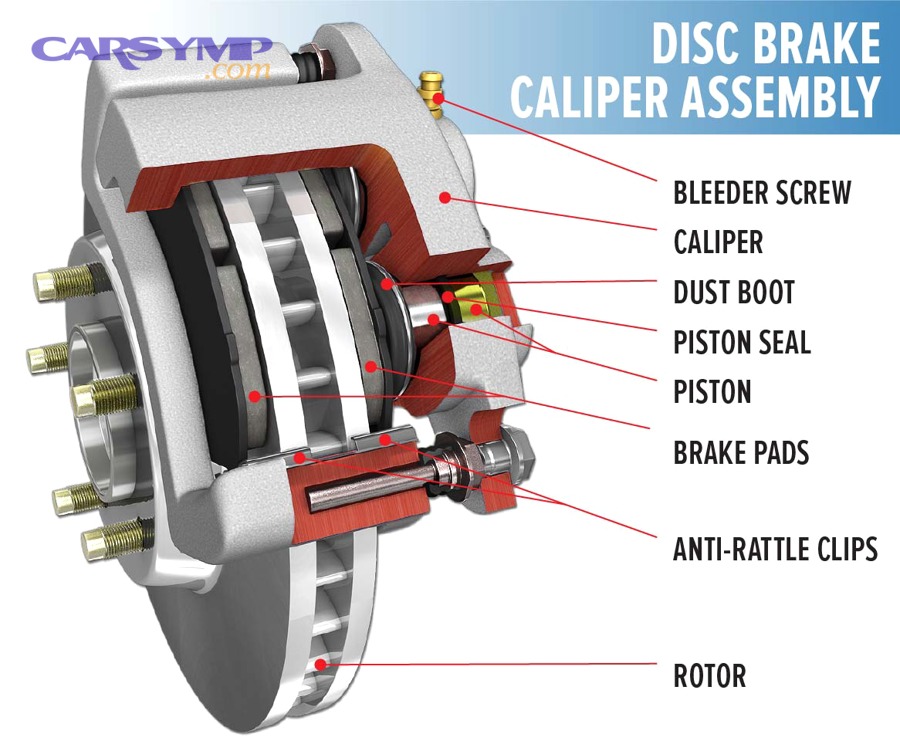
If inner and outer pads wear differently, or one side of the pad is tapered, inspect caliper slides and piston function. A sticking caliper can create hot spots and uneven rotor wear—then new pads get cooked and the cycle repeats.
When is resurfacing a smart middle option instead of replacement?
Resurfacing can be a good option when the rotor is above minimum thickness and the main issue is surface finish or mild thickness variation that can be corrected within specification. Trong khi đó, resurfacing is a poor choice when heat damage, cracking, or severe corrosion is present—because you cannot machine away structural or thermal fatigue.
To keep it objective, use the same logic OEM bulletins use: if thickness is above minimum, rotors may be reused for pad service; if rotors are at or below minimum, replacement is required.

Choose resurfacing when the problem is “surface,” not “structure”
Examples include light scoring, minor glazing, or a surface that’s too rough for new pads to bed smoothly. A proper cut can restore a consistent finish that helps pads transfer evenly.
Skip resurfacing if it pushes you near minimum thickness
If machining would remove too much material or leave you dangerously close to minimum, replacement is safer and often better value—because the rotor will be more resistant to overheating and distortion.
Insist on measurement before and after machining
Service guidance emphasizes measuring rotor thickness before and after machining to confirm it remains within specification.
Here’s the “móc xích” into the next section: once you decide reuse/resurface/replace, your success depends on prep and bedding. Even perfect parts can fail if the process is sloppy.
How do you prep rotors so new pads bed in evenly and quietly?
The best approach is a 4-step process: clean contamination, restore a consistent surface, correct torque practices, and perform a controlled bedding sequence. Để minh họa, think of bedding as “teaching” the pads and rotors to share friction material evenly without overheating.
Before you start, remove grease, oil, and rust scale from the friction surface. Also confirm the hub face is clean—hub rust can create runout that feels like rotor distortion even when the rotor is fine.
Step 1: Clean and deglaze the swept area
Use brake cleaner and a non-directional scuff (when reusing rotors) to help new pads establish a uniform transfer layer. Avoid sanding patterns that create ridges the pads will “read” as vibration.
Step 2: Check hardware and caliper motion
Replace worn shims or clips if needed, and ensure slide pins move freely. A sticky caliper creates localized heat, which can undo a perfect pad/rotor choice.
Step 3: Torque wheels correctly
Uneven lug torque can create runout, leading to pulsation complaints after service. Use a star pattern and correct torque values.
Step 4: Perform a controlled bedding/burnishing routine
A service procedure example describes repeated moderate stops (with limited cooling time) to burnish brakes after rotor service.
How can you decide in 10 minutes whether to replace pads with rotors?
Use this quick how-to checklist: inspect for hard “no” defects, measure thickness, assess stability (pulsation/runout clues), and only then decide whether new pads can seat properly. Sau đây is a fast workflow that works at home or in a shop inspection bay.
Minute 1–3: Visual scan (the fast eliminator)
- Replace rotors if you see cracks, heavy heat checking, chunks missing, or deep scoring.
- Lean replace if the rotor has severe rust ridges where the pad contacts.
- Likely reuse if the swept area is smooth and uniform.
Tiếp theo, if visuals don’t force a decision, move to measurement—because a rotor can look fine but be too thin or uneven.
Minute 4–7: Thickness measurements (the safety gate)
Measure at multiple points around the rotor and use the lowest reading. If you’re near the minimum spec, choose replacement over “hoping it works,” especially on heavier vehicles or high-heat driving.
Minute 8–10: Stability clues (what your body already told you)
- Pedal pulsation or steering shake under braking strongly suggests rotor instability.
- One wheel hotter than others suggests a sticking caliper that can distort rotors and cook pads.
- Noise only after pad replacement often indicates poor bedding or surface contamination—unless the rotor is already heat damaged.
For a practical demonstration of pads-and-rotors replacement workflow, here’s a related video guide you can reference for tool sequence and assembly order.
Contextual Border: From here, we shift from the main “replace vs reuse” decision to the micro factors that change the answer—vehicle type, environment, heat load, and how to plan the job to avoid surprise repeat labor.
Special cases that change the “pads with rotors” decision
Special cases matter because they change heat, corrosion, and friction behavior. In these situations, the same rotor that looks “fine” can still be a poor partner for new pads. Đặc biệt, heavy heat cycles and long idle periods can both create rotor conditions that push you toward replacing pads with rotors for reliability.
EVs and hybrids: low pad wear can hide rotor problems
Regenerative braking can reduce pad wear, but rotors may still corrode from low use. You can have “thick” rotors that are rough and pitted, causing poor pad contact and noise when friction brakes finally engage hard.
Rust-belt and coastal environments: corrosion can force pairing
If the rotor face is heavily pitted in the pad-swept area, new pads may never seat evenly. In that case, replacing pads with rotors is often the cleanest solution—especially if resurfacing cannot remove pitting without falling below spec.
Towing, mountains, and repeated high-heat stops
Heat is the rotor’s enemy. Theo nghiên cứu của Faculty of Engineering, Alexandria University, vào March 2022, improved rotor heat-dissipation designs reduced stress/temperature in simulation—highlighting why thermal capacity and heat control are central to braking stability.
When you tow or descend long grades, you push the rotor into higher temperatures more often. That increases the payoff of replacing marginal rotors rather than reusing them.
Planning the job: avoid surprises in time and budget
If you’re trying to prevent “double labor,” planning matters. For example, phrases you’ll often see in quotes and guides include brake rotor replacement, Rotor replacement labor time, and Rotor replacement cost estimate. Use them as prompts to ask: “Are rotors being replaced because they’re below spec, because of symptoms, or simply as a package?”
Also watch for symptom-language like Rotor wear and warp symptoms inside inspection notes—those phrases often signal that the rotor is the deciding component, not the pad.
Finally, some manufacturers and premium parts makers provide conservative guidance for pairing components. For instance, Brembo’s instructions state that every time you replace the rotors, you should also replace the related pads.
FAQ
These quick answers cover the most common edge cases so you can act confidently when you’re under time pressure.
Can I put new pads on old rotors if there’s no vibration?
Yes, if the rotor is above minimum thickness, the surface is healthy, and you prep it properly. Tuy nhiên, if the rotor is glazed, heavily grooved, or rust-pitted in the swept area, the odds of noise and uneven bedding rise quickly.
What if my rotors look fine but the pedal pulses?
Pulsation is a stability clue—often linked to thickness variation or runout. Measure thickness across multiple points, confirm hub cleanliness, and ensure wheel torque is correct. If pulsation persists after proper correction (and resurfacing within spec when allowed), replacement is usually the durable fix.
Do I have to replace both rotors on the same axle?
In most cases, yes. Axle-pair replacement keeps braking balanced side-to-side and helps pads bed evenly across both wheels. Mixing a new rotor with an old rotor often creates different friction behavior and uneven response.
Is resurfacing always cheaper than replacement?
Not always. If resurfacing requires extra labor, pushes the rotor close to minimum thickness, or doesn’t address heat damage/corrosion, replacement can be the better value because it lowers the risk of repeat work.
What’s the safest “default” when I’m unsure?
If you cannot confirm thickness/spec compliance, or if you see cracks/heat damage, choose replacement. Like the “replace vs reuse” rule suggests: you can negotiate comfort and cost, but you cannot negotiate minimum thickness and structural integrity.