Replace AC Condenser Guide for Drivers: Repair vs Replace Diagnosis
AC condenser replacement is the right move when cooling performance drops because the system can’t reject heat efficiently at the front of the vehicle. If the condenser is damaged, restricted, or leaking, replacing it restores the A/C loop’s ability to condense refrigerant and stabilize pressures.
You’ll also want clarity on how to confirm the condenser is the true failure point—so you don’t replace the wrong part and still end up with warm air. That means reading symptoms, checking airflow, and matching pressure behavior to what the system is doing.
Beyond diagnosis, the real success comes from doing the job in a contamination-safe way: sealing the system, replacing wear items, and verifying the repair with correct procedures so the new part isn’t immediately compromised.
Giới thiệu ý mới: below is a practical, end-to-end guide that helps you decide, replace, and validate results with minimal comebacks.
What is an automotive A/C condenser, and why does replacing it restore cooling?
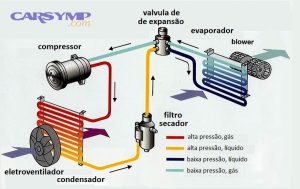
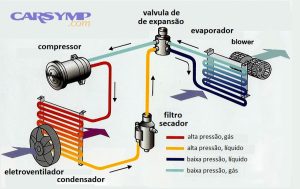
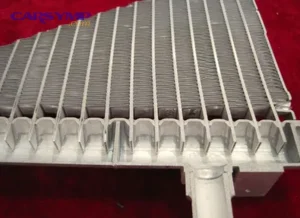
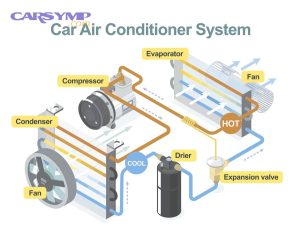
An A/C condenser is the front-mounted heat exchanger that turns hot, high-pressure refrigerant vapor into a high-pressure liquid so the system can make cold air again. Next, understanding what the condenser changes inside the loop makes the replacement decision much easier.

In simple terms, your compressor raises refrigerant pressure and temperature, and the condenser must shed that heat to outside air. When the condenser rejects heat effectively, high-side pressure stabilizes, the refrigerant fully condenses, and the expansion device can drop pressure to create a cold evaporator. When the condenser can’t do that, pressures drift, vent temps rise, and the system may short-cycle or blow lukewarm air.
A good mental model is “heat out here enables cold in the cabin.” Because the condenser is upstream of the expansion device, its health affects liquid quality and the system’s ability to maintain a stable pressure differential. That’s why a failing condenser can mimic other A/C faults even when the compressor still spins.
To connect this to real-world “why now” failures, note that modern condensers often use high-density designs that trade efficiency for vulnerability to internal restriction and contamination. Theo nghiên cứu của Oak Ridge National Laboratory từ Building Technologies Research and Integration Center, vào January 2019, a field investigation reported cases where fouling and blockage in heat exchangers could drive severe performance loss—up to about 65% reduction—under certain conditions.
In practice, when replacement restores proper heat rejection, you’ll usually notice steadier vent temperatures at idle, fewer pressure spikes in hot traffic, and quicker pull-down after startup—especially after a complete car AC repair sequence that includes correct evacuation and charging.
How do you confirm the condenser is the problem, not the evaporator or compressor?
You can confirm condenser involvement by matching symptoms and pressure behavior to a heat-rejection fault rather than a compression or cabin-side airflow fault. Next, you’ll use a structured checklist so the conclusion is evidence-based, not guesswork.
Start with a focused, system-level mindset: you’re doing Condenser vs evaporator vs compressor diagnosis, so each test should narrow the failure domain.
- Condenser-lead pattern: A/C is colder at speed than at idle, high-side pressure climbs quickly in traffic, and condenser fan operation or airflow restrictions change the outcome.
- Evaporator-lead pattern: The system pressures may look “normal,” but cabin airflow is weak, smells are present, or the evaporator is iced/frozen due to airflow or expansion-device issues.
- Compressor-lead pattern: Low differential pressure (weak pumping), noisy/seized compressor, clutch engagement issues, or metal contamination from compressor failure.
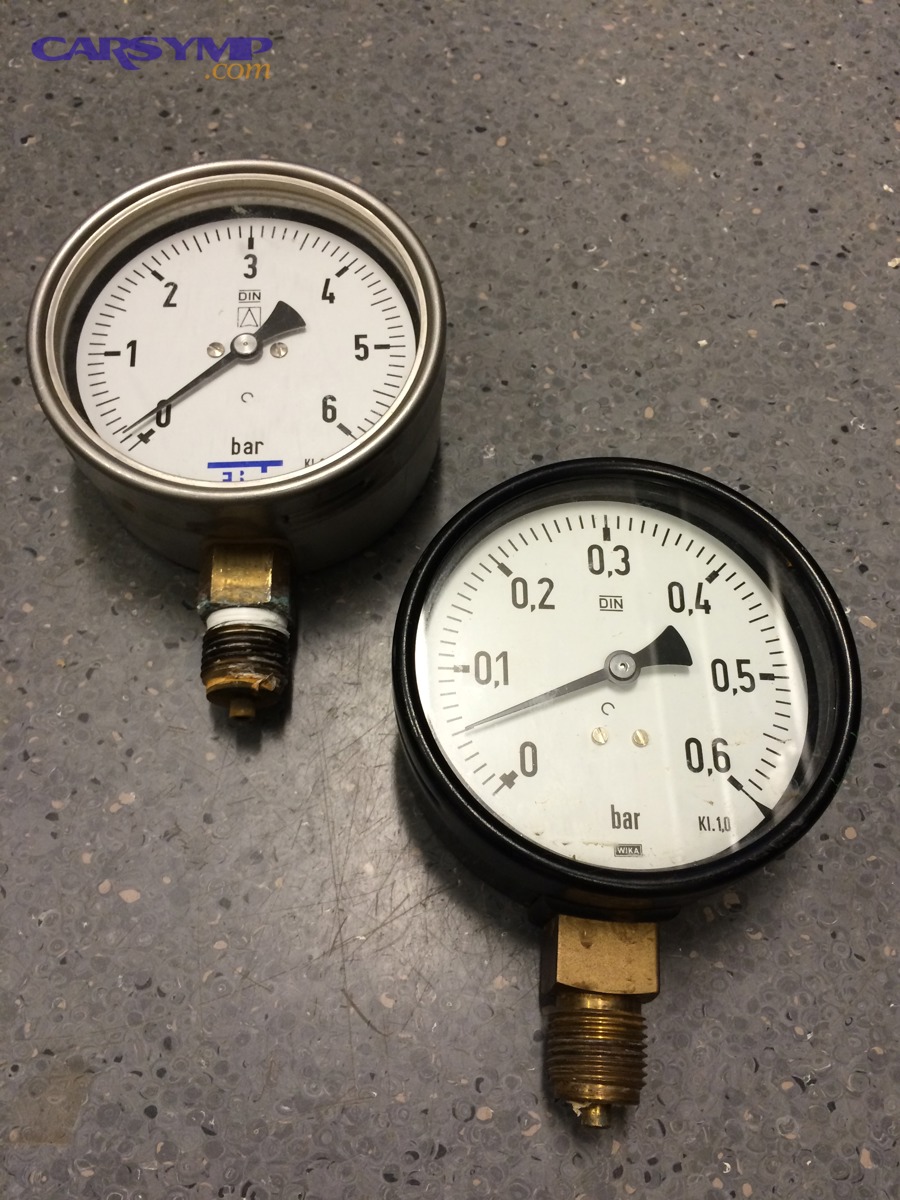
Cụ thể, with manifold gauges or scan data, a condenser heat-rejection issue often shows elevated high-side pressure relative to ambient temperature, especially at idle. If you increase airflow across the condenser (fan forced on, water mist in controlled tests, or simply driving speed), and pressures drop while vent temps improve, that’s a strong condenser/airflow clue. However, always avoid unsafe DIY shortcuts—refrigerant handling should be compliant and environmentally responsible.
Also check the “thermal gradient” across the condenser: inlet should be hotter than outlet if heat is being removed. If the outlet is nearly as hot as the inlet under load, the condenser is underperforming or airflow is poor.
The evidence anchor: Theo nghiên cứu của MAHLE Aftermarket từ Technical Messenger series, vào June 2022, modern condenser designs—especially parallel-flow layouts—are commonly difficult to flush when contaminated, so restriction-related symptoms often justify replacement rather than cleaning attempts.
Once you’ve separated “pumping” from “heat rejection,” you can decide whether the condenser is truly the bottleneck or just the victim of another upstream failure.
What are the most reliable warning signs that point to condenser failure?
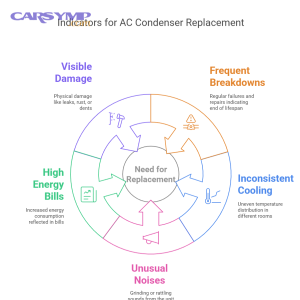
Yes—there are recognizable patterns of AC condenser leak symptoms and restriction symptoms that are more consistent than “it blows warm.” Next, you’ll group them by what physically fails: leakage, airflow loss, or internal blockage.
Which symptoms suggest a refrigerant leak at the condenser?
A condenser leak is likely when cooling fades over days/weeks, oily residue appears on the condenser face or end tanks, and UV dye (if previously used) is visible near joints. Next, you’ll confirm with proper leak testing rather than topping off repeatedly.
Condenser leaks often occur at end tanks, seam crimps, stone-impact pinholes, or where mounting stress concentrates. If the leak is slow, you may still get some cooling at first—then it deteriorates as charge drops, especially in hot weather.
Which symptoms suggest airflow/heat-rejection failure (not necessarily a leak)?
This is likely when A/C is colder while driving but warms at idle, the radiator fans fail to ramp, or the condenser face is blocked with debris. Next, you’ll inspect airflow path and verify fan strategy under load.
Airflow failures can mimic low charge because both raise vent temps at idle. The differentiator is that airflow faults often improve sharply with speed or forced fan operation.
Which symptoms suggest internal restriction or contamination?
Internal restriction is likely when high-side pressure is abnormally high, the high-to-low side differential is extreme, or temperature drop across the condenser is irregular. Next, you’ll consider the system’s contamination history before deciding the repair scope.
Restriction is frequently tied to debris after compressor damage, sealant misuse, or moisture-driven corrosion products circulating in the loop. It can also appear after partial repairs where contamination wasn’t removed.
Evidence anchor: Theo nghiên cứu của International Journal of Refrigeration từ peer-reviewed publication, vào May 2014, a blockage study reported that substantial airflow blockage on a condenser could measurably reduce system capacity and efficiency (for example, around an 8% capacity reduction at ~50% blockage in one tested case).
What usually damages a condenser, and how do you inspect it correctly?
Most condenser failures come from impact, corrosion, or contamination—not age alone. Next, you’ll do a front-end inspection that separates cosmetic fin damage from functional restriction or leakage.
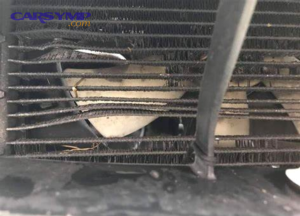
The front of the condenser lives in the “blast zone” behind the grille. Common Debris and road damage causes include stones, sand, insects, and minor collisions that kink tubes or puncture thin sections. Coastal regions add corrosion risk, and winter climates add chemical exposure (salt/brine) that can attack joints and fasteners.
For inspection, think in two layers: air-side and refrigerant-side.
- Air-side checks: Is the face blocked with bugs/leaves? Are fins flattened across a large area? Is there a plastic bag or bent grille restricting flow? Are fans operating at correct speeds?
- Refrigerant-side checks: Are there oily wet spots? Are tube headers cracked? Are fittings distorted? Is there evidence of prior sealant or stop-leak?
To solve the common confusion, use a simple method for How to spot bent fins vs internal leak: bent fins mainly reduce airflow and show up as poor idle performance, while internal leaks or pinholes often leave oily residue and steadily degrade cooling regardless of speed. However, severe fin flattening can also cause high pressures, so don’t dismiss it as purely cosmetic.
Use dye/UV or an electronic leak detector for leak confirmation, and consider nitrogen pressure testing (performed by professionals) for pinpointing. Do not rely on “top-off” cans as a diagnostic tool; repeated low charge operation can damage compressors and masks the real fault.
Evidence anchor: Theo nghiên cứu của Oak Ridge National Laboratory từ Building Technologies Research and Integration Center, vào January 2019, investigators documented that fouling and blockage in heat exchangers can produce large performance penalties—reinforcing why airflow and face cleanliness matter before blaming internal components.
How is the condenser replaced safely, step by step, without creating new problems?
The correct method is to recover refrigerant, replace the condenser with clean sealing surfaces, and restore the system under vacuum before charging to specification. Next, you’ll focus on the single most important risk: contamination and moisture entry.
Below is a practical workflow (vehicle-specific procedures may vary):
- Recover refrigerant legally with proper equipment (shop procedure). Never vent refrigerant.
- Access the condenser (often requires removing bumper cover, grille, undertrays, or radiator support trim). Protect the radiator and intercooler.
- Disconnect lines and cap immediately to keep moisture and debris out. Replace O-rings with the correct material and lubricant (typically compatible with the system oil).
- Remove the condenser carefully to avoid bending adjacent heat exchangers. Inspect mounting points for stress cracks.
- Install the new condenser ensuring correct fitment, correct integrated components (some units integrate receiver/drier), and correct torque on fittings.
- Reassemble airflow components (shrouds, ducts, seals). Air bypass around the condenser can ruin performance even with a new part.
- Evacuate under deep vacuum to remove air and moisture. Hold vacuum to check for gross leaks.
- Charge by weight using the factory specification (and correct refrigerant type). Add oil only as required for replaced parts.
The “make or break” moment is keeping the system sealed. Moisture saturation happens fast once the system is open, which is why professional practice emphasizes rapid capping and correct evacuation.
Evidence anchor: Theo nghiên cứu của MACS (Mobile Air Climate Systems Association) từ technical guidance, vào July 2010, they note the receiver/drier should be replaced any time the system is opened for service because the desiccant can saturate quickly and filtration can become restricted.
If you’re documenting symptoms for a customer or planning your own job, capture a brief “before/after” set: ambient temperature, vent temperature at idle, and fan status. That makes later verification objective, not subjective.
What parts should be replaced with the condenser, and what flushing rules matter most?
Yes—replacing the right companion parts prevents repeat failures, but flushing decisions depend on condenser design and contamination history. Next, you’ll apply Parallel-flow condenser flushing rules so you don’t waste time on a step that can’t work.
Should you replace the filter-drier/accumulator when the system is opened?
Yes, in most cases you should, because moisture exposure can saturate desiccant and the internal filter can trap debris that later restricts flow. Next, you’ll decide based on whether it’s integrated into the condenser or separate in your vehicle.
This directly addresses the common question: Should you replace receiver drier with condenser. Many systems integrate the drier into the condenser assembly; others use a separate canister. Either way, replacement is often recommended when the loop is opened or when contamination is suspected.
Evidence anchor: Theo nghiên cứu của MACS (Mobile Air Climate Systems Association) từ technical guidance, vào July 2010, they state the receiver/drier should be replaced any time the system is opened for service, and many compressor warranties require it.
When should you flush lines, and when should you avoid flushing the condenser?
You should flush lines and certain components after contamination events, but you should generally avoid trying to flush many modern condensers if they are parallel-flow designs. Next, you’ll match the flushing plan to the hardware in the car.
Modern parallel-flow condensers contain many small parallel passages; debris can lodge and remain even after aggressive flushing. That hidden restriction can starve the expansion device or overload the compressor. If the system had a compressor failure (metal debris), replacement of the condenser is often safer than attempting to clean it.
Evidence anchor: Theo nghiên cứu của MAHLE Aftermarket từ Technical Messenger, vào June 2022, they emphasize that most modern condensers can’t be flushed effectively due to their design and contamination risk.
What about expansion devices, O-rings, and oil balance?
Replacing O-rings and considering the expansion device is often smart when debris or old seal fragments are suspected. Next, you’ll track oil additions carefully to avoid over-oiling or under-oiling.
Always use the correct O-ring type (material must match refrigerant and oil), lubricate lightly with compatible oil, and torque fittings evenly. For oil, follow OEM guidance or professional service specifications based on which components were replaced.
How do you validate the repair and ensure the system cools well after replacement?
You validate success by confirming leak-tightness, correct charge, and stable pressures/temperatures under real load conditions. Next, you’ll perform Post-repair pressure test and recharge steps that prevent “it’s cold today, warm tomorrow” outcomes.
A proper verification sequence includes:
- Vacuum hold test (gross leak check) before charging.
- Charge by weight to spec; avoid “charge by feel.”
- Performance check at idle and 1,500–2,000 rpm with doors open, A/C max, recirc, fan high (typical shop method), then repeat with doors closed for real-world feel.
- Condenser airflow confirmation: fans commanded on, shrouds and seals installed, no blocked grille path.
To judge AC performance after condenser replacement, focus on repeatability: vent temperature should pull down consistently, high-side pressure should not spike excessively at idle, and the system should recover quickly after heat soak. If performance is great at speed but weak at idle, revisit airflow: fan speed control, fan relays, resistor modules, and condenser face blockage.
If you have access to temperature probes, a healthy condenser shows a meaningful temperature drop from inlet to outlet during steady operation. If you don’t, a simpler check is that the outlet line should be noticeably cooler than the inlet line once stabilized, consistent with heat rejection happening across the core.
Evidence anchor: Theo nghiên cứu của International Journal of Refrigeration from a peer-reviewed blockage experiment, vào May 2014, results showed that airflow blockage at the condenser measurably reduces capacity and efficiency—supporting why fan/airflow verification is part of post-repair validation, not optional.
Finally, if you’re chasing a stubborn intermittent issue, log ambient temperature, vent temperature, and whether the radiator fans are on. That transforms a vague complaint into actionable data for follow-up diagnostics.
What time and cost factors should you plan for when replacing the condenser?
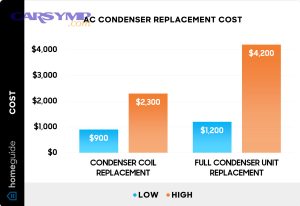
Costs vary mainly by access difficulty, vehicle design, and whether additional components and procedures are required. Next, you’ll estimate the job realistically using parts, labor, and the necessary service steps—not just the condenser price.
In many vehicles, the condenser is buried behind bumper covers and stacked heat exchangers, so labor can range from straightforward to time-consuming. This is where AC condenser replacement labor time becomes highly vehicle-specific: compact cars with easy front access may be faster, while SUVs with integrated shutters, sensors, or tight packaging can take longer.
To make planning concrete, the table below helps you map what “replacement” usually includes and what it does for you.
| Cost/Time Driver | What It Covers | Why It Matters |
|---|---|---|
| Front-end access | Bumper cover, grille, undertrays, supports | Most of the labor is simply reaching the condenser safely |
| Service procedure | Recover, vacuum, recharge | Required to remove air/moisture and restore correct charge |
| Companion parts | O-rings, drier/accumulator, sometimes expansion device | Prevents moisture and debris problems after opening the system |
| Contamination history | Flush lines (where appropriate), added filters | Prevents repeat restriction and compressor damage |
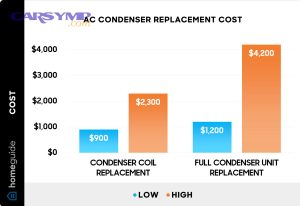
For a practical Condenser replacement cost estimate, think in layers: (1) condenser part price (OE vs aftermarket), (2) refrigerant and oil, (3) labor/access time, and (4) any additional parts required by best practice or warranty. If compressor damage occurred, the total can rise because contamination control becomes the main job, not the condenser itself.
Evidence anchor: Theo nghiên cứu của MACS (Mobile Air Climate Systems Association) from warranty-focused guidance, vào April 2022, they emphasize that replacing the drier/accumulator (and often other related parts) is commonly required to validate compressor warranties—illustrating how “cost” is influenced by required procedure, not only the condenser component.
In customer-facing terms, you can describe it as: parts are predictable; labor is what swings. If you plan ahead for seals, drier, and proper servicing, you reduce the chance of repeat visits and keep overall spend more stable.
Contextual border: Up to here, you’ve covered the core replacement decision, confirmation, and execution. Next are edge-case tips that improve outcomes when the problem isn’t obvious or when modern condenser designs complicate traditional service habits.
Advanced tips for modern condensers, tricky symptoms, and repeat-failure prevention
How do modern condenser designs change what “cleaning” can realistically fix?
Modern designs can be very efficient but less tolerant of internal contamination, so “flush it and go” may not restore full flow. Next, prioritize replacement when restriction risk is high and flushing effectiveness is low.
Many systems use dense passages that trap debris. If you suspect sealant, metal, or desiccant particles, treat the condenser like a filter that may be impossible to clean perfectly, especially if it’s parallel-flow.
How do you avoid misdiagnosis when A/C works at speed but not at idle?
This pattern often points to airflow rather than refrigerant charge alone. Next, verify fan command, fan speed staging, shrouds, and air seals that prevent bypass around the condenser stack.
In hot weather, weak fan performance can look exactly like low refrigerant: warm idle, better at speed. Confirm fans reach high speed and that the condenser face isn’t blocked or masked by add-on accessories.
What should you do when the condenser is replaced but cooling is still mediocre?
Check charge accuracy, trapped air/moisture, blend door operation, and expansion device health before blaming the new part. Next, measure vent temperature trends and stabilize the system before judging.
If charge is off by even a moderate amount, the A/C may cool “okay” on mild days but fail in traffic. Also verify that the radiator isn’t overheating, because excessive underhood temperature reduces condenser effectiveness.
Which “small” steps most often prevent comebacks after replacement?
Replacing seals correctly, capping lines fast, evacuating properly, and verifying airflow prevent most repeat issues. Next, treat moisture control as mandatory, not optional.
A single overlooked O-ring nick or a loose fitting can undo the whole job. Likewise, a missing foam seal or broken shroud can reduce airflow enough that the customer experiences weak cooling and assumes the new condenser is faulty.
Frequently Asked Questions
Can you keep driving if the condenser is leaking?
No—driving with a leak usually leads to low charge, poor lubrication, and higher risk of compressor damage; the safest choice is to repair promptly. Next, if cooling drops suddenly, stop using A/C to reduce stress until it’s serviced.
Does fin straightening fix performance?
Sometimes, mild fin straightening helps airflow, but it won’t fix internal restriction or leaks. Next, if a large area is flattened or oily residue is present, replacement is often the more reliable solution.
Will replacing the condenser alone fix every A/C issue?
No—condensers fail in specific ways, and other faults can mimic them. Next, use a structured approach that separates airflow, leakage, restriction, and compressor pumping performance before buying parts.
What is the single best “quick check” after the job is done?
Confirm stable vent temperature at idle with fans operating correctly and pressures within expected ranges for ambient conditions. Next, retest after a full heat soak to ensure real-world reliability.
Car Symp note: if you’re documenting a case for troubleshooting, record the exact conditions (ambient temperature, driving/idle state, fan status, and vent temperature) because symptoms that change with airflow are often the fastest path to the right conclusion.