


Bleeding the cooling system after a heater core replacement is the fastest way to remove trapped air so coolant circulates normally, cabin heat returns, and the engine avoids hot spots that can trigger overheating.
Next, you’ll learn whether bleeding is always required, what can go wrong if you skip it, and how to do a quick safety check before you touch the radiator cap or reservoir.
Then, you’ll get a clear definition of what “bleeding” actually means (and what it does not mean), plus how air pockets cause “no heat” symptoms that mimic bigger failures.
Introduce a new idea: once you understand the why, the step-by-step bleeding process becomes simple—and you’ll know how to verify the job is truly finished instead of “seems fine for now.”
Do you need to bleed the cooling system after a heater core replacement?
Yes—most of the time you should bleed the cooling system after a heater core replacement because trapped air is common during draining/refilling, air can block heater-core flow (causing no heat), and air pockets can create localized hot spots that contribute to overheating.
Next, the key is recognizing when bleeding is mandatory versus when a careful refill is usually enough.
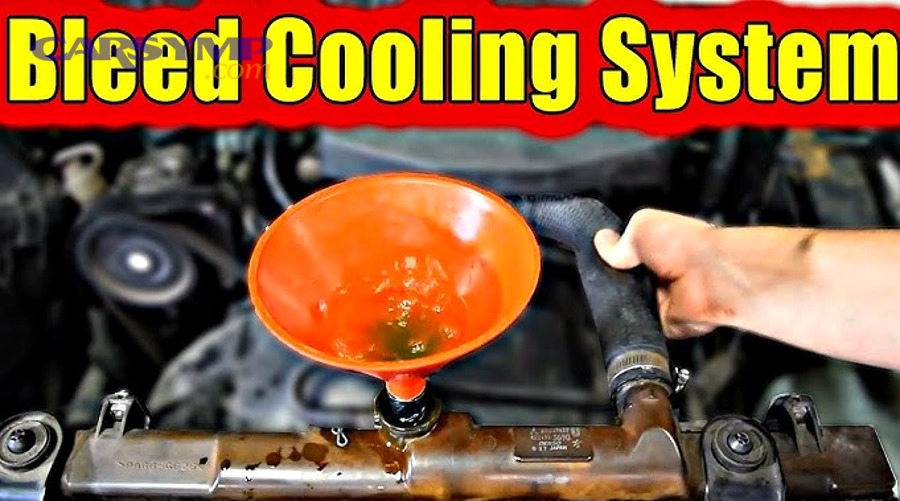
When bleeding is mandatory vs optional
Bleeding is mandatory in these situations because air is almost guaranteed to be trapped somewhere in the system:
- You drained a large volume of coolant (radiator + block + heater circuit) for the repair.
- The heater core sits higher than the radiator (or the hoses route upward), making it easy to trap air at high points.
- Your vehicle has bleed screws (manufacturers don’t add them for fun—there’s a reason they’re needed).
- You have an electronic coolant pump or complex cooling circuits (common on hybrids and some modern engines), where air can cause pump cavitation or flow errors.
- You experienced “no heat” immediately after refilling, even though the engine reaches operating temperature.
Bleeding is sometimes optional (or minimal) if all of these are true:
- You replaced the heater core but did not fully drain the system (rare in practice).
- The vehicle uses a pressurized degas bottle design that self-purges effectively and you refilled slowly and correctly.
- You verified stable temperature and consistent cabin heat across multiple heat cycles.
In real-world repairs, “optional” usually means less bleeding, not no bleeding.
What happens if you skip it
Skipping bleeding often creates problems that look like bigger failures, which wastes time and money:
- No cabin heat or weak heat: Air blocks flow through the heater core, so the blower pushes air across a core that isn’t receiving hot coolant.
- Temperature gauge swings: Air pockets move, expand, and collapse, creating intermittent coolant contact with sensors.
- Overflow and coolant loss: Air expands as the engine warms; the system burps into the reservoir, then the level drops after cool-down, making it look like a leak.
- Overheating risk: Air reduces heat transfer and coolant circulation efficiency; the cooling system can’t “carry away” heat evenly.
This is where the Coolant loss and overheating link becomes real: a system that repeatedly purges air can push coolant out, then run low, then overheat—especially in stop-and-go driving.
Quick safety checklist before you start
Before you bleed anything, confirm these basics so you don’t turn a normal job into a burn injury or a cracked plastic fitting:
- Let the engine cool until the upper radiator hose is cool to the touch.
- Never remove a radiator cap on a hot system—use the reservoir cap only if your design allows it.
- Confirm your coolant type is correct and mixed properly (premix vs concentrate).
- Verify heater-core hose clamps and connections are tight after heater core replacement work.
- Place the car on level ground (or follow the vehicle-specific “nose up” guidance if needed).
What does “bleeding the cooling system” mean and why does it matter?
Bleeding the cooling system is the process of removing trapped air from coolant passages so the system can maintain steady circulation, stable pressure, consistent cabin heat, and reliable heat transfer at operating temperature.
Then, once you see how air gets in and how it behaves, the “why” becomes obvious.
How air pockets form during repairs
Air enters the system during repair work in predictable ways:
- Draining coolant introduces air into the radiator, block passages, heater core, and hoses.
- High points trap air when you refill—especially where hoses arch upward or the heater core sits high in the dash.
- Thermostat behavior matters: if the thermostat stays closed during early warm-up, coolant may not circulate fully, so air stays trapped until later.
- Small leaks can suck air in: a loose clamp can pull air during cool-down even if it doesn’t drip coolant immediately.
Why air can cause overheating and no-heat
Air causes trouble because it behaves differently than liquid coolant:
- Air compresses and expands a lot with temperature changes, causing level swings and false “coolant loss.”
- Air blocks flow through the heater core, which is why “no heat” is one of the most common post-repair symptoms.
- Air reduces heat transfer at metal surfaces; even a small pocket near a hot area can create a localized hot spot.
According to a study by KTH Royal Institute of Technology from the School of Engineering Sciences (SCI), Department of Fluid Mechanics, in 2024, increasing aeration was associated with a measurable drop in convective heat transfer performance (reported as a drop in Nusselt number) as air content increased.
How bleeding differs from flushing
Bleeding and flushing get confused constantly:
- Bleeding (air-purging): Removes air pockets so coolant flows and transfers heat correctly.
- Flushing: Removes contaminated coolant, debris, rust, or scale from the system.
You can flush without fully bleeding (and still have issues), and you can bleed without flushing (if coolant is clean and correct). If your goal is stable heat and temperature after a repair, bleeding is the priority.
What tools and materials do you need to bleed the cooling system correctly?
You need three categories of items to bleed a cooling system correctly: (1) refill/bleeding tools, (2) the correct coolant and water, and (3) safety gear to prevent burns and spills.
Next, picking the right tool depends on whether your vehicle is self-purging, has bleed screws, or benefits from a vacuum fill.
Tools
Most DIY bleeding jobs go smoother with at least one of the following:
- Spill-free funnel kit (fits radiator neck or reservoir opening)
- Vacuum fill tool (best for stubborn systems; reduces air dramatically)
- Basic hand tools (pliers, screwdrivers, sockets for clamps and bleed screws)
- Catch pan and shop towels (coolant is slippery and toxic)
- IR thermometer (optional, helpful for verifying hose temps and thermostat opening)
- Jack and stands (only if the procedure calls for raising the front)
Fluids
Your refill is only as good as the coolant you put back in:
- Correct OEM-spec coolant (type matters: OAT, HOAT, IAT, etc.)
- Distilled water (if mixing concentrate)
- Premix coolant (simplifies mixing accuracy)
If you mix wrong or use the wrong chemistry, you can accelerate corrosion and contribute to Preventing heater core failure becoming your next repair goal.
Protective gear
Coolant system work is “quietly dangerous” if you treat it casually:
- Nitrile gloves (coolant is irritating and toxic)
- Safety glasses (splash protection)
- Long sleeves (hot steam exposure)
- Wheel chocks (if idling while raised)
How do you bleed the cooling system after replacement?
Bleed the cooling system by refilling the system correctly, warming the engine with the heater on, releasing trapped air through a controlled “burp” process (or bleed screws), and verifying stable temperature and consistent heat through multiple heat cycles.
Below, the biggest win is doing the refill phase slowly and methodically so you don’t create more air than you remove.
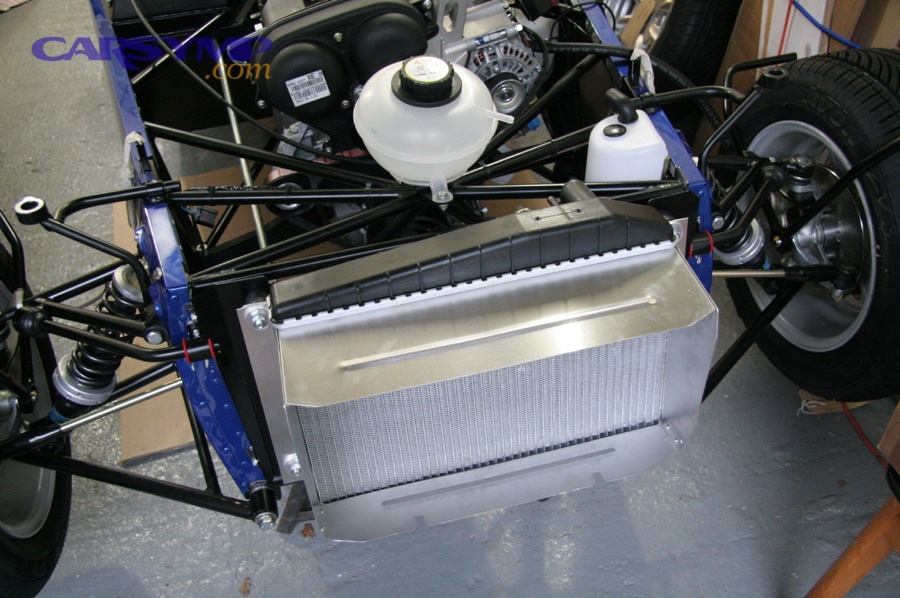
Step 1: Refill correctly (vacuum fill vs funnel)
A correct refill reduces trapped air before you even start the engine.
Option A: Vacuum fill (best if available)
- Connect the vacuum tool to the radiator neck or reservoir port (per tool instructions).
- Pull vacuum and confirm it holds briefly (a fast leak-down can reveal a loose clamp).
- Let coolant get drawn in under vacuum.
- Result: far fewer air pockets, faster stable heat.
Option B: Spill-free funnel (best DIY-friendly choice)
- Install the funnel with the correct adapter seal.
- Fill slowly until coolant stays near the funnel neck.
- Squeeze upper radiator hose gently to help move air.
- Keep the reservoir at the correct “cold” level too (if separate).
Key caution: if you pour fast, you can trap air behind the thermostat and in the heater core loop, which makes later steps take longer.
Step 2: Run the engine and set the heater correctly
This step ensures coolant can flow through the heater circuit you just worked on.
- Start the engine and set HVAC to maximum heat.
- Set the fan to a moderate speed (high fan isn’t required; heat setting is).
- Let the engine idle until it begins to warm.
- Watch for bubbles rising in the funnel/reservoir as air escapes.
If the cabin stays cold as the engine warms, that’s a clue you still have an air lock (or a valve/door issue).
Step 3: “Burp” the system or use bleed screws
This is the part most people rush—and rushing is how you end up with repeat symptoms.
If your vehicle has bleed screws:
- Locate them (often near thermostat housing, upper hose area, or high points).
- Open slowly until air escapes, then close when coolant runs steadily without bubbles.
- Do not overtighten (many are small and fragile).
If you’re burping via funnel:
- Keep the funnel partially filled.
- As the engine warms, gently raise RPM to ~1,500–2,000 for short bursts to increase flow.
- Massage the upper hose carefully (not aggressively).
- Look for repeated bubble release, then calmer flow.
Here’s a single video demonstration of a typical DIY approach (procedure varies by vehicle):
Step 4: Verify, top off, and test drive
Bleeding isn’t “done” when the bubbles stop once—it’s done when the system behaves consistently.
- Confirm the radiator fan cycles normally (if applicable).
- Confirm upper hose gets hot when the thermostat opens.
- Confirm cabin heat is steady at idle and during a short drive.
- Shut down, let it cool fully, then recheck the reservoir level.
- Top off to the cold mark if needed.
This is also where you reduce the Coolant loss and overheating link risk: a properly bled system doesn’t keep burping coolant out every heat cycle.
What are the signs air is still trapped in the cooling system?
There are four common signs air is still trapped: temperature gauge fluctuations, gurgling or sloshing sounds, intermittent or no cabin heat, and a coolant level that drops noticeably after the engine cools down.
Next, treat these like a checklist—if you fix the air, many “mystery” symptoms disappear.
Temperature gauge swings
If the gauge rises and falls without a clear driving pattern, air may be moving past the sensor or restricting flow. Watch for:
- Temp climbs at idle, then drops when you rev.
- Temp rises on hills, then normalizes quickly.
- Heater output changes with RPM.
Gurgling/sloshing noises
Air moving through the heater core or dash area can sound like:
- Sloshing behind the glove box
- Gurgling during acceleration
- A “waterfall” sound after shutdown
These noises are especially common right after heater core replacement.
No cabin heat or intermittent heat
A classic air-lock pattern is:
- Heat starts warm, then turns cool.
- Heat is warm only when driving, not at idle.
- One heater hose is hot and the other stays much cooler (flow restriction).
Low coolant in the reservoir after cool-down
If the level looks fine hot but drops low cold, the system likely expelled air into the reservoir during warm-up—and now it needs coolant to replace that lost volume.
According to a study by KTH Royal Institute of Technology from the School of Engineering Sciences (SCI), Department of Fluid Mechanics, in 2024, higher air content in the working fluid aligned with a larger percentage drop in convective heat transfer performance (reported as Nusselt number drop) as aeration increased.
Why is the car still overheating or losing coolant after bleeding?
If a car still overheats or loses coolant after bleeding, the most common reasons are a small leak pulling air back in, a thermostat that isn’t controlling flow correctly, restricted circulation (pump/radiator issues), or a combustion-gas intrusion problem that keeps reintroducing bubbles.
However, you can sort these quickly if you diagnose in the right order.
Small leaks (hose clamps, heater core connections)
A tiny seep can behave like a big problem because it allows air in during cool-down:
- Check heater hose connections at the firewall and at the engine.
- Look for crusty residue at clamps and plastic fittings.
- Inspect around the new heater core case area (inside cabin too).
If you’re seeing foggy windows, sweet smell, or damp carpet after the repair, move straight to Cabin damp carpet diagnosis—because that can indicate a leak inside the HVAC box.
Thermostat issues
A thermostat can cause overheating patterns that mimic trapped air:
- Stuck closed → rapid overheating, cold radiator hose
- Stuck open → slow warm-up, weak heat, but usually not overheating at idle
If the thermostat is questionable and you’re already dealing with cooling system work, replacement is often a practical next step.
Water pump and radiator flow issues
If the pump can’t circulate properly, bleeding won’t fix the root cause.
- Look for weak upper hose flow even when warm.
- Check for collapsed hoses under RPM (internal hose spring missing on some designs).
- Consider radiator restriction if the vehicle has a history of contaminated coolant.
This is also where Preventing heater core failure connects: dirty coolant and corrosion that clog a heater core can also reduce radiator efficiency and strain the entire system.
Head gasket red flags
If you “bleed” repeatedly and bubbles keep returning, suspect combustion gas intrusion:
- Bubbles appear continuously (not just early warm-up purge).
- Coolant pushes out aggressively.
- Sweet exhaust smell or white smoke (not always present).
- Overheats under load quickly.
At that point, a combustion leak test is smarter than endless bleeding attempts.
Which bleeding method is best for your vehicle?
A spill-free funnel is best for most DIY car owners, a vacuum fill tool is best for stubborn or complex systems, a pressure bleeder is best for controlled filling on certain designs, and scan-tool bleeding is best when the vehicle uses electric pumps or programmed purge routines.
Meanwhile, the “best” method is the one that matches your system design and reduces repeat air intrusion.
Funnel “burping”
Best for: Typical older systems, DIY workflows, quick post-repair stabilization.
- Pros: Affordable, effective, simple to monitor bubbles
- Cons: Can take time; some systems still trap air in high points
Vacuum fill tool
Best for: Systems that trap air easily, vehicles with complex routing, repeated post-repair air problems.
- Pros: Minimizes air from the start; faster stable results
- Cons: Requires tool; needs good seals and correct setup
Pressure bleeder
Best for: Certain European designs and controlled filling procedures.
- Pros: Controlled fill, less mess
- Cons: Wrong pressure can cause leaks; not universal
Dealer scan-tool bleeding for electric pumps
Best for: Vehicles with electric water pumps, hybrid cooling loops, and manufacturer-specific routines.
- Pros: Runs pumps/valves in the correct sequence
- Cons: Requires scan tool access or shop visit
If your repair history includes car AC repair work around HVAC components, be extra careful to confirm blend door function too—because a stuck door can mimic “no heat” even when coolant flow is perfect.
What special cases make bleeding the cooling system harder?
Bleeding becomes harder when the vehicle has high-point coolant routing, elevated heater core placement, recent temporary bypass work, or signs of an internal cabin leak that keeps reintroducing air and lowering coolant level.
More importantly, these special cases are where most repeat failures happen—because the system “seems bled” until real driving conditions expose the trapped air.

Elevated-fill point vehicles
Some vehicles need the front end raised or a special fill funnel location:
- The goal is to place the fill point at the highest coolant point so air naturally migrates upward.
- If you skip this, air can stay trapped in the heater core loop and reappear as intermittent heat.
After bypassing heater core temporarily risks
If someone previously bypassed the heater core to stop a leak, bleeding can get confusing:
- Bypass changes flow routing and can trap air differently.
- Reconnecting a previously bypassed circuit can release debris and trapped air.
- The system may need extra heat cycles to stabilize.
This is a good moment to inspect hose condition and clamps, because old hoses fail soon after being disturbed.
Cabin damp carpet diagnosis and heater core leak check
If your carpet is damp or windows fog with a sweet smell, bleeding won’t hold because coolant is leaving the system:
- Check passenger footwell dampness and sticky residue.
- Look for recurring coolant loss without visible engine-bay leaks.
- Confirm the heater core connections and seals are correct after the install.
A leak inside the cabin can repeatedly lower coolant level, pull air in, and recreate overheating symptoms—again reinforcing the Coolant loss and overheating link.
Preventing heater core failure after repair
After you finish bleeding, prevention is about keeping coolant healthy and flow unobstructed:
- Use the correct coolant chemistry and change interval.
- Avoid mixing incompatible coolants.
- Repair leaks early (low coolant accelerates corrosion and overheating).
- If you had sludge or scale, plan a proper flush later (separate from bleeding).
This is the practical foundation of Preventing heater core failure: stable coolant chemistry + stable system level + stable temperature control.
Evidence (if any)
According to a study by KTH Royal Institute of Technology from the School of Engineering Sciences (SCI), Department of Fluid Mechanics, in 2024, increasing aeration (air content) in the working fluid was associated with a larger percentage drop in convective heat transfer performance (reported as Nusselt number drop) as air content increased.