


Coolant loss and engine overheating are linked because coolant is the engine’s primary heat-transfer fluid, and when the system loses coolant (or can’t hold pressure), the engine cannot move enough heat out of the cylinder head and block to stay within a safe temperature range. The result is a predictable chain: reduced coolant volume or pressure creates steam pockets and hot spots, the temperature gauge climbs, and the engine can quickly enter a damaging overheat cycle.
Next, the most useful way to solve the problem is to treat “coolant loss + overheating” as a diagnostic puzzle instead of a single failure, because the same symptoms can come from external leaks, hidden internal leaks, or circulation and airflow problems that overheat even when the coolant level looks normal.
Then, you can narrow the cause much faster by recognizing the pattern of when it overheats (idle vs highway), what the heater does (hot vs suddenly cold), and what the cooling system shows (puddles, crusty residue, bubbling reservoir, or a sweet smell).
Introduce a new idea: once you understand the mechanism and the patterns, you can make safer decisions in the moment and choose the right fix—whether that’s a simple hose repair, a thermostat replacement, or a more serious internal-engine diagnosis.
What is the link between coolant loss and engine overheating?
Coolant loss and engine overheating are linked because coolant is the engine’s heat-carrying fluid, and when its level or system pressure drops, the cooling system can’t transfer heat fast enough to prevent hot spots, boiling, and rapid temperature rise. Specifically, understanding how heat moves through the coolant helps you diagnose why your engine temperature rises when the coolant level falls.
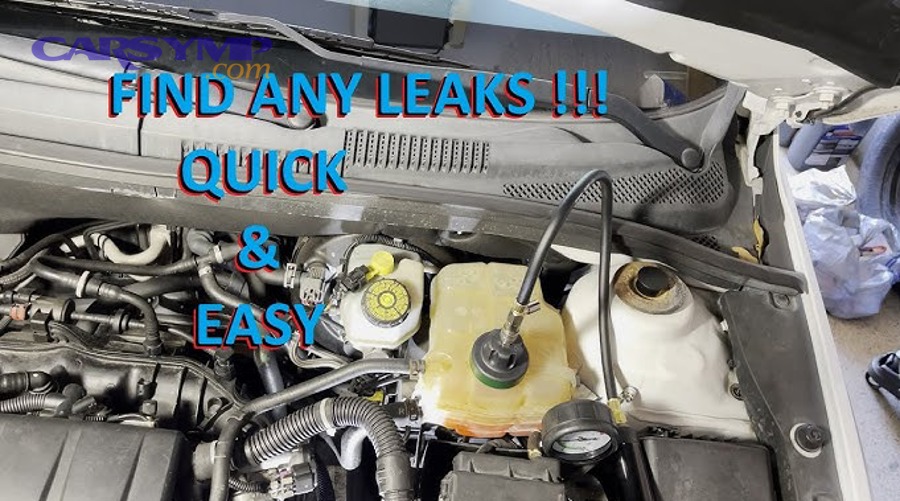
How does low coolant actually cause the temperature gauge to climb?
Low coolant causes the temperature gauge to climb because the system loses heat-transfer capacity, forms air/steam pockets, and stops circulating coolant evenly through the hottest engine passages—especially around the cylinder head. To illustrate the link clearly, follow the heat path: the engine produces heat → coolant absorbs it in the water jackets → the water pump moves it to the radiator → airflow removes it → coolant returns cooler.
When coolant is low, three things happen at the same time:
- Less liquid touches hot metal. Coolant can only remove heat where it physically contacts the water jacket surfaces. If the coolant level drops below key passages, the metal runs hotter and can distort.
- Air pockets disrupt circulation. Air compresses; coolant does not. A bubble near the thermostat or temperature sensor can cause erratic readings and sudden spikes.
- Boiling happens earlier without stable pressure. Even if you “still have some coolant,” a system that can’t hold pressure can boil sooner, and boiling creates steam pockets that insulate metal surfaces instead of cooling them.
A practical clue: the cabin heater may suddenly blow cold during an overheat event, because the heater core is a small radiator that needs coolant flow; if flow stops or air enters, heat output drops.
According to a thesis hosted by Loughborough University from an engineering research repository, in 2019, trapped gas (air) in engine cooling systems was shown to disrupt coolant behavior and performance, supporting why air management can contribute to overheating patterns.
Can overheating itself cause coolant loss even if there wasn’t a leak first?
Yes—overheating can cause coolant loss because (1) the coolant expands and can vent through the overflow, (2) boiling pushes coolant out as steam and liquid, and (3) excess pressure can force weak points (hoses, seams, caps) to release coolant. More importantly, this creates a feedback loop: overheating pushes coolant out → coolant level drops → the engine overheats faster next time.
This “overheat → lose coolant” sequence commonly shows up when:
- The radiator cap can’t maintain pressure, so the system vents early.
- The cooling fan isn’t moving enough air at idle, so temperature climbs in traffic.
- The engine is worked hard (climbing a hill, towing) and the system hits its limits.
A helpful reference point: many radiator caps are designed to raise the boiling point by increasing system pressure, which is why a weak cap can behave like a coolant-loss problem even when nothing else is broken.
Is it safe to drive when you’re losing coolant and/or overheating?
No—it is not safe to drive with coolant loss and/or overheating because (1) overheating can warp the cylinder head quickly, (2) low coolant can cause steam pockets that spike temperatures without warning, and (3) repeated overheating can damage head gaskets, catalytic converters, and bearings. Then, because the risk rises sharply once the engine crosses into the “red” zone, you need clear stop/continue rules rather than hoping it “cools down on its own.”

What are the “stop now” signs that mean you should shut the engine off?
There are 6 main stop-now signs you should treat as immediate shutdown triggers: red temp warning light, steam from the hood, temperature gauge pegged hot, coolant smell + sudden spike, heater suddenly blows cold during overheat, and visible boiling/overflow from the reservoir, based on immediate engine-damage risk. Next, use these signs to reduce the chance of turning a fixable cooling fault into an engine rebuild.
Here’s what each sign usually means:
- Red temp light or gauge pegged: the engine is already beyond safe operating temperature.
- Steam: coolant is boiling and escaping; you may already be losing coolant rapidly.
- Heater turns cold while overheating: coolant flow is compromised (air pocket, pump issue, low coolant).
- Reservoir boiling/overflow: pressure is venting; coolant loss is actively happening.
If you see any of these, the safe move is: pull over, shut off, let it cool, and tow if needed. Continuing can turn a minor leak into warped metal.
What should you do in the first 10 minutes after noticing overheating?
The safest response is a 6-step cooling response: reduce load, get to a safe stop, shut off, wait for cool-down, never open the cap hot, and inspect only when safe, with the expected outcome of preventing escalation and avoiding burns. To better understand why each step matters, connect it to pressure and boiling behavior in the cooling system.
Step-by-step:
- Turn off A/C and reduce engine load. A/C adds heat load and can increase under-hood temps.
- Turn the cabin heater on briefly (if the situation allows). This can pull heat from the engine—but if it’s already blowing cold, that’s a diagnostic clue.
- Pull over safely as soon as possible.
- Shut the engine off. Idling may not help if the fan or pump is compromised.
- Wait at least 15–30 minutes. Cooling systems can stay pressurized and scalding hot.
- Check coolant level only when cool. Opening a hot cap can flash-boil and spray.
A pressure system is designed to raise boiling point; when you interrupt the overheating cycle early, you reduce boil-over and prevent additional coolant loss.
What causes coolant loss and overheating together?
There are 3 main types of causes behind coolant loss and overheating together: external leaks, hidden/internal losses, and cooling-system failures that overheat first and lead to loss later, based on where the coolant goes and whether circulation/airflow stays intact. Moreover, grouping causes this way makes troubleshooting faster because each group has predictable symptoms and test methods.

Which external leaks most commonly trigger overheating?
There are 6 common external leak sources that frequently lead to overheating: radiator end tanks, upper/lower radiator hoses, heater hoses, water pump weep hole, thermostat housing, and reservoir seams, based on leak frequency and system pressure exposure. Next, once you know the common points, you can search smarter—looking for dried residue, wet seams, and coolant smell rather than waiting for a big puddle.
Practical inspection tips:
- Look for crusty white/green/orange deposits near hose connections and plastic tank seams.
- Inspect the underside of the water pump area for a wet trail or drip pattern.
- Check hose clamps for seepage; a clamp can loosen over time.
- Look under the car after a hot shutdown; small leaks may only show when pressurized.
Why external leaks cause overheating quickly: they drop coolant volume and often introduce air, which disrupts flow and heat transfer.
Which “no visible leak” causes can still drop coolant and overheat the engine?
There are 4 main “no visible leak” causes that can drop coolant and overheat: heater core leaks into the cabin, internal combustion leaks (head gasket or cracked component), overflow/pressure-cap problems, and slow leaks that evaporate on hot surfaces, based on where the coolant disappears. Especially when the driver sees “no puddle,” these hidden paths can delay diagnosis until overheating becomes frequent.
Key signs for each:
- Heater core leak: sweet smell inside, foggy windows, damp carpet (often passenger side), gradual coolant loss.
- Combustion leak: bubbles in reservoir, coolant smell from exhaust, white vapor on cold starts, unexplained pressure buildup.
- Cap/overflow issues: coolant pushed into overflow but not pulled back in when cool; repeated low radiator level with a “full” reservoir.
- Evaporation leak: coolant hits hot parts and evaporates, leaving only residue.
This is where readers often encounter related repair choices like heater core replacement—and why diagnosing the exact leak path matters before committing to a major job.
Which part failures cause overheating even before coolant level drops?
There are 4 common part-failure categories that cause overheating before coolant level drops: thermostat stuck closed, cooling fan failure, radiator restriction, and water pump circulation failure, based on whether the system can move heat to the radiator and reject it to air. However, these problems can look like coolant loss later because overheating can push coolant out through overflow or venting.
Pattern-based clues:
- Overheats at idle, cools on highway → often fan or airflow issue.
- Overheats on highway/load → often radiator restriction, pump issue, or thermostat.
- Heater output weak or fluctuating → air pockets or circulation issues.
If you ever face the HVAC symptom set, this is where a No heat vs clogged heater core diagnosis becomes relevant: no cabin heat can be a heater core blockage, but during overheating it can also signal low coolant or air in the system—two very different fix paths.
How can you diagnose the root cause without guessing?
Diagnosing coolant loss and overheating is best done with a 5-stage workflow—visual inspection, level/pressure verification, airflow checks, circulation checks, and confirmation tests—so you can prove the cause instead of swapping parts blindly. Then, because each stage rules out a category of failures, you reduce cost and prevent repeat overheating.

What checks can you do at home to find a coolant loss source?
You can do 7 home checks to locate coolant loss: cold level check, reservoir behavior check, visual leak scan, residue scan, cabin moisture/smell check, oil/coolant cross-check, and temperature pattern observation, based on effort and reliability. To begin, these checks build the fastest picture of whether you have a leak path, a pressure problem, or a circulation problem.
A practical at-home checklist:
- Check level when cold (radiator if accessible + reservoir level mark).
- Inspect hoses and clamps for wetness or crusty deposits.
- Scan the radiator end tanks (plastic-to-aluminum seams often seep).
- Smell inside the cabin for sweet coolant odor; look for foggy windows and damp carpet.
- Check engine oil for a milky look (not definitive, but a warning sign).
- Observe when it overheats (idle vs highway).
- Note heater output changes during temperature rise.
Avoid “stop-leak” additives as a first move; they can complicate repairs and hide the real leak location.
What tests confirm the problem at a shop (and what do they mean)?
There are 5 shop tests that confirm the true cause: pressure test, radiator cap test, combustion-gas (block) test, fan control/relay testing, and flow/thermal checks, based on what each test proves. More specifically, each test answers a different question: “Is it leaking?”, “Is it holding pressure?”, “Is combustion entering coolant?”, “Is airflow working?”, “Is heat moving through the radiator?”
What the results usually mean:
- Pressure test fails (pressure drops) + visible seep → external leak location identified.
- Pressure test holds but coolant still disappears → suspect internal leak or overflow behavior under driving conditions.
- Cap test fails → system may boil earlier and vent coolant, mimicking a leak.
- Block test positive → combustion gases likely entering the cooling system (often head gasket related).
- Fan test fails → overheating at idle/traffic is likely.
A relevant engineering reference is the SAE technical work examining thermal safety under coolant-loss conditions, which reinforces that running without adequate coolant rapidly escalates thermal risk.
How do you tell the difference between a leak problem and a circulation problem?
A leak problem wins on “evidence of escape,” a circulation problem wins on “evidence of poor heat movement,” and an airflow problem is best identified by idle-versus-speed overheating patterns. Meanwhile, using a comparison lens prevents the most common mistake: replacing the thermostat when the true cause is a slow leak (or chasing a leak when the fan is dead).
Here’s a quick comparison table to help you interpret symptoms. This table summarizes what each symptom pattern most strongly suggests and what to test next.
| Symptom pattern | Most likely category | Best next step |
|---|---|---|
| Puddle or wet residue visible | External leak | Pressure test + locate seep |
| Overheats at idle, improves at speed | Airflow/fan issue | Fan command/relay test |
| Overheats at highway/load | Circulation or radiator restriction | Flow check + thermostat/pump evaluation |
| Heater suddenly blows cold during overheat | Low coolant/air pocket/circulation loss | Cool-down + level check + bleed/pressure test |
| Reservoir full but radiator low (when cool) | Cap/overflow return issue | Cap test + hose/return path check |
This framework also explains why “temporary fixes” can be misleading: topping off coolant may mask the symptom but not fix the category of failure.
What fixes actually solve coolant loss + overheating (and what’s a temporary patch)?
A real fix repairs the failed component or leak path, while a temporary patch only restores coolant level or delays the symptom; permanent solutions protect the engine, whereas patches can allow repeated overheating damage. Besides, once you know whether the root cause is leak, airflow, or circulation, you can prioritize the right repair without wasting time and money.

Which repairs are most common and how urgent are they?
There are 7 common repair paths for coolant loss and overheating: hose/clamp repair, radiator cap replacement, thermostat replacement, water pump replacement, radiator repair/replacement, cooling fan electrical repair, and internal engine repair, based on failure frequency and risk. Next, urgency depends on whether the problem can strand you or damage the engine quickly.
A practical urgency guide:
- Highest urgency (stop driving if overheating): fan failure in traffic, major hose leak, failed water pump, confirmed combustion leak.
- Medium urgency: small external leak that becomes worse under pressure, thermostat sticking intermittently, radiator restriction.
- Lower urgency (still fix soon): weak radiator cap causing minor boil-over, small seep with no overheating yet.
If the cabin symptoms point to a heater core leak, you may be weighing Heater core replacement labor time against other repairs. In many vehicles, heater core access requires significant dash work, so diagnosis must be solid before you commit.
What’s the difference between topping off coolant and fixing the underlying issue?
Topping off coolant reduces immediate risk by restoring fluid, but fixing the underlying issue prevents repeat overheating by restoring system integrity, pressure, and reliable circulation. In addition, topping off can create a false sense of security because you may temporarily see “normal temperature” while the leak or failure continues in the background.
Use topping off only as a short-term safety step when:
- The engine is cool,
- You can add the correct coolant mix,
- You are driving only a short distance to a repair location,
- You are monitoring temperature continuously.
Avoid risky shortcuts. For example, some drivers consider bypassing the heater circuit to stop a cabin leak; Bypassing heater core temporarily risks include losing cabin heat/defrost function and potentially masking a leak while the cooling system still has unresolved pressure or air issues—especially if the bypass is poorly secured and introduces new leak points.
Why does coolant disappear with no visible leak, and how do you prove it?
Coolant can disappear with no visible leak because it can enter the cabin, enter the combustion process, vent through overflow under heat, or evaporate from hot surfaces, and you prove the path by testing pressure, combustion gases, and system behavior under temperature. Especially for “mysterious coolant loss,” proof matters more than suspicion because the fix ranges from a cap to a head gasket.

Could a heater core leak cause coolant loss without obvious overheating at first?
Yes—a heater core leak can cause coolant loss without obvious overheating at first because the leak may be slow, the engine may still have enough coolant to manage heat, and the driver notices cabin symptoms earlier than temperature symptoms. Then, as coolant loss accumulates, overheating can appear later, often during long drives or load.
Heater-core leak clues that matter:
- Sweet smell inside the car
- Foggy windows that persist (especially when using heat/defrost)
- Damp carpet (often passenger footwell)
- Gradual coolant loss with few external signs
This is also where No heat vs clogged heater core diagnosis becomes important:
- A leaking heater core often still produces heat until coolant runs low.
- A clogged heater core often produces weak/no heat while coolant level may be normal.
Because these two look similar from the driver’s seat, your diagnostic approach should consider both heater performance and coolant level behavior. If replacement is required, heater core replacement is typically a labor-heavy repair, so confirming the leak before disassembly is a cost-saving move.
How do block tests and pressure tests differ for finding internal coolant loss?
Pressure testing wins for finding leaks and pressure decay, block testing is best for detecting combustion gases in coolant, and a road-heat scenario is sometimes needed to reproduce the fault that only happens under load. More specifically, each test answers a different “internal loss” question.
- Pressure test: “Does the system hold pressure at rest?”
- Good for external leaks and some internal seepage.
- Not perfect for leaks that only occur at high temperature or under combustion pressure.
- Block test (combustion gas test): “Are combustion gases entering the cooling system?”
- Helpful for diagnosing head gasket-related issues.
- Can be false-negative if the leak is small, intermittent, or the test is performed under the wrong conditions.
A useful approach is to combine them: pressure test first (find the obvious), then block test if coolant still disappears with no external evidence.
When does a bad radiator cap or trapped air mimic a bigger problem?
A bad radiator cap or trapped air can mimic a bigger problem when they cause early boiling, coolant venting, erratic temperature spikes, and poor heater performance even though major components (radiator, head gasket) are intact. However, because these issues are inexpensive compared to engine repairs, they should be ruled out early in the diagnostic workflow.
What “cap/air” mimicry looks like:
- Reservoir level swings dramatically after driving.
- Temperature spikes quickly then drops.
- Heater output fluctuates.
- Coolant vents into overflow even at moderate temperatures.
This is where careful refill and bleeding procedures matter, because trapped air can create the same symptoms as failing circulation components.
According to a thesis hosted by Loughborough University from an engineering research repository, in 2019, trapped gas (air) in engine cooling systems was shown to affect coolant behavior during filling and operation, supporting why bleeding and air management are essential when diagnosing overheating patterns.
What rare clues point to unusual causes like electrolysis or micro-leaks?
There are 4 rare but meaningful clue groups for unusual causes: repeated pinhole leaks/corrosion, coolant discoloration and deposits, temperature “cold spot” patterns on the radiator, and leaks that only appear under load/heat, based on micro-failure modes rather than obvious breaks. To sum up, these clues help when the usual suspects test “fine” but the symptoms persist.
Rare diagnostics that add confidence:
- UV dye tracing for slow leaks that evaporate before dripping.
- Infrared temperature scanning across the radiator to find restricted sections (hot inlet, unexpectedly cool bands).
- Electrical/grounding inspection if corrosion is unusually aggressive (edge case).
- Repeat pressure tests hot vs cold to reproduce temperature-dependent seepage.
If you’re deep into this territory, stop relying on guesswork and lean on evidence-based testing, because the cost of another overheat event can dwarf the cost of a proper diagnosis.
Evidence (if any)
According to a thesis hosted by Loughborough University from an engineering research repository, in 2019, trapped gas (air) in engine cooling systems can occur during filling and affects behavior in operation—supporting why bleeding and air management are essential when diagnosing overheating patterns.
According to an SAE technical paper from 2021, running an internal combustion engine under coolant-loss conditions rapidly increases thermal risk—supporting why continued driving during overheating can quickly escalate damage.