


If you want to prevent heater core failure, the most reliable strategy is simple: keep coolant clean, correctly mixed, and moving—because the heater core is a small radiator with narrow passages that clog easily and corrode fast when coolant maintenance slips.
Next, it helps to understand what “failure” really means in daily driving, because a heater core usually fails in only two ways—leaks or clogs—and each one has a different prevention path that starts with the cooling system, not the dashboard.
Then, you’ll get a step-by-step coolant-flush checklist designed for car owners, including what to inspect monthly, when to flush, how to flush without pushing debris into the heater core, and how to bleed air so you don’t create hot spots.
Introduce a new idea: once you know the prevention routine, you also need “early warning” rules and a clear flush-vs-replace decision line, so you don’t waste time flushing a heater core that’s already past the point of saving.
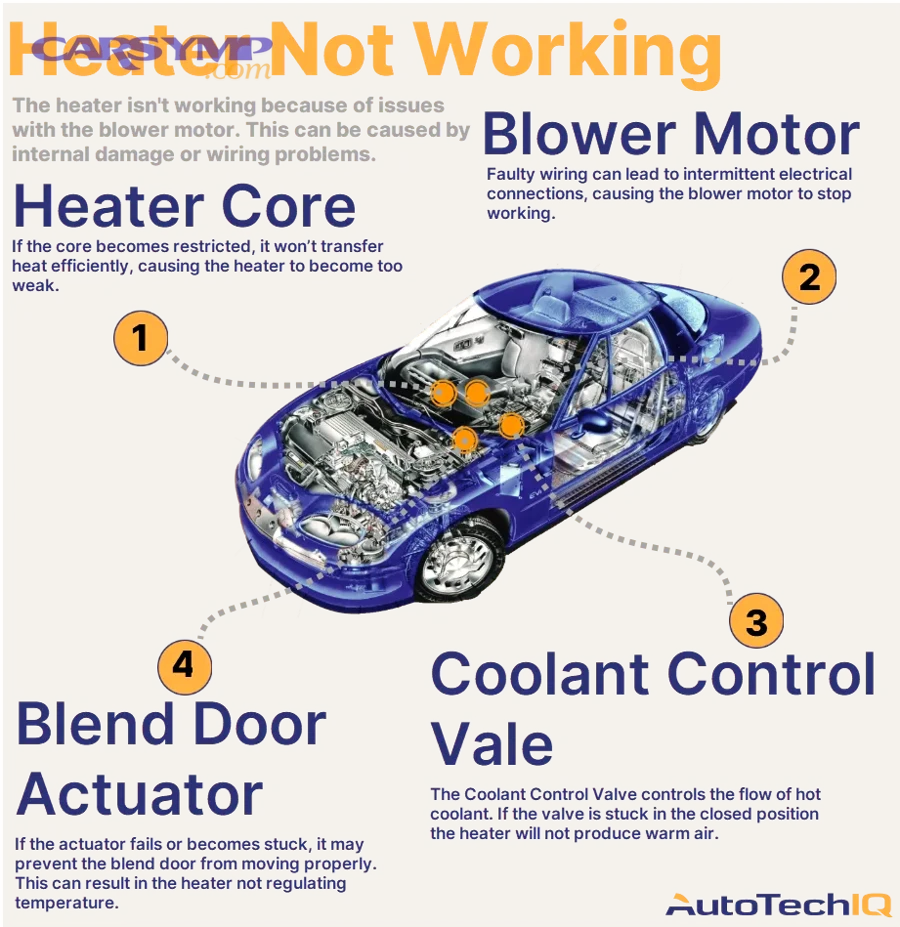
What does “heater core failure” mean, and why does prevention mostly come down to coolant care?
Heater core failure is a cooling-system problem that shows up as cabin heat loss or coolant leakage because the heater core’s thin metal tubes either clog with deposits or corrode into pinhole leaks, and both outcomes are directly influenced by coolant condition and flow.
Specifically, the heater core sits downstream of the engine’s hottest coolant flow, so any rust, sediment, oil contamination, or depleted corrosion inhibitors tend to do their worst damage there first.
What are the two main heater core failure modes: leaks or clogs?
There are 2 main types of heater core failure: (1) leaks and (2) clogs, based on the criterion of whether coolant escapes the heater core or can’t pass through it.
To illustrate why this matters, each type creates different symptoms and demands a different “prevention emphasis”:
- Leak-type failure (corrosion/pinhole leaks):
- What happens: Metal thins, then coolant starts escaping through tiny holes.
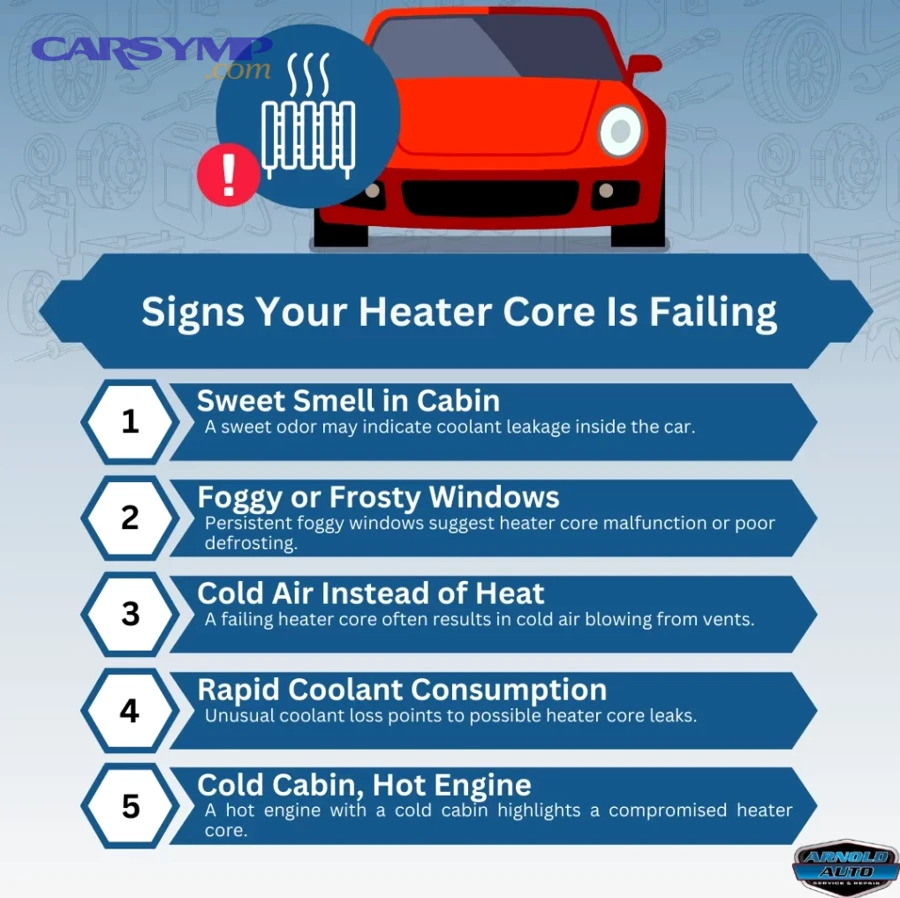
- What you notice: Sweet smell, foggy windows, damp carpet, slow coolant loss.
- What prevention targets: Corrosion inhibitor health, correct coolant chemistry, avoiding stray-current corrosion, and preventing chronic low-coolant exposure.
- Clog-type failure (restriction/blocked tubes):
- What happens: Sediment and sludge restrict flow through narrow tubes.
- What you notice: Weak/no heat at idle, one heater hose hot and the other lukewarm, inconsistent cabin temperature.
- What prevention targets: Removing contamination before it settles, avoiding stop-leak products, and flushing at sane intervals without stirring debris into the core.
A practical way to remember it is this: leaks come from chemical attack, while clogs come from physical contamination—and good coolant maintenance protects you from both by keeping chemistry stable and particles minimized.
Does running straight water or the wrong coolant mix increase heater core failure risk?
Yes—running straight water or the wrong coolant mix increases heater core failure risk for at least three reasons: it accelerates corrosion, it increases deposit formation, and it makes overheating/air-pocket events more likely.
Moreover, each reason connects directly back to how a heater core fails:
- Corrosion accelerates when inhibitor protection is missing. Proper coolant isn’t just antifreeze—it carries additive packages that protect mixed metals in the cooling system. When you dilute too far, use plain water, or mix incompatible coolant types, you can weaken those protective additives and expose the heater core’s thin metal to faster corrosion.
- Deposits form more easily with poor water quality and wrong chemistry. Tap water can contain minerals that contribute to scale. When scale and rust circulate, the heater core’s tiny passages act like a filter, trapping debris until flow drops and heat output collapses.
- Air pockets and overheating events become more likely. Weak coolant can boil sooner and protect less under load. Overheating or repeated hot spots can stress seals and metals and may push contaminants into places they settle and harden.
In short, the “cheap” shortcut (water or random mix) becomes expensive because it sets the exact conditions that create pinhole leaks and clogged passages—the two failure modes you’re trying to prevent.
What causes heater core failure in the first place?
There are 5 main causes of heater core failure: coolant contamination, depleted corrosion inhibitors, mixed/incorrect coolant chemistry, overheating/low-coolant exposure, and electrical/electrolysis-related corrosion, based on the criterion of what damages heater-core metal or blocks heater-core flow.
More importantly, these causes are not abstract—they show up as specific, preventable behaviors in everyday ownership.

Which cooling-system mistakes most commonly lead to heater core clogs?
There are 4 common mistake categories that cause heater core clogs: neglected coolant changes, contamination events, “stop-leak” usage, and poor flushing habits, based on the criterion of how debris gets created and trapped.
For example:
- Skipping coolant service until it looks dirty Coolant can degrade long before it looks terrible. As inhibitors deplete, corrosion byproducts increase, and those particles circulate until they settle in the heater core.
- Driving after a cooling-system failure without cleaning the system A failing radiator, deteriorating hoses, or a water pump issue can shed material into the system. If the system isn’t cleaned properly afterward, the heater core becomes the catch basin.
- Using stop-leak products as a “permanent fix” Many stop-leak products work by circulating small particles designed to plug leaks. Those same particles can lodge in narrow heater-core tubes and reduce flow.
- Performing an aggressive flush that dislodges debris and pushes it into the heater core A poorly planned flush can stir up sediment and send it downstream. If the heater core becomes the debris trap, your “maintenance” accidentally becomes the cause of restriction.
The prevention implication is straightforward: the goal isn’t just “flush”; it’s flush in a way that removes debris without relocating it into the heater core.
Which conditions most commonly lead to heater core leaks?
There are 4 common conditions that cause heater core leaks: depleted inhibitor protection, chronic low coolant (air exposure), overheating stress, and electrolysis/stray current, based on the criterion of how metal loses integrity.
Then, connect each condition to what you can control:
- Depleted inhibitor protection When inhibitors are used up, corrosion accelerates. Over time, thin passages and solder joints become vulnerable, and pinholes form.
- Chronic low coolant (air exposure inside the system) Low coolant introduces oxygen and promotes corrosion. It also increases the chance of localized hot spots.
- Overheating and repeated thermal cycling Overheating doesn’t just threaten the engine—it increases stress on cooling-system components. Repeated extremes can weaken metals and seals and speed up internal corrosion.
- Electrolysis/stray electrical current In some vehicles, electrical current can pass through coolant if grounds are poor. A technician-focused tip sheet explains that electrolysis can remove metal from the heater core and lead to pinhole leaks, and it notes that voltage above a certain threshold can accelerate damage. (4s.com)
The key takeaway is that leak prevention is not only about “no overheating”—it’s also about keeping coolant chemically protective and ensuring the vehicle’s electrical grounding is healthy.
What coolant-flush checklist prevents heater core failure (step-by-step for car owners)?
A heater-core prevention checklist works best when it combines 4 repeating actions—inspect, service, flush safely, and bleed correctly—to keep coolant clean and protective, which reduces the two failure outcomes: leaks and clogs.
Below, you’ll see a practical structure that fits real ownership: quick checks monthly, smarter flush timing, safer flushing habits, and correct air bleeding after service.
To make the checklist easy to use, the following table summarizes what to do and why. It’s designed to help you prevent heater core failure without guessing which tasks matter most.
| Checklist item | Frequency | Why it prevents heater core failure |
|---|---|---|
| Check coolant level trend (not just “today’s level”) | Monthly | Falling level can signal early leaks before cabin flooding happens |
| Inspect heater hoses & clamps | Monthly | Hose leaks cause low coolant/air pockets that accelerate corrosion |
| Watch for foggy windows/sweet smell | Monthly | Early cabin leak clues often appear before puddles do |
| Flush or exchange coolant per schedule | Interval-based | Restores corrosion inhibitors and reduces sludge that clogs heater cores |
| Use correct coolant spec & proper mix | Every refill | Prevents incompatible chemistry that accelerates corrosion and deposits |
| Bleed air fully after service | Every refill/flush | Prevents hot spots and flow interruptions that contribute to failures |
What should you inspect monthly to catch leaks early (before the heater core is damaged)?
There are 6 key monthly inspections for heater-core prevention, based on the criterion of catching low coolant, contamination, or cabin leak signs early.
Next, run through them in under five minutes:
- Coolant level trend in the reservoir Don’t just check “is it between MIN and MAX today.” Look for a trend: if you keep topping off, you have a leak somewhere.
- Smell and glass behavior inside the cabin A sweet odor or persistent film/fog can be an early warning that coolant vapor is entering the HVAC airflow.
- Passenger-side carpet and under-dash dampness Heater core leaks often show up as damp carpet because coolant drips inside the cabin HVAC box.
- Engine temperature behavior during normal driving If your gauge rises higher than usual, or fluctuates, you may have air pockets or cooling-system issues that stress all components, including the heater core.
- Hose condition (heater hoses + radiator hoses) Soft spots, cracking, or swelling can indicate aging hoses. A hose failure can suddenly drop coolant and create the conditions that accelerate heater core corrosion.
- Overflow bottle residue Sludge, floating debris, or oily residue suggests contamination that can later clog heater-core passages.
This monthly habit is “small effort, big payoff” because it prevents the most dangerous chain: minor leak → low coolant → air + heat stress → corrosion acceleration → heater core failure.
When should you flush coolant (time vs mileage), and what counts as “severe service”?
Coolant flushing is best planned by time and mileage together, because coolant additives age chemically over time while contamination risk increases with mileage and heat cycles.
Then, define “severe service” in a way that matters for real owners: it’s any pattern that increases heat load, contaminant generation, or thermal cycling.
Common severe-service patterns include:
- Frequent short trips (engine warms up and cools down repeatedly)
- Stop-and-go traffic in hot weather
- Towing or hauling heavy loads
- Long idling (work vehicles, rideshare, deliveries)
- Prior overheating event
- Recent cooling-system repair that introduced debris or mixed coolant
A safe rule of thumb is to follow your manufacturer’s service interval, but treat severe-service patterns as a reason to shorten the interval and prioritize coolant maintenance over “waiting until something feels wrong.”
How do you do a safer flush without dislodging debris into the heater core?
A safer flush is a method that uses 4 principles—control flow direction, avoid harsh chemistry, remove contamination gradually, and refill with the correct coolant—so you clear debris without packing it into heater-core tubes.
More specifically, treat “flush” as a controlled cleaning process, not a high-pressure blast:
- Start with a drain-and-fill mindset if coolant is very dirty If you suspect heavy sludge, a full aggressive flush can dislodge chunks. A staged drain-and-refill approach can reduce risk by removing contamination gradually.
- Avoid harsh, incompatible chemicals Strong chemical flushes can break loose deposits unpredictably. If you use any cleaner, choose one appropriate for automotive cooling systems and follow directions exactly.
- Use the correct coolant spec and proper mixture Correct chemistry helps prevent re-depositing and restores corrosion protection. This is where consistent coolant maintenance pays off.
- Be cautious with “shortcuts” like bypassing the heater core Some owners consider bypassing to avoid leaks temporarily, but Bypassing heater core temporarily risks include loss of cabin heat/defrost performance and masking a cooling-system issue that still needs repair.
If you’re not sure whether your system is “lightly dirty” or “heavily contaminated,” the safe move is to treat it as contaminated and clean it progressively.
After a flush, how do you bleed air properly to avoid hot spots and future leaks?
Bleeding air properly is a process that uses 4 steps—heat-on circulation, controlled fill, temperature stabilization checks, and recheck after cool-down—to prevent air pockets that cause hot spots and stress.
Especially after coolant service, trapped air can create the exact conditions that accelerate corrosion and overheating:
- Set cabin heat to maximum during the bleed process This helps open flow through the heater circuit so air can purge rather than stay trapped.
- Fill slowly and watch for burping/level drops As air escapes, coolant level drops. Keep topping up as needed.
- Watch for stable temperature and consistent heat output Fluctuating temperature or intermittent heat can indicate air pockets.
- Recheck level after a full cool-down Coolant contracts when cool. A final top-off after cool-down prevents a low-coolant condition that can start the corrosion chain again.
If your vehicle has bleed screws or a specific bleed procedure, follow the manufacturer’s steps, because different layouts trap air differently.
What warning signs mean your heater core may already be failing?
There are 2 major groups of warning signs that a heater core may already be failing: leak signals and restriction signals, based on whether coolant is escaping into the cabin or flow through the core is being blocked.
Next, the goal is to spot these signals early—because prevention is easiest before you reach the point where heater core replacement becomes the only realistic option.

Is a sweet smell or foggy windows a sign of heater core failure?
Yes—sweet smell or foggy windows can be a sign of heater core failure for at least three reasons: coolant vapor can enter cabin airflow, small leaks can evaporate before puddles appear, and the heater box can trap fluid where it’s hard to see.
Moreover, here’s how to interpret those signs without guessing:
- Coolant has a distinctive odor If you notice a sweet smell when the heater is on, treat it as a serious clue.
- Fog that doesn’t behave like normal humidity Normal humidity clears with defrost and airflow. Coolant film can leave residue and return quickly.
- Heater-on correlation If the smell/fog intensifies when you run heat, it points toward the heater circuit rather than an unrelated engine-bay leak.
To better understand the urgency, remember that cabin-side leaks can progress quickly because the heater core is inside the HVAC case; when it leaks, it doesn’t always drip outside where you’d notice it early.
How can you tell “no heat” is a clogged heater core vs a thermostat or blend-door issue?
A clogged heater core wins as the explanation when hose temperature difference points to restricted flow, a thermostat issue wins when engine temperature behavior is abnormal, and a blend-door issue wins when engine coolant is hot but airflow temperature doesn’t respond to HVAC settings.
Then, use a simple comparison checklist:
- Clogged heater core (restriction) indicators
- One heater hose is hot and the other is noticeably cooler (flow is limited)
- Heat may be weak at idle and improve slightly with higher RPM
- Coolant looks dirty or shows a history of contamination
- Thermostat-related indicators
- Engine struggles to reach operating temperature (stuck open) → weak heat overall
- Engine overheats or spikes (stuck closed) → major temp stress, potential for multiple cooling issues
- Blend-door / HVAC control indicators
- Heater hoses are both hot (coolant is flowing), but cabin air stays cool
- Temperature changes on the control panel don’t change vent temperature much
- You may hear clicking or feel inconsistent airflow direction
This comparison matters because flushing won’t fix a blend-door problem, and replacing a thermostat won’t restore a heater core that is packed with deposits.
Can coolant loss and overheating be linked to heater core leaks?
Yes—coolant loss and overheating can be linked to heater core leaks for three reasons: leaks reduce system volume, low coolant introduces air pockets that disrupt heat transfer, and repeated hot spots accelerate overall cooling-system stress.
Moreover, the heater core can leak slowly enough that you don’t see a puddle under the vehicle, especially if the coolant is leaking into the cabin HVAC case.
A technician tip sheet on electrolysis also notes that neglected cooling systems can promote conditions that accelerate pinhole leaks, and it provides a voltage threshold guideline used in electrolysis checks. (4s.com)
Flush vs replace: when is prevention no longer enough?
Flush wins when the problem is light restriction and cleanable contamination, replace wins when there is an active leak or repeated restrictions from an unresolved contamination source, and professional diagnosis becomes optimal when symptoms are mixed or safety is at risk.
However, the decision is easier when you tie it to outcomes: your aim is not “avoid spending money,” your aim is avoid wasting time while protecting the vehicle from overheating and cabin contamination.

Does backflushing the heater core work, or does it risk making clogs worse?
Backflushing wins in mild, early restriction cases, a standard system flush is best for general coolant degradation, and replacement becomes optimal when flow cannot be restored or contamination keeps returning.
Then, frame backflushing realistically:
- When backflushing can help
- Heat output dropped gradually, not suddenly
- Coolant isn’t extremely sludged
- You can restore more balanced hose temperatures after flushing
- When backflushing can make things worse
- Coolant is heavily contaminated with thick sludge
- You suspect stop-leak product residue
- Debris breaks loose but relocates and re-plugs passages
- You start seeing new leaks after aggressive cleaning (old corrosion was “sealed” by deposits)
If you attempt backflushing, the safety mindset is: restore flow gently and stop if you see signs of heavy contamination or new leakage.
When should you replace the heater core instead of flushing again?
Yes—you should replace the heater core instead of flushing again when the failure is structural or repeating, for at least three reasons: an active leak will not be cured by flushing, recurring restrictions usually mean a contamination source remains, and repeated service attempts increase the chance of overheating or cabin coolant exposure.
More importantly, look for these replacement triggers:
- Any confirmed heater core leak into the cabin Damp carpet, persistent fogging with sweet smell, or coolant residue under the dash points toward a leak, not a clog.
- Repeated clog symptoms after a flush If heat improves then quickly declines again, you likely have an upstream source of debris (corroding radiator, degraded hoses, prior component failure) that is refilling the system with particles.
- You need reliable defrost and cabin heat for safety In cold climates, poor defrost performance becomes a visibility hazard.
At this point, “heater core replacement” becomes the practical fix—but it’s also the moment where you should think about why it failed, so the new heater core doesn’t suffer the same fate.
A related ownership reality is that Heater core replacement labor time can be significant on many vehicles because the component is often buried behind the dashboard, so preventing repeat failures is worth serious effort.
What rare or vehicle-specific factors can accelerate heater core failure even with regular coolant changes?
Rare heater-core failure accelerators are specialized cooling-system and electrical conditions—such as electrolysis, abnormal coolant conductivity, post-failure debris cycles, and measurable flow restriction patterns—that can defeat normal maintenance unless you identify and correct the root cause.
Next, this section exists for one situation: you did “the normal stuff,” but the heater core still fails early or repeatedly—so you need more precise explanations and tests.
Can electrolysis (stray electrical current) cause heater core corrosion and repeat leaks?
Yes—electrolysis can cause heater core corrosion and repeat leaks for at least three reasons: coolant can become an electrical pathway, poor grounds increase voltage flow through the cooling system, and metal can be removed from the heater core and redeposited elsewhere, creating pinholes.
Moreover, a technician-oriented document explains electrolysis as electrical current passing through coolant and describes how it can create pinhole leaks, and it also mentions that poor/missing grounds can increase voltage flow through the cooling system. (4s.com)
Practical owner takeaway:
- If you’ve had repeat heater core failures with pinhole leaks, it’s reasonable to ask a shop to check grounds and test for electrolysis rather than just replacing parts again.
Should you test coolant pH or conductivity if you’ve had repeat heater core failures?
Yes—you should consider coolant pH or conductivity testing after repeat heater core failures for three reasons: abnormal conductivity can support stray current pathways, degraded coolant chemistry reduces corrosion protection, and repeated early failure suggests the system environment is still aggressive.
Then, keep expectations realistic:
- These tests don’t “prove” a single cause by themselves.
- They help you decide whether your system is chemically stable—or whether something is pushing it toward corrosion and deposits despite regular changes.
The high-level prevention logic remains the same: stable chemistry + clean coolant + good grounding equals less risk.
Do coolant filters or inline screens help prevent heater core clogs after a major cooling-system failure?
Yes—coolant filters or inline screens can help in specific post-failure situations for at least three reasons: they can capture debris after a component sheds material, they can reduce recirculation of rust/scale, and they can protect narrow passages like the heater core during a recovery period.
However, the use case is narrow:
- If your system is healthy and clean, adding a filter is often unnecessary complexity.
- If you had a major contamination event (severe corrosion, component disintegration, heavy sludge), filtration can sometimes help while the system stabilizes—especially if you’re trying to prevent repeat clogging.
The rule is: use filtration as a recovery tool, not a substitute for proper cleaning and correct coolant chemistry.
Is the inlet vs outlet heater-hose temperature difference a practical way to confirm restriction?
Heater-hose temperature difference is a practical restriction indicator because a healthy heater core typically shows hot inlet + slightly cooler outlet, while a restricted heater core often shows hot inlet + much cooler outlet due to reduced flow and reduced heat transfer.
To better understand what you’re measuring:
- Small difference can mean good flow (heat is transferring steadily).
- Large difference can mean restricted flow (coolant enters hot but doesn’t circulate enough to warm the outlet).
Evidence: According to a study by Chonnam National University from the Department of Materials Science and Engineering, in 2023, adding a corrosion inhibitor (SDBS) in an ethylene glycol–water coolant environment increased the polarization resistance of an aluminum alloy sample (A3003) from 174.49 kΩ to 1100 kΩ, indicating substantially improved corrosion resistance. (j-cst.org)
That matters because higher corrosion resistance translates to fewer corrosion byproducts circulating in the system—meaning fewer particles available to settle and restrict narrow passages like heater cores.
At this point, you have the complete prevention checklist, the early warning signals, and the flush-vs-replace decision rules, plus advanced factors that explain repeat failure patterns. Your next action is simple: pick the checklist interval you can actually follow—and make coolant maintenance consistent enough that the heater core never becomes the system’s “weakest link.”