How to Replace a Thermostat: Complete DIY Guide for Homeowners (2024)
Replacing a thermostat yourself is a straightforward DIY project that typically takes 30-60 minutes and requires only basic tools like a screwdriver, wire labels, and a level. Most homeowners can successfully complete thermostat replacement by following proper safety procedures—turning off power at the breaker, photographing existing wiring, and matching wire colors to corresponding terminals on the new unit. This guide walks you through every step of the installation process, from selecting the right replacement thermostat to testing your heating and cooling systems after installation.
Understanding when replacement is necessary versus simple repair can save you significant money and prevent recurring HVAC issues. Bad thermostat symptoms include inconsistent temperatures, unresponsive controls, short cycling, and displays that won’t turn on—all signs that indicate replacement rather than repair is the best solution. Professional installation typically costs between $150-$300 for labor alone, while DIY thermostat replacement requires only the cost of the new unit, which ranges from $25 for basic models to $250+ for advanced smart thermostats.
The tools and materials you’ll need are minimal and likely already in your home toolkit. Essential items include a Phillips and flathead screwdriver, drill with bits for new mounting holes if needed, wire labels or masking tape, a smartphone or camera to document existing wiring, and a level to ensure proper alignment. Choosing between OEM vs aftermarket thermostats depends on your HVAC system’s compatibility requirements, budget constraints, and desired features like programmability, WiFi connectivity, or smart home integration.
Safety is paramount when working with electrical components in your home. Next, we’ll explore exactly when thermostat replacement becomes necessary, how to distinguish between repairable issues and true replacement scenarios, and whether your specific situation requires professional intervention or is well-suited for a confident DIYer.
What Is Thermostat Replacement and When Do You Need It?
Thermostat replacement is the process of removing an outdated, malfunctioning, or incompatible temperature control unit and installing a new one that properly regulates your home’s heating and cooling systems. This procedure becomes necessary when your existing thermostat fails to maintain accurate temperature settings, displays error codes repeatedly, or when you’re upgrading to a more energy-efficient smart model with advanced features like remote access and learning capabilities.
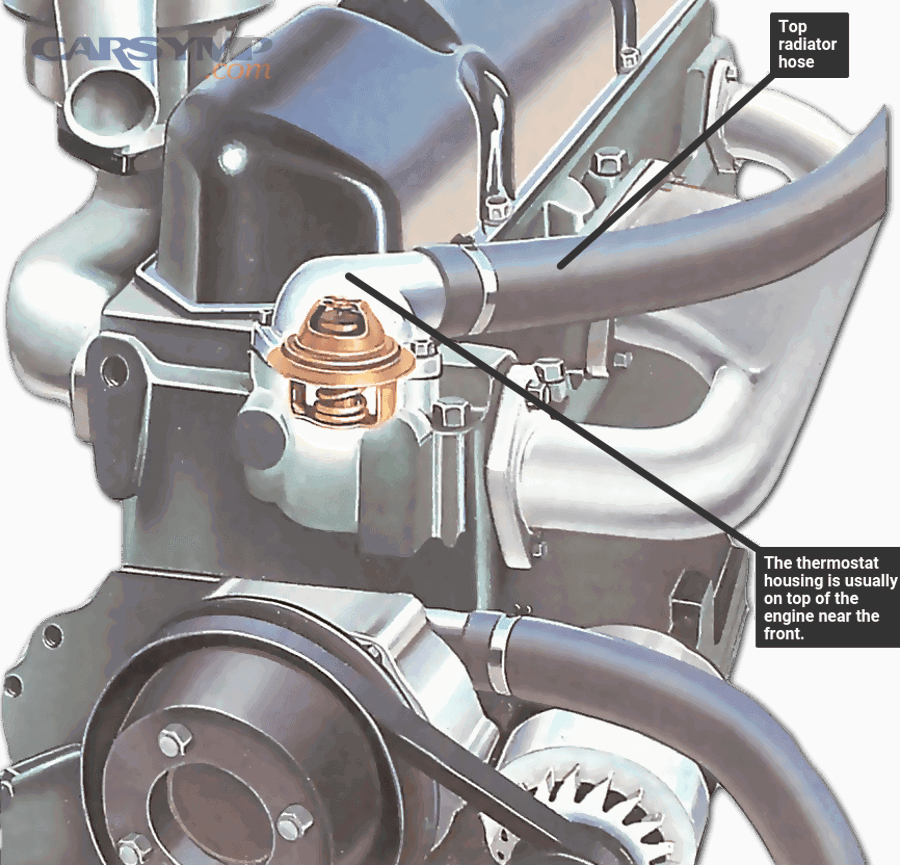
To better understand when replacement is the right choice, you need to recognize the warning signs that indicate your thermostat has reached the end of its functional lifespan. Several clear indicators suggest replacement rather than repair is your best option.
Your HVAC system short-cycles—turning on and off frequently in rapid succession—which typically signals faulty temperature sensors within the thermostat that can no longer accurately detect room temperature. The display screen remains blank or shows garbled information even after replacing batteries, indicating internal electronic failure that cannot be economically repaired. Temperature readings on your thermostat differ significantly (more than 3-5 degrees) from an accurate thermometer placed nearby, revealing calibration problems that worsen over time. Your heating or cooling system doesn’t respond when you adjust temperature settings, suggesting broken internal relay switches that control system activation.
Physical deterioration also warrants replacement. Corrosion around wire terminals creates unreliable electrical connections that cause intermittent failures and potential safety hazards. Cracked or damaged housings expose internal components to dust and humidity, accelerating electronic degradation. Older mercury-switch thermostats (typically installed before 2000) should be replaced both for improved accuracy and to eliminate the environmental hazard of mercury exposure during disposal.
Age plays a critical role in the replacement decision. Mechanical thermostats typically last 10-20 years, while digital programmable models function reliably for 10-15 years before internal components begin failing. Smart thermostats have a shorter proven lifespan of 8-10 years due to their complex electronics and software dependencies. However, even functioning older thermostats benefit from replacement when upgrading to models with superior energy-saving capabilities.
Upgrading from a basic manual thermostat to a programmable or smart model represents a proactive replacement that improves comfort and reduces energy costs. Modern thermostats offer scheduling capabilities that automatically adjust temperatures based on your daily routine, preventing wasted heating and cooling when you’re away from home. Smart thermostats with learning algorithms analyze your preferences and occupancy patterns to optimize temperature settings without manual programming.
How Do You Know If Your Thermostat Needs Replacing vs. Repair?
Your thermostat needs replacing rather than repairing when troubleshooting reveals internal electronic failures, severe calibration drift beyond 5 degrees, or age-related component degradation that makes repair costs approach or exceed replacement costs ($75-150 for repair vs. $25-250 for a new unit).
Specifically, simple issues like dead batteries, loose wire connections, or dust accumulation on sensors can be resolved through basic maintenance and repair. Remove the thermostat cover and inspect for corroded battery terminals—clean them with fine sandpaper or replace the batteries with fresh ones. Check that all wire terminals are firmly secured and haven’t loosened over time, which commonly occurs in homes with vibration from nearby doors or foot traffic. Use compressed air or a soft brush to remove dust and debris from temperature sensors, which can cause inaccurate readings.
However, certain conditions definitively indicate replacement is necessary. When your thermostat fails to control the HVAC system even after verifying proper wiring connections and breaker status, internal relay switches have likely failed—a repair that typically costs $100-150 in parts and labor, making replacement more economical. Persistent temperature inaccuracies that remain after recalibration attempts signal sensor degradation that cannot be corrected. Frequent error codes that reappear after resetting the system indicate circuit board failures in digital models.
The cost-benefit calculation strongly favors replacement in most scenarios. Repair visits typically cost $75-150 for diagnostics and simple fixes, while a quality programmable thermostat costs $50-100 and provides years of reliable service with improved features. Smart thermostats priced at $120-250 offer energy savings of 10-23% on heating and cooling costs, creating a payback period of 1-2 years that makes replacement financially advantageous even when the old unit still partially functions.
Preventing thermostat failures through regular maintenance extends lifespan but cannot eliminate eventual replacement. Clean your thermostat’s interior annually, replace batteries proactively every year rather than waiting for low-battery warnings, and ensure nothing blocks airflow around the unit that might cause false temperature readings.
Can You Replace a Thermostat Yourself or Do You Need a Professional?
Yes, you can replace a thermostat yourself if you’re comfortable working with basic electrical wiring, follow safety procedures like shutting off power at the circuit breaker, and your installation involves straightforward wire-to-terminal connections without needing to run new wires through walls.
To begin, assess your DIY capability honestly by evaluating three key factors: your comfort level with basic electrical work, the complexity of your HVAC system, and the type of thermostat you’re installing. Most thermostat replacements qualify as beginner-friendly electrical projects because they operate on low-voltage systems (24 volts) that pose minimal shock risk compared to standard household circuits (120/240 volts). The process primarily involves matching color-coded wires to clearly labeled terminals—a task comparable to connecting a new light fixture.
Your skill level assessment should consider these requirements. You must be able to identify and label wires accurately, as mixing them up can damage your HVAC equipment or the new thermostat. You need basic competence with hand tools like screwdrivers and drills for mounting the new base plate. You should possess the patience to carefully follow installation instructions and double-check connections before restoring power. You must understand basic safety protocols, including verifying power is off with a voltage tester before touching wires.
However, professional help becomes mandatory in several specific situations. Local building codes in some jurisdictions require licensed electricians to perform thermostat installations, particularly for line-voltage systems (120/240 volt) used with electric baseboard heaters—always check local regulations before starting. Complex multi-zone HVAC systems with multiple thermostats controlling different areas of your home require professional configuration to ensure proper communication between zones. Installing a smart thermostat when you lack a C-wire (common wire) may necessitate running new wiring from your furnace through walls, a task best left to HVAC technicians who can safely route cables without damaging building structures.
DIY thermostat replacement safety and steps require methodical attention to detail. Homeowners with basic handy skills successfully complete standard installations, while those uncomfortable with electrical work should hire professionals to avoid potentially costly mistakes. The labor time for professional thermostat replacement typically ranges from 30 minutes for simple swaps to 2-3 hours for complex installations requiring new wiring.
System compatibility presents another consideration. Older homes with unusual wiring configurations, proprietary thermostat systems (some heating-only or cooling-only setups), or multi-stage heating and cooling equipment may require professional assessment to ensure the replacement thermostat matches system requirements. Heat pump systems with auxiliary heating use different wiring schemes than standard furnace systems, requiring attention to terminal designations like O/B (changeover valve) that don’t exist on simpler systems.
According to installation data from major thermostat manufacturers including Honeywell and Ecobee, approximately 70% of homeowners successfully complete DIY installations with standard heating and cooling systems, while 30% encounter compatibility issues or wiring challenges that necessitate professional intervention.
What Tools and Materials Do You Need for Thermostat Replacement?
You need four essential categories of tools and materials for thermostat replacement: basic hand tools (screwdriver set, level, drill with bits), safety equipment (voltage tester, flashlight), wire management supplies (labels or tape, smartphone for photos), and your chosen replacement thermostat with compatible mounting hardware.
More specifically, assembling the right tools before starting prevents mid-project delays and ensures professional results. Your screwdriver set should include both Phillips and flathead drivers in multiple sizes, as thermostats use various screw types for mounting plates and wire terminals. A small torpedo level (6-9 inches) ensures your new thermostat mounts perfectly straight, preventing an unprofessional appearance and potential issues with mercury-switch models that require level positioning to function correctly.
A cordless drill with a basic bit set allows you to create new mounting holes if your replacement thermostat’s base plate doesn’t align with existing wall anchors—common when upgrading from older models to modern smart thermostats with larger footprints. A voltage tester (non-contact or probe-style) provides critical safety verification that power is truly off before you touch any wires, protecting both you and expensive HVAC equipment from electrical mishaps. Keep a bright flashlight or headlamp handy, as thermostat locations often suffer from poor lighting that makes reading wire labels and terminal markings difficult.
Wire management supplies prove essential for error-free installation. Small adhesive labels or masking tape with a permanent marker let you clearly mark each wire before disconnecting the old thermostat—write both the wire color and the terminal letter it connected to (R, C, Y, G, W, etc.). Your smartphone serves as an invaluable documentation tool: take multiple clear, well-lit photos of the existing wiring from different angles before removing anything, creating a reference you can consult if confusion arises during the new thermostat installation.
Additional helpful materials include a small piece of cardboard or painter’s tape to cover the wall opening after removing the old thermostat, preventing wires from falling back into the wall cavity—fishing them out again wastes significant time and causes frustration. A pencil allows you to mark level lines and screw hole positions before drilling. Drywall anchors may be necessary if you’re mounting the new base plate in a location without solid backing, though most thermostats install over existing holes or wall studs.
Your replacement thermostat selection determines additional requirements. Battery-powered models need batteries (typically AA or AAA), while hardwired smart thermostats may include a trim plate to cover gaps around larger old thermostat footprints. Some smart thermostats ship with a mounting adapter plate that fits over old screw holes, simplifying installation by eliminating the need to patch and repaint.
What Are the Different Types of Replacement Thermostats?
There are three main types of replacement thermostats: manual (non-programmable), programmable, and smart thermostats, each offering progressively more features, energy-saving capabilities, and price points ranging from $25 for basic manual units to $250+ for premium smart models with advanced learning algorithms.
In addition, understanding the characteristics and capabilities of each type helps you choose the replacement thermostat that best matches your needs, budget, and technical comfort level.
Manual thermostats represent the most basic and affordable option, featuring simple dial or slider controls that maintain a single temperature setpoint until you manually adjust it. These units cost $25-50 and appeal to homeowners who prefer simplicity, don’t follow predictable schedules, or want to replace a failed thermostat in rental properties or vacation homes where advanced features provide minimal value. Manual thermostats offer exceptional reliability due to their simple mechanical or basic electronic components, but they provide no energy-saving automation and require manual adjustment every time you leave home or go to bed to avoid wasting energy.
Programmable thermostats allow you to create weekly schedules with different temperature settings for various times of day—typically wake, away, home, and sleep periods. These models cost $50-120 and can reduce heating and cooling costs by 10-15% by automatically lowering temperatures when you’re away or sleeping, then warming or cooling your home before you wake or return. Modern programmable thermostats feature large digital displays, separate weekday and weekend programming, temporary override functions, and filter change reminders. However, they require initial setup effort and work best for households with consistent, predictable schedules; families with irregular routines may find the programming frustrating or see minimal energy savings.
Smart thermostats represent the premium category at $120-300, offering WiFi connectivity, smartphone app control, learning capabilities, energy usage reports, and integration with voice assistants like Alexa, Google Assistant, and Siri. Leading models from Ecobee, Nest, and Honeywell learn your preferences over time, automatically creating optimized schedules based on when you’re home or away. Remote access lets you adjust temperatures from anywhere, useful for irregular schedules or unexpected plan changes. Geofencing features detect when your phone leaves or approaches home, automatically adjusting temperatures to save energy when you’re gone and ensuring comfort upon arrival. Energy reports provide detailed analytics showing usage patterns and opportunities for additional savings.
Compatibility considerations significantly impact your thermostat choice beyond just features and price. Verify your HVAC system type before purchasing: single-stage heating and cooling systems work with any thermostat type, while multi-stage systems (often found in larger homes) require thermostats specifically rated for multi-stage compatibility. Heat pump systems need thermostats with dedicated O/B terminals for the reversing valve. Dual-fuel systems combining a heat pump with a gas furnace require thermostats capable of managing changeover logic between the two heat sources.
Voltage requirements also matter. Most residential heating and cooling systems use low-voltage (24V) thermostats, the standard for gas furnaces, central air conditioning, and heat pumps. However, electric baseboard heaters, wall heaters, and some radiant systems use line-voltage (120-240V) thermostats that look similar but operate on completely different electrical principles—installing the wrong voltage type can destroy the thermostat and potentially create safety hazards.
Feature comparison reveals practical differences beyond marketing descriptions. Manual thermostats offer temperature-only control with no scheduling. Programmable thermostats add weekly schedules, vacation holds, and often humidity monitoring. Smart thermostats incorporate all programmable features plus remote access, usage tracking, weather-responsive adjustments, and software updates that add new capabilities over time.
According to research from the Environmental Protection Agency’s ENERGY STAR program, properly programmed smart thermostats reduce heating and cooling energy consumption by an average of 8% compared to manual thermostats, and 3-5% compared to traditional programmable models, primarily through more precise scheduling and occupancy detection features that ensure systems run only when needed.
Do You Need a C-Wire for Your New Thermostat?
Yes, most modern smart thermostats require a C-wire (common wire) to provide continuous 24-volt power for WiFi connectivity, color touchscreens, and constant system monitoring, though several alternative solutions exist if your current wiring lacks this dedicated power wire.
Specifically, the C-wire serves as the return path for the low-voltage power circuit that keeps your thermostat continuously energized. Older mechanical and basic digital thermostats drew minimal power, stealing small amounts of electricity through the heating and cooling control wires—a technique called “power stealing” that worked adequately when thermostats only needed to power simple displays and mechanical relays. Modern smart thermostats consume significantly more power to maintain WiFi connections, run color LCD or LED touchscreens, process learning algorithms, and communicate with cloud servers, making continuous dedicated power essential for reliable operation.
To check if you have a C-wire, remove your current thermostat’s cover and examine the wires connected to terminals on the base plate. Look for a wire (typically blue but sometimes black, brown, or another color) connected to a terminal labeled “C” or “Common.” If you see this wire and terminal connection, your system already has C-wire capability and will support any smart thermostat without additional work. If you only see wires connected to terminals labeled R (power), W (heat), Y (cooling), and G (fan), you likely lack a C-wire, though one may exist in your wall but remains unused and tucked behind the thermostat.
Check inside the wall cavity by gently pulling the wire bundle forward—you may discover an extra unused wire that can be connected to the C terminal at both the thermostat and furnace ends. Trace these wires back to your HVAC system’s control board (usually located inside the furnace or air handler) where all thermostat wires terminate. If an unused wire exists in the bundle, connect it to the C terminal on the furnace control board, then connect the other end to the C terminal on your new thermostat—this zero-cost solution works in many homes where the original installer simply didn’t connect the C-wire because the old thermostat didn’t need it.
Alternative solutions accommodate situations where no extra wire exists. Many smart thermostat manufacturers provide a power adapter kit (sometimes called a C-wire adapter or common wire adapter) that installs at your HVAC system’s control board, converting existing wiring to provide both control signals and continuous power without running new wires. The Nest Power Connector, Ecobee Power Extender Kit (PEK), and similar devices work by connecting to multiple terminals on the furnace control board and using the existing wiring to carry power differently. Installation requires opening your furnace panel and following detailed wiring diagrams, a task many homeowners complete successfully though some prefer hiring an HVAC technician for this 30-45 minute installation.
Battery-powered hybrid operation provides another alternative. Some smart thermostats can operate on batteries while receiving intermittent charging through power-stealing technology when the heating or cooling system runs. This arrangement works adequately in climates with frequent HVAC operation but may require frequent battery changes in mild climates where systems run infrequently. The Nest Thermostat (not the Learning or E models) uses this approach, claiming to work without a C-wire in most installations, though Nest strongly recommends C-wire installation for optimal performance and to prevent battery drain issues.
Running a new dedicated C-wire represents the most reliable solution when alternatives don’t work or you prefer a permanent fix. This involves running an additional 18-gauge thermostat wire from your furnace control board to the thermostat location—a straightforward task if your furnace sits directly below the thermostat with accessible wall cavities, but potentially complex in finished basements or multi-story homes requiring wire fishing through insulated walls. HVAC professionals charge $100-250 for this service depending on the complexity of the wire run, while confident DIYers can purchase 18/5 (5-conductor) or 18/8 (8-conductor) thermostat wire (indicating 5 or 8 separate conductors in one sheath) for $20-40 and complete the installation themselves.
Power requirements vary by thermostat model. The Ecobee SmartThermostat and Google Nest Learning Thermostat strongly prefer C-wire connections for reliable operation. The Honeywell Home T9 offers both C-wire and battery operation modes. Budget-friendly smart thermostats like the Amazon Smart Thermostat typically require C-wire installation and don’t support battery backup, so verify specifications before purchasing.
How Do You Replace a Thermostat Step-by-Step?
Replacing a thermostat involves four main steps: turning off power and safely removing the old unit while documenting all wiring connections, mounting the new thermostat base plate and connecting wires to matching terminals, securing the thermostat to the base and restoring power, then programming and testing both heating and cooling functions to verify proper operation.
Moreover, this systematic approach ensures safe installation while preventing common mistakes that cause malfunctions or damage to HVAC equipment. The entire process typically takes 30-60 minutes for straightforward replacements, with additional time needed if you’re installing a C-wire adapter or running new wiring.
Success depends on meticulous attention to wiring documentation and terminal connections. HVAC systems use standardized terminal designations (R for power, C for common, W for heat, Y for cooling, G for fan), but wire colors sometimes vary between installations. Photograph everything before disconnecting any wires, label each wire with both its color and its original terminal letter, and verify connections match your new thermostat’s wiring diagram before restoring power.
How Do You Safely Remove Your Old Thermostat?
Begin by turning off power at the circuit breaker that controls your HVAC system—locate the breaker labeled “furnace,” “heating,” “air conditioning,” or “HVAC” and flip it to the OFF position—then verify power is off by attempting to change the temperature on your old thermostat, which should be unresponsive if power is successfully disconnected.
Specifically, power safety represents your first priority when working with any electrical system, even low-voltage thermostats. While 24-volt thermostat wiring poses minimal shock risk compared to standard household circuits, shutting off power protects your expensive HVAC equipment from potential short circuits during installation and prevents the furnace or air conditioner from unexpectedly starting while you’re working on wire connections. Use a non-contact voltage tester to confirm power is off by touching the probe to each exposed wire terminal—the tester should not light up or beep if power is truly disconnected.
Label each existing wire before disconnecting anything from the old thermostat. Use small adhesive labels or pieces of masking tape, wrapping them around each wire near the terminal connection and writing clearly with permanent marker. Record both the wire color and the terminal letter it connects to—for example, “Red – R” or “White – W.” This documentation prevents confusion even if wires get mixed up or pulled back into the wall cavity during removal. Common terminal designations include: R or Rh (24V power from transformer), C (common/return path), W or W1 (heat call), Y or Y1 (cooling call), G (fan), and O/B (heat pump reversing valve).
Take multiple clear photographs with your smartphone from different angles before removing any wires. Capture close-up shots showing exactly which wire connects to which terminal, and wider shots showing the overall wiring configuration. These photos serve as invaluable reference during installation if labels fall off or confusion arises about proper connections. Ensure your photos are well-lit and in focus—blurry images provide no help when you need them most.
Remove the old thermostat body from its base plate by gently pulling it straight off the wall—most models simply snap onto the base, though some use small screws on the bottom or sides that must be removed first. Once the body is removed, you’ll see all wire connections clearly visible on the base plate. Loosen each terminal screw slightly (don’t remove screws completely unless necessary) and carefully pull each wire free, holding it to prevent it from falling back into the wall cavity. Immediately after disconnecting each wire, check that your label remains securely attached.
Prevent wires from slipping back into the wall opening by using a trick that saves enormous frustration: take a small piece of cardboard, poke a hole through it for each wire, and thread the wires through the cardboard, then wedge the cardboard over the wall opening. Alternatively, wrap painter’s tape around the wire bundle and tape it to the wall surface just outside the opening. These simple steps prevent you from needing to fish wires back out of the wall—a time-consuming hassle that can add 20-30 minutes to your project.
Remove the old thermostat base plate from the wall by unscrewing the mounting screws that attach it to the wall or electrical box. Keep these screws if your new thermostat’s base plate has similar mounting holes, potentially saving you from drilling new holes. Examine the wall condition where the old thermostat was mounted—older models often leave discolored paint or exposed wallboard around their perimeter, which larger modern thermostats may not fully cover.
Inspect all wires for damage before proceeding to installation. Look for corroded or discolored wire ends, frayed insulation, or extremely short wire length that might make connections difficult. If wire ends appear corroded, use wire strippers to cut off the damaged portion (if you have enough extra length) and strip 1/4 inch of fresh insulation to expose clean copper conductor. If wires are too short to comfortably reach terminal connections, you’ll need to pull more wire from the wall cavity or use wire extension techniques with wire nuts and additional thermostat wire—though this situation is uncommon in standard installations.
How Do You Install the New Thermostat Base and Connect Wiring?
Mount the new base plate level on the wall using the provided screws and anchors, positioning it to cover old screw holes if possible, then connect each labeled wire to its corresponding terminal on the base plate—matching R to R, W to W, Y to Y, G to G, C to C—ensuring all connections are secure but not over-tightened.
To illustrate, proper base plate installation creates the foundation for reliable thermostat operation and professional appearance. Place your torpedo level on top of the base plate and adjust its position until the bubble centers between the level lines—perfectly level installation prevents an obviously crooked appearance and ensures proper function in older mercury-switch thermostats (though modern electronic thermostats tolerate slight angles without functional issues).
Mark the mounting screw positions with a pencil by placing the base plate in your desired location and marking through the screw holes onto the wall surface. If possible, position the new base to cover existing screw holes or damage from the old thermostat, eliminating the need to patch and paint the wall. If new holes are required, drill pilot holes at your pencil marks using a 3/32-inch bit for drywall or a 1/16-inch bit for plaster walls. Insert drywall anchors (usually included with your thermostat) into the pilot holes by tapping them gently with a hammer until flush with the wall surface, then drive the mounting screws through the base plate holes into the anchors.
Thread wires through the base plate opening, ensuring you have enough slack to comfortably work with each wire during connection—pull an extra 1-2 inches of wire from the wall cavity if connections feel cramped. Excessive tension on wires can cause poor connections or pull wires loose from terminals after installation completes.
Connect wires to terminals following strict attention to terminal labels. Common wire color conventions help but aren’t universally reliable, so always prioritize your labeled wire documentation over color-based assumptions. Standard connections include:
- R or Rh terminal: Typically red wire—provides 24V power from the transformer
- C terminal: Typically blue wire—common/return path completing the power circuit
- W or W1 terminal: Typically white wire—calls for heat when energized
- Y or Y1 terminal: Typically yellow wire—calls for cooling/air conditioning when energized
- G terminal: Typically green wire—controls fan operation independent of heating/cooling
- O/B terminal: Typically orange or blue wire—controls heat pump reversing valve (O for cooling mode, B for heating mode)
Loosen each terminal screw using a small screwdriver, insert the stripped wire end fully into the terminal opening (ensuring no bare wire remains exposed outside the terminal body), then tighten the screw firmly—the wire should not pull free with gentle tugging, but avoid over-tightening which can damage the terminal or break the wire strand. Some thermostat models use push-in terminals where you simply insert the wire until it clicks—these create secure connections without screws but require proper wire strip length (usually 1/4 inch) for reliable contact.
Verify connections match your photos and labels before proceeding. Double-check that each wire connects to the exact same terminal letter it occupied on the old thermostat—mixing up wires can cause system malfunctions or damage. Pay particular attention to the R wire (power) which absolutely must connect correctly for any system operation, and the C wire which provides continuous power to smart thermostats.
Special wiring situations require additional attention. If you’re using a C-wire adapter kit, follow the manufacturer’s specific wiring diagram precisely—these adapters require connecting multiple wires at the furnace control board and typically using the G wire differently than standard configurations. Heat pump systems use the O or B terminal for the reversing valve—consult your new thermostat’s manual to determine whether your heat pump requires the O or B setting, as incorrect configuration causes heating/cooling reversal. Multi-stage systems may have additional wires like W2 (second stage heat) or Y2 (second stage cooling) that must connect to corresponding terminals if your new thermostat supports multi-stage operation.
Tuck excess wire length neatly into the wall cavity before securing the base plate completely. Avoid creating tight bends or kinks in wires, and ensure no wires get pinched between the base plate and wall surface—pinched insulation can eventually lead to short circuits. Some installers gently fold excess wire in a large loop and tuck it into the cavity, while others spread it around the perimeter of the opening.
How Do You Complete the Installation and Test Your New Thermostat?
Attach the thermostat display unit to the mounted base plate by aligning it carefully and pressing firmly until it clicks into place, restore power at the circuit breaker, complete the initial setup prompts on the thermostat screen, then test both heating and cooling functions by adjusting temperatures above and below room temperature while monitoring that the HVAC system responds appropriately.
In addition, final installation steps and thorough testing ensure your new thermostat operates correctly before you consider the project complete. Rushing through this phase risks discovering problems hours or days later when troubleshooting becomes more frustrating.
Secure the thermostat body to the base plate following manufacturer-specific attachment methods. Most modern thermostats use a snap-fit design where you align tabs or hooks on the back of the thermostat with corresponding slots on the base plate, then press firmly until you hear and feel a secure click. Some models require sliding the thermostat downward onto the base plate from a slightly elevated position. Older designs may use small screws through the bottom or sides of the unit—if your model includes mounting screws, align the unit carefully and insert screws hand-tight, avoiding excessive force that could crack plastic housings.
Restore power by returning to your electrical panel and switching the HVAC breaker back to the ON position. Return to the thermostat and observe the display—it should power on within a few seconds, showing either a welcome screen, setup wizard, or normal operating display depending on the model. If the screen remains blank after 30 seconds with power confirmed on, check that the thermostat body properly seats on the base plate with all electrical contacts engaged, verify all wire connections are secure at terminals, and ensure the R wire (power) correctly connects to the R terminal.
Complete initial setup and programming following your thermostat’s specific prompts. Smart thermostats typically require WiFi network configuration, creating a user account, setting your time zone and location, and specifying your HVAC system type (heat pump, gas furnace, oil furnace, electric heat, etc.). Answer system configuration questions accurately, as incorrect settings can cause improper operation—for example, indicating “gas furnace” when you actually have a heat pump will result in the thermostat using incorrect control logic. Basic programmable thermostats require setting the current time and day, then optionally creating temperature schedules for different times and days of the week.
Test heating function by setting the thermostat mode to “Heat” and increasing the temperature setpoint at least 5 degrees above the current room temperature. Listen and watch for your heating system to start within 30-90 seconds—you should hear the furnace blower motor activate, followed by the burner or heating elements engaging. Walk to your furnace or air handler and verify it’s running normally with warm air flowing from supply vents. Allow the system to run for 2-3 minutes to confirm stable operation, then return the temperature to normal. The system should shut off within 30-90 seconds after the setpoint drops below room temperature.
Test cooling function by switching the thermostat mode to “Cool” and decreasing the temperature setpoint at least 5 degrees below current room temperature (only perform this test when outdoor temperatures allow safe air conditioner operation—generally above 60°F outdoor temperature to avoid damaging the compressor). The air conditioning system should start within 30-90 seconds, with the outdoor condensing unit fan and compressor activating and cold air flowing from supply vents. Listen for any unusual sounds, vibrations, or error messages that might indicate wiring problems or system malfunctions.
Test fan function independently by setting the thermostat fan mode to “On” rather than “Auto”—the blower should run continuously regardless of heating or cooling demand, confirming the G wire connection controls the fan properly. Return the fan mode to “Auto” after testing, which allows the fan to cycle on only when heating or cooling is active, providing better humidity control and energy efficiency.
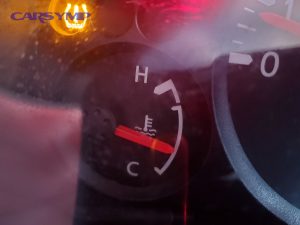
Verify proper Temp gauge behavior after thermostat change by comparing the displayed temperature to an accurate thermometer placed near the thermostat. Allow 15-20 minutes for the displayed temperature to stabilize after installation, as the thermostat’s sensor requires time to equalize with room temperature. Acceptable accuracy is typically within 1-2 degrees—larger discrepancies may indicate placement issues like proximity to heat sources, cold drafts, or direct sunlight affecting the temperature sensor.
Monitor system operation for the first 24 hours after installation, paying attention to heating and cooling cycles, temperature accuracy, and any error messages or unusual behavior. Smart thermostats may take 1-2 weeks to fully learn your preferences and occupancy patterns, so don’t expect immediate optimization of schedules and setpoints.
Troubleshoot common issues if the system doesn’t respond correctly. If heating works but cooling doesn’t (or vice versa), verify the corresponding Y (cooling) or W (heating) wire connects properly to its terminal. Short cycling (system turning on and off every few minutes) often indicates incorrect system type configuration in the thermostat settings—revisit setup menus and verify system specifications match your actual equipment. No power to the thermostat indicates either a tripped breaker, disconnected R wire, or blown fuse on the HVAC system control board.
According to installation tracking data from Nest and Ecobee customer support, approximately 15% of DIY installations require troubleshooting after initial setup, with 90% of these issues resolved by rechecking wire connections, verifying system type settings, or installing a C-wire adapter—only 1-2% of installations reveal fundamental compatibility problems requiring professional intervention or equipment replacement.
How Much Does Thermostat Replacement Cost?
Thermostat replacement costs $25-150 for DIY installation (thermostat unit only) or $150-450 for professional installation including both the thermostat and labor, with final costs depending on thermostat type (manual, programmable, or smart), installation complexity, and regional labor rates.
However, understanding detailed cost breakdowns helps you budget appropriately and decide whether DIY or professional installation offers better value for your specific situation.
DIY replacement eliminates labor costs entirely, requiring only the purchase price of your chosen thermostat and potentially minor additional supplies. Basic manual thermostats cost $25-50 and provide reliable temperature control without scheduling features, suitable for rental properties or homeowners who prefer simplicity. Programmable thermostats range from $50-120, offering weekly scheduling capabilities that reduce energy waste by automatically adjusting temperatures based on your daily routine. Smart thermostats represent the premium option at $120-300, with popular models including the Google Nest Learning Thermostat ($220-250), Ecobee SmartThermostat with voice control ($220-250), Honeywell Home T9 ($170-200), and budget-friendly options like the Amazon Smart Thermostat ($80) or Wyze Thermostat ($75).
Additional DIY costs may include wire labels ($3-5 if not using masking tape), a voltage tester ($15-25 if you don’t own one), drywall anchors ($3-6 if not included with the thermostat), and potentially a C-wire adapter kit ($20-30 if your thermostat doesn’t include one). Total DIY costs typically range from $30-280 depending on thermostat choice and whether you already own basic tools.
Professional installation costs combine the thermostat purchase price with labor charges that vary significantly by region and service provider. HVAC technicians typically charge $75-150 per hour, with straightforward thermostat replacement requiring 0.5-1 hour of labor time for basic installations. Total professional installation costs break down as follows:
- Basic manual thermostat: $100-200 ($25-50 thermostat + $75-150 labor)
- Programmable thermostat: $125-270 ($50-120 thermostat + $75-150 labor)
- Smart thermostat (simple install): $200-400 ($120-250 thermostat + $80-150 labor)
- Smart thermostat (complex install with C-wire): $300-550 ($120-250 thermostat + $180-300 labor including wire running)
Regional variations significantly affect professional costs. Metropolitan areas with higher costs of living (New York, San Francisco, Los Angeles) see labor rates of $100-200 per hour, while smaller cities and rural areas may charge $60-100 per hour. Some HVAC companies offer flat-rate thermostat installation packages in the $150-250 range regardless of thermostat type, making professional installation more attractive than hourly billing for simple installations.
Cost factors beyond basic installation affect your total project expense. Running new thermostat wire (C-wire installation) adds $100-250 to professional installation costs depending on the difficulty of accessing wall cavities and the distance from furnace to thermostat location. Installing multiple thermostats for multi-zone systems multiplies costs nearly linearly—two thermostats cost roughly twice as much as one, three cost three times as much. Emergency service calls outside normal business hours typically include surcharges of $50-150, so avoid weekend or evening installations unless absolutely necessary. Wall patching and paint touch-up around larger modern thermostats covering smaller old units may add $50-150 if you hire these services rather than handling them yourself.
Thermostat replacement cost estimates should include potential energy savings that offset initial investment. Smart thermostats reduce heating and cooling costs by 10-23% through better scheduling, occupancy detection, and usage optimization. For an average home spending $1,200 annually on heating and cooling, a smart thermostat saving 15% provides $180 per year in reduced utility bills. At a $250 total investment ($200 thermostat + $50 DIY supplies), the payback period is approximately 1.4 years, after which all savings represent pure profit. Even programmable thermostats offering more modest 8-10% savings ($96-120 annually) pay for themselves within 1-2 years at typical price points.
Hidden costs sometimes catch homeowners off guard. Discovering your HVAC system uses an incompatible or proprietary thermostat after purchasing a replacement means returning the unit or hiring a professional to assess compatibility—always verify compatibility before purchasing. Damaging your HVAC system control board through incorrect wiring during DIY installation can cost $200-500 for board replacement plus installation labor. Breaking wire insulation or pulling wires completely out of the wall during removal requires repair that adds time and potential professional service costs.
Bleeding cooling system after replacement doesn’t apply to thermostat replacement (this term refers to automotive cooling system maintenance, not HVAC thermostats), though some homeowners confuse terminology when researching HVAC work.
What Is the Cost Difference Between DIY and Professional Installation?
DIY thermostat installation costs $25-280 (thermostat and minor supplies only) while professional installation costs $150-550 (thermostat plus labor), creating savings of $125-350 through DIY installation, though professional service provides expertise, warranty protection, and time savings of 30-90 minutes compared to DIY attempts.
Especially for homeowners deciding between approaches, value assessment extends beyond simple price comparison to include time investment, risk factors, and long-term reliability.
Labor cost ranges vary substantially based on installation complexity and regional market conditions. A straightforward swap of a basic thermostat for another basic model typically requires 30-45 minutes of professional time at $75-150 per hour, resulting in $40-115 labor charges plus markup on the thermostat itself. Complex installations involving C-wire installation, system troubleshooting, or multi-zone configuration can require 2-3 hours of professional time, generating $150-450 in labor charges before equipment costs.
Hidden costs in professional installation often appear as service call fees, diagnostic charges, or emergency surcharges. Many HVAC companies charge a $50-100 service call fee just to send a technician to your home, sometimes waived if you proceed with the installation but charged regardless for quotes or estimates. After-hours or weekend installation requests typically incur 1.5x to 2x normal labor rates, turning a $100 installation into a $150-200 expense. Some companies bundle thermostat installation with seasonal HVAC maintenance packages at discounted rates—$99-149 for installation when combined with furnace tune-up versus $150-250 standalone.
Value of professional installation extends beyond the installation itself. Licensed HVAC technicians provide system compatibility verification before purchasing the wrong thermostat, proper electrical testing to confirm correct voltage and wiring configurations, expertise with complex multi-stage or heat pump systems requiring specific setup parameters, warranty protection where installation errors won’t void manufacturer coverage, and code compliance ensuring the installation meets local electrical regulations. Professional installers also identify related HVAC issues during installation—failing transformers, corroded wiring, ductwork problems—that DIY installers might overlook until systems fail completely.
DIY time investment typically requires 30-60 minutes for straightforward installations if you carefully follow instructions and encounter no complications. Budget additional time for tool acquisition if you lack basic hand tools (screwdrivers, level, drill), research and learning if you’re unfamiliar with low-voltage wiring, troubleshooting if systems don’t respond correctly after installation, and potential trips to hardware stores for forgotten supplies. First-time DIY installers should realistically expect 1.5-2 hours for completion including documentation, careful wire management, and thorough testing.
Risk factors in DIY installation include potential equipment damage from incorrect wiring ($200-500 HVAC board replacement if you short wires or connect power incorrectly), personal injury from electrical shock if you fail to shut off power (unlikely but possible with 24V systems, more dangerous with line-voltage thermostats), time loss if you need to call a professional after unsuccessful DIY attempts (paying labor costs anyway while having already purchased a thermostat), and warranty voidance if manufacturers require professional installation for warranty coverage (check terms before purchasing).
Confidence and comfort level with electrical work ultimately determines whether DIY provides true value. Homeowners who successfully complete DIY installations typically possess basic electrical understanding, carefully follow detailed instructions, methodically document existing wiring before disconnecting anything, and remain patient through the learning process. Those lacking confidence, facing time constraints, or encountering complex multi-zone or heat pump systems often find professional installation worth the additional $125-350 cost for guaranteed results and peace of mind.
According to survey data from Consumer Reports analyzing DIY home improvement projects, thermostat replacement ranks among the most successful DIY electrical projects with a 92% completion rate without professional intervention, compared to 45% for ceiling fan installation and 38% for installing GFCI outlets—indicating that confident DIYers face good odds of successful installation while risk-averse homeowners justifiably prefer professional service.
What Are Common Thermostat Replacement Mistakes to Avoid?
Common thermostat replacement mistakes include failing to shut off power before starting work, not labeling or photographing wires before disconnection, mixing up wire terminal connections, installing the thermostat in a poor location subject to drafts or direct sunlight, and neglecting to verify system compatibility before purchasing a replacement unit.
Moreover, understanding these frequent errors helps you avoid frustration, equipment damage, and the expense of calling a professional to fix DIY mistakes.
Skipping power shutoff represents the most dangerous mistake, potentially causing electrical shock to the installer (unlikely but possible with 24V systems, serious risk with 120-240V line-voltage systems) and creating short circuit conditions that can damage expensive HVAC control boards costing $200-500 to replace. Always shut off power at the circuit breaker, not just at the furnace switch or thermostat itself, and verify power is off using a voltage tester before touching any wires. Some installers mistakenly believe low-voltage thermostats are safe to work on while powered—while shock risk is minimal, short circuits during wire connection can instantly destroy electronic components in both the thermostat and furnace control board.
Inadequate wire documentation causes more installation failures than any other single mistake. Homeowners who rely on memory rather than labels and photographs frequently connect wires to incorrect terminals, causing systems that won’t heat, won’t cool, or won’t run at all. Wire color coding helps but isn’t universally reliable—previous installers may have used non-standard colors or substituted wires during repairs. Always label every wire with both its color and terminal letter using adhesive labels or tape before disconnecting anything, and take multiple clear photos from different angles showing exact wire positions. These 60 seconds of documentation prevent hours of troubleshooting.
Terminal connection errors include multiple specific mistakes. Connecting the R wire (power) to the wrong terminal prevents all system operation and can damage the thermostat. Reversing Y (cooling) and W (heating) wires causes the air conditioner to run when you call for heat and vice versa. Failing to connect a C-wire when required causes smart thermostats to experience power issues, display “low battery” warnings, or shut down intermittently despite being hardwired. Over-tightening terminal screws can break wire strands or crack plastic terminal bodies, while under-tightening creates loose connections that cause intermittent failures, especially as vibration from nearby HVAC operation gradually works wires loose.
Poor thermostat placement degrades performance even when wiring is perfect. Installing a thermostat on an exterior wall exposes the temperature sensor to outside temperature extremes that cause inaccurate readings and excessive heating/cooling cycles. Placing the unit directly above or near heat sources (floor registers, radiators, lamps, electronics, direct sunlight through windows) causes the sensor to read artificially high temperatures, resulting in inadequate heating and excessive air conditioning. Installing in locations with poor air circulation (inside closets, behind doors, in corners) prevents the sensor from detecting actual room temperature. Mounting at improper heights (too high near ceiling where hot air accumulates, or too low where cold air settles) skews temperature readings. Optimal placement is on an interior wall approximately 52-60 inches above the floor, away from direct sunlight, drafts, and heat sources, in a hallway or room with good air circulation representing average home temperature.
Compatibility oversights waste money and time when homeowners purchase incompatible thermostats. Common compatibility issues include buying a smart thermostat requiring a C-wire when your system lacks one and you’re unwilling to install an adapter, purchasing a low-voltage thermostat for a line-voltage baseboard heating system (or vice versa), selecting a thermostat incompatible with heat pump systems that require O/B reversing valve control, choosing a single-stage thermostat for a multi-stage heating and cooling system (it will work but won’t utilize all equipment capabilities), and buying a thermostat incompatible with proprietary systems from manufacturers like Carrier or Trane that require specific thermostat models. Always verify compatibility using manufacturer compatibility checkers on their websites or apps before purchasing.
Installation sequence errors create unnecessary difficulties. Failing to mount the base plate level before connecting wires makes proper wire connection awkward and results in a crooked final installation. Tightening mounting screws fully before testing the installation prevents easy access if you need to recheck connections—leave mounting screws slightly loose until you’ve confirmed system operation. Connecting all wires before ensuring adequate slack in the wire bundle creates tension that can pull connections loose. Forgetting to install batteries (if required) before attaching the thermostat body to the base plate necessitates removing and reattaching the unit.
Testing negligence allows problems to remain undiscovered until you actually need heating or cooling. Installers who complete wiring and immediately button up the installation without testing both heating and cooling functions may not discover wire connection errors until hours or days later when temperature demands trigger the mistake. Always test heat, cool, and fan modes immediately after installation while tools remain accessible and troubleshooting is straightforward.
System type configuration errors in smart and programmable thermostats cause improper operation even when wiring is perfect. Selecting “conventional furnace” when you have a heat pump causes incorrect control sequences that can damage equipment or provide inadequate temperature control. Misconfiguring the number of heating and cooling stages prevents multi-stage systems from operating at full capacity. Selecting wrong reversing valve settings (O versus B) on heat pump systems reverses heating and cooling operation.
Overheating vs no-heat thermostat diagnosis often points to specific wiring mistakes. Systems that overheat (run constantly without shutting off at the setpoint) typically indicate the R (power) and W (heat) or Y (cool) wires are accidentally reversed or shorted together, causing the system to run continuously. No-heat situations usually result from disconnected W wires, incorrectly configured system types, or failed heating equipment unrelated to the thermostat installation itself.
What Should You Do If Your New Thermostat Doesn’t Work After Installation?
If your new thermostat doesn’t work after installation, immediately verify power is on at the circuit breaker, check that all wire connections match your documentation exactly, confirm the thermostat body properly seats on the base plate with all contacts engaged, and review system type configuration settings to ensure they match your actual HVAC equipment.
Particularly when troubleshooting non-functional installations, systematic diagnosis identifies problems quickly rather than random trial-and-error approaches that waste time and potentially cause additional damage.
Troubleshooting checklist follows a logical sequence from most likely to least likely causes:
- Verify power supply: Confirm the HVAC breaker is ON, check for tripped breakers or blown fuses at the main panel and at the furnace disconnect switch, and use a voltage tester to verify 24V power reaches the R terminal on the thermostat base plate.
- Check thermostat seating: Remove and reseat the thermostat body on the base plate, ensuring it clicks firmly into position with all electrical contacts properly aligned—loose seating is surprisingly common and prevents power from reaching the thermostat electronics.
- Inspect wire connections: Verify each wire connects to its correct terminal matching your labels and photos, ensure terminal screws are tight enough to hold wires securely (wires shouldn’t pull free with gentle tugging), check that no bare wire extends outside terminal bodies where it could short against other terminals, and look for broken wire strands that may not be making electrical contact even though the wire appears connected.
- Review system configuration: Access the thermostat setup menus and confirm system type settings match your actual equipment (heat pump versus furnace, number of heating and cooling stages, reversing valve settings for heat pumps), verify C-wire configuration if applicable (some thermostats require enabling C-wire use in settings), and check that voltage settings match your system (most are 24V but some are different).
- Test individual functions: Set the mode to “Heat” and raise temperature setpoint 5+ degrees above room temperature—the system should start within 90 seconds; set mode to “Cool” and lower temperature setpoint 5+ degrees below room temperature—air conditioning should start within 90 seconds; set fan to “On” rather than “Auto”—fan should run continuously regardless of temperature calls.
Common wiring errors with specific symptoms help pinpoint problems:
- No power/blank screen: R wire disconnected or broken, tripped breaker, blown fuse on HVAC control board, or thermostat body not properly seated on base
- Heating works but not cooling (or vice versa): Y wire (cooling) or W wire (heating) not connected, loose connection, or broken wire strand
- Fan runs continuously: G wire shorted to R (power) wire, or fan mode stuck on “On” instead of “Auto”
- System short-cycles: Incorrect system type selected in configuration (single-stage selected for multi-stage system), thermostat installed in poor location with temperature fluctuations, or oversized HVAC equipment unrelated to thermostat
- Heat pump produces cold air when heating (or warm air when cooling): O/B reversing valve setting incorrect in thermostat configuration—try switching between O and B settings
When to call a professional rather than continuing DIY troubleshooting:
Call immediately if you smell burning plastic or electrical odors near the thermostat or furnace, see sparks or smoke when connecting wires or restoring power, hear unusual buzzing or humming from the furnace control board, or encounter repeatedly blown fuses on the HVAC system despite correct wiring. These symptoms indicate potential serious electrical problems or equipment damage requiring professional diagnosis and repair.
Consider professional help if you’ve verified all wiring connections match your documentation but the system still doesn’t respond, you’re unable to determine your system type or configuration requirements, you discover damaged or corroded wires requiring replacement, or you lack tools like a voltage meter to properly diagnose electrical issues. HVAC technicians charge $75-150 for service calls but can quickly identify problems that frustrated DIYers might struggle with for hours.
Specific diagnostic techniques for persistent problems:
For smart thermostats displaying C-wire errors despite proper connection, verify the C wire connects at both ends (thermostat and furnace control board), test C-wire voltage by measuring between R and C terminals (should read 24V AC), and consider installing a C-wire adapter if voltage is absent. For systems where individual components work when tested but won’t run in normal operation, examine thermostat scheduling to ensure you haven’t accidentally created schedules holding temperature at unexpected setpoints or system mode set to “Off” instead of “Heat” or “Cool.”
For cooling system repair issues where air conditioning won’t respond, verify the outdoor disconnect switch near the condensing unit is ON (easily overlooked after winter), ensure the thermostat temperature setpoint is at least 3-5 degrees below current room temperature (smaller differentials sometimes don’t trigger cooling), and check that outdoor temperature is above 60°F (most air conditioners refuse to start at lower temperatures to prevent compressor damage).
Documentation review helps when all else fails. Return to your installation photos and compare them directly to current wire connections—subtle differences like a wire that appears connected but isn’t fully inserted into the terminal may become visible. Consult your new thermostat’s installation manual and wiring diagram to verify your system type matches one of their standard configurations. Search the thermostat manufacturer’s support website for your specific model number plus your symptom (e.g., “Nest Learning Thermostat no cooling”) to find troubleshooting guides addressing common issues.
According to technical support data from Ecobee, approximately 85% of post-installation problems resolve through rechecking wire connections and verifying system type settings, 10% require C-wire adapter installation, and only 5% indicate actual thermostat defects or incompatible HVAC equipment requiring professional intervention or product return.
How Does Smart Thermostat Installation Differ from Traditional Replacement?
Smart thermostat installation differs from traditional replacement by requiring a C-wire for continuous power in most cases, involving WiFi network configuration and smartphone app setup, necessitating verification of system compatibility with advanced features like multi-stage control and heat pump operation, and including additional setup steps for voice assistant integration and learning algorithm initialization.
Especially for homeowners upgrading from basic thermostats to smart models, understanding these additional requirements prevents surprises and ensures successful installation with full feature access.
The C-wire requirement represents the most significant installation difference. Traditional mechanical and basic programmable thermostats draw minimal power, functioning adequately through power-stealing techniques that borrow small amounts of electricity through heating and cooling control wires. Smart thermostats require continuous 24V power to maintain WiFi connections, run color touchscreens or LED displays, continuously monitor indoor and outdoor conditions, process learning algorithms, and communicate with cloud servers for remote access and updates. Systems lacking C-wire capability require either installing a C-wire adapter at the furnace, running new thermostat wire between the furnace and thermostat location, or selecting one of the few smart thermostats designed to operate without C-wires (though these often experience reduced reliability and battery life issues).
WiFi network configuration adds setup complexity absent from traditional installations. After mounting and wiring the thermostat, you must connect it to your home wireless network through on-screen menus, entering your network name (SSID) and password using the thermostat’s touchscreen interface—a process that can be tedious on smaller screens with touch-keyboard entry. Router compatibility occasionally creates issues, as some smart thermostats don’t support 5GHz-only networks or require 2.4GHz band access. Weak WiFi signals in thermostat locations far from routers may cause connection dropouts requiring WiFi extenders or mesh network systems for reliable operation. Network security settings like MAC address filtering or guest network isolation may prevent thermostats from connecting, requiring router configuration changes.
Smartphone app installation and account creation extend setup time. Smart thermostats require downloading manufacturer apps (Nest, Ecobee, Honeywell Home, etc.) on iOS or Android devices, creating user accounts with email verification, and pairing the thermostat to your account through processes involving QR codes, PIN entry, or NFC tapping. These steps enable remote access and control but add 10-15 minutes to installation time compared to traditional thermostats that function immediately after wiring.
System compatibility verification becomes more critical with smart thermostats because their advanced features only work when properly configured for specific HVAC equipment types. The setup process requires answering detailed questions about your system: heat source type (gas, electric, oil, heat pump), number of heating stages (single-stage, two-stage, modulating), number of cooling stages, presence of auxiliary/emergency heat, whether you have a humidifier or dehumidifier, and accessory configurations. Incorrect answers cause improper operation—for example, selecting “gas furnace” when you have a heat pump prevents proper reversing valve control, causing the system to heat when you want cooling.
Voice assistant integration adds optional setup steps for users wanting Alexa, Google Assistant, or Siri control. This involves linking your thermostat account to your voice platform account through authentication processes, assigning the thermostat to specific rooms in your smart home setup, and learning voice commands that control temperature settings, mode changes, and schedule overrides. While optional, voice control represents a significant convenience feature that many users want to configure during initial installation.
Learning algorithm initialization requires patience in some smart thermostat models. The Nest Learning Thermostat, for example, spends 1-2 weeks observing your manual temperature adjustments and occupancy patterns before creating optimized automatic schedules—during this learning period, the thermostat functions more like a manual model requiring regular manual adjustments. Users expecting immediate automation may feel disappointed until they understand this learning phase is normal and necessary.
Physical installation differences include larger footprints and different mounting requirements. Many smart thermostats measure 4-5 inches square or circular, significantly larger than older rectangular thermostats measuring 3×4 inches—verify the new unit covers any wall damage or discoloration from the old thermostat, or plan for touch-up painting. Some models include decorative trim plates to cover gaps. Weight differences may require sturdier mounting, particularly on plaster walls where old anchors may not support heavier smart thermostats reliably.
Additional features require configuration attention. Geofencing features that automatically adjust temperatures based on your smartphone’s location require enabling location services and setting radius parameters. Weather integration requires entering your correct ZIP code or location. Occupancy sensors that detect when you’re home may need calibration periods. Energy usage reports and monthly savings estimates require establishing baseline data over several weeks before providing meaningful information.
What WiFi Requirements Do Smart Thermostats Need?
Smart thermostats need a 2.4GHz WiFi network (most models don’t support 5GHz-only networks), router placement within 30-50 feet for reliable signal strength, WPA or WPA2 security protocols (WEP may not be supported), and broadband internet speeds of at least 1-3 Mbps upload/download for cloud communication and remote access features.
Specifically, WiFi compatibility details vary by thermostat brand and model, making pre-purchase verification essential for homes with unusual network configurations.
Network frequency requirements dictate which WiFi band your thermostat connects to. Most smart thermostats including Nest, Ecobee, and Honeywell models require 2.4GHz WiFi networks and cannot connect to 5GHz-only networks. Modern dual-band routers broadcasting both 2.4GHz and 5GHz with the same network name (SSID) generally work fine as thermostats automatically select the compatible 2.4GHz band. However, routers configured to use 5GHz exclusively or separate SSIDs for each band may require reconfiguration—ensure your 2.4GHz band is enabled and broadcasting with a name you can select during thermostat setup. The 2.4GHz requirement exists because this frequency penetrates walls and obstacles more effectively than 5GHz, providing more reliable connections across typical home distances between thermostats and routers.
Router proximity considerations affect signal reliability. Smart thermostats require consistent WiFi connectivity for remote access, weather updates, and software upgrades—intermittent connections cause frustrating “offline” status in apps and prevent remote control. Optimal placement positions thermostats within 30 feet of wireless routers with no more than one interior wall obstructing signal paths. Thermostats installed in basements, second floors far from routers, or locations behind metal HVAC ducts may experience weak signals causing connection drops. Testing signal strength before installation using a smartphone WiFi analyzer app (available free for iOS and Android) helps predict connectivity success—look for signal strength above -65 dBm at the thermostat location for reliable operation.
Homes with weak WiFi coverage in thermostat locations require WiFi network improvements. Installing a WiFi mesh system (Google Nest WiFi, Eero, Orbi) extends coverage throughout the home with multiple access points providing seamless connectivity. Alternatively, a WiFi range extender positioned between the router and thermostat boosts signal strength, though this approach sometimes creates connectivity complexity as devices switch between the main router and extender. For new construction or major renovations, running Ethernet cable to thermostat locations and installing WiFi access points optimizes connectivity, though this option isn’t practical for most retrofit installations.
Security protocol compatibility requires routers using current WiFi security standards. Smart thermostats support WPA and WPA2 encryption—the current industry standards providing secure connections. Older routers using outdated WEP (Wired Equivalent Privacy) encryption may not work with modern thermostats, requiring router firmware updates or replacement with current models. WPA3 (the newest security standard) isn’t universally supported yet, though most thermostats work with routers in WPA2/WPA3 transitional modes. Open networks (no password required) work technically but create security risks allowing anyone within WiFi range to potentially access your thermostat.
Network isolation settings sometimes prevent thermostat connectivity. Guest network modes on many routers isolate connected devices from accessing other network resources—while this protects your computers and phones from untrusted visitors, it also prevents smart home devices including thermostats from communicating properly. Connect thermostats to your primary network rather than guest networks. Similarly, MAC address filtering (whitelisting specific devices) requires adding your thermostat’s MAC address (found in its network settings menu or printed on the device label) to your router’s allowed devices list.
Bandwidth and speed requirements are minimal but necessary. Smart thermostats consume very little bandwidth—typically 50-200 MB of data monthly for weather updates, remote access commands, and software updates. However, they require consistent internet connectivity, making reliable broadband service essential. Minimum connection speeds of 1 Mbps upload and download suffice for thermostat operation, though most modern internet plans provide far more. Satellite internet with high latency (delay) may cause sluggish response to remote commands but generally works. Cellular hotspots and mobile internet work if consistently available but may incur data charges.
Mobile app setup process follows logical steps once WiFi connectivity is established. Download the manufacturer’s app (Nest, Ecobee Home, Honeywell Home, etc.) from the Apple App Store or Google Play Store, create an account or sign in with existing credentials, and follow in-app instructions to add your thermostat. This typically involves scanning a QR code displayed on the thermostat screen, entering a connection code shown on the device, or tapping your NFC-enabled smartphone against the thermostat. The app guides you through final setup including naming your thermostat, assigning it to a home location, and configuring preferences.
App permissions require attention for full functionality. Location access enables geofencing features that automatically adjust temperatures based on your proximity to home. Notification permissions allow the app to alert you about extreme temperature conditions, filter replacement reminders, or HVAC system issues. Calendar access lets some thermostats optimize schedules around events and appointments. Review and grant appropriate permissions during initial setup to avoid later feature limitations.
Multi-user access allows family members to control the thermostat from their own devices. Most smart thermostat apps support adding additional users through email invitations—primary account holders send invitations through the app, recipients create their own accounts and gain shared access to thermostat controls. This feature proves particularly valuable in households where multiple people need remote access without sharing a single account password.
How Do You Set Up Voice Control with Your New Smart Thermostat?
Set up voice control by linking your smart thermostat account to your voice assistant platform (Amazon Alexa, Google Assistant, or Apple HomeKit) through the respective app, discovering the thermostat device, assigning it to a room in your smart home configuration, then using voice commands like “Alexa, set the temperature to 72 degrees” or “Hey Google, turn up the heat.”
In addition, voice control setup varies slightly by platform but follows similar general principles across Amazon, Google, and Apple ecosystems.
Amazon Alexa integration begins by opening the Alexa app on your smartphone, tapping the “More” menu, selecting “Skills & Games,” and searching for your thermostat manufacturer’s skill (Nest, Ecobee, Honeywell Home, etc.). Enable the skill and sign in to your thermostat account when prompted to link the accounts. Return to the Alexa app’s “Devices” tab, tap the “+” icon, select “Add Device,” choose “Thermostat,” and let Alexa discover your linked thermostat—this usually takes 20-45 seconds. Once discovered, assign the thermostat to a specific room (“Living Room,” “Upstairs,” etc.) to enable room-specific voice commands if you have multiple Echo devices or thermostats.
Common Alexa voice commands include:
- “Alexa, what’s the temperature?” — Reports current reading
- “Alexa, set the temperature to [number] degrees” — Changes setpoint
- “Alexa, raise the temperature by 3 degrees” — Relative adjustment
- “Alexa, set the thermostat to heat mode” — Changes operating mode
- “Alexa, turn on the air conditioning” — Activates cooling mode
Google Assistant integration follows a similar process through the Google Home app. Open the app, tap “+” to add a device, select “Works with Google,” and search for your thermostat brand. Link your thermostat account by signing in when prompted, then allow Google Assistant to discover devices—your thermostat should appear within 30-60 seconds. Assign it to a room in your home structure for organized control and location-specific commands.
Google Assistant voice commands include:
- “Hey Google, what’s the indoor temperature?” — Current reading
- “Hey Google, set the temperature to [number] degrees” — Changes setpoint
- “Hey Google, make it warmer” — Increases temperature (default 2 degrees)
- “Hey Google, turn on heating” — Switches to heat mode
- “Hey Google, increase the heat to 70 degrees” — Combined mode and setpoint
Apple HomeKit integration works differently because it requires thermostats with dedicated HomeKit support—not all smart thermostats include this capability, so verify compatibility before purchase. Ecobee thermostats offer strong HomeKit integration, while Nest thermostats don’t support HomeKit directly (requiring third-party bridges). For compatible devices, open the Home app on iPhone or iPad, tap “+” to add an accessory, scan the HomeKit setup code printed on the thermostat or included documentation, and follow prompts to complete pairing. Assign the thermostat to a room and optionally include it in scenes for automated control.
Siri voice commands on HomeKit-enabled thermostats:
- “Hey Siri, what’s the temperature inside?” — Current reading
- “Hey Siri, set the thermostat to 68 degrees” — Changes setpoint
- “Hey Siri, turn the heat up” — Increases temperature
- “Hey Siri, set the thermostat to cool mode” — Changes mode
- “Hey Siri, run goodnight scene” — Activates scene including thermostat adjustments
Voice command examples demonstrate practical daily uses. Morning routines might include “Alexa, turn off the heat” as temperatures rise naturally during the day. Departing for work triggers “Hey Google, set the thermostat to away mode” for energy savings. Arriving home in the evening works with “Hey Siri, set the temperature to 70 degrees” for immediate comfort without manually adjusting the physical thermostat. Bedtime commands like “Alexa, lower the temperature to 65 degrees” ensure comfortable sleeping conditions.
Advanced voice features expand beyond basic temperature control. Creating routines or scenes in smart home apps combines thermostat adjustments with other devices—saying “Alexa, good morning” might raise the temperature, turn on lights, and start your coffee maker simultaneously. Voice assistants can report energy usage when paired with compatible thermostats: “Hey Google, how much energy did I use last month?” Location-aware commands work if you have multiple thermostats: “Alexa, set the upstairs thermostat to 68 degrees” controls specific zones.
Troubleshooting voice control issues typically involves basic steps. If voice assistants can’t discover your thermostat, verify the thermostat connects to WiFi successfully (check the device’s network settings), ensure your voice assistant and thermostat apps are updated to current versions, and try unlinking and relinking accounts in the voice assistant skill or service settings. Commands that don’t work despite successful device connection often result from unclear phrasing—voice assistants require specific syntax like “set the temperature TO 72” rather than vague requests like “make it comfortable.”
Privacy considerations around voice control deserve attention. Voice assistants only listen actively after hearing their wake words (“Alexa,” “Hey Google,” “Hey Siri”), though devices constantly listen passively for those wake words. Commands involving thermostat control are processed through manufacturer cloud services, creating data about your temperature preferences and schedule patterns. Review privacy policies if these concerns affect your comfort with voice integration, and note that voice control is entirely optional—all smart thermostats function fully through manual controls and smartphone apps without voice assistants.
Can You Install a Smart Thermostat Without a C-Wire?
Yes, you can install a smart thermostat without a C-wire by using a manufacturer-provided power adapter kit that modifies wiring at your furnace control board, selecting battery-powered smart thermostat models designed to operate without continuous hardwired power, or hiring an HVAC technician to run new thermostat wire including a dedicated C-wire conductor.
Particularly for homes with older HVAC systems installed before smart thermostats became common, the absence of a C-wire presents the most significant installation obstacle requiring workarounds or modifications.
Adapter solutions provide the most popular C-wire workaround without running new wires through walls. Manufacturers including Ecobee and Venstar provide Power Extender Kits (PEK) with their thermostats that install at the furnace control board rather than the thermostat location. These adapters work by using existing thermostat wires in non-standard ways—typically commandeering the G (fan) wire to carry both fan control signals and return power to the thermostat. The adapter module mounts near the furnace control board, connects to multiple terminals using included jumper wires, then the existing thermostat wire bundle carries modified signals that provide both control and continuous power.
Installation requires opening your furnace panel, locating the control board where thermostat wires terminate, and following the adapter’s specific wiring diagram—each terminal on the adapter connects to specific terminals on your furnace board using short jumper wires included in the kit. At the thermostat end, you reconfigure wire connections according to new terminal assignments specified in the thermostat’s installation manual when using the adapter. This installation takes 30-45 minutes for DIYers comfortable working inside furnace panels, though professional installation ($75-150) is advisable if you’re uncertain about identifying furnace components.
The Nest Power Connector offers a similar solution specifically for Nest thermostats. This small module installs at the furnace, connecting to the C and W terminals on the control board and converting the existing wire configuration to provide return power. Installation is simpler than full adapter kits, making it popular for Nest users lacking C-wires.
Battery-powered options eliminate C-wire requirements entirely by operating on replaceable or rechargeable batteries. Some smart thermostats support dual-mode operation where they function primarily on battery power while using power-stealing techniques to supplement battery life through the heating and cooling wires. The Nest Thermostat (their budget model, not the Learning or E versions) uses this approach, claiming to work without C-wires in most installations while occasionally charging its internal battery from the HVAC system power.
However, battery-powered operation introduces limitations and maintenance requirements. Batteries typically need replacement every 6-12 months depending on WiFi usage, screen brightness settings, and HVAC system runtime—systems running frequently provide more opportunity for power-stealing recharge cycles, extending battery life. Thermostats display low-battery warnings typically 2-4 weeks before completely losing power, providing time for replacement. Some users report unreliable operation or intermittent WiFi disconnections with battery-powered smart thermostats in homes where HVAC systems run infrequently (mild climates or seasonal usage), as batteries drain without sufficient recharging opportunities.
Running new C-wire creates the most reliable long-term solution by providing dedicated continuous power exactly as smart thermostats are designed to use. This involves running new 18/5 (5-conductor) or 18/8 (8-conductor) thermostat wire from the furnace control board to the thermostat location, using one conductor specifically for the C-wire connection while the others carry standard control signals. In homes where the furnace sits directly below the thermostat with accessible basement or crawlspace routes, this represents a manageable DIY project requiring a few hours and $20-40 in wire costs.
Running wire through finished walls becomes more challenging, requiring drilling through wall plates, fishing wire through insulated cavities, and potentially cutting access holes that need patching and painting afterward. HVAC professionals charge $100-250 for this service depending on installation complexity—straightforward runs through basements or attics cost less, while multi-story installations requiring wall fishing cost more. Despite the higher upfront cost, dedicated C-wire installation provides the most reliable operation and eliminates ongoing battery replacement expenses and potential connectivity issues.
Alternative approaches suit specific situations. Some homeowners install 24V plug-in transformers near thermostat locations, creating a local power source that eliminates the need for C-wire running from the furnace—though this requires nearby AC outlets and potentially visible wiring along walls or through conduit. Others choose hybrid solutions using power adapters initially with plans to run dedicated C-wire during future renovations when walls are already open for other work.
Thermostat housing leak issues don’t apply to residential HVAC thermostats (this term refers to automotive cooling system components). However, some homeowners confuse terminology when researching both home HVAC and Car Symptoms, leading to mixed search results.
Compatibility verification before purchase prevents disappointment. Check your thermostat manufacturer’s website for C-wire compatibility tools—many provide apps where you photograph your existing wiring and receive guidance on whether you need an adapter. Read customer reviews specifically mentioning C-wire experiences to understand real-world success rates with various workarounds.
What Are the Energy Savings Benefits of Upgrading to a Smart Thermostat?
Upgrading to a smart thermostat provides energy savings of 10-23% on heating and cooling costs through features including automated scheduling based on occupancy patterns, remote control preventing unnecessary heating or cooling when plans change, learning algorithms optimizing temperature setpoints, and detailed usage analytics revealing opportunities for efficiency improvements.
Especially when evaluating whether smart thermostat investments justify their higher purchase prices compared to basic models, understanding concrete savings potential and payback periods helps inform purchasing decisions.
Usage analytics and reports give homeowners unprecedented visibility into heating and cooling patterns. Smart thermostats track when systems run, outdoor temperature correlations with energy consumption, and setpoint versus actual temperature differentials. Monthly energy reports delivered through smartphone apps show total runtime hours for heating and cooling, compare current month usage to previous months or years, and estimate energy costs based on runtime and local utility rates. This data awareness often motivates behavioral changes—users who see their air conditioning ran 180 hours in July versus 210 hours the previous July understand the impact of raising cooling setpoints by 2 degrees.
Usage reports identify wasteful patterns like systems running extensively during typical sleep hours (suggesting overnight setpoints are too comfortable and should be relaxed), heavy usage during known vacation periods (indicating forgotten manual adjustments), or extreme temperature swings requiring excessive recovery runtime (suggesting more gradual temperature transitions throughout the day). Smart thermostats quantify these patterns with specific data: “You used 12% more cooling this month because setpoints averaged 2 degrees lower than last year.”
Learning algorithms in premium smart thermostats like Nest Learning automatically create optimized schedules without manual programming. These thermostats observe your manual temperature adjustments over 1-2 weeks, detecting patterns like “owner lowers temperature to 68°F every evening around 10 PM” or “owner raises temperature to 72°F weekday mornings at 6:30 AM.” The algorithm gradually builds a complete weekly schedule mirroring your preferences, then continues refining based on ongoing adjustments and seasonal changes.
Auto-scheduling eliminates common programmable thermostat failures where homeowners create schedules once then never update them as routines change—resulting in heating or cooling empty homes after job changes, kids’ schedule shifts, or retirement. Learning thermostats adapt continuously, ensuring schedules remain optimized to current living patterns rather than outdated routines from years ago.
Occupancy detection through built-in sensors or smartphone geofencing enhances learning algorithms. Thermostats with motion sensors automatically switch to energy-saving away temperatures when detecting no movement for extended periods (typically 30-60 minutes), then resume comfort settings when sensing occupancy returns. Geofencing uses your smartphone’s GPS location to detect when you leave home (typically when moving 1-7 miles from your address, depending on configuration), automatically enabling away mode, then switching back to home mode when your phone approaches—ensuring you never waste energy heating or cooling an empty house yet arrive home to comfortable temperatures.
ROI timeline calculations demonstrate financial justification for smart thermostat investments. Consider a household spending $1,800 annually on combined heating and cooling (roughly the U.S. national average). A smart thermostat reducing consumption by 15% saves $270 yearly. At a $220 purchase price plus $50 in installation supplies, the total $270 investment achieves payback in exactly one year, with all subsequent savings representing pure profit. Over a typical 10-year thermostat lifespan, this generates $2,700 in total savings minus the $270 initial cost for $2,430 net savings—an excellent return on a small investment.
Payback periods vary with climate and usage patterns. Homes in extreme climates (very hot or very cold) running HVAC systems heavily see faster payback as percentage savings apply to higher baseline costs. A Phoenix household spending $3,000 annually on cooling might save $450 yearly (15% of $3,000), achieving payback in 7 months. Conversely, mild-climate homes with minimal HVAC usage see longer payback periods—a San Diego home spending $600 annually sees $90 savings (15% of $600), requiring 3 years for payback.
Behavioral improvements beyond automation contribute additional savings. Remote access prevents wasteful scenarios like accidentally leaving heat or AC running during multi-day trips—checking and adjusting settings from anywhere via smartphone app saves the cost of days of continuous operation. Weather-responsive adjustments allow proactive changes when forecasts predict unusual temperatures—raising cooling setpoints before afternoon heatwaves reduces mid-day peak demand charges, while lowering heating setpoints before warm spells prevents unnecessary furnace runtime.
Energy company incentives and rebates reduce effective smart thermostat costs. Many utility companies offer rebates ranging from $25-100 for installing ENERGY STAR certified smart thermostats as part of demand management programs. Check your utility’s website or call customer service to inquire about available programs—some require pre-approval before purchase, while others allow retroactive rebate applications with proof of purchase and installation. State and local energy efficiency programs sometimes provide additional rebates or tax credits. Combined incentives can reduce out-of-pocket thermostat costs by 30-50%, dramatically improving ROI.
According to research published by the American Council for an Energy-Efficient Economy analyzing over 10,000 smart thermostat installations, average savings range from 8% to 15% with most households achieving 10-12% reductions through occupancy-responsive scheduling and improved awareness of heating and cooling costs—though individual results vary significantly based on prior thermostat usage patterns, home insulation quality, and HVAC system efficiency.