


DIY timing chain repair is not safe for the average car owner, and the consequences of getting it wrong extend far beyond a simple mechanical inconvenience. The timing chain is one of the most precision-dependent components in your engine, and a single misalignment during self-repair can trigger a chain reaction of internal damage severe enough to require complete engine replacement. For most drivers without advanced mechanical training, the risks of attempting this job at home vastly outweigh the potential savings on labor costs.
Understanding those risks begins with knowing what the timing chain actually does — and why its role inside the engine makes any error during timing chain repair so immediately destructive. Unlike a brake pad or air filter, the timing chain operates at the heart of your engine’s combustion cycle, synchronizing components that move at thousands of revolutions per minute. Any mistake during installation does not sit quietly; it manifests immediately and violently.
The feasibility question — whether a skilled DIYer could realistically complete this job — depends entirely on their experience level, the specific engine platform, and whether they have access to the correct specialized tools. For most home mechanics, the answer is discouraging, not because the process is theoretically impossible, but because the margin for error is essentially zero and the cost of failure is measured in thousands of dollars.
Beyond the mechanical complexity, the financial stakes of a failed DIY attempt reframe the entire cost-benefit calculation. The table below summarizes how quickly a DIY error escalates in cost, from retiming fees to full engine replacement — and that context is essential before any driver picks up a wrench. Next, let’s build the foundation by understanding exactly what a timing chain is and why its function is so central to engine survival.
What Is a Timing Chain and Why Is It Critical to Your Engine?
A timing chain is a metal-link drive component inside the engine that synchronizes the rotation of the crankshaft and the camshaft, ensuring that intake and exhaust valves open and close at precisely the correct moment during each combustion cycle. Specifically, this synchronization is what allows fuel, air, spark, and exhaust events to occur in the exact sequence the engine requires to produce power without destroying itself.

To better understand why this component carries such outsized importance, it helps to trace its mechanical role step by step through the engine.
What Does a Timing Chain Actually Do Inside Your Engine?
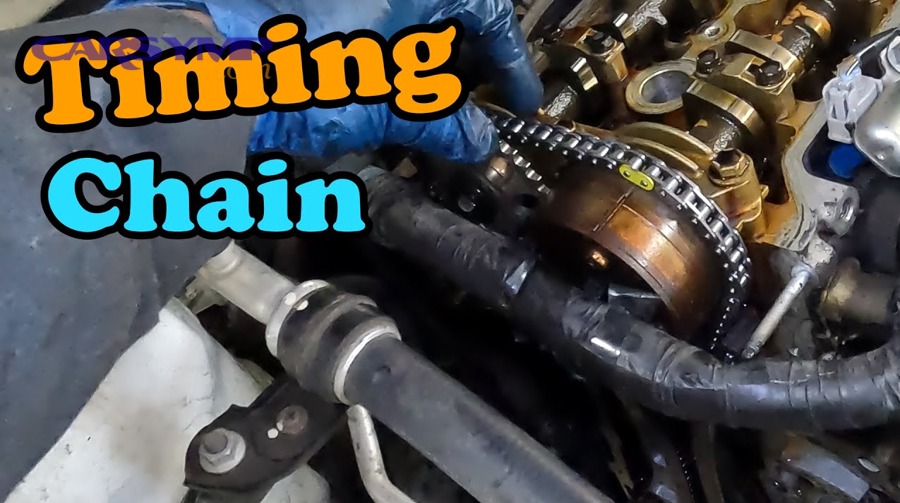
The timing chain connects the crankshaft sprocket at the bottom of the engine to the camshaft sprocket at the top, effectively linking the lower engine (pistons and crankcase) to the upper engine (valves and cylinder head). As the crankshaft rotates — driven by the up-and-down movement of the pistons — the timing chain transmits that rotation to the camshaft, which in turn opens and closes the intake and exhaust valves at precisely timed intervals.
This timing relationship is expressed in degrees of crankshaft rotation, and the tolerances are extraordinarily tight. Even a displacement of a few degrees from the correct timing mark can cause the engine to misfire, lose power, or fail to start. On interference engines — where the valves and pistons share the same physical space at different points in the cycle — incorrect timing causes valves and pistons to collide directly, resulting in bent valves, damaged pistons, and destroyed cylinder heads.
The timing chain also drives oil pump operation on many engine designs, meaning a chain failure does not just affect valve timing — it can simultaneously starve the entire engine of lubrication, accelerating catastrophic wear across every moving component.
Is a Timing Chain the Same as a Timing Belt?
A timing chain and a timing belt perform the same function — synchronizing the crankshaft and camshaft — but they differ significantly in material, durability, replacement interval, and DIY risk profile. The timing chain wins in longevity and durability, the timing belt is best suited to lower-cost, scheduled-maintenance replacement strategies, and neither is interchangeable in the context of DIY repair complexity.
Timing belts are made of reinforced rubber and typically require replacement every 60,000 to 100,000 miles as a scheduled maintenance item. Timing chains, made of hardened metal links, are designed to last the life of the engine under normal conditions — generally 150,000 to 300,000 miles with proper oil maintenance. However, this durability comes at a direct trade-off in replacement complexity. Because timing chains are located deeper inside the engine, behind the timing cover and often behind or beneath the oil pan, accessing them requires dismantling a far larger portion of the engine than a belt replacement does.
The DIY risk profile for a chain job is therefore substantially higher than for a belt job. A timing belt replacement on many four-cylinder engines is considered an advanced DIY task; a timing chain replacement on a modern transverse-mounted engine is firmly in the professional-only category for most car owners.
Is DIY Timing Chain Repair Safe for the Average Car Owner?
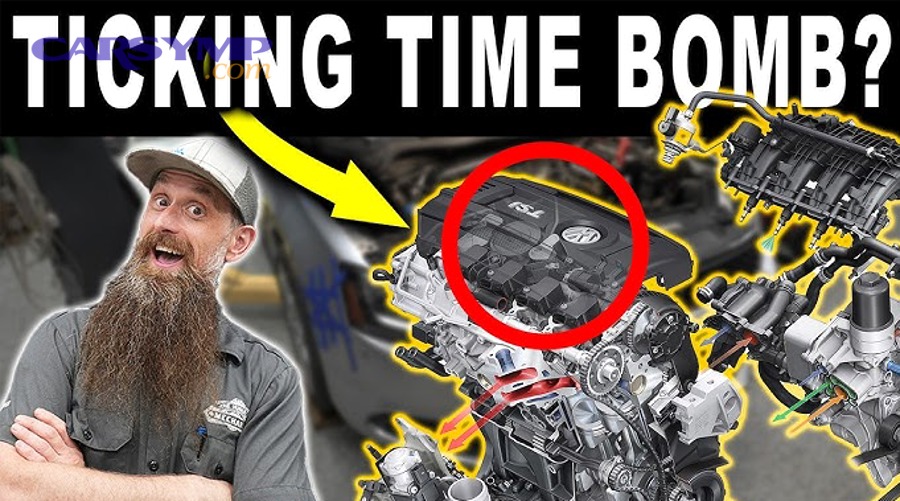
No — DIY timing chain repair is not safe for the average car owner, for three fundamental reasons: the job demands expert-level mechanical skill, requires specialized tools most DIYers do not own, and offers zero margin for error on a component whose failure destroys the engine. However, this does not mean all DIY timing chain work is impossible — it means that without specific prerequisites, the risk of catastrophic engine damage is unacceptably high.
To fully assess whether this job is within reach, it is important to examine both the skill requirements and the tool requirements in detail.
What Level of Mechanical Skill Does Timing Chain Replacement Require?
Timing chain replacement requires expert-level mechanical skill — well beyond the intermediate category that covers brake jobs, suspension work, or even clutch replacement. To complete this job correctly, a technician must understand engine teardown sequencing, torque specification application, timing mark alignment procedures, gasket sealing techniques, and in modern vehicles, variable valve timing (VVT) system behavior.
Forum accounts from experienced DIYers who have completed this job on vehicles like the Chevrolet Traverse or Honda Element consistently report 20 to 30 hours of actual wrench time, even for mechanics who have performed major engine work previously. The complexity is not concentrated in one difficult step — it is distributed across dozens of interdependent steps where each must be executed correctly before the next one is meaningful.
For context, a professional technician with factory training and a lift typically completes the same job in 8 to 12 hours. The gap between professional and DIY completion time is itself a signal of how much specialized knowledge the job demands.
What Specialized Tools Are Required That Most DIYers Don’t Own?
Timing chain replacement requires several specialized tools that are not found in a standard home garage toolkit and cannot be safely improvised with general-purpose alternatives. The critical tools include:
- Crankshaft pulley/harmonic balancer puller — required to remove the front crankshaft pulley without damaging the crankshaft snout
- Camshaft locking tools — engine-specific tools that hold the camshafts at top dead center (TDC) during chain installation; substituting these with makeshift solutions is one of the most common causes of timing errors
- Torque wrench (multiple ranges) — timing cover bolts, camshaft sprocket bolts, and main fasteners each have specific torque values that must be met precisely
- Timing light or scan tool — needed post-installation to verify cam/crank correlation codes are resolved
- Engine support bracket — required on many FWD vehicles where the engine must be partially lowered or supported during disassembly
Attempting this job without the correct cam locking tools in particular is a direct path to timing misalignment. These tools are engine-family specific — the tools for a GM Ecotec 2.4 are different from those required for a Ford EcoBoost 2.0 — and they are not interchangeable.
What Are the Critical Risks of DIY Timing Chain Repair?
There are five critical risk categories in DIY timing chain repair: timing misalignment, incorrect tensioner and guide installation, improper tool use, missed component replacement, and oil system contamination — each of which carries the potential to cause irreversible engine damage. These risks do not operate in isolation; in practice, one error during the repair process typically triggers or amplifies the others.
Below is a summary of the five risk categories and their consequences before each is explored in detail:
| Risk Category | Root Cause | Potential Consequence |
|---|---|---|
| Timing misalignment | Incorrect TDC setting or cam lock tool error | Bent valves, piston damage, no-start condition |
| Tensioner/guide reuse | Skipping worn secondary components | Metal debris in oil, renewed chain failure |
| Improper tools | Substituting specialized tools | Stripped fasteners, inaccurate torque, timing drift |
| Missed components | Chain-only replacement without kit | Premature re-failure, guide collapse |
| Oil contamination | Debris introduced during installation | Lubrication failure, accelerated bearing wear |
This table outlines the full risk landscape. Specifically, the most destructive of these risks — timing misalignment — deserves the deepest examination.
What Happens If the Timing Chain Is Installed Incorrectly?
If the timing chain is installed incorrectly, the engine immediately operates out of synchronization, meaning the camshaft and crankshaft no longer rotate in their required relationship. The result is that valves open and close at the wrong points in the piston’s travel, causing misfires, loss of compression, and in interference engines, direct physical contact between the valves and pistons.
The symptoms of a misaligned installation are immediate: the engine cranks but will not start, or starts but runs extremely roughly with multiple cylinder misfires. In severe misalignment cases, the engine produces a loud mechanical banging sound at startup — the sound of valve-to-piston contact — before the damage becomes irreversible within seconds of cranking.
Cold start rattle and chain issues that existed before the repair will be compounded if the new chain is installed with even a half-tooth offset from the correct sprocket position. Many DIYers who experience this outcome discover it only after the engine is fully reassembled, requiring a complete second teardown at additional cost.
Can a Misaligned Timing Chain Destroy Your Engine Permanently?
Yes — a misaligned timing chain can destroy your engine permanently, particularly on interference engines, for three reasons: valve-to-piston contact causes immediate mechanical damage, that damage is often non-repairable without a full head rebuild, and the repair costs frequently exceed the vehicle’s market value.
On an interference engine — which includes the majority of modern passenger car engines from Honda, Toyota, BMW, Ford EcoBoost, and GM — the valves extend into the cylinder bore at specific points in the piston’s travel. The timing chain ensures the valves retract before the piston reaches that space. Remove that synchronization, and the piston strikes the open valve directly.
The outcome is bent or broken valves, damaged valve seats, cracked or deformed pistons, and in severe cases, scoring of the cylinder walls. Repairing this damage requires at minimum a complete cylinder head rebuild; in worst-case scenarios, it requires a short block or complete engine replacement. The repair vs. engine replacement decision factors in these cases almost always favor replacement, as the cost of rebuilding bent-valve damage frequently approaches or exceeds the cost of a used replacement engine.
What Are the Most Common DIY Mistakes During Timing Chain Replacement?
The five most common DIY mistakes during timing chain replacement, in order of frequency and severity, are:
- Incorrect top dead center (TDC) alignment — Setting the engine to TDC incorrectly before removing the old chain causes every subsequent timing mark reference to be wrong
- Reusing worn tensioners and guides — Replacing only the chain while leaving the original tensioners and plastic guides in place; these components wear at the same rate as the chain and will fail again quickly
- Skipping VVT solenoid inspection — On engines with variable valve timing, clogged or failing VVT solenoids cause timing correlation codes (P0016, P0017) to return even after a correct chain installation
- Improper torque on timing cover bolts — Over-torquing causes warped covers and oil leaks; under-torquing causes cover movement that can shift timing mark references
- Introducing contamination during installation — Leaving rags, debris, or old gasket material in the timing cavity before closing the cover; these contaminants circulate through the oil system and damage bearings
Each of these mistakes is correctable before assembly is complete — but not after. Once the engine is sealed and started, diagnosing which error was made requires another full teardown.
Does Skipping Tensioners or Guides During DIY Repair Cause Engine Damage?
Yes — skipping tensioner and guide replacement during timing chain repair causes engine damage, and it does so through two distinct failure mechanisms: accelerated re-stretching of the new chain due to inadequate tension, and fragmentation of worn plastic guides that releases debris into the oil system.
The timing chain tensioner maintains constant hydraulic pressure against the chain to prevent slack. A worn tensioner that has reached the end of its travel range cannot maintain this pressure, which allows the new chain to develop slack almost immediately. That slack causes the chain to slap against the guides and jump teeth on the sprockets — replicating the original failure within a fraction of the mileage.
Plastic timing chain guides are equally critical. When they crack or fragment, the broken plastic pieces enter the oil system and circulate through oil passages, oil pump internals, and main bearings. This type of contamination is one of the most insidious forms of engine damage because it is not immediately detectable and causes progressive bearing wear that manifests as low oil pressure warnings weeks or months after the repair.
How Much Engine Damage Can a Failed DIY Timing Chain Job Actually Cause?
A failed DIY timing chain job can cause engine damage ranging from moderate — requiring a cylinder head rebuild — to catastrophic, necessitating complete engine replacement, with repair costs spanning from $1,500 to over $10,000 depending on which components are affected. The financial severity correlates directly with which error was made and how long the engine ran before the fault was identified.

To fully understand the cost exposure, it is essential to examine which specific components bear the damage and what professional repair of each component costs.
What Engine Components Are Most Likely Damaged by a DIY Timing Chain Error?
The six engine components most commonly damaged by a DIY timing chain error are the valves, camshaft, crankshaft sprocket, pistons, cylinder head, and oil pump — and damage rarely affects just one of these in isolation.
- Valves — The first casualties of timing misalignment on an interference engine; bent valves require cylinder head removal and valve replacement or head reconditioning
- Cylinder head — Valve-to-piston impact forces can crack the head, damage valve seats, or deform the combustion chamber surface
- Pistons — Direct contact with a valve leaves impact marks or cracks in the piston crown; cracked pistons require short block disassembly
- Camshaft — Rapid chain slap from a slack chain or failed tensioner accelerates cam lobe wear; on engines with VVT phasers, the phaser mechanism can be damaged by incorrect tension
- Crankshaft sprocket — Repeated tooth-skipping strips the sprocket teeth, requiring crankshaft removal for replacement
- Oil pump — On engines where the timing chain drives the oil pump directly, a chain failure causes simultaneous oil pressure loss, which begins damaging rod and main bearings within seconds
The mechanical chain reaction from a single timing error thus has the potential to involve every major internal component in the engine.
How Much Does It Cost to Fix Engine Damage Caused by a DIY Timing Chain Mistake?
Professional timing chain replacement costs $800 to $1,500 in total (parts and labor); DIY errors that cause valve damage cost $1,500 to $3,500 to repair professionally; and full engine replacement — the outcome in catastrophic cases — costs $5,000 to $10,000 or more. The DIY “savings” of $400 to $800 in avoided labor thus represent a financial gamble with a potential downside forty times larger.
The following table presents the repair vs. engine replacement decision factors across damage severity levels:
| Damage Level | Components Affected | Estimated Repair Cost | Recommended Action |
|---|---|---|---|
| Minor (timing off by 1 tooth) | None permanent — retiming required | $300–$600 (re-teardown labor) | Re-time professionally |
| Moderate (bent valves) | Valves, valve seats, head gasket | $1,500–$3,500 | Cylinder head rebuild |
| Severe (cracked head + pistons) | Head, pistons, connecting rods | $3,500–$6,000 | Short block replacement |
| Catastrophic (full interference collision) | All internal components | $6,000–$10,000+ | Engine replacement |
This cost structure is what makes the repair vs. engine replacement decision factors so consequential. In moderate-to-severe damage scenarios, professional mechanics often advise that replacing the engine with a low-mileage used unit is more economical than rebuilding the damaged one — particularly on high-mileage vehicles. According to data compiled by AAA’s automotive research division, engine-related failures are among the costliest repairs American drivers face, with average engine replacement jobs exceeding $4,500 when all associated labor and parts are included.
What Are the Warning Signs That Your Timing Chain Needs Replacement?
There are four primary warning signs that a timing chain requires replacement: a metallic rattling noise at engine startup, engine misfires and rough idle, illuminated check engine light with cam/crank correlation codes, and metal shavings detected in the engine oil. Recognizing these signs early is critical — acting on them before chain failure occurs is the difference between a $1,200 repair and a $7,000 engine replacement.

What Does a Failing Timing Chain Sound Like?
A failing timing chain produces a distinctive metallic rattling or slapping sound that is most pronounced during cold starts and typically originates from the front of the engine near the timing cover. This noise — commonly associated with cold start rattle and chain issues — occurs because the chain has stretched enough to develop slack, causing it to slap against the plastic timing guides before oil pressure builds and the hydraulic tensioner takes up the slack.
The cold start rattle is distinguishable from other engine noises in a few specific ways:
- It appears immediately at startup and typically diminishes or disappears within 5 to 15 seconds as oil pressure builds
- It is a rapid, rhythmic metallic chatter, not a slow knocking sound (which would suggest rod bearing issues)
- It worsens progressively over time as the chain continues to stretch
- It may intensify during acceleration as engine load increases chain tension demands
Drivers who notice this noise and continue operating the vehicle are gambling with the engine’s survival. A stretched chain that has begun slapping guides is already generating metal debris and degrading the guides themselves — creating the contamination risk described earlier.
What Engine Codes Indicate a Timing Chain Problem?
The four OBD-II diagnostic codes most directly associated with timing chain wear and failure are P0008, P0009, P0016, and P0017 — all of which indicate a loss of correct correlation between the camshaft and crankshaft positions as measured by their respective sensors.
| Code | Meaning | Implication |
|---|---|---|
| P0008 | Engine position system performance (Bank 1) | Cam/crank timing offset detected on Bank 1 |
| P0009 | Engine position system performance (Bank 2) | Cam/crank timing offset detected on Bank 2 |
| P0016 | Crankshaft/camshaft timing misalignment (Bank 1, Sensor A) | Chain has stretched or jumped a tooth |
| P0017 | Crankshaft/camshaft timing misalignment (Bank 1, Sensor B) | Exhaust cam timing offset, often VVT-related |
These codes should not be interpreted as a DIY repair trigger. They are diagnostic signals that require professional evaluation to determine whether the underlying cause is chain stretch, a failed VVT solenoid, a faulty cam or crank position sensor, or an already-jumped chain. Attempting a DIY teardown based on these codes alone — without understanding which specific failure mode is present — is one of the most common entry points into a failed DIY timing chain repair.
The sections above have directly addressed the primary search intent: understanding the critical risks of DIY timing chain repair and the engine-destroying consequences that follow from mistakes during self-repair. The content below expands into supplementary context — including how professional repair compares, warranty and insurance implications, engine-specific risk profiles, and the recommended course of action when a timing chain begins to fail.
When Is Professional Timing Chain Repair the Smarter Choice Over DIY?
Professional timing chain repair is the smarter choice when the vehicle has an interference engine, when timing correlation codes are already present, when the owner lacks cam locking tools specific to their engine family, or when the vehicle is still under powertrain warranty — which encompasses the vast majority of timing chain repair scenarios on modern vehicles.

How Does Professional Timing Chain Replacement Differ From DIY in Terms of Risk?
Professional timing chain replacement differs from DIY in three critical dimensions: access to factory service procedures, use of engine-specific tooling, and the ability to diagnose secondary damage before reassembly. A professional technician working from the OEM service manual follows a verified, sequence-validated procedure with torque specs, timing mark photographs, and step-by-step verification checkpoints that are not available in generic online guides.
More importantly, a professional shop inspects the VVT phasers, oil pump drive components, and cam position sensors during disassembly — components that a DIYer focused on replacing the chain itself is likely to overlook. Many vehicles that return to shops with recurring timing codes after a DIY repair are found to have VVT solenoids clogged with varnish deposits, a fault that has nothing to do with the chain itself but produces identical diagnostic codes.
Professional repair also provides a parts and labor warranty — typically 12 months or 12,000 miles at minimum for reputable shops — which provides a financial safety net that DIY repair cannot offer under any circumstances.
Does DIY Timing Chain Repair Void Your Car’s Warranty or Insurance Coverage?
Yes — DIY timing chain repair can void your vehicle’s powertrain warranty and, in specific circumstances, affect insurance coverage, for two primary reasons: improper repair documentation and warranty clause violations related to engine modification or damage. This is one of the rarest but most financially significant risks associated with DIY timing chain work, and it is almost never discussed in standard repair guides.
Under the Magnuson-Moss Warranty Act in the United States, a manufacturer cannot void a warranty simply because the owner performed their own maintenance — but this protection has limits. If a DIY timing chain repair causes or contributes to engine damage, the manufacturer or dealer can deny a warranty claim on the grounds that the damage resulted from improper repair rather than a manufacturing defect. The burden of proof in these disputes typically falls on the vehicle owner.
From an insurance perspective, most standard auto insurance policies exclude coverage for mechanical failures resulting from owner-performed repairs that do not meet manufacturer specifications. A DIY timing chain error that leads to engine seizure is therefore unlikely to be covered under a comprehensive policy, leaving the owner fully exposed to replacement costs.
Are There Any Engines Where DIY Timing Chain Replacement Is Considered Lower Risk?
Yes — non-interference engines with rear-wheel-drive longitudinal engine layouts present a comparatively lower risk profile for DIY timing chain replacement, primarily because valve-to-piston collision is physically impossible and engine access is significantly better than in front-wheel-drive transverse configurations.
On non-interference engines — where the valves and pistons do not share the same physical space at any point in the combustion cycle — a timing misalignment does not cause immediate mechanical destruction. The engine will run poorly, misfire, and potentially fail to start, but it will not suffer the catastrophic internal collision damage that makes interference engine DIY so dangerous. This distinction is critical in the DIY feasibility assessment.
RWD vehicles with longitudinally mounted inline engines (such as older BMW straight-six platforms or classic American V8s) also offer substantially better physical access to the timing cover. The engine cradle does not need to be disturbed, and the timing cover is typically reachable without removing the engine mounts or oil pan. This reduces both the time required and the probability of errors introduced during disassembly.
By contrast, FWD vehicles with transverse-mounted engines — including the GM Ecotec 2.4, Honda K-Series, and Ford EcoBoost family — require partial engine cradle removal or engine lowering to access the timing cover, dramatically increasing the complexity and the number of steps where errors can occur.
What Should You Do Instead of DIY If Your Timing Chain Is Failing?
The correct course of action when a timing chain is failing involves four steps: stop driving the vehicle immediately, obtain a professional diagnostic scan to identify which codes are present and assess chain stretch, request itemized estimates from at least two qualified shops, and specify that the repair must use a complete timing chain kit — not a chain-only replacement.
- Stop driving immediately — A chain that is slapping guides or producing cold start rattle is already generating metal debris. Every mile driven accelerates guide degradation and oil contamination
- Get a professional scan first — Codes P0016 and P0017 can result from a stretched chain, a clogged VVT solenoid, or a failed position sensor; the correct repair depends on which cause is confirmed
- Request complete kit installation — Insist that the repair includes the full timing chain kit: chain, tensioner(s), all guides, cam and crank sprockets, and VVT components if applicable. Shops that quote chain-only replacement are cutting corners that will result in a repeat failure
- Compare estimates with scope in mind — A lower quote that omits VVT solenoid inspection or uses an incomplete kit is not a better deal; it is a deferred repair that will cost more in the near future
In short, the safest, most cost-effective approach to a failing timing chain is professional diagnosis followed by a complete kit replacement at a qualified shop — not a DIY repair that puts the entire engine at risk for the sake of avoiding a few hundred dollars in labor costs.