


A cooling system pressure test is the most direct DIY method to find external coolant leaks because it pressurizes the system (safely, on a cold engine) and forces weak seals, hoses, and seams to show themselves as drips, wet spots, or a measurable pressure drop.
Next, you’ll get the tool-and-setup side right—choosing a pressure tester, matching the correct adapter to your radiator neck or pressurized expansion tank, and using the cap’s rated pressure as your hard limit so you don’t create a new problem while hunting the old one.
Then, you’ll learn how to read the results like a diagnosis, not a guess: what a fast drop vs a slow drop usually means, how to confirm a real leak versus a connection issue, and what to do when the gauge falls but the leak doesn’t show up right away.
Introduce a new idea: the radiator (or expansion tank) cap is part of the pressure story—so after you pressure-test for leaks, you’ll also cap-test to verify the system can hold pressure in real driving, which is essential for reliable coolant leak repair and long-term stability.
What is a cooling system pressure test and what does it reveal?
A cooling system pressure test is a diagnostic procedure that uses a hand pump and gauge to pressurize the cooling system to the cap’s rated pressure so you can reveal leaks, weak seals, and pressure-loss problems without running the engine.
To better understand why this works so well, it helps to know what you’re actually pressurizing and what “pressure loss” is trying to tell you.
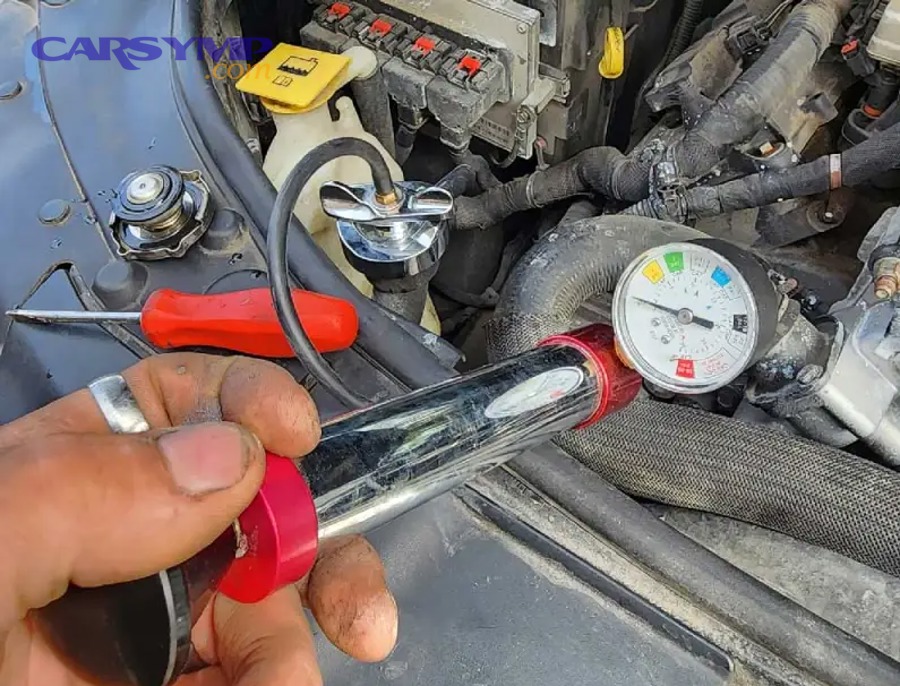
What parts of the cooling system are you actually testing under pressure?
You are testing every coolant-containing component that is connected to the pressurized side of the system, which usually includes:
- Radiator and end tanks (common seam and crimp leaks, especially on plastic end tanks)
- Upper and lower radiator hoses (clamp areas, hose cracks, swollen hose ends)
- Thermostat housing and gasket (seepage around the flange or bolts)
- Water pump (weep hole seepage, gasket leak, shaft seal leak)
- Heater core circuit (heater hoses, firewall connections, and the heater core itself)
- Expansion tank / reservoir (if it’s pressurized in your vehicle design)
- Coolant crossover pipes, quick-connect fittings, and bleed screws (design-dependent leak points)
What makes a pressure test powerful is that it “loads” those seals and joints the same way real operation does—without heat, vibration, and airflow hiding the leak. That means a small seep that evaporates when hot can become a visible wet trace when pressurized cold.
Is a pressure test the fastest way to find an external coolant leak?
Yes—a cooling system pressure test is often the fastest way to find an external coolant leak because (1) it creates controlled pressure on demand, (2) it turns intermittent seepage into visible wetness, and (3) it lets you inspect safely with the engine off and cool.
Then, once you accept it as the fastest path, the real speed comes from preparation: the right tools, the right adapter, and the right pressure limit—because guessing either one can waste time or cause damage.
What tools do you need to pressure test the cooling system at home?
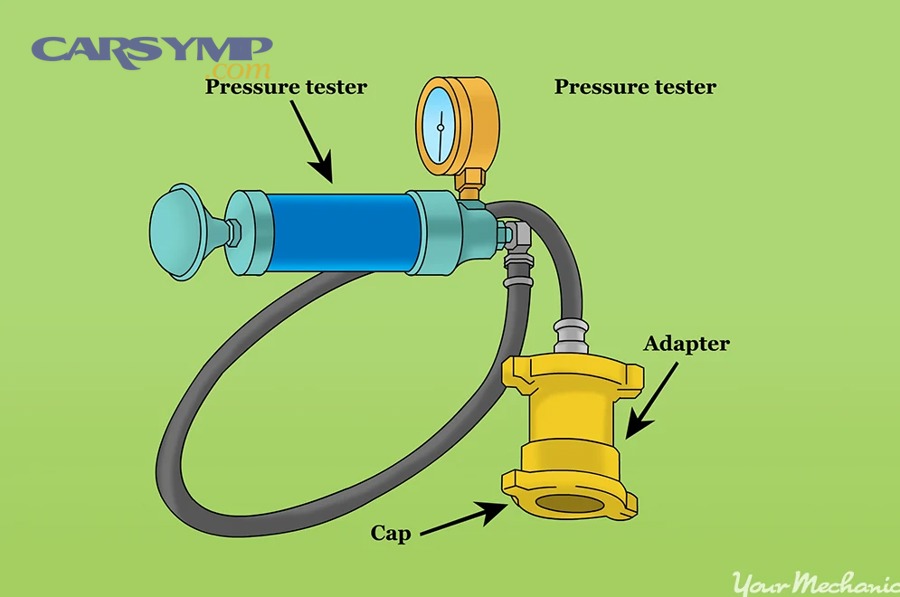
You need a cooling system pressure tester kit with a hand pump and gauge, the correct cap/neck adapter for your vehicle, and basic inspection aids (light, mirror, towels) to locate leaks quickly and confirm the source.
Next, focus on the two items that decide whether your test is accurate: adapter fit and cap compatibility.
Which adapter fits your radiator or expansion tank cap design?
The “right” adapter is the one that seals exactly like your cap does—because a poor seal at the adapter will mimic a leak and create false pressure loss. In practice, you’ll see these common designs:
- Traditional radiator neck + radiator cap (tester adapter locks or threads onto the radiator neck)
- Pressurized expansion tank systems (tester connects at the reservoir/tank cap opening instead of the radiator)
- European-style bayonet/quarter-turn caps (often require a specific adapter shape)
- Threaded reservoir caps (common on many modern vehicles)
A simple rule keeps you out of trouble: match the adapter to the cap location you actually use to fill and pressurize the system. If your vehicle uses a pressurized expansion tank, testing at the radiator may be impossible—or meaningless—because the radiator may not have a cap at all.
Should you test the radiator/expansion tank cap with the same tool?
Yes—you should test the radiator cap or expansion tank cap with the same kit because (1) the cap is a pressure regulator that must hold pressure, (2) a weak cap can cause boiling/overflow that looks like a leak, and (3) a cap that releases early reduces system pressure and can worsen overheating symptoms.
Besides, if you skip cap testing, you can “fix” an external seep and still lose coolant later—because the cap never held pressure in the first place.
What pressure should you pump to during a cooling system pressure test?
You should pump the system to the radiator/expansion tank cap’s rated pressure (never beyond it) because that rating is the engineered limit for seals, hoses, the radiator, and the heater core.

Then, once the target pressure is correct, your test becomes meaningful—because any drop is more likely to be a real leak rather than a self-inflicted overpressure event.
Where do you find the correct pressure rating for your system?
You can usually find the rating in one of these places:
- Printed on the cap (often in psi or kPa)
- Owner’s manual or service information (sometimes specified as a range)
- Replacement cap listing (only as a cross-check, not your primary source)
If your cap says 16 psi, your test target is 16 psi—not “a little more to be sure.” A pressure test is not a strength test; it’s a controlled diagnostic.
Evidence (practical benchmark): Many automotive references note that each additional psi increases boiling point by about 3°F, which is why cap pressure is designed—not guessed. (help.summitracing.com)
Can over-pressurizing the system cause new leaks or damage?
Yes—over-pressurizing can cause damage because (1) plastic tanks and aged hose rubber can split under excess load, (2) heater cores can rupture, and (3) seals that were holding at spec can be forced past their safe compression range.
More importantly, overpressure can create a leak you didn’t have five minutes ago—then you’ll spend the rest of the day “diagnosing” a problem you accidentally introduced. So, use the cap rating as a hard ceiling and treat the gauge like a safety instrument, not a challenge.
How do you pressure test the cooling system step by step to find leaks?
Pressure testing works best with a simple 7-step method—cool engine, remove cap safely, install the correct adapter, pump to the cap rating, hold pressure, inspect in a set pattern, and document what you find—so you can locate leaks fast and re-check repairs reliably.
Below, the key is consistency: do the same steps the same way every time, so your results mean something.
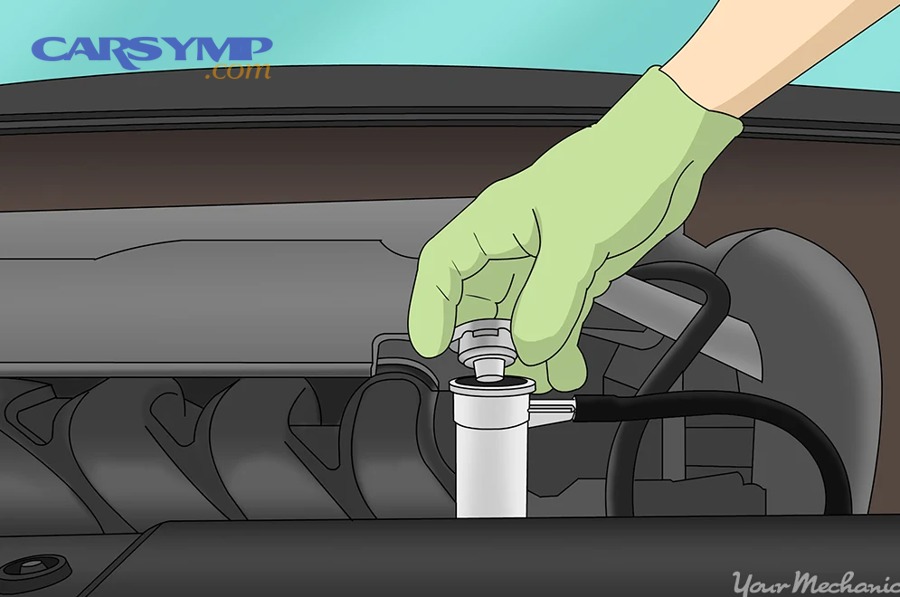
What are the exact steps to perform a safe pressure test on a cold engine?
Use this exact sequence to avoid burns, false leaks, and wasted time:
- Park on level ground and let the engine cool completely.
A warm system can still be pressurized, and opening it can spray hot coolant. - Inspect the coolant level visually first.
If the system is empty, you may need to add coolant/water mix just to pressurize enough to find the leak. Don’t run the engine yet. - Remove the cap safely (radiator cap or expansion tank cap).
If there’s any doubt, use a thick rag and open slowly—stop if you hear pressure release. - Select and install the correct adapter.
Make sure it sits squarely and locks/seals like the cap. - Attach the hand pump and verify the gauge reads zero before pumping.
A sticky gauge can mislead you. - Pump to the cap’s rated pressure and stop.
Don’t overshoot and “bleed it back.” Aim for clean accuracy. - Hold pressure and begin inspection immediately.
Watch the gauge for 1–2 minutes before you even crawl under the car—an immediate drop suggests a large leak or a bad adapter seal.
If your gauge drops fast within seconds, stop and re-check your adapter fit. It’s common for a slightly mis-seated adapter to leak air and mimic a “massive coolant leak.”
What inspection order finds leaks fastest (top-down, outside-in)?
A repeatable inspection pattern prevents you from chasing drips that traveled, splashed, or pooled. Use this order:
- Start at the fill point and cap seat (radiator neck or reservoir neck)
Look for wetness around the adapter seal (false leak indicator). - Radiator top tank, seams, and corners
Check crimp seams and plastic-to-aluminum joints carefully. - Upper radiator hose and clamp areas
Feel for wetness under the hose lip; coolant often hides under the clamp band. - Thermostat housing and nearby sensors
Look for a wet trail around the gasket edge or bolt heads. - Heater hoses at the engine side and firewall
Run a clean finger along connections; residue can be sticky and sweet-smelling. - Water pump area
Look for dampness under the pump snout and around the weep hole (if visible). - Lower radiator hose and underside of radiator
Gravity makes lower leaks show last; check the splash shield edges for fresh drips. - Cabin signs (if pressure drops with no obvious leak)
Damp carpet, foggy windows, or coolant smell can indicate heater core issues.
A good pressure test doesn’t just “find a wet spot.” It helps you plan coolant leak repair by identifying the true origin (for example, a drip on the lower hose may actually be running down from the thermostat housing above).
How do you interpret the results of a cooling system pressure test?
A pressure test result is interpreted by combining gauge behavior with physical evidence: stable pressure usually means no significant external leak, a fast drop often indicates a large leak or sealing issue, and a slow drop points to a small seep, trapped air movement, or a leak that’s hard to see.
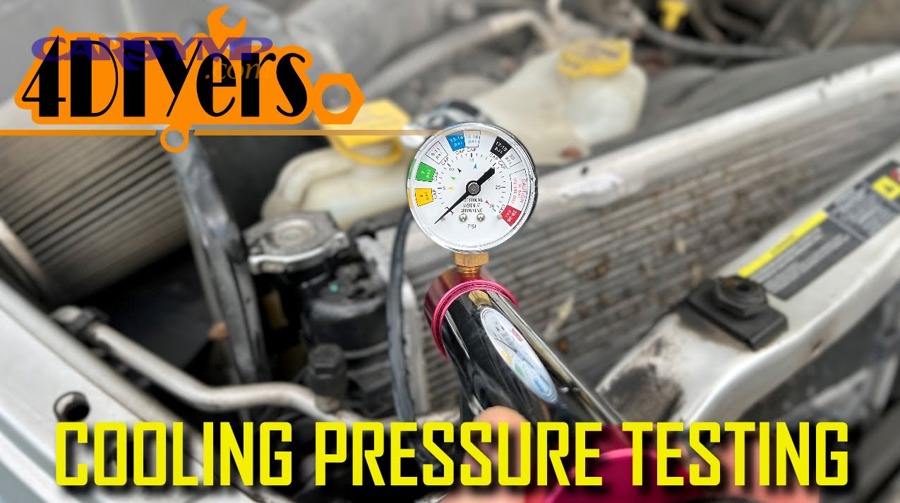
Then, once you interpret the pattern correctly, you can choose the right next action instead of randomly replacing parts.
What does it mean if the gauge drops quickly versus slowly?
A fast drop usually means one of these:
- A large external leak (hose split, radiator seam crack, loose clamp)
- A bad adapter seal at the tester connection (false leak)
- A cap seat issue (damaged neck lip) if you’re testing at the cap opening
A slow drop usually suggests:
- A small seep that may show as a wet edge rather than a drip
- A leak at a component that’s hard to see (under covers, behind pulleys)
- A very small heater core/hose seep that leaves residue without dripping
- Minor pressure stabilization effects (especially right after pumping)
To make this practical, here’s a quick interpretation table (use it while you’re under the hood).
Table context: This table links common gauge behavior during a pressure hold to the most likely meaning and the first places to inspect, so you can prioritize the fastest checks before moving to deeper diagnostics.
| Gauge behavior during hold | What it most often suggests | What to check first |
|---|---|---|
| Holds steady at target pressure | No meaningful external leak at that pressure | Re-check later when hot if symptoms persist |
| Drops immediately (seconds) | Large leak or tester/adapter not sealing | Adapter fit, radiator neck seat, big hose split |
| Drops steadily (minutes) | Small external leak or hidden seep | Thermostat housing edge, pump weep area, heater hose joints |
| Drops but no visible leak | Hidden external leak or possible internal issue | Under-shield areas, heater core signs, UV dye option |
This approach is how professionals avoid wasting time: the gauge tells you how urgent and how visible the leak should be.
What should you do if pressure drops but you can’t see a leak?
If pressure drops and you can’t see a leak, don’t assume “head gasket” immediately—instead follow a controlled escalation, because hidden external leaks are far more common than true internal failures.
- Confirm the tester seal first.
Pump again to the same pressure. Spray a little soapy water around the tester connection to check for air bubbles (false leak). - Check undercovers and splash shields.
Coolant can drip onto a shield, travel, and exit far from the source. - Look for heater core evidence.
Coolant smell inside the cabin, damp passenger floor, or a foggy windshield can indicate an internal cabin-side leak path. - Use UV dye if the leak is intermittent.
This is often the fastest “step up” when the leak only appears under pressure and then disappears. - Only then consider internal leak indicators.
Consistent coolant loss with no external signs can point to internal consumption, but it’s a later conclusion, not the first.
This is also where “Stop-leak products risks” matter: a pressure drop may tempt you to pour in a quick fix, but stop-leak can clog small passages and create new problems in radiators and heater cores. A pressure test is meant to guide a real repair, not mask a symptom.
How do you pressure test the radiator cap (or expansion tank cap) correctly?
A radiator/expansion tank cap pressure test checks whether the cap holds and releases pressure at its rated value, because a weak cap can lower boiling protection and cause overflow-like symptoms even when the rest of the cooling system is leak-free.
Next, treat the cap as a precision valve: it must seal, hold, and vent correctly—otherwise your whole pressure strategy collapses.
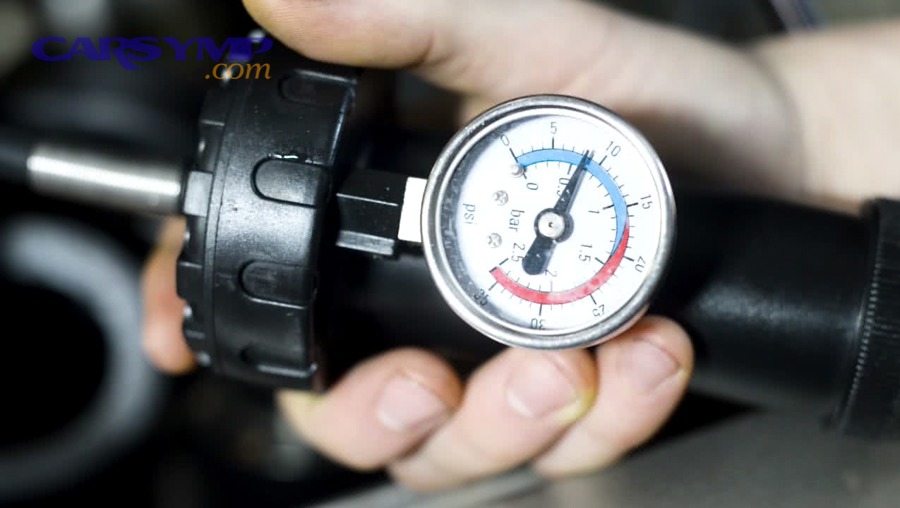
What is the difference between system pressure testing and cap pressure testing?
System pressure testing answers: “Where does the system leak under normal operating pressure?”
Cap pressure testing answers: “Can the cap maintain that operating pressure without venting early or leaking?”
In real driving, the cap is what keeps pressure stable. If the cap vents too early, the system can push coolant into the overflow/recovery path and look like it’s “losing coolant,” even if there’s no external leak.
So, if you do a system pressure test and it holds, but you still lose coolant over days, the cap becomes a prime suspect—especially if you find dried residue near the overflow tube or around the cap seat.
When should you replace the cap instead of “passing” it?
Replace the cap rather than trusting it if you see any of these:
- Cracked, hardened, or misshapen rubber seal
- Corrosion or pitting on the sealing surface
- Weak spring feel or inconsistent pressure behavior on the tester
- Coolant residue around the cap seat that returns after cleaning
- Recurring “push-out” symptoms (overflow smell, wet overflow tube area)
Cap replacement is often one of the cheapest forms of Preventing future coolant leaks because it stops pressure loss that encourages boil-off, overflow, and repeated heat cycling stress on hoses and plastic components.
After you find and fix a leak, how do you confirm the repair and avoid repeat issues?
After a leak repair, you confirm success by pressure testing again at the same cap-rated pressure, verifying stable hold, refilling correctly, bleeding air, and monitoring level/temperature over several heat cycles to prevent repeat leakage and overheating.
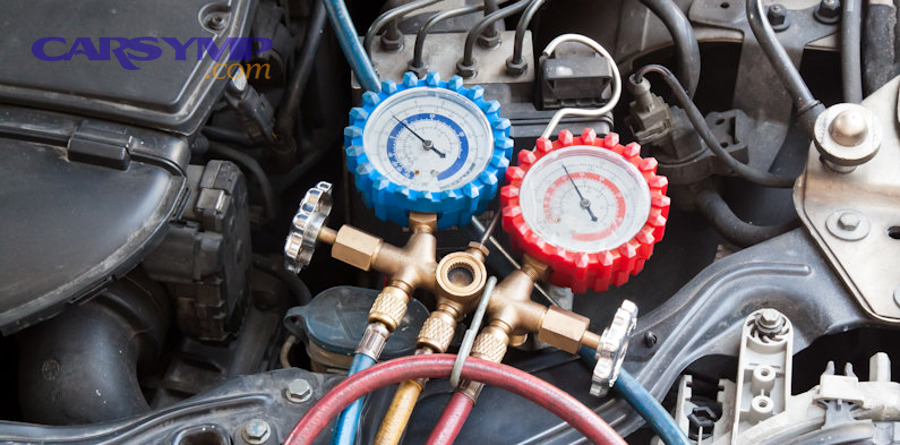
Then, the goal shifts from “find the leak” to “keep it from coming back,” which is where your process matters as much as your parts.
Should you re-test the system immediately after the repair?
Yes—you should re-test immediately because (1) it confirms the seal before you drive, (2) it catches mistakes like loose clamps or pinched O-rings, and (3) it prevents wasting fresh coolant on a system that still leaks.
Next, do the re-test the same way you did the first test: same adapter, same pressure, same hold time. Consistency is how you know the repair changed the result.
A strong best-practice loop looks like this:
- Clean and dry the suspected area
- Pressure test to spec
- Repair the confirmed source
- Pressure test again to spec
- Only then refill/bleed and road-test
This is the “professional rhythm” of coolant leak repair, and it’s the reason pressure testing saves money instead of just confirming bad news.
How do you prevent overheating after the test (refill and bleed basics)?
Preventing overheating after a pressure test comes down to removing air and restoring the correct coolant mix:
- Refill with the correct coolant type and mixture.
Use the manufacturer-recommended coolant chemistry and the proper dilution (commonly premixed or 50/50 with distilled water). - Bleed air using your vehicle’s method.
Some systems self-bleed; others require a bleed screw or a specific fill funnel method. Air pockets can prevent proper circulation and cause hot spots. - Run the heater on high while warming up (when safe).
This encourages flow through the heater core circuit and can help purge trapped air. - Watch temperature behavior and coolant level after cool-down.
Coolant may drop as air works out; top off only when the engine is cool.
Evidence (coolant property relevance): According to a thesis study by Nahrain University (College of Engineering, Chemical Engineering), in 2007, measured boiling temperature of ethylene glycol–water mixtures increased as ethylene glycol concentration increased, supporting why correct mixture and system pressure matter for boiling protection. (nahrainuniv.edu.iq)
This is also where you avoid shortcuts: if you’re tempted to use sealants, remember Stop-leak products risks—some can restrict radiator and heater core passages, creating chronic overheating that’s harder to diagnose than the original leak.
What advanced scenarios can affect pressure-test accuracy, and how do you handle them?
Advanced scenarios affect accuracy when leaks are hidden, intermittent, or design-dependent—so the fix is to verify tester sealing, adjust inspection strategy to your system layout, and use escalation tools like UV dye only when the basic pressure test points you there.
Below are the most common “why the gauge drops but I can’t find it” situations—and how to handle them without guessing.
What are the most common “no visible leak” causes during a pressure test (external vs internal)?
External-but-hidden causes (most common):
- Leak pooling under an engine cover or splash shield
- Slow seep at a hose end that only wets the underside
- Heater core seep that leaves cabin smell/dampness rather than driveway drips
- Leak at the back of the engine (hard to see without a mirror)
Internal or mixed-symptom causes (less common, but real):
- Coolant entering a combustion chamber (often accompanied by other signs)
- Coolant mixing with oil (milky oil, rising oil level—check carefully)
- Exhaust-side clues (sweet smell, persistent white steam beyond normal condensation)
The practical difference is that external-hidden leaks usually leave physical residue somewhere—while internal issues often show system behavior changes (pressure patterns, repeated overheating, persistent coolant loss without residue).
Should you use UV dye to find intermittent coolant leaks?
Yes—UV dye is a smart next step when (1) pressure drops slowly with no visible leak, (2) the leak only happens intermittently, and (3) you suspect the leak is wicking or evaporating before it drips.
Then, use it with discipline: add the dye, run the system briefly (if safe), pressure test again, and inspect with a UV light in low ambient light. Dye turns “I think it’s wet here” into “this exact seam is leaking.”
How is pressure testing different on vehicles with a pressurized expansion tank instead of a radiator cap?
Pressure testing is different because the expansion tank becomes the pressure point, so (1) your adapter must fit the reservoir neck, (2) leaks may show first at the tank seam and cap seat, and (3) the radiator may be inaccessible as a test port.
Next, adjust your inspection order:
- Start at the expansion tank seam, cap seat, and overflow connection
- Follow the main hoses away from the tank to the engine
- Pay extra attention to quick-connect fittings and plastic junctions
These systems can be very reliable—until the plastic tank ages—so accurate adapter fit and careful seam inspection matter more than ever.
Do hybrids/EVs with multiple coolant loops require a different diagnostic approach?
Yes—hybrids/EVs often require a different approach because (1) there may be multiple coolant circuits, (2) electric pumps and valves can change flow paths, and (3) service procedures may specify which loop to pressure test and how to isolate it safely.
More importantly, you should identify which circuit is losing coolant before you pressure test—because “pressurize everything” may not be possible or safe without the correct service procedure.
In short, a cooling system pressure test is your best DIY diagnostic for leaks when you keep it cold, keep it at the cap rating, and read the gauge as part of the story—not the whole story. Done correctly, it supports clean coolant leak repair, reduces Stop-leak products risks temptation, and is one of the simplest ways of Preventing future coolant leaks through confirmation, cap verification, and repeatable process.