Fix Oil Leak Repair Fast: Engine Oil Leak Fix for Drivers
Oil leak repair is the process of finding the exact leak source, sealing it correctly, and verifying the engine stays dry under real driving conditions—so you protect oil pressure, prevent damage, and avoid messy driveway stains.
To make the job practical, this guide focuses on an engine oil leak fix workflow you can follow: identify the fluid, pinpoint the leak path, choose the right repair method, and confirm the repair with a clean recheck.
You’ll also learn how to separate “safe to monitor” seepage from leaks that demand immediate action, plus what to expect if a shop handles the repair, including typical steps and what affects cost.
Giới thiệu ý mới: to start repairing the right way, you first need to understand what “repair” actually means for oil leaks and why timing matters.
What does oil leak repair actually include, and when is it urgent?
Oil leak repair means locating the oil’s true exit point, replacing or resealing the failed part, and verifying the fix after cleaning—because oil often travels and drips far from where it started.
To connect that idea to real-world urgency, the key is deciding whether you’re dealing with a minor seep or a loss-rate leak that risks low oil pressure or a fire hazard.
Which leaks are “urgent” versus “monitor and plan”?
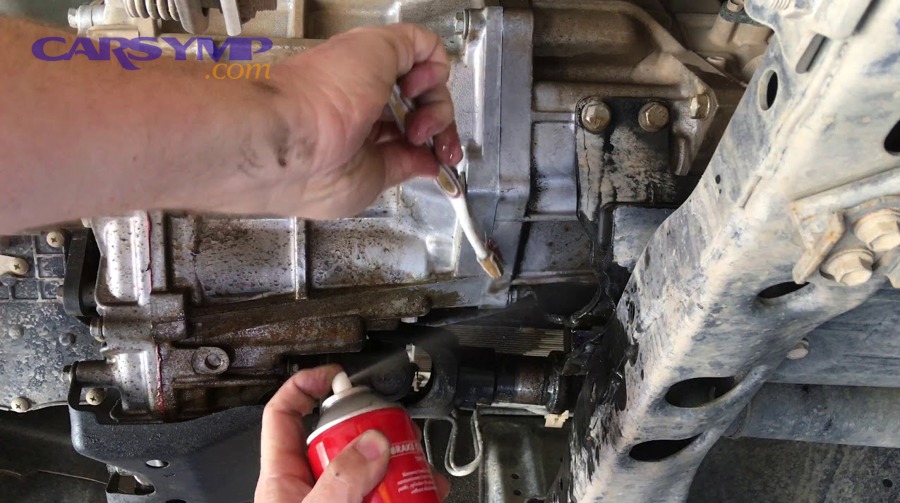
An oil leak is urgent when it can drop the oil level quickly, contaminate belts or electrical parts, or drip onto hot exhaust components—because those conditions amplify damage and safety risk.
Next, use three quick checks to classify it: oil level trend, drip rate, and smell/smoke behavior after a drive.
- Oil level drops between checks: If you add oil often, plan repair soon even if you don’t see big puddles.
- Drips after parking: A fresh spot that grows after every trip suggests an active leak, not just old residue.
- Smell or smoke: A burning oil smell after stopping can mean oil is reaching hot surfaces.
For clarity, a light “mist” around a gasket can be monitored if the oil level stays stable; however, any leak that reaches the alternator, serpentine belt, or exhaust should move to the top of your list.
Why cleaning first is part of the repair, not optional
Cleaning is essential because oil spreads along engine ribs and covers—so the visible drip point is often a “downstream” location, not the actual failure point.
Then, once the engine is clean, even a small fresh wet line becomes a reliable clue that guides you to the correct seal or gasket.
- Degrease the suspected area, rinse gently (avoid soaking electrical connectors), and dry thoroughly.
- Drive 10–20 minutes, park on clean cardboard, and inspect with a bright light.
- Look for the highest fresh wet spot; that’s usually the origin.
How do you confirm it’s engine oil and not another fluid under the car?
Yes—you can usually confirm engine oil by color, feel, smell, and location, then validate with fluid-level checks to rule out look-alikes like coolant or transmission fluid.
To keep the diagnosis accurate, treat the puddle as a clue but verify it against the vehicle’s dipsticks and reservoirs before you commit to any engine oil leak fix.
What quick “home tests” identify oil on the ground?
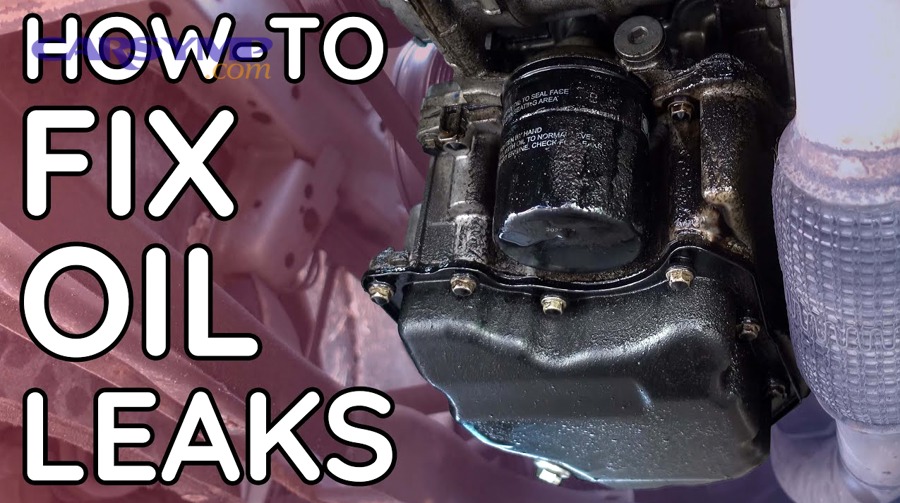
Engine oil usually feels slippery and thicker than water-based fluids, and it leaves a darker smear when rubbed on white paper—especially after it’s been in use.
Next, compare the spot to known references: check your dipstick level and see whether the stain matches what’s on the dipstick.
- Blot test: Dab with a white napkin; oil makes an oily ring and a darker center.
- Texture: Used oil is slick and slightly sticky; coolant feels watery.
- Smell: Used oil smells “petroleum”; if it smells sweet, suspect coolant.
Also remember that leaks can coexist: you may be planning coolant leak repair separately if you notice watery residue or the coolant level drops.
How do you tell oil apart from other common leaks?
Oil is only one of several fluids that can drip, so the safest approach is to check levels and note position under the vehicle rather than relying on color alone.
Then, use these comparisons to avoid a wrong repair:
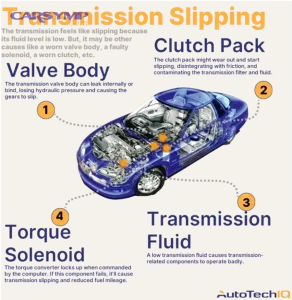
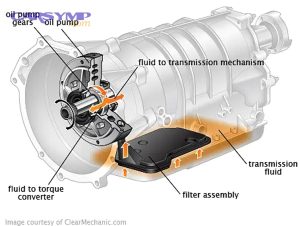
- transmission fluid leak: often red or amber (can darken with age) and may appear near the transmission pan area.
- power steering fluid leak: can be amber and thin; leaks often appear near steering rack lines or pump area.
- brake fluid leak: clear to amber, thin, and can damage paint; drops may appear near a wheel or master cylinder lines.
If you’re seeing mixed stains, document what you find as part of your personal “Car Symptoms” log so you can match levels, odors, and locations over time.
Where is the oil leak coming from on most engines?
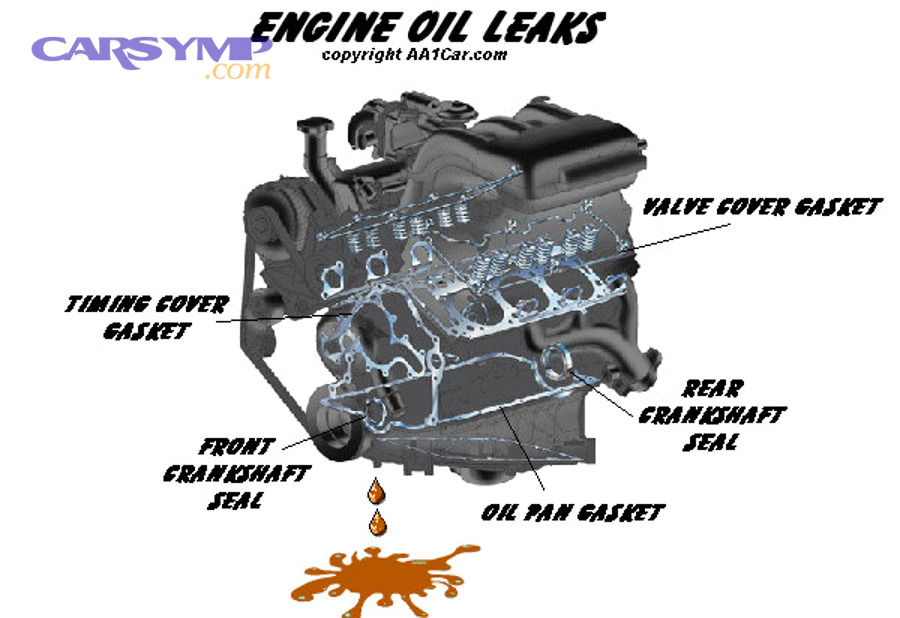
Most oil leaks originate from gaskets, seals, or threaded fittings near the top of the engine and migrate downward—so finding the highest fresh wet point is the fastest way to locate the source.
To make that search systematic, start at the valve cover area, then move to the oil filter housing, and finally inspect the lower engine and crankshaft seal zones.
How do you spot valve cover leaks without guessing?
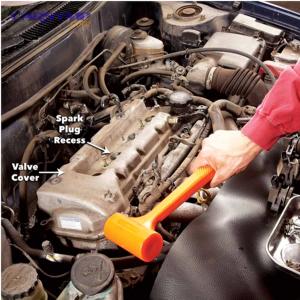
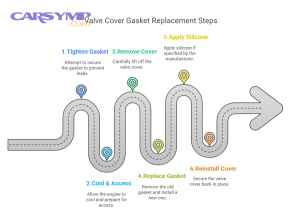
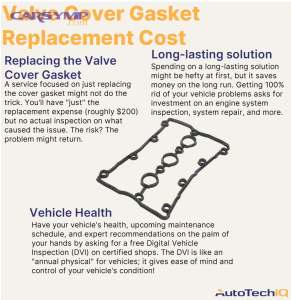
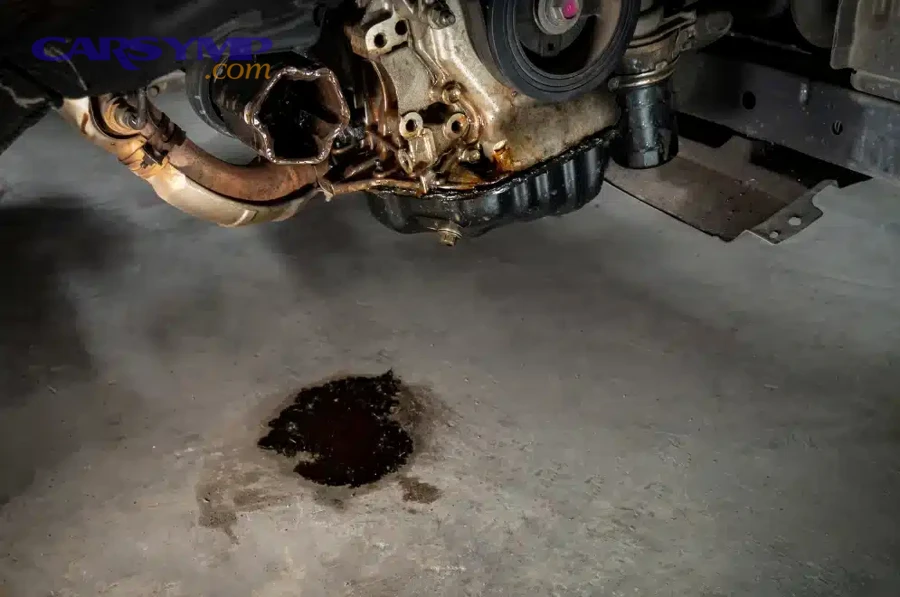
valve cover gasket replacement is often needed when oil wets the upper cylinder head edge and then runs down the side of the engine, sometimes pooling around spark plug tubes on certain engines.
Next, look for oil on the top perimeter seam and on components below it—because gravity turns a top leak into a bottom drip.
- Fresh wetness at the cover-to-head seam is a strong indicator.
- Oil smell after driving can happen when oil reaches the exhaust manifold area.
- Misfires can occur if oil contaminates plug wells (engine-dependent).
Practical tip: wipe the seam clean, drive briefly, then inspect again; fresh oil at the seam is more meaningful than old grime.
When is an oil pan leak the most likely culprit?
oil pan gasket replacement becomes likely when the pan rim is wet all around, especially if the engine block above the pan is relatively dry after cleaning.
Then, confirm the leak path: pan leaks usually start at the pan flange and drip from the lowest edges, not from higher covers.
- Wet pan bolts or a wet seam line around the pan perimeter are classic signs.
- Impact damage or a bent pan lip can prevent sealing even with a new gasket.
- Over-tightened bolts can warp the flange and create persistent seepage.
If the leak is at the rear of the pan, don’t assume the pan is the source until you inspect above it—rear leaks often “collect” and drip there.
How do oil filter housings and coolers create leaks?
Oil filter housings, cooler adapters, and pressure sensors can leak when their O-rings harden or when a filter is over-tightened or double-gasketed, leading to sudden, messy oil loss.
Next, look for oil radiating from the filter base or housing seam rather than from the pan below.
- Oil splatter patterns near the filter area can indicate a pressurized leak.
- A fresh ring of oil around the filter gasket surface suggests a seal issue.
- A cracked housing (common on some models) can leak only under pressure.
Because pressurized leaks can escalate quickly, treat them as urgent if the oil level drops noticeably after short drives.
What about crankshaft seals and hard-to-see rear leaks?
Crankshaft seals can leak where the crank exits the engine, and the oil may drip near the transmission bell housing—often discussed as a rear main seal leak when it’s at the back of the engine.
Then, verify before assuming: oil that appears at the lowest bell-housing edge may actually be traveling from above.
- Inspect the back of the valve cover and any oil pressure sender above the bell housing.
- Check for oil trails on the engine block’s rear face after cleaning.
- Use a mirror and light to spot fresh wetness higher up.
If oil is only visible at the bottom and not above, a seal may be more plausible—yet confirmation matters because seal repairs can be labor-intensive.
Can you do an engine oil leak fix at home without making it worse?
Yes—many leaks can be fixed at home if you can safely lift the vehicle, follow torque specs, and replace gaskets or O-rings correctly, while avoiding shortcuts like overtightening bolts or using the wrong sealant.
To keep the repair reliable, treat this as a method: diagnose, access, replace, torque, and verify—rather than guessing and hoping.
What are the safest step-by-step basics for DIY oil leak repair?
A solid DIY approach is to clean, pinpoint, repair the specific seal or gasket, and recheck after a controlled test drive, because oil residue can otherwise mimic a “failed” repair.
Next, follow these steps as your baseline workflow:
- Confirm the fluid: verify it’s engine oil via dipstick and blot test.
- Clean thoroughly: degrease the suspected area and dry it.
- Find the origin: locate the highest fresh wet spot after a short drive.
- Replace the right part: gasket, O-ring, seal, or crushed washer—no generic “seal everything” approach.
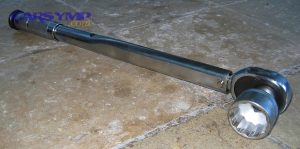
- Torque correctly: tighten in sequence where applicable; avoid overtightening to “stop” leaks.
- Verify: drive, park, and inspect again; monitor oil level for a week.
If you’re working under the car, use proper jack stands and wheel chocks; never rely on a jack alone.
Which common DIY mistakes cause repeat leaks?
The most common repeat-leak causes are poor surface prep, incorrect sealant use, and uneven torque, which distort gaskets and leave micro-gaps that seep under heat cycles.
Then, avoid these pitfalls to protect your time and the engine:
- Overusing RTV: excess sealant can squeeze inward and clog oil pickup screens on some designs.
- Dry gasket install when lube is needed: some O-rings require light oiling to seat without tearing.
- Skipping bolt sequence: valve covers and pans often require a pattern to distribute clamping force.
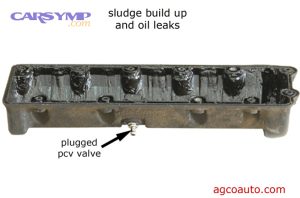
- Ignoring crankcase pressure: a clogged PCV system can push oil past new seals.
As a reality check, if your leak returns immediately after repair, suspect either the wrong source or a sealing surface issue (warp, crack, or debris).
Do stop-leak additives solve the problem?
No—stop-leak products can sometimes reduce minor seepage by softening seals, but they don’t replace damaged gaskets, cracked housings, or warped flanges, and they can complicate future repairs.
Next, if you use them at all, treat them as a short-term bridge while you schedule a proper oil leak repair, not as the final fix.
- They may help with very small seal shrinkage, but results vary widely by engine and leak type.
- They won’t fix loose fasteners, torn gaskets, or leaks from pressurized fittings.
- They can mask a leak while oil level still drops—so monitoring becomes even more important.
What does professional oil leak repair usually involve, and what affects cost?
Professional oil leak repair typically includes cleaning, dye or UV tracing when needed, replacing the failed gasket or seal, and verifying under heat and load—because accurate source identification prevents “repairing the drip” instead of the leak.
To understand cost without guesswork, focus on access difficulty, parts type, and diagnostic time rather than the size of the puddle alone.

Why do shops use UV dye and what does it reveal?
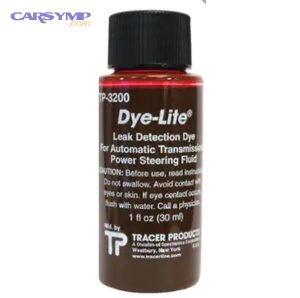
UV dye helps confirm the leak’s true origin by making fresh oil trails glow under ultraviolet light, which is especially useful when multiple areas are damp or when the leak only occurs under pressure.
Next, that visibility turns a messy engine into a traceable path, reducing the risk of replacing parts that weren’t actually leaking.
- Dye is added to oil, then the engine is run through normal conditions.
- The technician inspects with a UV lamp to identify the first bright trace.
- This can be crucial when the leak appears as an oil leak under car but starts high up.
Even if you DIY, a “clean, drive, inspect” method is a simplified version of the same logic.
Which repairs are “labor-heavy” even if the part is cheap?
Some seals and gaskets are inexpensive but expensive to replace because access requires removing major components, and labor dominates the total cost.
Then, prioritize confirmation before committing to these jobs:
- Crankshaft seal areas near the transmission can require significant disassembly on many vehicles.
- Oil cooler housings may be buried under intake components on certain engines.
- Timing cover reseals may involve belt/chain-related labor and precision reassembly.
If your leak is suspected in a hard-access zone, request a confirmed source explanation—photos, dye trace, or clearly identified wet origin—before approving repairs.
How does oil consumption relate to leak repair decisions?
Oil loss isn’t always an external leak: internal burning can mimic a “mystery leak,” so you should consider oil consumption diagnosis if you rarely see drips but frequently add oil.
Next, use both clues together—external wetness plus tailpipe smoke patterns—to choose the correct path.
- If the engine is dry outside yet oil level drops, internal consumption is more likely.
- If the underside is wet and you see drips, external leaks are more likely.
- If both exist, you may need a combined plan: stop external leaks and evaluate consumption separately.
This distinction matters because replacing external gaskets won’t solve internal burning, even though both present as “low oil.”
How do you prevent oil leaks from returning after repair?
Preventing repeat leaks means restoring proper sealing surfaces, using correct torque and parts quality, and controlling crankcase pressure and heat—so the new gasket or seal can live through thousands of hot-cold cycles.
To link prevention with daily habits, focus on oil level checks, correct oil spec, and early response to small seepage before it becomes a major leak.
What post-repair verification steps actually matter?
The most reliable verification is a clean baseline plus a repeat inspection after heat soak, because many leaks show only after the engine expands and pressure rises.
Next, follow a simple verification routine:
- After repair, clean the area again to remove residual oil.
- Drive 15–30 minutes, then park and let the engine heat-soak for 10 minutes.
- Inspect with a light for fresh wetness at the repaired seam.
- Recheck the ground the next morning for new spots.
- Monitor oil level every few days for two weeks.
If the repaired area stays dry but oil appears elsewhere, you may have had multiple small leaks—common on older engines.
How do oil choice and service habits influence leaks?
Oil type and service habits influence sealing indirectly: using the correct viscosity and changing oil on schedule helps reduce sludge, stabilize crankcase ventilation, and keep seals from hardening prematurely.
Then, pair oil changes with quick inspections to catch early seepage:
- Inspect the valve cover seam, filter base, and pan perimeter at each oil change.
- Replace crush washers or O-rings when components are serviced, not “next time.”
- Make sure the oil filler cap and dipstick tube seal are intact to avoid oil misting.
While no oil prevents all leaks, consistent maintenance lowers the chance that a small seep evolves into a dripping leak.
Why crankcase pressure (PCV) can defeat a new gasket
Excess crankcase pressure can push oil past good seals, so a restricted PCV system can cause repeat leaks even after a perfect gasket install.
Next, treat PCV health as part of leak prevention:
- Look for oily residue near breather hoses or around the air intake path.
- Check for idle issues or whistling that may suggest PCV imbalance (engine-dependent).
- If leaks recur across multiple seals, ask whether crankcase ventilation is operating correctly.
This is especially important when multiple gaskets are replaced yet seepage returns quickly across different locations.
At this point, you’ve covered the core diagnosis-and-repair path. Next, we’ll cross the boundary into less common scenarios and decision traps that often cause misdiagnosis—even when the leak looks obvious.
Oil Leak Repair FAQ and Rare Scenarios
These FAQs address edge cases that can confuse even careful inspections, so you can avoid replacing the wrong part and still end up with oil on the driveway.
Next, use each answer as a quick “rule-out” when your leak pattern doesn’t match common gasket failures.

Why does the leak look worse after an oil change or recent service?
A leak can appear “suddenly worse” after service if the filter gasket didn’t seat, an O-ring was pinched, or spilled oil wasn’t cleaned and later dripped down—making it look like a new failure.
Then, start with the simplest verification: clean the filter area, recheck the gasket surface, and look for a fresh ring of oil at the filter base after a short drive.
- Confirm the old filter gasket didn’t stick to the housing (double-gasket risk).
- Verify correct filter part number and proper tightening method.
- Inspect drain plug washer condition and torque.
Can a leak appear only when parked on a slope or only after highway driving?
Yes—vehicle angle and sustained RPM can change where oil pools and how pressure builds, so a leak may present only under specific conditions.
Next, recreate the condition deliberately: inspect immediately after the same type of drive and park orientation, then trace from the highest wet point.
- Highway driving can reveal leaks from pressurized areas or wind-splatter patterns.
- Sloped parking can make oil travel and drip from different edges of covers.
- Use cardboard under the car to map drip location changes by condition.
Could it be a turbo oil line or a small fitting instead of a gasket?
Yes—small fittings, banjo bolts, and turbo oil feed/return lines can seep and then spread oil widely, mimicking a larger gasket failure.
Then, inspect for oil concentrated around line unions and clamps before committing to a major reseal.
- Look for wetness at line junctions and along the hose sheath.
- Check for loosened clamps or hardened line seals.
- A tiny fitting leak can create a large drip footprint after airflow spreads it.
What if I smell burning oil but can’t find a drip on the ground?
If you smell oil burning without visible puddles, oil may be misting onto hot components and burning off, or you may have internal oil burning that doesn’t leave driveway evidence.
Next, inspect high-heat zones and consider a split diagnosis:
- Check valve cover edges near exhaust heat paths for light seepage.
- Inspect the underside of heat shields for fresh oil residue.
- If the engine exterior is dry yet oil level drops, revisit oil consumption diagnosis rather than chasing an external leak alone.
Tóm lại: the fastest oil leak repair is the one that targets the true origin—clean first, trace the highest fresh wet point, fix the specific seal or gasket, and verify after real driving conditions. When the pattern is confusing, compare it against other fluid leaks and rare scenarios before replacing big parts.