Diagnose & Fix a Coolant Leak: Step-by-Step Cooling System Repair for Car Owners (Radiator, Hose, Water Pump)
A coolant leak is fixable when you stop guessing and follow a repeatable process: confirm it’s coolant, identify the most likely leak zone, pressure-test to make the leak show itself, then repair the exact component that failed and verify the system holds pressure afterward.
Most drivers first notice “Car Symptoms” like a sweet smell, a colored puddle, a low coolant warning, or a temperature gauge that starts creeping up—each clue helps you narrow the leak location and avoid unnecessary parts replacement.
Just as importantly, you need clear Overheating risk and safe-to-drive guidance, because a small seep can become a fast coolant loss under pressure and heat—and overheating is what turns a simple cooling system repair into a costly engine repair.
Introduce a new idea: once the leak is repaired, the job is not finished until the system is refilled correctly, air is bled out, and the fix is verified with a recheck—this is the difference between a “temporary improvement” and a true coolant leak repair that lasts.
What does a coolant leak look like, and what symptoms confirm you have one?
There are five main coolant leak clues—puddle color, smell, residue, coolant level drop, and temperature/heater behavior—based on how coolant looks, evaporates, and affects engine heat control.
Next, those clues become more useful when you match each one to where it appears on the car and how quickly it shows up after a drive.

Is the fluid under my car definitely coolant (and not A/C water or washer fluid)?
Yes—coolant leak repair starts with confirming the fluid is coolant, because coolant has a distinctive smell, texture, and color profile, and misidentifying the fluid leads to wrong repairs for three reasons: different leak sources, different urgency, and different safety risks.
To begin, treat the puddle like evidence and verify it before you touch anything else.
Reason 1: Coolant leaves color clues that A/C water usually doesn’t.
Condensation from the A/C system is typically clear water that drips near the passenger-side firewall area and leaves no oily film. Coolant, by contrast, is often green, orange, pink, blue, or yellow depending on the formula and dye package. That color is your first fast “yes/no” check, especially when you place a white paper towel under the drip and blot it.
Reason 2: Coolant has a “sweet” smell and a slick feel that water lacks.
Coolant often smells sweet or syrupy and feels slightly slippery between fingers (wash hands immediately afterward). Washer fluid may smell like alcohol or detergent and is usually much thinner.
Reason 3: Coolant tends to crust and stain as it dries.
As coolant dries, it can leave chalky white residue, colored staining, or crystalline deposits at the leak source. That dried trail is exactly what you need for Coolant leak locations and quick identification.
Quick identification checklist (fast, practical):
- Color: green/orange/pink/blue/yellow = likely coolant
- Smell: sweet = likely coolant; alcohol-like = likely washer fluid
- Feel: slick/slimy = likely coolant
- Location: front center/front corners = often radiator/hoses; under firewall = possible heater core or related plumbing
- Residue: crusty deposit at a fitting = common coolant leak signature
When you’re uncertain, do not “top off and ignore it.” Confirming the fluid is the first safe step before cooling system repair decisions.
What are the most common signs of a coolant leak while driving?
There are seven common signs of a coolant leak—warning lights, rising temperature, weak cabin heat, sweet smell, steam, frequent topping-off, and performance changes—based on how coolant maintains stable operating temperature and supports the heater circuit.
Then, use these signs to decide whether you’re dealing with a slow seep or a leak that can suddenly turn into overheating.
1) Temperature gauge creeping up (especially at idle or in traffic).
A leak reduces coolant volume, which reduces heat-carrying capacity. Many cars run “normal” until they don’t, so watch for changes rather than waiting for the red zone.
2) Low coolant warning light or repeated low reservoir level.
A reservoir that drops from “FULL” to “LOW” in days is a strong leak indicator, even if you don’t see a puddle.
3) Cabin heat becomes weak or goes cold at idle.
The heater core needs coolant flow; air pockets or low coolant often reduce cabin heat first. This is a sneaky early symptom because the engine may still seem “fine.”
4) Sweet smell outside the car or inside the cabin.
Outside smell often points to engine-bay leaks burning off on hot surfaces. Inside-cabin smell is a classic path toward Heater core leak symptoms.
5) Steam from under the hood (not just on cold mornings).
Steam can be coolant contacting hot metal and instantly evaporating—often an upper hose, radiator end tank, or thermostat housing leak.
6) Colored spots or puddles where you park.
This is where Coolant leak smell and puddle color clues matter most—color plus location narrows the suspect list fast.
7) Secondary “Car Symptoms” that show up after overheating begins.
Misfires, rough running, or a check engine light can happen when the engine runs too hot. The goal is to catch the leak before you reach this stage.
Where do coolant leaks most commonly come from in the cooling system?
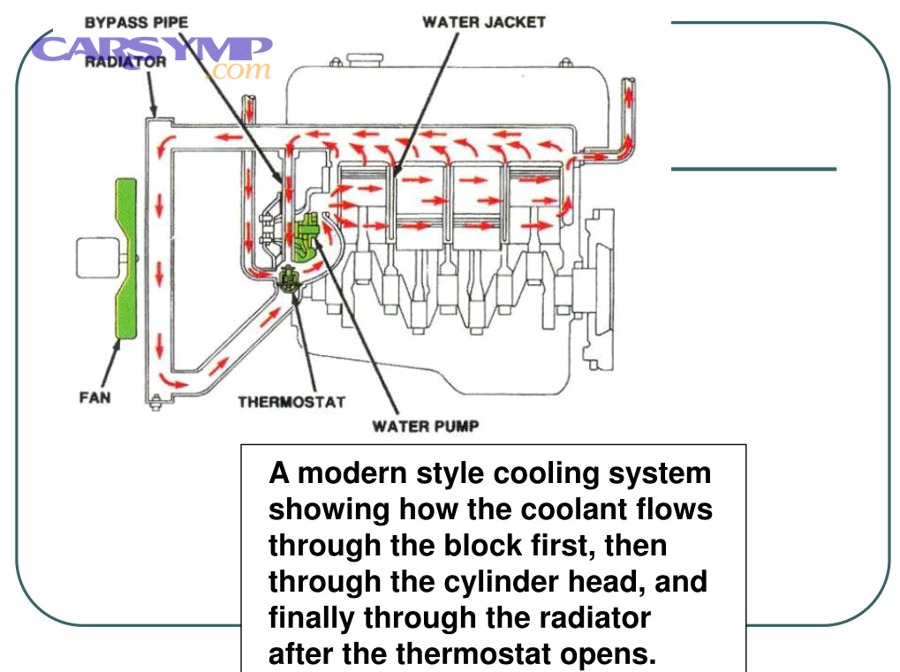
There are six main coolant leak source groups—hoses/clamps, radiator, water pump, thermostat housing/gaskets, reservoir/cap, and heater circuit—based on where the system is pressurized and where rubber seals and joints age fastest.
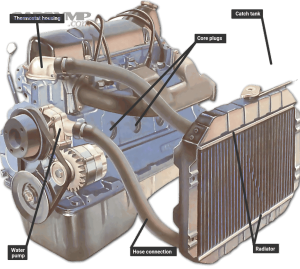
To better understand the leak, think in “zones” so you can do Radiator vs hose vs water pump leak diagnosis without replacing parts blindly.
Do hoses and clamps cause most coolant leaks ?
Yes—hoses and clamps are among the most common external leak points, because rubber ages, heat cycles loosen joints, and clamps lose uniform pressure over time for at least three reasons: material fatigue, clamp mismatch, and contamination at the sealing surface.
Specifically, this is why DIY hose clamp and hose replacement basics solve many “mystery” leaks when the leak is truly at a connection.
What hose/clamp leaks look like in real life:
- Wetness right at a hose end, not in the middle of a component
- A drip line that follows the hose downward and then drops off a low point
- Crusty residue around the fitting bead where coolant dries
- A pinhole spray that only appears under pressure (often invisible when cold)
How to spot them quickly:
- Inspect the upper radiator hose, lower radiator hose, and heater hoses at both ends.
- Check for swelling, soft spots, cracks, or a “ballooned” look near ends.
- Look for clamps that are over-tightened (cutting into rubber) or under-tightened (coolant seeping past).
- Feel for a raised ridge or hardened rubber at the very end—this can prevent sealing even if the clamp is tight.
A simple reality check: if the hose is stiff, cracked, or oil-soaked, tightening the clamp rarely lasts. Replace the hose instead.
How can you tell if the radiator or end tanks are leaking?
A radiator leak is usually confirmed by wet fins, seam seepage, or end-tank cracking, based on how radiators combine thin metal/plastic structures with constant pressure and vibration.
However, many radiators only leak when hot and pressurized, which is why visual inspection and pressure testing work best as a pair.
Common radiator leak patterns:
- End tank seam seep: residue along the plastic-to-aluminum crimp seam
- Core leak: wet fins or a “misty” damp area on the radiator face
- Neck leak: wetness around the cap/neck area (or on a pressurized reservoir design)
- Impact damage: localized wetness where road debris hit
Where to look:
- Under the radiator support, especially near corners
- Around the radiator cap neck or surge tank connection
- Along the side tanks where seams crimp to the core
Important tie-in: radiator leaks can mimic other failures because coolant runs down and drips elsewhere. That’s why you confirm the highest wet point first.
Is a water pump leak different—and what does the weep hole indicate?
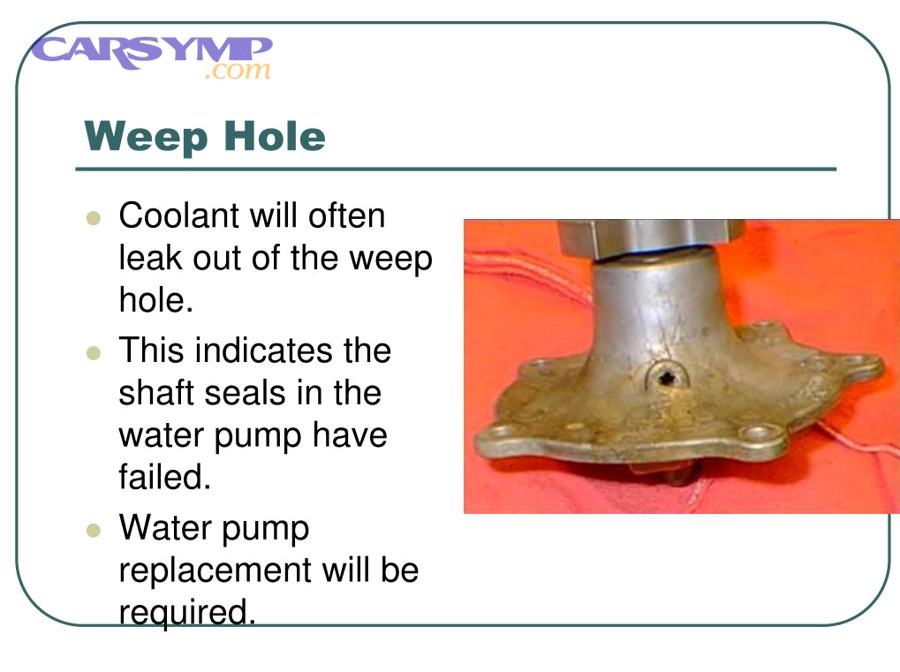
A water pump leak is different because it often shows up as seepage from a weep hole that signals internal seal wear, not just a loose hose, and it matters for three reasons: it predicts failure, it worsens under load, and it can throw coolant onto belts/pulleys.
Meanwhile, once you know what the weep hole is, you can avoid misdiagnosing it as an oil leak repair issue.
What the weep hole tells you:
A weep hole is a small drain opening designed to let coolant escape when the pump’s internal seal begins to fail. If it’s wet there, the pump is giving you an early warning.
Typical signs of a water pump leak:
- Coolant dripping from the front of the engine behind pulleys
- Dried residue sprayed in a circular pattern from pulley rotation
- Noise or wobble at the pulley (bearing issue can accompany leaks)
- Coolant running down the engine block and dripping near the oil pan edge
Why water pump leaks get worse:
They often increase with engine speed and pressure. A “tiny drip” today can become a fast leak during a highway climb—exactly when you need cooling most.
How do you diagnose a coolant leak step-by-step before replacing parts?
The best diagnosis method is a four-step workflow—inspect, pressure test, trace, and confirm—that reliably exposes the leak source and prevents unnecessary parts replacement.
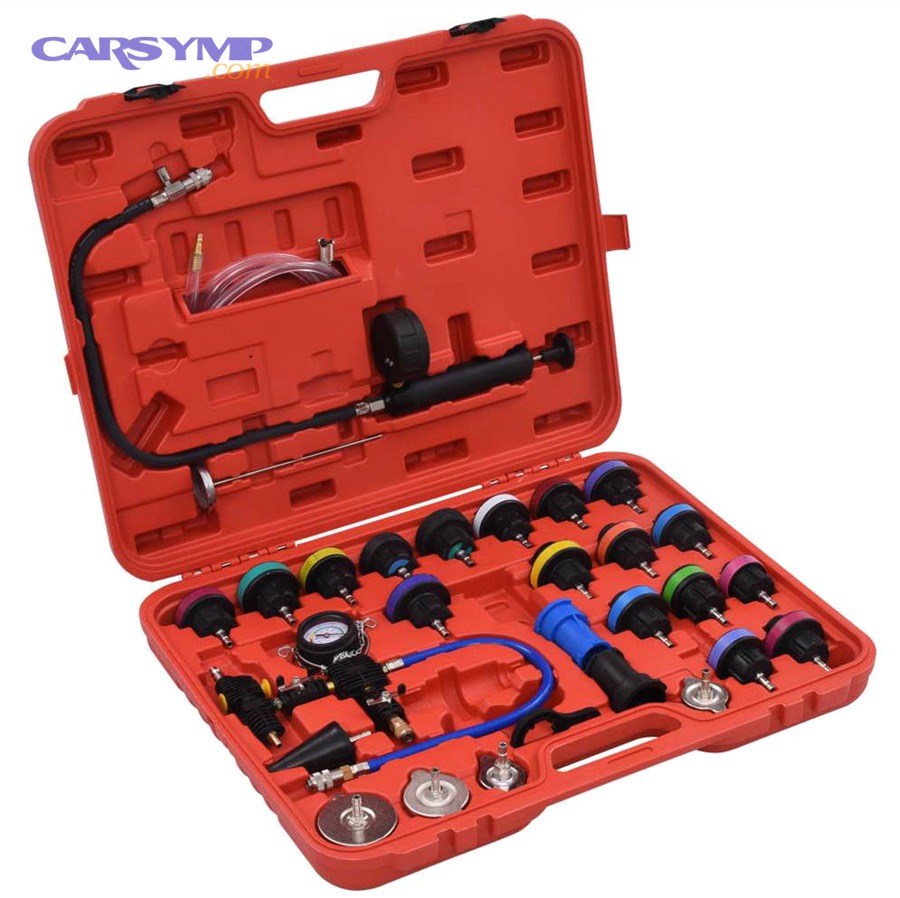
Below, you’ll see How to pressure test the cooling system and when to add dye so the leak becomes obvious instead of hidden.
Should you start with a cold visual inspection before any testing?
Yes—you should start cold, because it improves safety, reveals dried leak trails, and prevents false conclusions for three reasons: hot coolant is dangerous, heat evaporates evidence, and pressure changes can hide intermittent leaks.
Next, once you’ve done the cold inspection, you’ll have a short suspect list before you even touch tools.
Cold inspection steps that work:
- Park on level ground and let the engine cool fully.
- Check the reservoir level and note it (photo helps).
- Use a flashlight to look for the highest wet point and dried residue.
- Inspect hose junctions first, then seams, then gaskets/housings.
- Look under plastic covers or undertrays if needed—leaks can collect there and drip from the wrong spot.
What you’re hunting for:
A leak “map”—a trail from the highest point down. Coolant is lazy; it will follow gravity and surfaces.
Does a cooling system pressure test find leaks faster than “watching it drip”?
A pressure test wins because it forces the leak to appear on your timeline, while “watching it drip” can miss leaks that only happen at operating pressure or only under load.
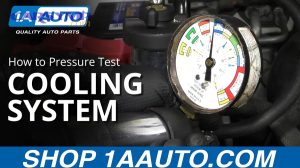
More importantly, a pressure test turns a vague symptom into a visible location, which is the entire goal of coolant leak repair.
How pressure testing works (in plain language):
You attach a pressure tester to the radiator neck or surge tank, pump the system to a safe pressure, then watch for pressure drop and visible seepage. When the system is pressurized, small leaks become wet and show a clear origin point.
Practical pressure test workflow:
- Confirm the engine is cool.
- Attach the correct adapter to avoid damaging neck threads or seals.
- Pump slowly and do not exceed the cap/system rating.
- Watch the gauge: a steady drop suggests a leak.
- Scan the engine bay methodically: hoses, radiator seams, water pump area, thermostat housing, heater hoses, and under the dash if needed.
Evidence: According to a work instruction published via the U.S. NHTSA in 2013, the procedure calls for pumping to 15–16 psi (matching the cap rating), monitoring pressure, and visually inspecting for leaks—while cautioning not to over-pressurize beyond the specified range. (static.nhtsa.gov)
When does UV dye make diagnosis easier than pressure testing alone?
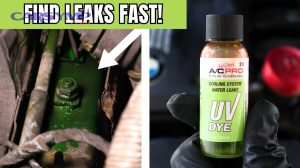
UV dye is better when the leak is intermittent, slow, or hidden, because dye leaves a glowing trail that remains visible after the coolant dries.
However, pressure testing is still the foundation—dye simply makes the leak path easier to see when the leak location is tucked behind covers or deep in the bay.
Use UV dye when:
- The leak only appears after driving, not in the driveway
- Coolant evaporates on hot parts before it drips
- The system has multiple wet areas and you need the true origin
- You suspect the heater core or an internal cabin leak
How to use dye without creating confusion:
- Clean suspected areas first so old residue doesn’t mislead you.
- Add dye as directed for coolant systems.
- Drive through a heat cycle (or pressure test after).
- Use a UV light to trace from the brightest point backward to the origin.
Can you safely drive with a coolant leak, or should you stop immediately?
No—you should not assume it’s safe to drive with a coolant leak, because leaks can accelerate under pressure, overheating can happen quickly, and engine damage risk rises sharply for three reasons: loss of heat control, air pockets, and potential hot spots in the cylinder head.
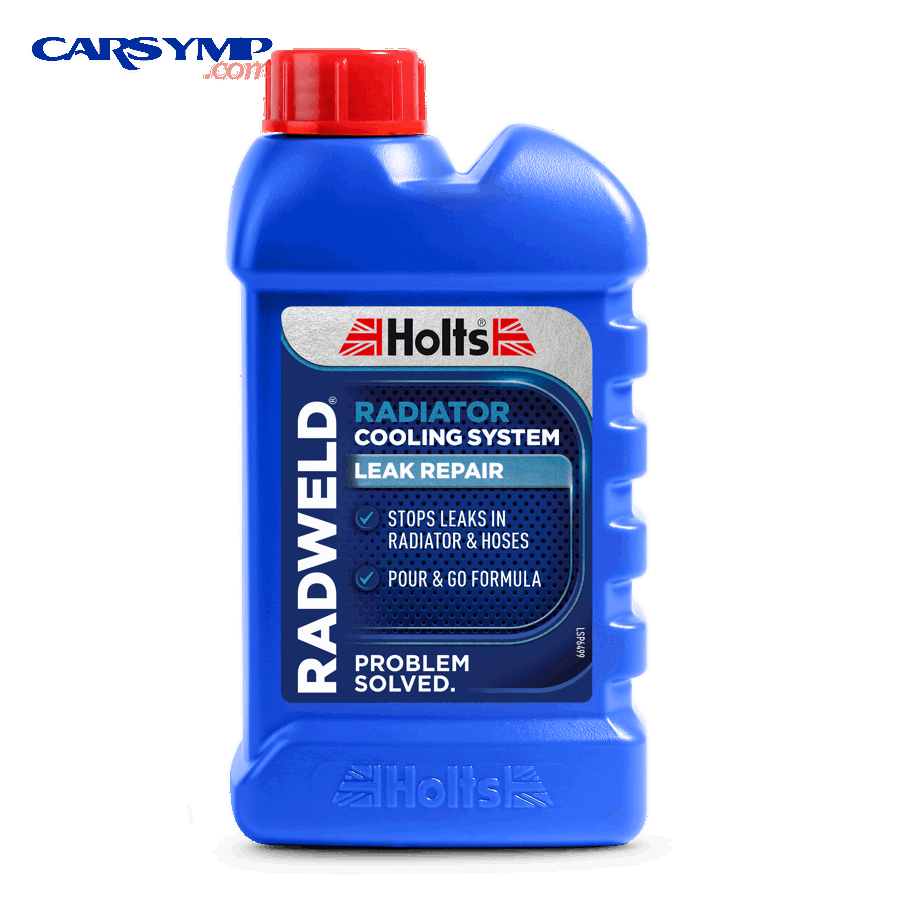
In addition, your decision should be based on the leak rate and temperature behavior, not on hope.
Is it ever okay to drive a short distance if the leak is small?
Yes—but only under strict conditions, because “small” must mean stable temperature, slow coolant loss, and a clear plan for monitoring and topping off safely.
Then, if any condition fails, you stop—because the safe window closes fast once the gauge climbs.
Short-distance driving can be acceptable if:
- The temperature gauge stays normal (no climbing at idle)
- The reservoir level drops slowly over days, not minutes
- There is no steam, no misfire, and no warning light escalation
- You have the correct coolant/water for emergency top-off
- You can pull over immediately if the gauge moves
When you should NOT drive:
- The gauge rises above normal or fluctuates suddenly
- You see steam from the hood
- The heater blows cold while the engine is hot (air pocket risk)
- You hear knocking/detonation or the engine runs rough
- Coolant loss is visible as a steady drip or stream
This is where Overheating risk and safe-to-drive guidance becomes a decision tree: if temperature rises, you stop—full stop.
What are the fastest ways to prevent overheating while you troubleshoot?
There are four fast overheating-prevention actions—cool down, avoid opening hot caps, top off correctly, and reduce load—based on how pressure and boiling point work in a closed cooling system.
More specifically, these steps protect you while you diagnose or limp to a safe place.
1) Cool down before touching anything.
Turn the engine off and let it cool. Hot coolant can spray violently if you open the system.
2) Never remove a cap when hot.
A pressurized system can release boiling coolant instantly. Wait until the upper hose is cool to the touch.
3) If you must top off, do it safely and correctly.
Use the correct coolant mix when possible. In a true emergency, water can be used temporarily, but you should restore the proper mix after the repair.
4) Reduce load if you’re moving the vehicle.
Avoid hills, high speed, towing, and stop-and-go traffic. Watch the gauge continuously.
Evidence: According to a Purdue University College of Veterinary Medicine news release in 2017, toxic levels after ethylene glycol ingestion can peak within three hours, and even small exposures can be harmful—supporting prompt cleanup after coolant spills. (purdue.edu)
How do you fix a coolant leak based on the leaking part?
There are five main repair paths—tighten/replace clamps, replace hoses, repair/replace radiator, replace water pump, or reseal housings/reservoir parts—based on which component is proven to leak under pressure.
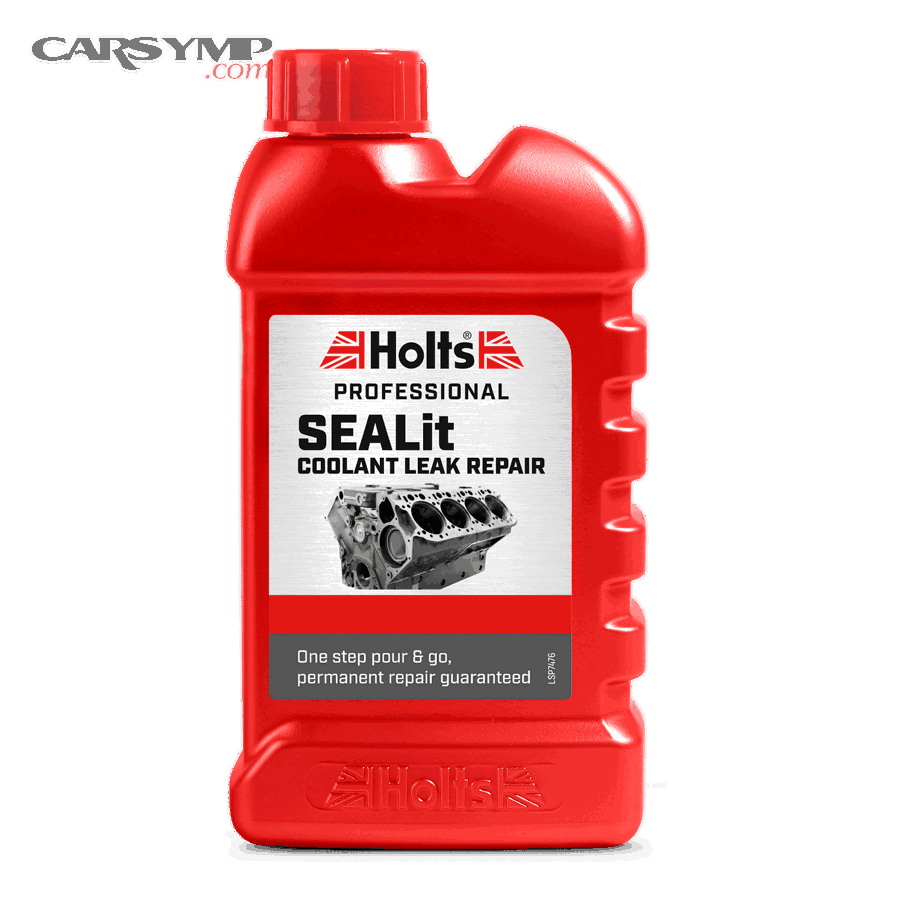
Next, the key is to choose the least invasive fix that is still permanent, instead of relying on guesswork or Stop-leak products risks.
Is tightening or replacing a hose clamp a real fix—or only temporary?
A clamp fix can be real when the hose and fitting are healthy, but it becomes temporary when the hose end is aged, the fitting is pitted, or the clamp type is wrong.
However, you can decide correctly by checking three things: hose condition, sealing surface, and clamp design.
When tightening is a legitimate fix:
- The hose rubber is soft and intact, not cracked or swollen
- The fitting bead is clean and not corroded
- The leak is a light seep at the joint, not a split hose
When you should replace the clamp (or the hose):
- The clamp is rusted, deformed, or bottomed out
- The hose shows cracks, bulges, or oil contamination
- The leak returns after tightening (seal is compromised)
DIY hose clamp and hose replacement basics that prevent repeat leaks:
- Use the correct clamp size and type (constant-tension clamps handle heat cycles well).
- Position the clamp behind the fitting bead, not on it.
- Cut old hoses carefully—don’t gouge the fitting.
- Clean the fitting surface before installing the new hose.
Should you replace the hose, radiator, or water pump—and what’s the best order of operations?
Hose replacement wins when the leak is at a connection, radiator replacement wins when the seam/core leaks, and water pump replacement wins when the weep hole or shaft seal fails—so the best order is diagnose first, then replace the proven failure point, not the most expensive guess.
On the other hand, you should also consider “overlap labor,” because some jobs share the same disassembly steps.
Decision table (what this compares): the table below helps you pick the correct repair by matching the symptom pattern to the most likely failed component.
| Evidence you see | Most likely failed part | Why this points there | Typical repair direction |
|---|---|---|---|
| Wetness at hose end + residue ring | Hose/clamp | Seal failure at joint | Replace clamp or hose |
| Wet fins / seam residue on side tank | Radiator | Crimp seam or core seep | Replace radiator |
| Drips behind pulley + weep hole wet | Water pump | Internal seal failing | Replace water pump |
| Wet at housing seam / gasket edge | Thermostat housing/gasket | Gasket shrink/warp | Reseal/replace housing |
| Sweet smell + damp carpet | Heater core circuit | Cabin-side leak | Diagnose heater core, repair |
Order of operations that avoids rework:
- Fix the proven external leak first (hose/radiator/pump).
- Refill and bleed properly.
- Verify pressure hold.
- Only then address secondary issues like a weak cap or aged hoses you disturbed.
One important clarity point: do not confuse coolant leaks with oil leaks. Coolant is usually colored and dries crusty; engine oil is brown/black and slick. If you also have oil leak repair needs, treat it as a separate diagnosis unless you’re dealing with oil/coolant mixing (rare, serious, and addressed later).
What are the critical steps after repair: refilling, bleeding air, and verifying the leak is gone?
The correct post-repair method is refill to the right level, bleed trapped air, heat-cycle, and recheck for pressure hold, which prevents overheating, false “new leaks,” and repeat visits.

Thus, the most common reason a repair “fails” is not the part—it’s trapped air or an unverified system.
Do you need to bleed air from every cooling system after a leak repair?
Yes—bleeding air is usually necessary after coolant leak repair, because air pockets reduce cooling efficiency, the heater circuit traps bubbles, and some engines develop hot spots for three reasons: uneven flow, thermostat behavior, and pump cavitation.
Besides, a perfectly sealed system can still overheat if it’s full of air.
Signs you still have air trapped:
- Temperature gauge spikes up and down
- Heater blows cold at idle but warm when revved
- Gurgling sounds behind the dash
- Coolant level drops after the first drive (air burped out)
Bleeding basics that work on most cars:
- Fill slowly to avoid trapping air.
- Set the heater to hot (so the heater circuit opens).
- Run the engine to operating temperature and watch for thermostat opening.
- Top off as the level drops.
- Use bleed screws if your engine has them.
- Let it cool fully, then recheck level and top off to the correct mark.
Pro tip that prevents mistakes: always use the manufacturer-recommended coolant type and mixture once the repair is complete, even if you used water temporarily.
How do you confirm the repair worked (without guessing)?
You confirm success by pressure-hold testing, stable coolant level over multiple heat cycles, and a dry reinspection of the original leak zone, because those checks prove the system is sealed under the same conditions that caused the leak.
In short, you’re not done until the leak can’t be recreated.
Verification steps (simple, reliable):
- Pressure test again: if the system holds pressure without dropping and no wetness appears, you’re close to done.
- Inspect the highest point first: look for fresh wetness at the original source, not just drips below.
- Heat-cycle recheck: drive normally, cool down fully, and recheck the reservoir level the next day.
- Watch the temperature behavior: stable temps and consistent heater output signal proper bleeding.
If it still drops pressure:
Return to diagnosis mode—small leaks can hide in heater hoses, radiator seams, caps, or gasket edges. That’s when How to pressure test the cooling system (again) saves you from throwing parts at the problem.
What else should you know about coolant leak repair to avoid repeat failures?
The smartest way to avoid repeat leaks is to treat coolant leak repair as a system job—use the correct coolant, avoid risky shortcuts, understand cost drivers, and recognize rare internal leaks—because the cooling system fails at weak links.
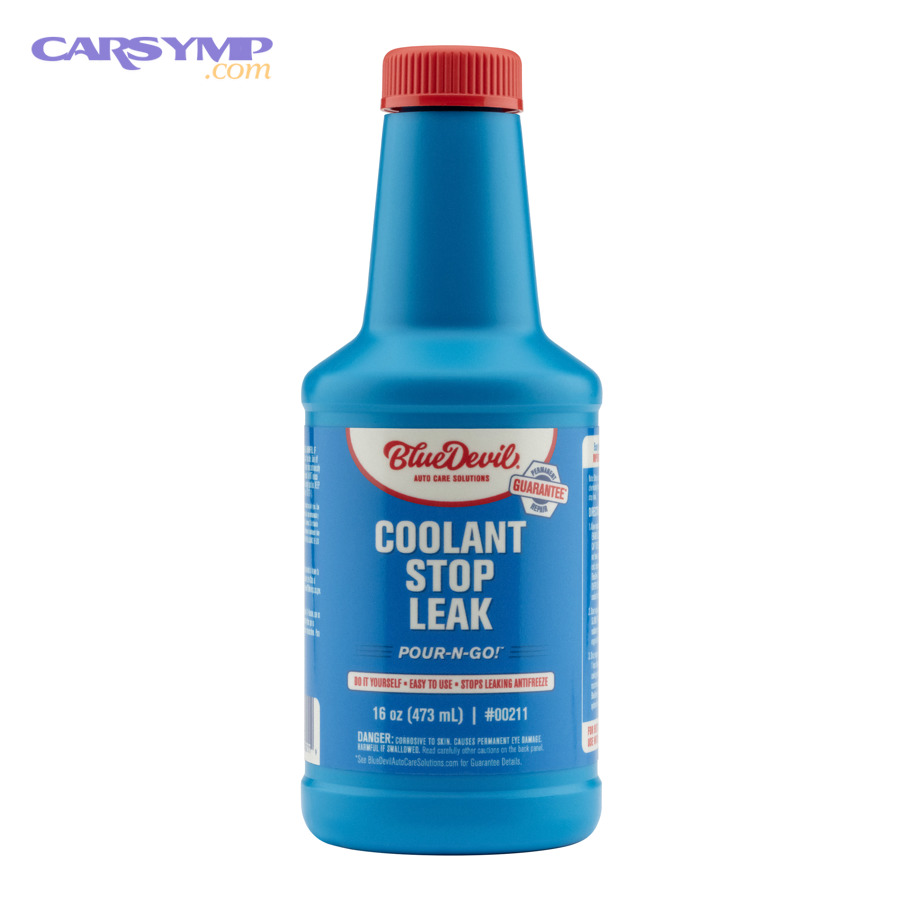
More importantly, this section helps you prevent the “fixed today, leaking next week” loop and understand a realistic Coolant leak repair cost estimate.
What is the difference between a temporary stop-leak fix and a permanent repair?
Stop-leak can be a short-term emergency patch, but a permanent fix requires repairing the leaking part because stop-leak products risks include clogging small passages, reducing heater performance, and masking the real failure.
However, knowing when each approach applies protects your engine and your wallet.
Temporary stop-leak (emergency-only) makes sense when:
- You are stranded and need to reach a safe location
- The leak is minor and external (not a blown hose)
- You accept that it’s a temporary compromise
Permanent repair means:
- Replace the failed hose, radiator, pump, or gasket
- Refill with correct coolant
- Bleed air and verify pressure hold
If you use stop-leak, plan a proper cooling system repair as soon as possible—treat the product as “get you home,” not “solve the problem.”
Which coolant type should you use after a repair, and can mixing coolants cause new leaks?
Use the coolant specification your vehicle requires, and yes, mixing incompatible coolants can contribute to problems, because additive packages can clash, corrosion protection can weaken, and deposits can form that stress seals and passages.
Meanwhile, the safest approach is simple: follow the owner’s manual spec and avoid “universal” assumptions unless the product explicitly matches the spec.
Best practice after repair:
- Use the correct coolant family/spec for your vehicle
- Use the correct mix ratio (commonly 50/50 unless specified)
- Use distilled water for mixing when required
- Replace the radiator cap if it fails testing or shows worn seals
This is one of the most effective steps for Preventing future coolant leaks, because corrosion and seal wear often start with the wrong chemistry.
How much does coolant leak repair typically cost compared to DIY, and when is a shop smarter?
DIY wins on labor savings for simple hose/clamp jobs, while a shop is smarter for water pump, radiator, or hard-access leaks—so a Coolant leak repair cost estimate depends mainly on part cost, access time, and whether multiple components overlap.
On the other hand, the wrong DIY attempt can raise costs if it causes overheating or damages fittings.
DIY is usually smart when:
- The leak is clearly a hose/clamp or easy-access radiator hose
- You can safely lift/support the vehicle if needed
- You can refill and bleed correctly
A shop is usually smarter when:
- The water pump is timing-belt driven or requires major disassembly
- The leak is internal or intermittent and needs advanced diagnosis
- You need specialized tools (vacuum fill, special adapters, scan-tool bleeding on some models)
Cost drivers to remember (what actually changes the bill):
- Diagnostic time (especially intermittent leaks)
- Access and labor overlap (pump + belt + thermostat)
- Coolant type/quantity (some systems hold a lot)
- The need for post-repair bleeding/verification
Could the leak be internal (head gasket/heater core), and what signs point to that?
Yes—sometimes the leak is internal, and you should suspect it when external components stay dry but coolant disappears, because internal leaks show different patterns for three reasons: they enter the combustion path, they enter the cabin, or they mix with oil.
Especially, this is where you stop DIY guessing and focus on confirming evidence before driving further.
Internal leak warning signs (grouped by path):
1) Combustion-path clues (possible head gasket / related):
- White exhaust smoke with a sweet smell after warm-up
- Bubbles in the reservoir during throttle blips
- Repeated overheating with no obvious external leak
- Coolant loss that leaves no puddle
2) Cabin-path clues (Heater core leak symptoms):
- Sweet smell inside the cabin
- Fogging windows when heat is on
- Damp or sticky carpet (often passenger side)
- Coolant level drops while the engine bay stays dry
3) Oil-mixing clues (high urgency):
- Milky “coffee” residue on oil cap or dipstick
- Oily film in the coolant reservoir
- Rising oil level (rare but serious)
If you see mixing signs, treat it as urgent. This is no longer routine coolant leak repair—it’s potential engine damage prevention.
Evidence (if any):
According to a work instruction published via the U.S. NHTSA in 2013, a coolant pressure leak test procedure includes verifying a cap rated 15–16 psi, pressurizing to that rating, monitoring pressure for leak confirmation, and cautions against over-pressurizing beyond specification. (static.nhtsa.gov)
According to a Purdue University College of Veterinary Medicine news release in 2017, toxic levels after ethylene glycol ingestion can peak within three hours, and even small exposures can be harmful—supporting prompt cleanup after coolant spills. (purdue.edu)