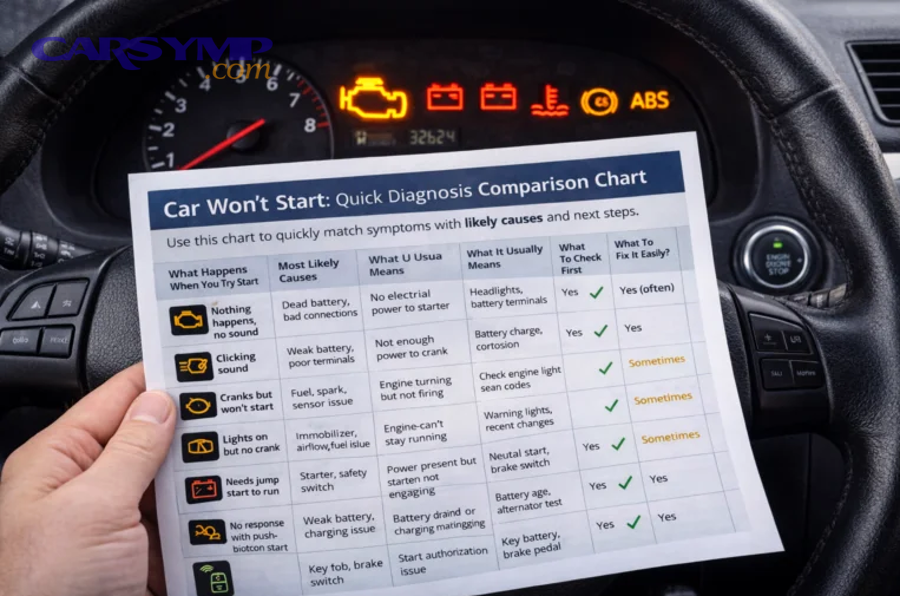
A headlight that won’t turn on is usually a simple electrical path problem—either the lamp isn’t getting power, it doesn’t have a solid ground, or the circuit isn’t being commanded on—and you can isolate which one it is with a fast bulb → fuse → relay → connector test sequence.
If you diagnose by pattern first (one headlight out vs both; low beams vs high beams), you can skip unnecessary steps and go straight to the most probable failure point—saving time and avoiding parts swapping that doesn’t fix the issue.
Next, you’ll validate each checkpoint with basic DIY tests (visual checks, fuse/relay swaps, and quick voltage/ground confirmation), so you can move from “guessing” to a repeatable checklist that supports confident headlight repair.
Introduce a new idea: once you complete the core checklist, you’ll also know when modern lighting systems (LED/HID, DRL, BCM control) and moisture problems inside the housing can complicate the diagnosis—and how to handle those without getting misled.
What does “headlight won’t turn on” mean in diagnostic terms (power, ground, or control)?
A headlight won’t turn on because the headlight circuit is missing one of three essentials—power to the lamp, ground back to the battery, or a control command (switch/module/relay logic) that closes the circuit—so diagnosis starts by identifying which essential is absent.
To better understand why a “simple light” can fail in multiple ways, think of the headlight circuit as a chain: battery/charging system → fuse → relay/module → switch/control → connector → bulb/LED module → ground. When any link weakens, the light goes out—or becomes dim/intermittent.
Which symptoms matter most before you start testing (dead, dim, flicker, intermittent)?
There are 4 main symptom types that matter most—dead, dim, flicker, and intermittent—because each points to a different failure mode based on whether the circuit is losing power, losing ground, or losing control.
- Dead (no light at all):
Most commonly a blown fuse, failed relay, open wire, bad bulb/module, or disconnected connector. If it’s both headlights, prioritize shared components first (main fuses, relay, switch, BCM output). - Dim (noticeably weaker than the other side):
Often indicates high resistance rather than a complete open circuit—think corroded connector pins, heat-damaged socket, weak ground point, or partially failing bulb/driver. Dimming is a classic clue that the circuit has some continuity but can’t deliver current. - Flicker (rapid or occasional):
Usually points to an unstable connection or an electronics issue. Common culprits include a loose connector, ground that is barely making contact, failing relay contacts, or a failing LED driver/ballast. Flicker is the circuit telling you “contact is inconsistent.” - Intermittent (works sometimes, fails sometimes):
Most often heat- and vibration-related: connector pins expand/contract, a cracked wire opens when flexed, or a relay fails as it warms up. Intermittent issues are where “wiggle testing” at the connector and checking for heat damage shines.
The practical payoff: choose your first test based on symptom. A dead light invites a straight checklist. A dim or flickering light suggests you should move power/ground testing earlier because the issue may be resistance—not a blown part.
Is it normal for one headlight to fail without warning?
Yes, it can be normal for one headlight to fail without warning, because (1) filament bulbs can break suddenly, (2) connector corrosion can reach a tipping point and open the circuit, and (3) localized heat damage at one socket can cause a one-side-only failure.
Then, the important nuance is this: “one out” vs “both out” is your fastest diagnostic fork. One headlight out often is the bulb or the local connection. Both out usually means a shared upstream issue—fuse, relay, switch, or module.
Is it one headlight out or both headlights out—and why does that change the checklist?
One headlight out points first to the bulb or that side’s connector/ground, while both headlights out points first to shared fuses, relays, switches, or modules, so the checklist changes because you should test the most probable shared failure points before touching individual components.
However, “both out” doesn’t always mean the same thing on every vehicle. Some cars have separate left/right fuses, others share a relay but split fuses, and many newer vehicles use a BCM (Body Control Module) to control headlamp power. That’s why the checklist is built around patterns + checkpoints, not assumptions.
If only one headlight is out, is the bulb the most likely cause?
Yes, a bulb is often the most likely cause when only one headlight is out, because (1) bulbs are common wear items, (2) the failure is localized to one side, and (3) swapping a known-good bulb is a fast confirmation test.
Moreover, two near-equal runners-up often get missed:
- Connector/socket issues: melted plastic, loose terminal tension, green/white corrosion on pins.
- Local ground problems: a single ground eyelet near one headlight can corrode or loosen, especially after body work or water exposure.
A smart workflow for “one out” is: swap bulb → inspect connector → confirm power/ground. That prevents unnecessary relay/fuse chasing that typically affects both sides.
If both headlights are out, is a fuse/relay/control issue more likely than two bulbs?
Yes, a fuse/relay/control issue is more likely than two bulbs failing at the same time, because (1) simultaneous bulb failure is statistically less common, (2) the circuit likely shares upstream components, and (3) both-out patterns align with single-point failures like a relay, main fuse, or switch/module.
More importantly, both-out cases often fall into one of these high-probability buckets:
- Main headlight fuse or fusible link (or a power feed problem to the fuse box)
- Headlight relay (or relay control not being commanded)
- Headlight switch / dimmer stalk (especially if only lows or highs fail)
- BCM/DRL module logic (common on modern vehicles)
- Shared ground splice or ground point (less common, but possible)
If your goal is efficient headlight repair, you always test what can kill both lights at once before replacing individual bulbs.
What is the bulb-first checklist ?
There are 3 steps in the bulb-first checklist—inspect the bulb, swap with a known-good bulb, and inspect the socket/connector—and it reliably confirms whether the bulb is the true failure or just a victim of a wiring/connection issue.
Specifically, a bulb-first check is fast and low-risk, but it only works if you confirm it the right way. People often see a “darkened bulb” and assume it’s dead, or they replace a bulb and it still doesn’t work because the connector is the real problem.

How do you diagnose a bad bulb vs a bad socket/connector?
A bad bulb fails the “known-good swap” test, while a bad socket/connector usually shows heat damage or corrosion and fails to deliver stable power/ground even with a good bulb—so the cleanest diagnosis is a controlled swap plus a connector inspection.
A dependable DIY method:
- Swap the suspected bulb with the working side (if both sides use the same bulb type).
If the problem moves, the bulb is the issue.
If the problem stays, the issue is in the socket, wiring, fuse/relay, or control. - Inspect the connector pins and plastic around the socket.
Look for:- Melted or browned plastic (heat)
- Loose pin fitment (terminal tension)
- Green/white crust (corrosion)
- Moisture trails or water droplets
- Check for “bulb killed by the circuit.”
If the connector is heat-damaged or corroded, it can cause resistance, heat buildup, and repeated bulb failures. That’s why the best headlight repair sometimes includes replacing the pigtail/connector—not just the bulb.
Pro tip for halogens: don’t touch the glass with bare fingers. Skin oil can create hot spots that shorten bulb life.
Do LED/HID headlights fail differently than halogen bulbs?
Yes, LED and HID headlights fail differently than halogen bulbs because (1) they rely on electronics like drivers/ballasts that can fail independently, (2) their failure patterns are often flicker/intermittent, and (3) the “bulb” may be a sealed module rather than a simple replaceable filament.
Then, translate that into your checklist:
- Halogen: bulb swap is often definitive.
- HID (xenon): suspect ballast/igniter if the bulb is known-good; look for color shift, delayed ignition, or intermittent start.
- LED: suspect driver/module issues, thermal shutdown behavior, or BCM/CAN-related compatibility if aftermarket retrofits are involved.
If your vehicle uses LED modules, the “bulb-first” concept becomes “module/driver-first,” and you may need to confirm whether the headlight assembly is serviceable or requires replacement as part of the headlight repair plan.
Which fuses should you check first, and how do you test a headlight fuse correctly?
You should check the headlight-related fuses first—often separate for left/right and low/high beams—and you test them correctly by verifying continuity or power on both sides of the fuse, not just looking at the metal strip.
Besides, fuse layouts vary widely by vehicle, but the principle does not: a fuse can look intact and still fail under load or have a hairline break. That’s why professional-style Headlight fuse and relay troubleshooting begins with a proper electrical check.

Can a fuse look fine but still be blown?
Yes, a fuse can look fine but still be blown, because (1) hairline cracks can be hard to see, (2) the fuse element can separate at the ends, and (3) the fuse can fail electrically under load even if it appears intact.
Moreover, here are two reliable DIY tests:
- Continuity test (multimeter): pull the fuse and check continuity across the blades.
- Power-on-both-sides test (test light): with the headlight switch ON, probe both test points on top of the fuse. If one side lights and the other doesn’t, the fuse is open.
If you’re diagnosing both headlights out, also check larger “main” fuses or fusible links feeding the headlight relay or BCM.
What does it mean if a replacement fuse blows immediately?
A fuse that blows immediately usually means a short to ground downstream of that fuse, not “bad luck,” because (1) current is spiking beyond the fuse rating, (2) the circuit is contacting ground where it shouldn’t, and (3) repeated fuse replacement can overheat wiring and create bigger damage.
Then, shift your troubleshooting approach:
- Stop installing new fuses repeatedly.
- Unplug the headlight connector(s) and retry—if the fuse holds with the lamps unplugged, the short is likely in the lamp/socket area or inside a damaged connector.
- Inspect wiring where it bends and rubs: behind the headlight, near the radiator support, and along the fender.
A fuse that blows immediately is a warning sign that your headlight repair should focus on wiring integrity before parts replacement.
What is the relay check (swap test vs meter test), and when is each appropriate?
A relay check has 2 practical methods—a fast swap test with an identical relay and a precise meter test of control and load circuits—and you choose based on how quickly you need an answer and whether you have an identical relay available.
More specifically, relays fail in predictable ways: worn internal contacts, heat-related intermittent opens, or a coil that no longer energizes. That’s why relay testing is a cornerstone of Headlight fuse and relay troubleshooting.

Is swapping relays a reliable diagnostic step?
Yes, swapping relays is a reliable diagnostic step when done correctly, because (1) it isolates relay failure quickly, (2) it uses a known-good comparator in the same fuse box, and (3) it avoids unnecessary parts replacement before confirming the fault.
However, follow these rules to keep it safe and meaningful:
- Swap only with a relay that is identical in part number and pin layout.
- Prefer swapping with a non-critical relay that won’t strand you (avoid fuel pump or main ECU relays unless you’re confident).
- After swapping, retest the headlights. If the issue changes, you’ve found a strong lead.
If the swap doesn’t change anything, the relay may still be fine—or the relay may not be receiving the control command. That’s where meter testing comes in.
How do you know if the relay is getting a control signal?
You know the relay is getting a control signal when the relay coil circuit shows the correct coil power and/or ground trigger when the headlights are commanded on, and the relay output sends power to the lamp circuit.
Then, think in two halves:
- Control side (coil): the “command” that energizes the relay
- Load side (contacts): the “power delivery” to the headlights
A practical approach:
- With headlights ON, listen/feel for a click. No click suggests no command or a bad coil.
- Use a multimeter/test light at the relay socket to confirm:
- One coil pin has power (or ground, depending on design)
- The other coil pin is being switched by the headlight switch/BCM
- Confirm the output pin becomes hot when the relay energizes.
On modern cars, the BCM may switch ground rather than power, and it may cut output if it detects a fault. That’s why your checklist must eventually validate power and ground at the headlight connector, not only at the relay.
How do you test for power and ground at the headlight connector (the fastest “truth test”)?
You test for power and ground at the headlight connector by checking battery-voltage presence on the power pin and verifying a low-resistance ground path, and it’s the fastest “truth test” because it tells you whether the lamp is being fed correctly right where it matters.
More importantly, this is the checkpoint that prevents guesswork: if the connector has correct power and ground when commanded on, your headlight problem is likely the bulb/module itself; if not, you’re chasing upstream power/ground/control.
If you have power but no light, is the ground the next suspect?
Yes, if you have power but no light, the ground is the next suspect, because (1) the circuit can’t flow current without a return path, (2) ground points corrode and loosen over time, and (3) ground failures often create dimming, flicker, or intermittent behavior before total failure.
Then, confirm ground the right way:
- Quick test light method: connect the test light clip to battery positive, probe the ground pin. If it lights strongly, ground is present.
- Voltage drop method under load: with the headlight commanded on, measure voltage between the ground pin and battery negative. A higher reading indicates resistance in the ground path.
If your ground is weak, headlight repair may be as simple as cleaning and tightening the ground eyelet, removing rust/paint, and re-securing the connection.
What does “voltage drop” testing tell you that a simple voltage check doesn’t?
Voltage drop testing reveals hidden resistance under load—something a simple “it reads 12V” check can miss—because (1) resistance can allow voltage to appear without delivering current, (2) corroded joints create heat and loss under load, and (3) a good circuit should show minimal drop across wiring and connections.
For example, a connector pin might show near battery voltage with the lamp unplugged, but the moment the bulb/module draws current, the voltage collapses due to resistance. Voltage drop testing catches that reality.
In practice, you can use voltage drop to confirm whether the problem is:
- A power-side resistance (drop between fuse/relay output and connector power pin), or
- A ground-side resistance (drop between connector ground and battery negative)
This is one of the most “pro” steps you can add to DIY diagnosis without expensive tools.
When should you suspect the headlight switch, dimmer/combination stalk, or BCM/DRL module?
You should suspect the switch, stalk, BCM, or DRL module when fuses/relays test good but the circuit isn’t being commanded on, especially when the failure follows a pattern like “high beams work but low beams don’t,” “DRLs work but headlights don’t,” or “auto headlights behave inconsistently.”
Next, recognize that newer cars often don’t route full lamp current through the dash switch. Instead, the switch sends a signal to a module (BCM), and the BCM decides whether to energize the relay or provide power. That changes diagnosis: you’re sometimes testing signals, not just power.

If high beams work but low beams don’t, what are the top causes?
There are 5 top causes when high beams work but low beams don’t—low-beam bulbs/modules, low-beam fuses, low-beam relay/control, dimmer/combination stalk contacts, and BCM output logic—based on how low and high beams are often separated in the circuit.
To illustrate the diagnostic sequence:
- Confirm low-beam bulbs or LED modules (swap if applicable).
- Check low-beam specific fuses (many vehicles split low/high).
- Swap or test the low-beam relay if present.
- Evaluate the stalk/switch input (if low-beam command isn’t reaching the relay/BCM).
- Consider BCM/DRL behavior if the car has automatic lights, DRLs, or headlamp leveling/assist systems.
A practical headlight repair strategy is to treat low beams and high beams like two related but distinct circuits that share only some upstream elements.
If DRLs work but headlights won’t, is the headlight switch still a prime suspect?
Yes, the headlight switch (or its signal path) is still a prime suspect even if DRLs work, because (1) DRLs often run through a different control logic, (2) the BCM may power DRLs separately from headlight low beams, and (3) auto-headlight sensors and settings can prevent full headlight activation.
Moreover, DRL behavior can mislead DIY diagnosis:
- DRLs may illuminate at reduced power or through a different filament/LED segment.
- Some vehicles disable DRLs when the parking brake is engaged or when the car is in park.
- The BCM may command DRLs while still refusing headlamp activation due to a detected fault or configuration issue.
So if DRLs work but headlights don’t, your checklist should shift toward control verification: is the switch sending a headlight command, and is the BCM/relay responding accordingly?
Evidence: According to a study by the University of Michigan Transportation Research Institute, in 2017, only 18% of drivers who were isolated enough to use high beams actually did so—highlighting how driver headlamp control behavior and system design influence real-world nighttime visibility. (iihs.org)
What wiring problems cause headlights to fail, and how do you find them without chasing the whole harness?
There are 5 common wiring problem categories—open circuits, shorts to ground, corroded connectors, heat-damaged sockets, and ground failures—and you find them efficiently by inspecting high-stress zones and testing at logical checkpoints instead of tearing into the entire harness.
More importantly, wiring faults are where many “I replaced everything” stories come from. If a headlight repair keeps failing, it’s often because the real issue is a connector, ground, or rubbed-through wire—not a bulb, fuse, or relay.
How do you distinguish an open circuit vs a short circuit in headlight wiring?
An open circuit is a broken path that stops current flow, while a short circuit is an unintended path to ground that pulls excessive current and blows fuses—so you distinguish them by whether the fuse blows and by whether voltage disappears at checkpoints.
Here’s a clear comparison:
- Open circuit signs:
- Fuse stays intact
- No voltage at the connector power pin (when commanded on)
- Intermittent behavior if the break is partial or vibration-related
- Continuity test shows a break along the suspect segment
- Short circuit signs:
- Fuse blows immediately or soon after activation
- Wiring may get warm (danger sign—stop testing)
- Unplugging the headlight may prevent fuse blowing (helps isolate location)
- Resistance to ground may be very low where it shouldn’t be
If your symptom is “new fuse pops instantly,” treat it as a short-to-ground case and prioritize inspection around the headlight assembly, the connector, and any areas where wires rub against metal.
Are corroded connectors a common cause of intermittent headlights?
Yes, corroded connectors are a common cause of intermittent headlights, because (1) corrosion increases resistance and heat, (2) vibration changes contact pressure at the terminals, and (3) moisture exposure accelerates terminal damage and pin loosening.
Then, use a focused connector checklist:
- Look for green/white deposits on terminals
- Check for heat discoloration (brown or melted plastic)
- Tug lightly on wires to detect a loose crimp
- Ensure terminals have spring tension (not loose and sloppy)
If corrosion is present, the best headlight repair is often replacing the connector pigtail, sealing it properly, and ensuring the housing is not feeding moisture into the connection.
What special cases can make a headlight diagnosis confusing on modern cars (LED, HID, DRL, BCM)?
Modern headlight systems can be confusing because LED/HID electronics, DRL logic, and BCM control can change the way voltage behaves and how failures present—so you may need to diagnose drivers, ballasts, PWM signals, and module decisions, not just bulbs and fuses.
Below, you’ll see the most common modern “gotchas” that turn a straightforward checklist into a misleading one—and how to stay on track without overcomplicating your DIY workflow.
Do LED and HID headlights require checking the driver/ballast and igniter, not just the “bulb”?
Yes, LED and HID headlights require checking the driver/ballast/igniter (not just the bulb) because (1) the electronics can fail independently, (2) faults can be intermittent and heat-related, and (3) power may be present but unusable due to control electronics not firing the lamp.
A practical approach:
- HID: if the bulb is known-good but it won’t ignite, suspect ballast/igniter connections, water intrusion, or ballast failure.
- LED: if the module flickers, fails after warming, or works intermittently, suspect driver overheating, poor heat sinking, or module-level failure.
This is where headlight repair becomes less about a $20 bulb and more about diagnosing serviceable components versus assembly replacement.
Can PWM/BCM-controlled headlights show “weird” voltage readings that mislead a multimeter?
Yes, PWM/BCM-controlled headlights can show misleading voltage readings because (1) the BCM may pulse power rapidly (PWM), (2) a multimeter can average that signal into a “fake steady” number, and (3) the BCM may shut down output when it detects faults.
Then, the fix is methodological:
- Validate with a test light or a known resistive load when appropriate.
- Use voltage drop under load to confirm whether the circuit can actually deliver current.
- If the BCM is involved, consider scanning for body codes—especially when everything “tests good” but the BCM isn’t commanding output.
How do aftermarket LED retrofit bulbs create “false failures” (polarity, CANbus, fitment)?
Aftermarket LED retrofit bulbs create false failures when polarity, CANbus/bulb-out monitoring, or physical fitment prevents proper connection, because the circuit may technically provide power but the retrofit doesn’t interface with the vehicle the way the original bulb did.
Common failure patterns:
- LED doesn’t light until you flip the connector (polarity sensitive on some designs)
- Flicker or shutdown due to bulb-out monitoring or PWM signals
- Poor seating causes intermittent contact or beam misalignment
- Heat buildup melts connectors (a real-world headlight repair nightmare)
A disciplined diagnostic move is to reinstall a known-good OEM-type bulb temporarily. If the OEM bulb works, the wiring and control are likely fine—and the issue is the retrofit compatibility.
What can you do to prevent repeat headlight failures (moisture, connector heat damage, ground maintenance)?
There are 4 prevention moves that reduce repeat headlight failures—keep moisture out, protect connectors from heat, maintain grounds, and avoid mismatched parts—because most repeat failures come from the environment and resistance, not from random bulb defects.
Practical prevention checklist:
- Inspect seals and rear covers; fix missing caps and torn gaskets
- Address Moisture inside headlight housing fixes early (see below), because condensation often leads to corrosion and socket failure
- Replace heat-damaged connector pigtails instead of reusing them
- Clean and tighten headlight grounds, especially after collision repair or body work
- Use correct bulb wattage and compatible LED/HID components
If you want an authoritative DIY path, treat prevention as part of headlight repair, not an afterthought.
Evidence (if any)
According to a study by the University of Michigan Transportation Research Institute, in 2017, only 18% of drivers who were isolated enough to use their high beams actually did so—supporting the real-world importance of reliable headlamp control and diagnostic clarity when addressing headlight performance issues. (iihs.org)