


A headlight fault can absolutely affect your safety inspection outcome because inspections typically treat headlights as “critical safety equipment” that must turn on, aim correctly enough, and not create unsafe glare. If your low beams are out, your beams are wildly misaligned, or your lens/housing is damaged in a way that changes the beam pattern, you’re risking a fail—and you’re also reducing what you can see (and what others can see of you) at night.
Next, the most common inspection-related headlight problem is surprisingly simple: a burned-out bulb. It’s easy to spot, relatively cheap to fix, and usually a direct pass/fail item because one missing headlight immediately compromises forward visibility and conspicuity.
Then, even if both headlights illuminate, misalignment can still cause inspection trouble because the beam can point too high (glare) or too low/left (poor visibility). Misalignment is also common after suspension work, bumper replacement, or headlight repair—so it’s one of the most overlooked “it works, but it’s not right” issues.
Introduce a new idea: if you want to reliably pass inspection (and drive safely), you need to understand how inspectors and road-safety standards functionally evaluate headlights—then fix the fault based on whether it’s a burned-out bulb problem or a misalignment problem.
Can headlight faults cause you to fail a safety inspection?
Yes—headlight faults can cause you to fail a safety inspection for at least three reasons: (1) non-functioning lights reduce forward visibility, (2) incorrect aim creates glare or inadequate roadway illumination, and (3) damaged lenses/housings distort the beam pattern and can make the light unsafe or non-compliant.
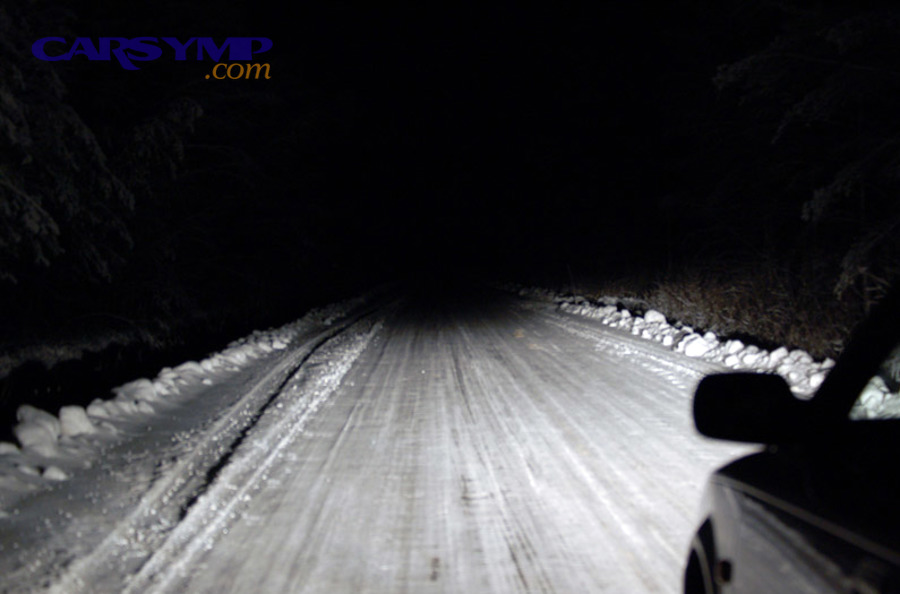
More importantly, inspections don’t just “see light”; they’re effectively checking whether your lighting system still performs its safety job. A headlight can turn on and still be unsafe if the beam is scattered, pointing into oncoming eyes, or too weak to illuminate hazards at typical stopping distances.
To make this practical, think in “inspection logic”:
- Function check (pass/fail): Do low beams come on? Do high beams come on? Does the indicator work (where required)?
- Condition check (often pass/fail): Is the lens cracked or missing? Is the housing loose? Is moisture affecting output?
- Performance check (varies by jurisdiction): Is the aim “reasonable,” is glare obvious, is the beam pattern clearly wrong?
When headlight output or aim is significantly off, it isn’t just cosmetic. Research into headlighting and safety repeatedly ties better beam control and better nighttime seeing conditions to measurable safety benefits. For example, analysis from the Lighting Research Center at Rensselaer Polytechnic Institute suggests adaptive curve headlighting could reduce nighttime crashes along curves by about 2%–3% because it improves visual performance where drivers need it most. (rosap.ntl.bts.gov)
What does “burned-out bulb” mean in inspection terms?
A burned-out bulb means the headlight’s light source has failed (filament break in halogen, LED emitter/driver failure, or HID capsule/ballast issues), resulting in a headlight that does not illuminate when switched on—and that’s usually a straightforward inspection failure.
In addition, a bulb can be “functioning” but effectively failed if it’s so dim, flickery, or intermittent that it can’t be relied on. Inspectors often treat that as defective because it’s not dependable lighting.

How do inspectors typically check for a burned-out bulb?
Inspectors usually confirm basic operation in a simple sequence:
- Switch on low beams: both left and right should illuminate.
- Switch to high beams: both should illuminate (or high-beam elements should engage).
- Confirm any required indicator (high-beam dash icon) and basic switching behavior.
- Check for obvious issues: one side dark, rapid flicker, intermittent output, or wrong color that suggests a mismatched or failing component.
A single dead low beam is the most common fail pattern because it’s visible in seconds and affects basic nighttime driving safety.
Why a burned-out bulb is a “hard fail” compared with other headlight issues
A burned-out bulb tends to be treated as a hard fail because it creates a binary safety deficit: you either have symmetric forward lighting or you don’t. With one headlight out, you get:
- Reduced seeing distance on one side of the lane
- Worse lane/edge detection, especially in rain or on unlit roads
- Confusion for other drivers (your car can be mistaken for a motorcycle at distance)
That’s why many jurisdictions—and many inspection stations—don’t debate this one. If it doesn’t light, it doesn’t pass.
What does “headlight misalignment” mean, and can it still fail inspection?
Headlight misalignment means your headlamp aim is no longer set to the correct vertical and horizontal angles, so the beam pattern is too high, too low, too far left, or too far right. Yes—misalignment can still fail inspection because it can produce unsafe glare or provide inadequate roadway illumination, even when both bulbs work.
However, misalignment failures vary by region and by how strictly the station evaluates aim. Some places use an aiming device; others use a visual standard (e.g., “obvious glare,” “aim clearly incorrect”). Either way, misalignment matters because the beam pattern is designed to balance your visibility with other drivers’ comfort and safety.

What are the most common causes of misalignment?
Misalignment usually happens after something changes your vehicle’s geometry or headlamp mounting:
- Front-end collision or bumper/headlamp replacement (common after headlight repair)
- Suspension work (struts, springs, lift/level kits)
- Worn components that change ride height (sagging springs)
- Incorrectly seated headlamp assembly or broken mounting tabs
- Heavy loads/towing that squat the rear and raise the front
The key point: you can “fix” the light source and still fail if the beam is now aimed into oncoming traffic or pointed uselessly at the pavement a few car lengths ahead.
How can misalignment create a safety and inspection problem even if the bulbs work?
Misalignment causes a “double penalty”:
- Visibility loss: If the cutoff is too low, you lose seeing distance, especially at speed.
- Glare risk: If it’s too high, you may dazzle oncoming drivers—often treated as unsafe.
This isn’t just subjective. Glare has been studied extensively. Work associated with the University of Michigan Transportation Research Institute (UMTRI) has shown that headlamp type and intensity strongly affect discomfort glare ratings, and older drivers tend to report worse glare sensitivity; one UMTRI report found HID headlamps were rated as more glaring than halogen in certain contexts and quantified differences in illuminance needed to reach similar discomfort ratings. (nhtsa.gov)
(Translation for inspection reality: if your misalignment or modifications cause “HID/LED glare behavior,” you may get flagged even if everything technically turns on.)
Burned-out bulb vs misalignment: which is more likely to fail inspection?
A burned-out bulb is more likely to fail inspection immediately, while misalignment is more likely to fail when it is severe enough to be obvious (glare, incorrect pattern, or measured aim out of spec). In other words: bulb failure is usually a direct fail; misalignment is a conditional fail—but both can stop you from passing.
However, misalignment becomes “as fail-worthy as a dead bulb” in three common scenarios:
- After headlight replacement: the assembly sits slightly off.
- After suspension changes: ride height shifts and the beam points higher.
- After installing non-OEM bulbs: the beam pattern becomes scattered and looks mis-aimed.

Here’s a practical way to decide what you’re dealing with before inspection:
- One side completely dark? Burned-out bulb or power issue (fuse, connector, driver/ballast).
- Both on, but you get flashed by other drivers? Likely misalignment or scattered beam pattern.
- Both on, but you can’t see far enough? Aim too low, hazy lens, or weak/incorrect bulb.
- One beam pattern looks “blobby” or uneven? Housing/lens damage, moisture, or wrong bulb fitment.
How do you fix headlight faults to pass inspection safely?
The most reliable method is: diagnose the fault type first, then apply a targeted fix—replace failed components for a burned-out bulb, or re-aim and stabilize mounting points for misalignment—then verify beam pattern on a wall and road-test for real-world visibility.
To better understand what gets you to a pass, treat this like a short “inspection readiness routine,” not a random parts swap.

What’s the safest “headlight not working diagnosis checklist” before inspection?
Use this quick checklist before you buy anything:
- Confirm the symptom: low beam out, high beam out, both out, intermittent, flicker, dim.
- Swap test (if applicable): move the bulb left↔right (halogen) to see if the problem follows the bulb.
- Check connectors: look for melted sockets, corrosion, loose pins.
- Check fuses/relays: especially if both on one function (e.g., both low beams) are out.
- Inspect the lens/housing: haze, cracks, missing caps, or moisture.
- Check aim: look for obvious upward glare or low, short throw.
If you discover haze or moisture, fix those first because aim adjustments won’t fully compensate for scattered light.
How do you handle headlight repair when the bulb is the issue?
When the bulb is truly failed, a correct repair is typically:
- Replace with the correct bulb type (matching OEM spec).
- Avoid touching halogen glass with bare fingers (oil can shorten life).
- Confirm both sides match in color and brightness.
- Verify high/low operation and indicators.
For HID/LED systems, “bulb” problems can involve more than a bulb. Many LED headlamps use integrated modules; some HID systems require diagnosing the ballast/igniter. If you’re seeing flicker or intermittent shutdown, diagnosing the driver/ballast matters as much as the capsule.
How do you do “Headlight alignment after repair” the right way?
Headlight alignment after repair is one of the highest ROI steps you can do, because it improves safety and reduces glare complaints. Here’s a widely used wall-aiming approach that works as a practical check (even when local specs vary):
- Park on level ground facing a flat wall.
- Measure the height from ground to the center of each low-beam projector/reflector.
- Mark those heights on the wall with tape.
- Back up a consistent distance (many guides use ~25 feet / ~7.6 m).
- Turn on low beams and adjust:
- The cutoff should sit slightly below the headlamp center height mark (often around 2 inches lower at 25 ft as a rule-of-thumb; check your vehicle guidance when available).
- The left/right aim should keep the main hotspot in the correct lane zone and avoid crossing into oncoming space.
To make this easy, here’s one video demonstration you can follow:
After adjustment, do a real road verification on a dark road: you should see consistent lane-edge illumination without lighting up road signs “like a spotlight” at close distance.
How do you handle “Moisture inside headlight housing fixes” without creating new problems?
Moisture inside headlight housing fixes should focus on removing water and restoring proper sealing/venting, not simply drying it once and hoping it stays gone. A practical sequence is:
- Check rear caps and bulb boots for improper seating or torn seals.
- Inspect vents (many housings are designed to breathe; blocked vents trap humidity).
- Dry the housing (gentle heat, time, or desiccant packs) and then address the entry point.
- If the lens seam sealant has failed, resealing may be needed; if the housing is cracked, replacement is often the durable fix.
Moisture matters for inspection because it can reduce output, cause fogging that scatters light, and accelerate corrosion at connectors—leading to intermittent operation.
Contextual border: you now know how bulb failure and misalignment affect inspection outcomes, and how to correct each safely. Next, we’ll expand into less-obvious, vehicle-specific issues that can still trigger a fail even when your headlights “turn on.”
What rare or vehicle-specific headlight issues can still cause an inspection fail (even when lights turn on)?
Some less-obvious headlight faults can still cause an inspection fail even when illumination is present, mainly because they affect beam pattern integrity, legal function, or safety side-effects (glare, instability, incorrect components). These issues are “rare” because they’re tied to specific designs or modifications—but they’re common enough to surprise owners at inspection.
Especially with modern LED/HID systems, a headlight can look bright yet still be wrong in a way inspectors (or other drivers) notice immediately.
Can the wrong bulb type or LED retrofit create a fail-worthy beam pattern?
Yes—installing the wrong bulb type or an LED retrofit in a housing not designed for it can create scattered light, glare, and a distorted cutoff, which can be treated as unsafe even if the light “works.” This tends to happen when:
- LED bulbs are installed in reflector housings designed for halogen filament geometry.
- The bulb seats slightly rotated, shifting the cutoff.
- The kit produces glare hotspots above the cutoff.
This is one of the most common “my headlights are brighter but worse” scenarios—brighter doesn’t automatically mean safer if the beam control is gone.
Can loose mounting tabs or vibration make you fail inspection?
Yes—if the headlamp assembly is loose, wobbles, or visibly shifts, it can be flagged because the aim won’t stay consistent and the beam can bounce into oncoming eyes. Loose tabs often occur after:
- Front-end impacts
- Low-quality aftermarket housings
- Improper fasteners after headlight repair
If you can move the housing by hand, treat that as a real safety defect and fix the mounts before you spend time aiming.
Do adaptive headlights or automatic leveling systems ever cause inspection issues?
They can. If an adaptive system malfunctions, you may see warning lights, stuck actuators, or a beam that won’t self-level correctly. Even if the lights turn on, an inspector may flag:
- Warning indicators related to lighting (depending on inspection rules)
- Obvious aim instability (one side drooping, one side high)
- A beam pattern that looks broken or mismatched left-to-right
Research from the Lighting Research Center at Rensselaer Polytechnic Institute discusses the safety rationale for adaptive driving beam systems and quantifies potential crash-reduction benefits when beam control improves; that same logic is why a malfunctioning adaptive system can be treated as safety-relevant. (rosap.ntl.bts.gov)
Can headlight glare complaints (“I keep getting flashed”) indicate a real inspection risk?
Yes—consistent glare complaints are a strong signal that your aim or beam pattern is unsafe, and some inspections effectively treat obvious glare as a defect. Beyond the social signal, glare has measurable human-factor impact. UMTRI research summarized in an NHTSA-hosted RPI glare report describes how glare ratings correlate with illuminance and how factors like age affect discomfort responses. (nhtsa.gov)
If you’re getting flashed often, don’t wait for inspection—re-check aim, correct bulb type, housing condition, and lens clarity.
Evidence (summary): According to analyses from the Lighting Research Center at Rensselaer Polytechnic Institute, improved visual performance from adaptive curve headlighting may contribute to reducing nighttime crashes along curves by 2%–3%. (rosap.ntl.bts.gov)