Fix Auto Electrical Repair for Drivers: Car Electrical Repair Solutions
Auto electrical repair is the fastest way to restore safe starting, stable charging, reliable lighting, and consistent vehicle electronics when your car acts “possessed”—random warning lights, weak cranking, dead accessories, or intermittent power loss.
If you’re searching for car electrical repair, you likely want two things at once: a clear diagnosis you can trust and a practical plan that avoids repeat failures, surprise costs, and roadside breakdowns.
You may also be comparing DIY checks versus a professional shop, and wondering which symptoms point to a simple fix versus deeper wiring or module faults.
After all, the smartest electrical fix is the one that prevents the next fault. To begin, let’s map the systems, symptoms, and a diagnosis flow that stays logical from “easy wins” to “hard-to-find” problems.
What does auto electrical repair actually cover in a modern car?
Auto electrical repair is the diagnosis and restoration of a vehicle’s power, charging, starting, lighting, controls, and electronic communication so every circuit works safely within spec and without intermittent faults.
Next, it helps to picture your car as a set of connected electrical “neighborhoods,” because where a symptom appears is often not where the root cause lives.

Power delivery: battery, grounds, and main feeds
The foundation is simple: power must leave the battery, travel through main cables and fuses, return through solid grounds, and stay stable under load. When that foundation weakens, the car can show odd behavior—flickering interior lights, slow cranking, or modules resetting.
For example, corrosion at a ground point can mimic a bad alternator, and a loose battery terminal can imitate a failing starter by starving current at the worst moment.
Charging and starting: keeping voltage “healthy”
Charging keeps the battery topped up while driving, and starting demands huge current for a short time. If voltage drops too low during cranking, modern modules may throw errors even if the engine still starts.
In other words, electrical reliability is not only about “does it run?”—it’s also about whether voltage stays clean and consistent.
Control circuits: switches, relays, motors, and sensors
Many “electrical” problems are control-side issues: a relay that sticks, a switch that wears out, or a motor that draws too much current. In these cases, you’re hunting for abnormal resistance, abnormal current draw, or inconsistent command signals.
After that, the same logic extends to sensors and actuators, where a small wiring defect can create big symptoms.
Networked electronics: modules that talk to each other
Modern vehicles use networks (like CAN) so modules can share data. This is why one damaged wire or water intrusion can produce a “constellation” of unrelated warnings.
To understand this better, it’s useful to treat the car as a system: power, ground, signal, and communication must all be correct for the vehicle to behave normally.
Key idea: Most electrical issues become solvable when you separate the problem into four buckets—power, ground, signal, and communication—then test each bucket methodically instead of guessing parts.
What are the most common signs you need car electrical repair now?
Yes—there are clear early-warning signs of electrical trouble, and the safest approach is to treat repeated symptoms as a system fault, not a “one-off,” because electrical issues often escalate under heat, vibration, and moisture.
After that, you can sort symptoms by what they reveal about voltage stability, current demand, or circuit integrity.
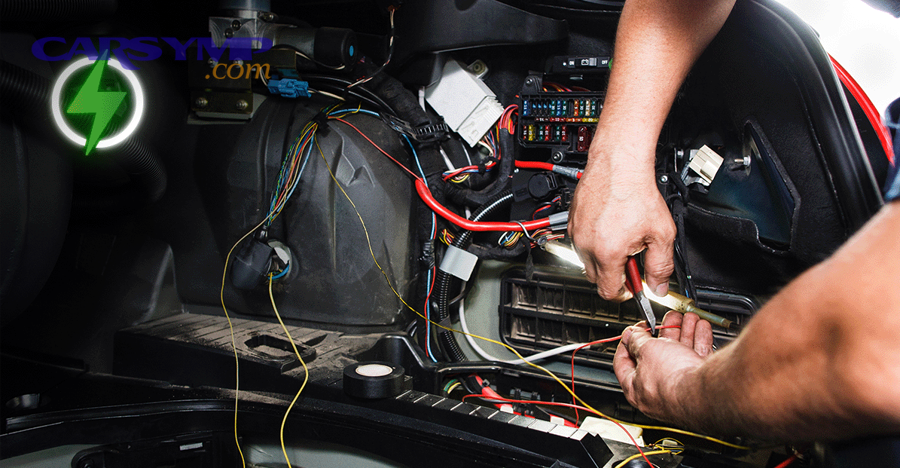
Starting symptoms: slow crank, click-no-start, or random no-start
Slow cranking often points to low available current (battery condition, poor connections, or high resistance), while a single click may indicate insufficient voltage at the solenoid, a weak battery, or excessive starter draw. Random no-starts strongly suggest an intermittent connection, heat-soak issues, or a control circuit fault.
Next, notice whether the problem changes with temperature or after the car sits—those patterns are diagnostic gold.
Charging symptoms: battery light, dimming lights, or repeated dead battery
A charging warning or dimming lights can indicate unstable system voltage. Repeated dead batteries can be charging-related, but they can also be caused by an excessive parasitic draw when the car is off.
In particular, if the battery is new and still goes flat, treat it as a diagnosis problem—not a “bad luck” part problem.
Accessory symptoms: intermittent power windows, locks, and infotainment resets
When accessories act up together, suspect a shared fuse, shared ground, body control supply, or wiring damage in a common loom. When one accessory fails alone, suspect its local switch, motor, relay, or connector.
To connect the dots, keep a list of what fails together; electrical faults often follow shared pathways.
Visible clues: burning smell, melted plastic, or water intrusion marks
Burnt odor or heat damage suggests high resistance at a connector or an overloaded circuit. Moisture trails, green corrosion, and water stains near kick panels or under carpets are classic triggers for intermittent faults.
Therefore, don’t ignore “small” signs—heat and water are two of the biggest enemies of wiring.
How do you diagnose an electrical problem step by step without guessing?
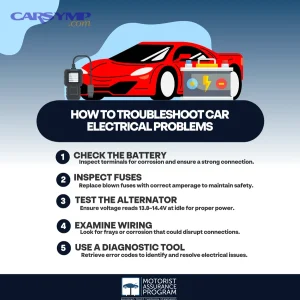
The most reliable method is a structured flow—confirm the symptom, check battery/charging basics, inspect power and grounds, then test the suspect circuit with voltage-drop and load checks before replacing parts.
To begin, you need the right mindset: electrical diagnosis is about measuring what the circuit is doing under real conditions, not what you wish it were doing.
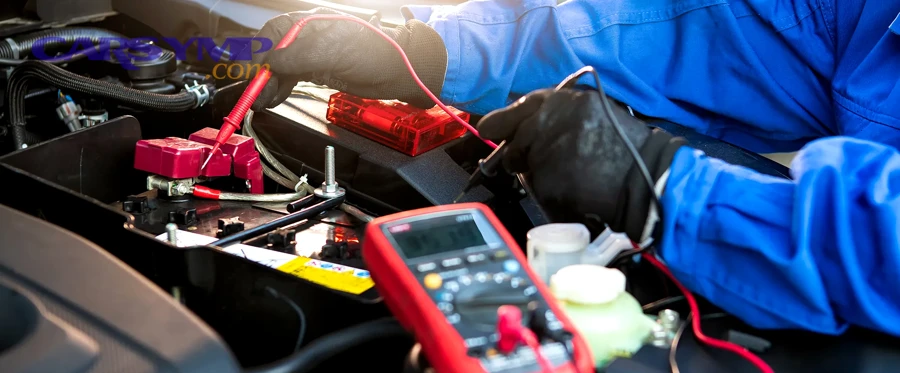
Step 1: Confirm the symptom and capture the conditions
Write down when it happens (cold start, hot soak, rain, bumps, long drives) and what else changes (lights flicker, radio resets, warning lights appear). If you have a scan tool, record codes and freeze-frame data, but don’t let codes “tell you what to replace”—use them to guide tests.
Next, reproduce the symptom safely if possible, because intermittent problems often disappear at the shop unless you can recreate the trigger.
Step 2: Baseline checks—battery health and charging stability
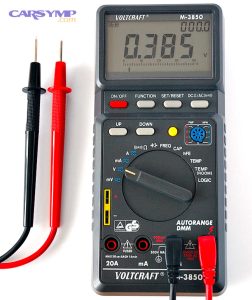
Check resting voltage, cranking voltage drop, and charging voltage while running. A weak battery, loose terminals, or unstable charging can create a cascade of faults. If basic voltage is wrong, fix that first before chasing deeper issues.
For example, what looks like a “module failure” may be a low-voltage reset caused by a bad connection at the battery posts.
Step 3: Inspect high-probability failure points (connectors, grounds, fuses)
Look for looseness, corrosion, heat discoloration, and damaged insulation. Wiggle tests can reveal intermittent opens. If you find corrosion at a connector, treat it as a system issue: moisture likely traveled further than the visible spot.
After that, check protection devices carefully—many issues start with a compromised fuse box or poor contact tension at terminals.
Step 4: Use voltage-drop testing to find hidden resistance
Voltage drop under load is one of the fastest ways to locate high resistance in cables, grounds, and connections. Instead of guessing “the cable looks fine,” you measure how much voltage is lost across it while it’s working.
In other words, you’re letting the circuit “confess” under stress—exactly when failures show up.
Step 5: Validate the fix with a post-repair stress test
After repairs, repeat the same conditions that caused the symptom: high electrical load, engine heat, vibration, and accessory operation. Confirm stable voltage and consistent behavior. Intermittent problems demand proof, not hope.
Tóm lại, diagnosis is a loop: symptom → measurement → targeted repair → verification.
Which systems fail most often, and how do you tell them apart?
There are four high-frequency electrical fault zones—starting, charging, body electronics, and lighting—and each zone leaves a distinct “signature” if you compare symptoms, voltage behavior, and failure timing.
Next, let’s separate these zones so you can stop replacing parts that aren’t guilty.

Starting zone: high current, short duration, connection-sensitive
Starting issues often involve high resistance at terminals, worn cables, poor grounds, or a starter that draws excessive current. This is where voltage-drop testing shines because small connection problems become big under heavy load.
In repair scenarios, starter replacement is sometimes necessary, but it should come after you confirm voltage at the starter and the control signal under the exact no-start condition.
After that, you can decide whether the fault is power-side (cables/grounds) or component-side (starter itself).
Charging zone: voltage regulation and belt-driven realities
Charging problems present as warning lights, dimming, battery drain while driving, or repeated battery failures. A failing regulator can overcharge or undercharge, and heat can make a marginal unit behave normally until it doesn’t.
Sometimes the correct fix is alternator replacement, but the diagnosis should also rule out belt slip, poor main charging cable integrity, and weak grounds that cause unstable readings.
In particular, confirm charging stability with electrical loads on (lights, blower, defroster) because weak systems collapse under load.
Body electronics zone: convenience features and shared modules
Body electronics include many comfort and security circuits. If several features fail together, the root cause may be shared power feeds, grounds, or a controller supply path.
Common real-world repairs include power window repair and central locking repair, but the best results come from testing the motor current draw, switch outputs, and connector integrity before replacing assemblies.
Bên cạnh đó, pay attention to door harnesses—repeated flexing can break conductors inside insulation.
Lighting zone: heat, vibration, and connector fatigue
Lighting faults can be bulb-related, but repeated failures often point to connectors, grounds, or water intrusion in housings. If lights flicker with bumps, suspect loose terminals or broken wires near mounting points.
In practice, headlight repair sometimes means restoring a melted connector and correcting current draw, not just swapping bulbs.
Ngược lại, if lighting fails with other accessories, look upstream at shared power distribution.
When should you choose professional car electrical repair instead of DIY?
Yes—you can do basic checks safely at home, but you should choose professional car electrical repair when the fault is intermittent, involves multiple modules, shows heat damage, or requires network-level diagnosis, because the risk of misrepair and repeated failure rises quickly.
Next, use a simple decision rule: DIY is for straightforward access and low-risk testing; professionals are for high-complexity circuits and hard-to-reproduce symptoms.

DIY-friendly checks that provide real value
- Visual inspection: look for loose terminals, corrosion, frayed insulation, and moisture trails.
- Basic voltage checks: battery resting voltage and charging voltage with engine running.
- Simple load behavior: do symptoms worsen with headlights, blower, or rear defroster on?
These checks can reveal obvious connection issues, and they help you communicate clearly when you do visit a shop.
After that, stop if you see melted plastic or burnt odor—those are signs of heat and potential fire risk.
Red flags that justify a shop immediately
- Multiple warning lights at once with no consistent pattern.
- Repeated fuse blowing or visible heat damage at connectors.
- Intermittent no-start or sudden power loss while driving.
- Moisture intrusion under carpets, in fuse boxes, or near modules.
When these appear, you want deeper circuit testing, pin-pointing high resistance, and sometimes network diagnostics rather than trial-and-error parts swapping.
Quan trọng hơn, modern vehicles can be sensitive to incorrect jump-starting or probing the wrong circuits, so risk management matters.
How a good shop adds value beyond “parts changing”
A strong electrical specialist verifies power and ground integrity, uses voltage-drop testing, checks connector tension, and validates repairs with repeatable stress tests. If needed, they can also coordinate scan-tool data with real electrical measurements to confirm what the modules are experiencing.
For drivers seeking reliable guidance, a shop can also document results and explain why a certain repair is necessary, which helps avoid repeat visits.
To connect this to your search, if you’re building content or booking workflows, you can direct readers to your diagnostic intake at carsymp.com once you’ve explained the symptom patterns and safety boundaries.
How do you handle blown fuses, shorts, and wiring faults safely?
You can fix many protection and wiring issues by isolating the circuit, identifying whether you have an overload or a short-to-ground, repairing the damaged section, and confirming correct current draw—without repeatedly “feeding” the fault with new fuses.
Để bắt đầu, treat a blown fuse as a message: it failed to protect the circuit from abnormal current, so replacing it without diagnosis only repeats the event.

Understand why a fuse blows (and why it matters)
A fuse typically blows due to a short, a pinched wire, water intrusion creating a conductive path, or a component drawing too much current. The right repair depends on which category you’re in.
In many cases, fuse replacement is the final step, not the first step—because the fuse is the symptom, not the root cause.
After that, you can avoid wasted time by testing for short conditions before re-energizing the circuit.
Use a controlled approach to pinpoint a short
Instead of installing fuse after fuse, use a test light or circuit breaker tool in place of the fuse, then unplug components one by one to see when the short disappears. This method reduces risk and makes the fault visible.
If the short changes when you move the harness, you’re likely dealing with insulation damage, rubbing, or a broken conductor inside the loom.
Cụ thể hơn, harness damage often happens at hinge points (doors, trunk), near hot exhaust components, or where aftermarket accessories were installed.
Repair wiring correctly to prevent repeat failures
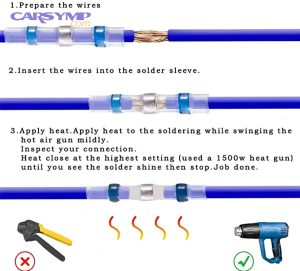
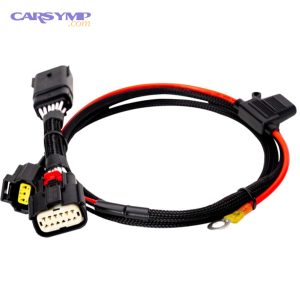
Good wiring repair restores conductor integrity, insulation protection, strain relief, and corrosion resistance. Poor repairs—twist-and-tape, wrong gauge wire, unsealed splices—tend to fail under heat, moisture, and vibration.
To keep it durable, match wire gauge, use quality crimps or solder where appropriate, seal with heat-shrink, and secure the harness to prevent rubbing.
How much does auto electrical repair cost, and what drives the quote?
Auto electrical repair cost depends on diagnosis time, accessibility, parts pricing, and whether the problem is a clear component failure or an intermittent wiring/network fault that requires methodical testing.
Next, you can estimate your range more accurately by understanding what you’re actually paying for: time to pinpoint the fault, and the quality of the repair that prevents comebacks.

Diagnosis fee versus repair fee: why both exist
Electrical work often begins with diagnostics because symptoms can be misleading. A good diagnosis reduces total cost by preventing unnecessary parts replacement. If a shop charges for diagnosis, it’s usually because the testing is skilled labor and tool-driven, not guesswork.
After that, once the root cause is proven, repairs become faster and more predictable.
What makes an electrical job “simple” versus “complex”?
Simple jobs have direct symptoms and easy access—like a corroded battery terminal or a clearly failed component. Complex jobs involve intermittent behavior, multiple modules, hidden harness damage, or moisture intrusion that spreads across connectors.
Examples of jobs that can vary widely include battery replacement when there’s also a parasitic draw, or alternator replacement when the real problem is a poor ground causing unstable regulation readings.
In other words, the same part name can hide very different root causes.
A quick table to connect symptoms to likely cost drivers
This table helps you predict what usually increases labor time and why some symptoms require deeper testing.
| Symptom pattern | What it often suggests | Typical cost driver |
|---|---|---|
| Repeat dead battery after a “new battery” | Parasitic draw or charging instability | Diagnosis time to isolate draw |
| Intermittent no-start, worse when hot | Heat-sensitive connection or component | Reproducing the condition + testing under load |
| Multiple warning lights with odd behavior | Voltage instability or network issue | System-level testing + scan correlation |
| Repeated fuse blowing | Short-to-ground or overcurrent component | Isolation process + harness repair quality |
What questions should you ask a shop before approving the repair?
You should ask for measured evidence—what tests were performed, what readings were found, and how the repair was validated—because good electrical repairs are proven with data, not just replaced parts.
Next, these questions help you filter for a shop that actually diagnoses rather than guesses.

Ask what was measured and under what conditions
Ask whether they performed voltage-drop testing, current draw tests, and charging system load tests. Ask if they reproduced the symptom and what conditions triggered it.
For example, “What was the charging voltage with accessories on?” is more useful than “Is the alternator bad?” because it forces a measurable answer.
Ask how they prevented repeat failure
If a connector was repaired, ask whether it was heat-damaged and whether the underlying resistance cause was corrected. If wiring was repaired, ask if the harness was re-secured to prevent rubbing and if the splice was sealed against corrosion.
Bên cạnh đó, if moisture was involved, ask what was done to address the water path—otherwise corrosion may return.
Ask how they validated the repair
Electrical fixes should be validated with the same stress that caused the problem: hot engine bay, full electrical loads, vibration, and accessory operation. Ask whether they test-drove with loads on and confirmed stable system voltage.
Tổng kết lại, the best shops can explain the “why,” not just the “what.”
How can you prevent electrical problems from coming back?
You can prevent many electrical failures by protecting connections from corrosion, avoiding voltage abuse, managing water intrusion early, and maintaining the charging system so voltage remains stable across seasons and driving conditions.
Next, think of prevention as “reducing stress” on wiring and electronics—heat, moisture, vibration, and poor connections are the main stressors.
Keep battery terminals and grounds clean and tight
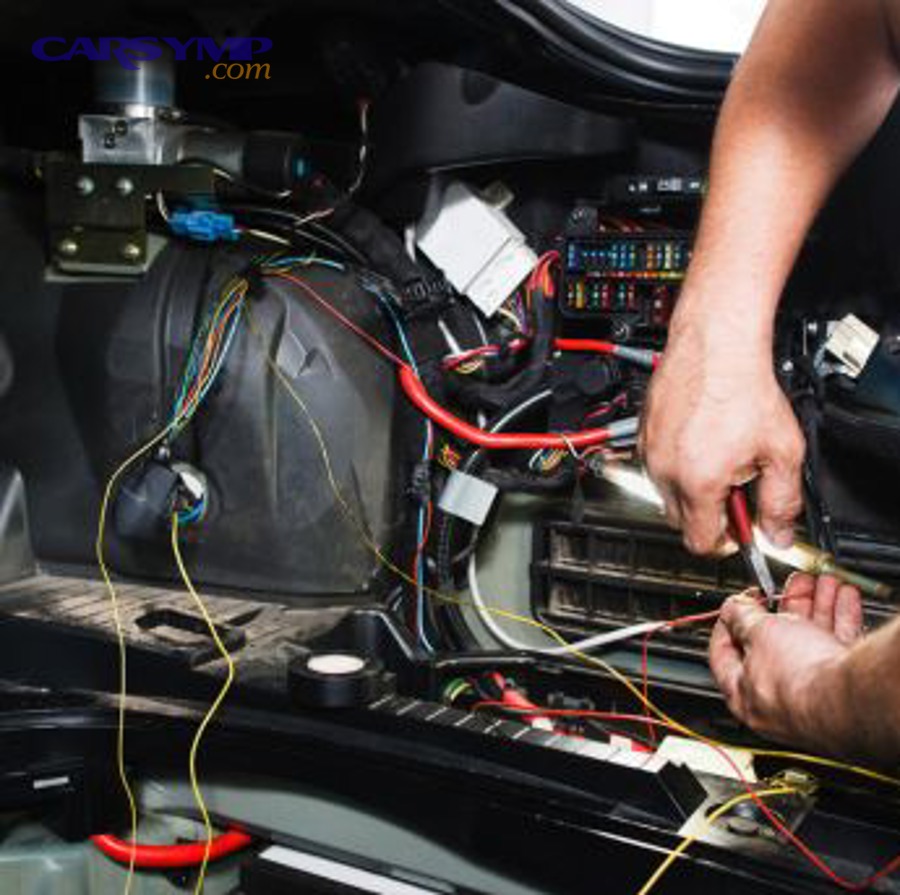
Loose terminals create heat and voltage drop; corrosion adds resistance. Both increase electrical stress and can trigger erratic module behavior. Periodic inspection and proper tightening help more than people expect.
After that, check chassis and engine grounds—many strange electrical symptoms trace back to one weak ground path.
Avoid voltage abuse: jump-starting and aftermarket add-ons
Incorrect jump-starting can damage sensitive electronics. Aftermarket accessories can overload circuits if installed incorrectly. If you add devices, use properly fused circuits and ensure wiring is routed safely.
When electrical integrity is important, treat modifications as engineering tasks, not quick hacks.
Quan trọng hơn, use quality connectors and secure harnesses to prevent rubbing and future shorts.
Address water intrusion early
Water is a slow destroyer: it creeps into connectors, wicks along wires, and corrodes terminals over time. Fix leaks at door seals, windshield edges, sunroofs, and body grommets as soon as you notice damp carpets or foggy lenses.
To keep the flow, water intrusion prevention also makes diagnosis easier because it removes one of the biggest sources of intermittent faults.
FAQs about auto electrical repair and car electrical repair
These FAQs answer the most common questions drivers ask when deciding between quick fixes and deeper diagnosis for auto electrical repair and car electrical repair needs.
Next, use these answers to choose the safest next step based on symptoms and risk level.

Can a bad battery create dashboard errors even if the car starts?
Yes. Low voltage during cranking or unstable voltage while driving can cause modules to reset or flag faults, which may look like sensor or computer failures. If errors appear in clusters, verify voltage stability before chasing individual codes.
Why do electrical problems get worse in rain or after a car wash?
Moisture can create temporary conductive paths, reduce insulation effectiveness, and accelerate corrosion inside connectors. If symptoms correlate with rain, suspect water intrusion around fuse boxes, door harnesses, or low-mounted connectors.
Is it normal for a fuse to blow “once” and never again?
Sometimes a transient event happens, but it’s safer to assume there’s a root cause—especially if the circuit powers something critical. If a fuse blows again or shows heat damage around the fuse box terminals, stop and diagnose the circuit before repeated replacement.
What causes intermittent power windows or locks?
Intermittent behavior often comes from broken conductors in door harnesses, worn switches, weak grounds, or connector corrosion. Testing under movement (door open/close) and measuring voltage at the motor under load reveals whether the issue is supply-side or component-side.
When should you suspect a deeper computer-related issue?
If basic power and grounds test good, multiple modules report communication faults, and symptoms involve coordinated behaviors (random resets, multiple warning lights), you may need advanced diagnostics such as ECU diagnosis and dashboard warning lights diagnosis to correlate scan data with electrical measurements.
Contextual Border: Now that you have the core diagnosis flow, system separation, cost logic, and prevention habits, it’s time to expand into rarer, high-impact electrical scenarios that often confuse even experienced drivers.
Advanced auto electrical repair: rare faults, networks, and modern module behavior
Advanced electrical problems often come from network communication, hidden corrosion, or security/programming constraints, so the best approach is to combine scan-tool evidence with power/ground verification and targeted isolation tests.
Next, these are the scenarios where “symptom-based guessing” fails and systematic proof becomes essential.
Network communication faults that mimic many unrelated problems
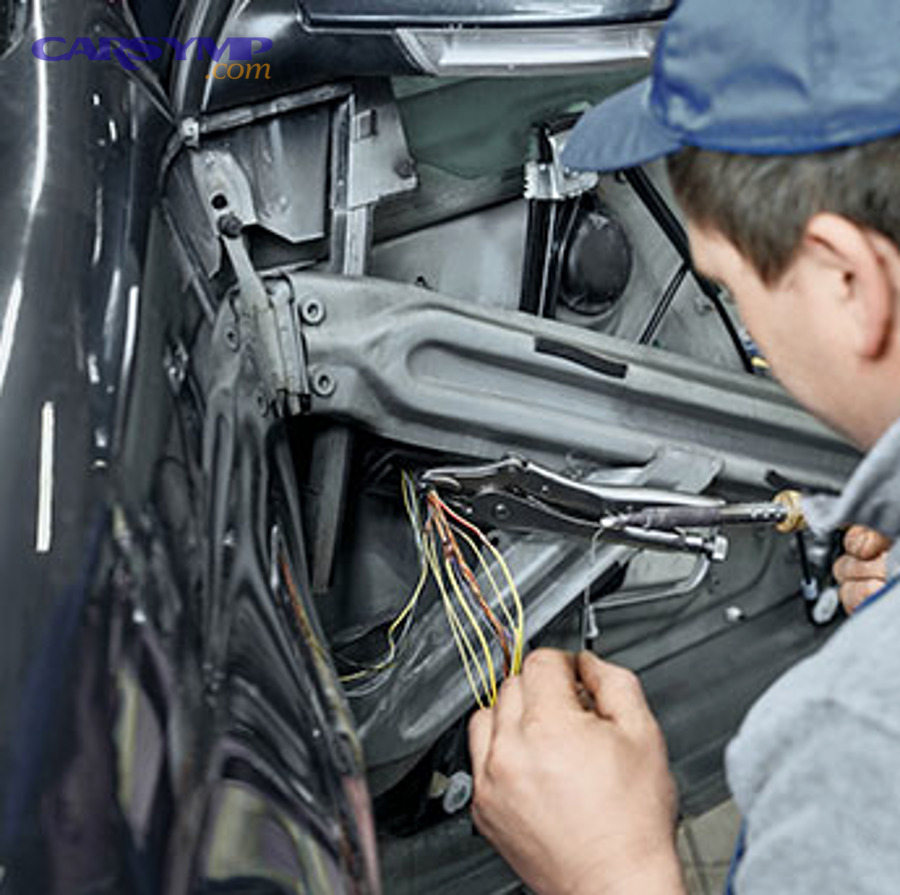
On networked vehicles, one damaged wire, a corroded connector, or a failing module can disrupt communication and trigger widespread warnings. The key is to identify whether the issue is voltage instability (modules rebooting) or true communication disruption (network errors persisting with stable voltage).
In practice, a careful technician checks power and ground integrity first, then uses network diagnostics to isolate the disruptive node without replacing multiple modules unnecessarily.
Hidden corrosion after water intrusion or long-term humidity
Corrosion can hide inside connectors and under insulation where you can’t see it. It increases resistance slowly until the system becomes intermittent. When symptoms appear after rain, cleaning visible corrosion is rarely enough—you must also address the water path and inspect adjacent connectors in the same harness run.
To keep repairs durable, restore sealing, use correct terminal repair methods, and confirm low resistance under load after reassembly.
Programming, security access, and “replacement that isn’t plug-and-play”
Some electronic components require programming, pairing, or security authorization. This means that even if the physical replacement is done, the car may still malfunction until the module is configured correctly. That’s why advanced repairs often require specialized tools and procedures.
As a result, you should verify whether a replacement part needs coding before approving the job, especially on late-model vehicles.
Accessory installs and electrical noise in modern cars
Aftermarket lighting, audio systems, remote starters, and chargers can introduce electrical noise, overload circuits, or create poor ground paths. Symptoms may appear as intermittent malfunctions, radio interference, or unexplained faults. A proper install uses clean power feeds, appropriate fusing, and careful grounding to avoid “ghost” problems later.
Như vậy, advanced electrical reliability is less about one part and more about system integrity—power quality, ground quality, sealing, and correct integration.