


If your headlights aren’t working, the fastest way to diagnose the problem is to follow a fuse-and-relay checklist that confirms power in → protection (fuse) → switching (relay) → power out → ground, so you don’t waste time replacing parts that aren’t broken.
To support that diagnosis, you’ll also learn how to test a headlight relay reliably—starting with a safe swap test, then stepping up to multimeter checks that separate “relay not commanded” from “relay internally failed.”
Then you’ll map symptoms (both out vs one out, low-beam only vs high-beam only) to the most likely fuse box location and circuit labels, so you can identify the correct headlight fuse and relay quickly.
Introduce a new idea: once the fuse and relay test good, you’ll shift to the next checks (bulb, connector, ground, switch, BCM) so your troubleshooting stays linear, safe, and complete.
Are your headlights really “not working,” and which pattern matters for diagnosis?
Headlights “not working” can mean three main patterns—both out, one side out, or only high/low out—and that pattern is the quickest clue to whether the likely fault is a shared fuse/relay/control issue or a local bulb/connector/ground issue.
Then, because the correct fix depends on the pattern, you should classify the symptom before you touch the fuse box so your troubleshooting doesn’t branch into guesswork.
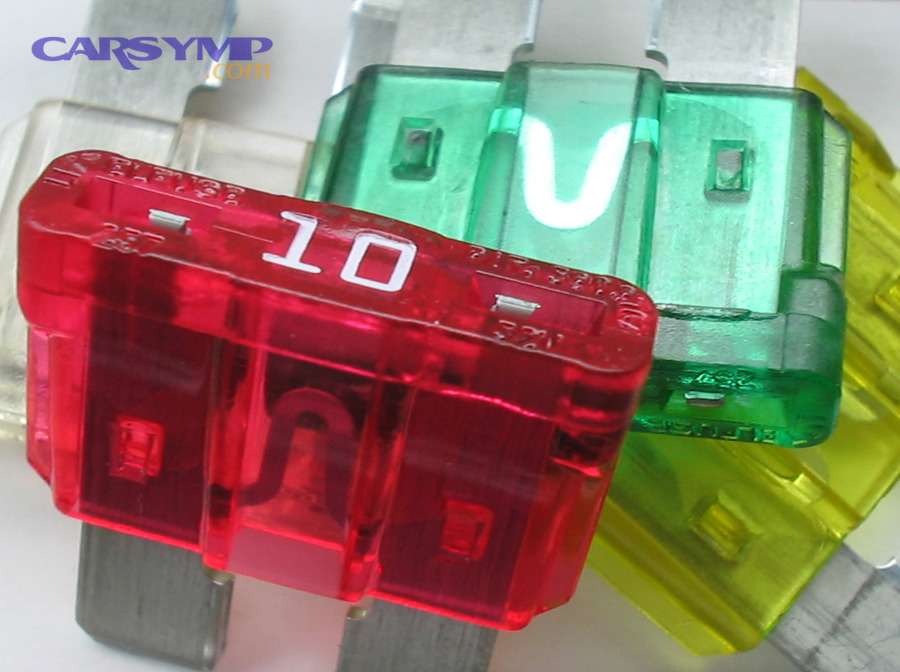
Do both headlights fail at the same time (Yes/No), and does that suggest a fuse or relay problem?
Yes—if both headlights fail at the same time, it often points to a shared headlight fuse feed, a shared headlight relay, or a shared control input, for three practical reasons: (1) many vehicles route both lamps through a common supply path before splitting left/right, (2) relays and main fuses are shared components by design, and (3) simultaneous failure is statistically less consistent with two independent bulbs failing at the same moment.
Next, because “both out” narrows your search, start by checking for a shared headlight fuse/relay label (often “HEAD,” “LOW,” “HI,” or “HDLP”) before you remove either headlight assembly.
How to interpret the common “both out” scenarios (fast triage):
- Both low beams out, highs work: often low-beam fuse/relay path, the low-beam command, or low-beam wiring/ground point.
- Both highs out, lows work: often high-beam fuse/relay path or the dimmer/combination switch command.
- All front lighting weird (DRL OK, headlights not): can involve the BCM or smart junction logic.
- Both out and no relay click: could be no command to relay coil, a blown supply fuse, or a dead relay coil.
Safety note: If both headlights are out at night, treat it as a safety-critical fault. Temporary measures (parking, hazard lights, seeking a safe place) are safer than “driving it home carefully.”
What’s the difference between a headlight fuse and a headlight relay in the circuit?
A headlight fuse is a protective device that opens when current exceeds its rating, while a headlight relay is an electrically controlled switch that lets a low-current command control a higher-current headlight circuit—two different jobs with two different failure patterns.
More specifically, once you understand “protection vs switching,” you can predict what each failure looks like and test it correctly.
Headlight fuse (protection):
- What it does: protects wiring and components from overcurrent/shorts.
- What failure looks like: sudden outage (often repeatable), sometimes a fuse that blows immediately after replacement if a short remains.
- What your test should prove: power on both sides of the fuse when the circuit is commanded on.
Headlight relay (switching):
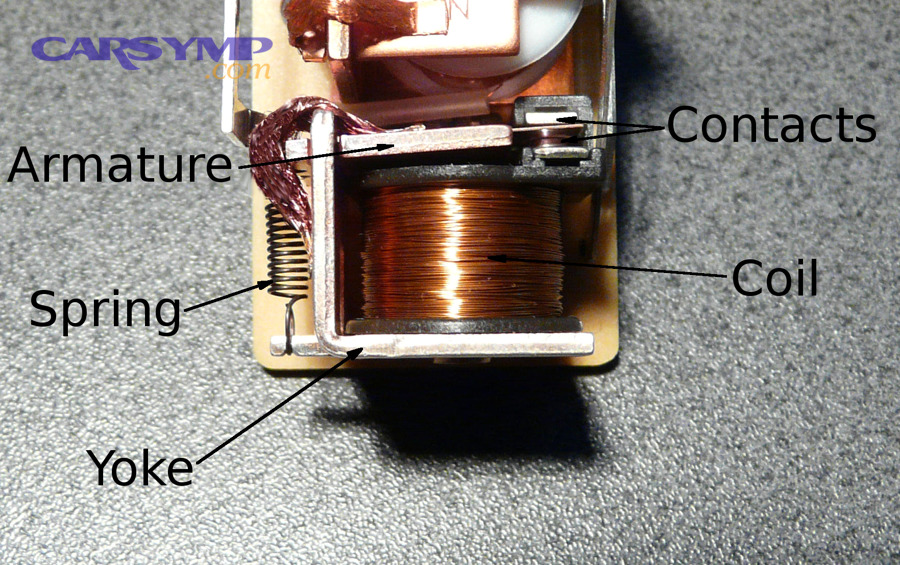
- What it does: connects battery power to headlight output when its coil is energized (commanded).
- What failure looks like: intermittent headlights, clicking with no output, or no click because coil isn’t energized (or coil is open).
- What your test should prove: relay receives coil command and its contacts can pass current with low resistance.
This difference matters in real headlight repair because a relay can “click” and still fail under load, while a fuse can look intact and still not conduct due to poor terminal contact.
Which headlight circuits are commonly separated (low/high, left/right), and why does that change your checklist?
There are four common headlight circuit groupings—low beam vs high beam, left vs right, DRL vs headlamp, and sometimes a shared “main feed” vs individual branch circuits—and your checklist changes based on which grouping your vehicle uses.
In addition, knowing the grouping helps you avoid the classic mistake: testing the wrong fuse because you assumed there was only one headlight fuse.
Common ways manufacturers split headlight circuits (and what the split implies):
- Low beam vs high beam split: one beam can fail while the other works; fuse labels often include LO/HI.
- Left vs right split (especially for low beams): a single headlight out can still be fuse-related if each side has its own fuse.
- DRL integration: DRLs may share bulbs or use reduced voltage/PWM; DRL behavior can mislead diagnosis.
- BCM-controlled headlamps: the “relay” function may be internal; external relays may be absent or not serviceable.
If you describe your issue using Car Symptoms language—“both low beams out,” “left low beam only,” “high beams fine,” “flickers over bumps”—you’ll diagnose faster because every symptom maps to a smaller set of circuit possibilities.
Where are the headlight fuse and relay located, and how do you identify the right one?
Headlight fuses and relays are typically located in one or two fuse panels (under-hood power distribution and/or interior panel), and you identify the correct one by matching the fuse-box legend to your symptom pattern and circuit name.
To better understand that mapping, use the lid diagram first, then confirm with a quick power test—because diagrams tell you “what it should be,” while your meter tells you “what it is.”

Is the headlight fuse in the under-hood box or interior panel (Yes/No), and how can you confirm quickly?
Yes—on many vehicles the headlight fuse is in the under-hood box, but it can also be in the interior panel, for three reasons: (1) high-current loads are often routed through under-hood power distribution, (2) some vehicles split control and load between panels, and (3) modern lighting control may be centralized in a body module near the cabin.
Next, because you don’t want to pull random fuses, confirm location in this order:
Quick confirmation order (fastest to slowest):
- Fuse box lid legend: look for HEAD/HDLP/LOW/HI/LH/RH/DRL.
- Owner’s manual index: often lists “Headlight (Low Beam)” and “Headlight Relay.”
- Visual matching: the headlight relay is frequently the same style as horn/fan relays.
- Test light check: confirm that the suspected fuse has power when the headlight switch is on.
If you can’t find a “headlight relay” listed, don’t assume it doesn’t exist—some vehicles label it under a broader term (like “Headlamp” or “Exterior Lamp”), and some integrate relay logic into a smart fuse box/BCM.
What do “LOW BEAM,” “HI BEAM,” “LH/RH,” and “DRL” labels usually mean on fuse-box diagrams?
“LOW BEAM” and “HI BEAM” indicate the beam-specific power path, “LH/RH” indicates left-hand/right-hand branch protection, and “DRL” indicates daytime running light logic that may share a bulb but not the exact same electrical behavior.
Specifically, these labels tell you which part of the low-beam/high-beam circuit you’re working on .
Common label translations:
- HEAD / HDLP: headlamp/headlight main circuit
- LO / LOW / DIPPED: low beam
- HI / HIGH / MAIN: high beam
- LH / RH: left/right branch circuits
- DRL: daytime running lights (may be reduced output or separate LED module)
- BCM / SJB / ETACS: body control or junction box involvement
When your symptom is “both low beams out,” prioritize any fuse/relay labeled LOW before you chase DRL labels.
Can you swap the headlight relay with a matching relay (Yes/No), and when is that a valid test?
Yes—relay swapping is a valid first test if the relays are the same part number and pin layout, for three reasons: (1) it’s fast and non-destructive, (2) it isolates a relay contact/coil issue without special tools, and (3) many fuse boxes use identical relays for horn, fogs, or fans.
However, because an incorrect swap can create new faults, only swap with a relay that is confirmed identical by marking/diagram.
Safe relay swap checklist:
- Match part number (or exact relay code) and pin count.
- Confirm the same function type (SPST/SPDT) if the relay diagram is printed on the case.
- Swap with a non-critical circuit temporarily (horn is common—test briefly).
- If headlights return after swap, you’ve strongly implicated the relay.
If swapping doesn’t change anything, you haven’t “proven the relay good”—you’ve only proven it behaves similarly in that configuration. The next section shows how to test it like a circuit component, not like a guess.
How do you troubleshoot the headlight fuse step-by-step?
Headlight fuse troubleshooting is a 4-step method—verify command, check power on both sides, confirm fuse continuity under the right conditions, and inspect terminals—that tells you whether the fuse is truly the failure point or only a symptom of a deeper short.
Next, because a blown headlight fuse is often a protective reaction, your goal is not only to replace it but to determine why it opened.
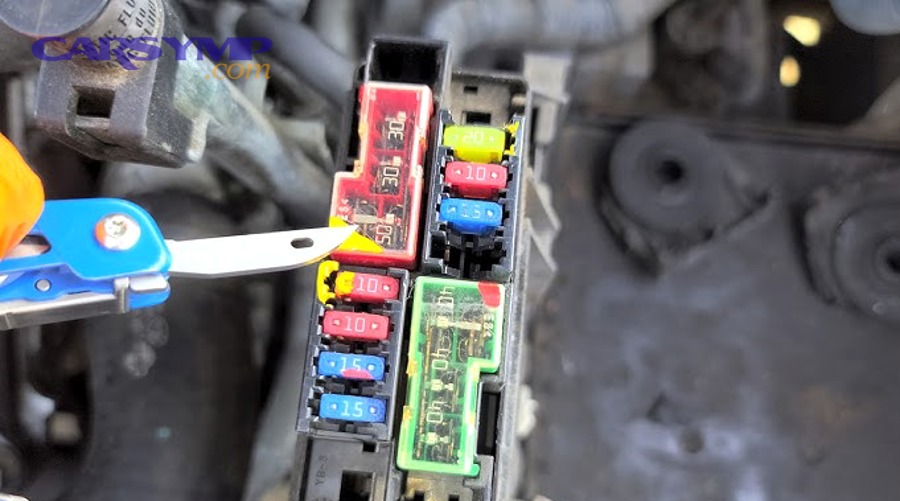
Should you test the fuse with a test light/multimeter instead of only looking at it (Yes/No)?
Yes—you should test the headlight fuse electrically instead of relying only on a visual check, for three reasons: (1) hairline breaks can be hard to see, (2) corrosion at fuse blades can prevent current flow even when the element looks intact, and (3) the real question is whether voltage is present on both sides when the circuit is commanded on.
Then, because this is the most common DIY miss, treat “looks good” as “unverified.”
Best-practice fuse test (practical DIY method):
- Turn headlights to ON (or ensure the vehicle is in a mode where headlights should be powered).
- Touch a test light or meter probe to the two small test points on the top of the blade fuse.
- Expected result: both points show power (test light on both sides, or ~12V on both sides relative to ground).
- If only one side has power, the fuse is blown or not seated/conducting.
Extra reliability tip: If you have a multimeter, also test continuity with the fuse removed—but remember continuity alone doesn’t catch contact resistance at the socket.
What does it mean if the fuse has power on one side but not the other?
If a headlight fuse has power on one side but not the other, it usually means the fuse element is open (blown) or the fuse is not making solid contact in the socket, and you must resolve that before the circuit can deliver power downstream.
Moreover, this “one-side hot” result is valuable because it confirms the upstream feed exists and your problem is at the fuse element/contact point, not the battery.
What to do next (in order):
- Replace with the exact same amperage rating. Never upsize to “make it last.”
- Inspect the fuse blades and socket terminals for discoloration, melting, or looseness.
- Check for a short if the new fuse blows immediately (see next H3).
Why terminal condition matters: A loose or heat-damaged terminal can cause intermittent headlights—current arcs or drops, producing flicker that feels like a “relay problem” even when it’s actually a poor fuse contact.
If the headlight fuse keeps blowing, is it safe to keep replacing it (Yes/No)?
No—it is not safe to keep replacing a headlight fuse that repeatedly blows, for three reasons: (1) the fuse is warning you about a short or overload that can overheat wiring, (2) repeated blowing can damage the fuse box terminals and create larger electrical failures, and (3) a short can escalate into smoke or fire, especially near plastic housings.
Next, because repeated fuse failure changes the diagnosis, switch from “replace” mode to “find the short” mode.
High-probability causes of repeat blowing:
- Short to ground in headlight wiring harness (rubbed-through insulation, accident damage)
- Water intrusion into connectors or headlight housing harness grommets
- Incorrect bulb type or adapter causing improper seating or shorting
- Aftermarket HID/LED kit wiring faults (ballast/driver wiring, polarity issues)
This is where “headlight repair” becomes less about the bulb and more about harness routing, connector sealing, and correcting the underlying load/short.
Evidence (safety context): According to a study by Texas A&M Transportation Institute (Texas A&M University System) from transportation safety research, in 2019, the authors reported that FARS-based defect coding attributes a measurable share of fatal crashes to pre-existing vehicle defects, highlighting why Safety inspection implications of headlight faults and defect prevention matter. (subasish.github.io)
How do you troubleshoot the headlight relay step-by-step?
Headlight relay troubleshooting is a 3-part test—confirm the relay is commanded, confirm the relay can switch, and confirm the relay can carry load—so you can separate “bad relay” from “no command” and from “high resistance under load.”
Then, because relay faults are often intermittent, your testing must go beyond a simple click.
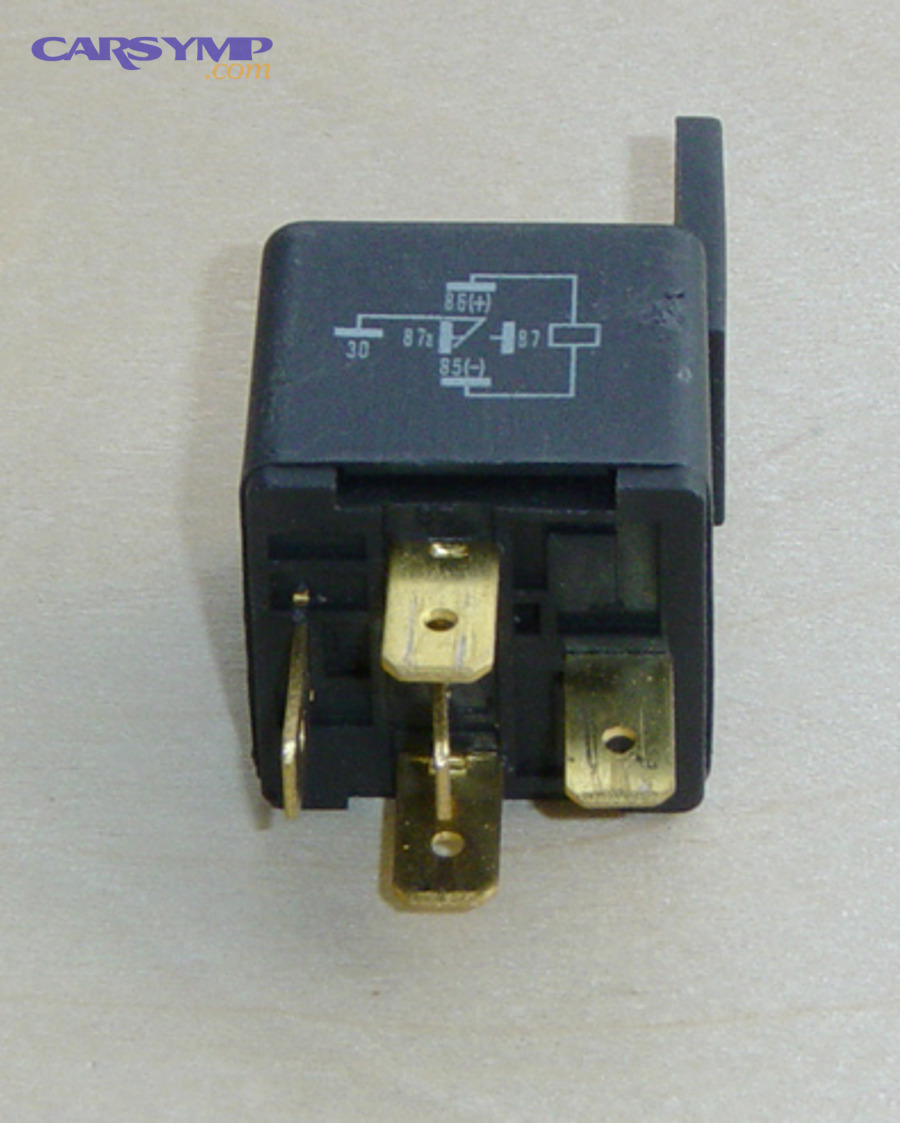
Does the relay “click” when you switch headlights on (Yes/No), and what does that prove?
Yes—a relay click suggests the coil is being energized, but it does not prove the relay contacts can deliver headlight power, for three reasons: (1) a relay can click while its contacts are burned or resistive, (2) a click doesn’t confirm voltage is reaching the output terminal, and (3) some clicks come from adjacent relays, not the one you think you’re testing.
However, because the click still provides useful direction, use it as a clue—then confirm output electrically.
What a click can mean:
- Likely command present (switch/BCM is attempting to activate the circuit)
- Coil is not open (at least not fully), and the armature is moving
What a click cannot guarantee:
- Clean contact surfaces (contacts may be pitted)
- Low-resistance conduction under headlight load
- Correct relay identification (you may be hearing a different relay)
Practical next test: With headlights commanded on, measure voltage at the relay output (or at the headlight fuse downstream if the fuse is on the output side).
How can you test a relay using a swap test vs a multimeter, and which is more reliable?
A multimeter test is more reliable than a swap test for proving relay health under conditions, while a swap test is faster for triage—so the best approach is swap first, meter second if the symptom persists.
More specifically, you can choose based on what you need to prove: “is the relay likely bad?” (swap) vs “is the relay commanded and delivering output?” (meter).
Swap test (fast triage):
- Best for: quick confirmation when identical relay is available
- Strength: immediate change in symptoms is meaningful
- Weakness: doesn’t quantify voltage drop or contact resistance
Multimeter/test-light test (component-level proof):
- Best for: intermittent faults and “clicks but no headlights” cases
- Strength: separates command side (coil) from load side (contacts)
- Weakness: requires careful probing and a stable ground reference
Simple multimeter approach (without needing to memorize pin numbers):
- Identify relay terminals (often printed on relay case: 30/85/86/87/87a).
- With headlights ON, verify the coil side is receiving command (typically 85/86).
- Verify the load side switches power from supply (30) to output (87) when commanded.
If you’re dealing with Bulb vs ballast vs LED driver failure, this relay testing is still critical because a bad ballast/driver can mimic “relay failure” by drawing abnormal current or backfeeding—meaning you must prove the power path before blaming the lamp module.
What should you check if the relay socket shows heat, melting, or green corrosion?
If the relay socket shows heat damage or green corrosion, you should treat the socket as part of the failure because high resistance at the terminal can drop voltage, create heat, and cause intermittent headlight operation—even if the relay itself is new.
In addition, socket damage often repeats unless you restore proper terminal tension and eliminate moisture.
What to check (most important first):
- Terminal tension: loose female terminals fail under vibration; they can “work” at rest and fail while driving.
- Corrosion source: water intrusion from missing covers, cracked fuse-box seals, or pressure washing.
- Heat signature: browned plastic, warped cavity, or melted relay base indicates sustained resistance heating.
Corrective actions (DIY vs pro):
- Light corrosion: electrical contact cleaner + dry + reseat (do not scrape aggressively).
- Loose terminals or melted plastic: replace relay pigtail/socket or fuse box section (often a professional-level repair).
Evidence (why heat matters): According to a study by Texas A&M Transportation Institute (Texas A&M University System) from transportation systems safety research, in 2019, the authors note that defect-related conditions are tracked and analyzed in national safety datasets—reinforcing why persistent electrical heat damage is not “cosmetic” but a safety-relevant defect. (subasish.github.io)
If the fuse and relay test good, what should you check next in the headlight system?
If the fuse and relay test good, the next checks are bulb/module health, connector integrity, ground quality, switch/dimmer output, and BCM control, in that order, because each step confirms a necessary condition for headlights to work.
Next, since this is where DIY troubleshooting often stalls, you’ll use “prove power and ground at the bulb connector” as the pivot test that prevents random part swapping.
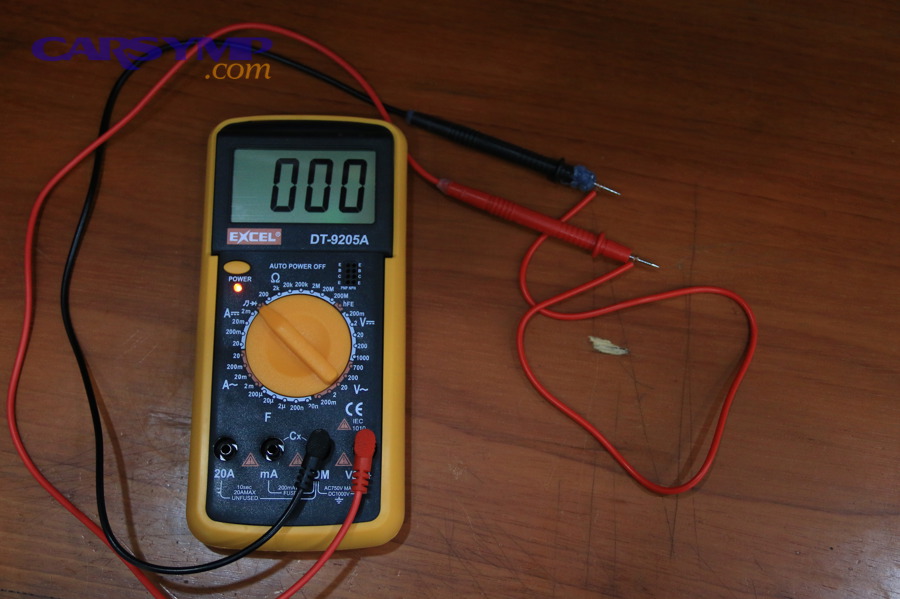
Can a bad ground cause both headlights to fail (Yes/No), and how do you spot it quickly?
Yes—a bad ground can cause both headlights to fail or behave erratically, for three reasons: (1) some vehicles share a common ground point for both headlamps, (2) corrosion increases resistance and reduces current flow, and (3) a weak ground can create dim, flickering, or “sometimes works” headlight behavior.
Then, because ground faults can mimic relay trouble, check ground integrity before you condemn the switch or BCM.
Quick ways to spot a ground problem:
- Both headlights are dim rather than completely dead
- Headlights flicker when hitting bumps
- Other front lighting acts strange (turn signals changing brightness with headlights)
- Visible corrosion at ground strap/eyelet near radiator support or fender apron
Simple proof test: With headlights commanded on, measure voltage between the headlight ground wire and battery negative. Any notable voltage indicates resistance in the ground path (a voltage drop), which can prevent full brightness or operation.
What’s the difference between a headlight switch problem and a relay problem?
A headlight relay problem is usually a load-side switching failure, while a headlight switch problem is typically a command-side failure, and the winner depends on where voltage disappears: relay output points to relay; no coil command points to switch/BCM.
However, because modern vehicles route switch inputs through modules, you must confirm whether your vehicle uses direct switching or BCM interpretation.
Practical comparison (what you’ll observe):
- Relay issue: switch position changes do not restore output; relay may click but output stays dead; swapping relay may change symptoms.
- Switch/dimmer issue: relay may not click; highs may work while lows don’t (or vice versa); other steering-column functions may correlate.
If you’re diagnosing “only low beams don’t work,” the switch/dimmer path becomes more likely—especially if the relay never receives a command.
When should you suspect a BCM/smart fuse box instead of a replaceable relay?
You should suspect BCM/smart fuse box involvement when there’s no serviceable headlight relay listed, multiple lighting functions misbehave together, or the system uses PWM/LED modules, because the “relay function” may be internal and controlled by software logic.
More importantly, BCM-style control changes what “testing” means: you’re confirming commands and outputs rather than swapping a discrete relay.
Common indicators of BCM/smart junction behavior:
- Fuse box legend lacks a headlight relay even though headlights are relay-like loads
- DRL/auto headlights behave inconsistently across modes
- Headlights may shut off after a moment (protective logic triggered)
- Scan-tool fault codes exist for exterior lighting circuits
This is also where you revisit Safety inspection implications of headlight faults: many jurisdictions treat inoperative headlights as an inspection failure because lighting is foundational to visibility and “see-and-be-seen” safety. When you reach module-level control, getting a professional diagnostic can be the safest and fastest outcome.
What uncommon issues can mimic headlight fuse/relay failure, and how do you prevent repeat problems?
Uncommon issues that mimic headlight fuse/relay failure usually fall into four buckets—fails only under load, aftermarket lighting side effects, integrated smart junction limitations, and moisture-driven corrosion—and prevention focuses on restoring clean, low-resistance connections and correct electrical load behavior.
In short, once the basic checklist is complete, you shift from “is there power?” to “is power stable under real headlight load?”
What is voltage drop testing across a fuse/relay, and why can continuity tests be misleading?
Voltage drop testing is a method that measures how much voltage is lost across a fuse, relay, or connection while the headlights are actually drawing current, and it’s more revealing than continuity because continuity can look “good” even when resistance is high enough to fail under load.
Next, because this is the #1 explanation for intermittent headlights with “good” parts, voltage drop becomes your advanced confirmation step.
Why continuity can mislead you:
- A corroded contact can still show continuity at low meter current
- A relay contact can pass a tiny meter signal but fail at headlight current
- Loose terminals can connect at rest but open under vibration/heat
How voltage drop helps (conceptual):
- Low drop = healthy path
- High drop = resistance heating and insufficient power delivery
If you’re chasing a “clicks but no light” complaint, voltage drop across relay contacts under load can reveal a relay that’s effectively acting like a resistor.
Can aftermarket LED/HID conversions cause relay chatter, blown fuses, or backfeeding (Yes/No)?
Yes—aftermarket LED/HID conversions can cause relay chatter, blown fuses, or backfeeding, for three reasons: (1) the electrical load differs from what the circuit expects, (2) adapters/drivers can introduce noise or polarity issues, and (3) some conversions interact with DRL/PWM control and confuse detection logic.
However, because the symptom can look identical to a bad relay, the safest diagnostic move is to temporarily revert to the stock bulb configuration and retest.
What “conversion-caused” problems look like:
- Headlights flash rapidly, then shut off
- Fuse blows after installation, not before
- High beams trigger low beam flicker (or vice versa)
- DRL behaves oddly or triggers warning indicators
This is exactly where “Bulb vs ballast vs LED driver failure” becomes real-world troubleshooting: a bad ballast or LED driver can fail intermittently and overload the circuit, so proving stable current draw is as important as proving voltage.
What does it mean if your vehicle has an integrated “smart junction box” (rare), and what are your options?
An integrated smart junction box means the vehicle may control headlights using internal solid-state switching or module-managed relays, making the headlight “relay” effectively non-serviceable as a separate part in some designs.
Moreover, your options change from “swap relay” to “validate inputs/outputs” and repair at the module or harness level.
Your realistic options (in order):
- Confirm fuses, grounds, and lamp modules are good (still required).
- Check for BCM-related fault codes and live data (often requires a scan tool).
- Repair connector/harness issues that feed the module.
- Replace or repair the junction box/module if it’s proven faulty.
If you reach this stage, a professional diagnostic can be cost-effective because it prevents replacing expensive modules based on assumption.
How do you reduce future failures from moisture/corrosion in fuse boxes and connectors?
You reduce future failures by following four preventive habits—seal, dry, protect, and inspect—because moisture drives corrosion, corrosion drives resistance, and resistance drives heat and intermittent faults.
Then, because many recurring headlight issues are environmental rather than component-based, prevention directly reduces repeat headlight repair events.
Prevention checklist (practical and repeatable):
- Seal: ensure fuse box covers and gaskets are intact and fully latched.
- Dry: avoid pressure washing directly into fuse box seams and headlight rear caps.
- Protect: use appropriate contact protection (sparingly and correctly) after cleaning and drying.
- Inspect: look for early green corrosion and heat discoloration before it becomes a melted socket.
Evidence (why lighting quality matters): According to research summarized by the Insurance Institute for Highway Safety, vehicles with better-performing headlights are associated with fewer nighttime crashes, supporting why maintaining working, correctly performing headlights is not optional from a safety perspective. (iihs.org)