Replace a Blown Fuse Safely: Correct vs Wrong Fuse Rating Guide for Car & Home DIYers
A blown fuse is usually a symptom, not the real problem—so the safest “fuse replacement” is the one that restores power and confirms you’re protecting the circuit correctly. This guide shows you how to replace a fuse without guessing, forcing, or masking a deeper fault.
If you’re working on a vehicle, you’ll learn what a fuse actually protects, how to identify the right slot and amperage, and what to do if the fuse looks fine but the circuit is still dead. The goal is a quick restore with minimal risk.
If you’re working on a home fuse box, you’ll learn how to cut power safely, match the fuse type (plug vs cartridge), and avoid the most common “upgrade” mistake that can overheat wiring.
Introduce a new idea: below, we’ll move from what a fuse is to how to replace it correctly—and how to diagnose the real cause if it blows again.
What is a blown fuse, and what does “fuse replacement” actually mean?
A blown fuse is an overcurrent safety device that has opened the circuit to stop excessive current from overheating wiring or components, and “fuse replacement” means restoring protection by installing the same type and rating—not a higher one.
Next, because “blown” can be obvious or subtle, it helps to understand what actually happens inside the fuse and what you’re really fixing.

What causes a fuse to blow?
A fuse opens because current exceeded its safe limit long enough (or high enough) to melt the fusible link. In real-world terms, that usually comes from:
- A short to ground (damaged insulation, pinched wire, water intrusion)
- An overloaded circuit (too many accessories on one circuit)
- A failing component (motor dragging, seized blower, shorted solenoid)
- A momentary spike (some circuits tolerate inrush, others don’t)
A key point: a fuse can blow once from a one-off event—or keep blowing because the fault is still present.
How do you tell if a fuse is blown?
Use both a visual check and an electrical check:
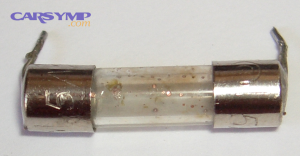
- Visual check (fast): broken or melted element, discoloration, cloudy glass, burnt smell.
- Electrical check (accurate): continuity/resistance test after removal, or voltage test in-circuit if you know what you’re doing.
A visual check is useful, but it can miss hairline breaks or internal damage—so testing is the best confirmation.
Is it safe to replace a blown fuse yourself?
Yes—fuse replacement is safe if you match the fuse exactly, remove power appropriately, and avoid three common hazards: installing the wrong rating, bypassing the fuse, or handling a live residential fuse holder.
Then, to keep it safe in both cars and homes, you’ll want a quick checklist of do’s and don’ts before you touch the panel or fuse box.
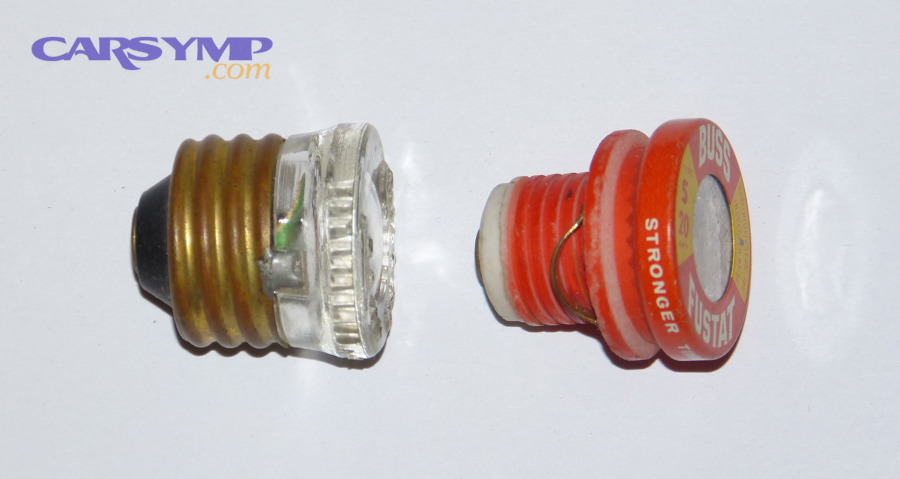
Safe fuse replacement do’s and don’ts
Do:
- Replace with the same amperage and type (and same physical size).
- Turn off the load that likely caused the blow before replacing.
- Use a fuse puller for blade fuses, and insulated tools for home work.
- If a replacement blows immediately, stop and diagnose.
Don’t:
- Don’t install a higher-amp fuse “just to see if it holds.”
- Don’t wrap foil, bridge with wire, or bypass the fuse.
- Don’t keep replacing fuses repeatedly without finding the cause.
- Don’t work inside a residential fuse box if you can’t fully de-energize safely.
These are exactly the kinds of Common mistakes that damage electronics in vehicles and the kinds of wiring-overheat mistakes that can escalate in homes.
When is DIY not safe?
DIY becomes unsafe when:
- You see heat damage (melted plastic, scorch marks, burned insulation).
- You smell burning or notice buzzing/arcing in a home panel area.
- The fuse feeds a critical circuit and the reason for failure is unknown.
- The vehicle fuse blows with no accessory connected (suggesting harness damage).
For homes, warning signs like discolored outlets, burning smells, or buzzing can indicate dangerous faults—treat them as a reason to stop and escalate. (nfpa.org)
How do you identify the correct fuse to replace?
You identify the correct fuse by confirming the failed circuit, locating the matching fuse position using the diagram, and verifying the fuse’s type and amperage printed on the fuse body (not just color).
To begin, start with the circuit symptom, then work backward to the fuse slot so you don’t replace the wrong one and create a new problem.

Where to find fuse box diagrams
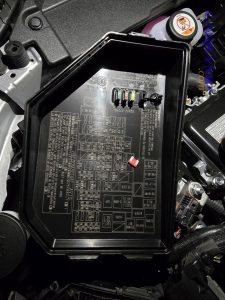
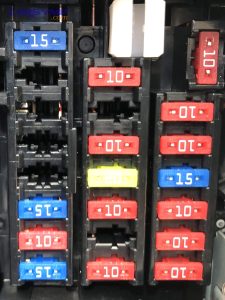
For vehicles, Where to find fuse box diagrams is usually straightforward:
- Owner’s manual index: “Fuses” / “Fuses and relays”
- Fuse-box cover label (often abbreviated)
- Manufacturer service manual or OEM diagram
- Sometimes a QR code label inside the cover
For homes with fuse boxes, the “diagram” may be an old directory card. If it’s missing or inaccurate, label circuits after you confirm them.
How to find the right fuse for a circuit
Use this method:
- Identify the dead system (e.g., radio, power windows, tail lights, blower).
- Confirm whether it’s fully dead or intermittent.
- Match the system name to the fuse label/diagram.
- Pull the suspected fuse and confirm its rating matches the diagram.
- Test the fuse (don’t assume).
This is also where basic Relay vs fuse troubleshooting basics matters: if a high-current device (fan, fuel pump, headlights) is dead, a relay, ground, or power feed may be the real issue—even if the fuse is okay.
Symptoms of a blown fuse by system
Here are common patterns that help you narrow the correct circuit quickly:
- One feature dead, everything else normal (often a single fuse): radio, 12V outlet, interior lights, power mirror.
- Multiple features dead that “share” a circuit: instrument cluster + OBD port, wipers + washer, etc.
- Intermittent failure: loose fuse, corroded terminals, or a harness problem that vibrates.
Quick rule: one dead item points to a fuse or component; multiple dead items points to a shared feed, ground, or fuse/relay block issue.
How do you replace a blown car fuse step by step?
Car fuse replacement is a simple process with 7 steps—verify the fault, locate the fuse, remove it safely, match type and amperage, install firmly, retest the system, and monitor for repeat failure.
Next, because vehicle electronics are sensitive, treat this like careful auto electrical repair rather than “swap and hope.”

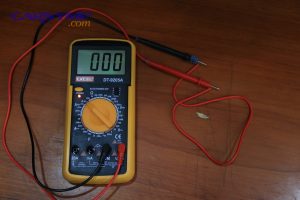
How to test a fuse with a multimeter
- Turn the vehicle off (key out). For extra safety on some vehicles, disconnect the negative battery terminal.
- Remove the fuse using a puller.
- Set the meter to continuity (beep) or low ohms.
- Probe both blades/end caps:
- Beep / near 0 Ω = good fuse
- No beep / OL = blown fuse
This testing approach is the most reliable confirmation method.

Step-by-step car fuse replacement checklist
- Turn off the circuit (lights off, accessory unplugged).
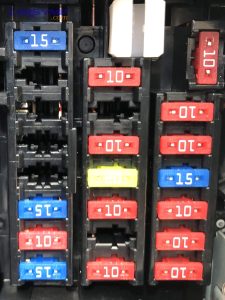
- Locate the fuse box (under dash, under hood, trunk, or side panel).
- Use the diagram to identify the exact fuse.
- Remove the fuse with a puller (avoid twisting hard).
- Confirm the rating printed on top (e.g., 10A, 15A, 20A).
- Install the replacement straight and fully seated.
- Test the system and watch for immediate failure.
Tip: Push blade fuses in by hand and avoid forcing them at an angle to prevent cracking the body or spreading terminals.
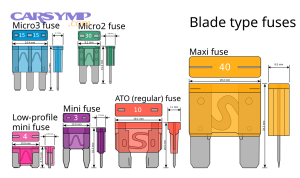
A practical table of common blade-fuse amp ratings
This table helps you double-check typical vehicle blade fuse ratings and the common circuits they protect. Always follow your vehicle’s diagram first.
| Common amp rating | Typical use examples | What a mismatch risks |
|---|---|---|
| 5A–10A | sensors, modules, interior electronics | module damage if overfused |
| 15A | accessory circuits, small motors | repeated blowing if underfused |
| 20A–30A | blower motor, power outlets, windows | wiring heat if overfused |
| 40A+ (maxi) | fans, ABS, high-load feeds | major harness damage if wrong |
Important: color is not a guarantee across all fuse styles; the printed amp number is your truth.
Evidence: According to a study by Technical University of Gabrovo from the Department “Basic Principles of Electrical and Power Engineering”, in 2021, testing of blade fuses found measurable differences in cold resistance and voltage drop by rating (e.g., 5A ≈ 12.72 mΩ vs 30A ≈ 2.24 mΩ), which helps explain why correct sizing matters for safe operation. (utgjiu.ro)
How do you replace a household fuse safely (screw-in or cartridge)?
Household fuse replacement is safe if you shut off the main disconnect, confirm whether you have a screw-in plug fuse or a cartridge fuse, replace with the same type and rating, and stop immediately if you see heat damage or arcing.

Then, because home circuits carry higher fault energy than cars, treat every step as energized until you’ve verified it isn’t.
For utility-style safety guidance, the consistent first step is to shut off the main electric switch before replacing a fuse.
Screw-in plug fuses: safe steps
- Turn off the affected branch switch (if present) and shut off the main.
- Unscrew the blown plug fuse using a dry hand and stable stance.
- Verify the blown fuse rating (amps) and type (time-delay vs fast-acting).
- Replace with the same amp and correct type.
- Restore main power, then restore the branch load.
If a plug fuse holder feels hot or shows scorch marks, stop—heat indicates a poor connection or overload, not “bad luck.”
Cartridge fuses: safe steps
Cartridge fuses are typically in pull-out blocks or clips:
- Shut off the main.
- Pull the fuse block straight out (use insulated gloves if you have them).
- Remove the cartridge fuse and match its markings exactly.
- Reinstall firmly so the clips make solid contact.
- Restore power and check for normal operation.
A key upgrade for older fuse boxes
If you have Edison-base plug fuses, consider Type S adapters/fuses where appropriate because they help prevent installing an oversized fuse. A manufacturer explanation of Type S adapters describes them as designed to prevent the wrong size fuses and reduce tampering. (littelfuse.com)
How do you choose the right replacement fuse (type, amperage, and voltage)?
You choose the right replacement fuse by matching type/physical format, amperage, and voltage rating to the original fuse and the circuit design—because the fuse is calibrated protection, not a “plug” you can upgrade.
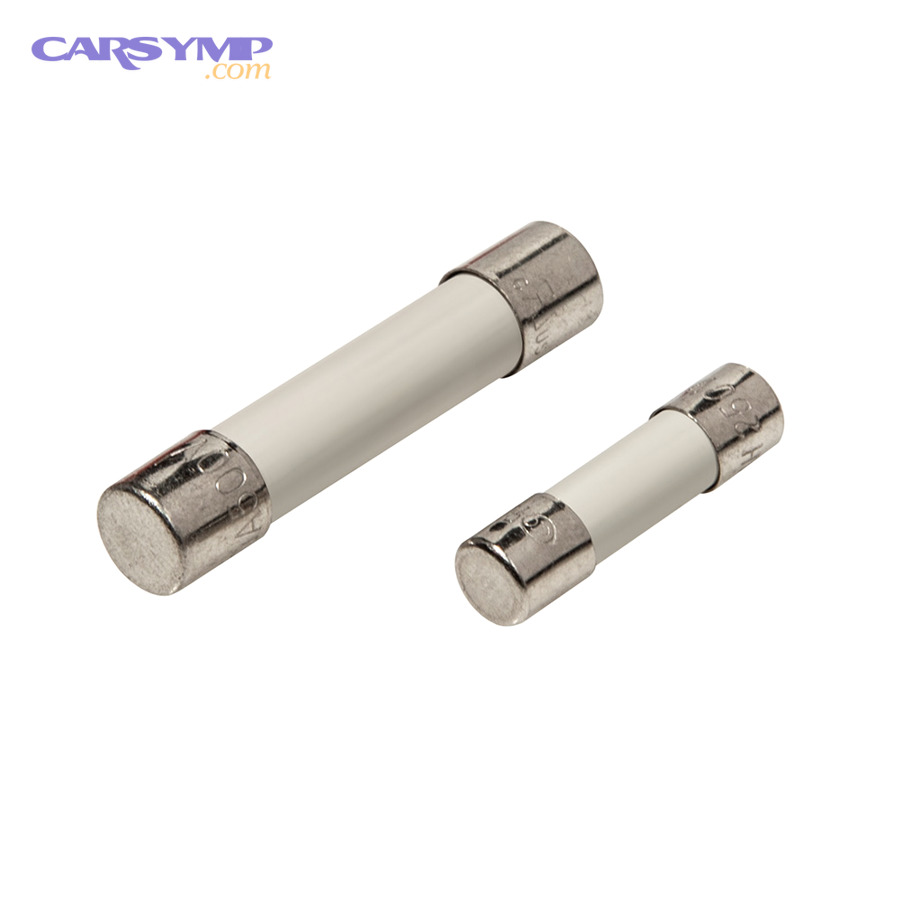
More specifically, once you know the circuit and fuse style, selection becomes a checklist rather than a guess.
Fuse types and ratings explained
Use this quick breakdown:
- Automotive blade fuses (Micro/Mini/ATO/Maxi): match size + amp value.
- Glass tube fuses (electronics/older cars): match length + amp + fast/slow.
- Home plug fuses (Edison base / Type S): match amp + correct base system.
- Cartridge fuses (home/industrial): match class, amp, voltage, and time-delay where specified.
Amperage (A) is the primary safety match: it must match the circuit’s designed current limit.
Voltage rating (V) must be at least the circuit voltage; don’t substitute a lower-voltage fuse into a higher-voltage circuit.
Why “bigger amp” is not an upgrade
A higher-amp fuse can allow wiring to carry more current than it was designed for, which raises heat and fire risk. That’s why power companies explicitly warn against replacing with a higher amperage. (pge.com)
A small table for home plug-fuse types
This table helps you keep “looks similar” from becoming “dangerous mismatch.”
| Fuse style | Typical location | Why it matters |
|---|---|---|
| Edison-base (older plug fuse) | older homes | easy to overfuse without adapters |
| Type S (tamper-resistant system) | upgraded older panels | prevents wrong amp installation |
| Time-delay vs fast-acting | motors vs lighting | prevents nuisance blows or under-protection |
Why does a new fuse blow again after replacement?
A fuse that keeps blowing means the underlying fault is still present—most often a short to ground, an overloaded circuit, a failing component drawing excess current, or a wiring/connector issue that intermittently touches ground.

However, instead of repeating replacements, use a structured fault-finding path so you isolate the cause quickly and avoid collateral damage.
Fuse keeps blowing diagnosis steps
Use this order (fastest to most diagnostic):
- Confirm correct fuse (type + amp + position).
- Unplug the load (device/accessory) and retest:
- If it stops blowing, the component is suspect.
- Inspect for obvious shorts:
- pinched wires, rubbed-through harness, water intrusion, melted connectors.
- Test for short to ground with a meter (fuse removed):
- measure resistance from load side to ground; near-zero suggests a short.
- Divide the circuit:
- disconnect sections (connectors) until the short disappears.
In cars, this is where auto electrical repair becomes real diagnostics: you’re chasing a fault in a harness or component, not the fuse itself.
Relay vs fuse troubleshooting basics
A repeating blow is different from “dead circuit with good fuse”:
- Fuse blows instantly: hard short or wrong fuse installed.
- Fuse blows when device activates: motor/load failure or inrush problem.
- Fuse never blows but device dead: relay, switch, ground, or power feed issue.
If a relay is suspected, you can swap with an identical known-good relay (only if the vehicle’s relay block supports it) as a quick test—without changing any ratings.
When a “fix” becomes a bigger electrical problem
Repeated overfusing or bypassing can cascade into:
- melted fuse terminals (high resistance heat)
- damaged control modules
- burned wiring insulation
- intermittent faults that are harder to trace
Evidence: According to a study by the University of Illinois from the Division of Research Safety, in 2025, current in excess of a wire’s rating can overheat conductors and insulation, which can smolder and lead to fire—exactly the risk overfusing is meant to prevent. (drs.illinois.edu)
Car fuse vs fuse box vs breaker panel: what are you actually replacing?
A car fuse is a single sacrificial overcurrent protector, a fuse box is the distribution housing that holds multiple protectors and relays, and a breaker panel is a resettable overcurrent system (or main distribution) used in buildings—so you’re usually replacing a device, not the system.

In addition, getting the terms right helps you avoid buying the wrong parts and helps a shop diagnose faster if you escalate.
What “replacing the fuse box” usually means (and when it’s real)
In vehicles, people say “fuse box” when they mean:
- a blown fuse
- a loose fuse terminal
- corrosion in the under-hood fuse block
- an internal busbar fault (rare but real)
You replace the fuse box (or integrated power module) when:
- terminals are heat-damaged and won’t grip
- corrosion has invaded internal connections
- multiple circuits fail with no fuse issue
- the housing is cracked and water intrusion is recurring
Breaker panels and older fuse boxes in homes
In homes:
- A breaker trips and can be reset.
- A fuse blows and must be replaced.
- A panel/box is the enclosure and distribution point.
If your home still uses fuses, correct replacement works—but chronic issues may signal you’ve outgrown that system’s capacity or have deteriorated connections.
When should you call a professional, and what does fuse box / panel work cost?
You should call a professional when there’s evidence of heat, arcing, burning smells, repeated fuse failures without an obvious cause, or when the fuse you’re replacing is in a location you cannot safely de-energize; costs vary based on diagnosis time, access, and whether wiring repair is needed.

Thus, think of fuse replacement as the starter step, and professional help as the safety net when the failure pattern suggests a deeper fault.
When to see a shop for electrical faults
For vehicles, escalate when:
- The same fuse blows repeatedly after correct replacement.
- There’s melted plastic in the fuse cavity.
- Multiple unrelated circuits fail (suggesting a power/ground distribution issue).
- You suspect harness damage (after collision, rodent, water intrusion).
A shop can trace shorts with current-limited power supplies, thermal imaging, and wiring diagrams—faster and safer when the fault is buried.
What professionals do differently (and why it saves money)
Pros typically:
- verify load current draw vs spec
- isolate the circuit in sections
- check grounds and voltage drop
- inspect connectors for heat rise
- confirm correct protection (fuse class, time-delay, interrupt rating)
That’s why calling early can prevent the “replace 10 fuses, burn a connector” spiral.
Cost expectations (realistic ranges)
Costs vary widely by region and vehicle/home complexity, but typical categories are:
- Simple diagnosis + fuse replacement: usually low labor
- Circuit tracing and harness repair: moderate to high (time-intensive)
- Fuse box/panel component replacement: higher parts + labor
- Electrical panel/fuse box upgrades (home): significant project scope
A safety-driven reason to escalate
Electrical distribution and lighting equipment fires are not rare, and wiring-related issues are a major contributor—so if your fuse behavior suggests hidden wiring faults, professional intervention is a safety decision, not just a convenience. (content.nfpa.org)