


If your car has no cabin heat, you can usually diagnose the cause in under 30 minutes by verifying the engine reaches normal temperature, then checking heater-hose temperatures and coolant flow to confirm (or rule out) a clogged/blocked heater core.
Next, you’ll learn the symptom patterns that strongly point to heater-core restriction—like one hot hose and one cool hose, weak heat at idle, or heat that improves with RPM—so you don’t replace parts based on guesswork.
Then, you’ll follow a step-by-step checklist that separates heater-core problems from common “no heat” lookalikes such as low coolant, trapped air, thermostat issues, blend-door faults, and heater control valves.
Introduce a new idea: once you can confidently identify the root cause, you’ll also know what to do next—flushing vs repair decisions, and how to prevent repeat clogging—without breaking the “hook chain” that keeps your troubleshooting logical.
Is the heater core actually the reason you have no heat? (Yes/No)
No—your heater core is not automatically the reason for no heat, because the engine may not be warming up, coolant may not be circulating correctly, or the HVAC controls may not be routing air across the core.
Next, to avoid chasing the wrong part, you need to confirm the engine is producing heat, the blower is moving air, and the heater circuit is actually being fed hot coolant.
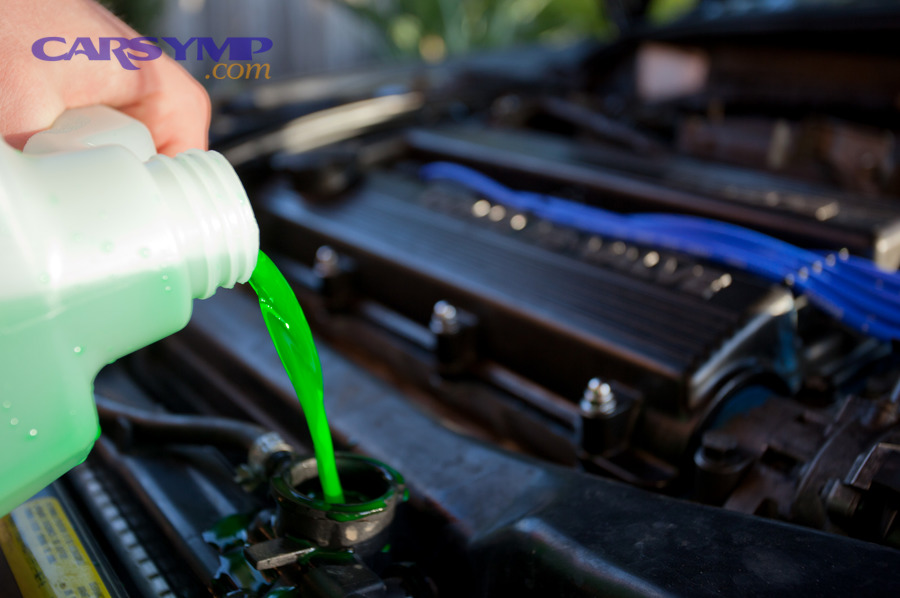
Is the engine reaching normal operating temperature? (Yes/No)
If the engine doesn’t reach normal operating temperature, your cabin heat will be weak or absent even if the heater core is perfectly clear. Specifically, cabin heat depends on hot coolant—so the engine must warm the coolant first.
How to check quickly (DIY-friendly):
- Watch the temperature gauge: it should rise steadily from cold and stabilize around the normal range.
- Feel the upper radiator hose (carefully): it typically stays cooler early, then warms quickly when the thermostat opens.
- Notice driving behavior: if the gauge drops while cruising on the highway, the thermostat may be stuck open.
Why it matters for heater-core diagnosis:
A clogged heater core is a heat-transfer restriction problem. A thermostat stuck open is a heat-production/retention problem. They can feel similar (no heat), but they require completely different fixes.
Is airflow strong but the air stays cold? (Yes/No)
If you have strong airflow but the air stays cold, that’s a “heat delivery” problem—meaning either: 1) hot coolant is not flowing through the heater core, or 2) air is not being directed across the core (control/blend-door issue).
If you have weak or no airflow, start with the blower system first (blower motor, resistor/module, cabin filter, vents). A heater core can’t warm air that never moves.
Quick airflow triage:
- Change fan speeds: if only one speed works, suspect the resistor/module.
- Switch vent modes: if airflow changes location but not temperature, suspect heat source or blend door.
- Check the cabin air filter: a clogged filter can reduce airflow and make heat feel “nonexistent.”
What is a clogged (blocked) heater core, and why does it cause no heat?
A clogged (blocked) heater core is a small radiator-like heat exchanger inside the HVAC box that loses cabin heat output because debris, corrosion, or sealant reduces coolant flow and heat transfer to the air stream.
Then, once flow is restricted, the core can’t deliver enough thermal energy to warm the cabin—especially at idle.
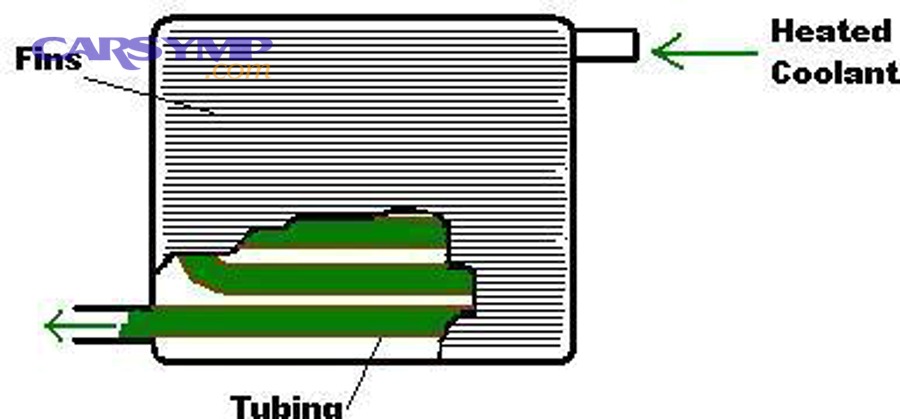
In normal operation, the heater core sits in the path of air moved by the blower fan. Hot coolant enters the core, passes through narrow tubes and fins, and exits cooler after transferring heat to the air.
What “clogged/blocked” really means in practice:
- Restricted flow through the core’s tiny tubes (sediment, rust, scale).
- Reduced effective surface area for heat transfer (internal buildup reduces tube efficiency).
- Uneven heating (some tubes flow, others are blocked—creating “patchy heat”).
What does “clogged” mean compared to “leaking” or “failed”?
A clogged heater core is different from a leaking heater core, and both are different from HVAC control failure.
- Clogged/blocked heater core: weak/no heat, especially at idle; often one heater hose is hot and the other is cooler.
- Leaking heater core: coolant smell inside, foggy film on windshield, coolant loss, and often the classic Cabin damp carpet diagnosis clue (wet passenger floor).
- Failed blend door/actuator: airflow changes but temperature won’t respond correctly; sometimes clicking noises behind the dash.
This distinction matters because a clog might be addressed with flushing, while a leak typically pushes you toward heater core replacement.
What are the most reliable signs of a clogged heater core?
There are 4 main sign groups of a clogged heater core—hose temperature imbalance, idle vs RPM heat behavior, defrost weakness, and leak/coolant clues—based on how restriction changes coolant flow and heat transfer.
Next, you’ll use these sign groups to judge whether you’re dealing with a true restriction or a different “no heat” cause.

Which symptoms strongly suggest restriction vs normal flow?
Strong restriction indicators (high confidence):
- One heater hose is hot, the other is noticeably cooler after the engine is fully warm and the heater is set to hot.
- Heat improves when you rev the engine (higher pump speed pushes through partial blockage).
- Good heat briefly, then fades (debris shifts and re-blocks passages).
- Defroster struggles even though blower airflow is strong (air is moving, but it isn’t getting heated).
Moderate indicators (needs confirmation):
- Lukewarm heat on both sides, especially in cold weather.
- Inconsistent temperature swings as you drive.
Why these are strong clues:
A restriction creates a temperature drop across the core. If coolant enters hot but can’t circulate freely, the outlet side stays cooler.
Which symptoms point away from the heater core?
These symptoms often signal a different root cause:
- Temperature gauge stays low → thermostat stuck open or engine not warming.
- Engine overheats and heat is weak → low coolant, air pocket, or circulation issue (water pump).
- One side hot, one side cold (dual-zone) → blend door/actuator calibration or failure.
- No airflow → blower system or cabin filter issue.
- Gurgling behind dash after coolant service → trapped air needs bleeding, not a new heater core.
How do you do the fast heater-hose temperature test correctly?
The fast heater-hose temperature test is a 2-step method—warm the engine fully and compare heater-hose inlet vs outlet temperatures—to reveal whether coolant is flowing through the heater core and delivering heat.
To begin, do the test only after the engine is at normal temperature; otherwise you’ll misread normal warm-up behavior as a “clog.”
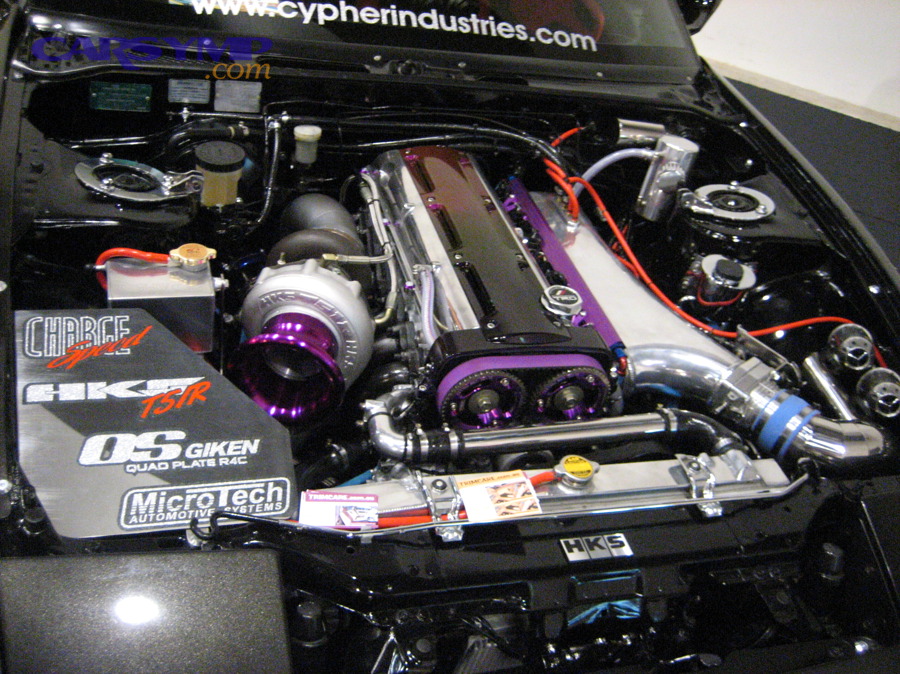
Step-by-step (safe and repeatable):
- Start cold engine, let it warm until the temp gauge stabilizes at normal.
- Set HVAC to full hot, fan medium, recirculation off (for consistent results).
- Locate the two heater hoses at the firewall (usually 5/8" and 3/4").
- Carefully feel both hoses (or use an IR thermometer): compare inlet vs outlet.
- Repeat after holding 1,500–2,000 RPM for 30–60 seconds to check for partial restrictions.
If one heater hose is hot and the other is cool, is the heater core clogged? (Yes/No)
Yes—one hot hose and one cool hose usually means the heater core is restricted, because hot coolant enters but cannot flow freely through the core, creating a large temperature drop across it.
However, to avoid a false conclusion, confirm three additional reasons:
- The engine is fully warm (normal gauge reading).
- Coolant level is correct and there’s no obvious air pocket behavior.
- There is no heater control valve stuck closed upstream of the core.
What “cool” means here:
In real diagnosis, “cool” often means notably cooler than the inlet—not necessarily cold to the touch in winter. The key is the difference between hoses after full warm-up.
If both heater hoses are hot, can the heater core still be clogged? (Yes/No)
Yes—both hoses can feel hot even with a partially clogged heater core, because some coolant still flows and warms the outlet hose, but the core may not transfer enough heat to the air due to reduced internal surface area or uneven tube flow.
Moreover, three common reasons explain hot hoses with cold cabin air:
- The blend door isn’t routing air across the heater core.
- The heater core is partially restricted and heat output collapses at idle.
- The HVAC box has airflow mixing issues (dual-zone doors, actuator calibration).
A practical follow-up check:
If both hoses are hot, switch temperature from cold to hot while listening for actuator movement and watching if air temperature changes at the vents. If controls change but air stays cold, suspect door problems; if controls change and air warms only at speed, suspect partial restriction.
What other problems mimic a clogged heater core, and how do you rule them out?
A clogged heater core is only one of several “no heat” causes—low coolant/air pockets, blend-door failures, heater control valves, and weak circulation—so the best diagnosis compares each cause using one or two decisive tests.
Next, you’ll rule out the most common mimics in the fastest order, so you don’t jump into Flushing heater core vs replacing it prematurely.
Is low coolant or trapped air causing no heat instead? (Yes/No)
Yes—low coolant or trapped air can absolutely cause no heat, because the heater core sits high in the cooling system and is one of the first places to lose liquid flow when coolant is low or air pockets form.
Specifically, diagnose it with three reasons:
- Coolant level is below the proper mark when cold.
- You hear gurgling behind the dash or see fluctuating heat.
- Engine temperature behavior is unstable (spikes, slow warm-up, or intermittent overheating).
How to rule it out:
- Check coolant level cold (never open a hot system).
- Inspect for leaks: radiator end tanks, hoses, water pump weep hole, reservoir cracks.
- If the system was recently serviced, follow the correct bleeding procedure (some vehicles require special steps).
Is the blend door or HVAC actuator the real culprit? (Yes/No)
Yes—blend-door or actuator failure can create “no heat” even when the heater core is hot, because the door controls whether air passes through the heater core or bypasses it.
Moreover, three strong reasons suggest blend-door issues:
- Heater hoses are hot but vent air stays cold.
- Temperature changes do not respond to knob/button input.
- You hear clicking/ratcheting inside the dash when changing temperature.
How to rule it out quickly:
- Change temp from cold to hot: do you feel any temperature shift at all?
- On dual-zone systems: if driver and passenger differ wildly, suspect door/actuator calibration.
- If you have scan tool access, check HVAC actuator codes (where applicable).
Is a heater control valve blocking flow? (Yes/No)
Yes—a stuck-closed heater control valve can mimic a clogged heater core, because it prevents hot coolant from reaching the core in the first place.
Especially in vehicles that use a valve (vacuum, cable, or electronic), check these three reasons:
- The hose feeding the valve is hot but the hose leaving it stays cool.
- Temperature changes don’t affect valve movement.
- Heat output changes randomly with vacuum issues or electrical faults.
Rule-out method:
Locate the valve (often near the firewall) and compare hose temperatures before and after it. A cold downstream hose often points to valve control rather than a plugged core.
Could weak coolant circulation cause “no heat”? (Yes/No)
Yes—weak circulation can cause poor heat, because the heater core needs steady coolant flow, and reduced pump performance or severe blockages elsewhere can starve the heater circuit.
However, three reasons help you distinguish circulation problems from a heater-core clog:
- Overheating under load often accompanies circulation issues.
- Heater output may be inconsistent across multiple conditions, not just idle.
- Radiator hoses and coolant flow patterns look abnormal during warm-up.
Rule-out caution:
If the engine is overheating, stop diagnosing the heater core first—fix overheating/low coolant issues before any heater-core conclusions.
How do you confirm a clogged heater core with a simple DIY flow check?
A simple DIY flow confirmation uses a 3-factor pattern—hose temperature difference, RPM response, and repeatability—to verify restriction without disassembling the dash.

Then, once the pattern repeats consistently, you can treat “clogged heater core” as a high-confidence diagnosis.
Does heat improving when you rev the engine indicate a restriction? (Yes/No)
Yes—heat that improves when you rev the engine often indicates a partially restricted heater core, because increased water-pump speed pushes coolant through narrowed passages and raises outlet temperature.
However, make sure three conditions are true before you conclude restriction:
- Coolant level is correct and there’s no bleeding/air pocket behavior.
- The heater control valve is open (if equipped).
- The blend door actually routes air across the heater core.
How to do the RPM confirmation safely:
- Park, set brake, keep clear of moving parts.
- Hold 1,500–2,000 RPM for 30–60 seconds.
- Watch vent temperature change and compare heater hose temps again.
Why this is powerful:
Blend-door failures usually do not improve with RPM. Restrictions often do—at least temporarily.
If it’s clogged, should you flush the heater core or replace it?
Flushing wins for mild to moderate restrictions, while replacement is best for severe blockage, recurring clogs, or leaks—and the optimal choice depends on access, risk, and repeat-failure likelihood.
Next, you’ll decide between flushing heater core vs replacing it using criteria that match real-world outcomes, not wishful thinking.

Key comparison criteria (what actually matters):
- Restriction severity: partial vs near-total blockage
- Contamination source: rust/sludge vs stop-leak vs corrosion
- Leak risk: old core may start leaking after aggressive flushing
- Access/labor: some vehicles require major dash work
- Budget/time: DIY flush is quicker; replacement is more permanent but labor-heavy
When does a backflush usually work best?
A backflush typically works best in these 4 situations:
- Heat is weak but not completely gone (partial restriction).
- Heater output improves with RPM (flow-limited pattern).
- Coolant isn’t heavily contaminated (no thick sludge).
- There’s no evidence of heater-core leakage (no sweet smell in cabin, no damp carpet).
Best-practice flushing notes (without overpromising):
- Backflush direction matters: reversing flow can dislodge debris.
- Use clean water first; consider appropriate chemicals only if recommended and safe for your system.
- Always restore correct coolant mix afterward and bleed air properly.
When is replacement the smarter fix?
Replacement is usually the smarter fix when you see any of these:
- Persistent clog returns shortly after flushing (upstream contamination remains).
- Heat is nearly nonexistent and the outlet hose stays cold consistently.
- Evidence of a leak: fogging film, sweet smell, or confirmed Cabin damp carpet diagnosis findings.
- The cooling system is corroded internally and debris keeps circulating.
About labor reality:
Heater core replacement labor time varies widely by vehicle because the core is often buried inside the HVAC box. Some cars require partial dashboard removal; others can be accessed more easily. If your model requires full dash removal, factor that into your decision—flush might be reasonable as a temporary measure, but replacement may be the durable solution.
What’s the safest “no-guesswork” diagnostic sequence to avoid misdiagnosis?
There are 8 core steps in the safest no-guesswork sequence—warm-up validation, coolant check, airflow check, hose-temp test, valve/door checks, air bleeding, RPM confirmation, and decision—based on eliminating the most common failure points first.
To better understand why the order matters, use the sequence like a flowchart: each step either confirms a requirement or redirects you to the true cause.
Here is the context for the table below: it summarizes the same diagnostic order as a quick reference, showing what each step proves and what your next move should be.
| Step | What you check | What it proves | If it fails, suspect |
|---|---|---|---|
| 1 | Engine reaches normal temp | Heat source exists | Thermostat/warm-up issue |
| 2 | Coolant level (cold) | Heater core can fill | Leak/low coolant/air |
| 3 | Blower airflow & vent mode | Air can carry heat | Blower/resistor/filter |
| 4 | Heater-hose inlet vs outlet temp | Flow through heater core | Restriction/valve/air |
| 5 | Heater control valve operation | Coolant path is open | Valve control failure |
| 6 | Blend door response | Air routes across core | Actuator/door fault |
| 7 | Bleed air (if needed) | Core isn’t airlocked | Improper bleeding |
| 8 | RPM response test | Partial restriction confirmation | Restriction vs control |
What is the quick no-heat diagnosis checklist from start to finish?
Use this checklist as a “do not skip steps” approach:
- Confirm engine reaches normal temp.
- Confirm coolant level is correct (cold check).
- Confirm airflow is strong and vents change properly.
- Perform heater-hose temperature test after warm-up.
- Check for heater control valve (if equipped).
- Verify blend door changes temperature output.
- Bleed air if symptoms suggest air pocket.
- Use RPM test to confirm partial restriction.
- Decide: flush or replace based on severity/leak evidence.
Hook chain reminder:
Every step locks in the next step. When you skip warm-up or coolant checks, you break the chain and risk blaming the heater core incorrectly.
Evidence: According to a degree project thesis by KTH Royal Institute of Technology, School of Industrial Engineering and Management, in 2016, researchers concluded that stray current can accelerate corrosion in coolant circuits and emphasized that proper grounding reduces stray current and helps prevent corrosion-related failures. (diva-portal.org)
Contextual Border: At this point, you can confidently tell whether your no-heat problem is caused by a clogged/blocked heater core or by a control/cooling-system issue. Next, we’ll expand into deeper micro-level topics—advanced confirmation tools, prevention, and less-common causes of heater-core clogging.
How can you prevent heater core clogging (and what rare causes make it come back)?
Prevention focuses on keeping coolant chemistry stable and passages clean, because a heater core stays clear when the cooling system avoids corrosion, sludge, and conductive contaminants that promote buildup.
Besides fixing today’s no-heat problem, prevention protects you from repeat failures that can force an expensive heater core replacement later.
What coolant habits help keep the heater core clear instead of clogged?
A heater core stays “clear” when coolant remains clean, correctly mixed, and compatible with the system metals—while it tends to clog when coolant becomes contaminated, depleted of inhibitors, or mixed incorrectly.
Clear-system habits (high impact):
- Use the correct coolant type specified for your vehicle (mixing types can create gel/sludge).
- Use distilled/deionized water when mixing concentrate (reduces mineral scale).
- Replace coolant at the recommended interval so inhibitors don’t deplete.
- Fix leaks promptly—air intrusion can accelerate corrosion and sediment formation.
Clog-promoting habits (avoid):
- Topping off with plain tap water repeatedly (minerals accumulate).
- Mixing incompatible coolant chemistries without proper flushing.
- Ignoring chronic overheating, which can bake deposits onto internal surfaces.
Evidence: According to a peer-reviewed corrosion study published in 2016, researchers found that aluminum alloy corrosion behavior changes in ethylene glycol–water solutions and is influenced by conditions like temperature and solution chemistry—supporting the practical point that coolant condition and chemistry affect metal components over time. (sciencedirect.com)
Can stop-leak products cause a blocked heater core? (Yes/No)
Yes—stop-leak products can cause a blocked heater core, because many sealants work by depositing solids where flow slows, and the heater core’s narrow tubes are a common place for those solids to accumulate.
Moreover, three reasons make heater cores especially vulnerable:
- Heater-core tubes are small and easy to plug.
- Flow through the heater circuit can be lower in certain designs.
- Deposits can harden over time, reducing flow even after the original leak stops.
What to do if stop-leak was used:
- Expect that flushing may be less effective if deposits have hardened.
- Inspect the rest of the cooling system for residue.
- If repeated clogging occurs, replacement may be more reliable than repeated flush attempts.
Do electrolysis or coolant chemistry issues contribute to heater core blockage? (Yes/No)
Yes—electrolysis (stray current) and coolant chemistry problems can contribute to heater core blockage, because they accelerate corrosion and generate oxides and debris that circulate and settle in small passages.
More importantly, three reasons explain why these issues can be “invisible” until heat fails:
- Corrosion can create fine debris long before a leak appears.
- Heater cores trap particles due to their fine tube geometry.
- Stray current can rapidly damage metal surfaces, increasing sediment.
Practical prevention steps include ensuring good grounds, maintaining coolant inhibitors, and avoiding conductive contamination (like repeated tap-water dilution).
How can an IR thermometer help you spot partial heater-core restriction?
An IR thermometer helps spot partial heater-core restriction by measuring a temperature gradient across the inlet and outlet hoses (and sometimes across accessible HVAC lines), revealing whether heat is being transferred and whether flow is uneven.
In addition, the method supports better repeatability than the “hand feel” test.
How to use it effectively:
- Measure inlet hose temp near the firewall.
- Measure outlet hose temp near the firewall.
- Compare at idle and after holding 1,500–2,000 RPM.
- Look for a consistent, abnormal temperature drop that matches weak cabin heat.
Evidence: According to a research review published in 2014, infrared thermography is widely used for temperature measurement and diagnostic applications, outlining standard procedures and limitations—supporting its role as a practical tool for identifying abnormal thermal patterns in systems. (pmc.ncbi.nlm.nih.gov)
Where “Car Symp” fits in your workflow: If you’re building a DIY troubleshooting library (for example, “Car Symp” style symptom guides), this article’s value is the diagnostic structure—confirm prerequisites, compare hoses, rule out controls, and only then decide on flushing or heater core replacement.