How to Repair Damaged Wiring Harnesses and Wires: A Practical Wiring Repair Guide for DIY Car Owners
Repairing damaged wiring harnesses and wires starts with a simple truth: many automotive wiring faults can be fixed safely and permanently when the damage is localized, the correct materials are used, and the circuit is diagnosed before any splice is made. That is the core of good auto electrical repair, and it also explains why careless repairs often create bigger electrical problems than the original fault. ([static.nhtsa.gov](https://static.nhtsa.gov/odi/tsbs/2022/MC-10207962-9999.pdf))
The next issue is diagnosis. DIY car owners usually search for wiring repair because a light stopped working, an accessory works only sometimes, a fuse keeps blowing, or the vehicle shows warning signs that point to Common automotive wiring problems and symptoms. In practice, the real job is not just fixing a wire. It is finding whether the fault is an open circuit, a short, a corroded connector, a bad ground, or a damaged section inside the harness. ([fluke.com](https://www.fluke.com/en-us/learn/blog/automotive/electrical-automotive-troubleshooting?srsltid=AfmBOop5ffaJjH32QZWBnSL3PB_n1CXoAJhFQRrfGvMy-jpVVBmnNUVe))
The third concern is method. Proper solder vs crimp vs heat-shrink methods matter because the best repair must restore conductivity, seal the joint, and survive vibration, moisture, and heat. A neat-looking splice is not enough if it adds resistance, traps moisture, or breaks again after a few weeks of driving. Manufacturer repair guidance also shows that some damage patterns should push you toward replacement rather than repair. ([static.nhtsa.gov](https://static.nhtsa.gov/odi/tsbs/2022/MC-10207962-9999.pdf))
The final concern is judgment. DIY owners also want a Wiring repair cost estimate, want help Repairing corroded connectors and grounds, and want clear Wiring repair vs harness replacement decisions without guesswork. Introduce a new idea: the guide below walks from safe DIY limits to diagnosis, repair technique, tool choice, testing, and the special situations that separate a durable fix from a risky one.
What Is Wiring Repair and When Can DIY Car Owners Do It Safely?
Wiring repair is the process of restoring damaged automotive conductors, terminals, insulation, or harness sections so the circuit works safely, reliably, and with proper electrical continuity.
To better understand wiring repair, start with the limit of DIY work: a safe repair is one that fixes a localized fault without exposing you to airbag, high-voltage, or major fire risk.
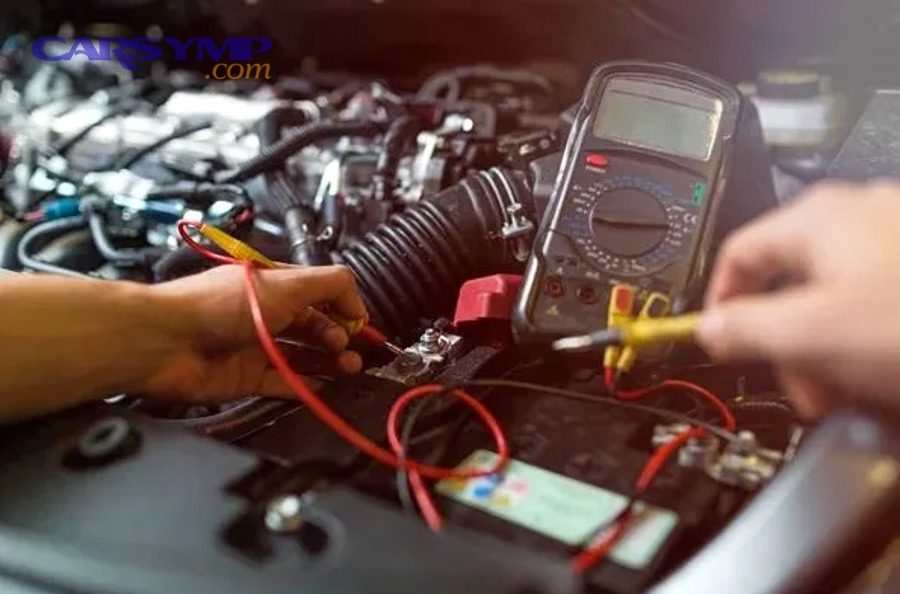
Is Wiring Repair Safe to Do Yourself?
Yes, wiring repair is safe to do yourself when the damage is localized, the battery is disconnected, the circuit is not safety-critical, and you use the correct wire, splice, and sealing method.
More specifically, DIY wiring repair is usually reasonable when you can see the damaged section, access it without dismantling half the vehicle, and confirm that the problem is in a low-voltage conventional circuit such as lighting, speakers, sensors, or accessory feeds. In those cases, a careful owner can inspect the insulation, cut back bad copper, match wire gauge, make a sound splice, seal the joint, and retest the circuit.
However, not every repair belongs in a driveway. Airbag wiring, seatbelt restraint circuits, hybrid or EV high-voltage circuits, and certain shielded or signal-sensitive circuits should not be treated like a simple lamp wire. Manufacturer guidance specifically flags SRS-related circuits, HEV/EV high-voltage wiring, shielded areas, and USB/coax/antenna feeder wiring as situations where harness replacement or specialist-level procedures are required rather than casual repair. ([static.nhtsa.gov](https://static.nhtsa.gov/odi/tsbs/2020/MC-10172185-0001.pdf))
Safety also includes fire prevention. A bad splice can create resistance, heat, intermittent operation, or repeated fuse failures. NFPA reporting on vehicle fires notes that electrical failures remain a meaningful part of the vehicle-fire picture, which is why Avoiding electrical fires and safety tips should be treated as part of the repair itself, not an afterthought. ([nfpa.org](https://www.nfpa.org/education-and-research/research/nfpa-research/fire-statistical-reports/vehicle-fires?))
According to NFPA Research, in its 2024 reporting on 2022 U.S. incidents, approximately three-quarters of highway vehicle fires caused by mechanical or electrical failures involved older vehicles, showing why aging wiring and poor repairs deserve serious attention. ([content.nfpa.org](https://content.nfpa.org/-/media/Project/Storefront/Catalog/Files/Research/NFPA-Research/US-Fire-Problem/osvehiclefires.pdf?rev=928a1755d83249dfb5a951905ee7e336&))
What Counts as a Wiring Repair in a Car?
A wiring repair in a car is any corrective work that restores a circuit by repairing wire, replacing a terminal, resealing a connector, rebuilding a small harness section, or correcting a damaged ground path.
Specifically, wiring repair is broader than twisting two broken ends together. It can include replacing a single damaged wire section, repairing a broken conductor inside a loom, replacing a corroded terminal pin, cleaning and restoring a ground connection, fixing insulation rubbed through by vibration, or replacing a connector pigtail when the plastic body or locking tab is damaged.
That distinction matters because the failure point is not always the copper itself. Many Intermittent electrical issues troubleshooting cases turn out to be terminal spread, corrosion inside the connector cavity, a loose ground eyelet, or a wire that broke internally under intact insulation near a hinge point or engine movement zone. A good repair identifies which part failed before choosing the method.
Manufacturer service bulletins also separate repairable faults from non-repairable damage. Melted wires, terminal discoloration from heat, and corrosion deep enough to make the extent uncertain are often treated as replacement cases because the true spread of damage may be impossible to verify completely. ([static.nhtsa.gov](https://static.nhtsa.gov/odi/tsbs/2022/MC-10207962-9999.pdf))
According to Lexus service guidance published through NHTSA, melted wires and wire terminal corrosion are recommended harness-replacement cases because heat and corrosion can impair flexibility, conductivity, and the ability to locate all damaged areas precisely. ([static.nhtsa.gov](https://static.nhtsa.gov/odi/tsbs/2022/MC-10207962-9999.pdf))
What Types of Wiring Damage Need Repair?
There are six main types of wiring damage that need repair in vehicles: cuts, abrasion, heat damage, corrosion, terminal failure, and internal strand breakage caused by flexing or vibration.
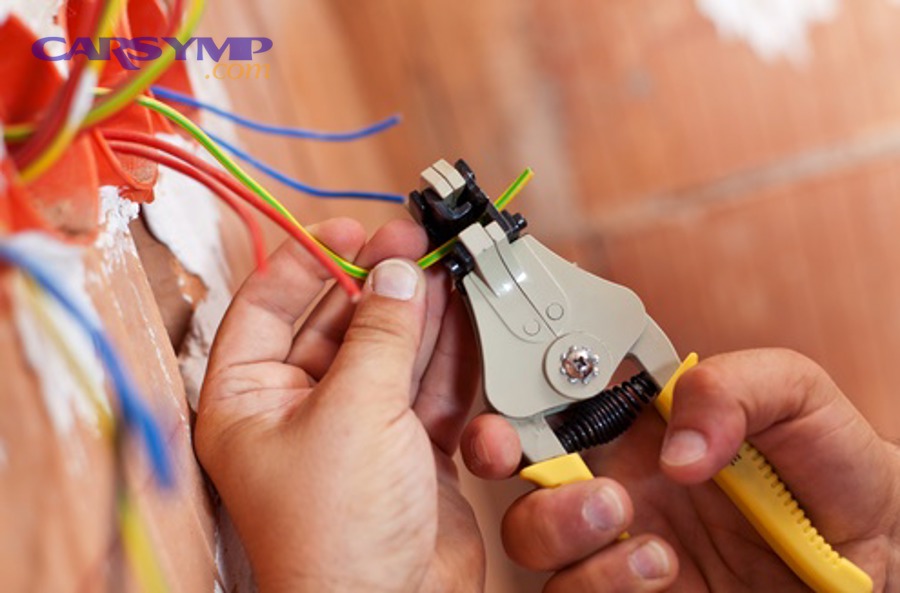
Next, once you know what counts as wiring repair, you need to classify the damage because the repair method depends on what actually failed.
What Are the Most Common Types of Damaged Wires and Harness Failures?
There are six main types of damaged wires and harness failures: cut wires, chafed insulation, melted sections, corroded conductors, damaged terminals, and internally broken wires caused by repeated movement.
For example, a cut wire usually causes a clean open circuit and a complete loss of function. A chafed wire may create an intermittent short to ground when the harness moves. Heat-damaged wiring can stiffen insulation, discolor terminals, and affect more of the harness than the visible burn mark suggests. Corrosion often starts where water enters a connector or loom and can travel farther inside the strands than you expect. Terminal damage creates loose contact, voltage drop, and sporadic operation. Internal strand breakage often shows up in trunk lids, doors, and engine-bay sections that flex repeatedly.
These patterns explain many common automotive wiring problems and symptoms: flickering lights, accessories that work only over bumps, no-crank conditions, sensor faults, charging irregularities, or a fuse that blows only when the harness is moved. In Car Symp style terms, the symptom rarely names the failure. The symptom only points you toward the circuit.
According to Fluke’s automotive troubleshooting guidance, voltage drop has become a prevalent electrical issue as vehicles use more connections and wiring, making poor connections and partial restrictions common failure modes rather than rare exceptions. ([fluke.com](https://www.fluke.com/en-us/learn/blog/automotive/electrical-automotive-troubleshooting?srsltid=AfmBOop5ffaJjH32QZWBnSL3PB_n1CXoAJhFQRrfGvMy-jpVVBmnNUVe))
How Can You Tell Whether the Problem Is the Wire, the Connector, or the Whole Harness?
The wire is usually the problem when damage is localized, the connector is usually the problem when contact is loose or corroded at the terminal, and the whole harness becomes the problem when damage is widespread, heat-affected, flooded, or structurally compromised.
To illustrate, inspect the failure in three layers. First, check the conductor: look for cuts, hard spots, stretched sections, or green corrosion in the copper. Second, check the connector: look for spread female terminals, broken locks, heat discoloration, water intrusion, or pin corrosion. Third, judge the harness as a system: ask whether the damage is limited to one point or whether the loom shows multiple affected branches, melt damage, flood contamination, or crushed sections from an accident.
A connector fault often shows up as movement-sensitive behavior. Wiggle the connector and the circuit cuts in and out. A wire fault often shows up a few inches away from the visible trouble point, especially where the wire bends. A whole-harness problem appears when several related circuits fail together or when damage has spread inside the loom.
Manufacturer guidance again gives a useful boundary. Flood damage, thermal incidents, major accident damage, unavailable repair components, and certain specialized circuit types are common reasons to replace the harness rather than keep repairing piece by piece. ([static.nhtsa.gov](https://static.nhtsa.gov/odi/tsbs/2020/MC-10172185-0001.pdf))
According to Nissan service information published through NHTSA, harness replacement is recommended when the vehicle has flood or thermal damage, severe accident damage, safety-related circuits, or repairs in shielded and specialized wiring areas. ([static.nhtsa.gov](https://static.nhtsa.gov/odi/tsbs/2020/MC-10172185-0001.pdf))
How Do You Diagnose a Damaged Wire Before Repairing It?
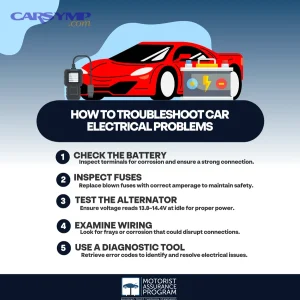
The best way to diagnose a damaged wire is to follow a short sequence: verify the symptom, inspect the circuit visually, check fuses and grounds, test continuity and voltage, and isolate the exact failure point before cutting anything.
Then, diagnosis becomes the part that saves time and money, because guessing creates unnecessary splices and makes future faults harder to trace.
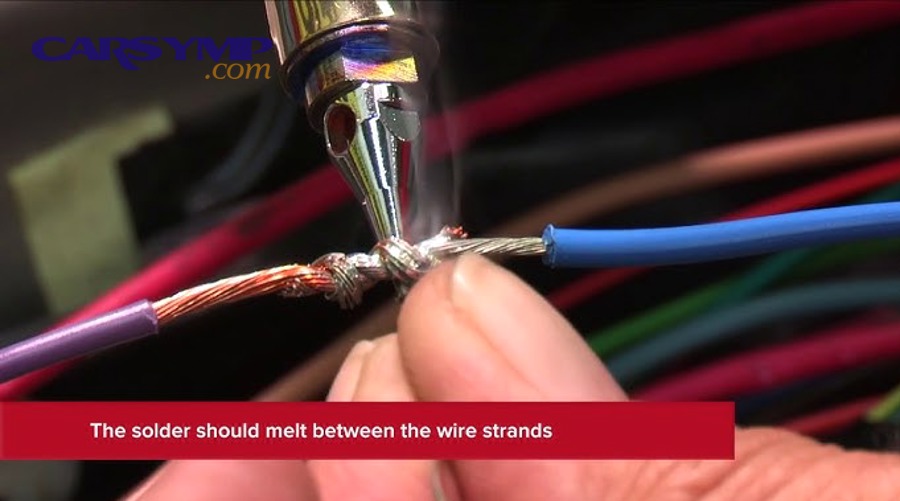
What Basic Checks Should You Do Before Starting a Wiring Repair?
There are five basic checks before starting a wiring repair: confirm the symptom, inspect the harness route, check the fuse and power source, inspect grounds and connectors, and test the circuit with a multimeter.
More specifically, begin with symptom confirmation. Does the part fail all the time or only intermittently? Does it fail only with the key on, with the lights on, or when a door opens? Next, perform a visual inspection along the harness route. Look for rubbing points, melted areas, rodent damage, crushed sections, and previous poor repairs. Then check the fuse, the power supply, and the ground path. After that, inspect connector fit and terminal condition. Only then should you use a multimeter for wiring diagnosis.
Diagnosing shorts and open circuits basics comes down to logic. An open circuit breaks current flow. A short sends current where it should not go, often to ground. An open often creates no operation. A short often blows a fuse, overheats wiring, or creates strange backfeeding behavior. Intermittent electrical issues troubleshooting frequently requires a wiggle test while monitoring continuity or voltage.
A voltage drop test can also reveal high resistance in a circuit even when continuity alone looks acceptable. That matters because a damaged or corroded connection can still pass a continuity beep yet fail under load. ([fluke.com](https://www.fluke.com/en-us/learn/blog/automotive/electrical-automotive-troubleshooting?srsltid=AfmBOop5ffaJjH32QZWBnSL3PB_n1CXoAJhFQRrfGvMy-jpVVBmnNUVe))
According to Fluke’s automotive troubleshooting guidance, a voltage drop test can reveal whether a circuit is too restricted to operate a component properly, which makes it one of the most practical ways to find high-resistance faults. ([fluke.com](https://www.fluke.com/en-us/learn/blog/automotive/electrical-automotive-troubleshooting?srsltid=AfmBOop5ffaJjH32QZWBnSL3PB_n1CXoAJhFQRrfGvMy-jpVVBmnNUVe))
Is a Multimeter Enough to Diagnose Most Wiring Problems?
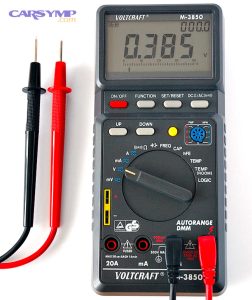
Yes, a multimeter is enough to diagnose most basic wiring problems because it can check voltage, continuity, resistance, and many open-circuit or short-related faults in everyday vehicle circuits.
However, “enough” does not mean “everything.” A digital multimeter is ideal for confirming power, confirming ground, checking whether a conductor is open, and comparing voltage where it should and should not be. It also helps you confirm whether a repaired circuit works normally after the fix. For many DIY owners, that covers the majority of lighting, accessory, charging, and simple control-circuit issues.
Where a multimeter becomes less complete is on advanced network diagnostics, high-speed data circuits, or faults that appear only under load and vibration. In those cases, a scan tool, wiring diagram, or voltage-drop strategy becomes more important than a simple resistance check. Even so, the multimeter remains the core instrument for diagnosing shorts and open circuits basics.
Fluke’s general multimeter guidance also reinforces safe meter use: connect the common lead first, remove it last, and turn off circuit power before testing continuity or resistance. Those habits protect both the technician and the meter. )
According to Fluke’s multimeter guide, multimeters are versatile tools for diagnosing electrical problems, and safe procedure includes powering down the circuit before resistance or continuity testing. )
What Is the Best Way to Repair a Damaged Wire or Wiring Harness?
The best way to repair a damaged wire or wiring harness is to remove all compromised material, match the wire correctly, make a low-resistance sealed joint, support the repair mechanically, and test the circuit afterward.

Below, that method becomes practical when you break it into clear steps instead of treating wiring repair like improvised patchwork.
How Do You Repair a Broken Automotive Wire Step by Step?
A broken automotive wire is best repaired in seven steps: disconnect power, expose the damage, cut back to clean copper, match gauge, make the splice, seal the repair, and test the circuit.
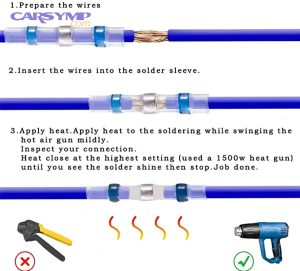
Step one is disconnecting the battery when the circuit and vehicle design make that appropriate. Step two is opening the loom and exposing enough wire to inspect the full damaged area. Step three is cutting back all bad conductor until the copper is clean and bright rather than dark, brittle, or green. Step four is selecting replacement wire of the same gauge and similar insulation quality. Step five is making the splice using a method suited to the circuit. Step six is sealing the joint with quality heat shrink and rewrapping or relooming the harness so the splice is protected from rubbing, moisture, and strain. Step seven is testing operation and checking that the harness now sits with enough slack and support.
The most important caution is not to leave weakened copper in place. A repair that joins onto partially corroded or heat-damaged strands may work briefly but will continue to build resistance or break later. The second major caution is routing. If the harness goes back against a sharp bracket, hot exhaust part, or moving hinge without abrasion protection, the same failure returns.
Repairing corroded connectors and grounds follows the same logic. Clean back to sound metal, replace terminals when pitting or looseness remains, reseal the connector if possible, and resecure the ground on clean metal with proper tightening and protection against future moisture.
According to Lexus service guidance, repair-versus-replacement decisions begin by locating the damaged portion and identifying the cause of damage before work proceeds, which supports the step-first diagnostic approach rather than blind splicing. ([static.nhtsa.gov](https://static.nhtsa.gov/odi/tsbs/2022/MC-10207962-9999.pdf))
Which Wiring Repair Method Is Better: Crimping or Soldering?
Crimping wins for vibration resistance and consistency, soldering can work for certain controlled repairs, and heat-shrink sealing is essential for durability regardless of the joint style.
More specifically, a high-quality crimp made with the correct connector and tool usually gives the most repeatable result for automotive use because it avoids excessive stiffness and tends to tolerate vibration well. Soldering can create an electrically sound joint, but it demands more skill, more heat control, and more attention to strain relief. If solder wicks too far into the conductor, the wire can become rigid and more likely to fatigue near the end of the soldered area. Heat shrink, especially adhesive-lined shrink, protects either repair from moisture and abrasion.
That is why proper solder vs crimp vs heat-shrink methods should be viewed as a system, not a single choice. The joint carries current, the seal blocks contamination, and the support prevents future flex failure. For many DIY owners doing ordinary vehicle repairs, quality crimp-and-shrink methods are the most practical path to a reliable result.
Broader technical repair guidance outside the auto industry also emphasizes avoiding excessive resistance and poor junction quality. FAA repair guidance for wiring systems highlights the importance of preventing excessive voltage drop and high resistance at junctions that can ultimately lead to failure. ([faa.gov](https://www.faa.gov/documentLibrary/media/Advisory_Circular/AC_25_1701-1.pdf?))
According to FAA advisory guidance on wiring practices, technicians should avoid conditions that create excessive voltage drop and high resistance at junctions because these can lead to failure. ([faa.gov](https://www.faa.gov/documentLibrary/media/Advisory_Circular/AC_25_1701-1.pdf?))
What Tools and Materials Do DIY Car Owners Need for Wiring Repair?
DIY car owners need a small set of core tools and quality materials: a multimeter, wire stripper, crimp tool, heat source, correct wire, sealed connectors, and harness protection supplies.
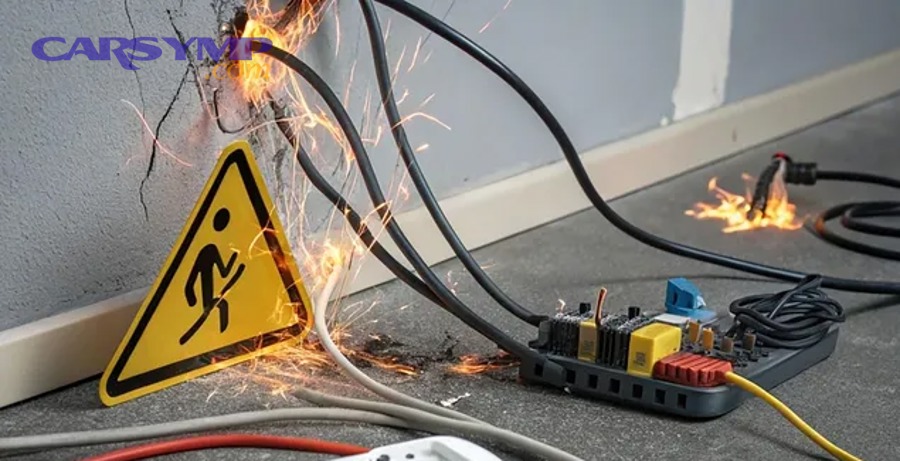
In addition, tool and material quality affects the repair as much as technique, because weak tools create weak crimps and poor materials invite moisture, corrosion, and repeat failure.
What Basic Tools Should Be in a DIY Wiring Repair Kit?
A basic DIY wiring repair kit should include eight essentials: a digital multimeter, wire strippers, flush cutters, a ratcheting crimper, heat gun, terminal tools, replacement wire, and harness wrap or loom.
A multimeter helps you verify the fault and confirm the fix. Wire strippers prevent nicked strands. Flush cutters make clean cuts. A ratcheting crimper improves consistency over cheap pinch-style tools. A heat gun shrinks tubing evenly without scorching insulation the way an open flame can. Terminal tools help release pins without damaging connector bodies. Replacement wire should match gauge and suit the environment. Loom, cloth harness tape, or abrasion sleeve protects the finished repair.
Beyond those basics, dielectric grease may help connector weather sealing in suitable situations, while test leads, back-probe pins, and a simple test light can speed diagnosis. Still, the multimeter remains the centerpiece because Using a multimeter for wiring diagnosis is what turns a repair kit into a troubleshooting kit.
According to Fluke guidance, multimeters support measurements including voltage and continuity, which is why they remain one of the most versatile tools for troubleshooting electrical faults. )
What Materials Help Make a Wiring Repair Last Longer?
The materials that make a wiring repair last longer are correct-gauge wire, sealed splice connectors, adhesive-lined heat shrink, quality terminal replacements, and abrasion-resistant loom or tape.
Specifically, the goal is to restore both the electrical and physical integrity of the circuit. Correct-gauge wire keeps current capacity and flexibility close to original. Sealed connectors and adhesive-lined shrink help block moisture. Quality replacement terminals restore contact pressure. Loom and cloth tape protect the repair from vibration and chafing. These are the materials that support Preventing wiring damage after the repair rather than merely hiding it.
Cheap vinyl-only tape and unsealed butt connectors often fail because they do not address moisture, heat, or movement. In the engine bay or underbody, those weaknesses appear quickly. This is also why a quick wiring repair cost estimate should account for materials, not just time. Better materials cost more up front but often avoid a second repair later.
According to manufacturer repair bulletins, connector- and harness-specific tools and parts are treated as part of the repair process, reinforcing that durable repairs depend on matched parts and procedures rather than universal shortcuts. ([static.nhtsa.gov](https://static.nhtsa.gov/odi/tsbs/2020/MC-10172185-0001.pdf))
Should You Repair the Wire or Replace the Wiring Harness?
You should repair the wire when damage is localized and the rest of the circuit is sound, but you should replace the wiring harness when damage is widespread, heat-affected, flooded, safety-related, or economically unreasonable to repair.

More importantly, this is where wiring repair vs harness replacement decisions become a matter of scope and risk rather than preference.
Can a Damaged Wiring Harness Be Repaired, or Does It Need Replacement?
Yes, a damaged wiring harness can often be repaired, but replacement is the better choice when the damage extends beyond a clean local section or affects critical circuit integrity.
A repair makes sense when one branch or one reachable section is damaged by abrasion, a single break, or limited connector corrosion and the remaining harness is healthy. Replacement becomes the better decision when the harness has melted wires, multiple damaged branches, flood contamination, thermal damage, collision crush damage, specialized shielded wiring, or safety-system involvement. The same applies when proper parts are unavailable or when labor costs exceed the practical value of repairing several sections separately.
This is where a realistic wiring repair cost estimate helps. A small localized repair may cost little in materials and moderate labor. A large harness rebuild can consume so much time that replacing the harness becomes the cleaner and sometimes cheaper option over the life of the vehicle. The decision should be based on failure extent, access, circuit type, and confidence in long-term reliability.
According to Nissan service guidance, replacement is recommended when repairs involve SRS circuits, HEV/EV high voltage, flood or thermal incidents, major accident damage, unavailable repair components, shielded areas, or certain specialized cable types. ([static.nhtsa.gov](https://static.nhtsa.gov/odi/tsbs/2020/MC-10172185-0001.pdf))
What Is the Difference Between a Spot Repair and Full Harness Replacement?
A spot repair is best for limited localized damage, while full harness replacement is best for systemic damage, hidden contamination, or cases where long-term confidence matters more than saving a small amount upfront.
To better understand the difference, think in terms of certainty. A spot repair fixes what you can identify. Full replacement removes what you cannot fully trust. Spot repairs are usually faster, cheaper in parts, and realistic for DIY work. Full replacement costs more and may involve major disassembly, but it restores factory continuity across the whole harness path and eliminates uncertainty about hidden internal corrosion or heat spread.
That difference becomes crucial after flood exposure, fire, or melted sections. A wire may look repairable at one point while the adjacent loom contains degraded insulation or oxidized copper farther inside. In such cases, repair can become repeated patching.
According to Lexus and other manufacturer bulletins available through NHTSA, melted wires, terminal corrosion, and damage whose full extent cannot be precisely located are strong replacement indicators because conductivity and long-term reliability may already be compromised beyond the visible section. ([static.nhtsa.gov](https://static.nhtsa.gov/odi/tsbs/2022/MC-10207962-9999.pdf))
How Do You Test the Wiring Repair After Finishing the Job?
You test a finished wiring repair by confirming continuity, verifying voltage and ground under operation, checking the component function, and inspecting the harness for proper routing, sealing, and strain relief.
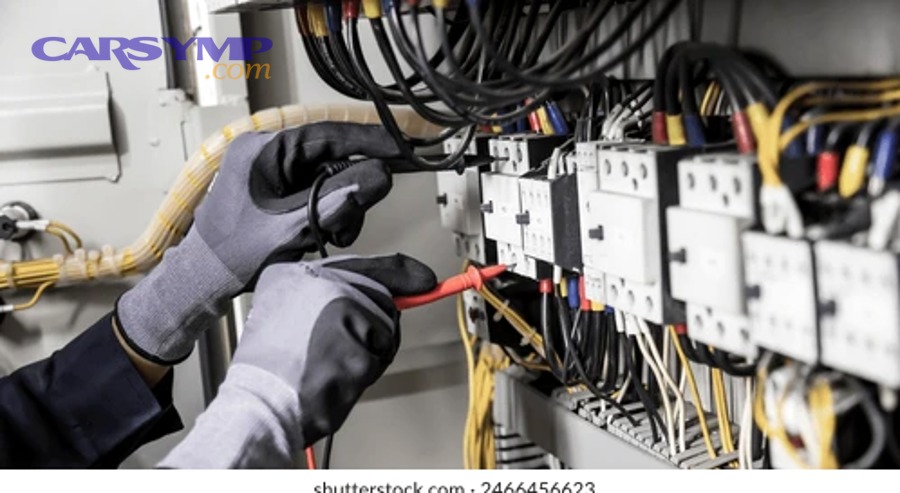
Thus, finishing the splice is not the finish line. The real end of the job is proving that the circuit works normally and will keep working.
How Do You Check If the Repair Actually Fixed the Problem?
You check whether the repair fixed the problem by retesting the symptom, measuring the circuit, operating the component under normal conditions, and moving the harness to see whether the fault returns.
Start by repeating the original condition that caused the complaint. If the window, lamp, sensor, or accessory now works, continue instead of stopping there. Verify that power reaches the load, that the ground path is good, and that voltage drop across the repaired area is low enough not to create a restriction. Then perform a wiggle test while the circuit operates. If movement changes the result, the fault may still be present in the connector, in another section of the harness, or in the mechanical support of the repair.
This is especially important for intermittent electrical issues troubleshooting because many repairs appear successful until vibration, steering movement, engine heat, or door movement recreates the original condition. If possible, check the harness again after a short drive or full system cycle.
According to Fluke’s automotive guidance, voltage-drop testing helps determine whether a component circuit is too restricted to operate correctly, making it a useful confirmation step after a wiring repair. ([fluke.com](https://www.fluke.com/en-us/learn/blog/automotive/electrical-automotive-troubleshooting?srsltid=AfmBOop5ffaJjH32QZWBnSL3PB_n1CXoAJhFQRrfGvMy-jpVVBmnNUVe))
Are There Common Mistakes That Make a Wiring Repair Fail Again?
Yes, wiring repairs commonly fail again because of wrong wire gauge, weak crimps, poor solder control, missing heat-shrink sealing, bad routing, and leaving damaged copper or corrosion in place.
In short, most repeat failures are process failures. A splice made on partly corroded wire keeps corroding. A repair without strain relief breaks next to the joint. A connection repaired with the wrong terminal loses contact pressure. A harness reinstalled against a hot bracket or moving hinge rubs through again. A ground cleaned poorly keeps causing voltage drop. These are the mistakes that turn a one-time repair into a recurring electrical complaint.
Avoiding electrical fires and safety tips belong here too. Never bypass a fuse with oversized protection. Never leave exposed copper. Never route a repaired wire where it can contact exhaust or sharp metal. Never treat melted insulation as a cosmetic issue only. The goal is not simply to make the part work today. The goal is to restore safe current flow tomorrow, next month, and next winter.
According to NFPA reporting and manufacturer guidance, electrical failures remain part of the vehicle-fire risk profile, while heat-damaged or corroded harness sections can have damage that extends beyond the visible area. ([content.nfpa.org](https://content.nfpa.org/-/media/Project/Storefront/Catalog/Files/Research/NFPA-Research/US-Fire-Problem/osvehiclefires.pdf?rev=928a1755d83249dfb5a951905ee7e336&))
What Special Wiring Repair Situations Should DIY Car Owners Know About?
DIY car owners should know four special wiring repair situations: signal-wire sensitivity, hidden internal corrosion, emergency temporary repairs, and harsh-environment damage from heat, vibration, and moisture.
Besides the core repair process, these edge cases deepen your judgment and help you know when a standard splice is not enough.
How Is Sensor or Signal Wire Repair Different From Standard Power Wire Repair?
Sensor or signal wire repair is different because the circuit may be more sensitive to resistance, shielding, routing, and electrical noise than an ordinary power feed for a light or motor.
For example, a low-current sensor line or communication-related conductor may tolerate poor repair quality less than a basic lamp circuit. A splice that works on a simple accessory may distort a reference signal, create erratic readings, or compromise shielding performance. That is why some manufacturer guidance excludes shielded areas and specialized wiring from routine harness repair decisions. ([static.nhtsa.gov](https://static.nhtsa.gov/odi/tsbs/2020/MC-10172185-0001.pdf))
In practice, that means extra caution with twisted pairs, shielded runs, coaxial-style lines, and circuits linked to modules or safety systems. Matching conductor characteristics and preserving original routing matter more here than on a simple power wire. When in doubt, replacement or model-specific repair instructions are safer than experimentation.
According to Nissan service guidance, wiring harness repairs in shielded areas and certain specialized cable types are replacement-level or specialist-level cases rather than ordinary DIY repairs. ([static.nhtsa.gov](https://static.nhtsa.gov/odi/tsbs/2020/MC-10172185-0001.pdf))
What Should You Do If Corrosion Is Hidden Inside the Wiring Harness?
If corrosion is hidden inside the harness, you should open the loom, inspect farther than the visible damage, cut back to clean copper, and be ready to replace the section or the harness if the spread is uncertain.
Specifically, corrosion often travels inside the strands under the insulation, especially after water intrusion. A connector may show only a small amount of green residue at the edge while the conductor farther back has already darkened and lost integrity. That is why repairing corroded connectors and grounds must include inspection beyond the visible point of failure.
If clean bright copper does not appear after trimming back a reasonable distance, or if multiple nearby branches show similar contamination, localized repair may no longer be trustworthy. In those cases, replacement is the safer call.
According to Lexus service guidance, wire terminal corrosion is a replacement indicator partly because it can be difficult to locate all affected areas precisely and corrosion or rust may continue after a partial repair. ([static.nhtsa.gov](https://static.nhtsa.gov/odi/tsbs/2022/MC-10207962-9999.pdf))
Is an Emergency Wiring Repair Good Enough for Long-Term Use?
No, an emergency wiring repair is not good enough for long-term use because it usually restores temporary function without fully restoring sealing, strain relief, material match, and long-term reliability.
However, emergency repairs still have value when they get you off the road safely or help confirm a diagnosis. A temporary bypass, a basic insulated connector, or a protected roadside patch can get a non-critical circuit working again. The problem comes when that temporary patch stays in service for months. Moisture gets in, vibration works the joint loose, and the original problem returns in a harder-to-diagnose form.
A permanent repair should always follow. That means using correct-gauge wire, a durable joint, sealed protection, proper relooming, and a full retest. Temporary and permanent fixes are not synonyms. They serve different purposes.
According to manufacturer repair logic in service bulletins, repair quality depends on matched parts and procedure, which is why improvised fixes should be treated as diagnostic or emergency measures rather than final repairs. ([static.nhtsa.gov](https://static.nhtsa.gov/odi/tsbs/2022/MC-10207962-9999.pdf))
How Do Heat, Vibration, and Moisture Affect Wiring Repair Durability?
Heat hardens insulation, vibration fatigues conductors and joints, and moisture drives corrosion, so these three factors largely determine whether a wiring repair lasts or fails.
More specifically, engine-bay heat can embrittle insulation and reduce flexibility. Vibration can break wires next to a stiff splice or a poorly supported joint. Moisture enters through unsealed connectors, damaged loom, or incomplete heat shrink and then corrodes strands and terminals from inside out. That is why preventing wiring damage after the repair depends on routing, support, sealing, and material choice as much as on the joint itself.
A durable repair keeps the wire away from heat sources, uses abrasion protection where the harness touches structure, leaves enough slack for movement, and seals against water ingress. If those protections are missing, even a good electrical joint may not survive real driving conditions.
According to Lexus manufacturer guidance, excessive heat can impair the flexibility and electrical conductivity of a wire harness assembly, while corrosion may continue if damage extends beyond the visibly repaired section. ([static.nhtsa.gov](https://static.nhtsa.gov/odi/tsbs/2022/MC-10207962-9999.pdf))
A practical takeaway from all of these special cases is that the repair method must match the environment, not just the symptom. A wire repaired inside a dry cabin panel does not face the same stress as one routed across an engine, through a door jamb, or beneath the vehicle. That is why the best DIY auto electrical repair work combines diagnosis, material choice, and routing discipline rather than focusing on the splice alone.
For DIY car owners, the smartest workflow is consistent every time. First, confirm the symptom and isolate the circuit. Second, inspect the harness, connector, and ground path so you know whether the failure is an open, a short, corrosion, or a movement-related break. Third, choose the repair method based on the damage pattern, circuit type, and environment. Fourth, seal and support the repair so vibration, heat, and moisture do not undo the work. Finally, retest under the same conditions that originally caused the fault. That process is what separates a temporary fix from a durable solution.
This also brings the article back to the core wiring repair vs harness replacement decisions. If the damage is small, visible, and clearly limited, repair is often the most efficient path. If the damage is melted, corroded deep into the harness, spread across multiple branches, or located in a safety-critical or specialized circuit, replacement is the safer answer. Manufacturer bulletins repeatedly reinforce that boundary because the hidden extent of damage can matter more than the visible break. ([static.nhtsa.gov](https://static.nhtsa.gov/odi/tsbs/2022/MC-10207962-9999.pdf)) ([static.nhtsa.gov](https://static.nhtsa.gov/odi/tsbs/2020/MC-10172185-0001.pdf))
A realistic wiring repair cost estimate should follow the same logic. Localized repairs usually cost less because they need fewer parts and less disassembly. Full harness replacement costs more in labor and parts, but it can still be the better value when repeated patch repairs would leave you with ongoing intermittent faults, hidden corrosion, or reduced confidence in the vehicle. Cheap repairs are not always economical if they fail twice. Reliable repairs usually cost less over time than repeated troubleshooting.
The same principle applies to repairing corroded connectors and grounds. Many owners focus on the broken wire and miss the return path. A bad ground can mimic a bad power feed, create erratic module behavior, dim lights, false sensor readings, or intermittent no-start complaints. Cleaning to bare sound metal, restoring terminal fit, protecting the area from future moisture, and checking voltage drop after the repair often solve issues that a wire splice alone cannot fix. According to Fluke’s automotive troubleshooting guidance, voltage drop testing is one of the most practical methods for identifying restrictions in a circuit, including those caused by poor connections. ([fluke.com](https://www.fluke.com/en-us/learn/blog/automotive/electrical-automotive-troubleshooting?srsltid=AfmBOop5ffaJjH32QZWBnSL3PB_n1CXoAJhFQRrfGvMy-jpVVBmnNUVe))
If you step back, most common automotive wiring problems and symptoms follow a pattern. Complete failure often points toward an open circuit, no power, or no ground. Repeated fuse failure points toward a short or an overloaded path. Intermittent faults usually suggest movement, heat, moisture, weak terminals, or a partially broken conductor. Strange cross-circuit behavior can indicate shared-ground problems or damaged harness routing. Once you learn those patterns, diagnosing shorts and open circuits basics becomes much easier because the symptom starts to guide the test sequence instead of sending you into random part replacement.
Preventing wiring damage should also become part of every completed repair. The best prevention habits are simple: keep harnesses clipped in their original positions, protect wires from sharp edges, avoid unsupported hanging sections, keep repairs away from direct exhaust heat, reseal weather-exposed areas, and never leave a repair under tension. Prevention matters because the cause of the original failure often remains present unless you correct the route, support, or environmental exposure that damaged the wire in the first place.
Avoiding electrical fires and safety tips deserve one final emphasis. Never install an oversized fuse to “solve” a blowing-fuse problem. Never bypass a circuit with household wire or unprotected jumpers. Never ignore heat-discolored terminals, melted insulation, or burning smells. Those are warning signs, not cosmetic flaws. NFPA vehicle-fire research shows that electrical or mechanical failures continue to contribute to real fire events, especially in older vehicles, which is why safe repair quality matters beyond convenience. ([content.nfpa.org](https://content.nfpa.org/-/media/Project/Storefront/Catalog/Files/Research/NFPA-Research/US-Fire-Problem/osvehiclefires.pdf?rev=928a1755d83249dfb5a951905ee7e336&))
In the end, repairing damaged wiring harnesses and wires is less about clever shortcuts and more about disciplined decisions. Diagnose first. Repair only sound material. Use the correct gauge and connection method. Seal the joint. Support the harness. Retest the circuit. Replace the harness when the damage goes beyond what a localized repair can restore confidently. That is the practical standard DIY car owners can follow to make wiring repair safer, more reliable, and more cost-effective.
According to NFPA Research and manufacturer service guidance published through NHTSA, electrical failure remains a real safety concern in aging vehicles, while melted, corroded, flood-damaged, or safety-system-related harnesses often justify replacement instead of partial repair. ([content.nfpa.org](https://content.nfpa.org/-/media/Project/Storefront/Catalog/Files/Research/NFPA-Research/US-Fire-Problem/osvehiclefires.pdf?rev=928a1755d83249dfb5a951905ee7e336&)) ([static.nhtsa.gov](https://static.nhtsa.gov/odi/tsbs/2020/MC-10172185-0001.pdf)) ([static.nhtsa.gov](https://static.nhtsa.gov/odi/tsbs/2022/MC-10207962-9999.pdf))
Here are three practical scenarios that show how the decision process works in real life.
A power window that stops working only when the door is half open often points to a broken conductor inside the door-jamb harness. In that case, the best repair is usually a localized wire-section replacement, not just wrapping the visible area with tape. The repeated flexing at the hinge point means the wire often breaks internally near the rubber boot, so the repair needs enough fresh wire length and enough slack to move with the door.
A headlight or taillight circuit that works intermittently during rain often points toward connector corrosion or a weak ground rather than a clean wire break. In that case, repairing corroded connectors and grounds may solve the problem more effectively than replacing the lamp or splicing a nearby wire. The real fix is to clean or replace the terminal, restore metal-to-metal ground contact, and reseal the area against future moisture.
A fuse that blows immediately after replacement usually suggests a short to ground or damaged insulation contacting metal. That kind of problem should not be handled by guessing. The smarter approach is diagnosing shorts and open circuits basics step by step: isolate the branch, inspect likely rub points, test continuity to ground with power disconnected, and only repair the damaged section after the fault location is confirmed.
The same logic helps with intermittent electrical issues troubleshooting. If a symptom appears only over bumps, during steering input, while the engine rocks, or when a hatch opens, the harness movement itself becomes a clue. A stable failure often points to a permanent open or complete power loss. A moving failure often points to fatigue, terminal looseness, or harness chafing. That distinction saves time because it tells you whether to focus on static voltage checks or movement-based inspection.
For DIY car owners who want a simple repair standard, this checklist works well:
- Confirm the exact symptom before touching the harness
- Disconnect power when the circuit and vehicle design require it
- Expose enough of the harness to inspect beyond the visible damage
- Cut back to clean, sound copper
- Match wire gauge and insulation quality
- Choose a durable connection method
- Seal the repair against moisture
- Support and reroute the harness to prevent repeat damage
- Retest under real operating conditions
- Reevaluate for harness replacement if damage is broader than expected
That checklist also helps with wiring repair cost estimate thinking. Small repairs stay affordable when diagnosis is accurate and access is simple. Costs rise when trim removal, connector replacement, hidden corrosion, or repeated testing become necessary. Full harness replacement is more expensive up front, but it can still be the better decision when several localized repairs would leave the vehicle unreliable.
One more point matters for long-term reliability: the cause of the wiring failure should always be corrected, not just the damaged wire itself. If a harness rubbed through because a retaining clip broke, replace or secure the clip. If moisture entered through a cracked seal, fix the seal. If heat damaged the insulation, address the routing or nearby heat source. If corrosion formed at a ground point, protect that area after cleaning. Preventing wiring damage is what turns a repair into a lasting repair.
Taken together, the article’s central answer stays consistent. Wiring repair is a practical DIY job when the damage is limited, the diagnosis is clear, and the repair method restores both conductivity and protection. Harness replacement becomes the right answer when the damage is widespread, hidden, safety-critical, or no longer trustworthy. That is the clearest way to make sound wiring repair vs harness replacement decisions without wasting time or risking future failures.
To sum up, good auto electrical repair follows a disciplined sequence: diagnose the fault, identify whether it is the wire, connector, ground, or harness, repair only with sound materials and proper methods, protect the finished work from heat, vibration, and moisture, and confirm the result with testing. That approach addresses the real search intent behind wiring repair: not just how to reconnect a wire, but how to fix the problem safely, correctly, and with confidence.