Scan tool codes for brake system warnings are the fastest way to turn a scary dashboard light into a specific, testable fault. When you read the right module and interpret the DTC correctly, you can separate “stop now” hydraulic risks from “drive carefully” sensor or communication issues.
Beyond the code itself, the next goal is accuracy: choosing the correct scan mode, capturing freeze-frame and live data, and confirming whether a fault is current, intermittent, or history. That’s how you avoid replacing good parts and chasing symptoms.
Many brake-related warnings are not stored where a basic engine code reader looks. So you also need to understand where ABS/ESC, electronic brake distribution, and electric parking brake controllers keep their information, plus what “C-codes,” “U-codes,” and manufacturer-specific subcodes actually imply.
To introduce a new idea, the most reliable workflow is a loop: retrieve codes → validate with data → inspect and test → repair → verify on a controlled drive. Below is a practical, module-aware guide you can use whether you’re a DIY owner or coordinating a professional diagnosis.
What do scan tool codes mean when brake system warnings appear?
They are diagnostic trouble codes that point to a monitored brake-system condition—such as a sensor signal, hydraulic unit response, or network message—so you can test the cause instead of guessing from the warning light alone.
To start, think of a brake warning as the car’s “headline,” while the code is the “full article.” A red brake lamp may indicate fluid level, pressure imbalance, or a critical fault; an ABS/ESC lamp may indicate wheel-speed plausibility, pump/valve control, or module communication. The code adds the missing details: which circuit, what type of failure (open/short/implausible), and whether it occurred once or repeatedly.
After that, interpret the code format:
- C-codes (chassis) often relate to ABS/ESC sensors, pump motors, valves, steering angle, yaw/lateral sensors, or brake switch plausibility.
- U-codes usually point to communication/network problems—missing messages, bus-off events, or modules that didn’t wake up.
- B-codes can appear for body-related brake inputs such as switches, indicators, or EPB controls depending on architecture.
- P-codes may appear when powertrain logic detects a brake input mismatch (e.g., brake switch vs pedal position) or torque management events tied to stability control.
To be clear, a code is not a “replace this part” command. It is a direction: a code naming a wheel-speed sensor can still be caused by a cracked tone ring, metal debris, bearing play, corroded connector pins, or a wiring rub-through. In other words, the code identifies the system’s complaint, while your job is to prove the reason.
To connect this to real outcomes, match the warning color and behavior with the code status. A steady light with a stored “history” code often indicates an intermittent event; a flashing or immediate-return code indicates a current fault that the module can reproduce.
According to research by SAE International from its Vehicle Electrical Systems community, in 06/2019, diagnostic strategies that combine DTCs with data validation reduce misdiagnosis by highlighting whether a fault is electrical, mechanical, or communication-related.

Which modules store brake-related codes, and why do basic readers miss them?
Most brake warnings are logged in the ABS/ESC control module (and sometimes EPB or body modules), so a basic engine-only reader can show “no codes” even while the brake system has multiple active faults.
Next, map the vehicle’s braking architecture. Modern cars distribute responsibility across multiple controllers: the ABS/ESC module controls wheel slip and stability functions; a body or gateway module manages lamps and inputs; an EPB module manages parking brake actuation; and the powertrain may log brake input plausibility for torque reduction or cruise cancellation. If you scan only the engine ECU, you may never see the “C” or manufacturer codes that triggered the ABS light.
To make this practical, here’s where to look most often:
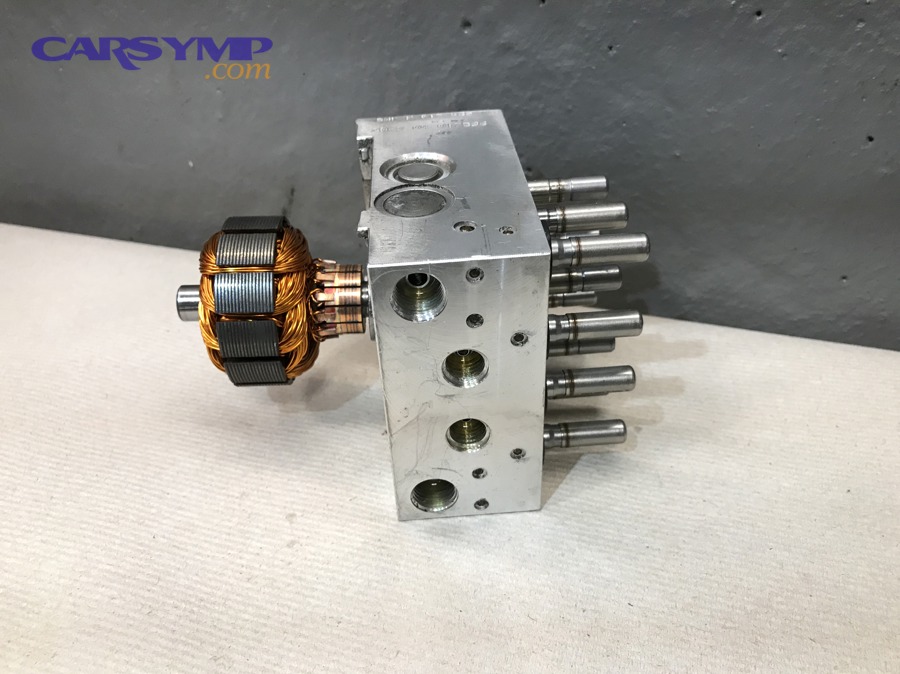
- ABS/ESC module: wheel speed sensors, hydraulic pump motor, solenoid valves, pressure sensors, yaw/accel/steering sensors, internal module faults.
- EPB module (if separate): actuator motors, switch inputs, current draw, calibration, service mode errors.
- Body control module: brake lamp switch, lamp circuits, cluster communication, parking brake switch input (architecture-dependent).
- Gateway module: network routing and missing-message errors that show up as U-codes in multiple modules.
- Powertrain ECU: brake switch plausibility, pedal position correlation, stability/traction requests.
After that, choose a tool that can access chassis systems. Many consumer tools advertise “ABS capable,” but coverage can still vary by make, model year, and region. The difference isn’t just reading codes: you often need live data (wheel speeds), actuator tests (pump/valves), and calibrations (steering angle, yaw) to finish the job.
According to research by ISO from its Road Vehicles Diagnostics standards work, in 11/2018, modular diagnostics require tool support beyond generic powertrain queries to reliably retrieve chassis and network fault information.

How do you pull brake-system codes correctly without creating false leads?
Use a repeatable scan routine—stable battery voltage, full-system scan, saved freeze-frame, and a second read after a key cycle—so you don’t chase low-voltage ghosts or stale history codes.
To begin, prepare the car like you would for an electrical test. Low battery voltage can trigger a cascade of “communication” and “implausible signal” codes across modules. If voltage is marginal, connect a maintainer or charger before scanning; otherwise, you may misread the entire situation.
Next, follow this step-by-step method:
- Record the complaint: which lamps are on (red brake, ABS, ESC, EPB), and under what conditions they appear (start-up, first stop, after rain, at highway speed).
- Run a complete module scan: not just engine—include ABS/ESC, EPB, BCM, gateway, and cluster if supported.
- Save freeze-frame or event data: vehicle speed, wheel speeds, brake pressure, steering angle, voltage, and timestamp if provided.
- Check code status: active/current vs stored/history vs pending. Prioritize current faults first.
- Key-cycle and rescan: some faults clear with a sleep/wake cycle; others return immediately, which is valuable evidence.
- Pull live data: confirm plausibility (e.g., all wheel speeds agree on a straight road).
To connect scanning with real diagnosis, treat codes as hypotheses. If you have a left-front wheel speed sensor code, you still verify: connector condition, sensor gap, tone ring integrity, harness routing, and whether the bearing has play that changes the sensor air gap at speed. The same logic applies to pump motor or valve codes: confirm power, ground, and commanded activity before condemning the hydraulic unit.
According to research by NHTSA from its Vehicle Safety Research programs, in 08/2020, maintaining stable system voltage during diagnostics reduces spurious fault detection in safety-related electronic control systems.

What are the main code families for ABS/ESC warnings, and how should you group them?
There are five main groups of brake-warning DTCs: sensor signal, hydraulic actuation, calibration/plausibility, power/ground, and communication—and grouping them quickly narrows the most likely causes.
Next, use the code’s “failure type” wording to place it into a bucket. “Open circuit,” “short to ground,” and “voltage high/low” usually mean wiring, connectors, or power supply. “Implausible signal” often points to mechanical issues (tone ring damage, bearing play) or sensor contamination. “Internal module failure” can be real, but you verify voltage and grounds first because low voltage can mimic internal errors.
Before the table, this table contains code groupings and the tests they suggest, so you can turn a scan report into a short diagnostic plan.
| Code Group | Common Clues | Most Useful Confirmation Test | Typical Root Causes |
|---|---|---|---|
| Wheel speed / tone ring | ABS/ESC lights, intermittent at speed, traction events | Compare live wheel speeds on a straight drive | Sensor gap, rusted tone ring, debris, wiring damage, bearing play |
| Hydraulic pump / valve control | ABS disabledegraded, pump runs abnormally, code returns immediately | Bidirectional pump/valve actuation test (if supported) | Pump motor wear, relay issues, wiring, internal HCU faults |
| Brake pressure / switch plausibility | Brake lamp inconsistencies, stability faults, cruise cancel issues | Monitor brake switch, pedal input, pressure sensor data | Switch misadjustment, pressure sensor drift, connector corrosion |
| Calibration (steering angle/yaw) | ESC light after alignment, battery disconnect, module swap | Run calibration routine and verify zero offsets | Uncalibrated sensor, incorrect ride height, scan tool procedure missed |
| Communication / network (U-codes) | Multiple modules report missing messages | Check battery, grounds, CAN integrity, gateway logs | Low voltage, water intrusion, wiring faults, module not waking |
After that, prioritize by risk. If you see codes suggesting hydraulic pressure loss or critical actuation failure, you treat it as a safety condition. If you see a single intermittent wheel-speed plausibility code, you can often drive carefully to verify with data—while still planning repairs soon.
According to research by University of Michigan Transportation Research Institute from its Vehicle Safety Systems work, in 03/2021, grouping faults by sensor versus actuator versus communication reduces time-to-repair by guiding technicians toward the highest-yield tests first.
Can you drive with brake system warnings after reading the codes?
Sometimes yes, often no: you can drive short distances only if the codes indicate a non-hydraulic stability/ABS issue and the pedal feels normal, but you should stop immediately if codes suggest pressure loss, severe fluid issues, or braking performance changes.
To begin, do a quick safety triage before any extended testing:
- Stop now if: brake pedal sinks, braking effort suddenly increases, grinding occurs, brake fluid is low and dropping, or a red brake warning is paired with hydraulic/pressure codes.
- Drive carefully to verify if: only ABS/ESC lamps are on, braking feels normal, and codes point to wheel-speed plausibility or a calibration issue (you still lose anti-lock and stability assistance).
- Be cautious in wet/ice: with ABS/ESC disabled, stopping distances and stability can worsen, especially on low-traction surfaces.
Next, use scan data to confirm what the car believes. If wheel-speed data drops out on one wheel above a certain speed, you can often reproduce the warning safely on a quiet road to confirm the pattern—then return for inspection. However, if the code indicates a pump motor electrical fault or a pressure sensor plausibility failure that ties to braking assist, you don’t gamble. Warnings exist because the control module has detected a safety-relevant condition.
To connect this with real-world decisions, remember: “Driveable” does not mean “safe.” ABS and ESC are safety layers; losing them may be acceptable briefly for diagnosis, but not for long-term driving—especially if you commute in traffic, mountains, or heavy rain.
According to research by IIHS from its Vehicle Crash Avoidance research, in 10/2017, stability control and anti-lock braking reduce loss-of-control crash risk, making prompt repair important when related warning lights indicate system disablement.

What repairs usually match common brake-warning code patterns?
Most brake-warning code fixes fall into three buckets: sensor/circuit repairs, hydraulic unit power/actuation repairs, and calibration/network repairs—so you can estimate effort by matching code wording to the most likely bucket.
Next, translate patterns into inspection priorities. For example, a repeated wheel-speed “signal implausible” code that appears only after rain strongly suggests connector moisture, cracked insulation, or sensor contamination. A pump motor electrical code that returns immediately suggests power supply, relay/fuse issues, or an internal motor problem. A steering angle/yaw calibration code after battery replacement suggests a missed calibration routine rather than a broken part.
Before the table, this table contains typical repairs linked to code patterns and what the work usually involves, so you can plan the next step.
| Code Pattern | What It Often Means | Typical Repair Actions | What to Verify After |
|---|---|---|---|
| Wheel speed sensor circuit/open | Electrical discontinuity | Inspect connector pins, repair harness, replace sensor if failed | Stable live wheel speed across all wheels |
| Wheel speed implausible / erratic | Signal mismatch under load | Check tone ring, rust/debris, bearing play, sensor gap | No dropout during road test |
| Pump motor / relay electrical | Actuator can’t run reliably | Test fuses/relay, power/ground, run actuator test, repair wiring | Pump activates in test; no immediate return code |
| Valve solenoid performance | Hydraulic modulation issue | Wiring tests, module output test, HCU service if applicable | Consistent ABS operation on a controlled stop |
| Steering angle/yaw not initialized | Calibration missing or zero offset wrong | Perform calibration routine, verify alignment/ride height | Offsets near zero; ESC light stays off |
| Multiple U-codes across modules | Network/voltage instability | Battery/charging test, inspect grounds, CAN wiring checks | Stable voltage; missing-message codes do not return |
After that, incorporate smart verification steps. If you replace a wheel speed sensor, don’t just clear codes—verify the sensor’s waveform or live value while spinning the wheel. If you repair a ground, rescan all modules because network faults often “shadow” the true root cause. And if you replace a module, expect coding and calibrations; many vehicles require scan-tool setup before the system will fully enable.
According to research by SAE International from its Brake Systems technical community, in 02/2020, pattern-based fault isolation (matching DTC families to test plans) reduces unnecessary part replacement in ABS/ESC troubleshooting.
How much does diagnosis and repair usually cost when codes point to brake warnings?
Costs vary, but most brake-warning fixes range from low-cost wiring/sensor service to high-cost hydraulic unit or module work, and the scan report helps you estimate where your case likely falls.
Next, separate diagnosis cost from repair cost. A thorough chassis scan plus live-data road test is different from a quick “code pull.” The more the technician confirms with data and inspection, the more likely the repair will be correct the first time—especially for intermittent faults.
Before the table, this table contains typical cost ranges and what they usually include, so you can compare quotes and understand why estimates differ.
| Item | Typical What’s Included | Common Range (USD) | Big Variables |
|---|---|---|---|
| Chassis scan + live data check | Full module scan, code status, short road test | $80–$180 | Labor rate, tool capability, time to reproduce |
| Wheel speed sensor repair | Sensor, labor, connector cleaning (varies) | $150–$450 | Seized fasteners, hub design, wiring damage |
| Tone ring/bearing related repair | Hub/bearing assembly and labor (common on many cars) | $250–$800 | Front vs rear, press-in vs bolt-on, alignment needs |
| ABS pump/relay electrical repair | Electrical testing, relay/fuse, wiring repair | $120–$400 | Accessibility, corrosion, harness length |
| Hydraulic control unit or ABS module | Part replacement, bleeding procedures, coding | $600–$2,500+ | OEM vs reman, programming, labor hours |
| Calibration procedures | Steering angle/yaw calibration, setup checks | $80–$250 | Tool subscription, procedure complexity |
After that, use the code type to set expectations. A single wheel-speed circuit code typically stays in the lower ranges unless rust or bearing work complicates it. A module internal fault or hydraulic unit performance code can push costs higher because parts are expensive and setup/bleeding can be time-intensive. Communication codes can be cheap if it’s a weak battery, or costly if water intrusion has damaged wiring.
According to research by AAA from its Automotive Repair guidance, in 04/2022, clear diagnostic documentation (codes + tests performed) helps consumers compare estimates and reduces repeat repair visits for intermittent electronic faults.
How do you verify the fix after repairs when brake-related codes were present?
Verify by clearing codes only after the repair, then confirming live data, performing a controlled road test, and ensuring no immediate-return faults—because a cleared memory without validation can hide an unresolved root cause.
Next, treat verification as a checklist. First, rescan all modules and confirm only expected history codes remain. Then check live wheel speeds, brake switch state, and system voltage. After that, run any calibrations required by the repair (steering angle, yaw, EPB initialization). Finally, perform a safe road test that reproduces the original condition (speed threshold, bumps, wet road, repeated stops).
To connect this step to broader troubleshooting, this is where many people accidentally create confusion: clearing codes too early removes context like freeze-frame data and can make an intermittent fault harder to pinpoint. Save the report first, fix the underlying issue, then clear and confirm.
When you’re working through a broader warning scenario, you may also be correlating this process with related procedures and articles such as brake warning light diagnosis, Brake pad wear sensor warning diagnosis, and How to reset brake warning light after repair—but the key principle remains the same: verification must be data-backed, not just “the light is off today.”
If your scan tool supports it, use bidirectional tests and special functions. For ABS, you may command the pump and valves, then confirm the module sees the expected current draw and response. For brake fluid service, you may need an automated bleeding routine on some systems to fully purge air from the HCU.
According to research by SAE International from its Diagnostics and Service Procedures discussions, in 09/2021, post-repair verification using live data and functional tests significantly reduces comebacks in brake-control electronics.
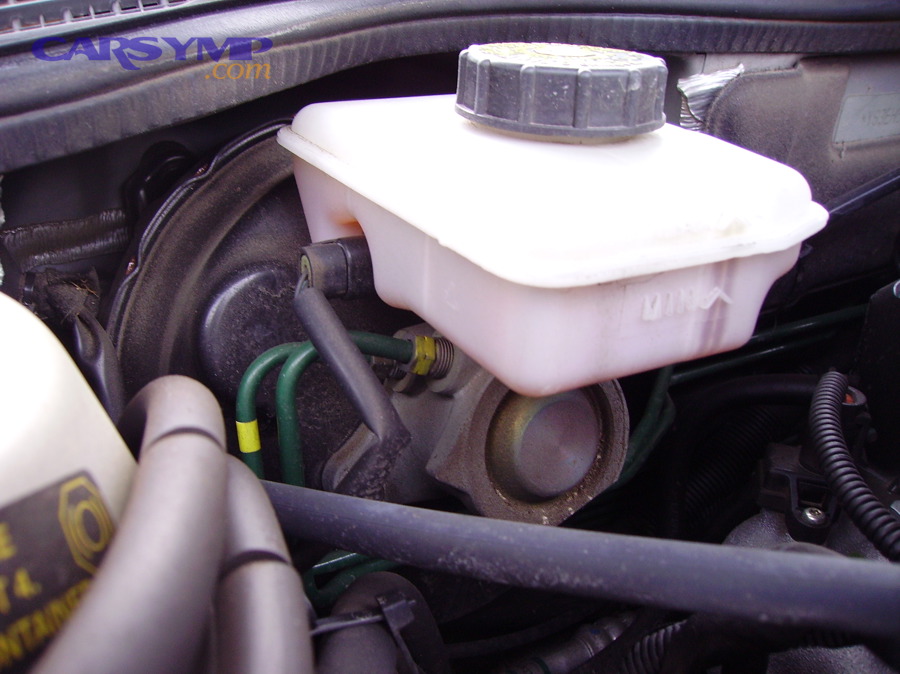
To make verification easier, this video shows a practical approach to pulling ABS-related codes and using live data to confirm wheel speed signals.
Advanced diagnostics beyond code reading for stubborn brake warnings
When codes don’t fully explain the warning, you need advanced diagnostics—bidirectional tests, calibrations, and network integrity checks—because the fault may be intermittent, mechanical, or message-related rather than a simple sensor failure.
How do bidirectional tests change brake-system troubleshooting?
They let you command the system—pump motor, solenoids, EPB actuators—so you can confirm whether the module can execute outputs under control. Next, compare commanded states to measured feedback (current draw, pressure response, wheel speed change) to separate wiring faults from internal actuator faults.
When should you run steering angle and yaw calibrations?
Run them after alignments, battery disconnects, module replacements, or when codes indicate “not initialized” or “implausible.” After that, confirm the vehicle is on level ground and follow the scan tool’s exact steps, because small setup errors can keep ESC disabled.
How do you handle network-related brake warnings with U-codes?
Start with battery and grounds, then inspect connectors for water intrusion, especially near wheel wells and under carpets. Next, look for patterns: if multiple modules complain about the same missing message, the sender module or the bus segment becomes the focus.
What live-data signals are most useful for intermittent ABS warnings?
Wheel speeds, brake switch state, steering angle, yaw rate, lateral acceleration, and system voltage are the highest-yield channels. After that, log data during the exact condition that triggers the light—speed threshold, bumps, turns, or wet roads—then correlate dropouts to the stored event.
According to research by IEEE from its Automotive Electronics publications, in 05/2020, data logging during transient events improves fault isolation for intermittent sensor and network issues in vehicle safety systems.
FAQ
Do generic OBD-II apps show ABS codes for brake warnings?
Usually not. Generic apps often read only powertrain emissions-related data, while ABS/ESC codes live in chassis modules. Next, choose an app or tool explicitly supporting ABS/ESC for your exact vehicle, then confirm it can read live wheel speeds.
Why did a brake warning return right after clearing codes?
Because the fault is still present or self-tests detect it immediately. After that, treat an instant return as a clue: it often indicates a hard electrical fault (open/short), a missing calibration, or a module communication issue rather than a one-time glitch.
Is it safe to clear brake-related codes before repairs?
It’s not recommended because you can erase freeze-frame context and hide intermittent patterns. Next, save a scan report first, document conditions, and clear only after the repair so the verification step is meaningful.
What’s the fastest way to identify a bad wheel speed sensor from scan data?
Compare all four wheel speeds during a straight, steady drive; the failing channel often drops out, spikes, or reads zero. After that, confirm by inspecting the sensor, tone ring, connector, and wiring at that wheel.