


No, you generally should not keep driving when the brake warning light is on—because the safest assumption is that your car may not stop normally, and a “short drive” can turn a minor issue into a dangerous failure.
Next, the real question becomes: is this a simple condition (like the parking brake still engaged) or a true hydraulic problem (like low fluid from a leak) that can escalate within minutes.
After that, you need a quick way to sort the most common triggers using what you can feel and see—pedal behavior, fluid level, obvious leaks, and whether the light changes with the parking brake.
Giới thiệu ý mới: Below is a practical, safety-first path to decide whether you should pull over immediately, limp to a nearby shop, or stop and arrange a tow.
Can you drive with the brake warning light on at all?
Usually no: you should treat the brake warning light as an urgent “stop safely and check” signal because it can indicate reduced braking, fluid loss, or a fault that compromises your ability to stop.
To start, think of the light as a risk multiplier—if anything else feels off, you don’t negotiate with it; you stop and verify basics before moving again.

Here’s why this matters:
- Brakes can fail progressively: A small leak can become a big leak when pressure and heat rise.
- Stopping distance can increase suddenly: A sinking pedal or air in the lines can appear “fine” once, then worsen on the next stop.
- Warning logic is conservative but not perfect: Some cars light the indicator for fluid level, parking brake state, or pressure imbalance—each has different urgency.
If the light is red, treat it as critical. If it is amber (some cars), it may still be serious, but you must rely on symptoms and checks, not color alone.
What does the brake warning light usually mean?
It typically means the system detected a condition that could reduce braking—most commonly the parking brake is applied, brake fluid is low, or there is a hydraulic pressure/imbalance issue.
Next, it helps to map “light on” to “what the car is monitoring,” so you can pick the right first checks instead of guessing.

Common meanings, from least to most urgent (in many vehicles):
- Parking brake engaged or switch stuck (light may change as you move the lever/pedal).
- Low brake fluid level (often due to worn pads, a small leak, or recent service issues).
- Hydraulic fault or pressure imbalance (can accompany a soft pedal, pulling, or poor stopping).
- System-level warning strategy (some designs also light it when another brake-related module reports a fault).
When people say “the brake light,” they may mean multiple icons; your decision should depend on which warning is lit, how the pedal feels, and whether the car stops normally.
How can you tell “parking brake” vs “real brake problem” quickly?
You can often separate them by checking whether the light responds to parking brake movement and whether the pedal and stopping feel normal—if anything feels abnormal, assume it’s a real brake problem.
To begin, treat this like a fast sorting test: one branch is “switch/state,” the other is “hydraulics/pressure.”
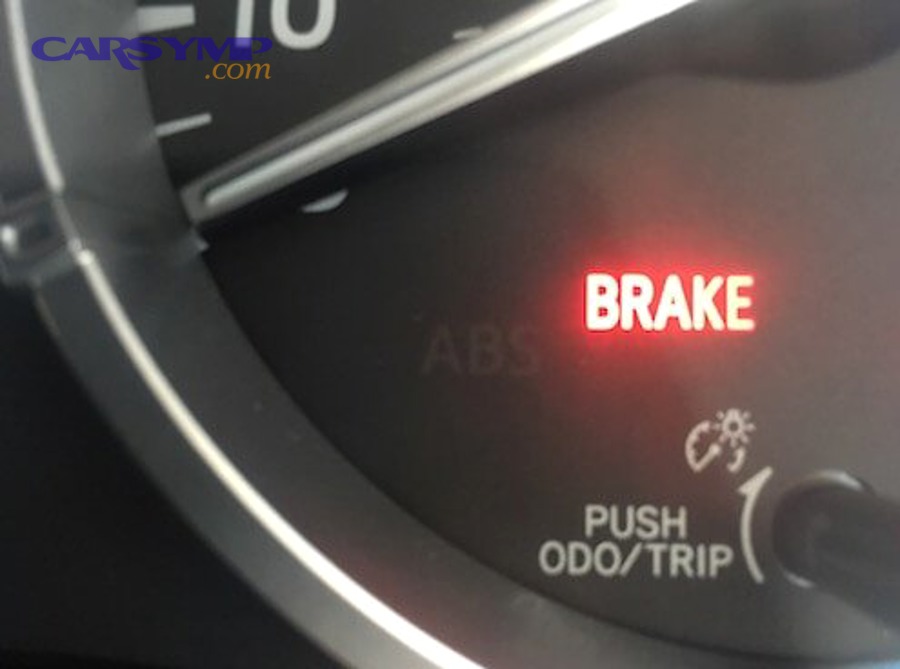
Use these quick signals:
- Parking brake clue: The light changes when you slightly lift/release the lever or pedal, and braking feels normal.
- Hydraulic clue: The pedal is soft, sinks, requires pumping, feels spongy, or the car takes longer to stop.
- Imbalance clue: The car pulls to one side, or one wheel seems to be doing less work.
- Leak clue: You smell hot brake fluid, see wetness near wheels, or find fresh fluid under the car.
If you cannot clearly prove it’s only a parking-brake-state issue, act as if it’s hydraulic—because the cost of being wrong is extremely high.
What should you do immediately when the light comes on while driving?
You should slow down smoothly, increase following distance, avoid hard braking, and pull over to a safe spot to assess the pedal feel and basic brake function before deciding to continue.
Next, you’re trying to reduce demand on the system while you gather evidence—panic stops and repeated hard braking are the enemy when a brake warning appears.

- Signal and stabilize: Turn on hazards if needed; move to the right lane or shoulder safely.
- Test gently at low speed: With space ahead, apply light brake pressure. Note if the pedal is firm and consistent.
- Check the parking brake: Ensure it’s fully released; gently re-set and release once to see if the light changes.
- Stop and inspect: Look for obvious leaks near each wheel and under the engine bay area.
If the pedal is soft, sinks, or you need to pump to get braking, you should not continue driving—arrange a tow.
Is it ever safe to “limp” to a shop instead of towing?
Only sometimes: it may be reasonable to drive a very short distance at low speed if brakes feel completely normal, fluid level is safe, there are no leaks, and the light is clearly tied to a non-hydraulic trigger.
However, the decision depends on what you can verify—so the next step is to apply strict “go/no-go” rules rather than hope.

Green-light conditions (still cautious):
- Pedal is firm and consistent; stopping power feels normal.
- No grinding, pulling, burning smell, or abnormal noises.
- Brake fluid level is between MIN and MAX (or at least not below MIN).
- The warning clearly changes with the parking brake, or you just completed service and suspect a sensor/switch.
Red-light conditions (tow, don’t drive):
- Pedal sinks, feels spongy, or requires pumping.
- Fluid is below MIN, or you see wetness/leaks at a wheel or under the car.
- Car pulls, stops unevenly, or the steering wheel shakes under braking.
- Brake performance worsens with each stop (heat-related decline).
Even if you choose to drive to a shop, keep speeds low, avoid highways, and plan a route with minimal stops.
How do you check brake fluid level correctly in the driveway?
You check the brake fluid reservoir on a level surface with the engine off, compare the level to the MIN/MAX marks, and look for signs of contamination or sudden level drop.
To start, the goal is not just “is there fluid,” but “is the level plausibly stable and clean enough to trust until inspection.”

Do it step-by-step:
- Find the reservoir: Usually on the driver-side firewall area, above the master cylinder.
- Read the marks: If below MIN, do not drive; find the cause first.
- Check the cap area: Wetness around the cap can indicate overfill, spillage, or a sealing issue.
- Look at fluid color: Very dark fluid can indicate age/contamination (not an immediate “no-go” alone, but a service flag).
Important: Low fluid is often linked to pad wear, but it can also be a leak. If the level dropped quickly, treat it as a leak until proven otherwise.
What pedal feel tells you it’s dangerous to continue?
If the brake pedal feels spongy, sinks toward the floor, changes from one press to the next, or requires pumping to build pressure, it’s dangerous to continue because hydraulic integrity may be compromised.
Next, connect the sensation to what might be happening inside the system—air, fluid loss, or seal bypass—so you take the right action fast.

- Spongy pedal: Often air in lines or boiling fluid; braking may fade with heat.
- Sinking pedal: Possible internal leak (seal bypass) or external leak; pressure isn’t holding.
- Pumping helps briefly: Suggests air or a leak; it may buy one stop, then fail again.
- Hard pedal with poor stopping: Can indicate booster issues or friction problems; still unsafe to “just drive.”
In any of these cases, a tow is the correct move. Your car can’t negotiate physics: if pressure or friction is unreliable, braking is unreliable.
Where should you look for leaks and what do they look like?
You should look near each wheel, along the inside of tires, under the master cylinder area, and under the car for fresh, oily fluid—brake fluid often looks clear-to-amber and feels slick.
To begin, understand that leaks can be small and still dangerous, because braking uses pressure and repeated stops can empty a reservoir quickly.

Leak hotspots:
- Calipers/wheel cylinders: Wetness around the caliper piston area or behind the wheel (drum brakes).
- Brake hoses: Cracks, bulges, or wet sections near fittings.
- Master cylinder/reservoir: Dampness where the master cylinder meets the booster or lines.
- Hard lines: Rusted metal lines can seep or burst under pressure, especially in salt climates.
If you find wetness that looks like brake fluid, do not drive. Even if the pedal feels “okay” now, one hard stop can change that instantly.
What problems most commonly trigger the warning—and why they matter?
The most common triggers are parking brake switch issues, low fluid from pad wear or leaks, and hydraulic pressure faults—each matters because it changes either system state monitoring or actual stopping ability.
Next, it’s useful to group causes by the part of the system they belong to, so you can predict symptoms and urgency.

- State/switch causes: Parking brake switch misread, connector corrosion, intermittent wiring.
- Wear-related causes: As pads wear, caliper pistons extend and fluid level can drop; the light may appear before you notice reduced pad thickness.
- Leak causes: Caliper seals, wheel cylinders, hoses, rusted lines—these are the highest-risk category.
- Hydraulic integrity causes: Internal bypass in the master cylinder, pressure imbalance, or valve issues in the hydraulic unit.
In a proper brake warning light diagnosis, a technician won’t just clear a light; they’ll confirm fluid stability, pedal feel under load, and whether any pressure imbalance exists.
How is this different from an ABS warning, and why does that change your decision?
A brake warning light can indicate reduced base braking, while an ABS warning usually indicates loss of anti-lock function—but the difference matters because base braking problems can make stopping unreliable, whereas ABS loss may still allow normal stops in many cases.
However, the key is that many cars can show both warnings together, so the next step is to interpret combinations, not single icons in isolation.

Practical interpretation:
- ABS light only: You may have normal braking but no anti-lock assist; drive cautiously and fix soon.
- Brake warning light only: Treat as potentially serious; verify parking brake and fluid; tow if any abnormal feel.
- Both lights: Assume higher severity; some vehicles flag broader brake-system faults when modules detect a shared issue.
This is where understanding Brake warning light vs ABS light differences helps you avoid the common mistake of assuming “it’s just ABS” when the base brake system may be warning you too.
What should a shop check, and what repairs are typical?
A shop should verify hydraulic integrity, scan relevant modules, inspect for leaks and pad wear, and road-test safely; typical repairs range from fluid/top-off and switch service to calipers, hoses, lines, or master cylinder replacement.
Next, a structured inspection prevents “parts roulette,” because brake problems can stack—one leak can contaminate pads, warp rotors from heat, and trigger additional warnings.

What a thorough inspection often includes:
- Visual inspection: Pads/rotors, calipers, hoses, lines, and reservoir level stability.
- Hydraulic test: Pedal hold test, pressure behavior, and whether the pedal sinks under steady force.
- Parking brake system: Cable adjustment, switch function, and electronic parking brake operation (if equipped).
- Module checks: Reading stored faults and freeze-frame context via professional equipment.
Some vehicles require checking Scan tool codes for brake system warnings to identify which input triggered the lamp—especially on modern systems where a switch, sensor, or pressure signal can set a warning without an obvious leak.
When the warning is tied to pressure signals, what does that imply?
If the warning is tied to pressure signals, it implies the car detected abnormal hydraulic behavior—meaning your braking could be uneven, fading, or unable to build/hold pressure consistently.
To start, pressure-related warnings are high priority because they describe the “inside” performance of the system, not just a switch position.

What this can look like in the real world:
- Inconsistent pedal height: First press feels okay, second press changes.
- Pulling under braking: One circuit may be doing more work than the other.
- Warning appears during hard stops: The system notices pressure behavior under load.
In discussions about Master cylinder and pressure switch faults, the practical takeaway is simple: if pressure is not building or holding normally, you should not drive until the cause is identified and repaired.
How can you reduce risk if you must move the car a short distance?
If you must move the car, reduce risk by keeping speed very low, increasing stopping distance dramatically, avoiding steep hills and traffic, and stopping immediately if pedal feel changes—even slightly.
Next, treat this as a controlled, low-demand maneuver, not a normal drive; your mission is to reach safety, not to “test it on the road.”

- Choose the safest route: Short, flat, low-traffic, with wide shoulders or parking lots.
- Use gentle inputs: Smooth acceleration and early braking; avoid sudden pressure spikes.
- Stop and re-check: After one or two stops, reassess pedal feel and check for new wetness or smell.
- Have a fallback: If anything worsens, stop and call for assistance immediately.
This approach is not “safe driving with a warning,” it’s harm reduction when you’re trying to avoid creating an emergency.
How do you prevent the brake warning light from returning?
You prevent it by fixing the root cause, ensuring correct fluid level, replacing worn components properly, and verifying that switches/sensors and wiring are secure after service.
Next, prevention is about closing the loop: confirm the system is stable, not just that the lamp is off.

- Address pad wear early: Worn pads can lower fluid level and increase heat; replace before metal-to-metal risk.
- Use correct fluid and cap sealing: Wrong fluid or a contaminated reservoir can cause performance changes over time.
- Inspect for seepage: Minor seepage at a caliper or line can become a major leak later.
- Verify parking brake function: Make sure the cable or electronic actuator releases fully every time.
If the light returns intermittently, don’t ignore it—intermittent faults often become permanent faults at the worst possible moment.
Contextual Border: From here, we move from “must-do safety decisions” into extra context for intermittent warnings, modern electronic parking brakes, and common myths that confuse drivers.
Extra context for modern cars and intermittent brake warnings
Intermittent brake warnings often come from switches, wiring, or borderline fluid levels, but you should still treat them seriously because intermittent signals can precede a real failure.
Next, these scenarios require you to watch patterns—when it happens, what changes it, and whether it’s linked to temperature, bumps, or braking intensity.

What if the light turns off after you restart the car?
It may indicate a momentary reading (switch bounce, low level slosh, or a transient electrical signal), but it does not prove the issue is harmless.
To begin, note when it appears—hard braking, turns, hills, or bumps—because that can hint at low fluid movement or a loose connector.
How do electronic parking brakes change the picture?
Electronic parking brakes can trigger warnings through actuator position, motor current, or module logic, so a warning can appear even if the lever-based “feel test” doesn’t exist.
However, if base braking feels abnormal, you still follow the same rule: stop and assess before driving further.
What myths cause the most dangerous decisions?
The most dangerous myth is “the car still stops, so it’s fine,” because brakes can degrade quickly under heat and repeated use.
In the same way, assuming it’s “just a sensor” can delay repair until a leak or seal failure becomes severe.
When should you choose towing even if the brakes feel okay?
You should choose towing when you cannot verify fluid level safely, you see any leak evidence, the light is red and persistent, or you must travel at highway speeds to reach help.
Tóm lại, when uncertainty is high, towing is often the cheapest “insurance policy” you can buy.
FAQ
These quick answers clarify common edge cases people run into when deciding what to do with a brake warning light.

Can I top off brake fluid and keep driving?
You can add fluid only as a temporary step after confirming there are no active leaks and the pads aren’t dangerously worn, but you still need inspection—topping off can hide a leak and delay a critical repair.
If the light is on but the pedal feels firm, is it safe?
A firm pedal is a good sign, but it is not a guarantee; you must also verify fluid level, check for leaks, and confirm the light isn’t indicating a pressure imbalance or another brake-system fault.
Why did the light come on right after brake service?
Common reasons include low fluid after caliper piston retraction issues, a loose connector, a misadjusted parking brake, or a sensor/switch not seated properly—return to the shop promptly for a re-check.
Will the light reset by itself?
Some warnings clear when the underlying condition disappears, but you should not rely on that; the correct “reset” is fixing the cause and confirming normal operation under safe conditions.