
How to Diagnose Vibration Problems in Machines and Vehicles: A Practical Guide for Technicians
Vibration diagnosis is the process of identifying where a vibration starts, what operating condition triggers it, and which component actually causes it. In practice, the fastest way to diagnose vibration problems in machines and vehicles is to separate the symptom by speed, RPM, load, and location, then confirm the pattern with inspection and measurement instead of replacing parts by guesswork. Next, this guide shows how technicians can move from a complaint like “it shakes at 60 mph” or “it buzzes at idle” to a cause they can verify.
The first layer of that diagnosis is classification. A steering wheel shake, a seat vibration, a machine base tremor, or a brake pedal pulsation may all feel similar, but they rarely come from the same source. To better understand the pattern, the article groups common causes such as imbalance, misalignment, looseness, resonance, brake issues, tire and wheel problems, engine faults, and Drivetrain vibration into practical categories technicians can test in sequence.
The second layer is comparison. Vibration at speed vs idle vs braking diagnosis is not just a catchy phrase; it is one of the most useful filters in real-world car diagnostics and machine troubleshooting. A vibration that appears only at idle points you toward mounts, combustion quality, or accessory drive issues, while a vibration that grows with road speed often points toward tires, wheels, hubs, axles, or driveshafts. Meanwhile, Brake rotor vibration under braking causes show up under a different trigger altogether, which is why the article compares operating conditions before discussing tools and repair decisions.
The third layer is confirmation. Technicians need a Road test checklist to isolate vibration, a practical tool list, clear Safe-to-drive guidance with severe vibrations, and a realistic Repair cost estimate by likely cause. Introduce a new idea: the sections below explain what vibration diagnosis means, how to group faults, how to test the symptom step by step, and how to confirm the root cause before repair.
What Is Vibration Diagnosis and Why Does It Matter in Machines and Vehicles?
Vibration diagnosis is a troubleshooting method that identifies abnormal motion by its source, trigger, and pattern so technicians can find the root cause instead of chasing the symptom. To better understand why that matters, you need to see vibration as a message from a system rather than as a defect by itself.
What Is Vibration Diagnosis?
Vibration diagnosis starts with one simple principle: every machine and vehicle vibrates, but not every vibration is a fault. Rotating assemblies, reciprocating parts, road input, combustion pulses, and drivetrain load changes all create some level of normal movement. The job of the technician is to determine when that movement becomes abnormal, repeatable, and severe enough to indicate a specific problem.
In machines, abnormal vibration often points to imbalance, misalignment, looseness, bearing wear, resonance, or structural transmission. In vehicles, the same symptom can come from tires, wheels, brake components, axle shafts, engine operation, Motor mounts causing vibration at idle, or a driveline angle issue. That is why experienced technicians avoid vague labels like “front-end shake” until they have matched the symptom to a condition and a source.
A good diagnosis also separates the complaint from the actual fault. A customer may say, “The car shakes on the highway,” but the real cause may be a tire with high road force variation, a bent wheel, or a worn inner CV joint. In a pump or motor set, an operator may report “the machine is rough,” but the real issue may be soft foot, misalignment, or resonance at a certain RPM band.
According to IBM, vibration analysis is used to identify, monitor, and help prevent mechanical failures in rotating and reciprocating machinery, which is why vibration diagnosis is a foundational part of predictive maintenance as well as repair troubleshooting. ([ibm.com](https://www.ibm.com/think/topics/vibration-analysis?))
Is Vibration Always a Sign of a Fault?
No, vibration is not always a sign of a fault because all operating systems generate baseline vibration, normal load changes can alter feel, and some frequencies become noticeable even when parts remain serviceable. However, the issue becomes diagnostic when the vibration is new, repeatable, growing, or linked to a specific trigger.
That distinction matters because overreacting to normal vibration wastes time and money. A performance engine may transmit more idle feel than a luxury engine. A heavy-duty truck may produce normal driveline sensation under load. A machine mounted on a light structure may feel more active than the same machine mounted on a massive base. These examples do not automatically signal failure.
What does matter is trend and correlation. If the vibration appears after tire replacement, brake service, a coupling change, an engine repair, or a mount replacement, the technician gains a valuable clue. If the vibration increases with speed or load, or disappears when one variable changes, the symptom moves from “general complaint” to “testable pattern.”
For technicians, the practical rule is simple: treat vibration as a fault indicator when it changes from the unit’s normal baseline, when it affects control or comfort, or when it is strong enough to indicate a safety issue. That approach keeps the diagnosis objective and prevents unnecessary part swapping.
What Types of Vibration Problems Should Technicians Group First?
There are 10 main types of vibration causes technicians should group first: imbalance, misalignment, looseness, wear, resonance, tire and wheel faults, brake faults, engine faults, mount faults, and drivetrain faults based on source and operating condition. Let’s explore this grouping first, because the fastest diagnosis always starts with classification.
What Are the Main Groups of Vibration Causes?
The first group is rotating imbalance. In vehicles, this often means a tire and wheel assembly, brake drum, hub, axle, or driveshaft that rotates with uneven mass distribution. In machines, it usually points to fans, pulleys, rotors, impellers, or shafts. Imbalance tends to create a vibration that rises with rotational speed and often feels steady once it appears.
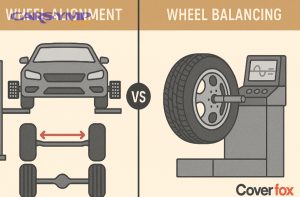
The second group is misalignment. In machinery, shaft misalignment between driver and driven equipment is a classic cause of elevated vibration and premature bearing wear. In vehicles, alignment means something different: wheel alignment affects tire wear, tracking, and steering behavior, but it is often misunderstood in the Wheel balance vs alignment vibration comparison. Alignment problems can contribute to pull, tire scrub, and wear patterns, while pure vibration at speed more often points first to balance, road force, or rotating part issues.
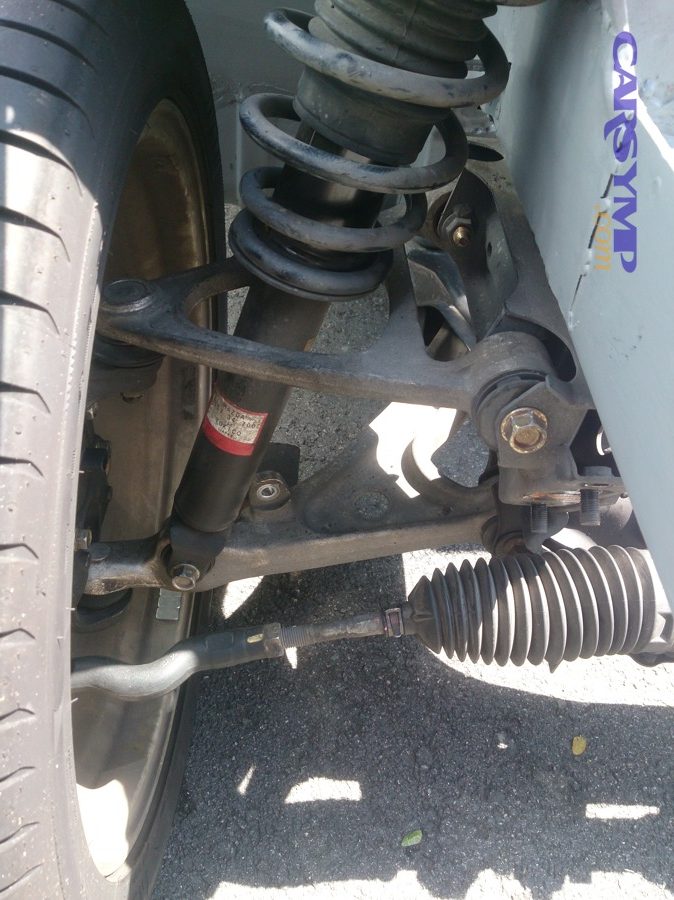
The third group is looseness and wear. Loose suspension links, worn bushings, failing wheel bearings, deteriorated couplings, loose machine hold-downs, and fatigued brackets can all transmit or amplify vibration. Looseness often changes with load, surface, or direction.
The fourth group is resonance and structural transmission. Some systems vibrate because a normal input frequency matches a structure’s natural frequency. In those cases, the source may be modest while the felt result becomes severe. This is why a floor pan, machine skid, panel, or mount can make a moderate issue feel like a major one.
The fifth group is condition-specific faults. These include Engine misfire vibration symptoms, brake rotor vibration under braking causes, and drivetrain vibration that only appears under acceleration, coast, or torque transfer. These cases require tighter correlation between the symptom and the trigger.
What Symptoms Help Group Vibration by Condition?
The most useful grouping method is to ask when the vibration happens. If the vibration occurs at idle, technicians think about combustion quality, accessory drives, engine mounts, and idle control behavior. If it appears only while driving faster, road-speed-related components move to the top of the list. If it appears only under braking, the brake system becomes the primary suspect. If it appears during acceleration or under load, torque-sensitive driveline components deserve more attention.
Here is a simple context table that shows what the symptom timing usually helps you compare:
| Operating condition | Most likely starting area | Why it matters |
|---|---|---|
| Idle in park or neutral | Engine, mounts, accessory drive | Road-speed inputs are removed |
| Acceleration under load | Drivetrain, axle, CV joints, mounts | Torque changes component angles and force |
| Steady highway speed | Tires, wheels, hubs, driveshaft | Rotating speed becomes the dominant clue |
| Braking | Rotors, pads, hubs, wheel-end condition | Brake application changes the symptom |
| Cornering | Wheel bearing, tire, suspension loading | Side load shifts the stress path |
| Machine startup/coastdown | Resonance, imbalance, looseness | Critical speed zones become visible |
This grouping prevents one of the most common mistakes in car diagnostics: assuming that every vibration felt through the steering wheel is a front-end alignment issue. Sometimes it is, but the operating condition often says more than the location alone.
According to Tire Rack’s vibration diagnosis chart, technicians should isolate whether the vibration is felt through the steering wheel, seat, or floor and then follow the symptom by speed and component area, which supports grouping the complaint before replacing parts. ([tirerack.com](https://www.tirerack.com/images/tires/vibechart.pdf?srsltid=AfmBOop9axS-KGlwL0Xz3IEuG47TU9AOOje17FdUOAXbPmKdTGCQUaDv&))
How Do You Diagnose Vibration Problems Step by Step?
A reliable vibration diagnosis uses 6 steps—verify the complaint, define the trigger, inspect visible causes, run controlled tests, measure the pattern, and confirm the fix—to produce a root-cause answer you can defend. More specifically, the value of the process lies in its order: each step eliminates guesses before the next test begins.
What Should You Check First Before Using Instruments?
Start with the complaint, not the tool. Ask when the vibration occurs, how the driver or operator feels it, whether it changed recently, and what work happened before the symptom appeared. Recent tire replacement, brake work, suspension repairs, mount replacement, clutch service, driveshaft removal, or machine relocation can all point to the fault path.
After that, do a careful visual inspection. On a vehicle, check tires for uneven wear, bulges, flat spots, irregular tread blocks, missing balance weights, bent rims, loose lug torque, damaged bushings, leaking struts, deteriorated mounts, loose exhaust contact, and signs of impact. On a machine, inspect mounting bolts, foundation condition, coupling alignment, belt tension, guard contact, shaft condition, and any sign of looseness or rubbing.
This first stage is also where severe safety issues are found. A separated tire, a cracked wheel, loose wheel fasteners, a broken mount, or a failing U-joint changes the job immediately from diagnosis to safety control. That is the beginning of safe-to-drive guidance with severe vibrations: if the vibration is violent, sudden, or paired with noise, wobble, or steering instability, the unit should not be operated until inspected.
How Do You Confirm the Source of a Vibration Problem?
After inspection, confirm the source by reproducing the symptom under controlled conditions. On a vehicle, that often means a road test checklist to isolate vibration. The checklist should include idle in park, idle in drive, low-speed roll, steady-speed cruise, acceleration, coastdown, light braking, firm braking, smooth road, rough road, and if safe, a neutral coast test at the speed where the vibration appears.
That checklist matters because each test removes one variable and highlights another. If the vibration appears at idle in gear but drops in neutral, engine load and mounts become stronger suspects. If the vibration increases with road speed regardless of gear, wheels, tires, hubs, axles, or driveshafts move up the list. If the vibration changes sharply under braking, the brake system becomes central. If the vibration fades when torque is removed, a drivetrain vibration becomes more likely.
In machines, the same logic applies. Run the unit at known operating points. Check startup and coastdown. Note whether the vibration peaks at a narrow band, rises steadily with speed, or changes under process load. Use the change in condition to narrow the mechanical cause.
A strong technician always ends this stage by stating the complaint in testable language, such as: “Vibration is most noticeable through the seat at 58–68 mph on smooth roads and does not change with light throttle.” That statement is far more useful than “vehicle shakes.”
According to a Daimler vibration analysis training bulletin archived by NHTSA, technicians are taught to collect vibration data, identify the source rapidly, validate the complaint, and determine what is not causing the problem before parts are replaced. ([static.nhtsa.gov](https://static.nhtsa.gov/odi/tsbs/2018/MC-10158122-9999.pdf?))
How Can You Compare Vibration by Speed, RPM, Load, and Location?
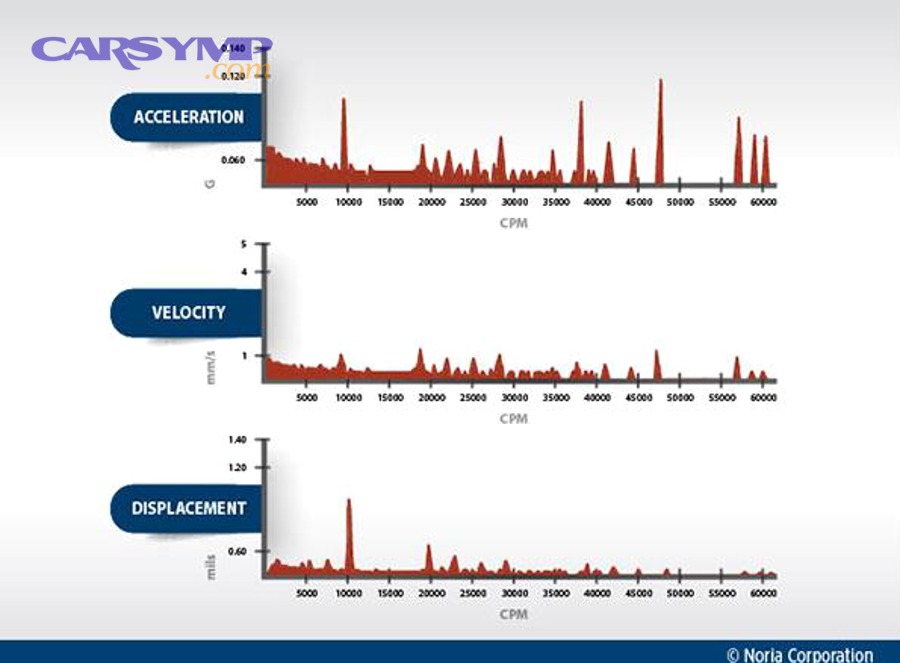
Road-speed vibration wins in wheel-end and driveline clues, engine-speed vibration is best for combustion and accessory clues, and brake-triggered vibration is optimal for rotor and brake-surface clues. To better understand that comparison, technicians should evaluate trigger first and location second.
Is the Vibration Related to Vehicle Speed or Engine Speed?
Yes, this comparison is one of the most important diagnostic filters because vehicle-speed-related vibration, engine-speed-related vibration, and brake- or load-related vibration each point toward different systems. Specifically, a road-speed symptom usually implicates rotating chassis components, while an engine-speed symptom usually implicates the powertrain.
A road-speed vibration usually shows up at the same mph range no matter which gear the transmission uses. That pushes the diagnosis toward tires, wheels, hubs, wheel bearings, axle shafts, or a driveshaft. This is where the wheel balance vs alignment vibration comparison becomes important. Balance faults cause a rhythmic shake because mass distribution changes with rotation. Alignment faults, by contrast, more commonly cause pull, feathered wear, and instability, though severe geometry issues can indirectly contribute to shake through tire wear.
An engine-speed vibration follows RPM rather than mph. If the vehicle vibrates at 2,000 rpm in first gear and again at 2,000 rpm in neutral or lower speeds, technicians look at combustion smoothness, accessory drive components, engine internal balance, or motor mounts causing vibration at idle and under load. Engine misfire vibration symptoms often feel harsh, uneven, or pulsing rather than like the steady cyclic feel of a tire balance issue.
Brake-triggered vibration is different again. A vehicle may feel smooth at speed until the driver applies the brakes. That pattern moves the diagnosis toward rotor thickness variation, pad deposits, wheel-end runout, hub condition, or sometimes suspension compliance that becomes noticeable during deceleration.
Is the Vibration Coming From the Front, Rear, Engine, Driveline, or Structure?
Yes, location matters, but it works best when combined with operating condition. A steering wheel shake often suggests a front-end source because the steering system transmits the disturbance directly to the driver’s hands. A seat or floor vibration more often suggests rear tires, rear axle, or driveline contribution. A vibration mostly felt in the cabin at idle suggests engine or mount transmission. A machine vibration strongest at the base or frame suggests structure, mounting, or resonance.
Still, location alone can mislead. A rear tire fault can sometimes be felt through the steering wheel, and a brake issue on one corner can transmit through the body rather than the pedal alone. Likewise, a driveshaft vibration can feel like a seat buzz at one speed and a floor drone at another. Machines create the same diagnostic trap: a fault in one bearing location may excite a panel or support elsewhere.
That is why technicians should map the complaint using both “where it is felt” and “when it is felt.” When those two answers agree, diagnosis becomes much faster. If they conflict, the system may be transmitting vibration through another path, which is a clue in itself rather than a reason to guess.
According to a Chrysler steering wheel vibration diagnostic bulletin archived by NHTSA, technicians are advised to use road testing, road force measurement, and symptom-specific checks to isolate shake and vibration by operating condition rather than relying on one general assumption. ([static.nhtsa.gov](https://static.nhtsa.gov/odi/tsbs/2014/MC-10229967-9999.pdf?))
What Tools and Measurements Help Diagnose Vibration Accurately?
Basic inspection tools, road-test discipline, and a few measurements—amplitude, frequency, speed relation, and component runout—help technicians diagnose vibration accurately without overcomplicating the job. In addition, the right tool matters less than using it at the right point in the process.
What Basic Tools Can Technicians Use for Vibration Diagnosis?
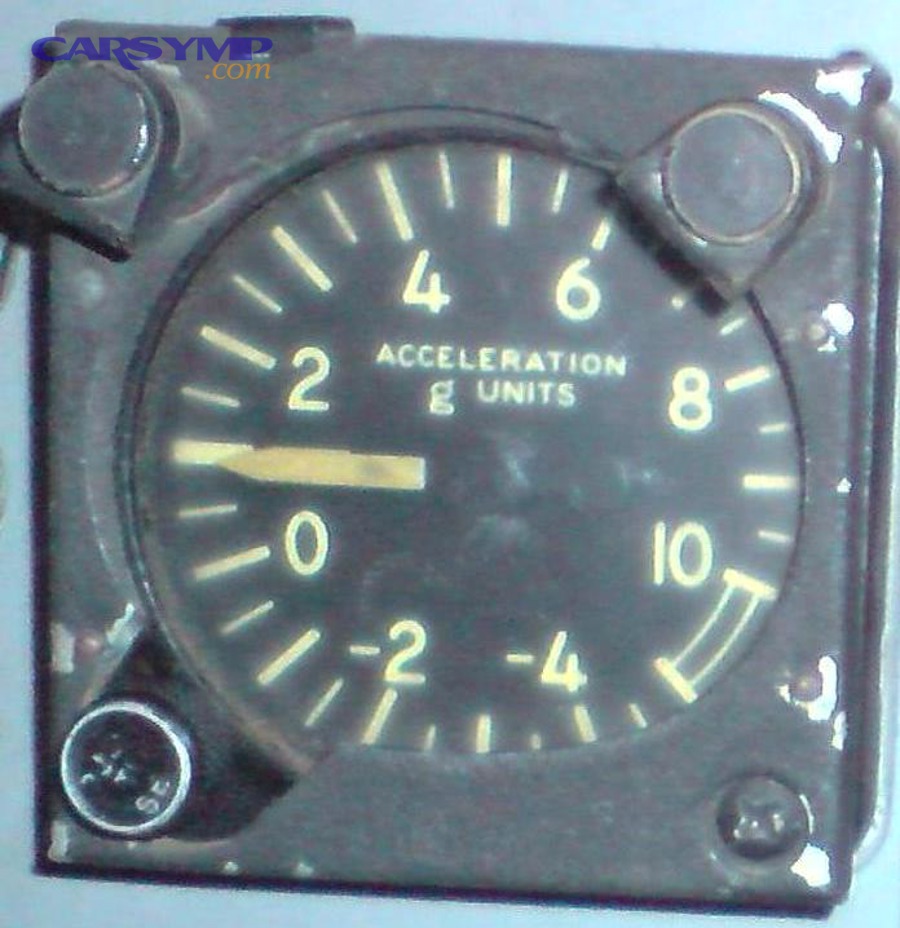
On the vehicle side, start with the fundamentals: tire pressure gauge, tread depth gauge, torque wrench, pry bar, dial indicator, scan tool, jack and stands, wheel balancer access, and if possible a road force balancer. A smartphone-based NVH app or dedicated vibration tool can also help correlate frequency with vehicle speed or engine order, especially when the complaint is subtle.
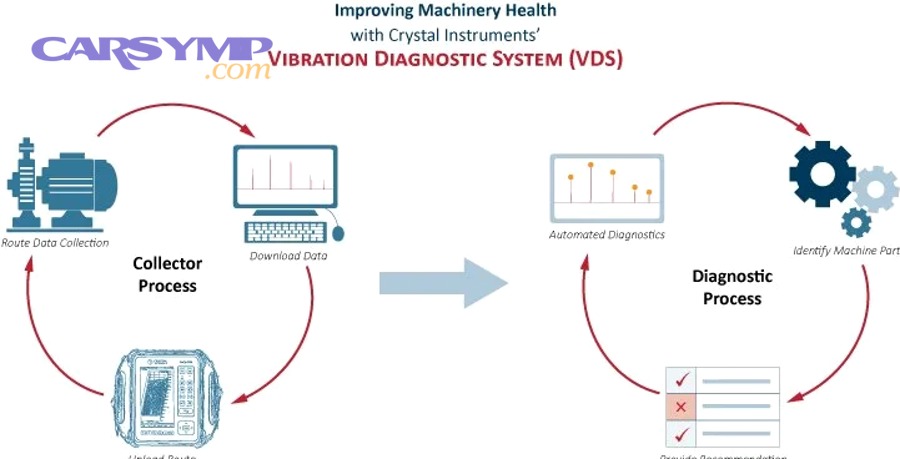
On the machine side, technicians often use an accelerometer, handheld vibration meter, laser alignment tool, dial indicator, tachometer, strobe, and thermal or acoustic checks to add context. Even simple observations such as belt flutter, coupling wear dust, loose base bolts, or a change during coastdown can matter as much as a sensor reading.
The best tool list is practical, not glamorous. Most wrong diagnoses happen because technicians skip verification, not because they lack a premium analyzer. A torque wrench can solve a wheel-related vibration if the fault came from improper wheel installation. A dial indicator can expose rotor runout or bent components that no generic “scan for codes” approach will reveal.
What Measurements Actually Matter in Vibration Analysis?
For most technicians, four measurements matter first: when the vibration occurs, how strong it feels, what speed or RPM matches it, and whether the pattern changes with load. These measurements connect the symptom to the system before any advanced analysis begins.
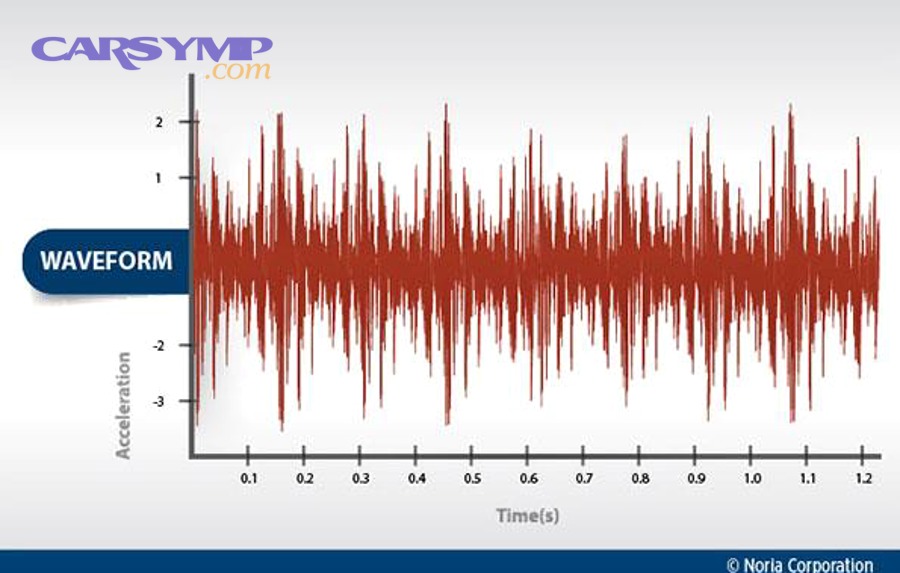
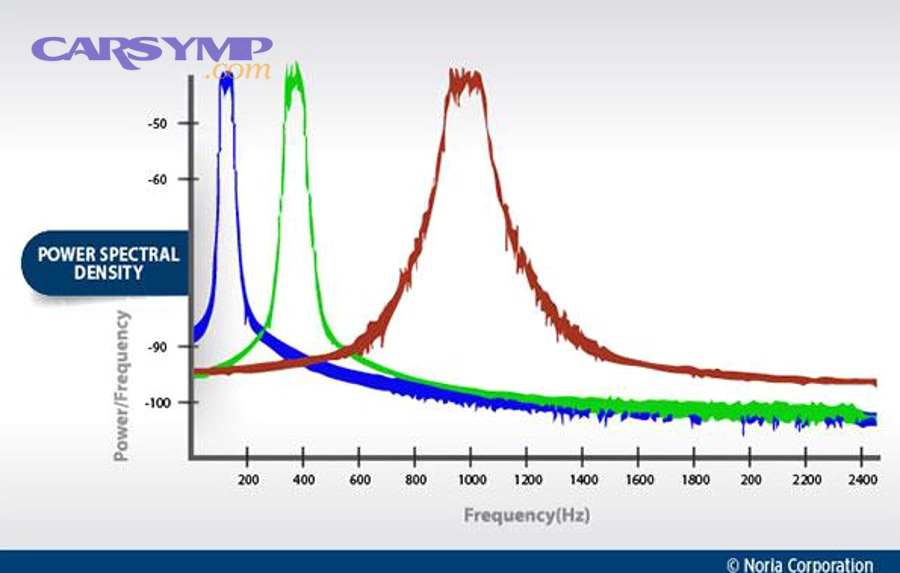
In formal vibration analysis, amplitude tells you severity, frequency tells you rate, and phase can help compare motion at different points. In practical service work, technicians often use simpler versions of those same ideas. If the vibration frequency matches wheel rotation at a given speed, think tire/wheel or other road-speed rotating parts. If it matches engine order, think combustion, accessories, or internal engine-related causes. If it spikes in a narrow speed band, think resonance.
This is also where machine and vehicle practice overlap. A machine analyst may look at spectrum peaks and harmonic families; a vehicle technician may use an NVH app to identify whether the frequency matches tire speed, driveshaft speed, or engine order. The principle is the same: match the symptom frequency to the part that can physically create it.
According to Adash’s beginner guide to vibration diagnostics, practical vibration work centers first on detecting that machine condition has changed and then on analyzing the vibration more deeply to identify the specific fault or wear mode. ([adash.com](https://adash.com/documents/Easy-basics-of-vibration-diagnostics.pdf?))
What Are the Most Common Vibration Patterns and What Do They Usually Mean?
The most common vibration patterns are steady speed-related shake, idle harshness, braking pulsation, load-sensitive driveline shake, and narrow-band resonance because each pattern matches a different mechanical story. More importantly, technicians should read the pattern as a clue cluster rather than as one single answer.
What Does a Steady High-Speed Vibration Usually Indicate?
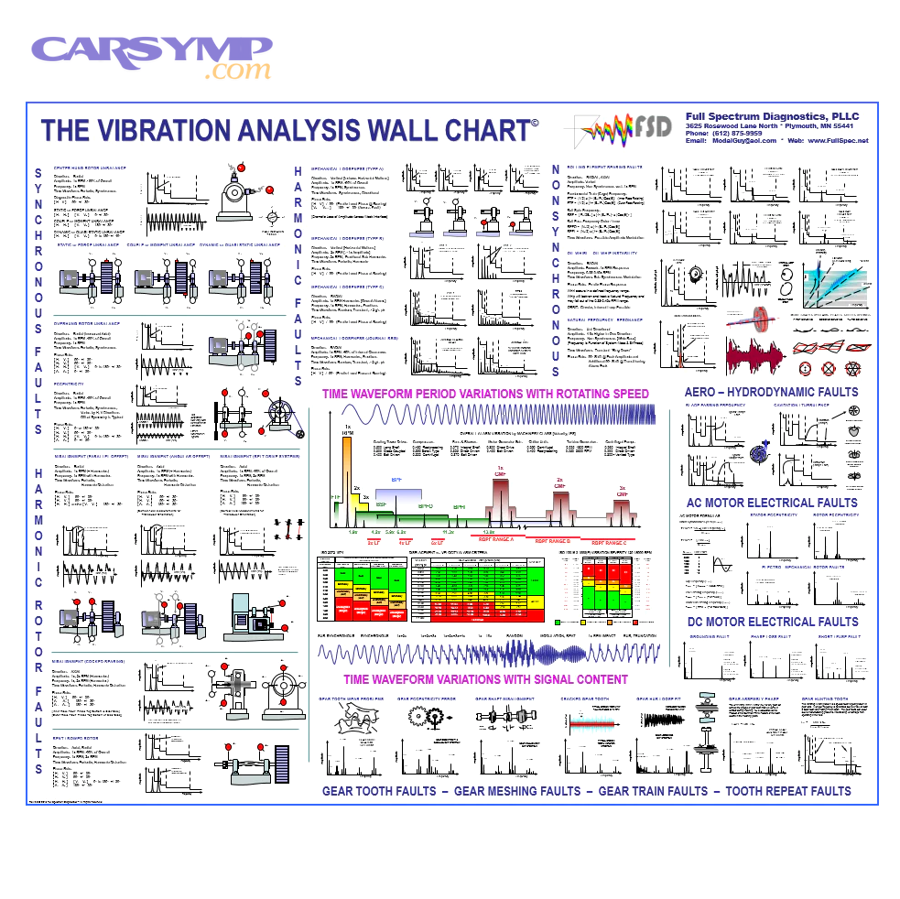
A steady high-speed vibration usually indicates a rotating imbalance, tire uniformity problem, bent wheel, wheel-end issue, or shaft-related fault because the symptom grows with rotational speed and becomes most obvious in a repeatable mph range. Specifically, this pattern is the classic starting point for tire and wheel diagnosis.
In cars and light trucks, the first suspects are usually tire balance, road force variation, tread separation, wheel runout, hub issues, and axle or driveshaft imbalance. If the steering wheel shakes most, the front end deserves early attention. If the seat or floor shakes more than the wheel, rear tires or driveline components become stronger suspects. That does not guarantee the answer, but it gives the diagnosis a disciplined first direction.
This is the point where the wheel balance vs alignment vibration comparison helps the reader most. Balance issues create a cyclic disturbance that appears as speed rises. Alignment issues more often create abnormal tire wear over time, and that abnormal wear can later create a vibration. In other words, alignment can contribute indirectly, but balance and uniformity are more often the immediate cause of a steady highway shake.
On the machine side, a steady speed-related vibration often points toward imbalance or a rotating element defect. If the symptom appears smoothly as RPM rises and does not depend much on process load, imbalance moves up the list.
What Does Intermittent, Load-Dependent, or Resonant Vibration Usually Indicate?
Intermittent, load-dependent, or resonant vibration usually indicates looseness, mount failure, torque-sensitive drivetrain issues, structural amplification, or a defect that appears only in a certain force path. However, the technician must compare trigger and transmission path before choosing a repair.
A classic example is motor mounts causing vibration at idle. An engine may produce a normal level of idle excitation, but collapsed or torn mounts allow that energy to transfer into the body. The symptom may feel much worse in drive than in neutral because the load path changes. Another example is drivetrain vibration under acceleration: worn CV joints, U-joints, driveshaft angles, or axle problems may feel fine at cruise but shake hard under torque.
Brake rotor vibration under braking causes belong in the same pattern family because the trigger is not speed alone but braking force. The vehicle may feel smooth until the brakes are applied. That points toward rotor thickness variation, uneven friction material transfer, hub runout, or related wheel-end issues. The same logic applies in machinery when resonance appears only as speed passes through a specific range: the system may be acceptable outside that narrow band but objectionable inside it.
According to a BMW service bulletin archived by NHTSA, diagnosing vibration while braking requires road testing and then separating wheel/tire concerns from disc and pad issues based on whether the vibration appears specifically during brake application. ([static.nhtsa.gov](https://static.nhtsa.gov/odi/tsbs/2019/MC-10153783-9999.pdf?))
How Do You Know the Diagnosis Is Correct Before Repair?
A diagnosis is correct before repair when the symptom is repeatable, the suspected cause matches the trigger, inspection supports the theory, and a confirmation test rules out competing causes. Thus, correct diagnosis depends on proof, not confidence.

Should You Repair the Symptom or the Root Cause?
No, you should not repair the symptom alone because vibration is an output, not a component; surface-level fixes often hide the complaint temporarily, and repeated guesswork drives up cost without removing the fault. Instead, technicians should repair the root cause and then verify that the symptom disappears.
This matters because many vibration complaints create tempting shortcuts. A technician may rebalance wheels even though the issue appears only during braking. Another may replace engine mounts even though the vibration follows road speed, not idle or RPM. In machinery, a team may tighten a base or add isolation while ignoring the underlying imbalance or misalignment. Those repairs may change the feel briefly, but they do not create a reliable fix.
The better approach is to ask one final question before authorizing repair: “What observation would prove this part is actually the cause?” If the answer is weak, the diagnosis is not finished. That discipline protects the customer, the technician, and the shop.
What Final Checks Confirm a Vibration Diagnosis?
Final confirmation comes from before-and-after comparison under the same conditions. If the complaint occurred at 62 mph on smooth pavement, the retest must include that speed on a similar surface. If the symptom appeared at idle in drive with the A/C on, the retest should reproduce the same condition. If the machine peaked at a known RPM band, the retest should pass through that band again.
This is also the right place for a repair cost estimate by likely cause. A tire rebalance or road-force correction is usually one of the lowest-cost repairs. Tire replacement, wheel repair, or rotor service falls into a moderate range. Mounts, axle shafts, hubs, or driveline work can move higher. Complex machine alignment, bearing replacement, or structural correction may cost more because labor and verification time increase. The point of the estimate is not to promise a number before confirmation, but to tie cost to an evidence-based cause.
Here is a practical framework for explaining likely repair cost by cause:
| Likely cause | Typical repair approach | Relative cost tendency |
|---|---|---|
| Tire balance / wheel weight issue | Rebalance, verify torque, road test | Low |
| Tire uniformity / damaged tire | Road-force test, rotate or replace tire | Low to moderate |
| Bent wheel / rotor issue | Measure runout, repair or replace part | Moderate |
| Motor mount or transmission mount | Inspect and replace mount(s) | Moderate |
| Engine misfire | Diagnose ignition/fuel/mechanical cause | Moderate to high |
| Driveshaft / axle / CV joint | Inspect angles, joints, shafts, replace as needed | Moderate to high |
| Machine misalignment / bearing / foundation | Alignment, bearing service, base correction | Moderate to high |
A final confirmation stage should also include Preventing vibrations with maintenance. That means keeping tires properly inflated, balancing assemblies when needed, maintaining suspension and mounts, using correct torque procedures, checking alignment when wear patterns suggest it, keeping rotating machinery aligned and mounted correctly, and responding early to new symptoms before they become severe.
What Advanced Vibration Methods Expand Diagnosis Beyond the Basics?
Advanced vibration methods expand diagnosis with NVH correlation, phase analysis, order tracking, and resonance evaluation because they help technicians solve faults that basic inspection can detect but not separate cleanly. In addition, these methods become valuable when symptoms overlap or when replacement history has already made the case expensive.
What Is the Difference Between Basic Vibration Checks and NVH or Spectrum Analysis?
Basic checks answer whether the complaint is real, repeatable, and linked to a general system. NVH or spectrum analysis goes further by matching the felt vibration to a frequency that corresponds to a rotating or reciprocating source. In car diagnostics, that often means distinguishing tire speed from driveshaft speed or engine order. In machinery, it means separating imbalance, misalignment, looseness, and bearing-related patterns with greater confidence.
This difference matters when a symptom sits in a gray area. A driver may report a floor buzz at highway speed that feels like a tire problem, but frequency analysis may point to driveshaft order instead. A machine may feel rough at one support, but phase comparison can show whether the movement comes from looseness, resonance, or a rotating source elsewhere.
When Should Technicians Use Phase Analysis or Order Tracking?
Technicians should use phase analysis or order tracking when speed-based clues are not enough, when multiple possible sources rotate at different rates, or when the vibration changes across a speed sweep. In vehicles, order tracking helps when engine order, tire speed, and driveshaft speed compete as suspects. In machinery, phase helps compare how one point moves relative to another, which can clarify imbalance, misalignment, or looseness.
These methods are especially helpful after basic repairs fail. If balancing, tire swapping, and brake checks do not remove a highway vibration, more advanced frequency correlation can prevent the next round of guessing. If a machine still vibrates after alignment correction, phase and spectrum data can reveal whether a second fault remains.
Can Resonance or Structural Transmissibility Cause a False Diagnosis?
Yes, resonance and structural transmissibility can cause a false diagnosis because a structure can amplify a modest source, shift where the symptom is felt, and make the loudest or harshest point look like the origin. More specifically, the transmission path can be as important as the source.
In vehicles, a mount, subframe, exhaust contact point, or body panel can turn a manageable engine or driveline input into an objectionable cabin vibration. In machinery, a flexible base, guard, skid, floor, or pipe connection can magnify vibration so dramatically that the analyst blames the wrong bearing or rotor. This is why advanced diagnosis does not stop at “what shakes most” but asks “what excites this structure and when?”
What Rare Fault Signatures Are Often Missed in Vibration Diagnosis?
Rare but important fault signatures include intermittent harmonic families, transient events, early bearing defects detected by advanced analysis, structure-borne amplification, and symptoms created by multiple small problems rather than one dominant failure. These cases often fool technicians because each individual defect looks too minor to explain the complaint alone.
A good example is a vehicle with slightly high road force, a worn mount, and mild rotor variation. None of those issues alone may create a severe symptom, but together they produce a complaint that feels confusing and inconsistent. The same happens in industrial equipment where soft foot, mild imbalance, and a flexible support act together. The cure in both worlds is the same: isolate one variable at a time, measure the change, and confirm the path.
In short, advanced methods do not replace basic diagnosis; they refine it. The best technicians still begin with condition, trigger, and inspection, then use advanced tools only when the symptom pattern demands more precision. That disciplined flow is what turns vibration diagnosis from trial-and-error into a professional repair process.