


A clunk from the rear or mid-underside when you hit bumps is often an exhaust hanger problem: the exhaust swings, sags, or contacts the body because a rubber isolator has stretched, torn, or the system is misaligned. This guide shows you how to confirm it quickly and fix it reliably.
Next, you’ll learn how to separate an exhaust clunk from other common causes—because many drivers misread a clunking noise over bumps as suspension trouble when it’s actually metal-to-body contact from the exhaust.
Then, if the noise started right after an exhaust replacement, we’ll cover the most common post-install mistakes (clocking, clamp torque, hanger position) that make a new system bang on the chassis even when all parts are “new.”
Introduce a new idea: once you fix the core cause, you can prevent the clunk from returning by choosing the right isolator type, maintaining correct clearances for heat expansion, and doing quick checks during routine service.
What Does an Exhaust Hanger “Clunk Over Bumps” Mean?
An exhaust hanger clunk over bumps is a low, heavy impact sound caused by the exhaust system moving too far and striking the underbody or frame because the hanger system (especially the rubber isolator) isn’t controlling motion.
To better understand the noise you’re chasing, it helps to translate “clunk” into physical movement and contact—because the fix is always about restoring controlled movement and clearance.
What Is a Rubber Exhaust Isolator and How Does It Prevent Noise?
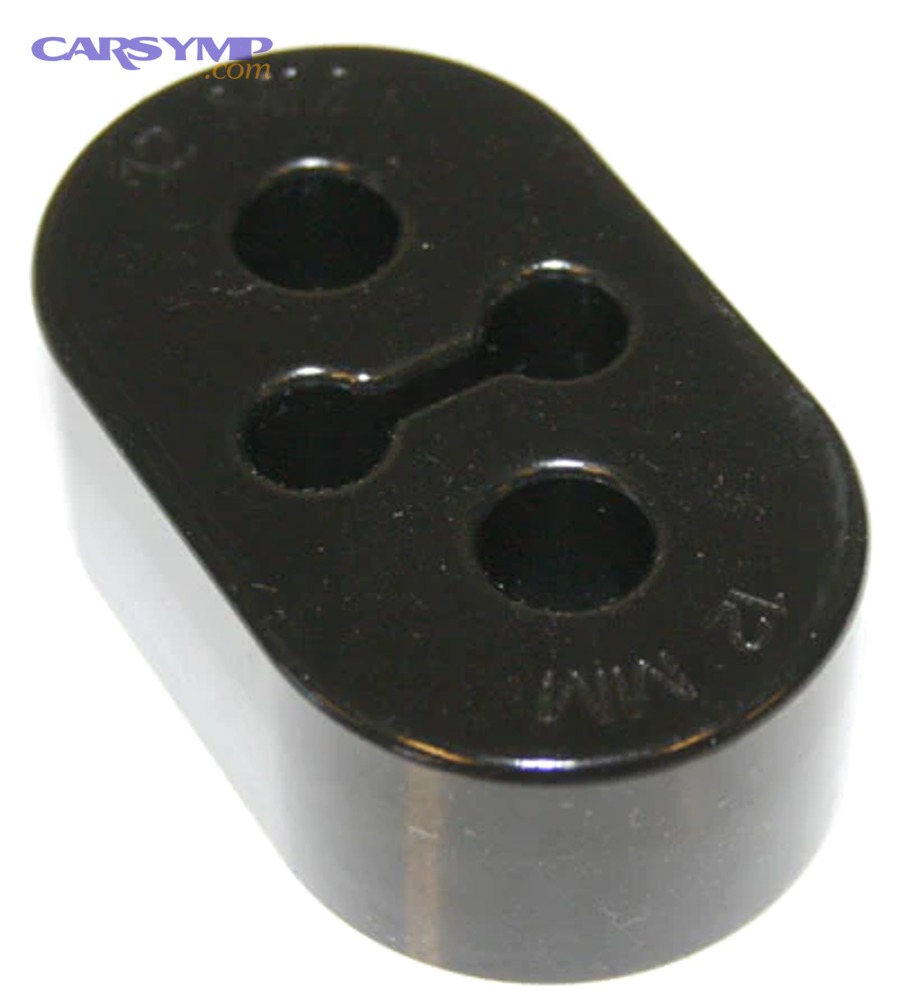
A rubber exhaust isolator is a molded elastomer mount that supports the exhaust while absorbing vibration and limiting swing, so the pipe and muffler don’t hit the body during bumps or engine movement.
Specifically, the isolator works like a flexible joint with damping:
- Support: It holds the exhaust at the correct height so the system maintains clearance from heat shields, crossmembers, and the floor pan.
- Isolation: Rubber reduces the transfer of vibration into the cabin (less booming and buzzing).
- Motion control: It allows small, designed movement but prevents large “pendulum” swings that create impact noises.
When the rubber fails, you’ll usually see at least one of these:
- Elongated holes (the hanger rod has “pulled” the rubber)
- Cracks or tearing at the thinnest section
- Oil/chemical deterioration that softens the rubber and increases movement
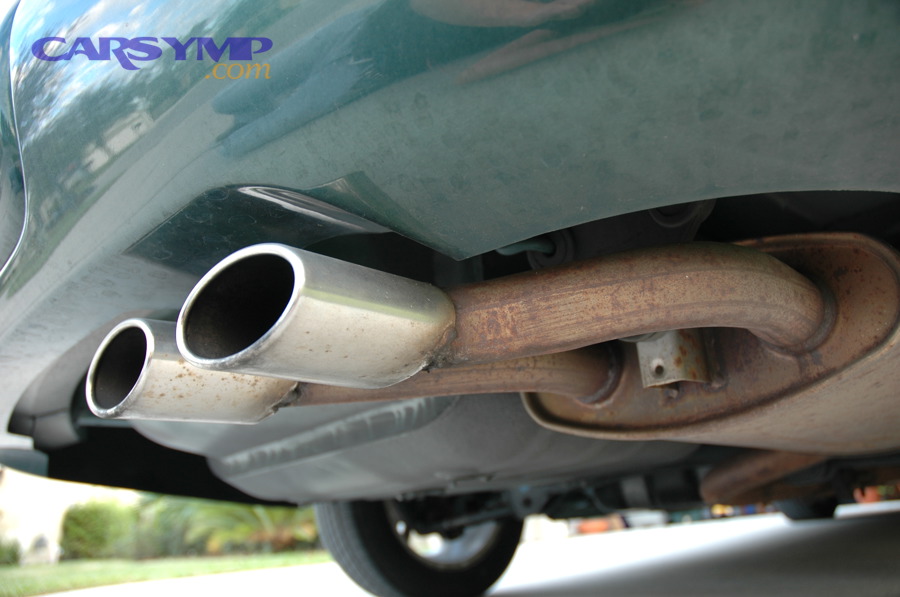
- Sagging exhaust (tips sitting low or shifted left/right)
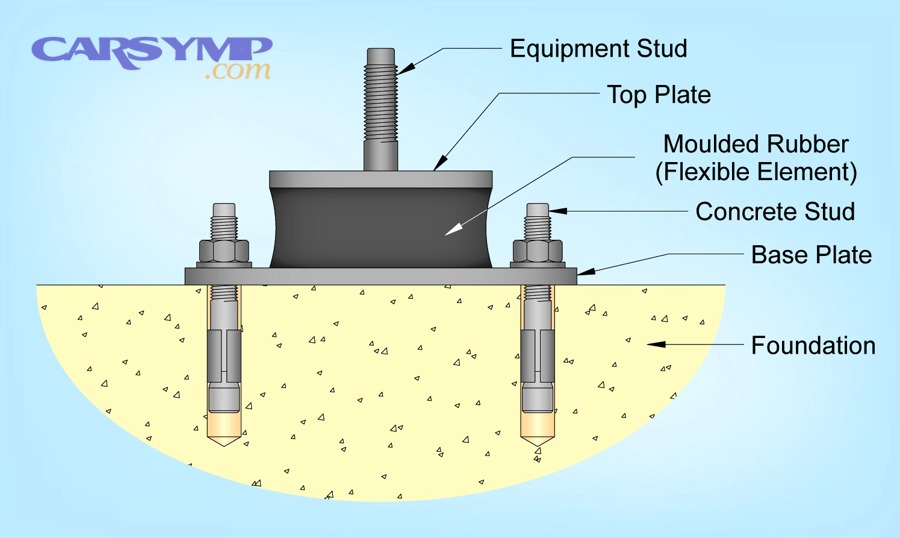
A useful way to think about it : the “hanger system” includes the rubber isolator, metal hanger rods, brackets, and mounting points—and a clunk can come from any of these parts losing control. For general isolation mount behavior, molded rubber mounts are designed specifically to reduce transmitted vibration while allowing controlled compliance.
Why Would the Exhaust Hit the Body or Frame Only When You Hit Bumps?
It happens because bumps compress the suspension and tilt the drivetrain, which briefly changes the exhaust’s position and swing arc—so a sagging or misaligned exhaust contacts the chassis at the moment of maximum movement.
More specifically, three “movement events” stack up over bumps:
- Suspension compression: The body moves relative to the wheels and subframes.
- Exhaust inertia: The heavy muffler and pipe want to keep moving as the car changes vertical speed.
- Rubber deflection: A worn isolator deflects farther and faster, letting metal parts reach contact points.
The result is classic: a single dull thud (pipe hitting body) or a double knock (pipe hits, rebounds, hits again). If you see polished shiny spots, soot scuffs, or chipped undercoating right where the clunk originates, you’re looking at the “footprint” of that impact.
Is the Clunk Actually Coming From the Exhaust Hanger?
Yes—an exhaust hanger can cause a clunk over bumps because (1) worn rubber isolators allow excess swing, (2) misalignment reduces clearance until contact happens, and (3) loose brackets/clamps let the exhaust shift suddenly under load.
Let’s explore how to confirm it fast, because the best diagnosis is the one you can reproduce safely and consistently.
Can You Reproduce the Clunk by Shaking the Tailpipe or Muffler by Hand?
Yes, you can often reproduce an exhaust-hanger clunk by shaking the tailpipe/muffler because a failing isolator or loose bracket allows large, sloppy movement that mimics bump forces.
However, do it the safe way:
- Only when the exhaust is cool (burn risk).
- Park on level ground, set the parking brake, and use wheel chocks if available.
- Push and pull the muffler side-to-side and up-down in short strokes.
What you’re listening/feeling for:
- A hard “tap” against the floor pan, spare tire well, or crossmember.
- A sudden jump rather than smooth rubber resistance.
- Visible travel that seems larger than you’d expect (the system swings like a pendulum).
If the exhaust moves smoothly and never contacts anything, the clunk might be elsewhere—so keep your test-based mindset and move to visual confirmation next.
Are There Visible Contact Marks on the Pipe, Heat Shield, or Underbody?
Yes, contact marks are one of the most reliable signs because metal-to-metal or metal-to-body impact leaves polished rub spots, soot smears, dented shields, or chipped undercoating right where the clunk originates.
Besides, this is the quickest “no-tools” proof:
- Check near the muffler (common for sagging rear hangers).
- Inspect around heat shields (thin metal bends easily and then rattles).
- Look at crossmembers and rear axle area (movement under compression).
If you find a mark, follow the chain: mark → nearest hanger/isolator → bracket/clamp that sets position. That’s your repair map.
Which Exhaust Hanger Parts Commonly Cause Clunks, and How Do You Identify Them?
There are 5 main types of exhaust-hanger clunk causes—rubber isolator failure, hanger rod deformation, loose brackets, rotated slip joints/clamps, and exhaust-to-body clearance loss—based on which component stops controlling motion.
To better understand what you’re fixing, classify the noise by component behavior, not just by sound.
Before the deep dive, here’s a practical table showing what each failure tends to feel/sound like and what you’ll usually see.
| Component / fault | What you hear | What you see | Fast check |
|---|---|---|---|
| Rubber isolator stretched/torn | Dull thud on bumps | Elongated holes, cracks | Shake test: large swing |
| Hanger rod bent | Thud + exhaust sitting “off” | Tip misaligned, sagging | Compare left/right height |
| Loose bracket/bolt | Heavy knock, sometimes intermittent | Missing bolt, shiny movement marks | Pry test: bracket shifts |
| Rotated joint / clamp slippage | Clunk after install, changes with temperature | Pipe sits closer to body | Loosen/realign/retighten |
| Heat shield contact (secondary) | Lighter rattle after impact | Bent shield edge | Tap shield by hand |
Which Hanger/Isolator Failure Patterns Point to a “Clunk” vs a “Rattle”?
Clunk wins as the diagnosis when the contact involves heavy mass (muffler/pipe) impacting structure, while rattle is more typical of thin parts (heat shields, loose clips) vibrating at higher frequency.
However, the same root issue can create both:
- Worn isolator → exhaust drops → clunk on bumps
- Dropped exhaust pushes heat shield → rattle at idle or acceleration
Use these separators:
- Clunk: single impact, felt through seat/floor, usually bump-triggered.
- Rattle: rapid metallic vibration, often RPM-dependent, may disappear with light pressure on the shield.
If your goal is to stop the clunking noise over bumps, prioritize restoring clearance and motion control first—rattles often vanish once the exhaust stops moving too far.
What Are the Most Common Exhaust Contact Points ?
The most common exhaust contact points are the crossmember, floor pan/spare tire well, rear subframe/axle area, and heat shields—based on where exhaust swing arcs intersect the chassis when hangers sag.
More specifically, check these “hot zones” in order:
- Rear muffler area: sagging rear isolators let the muffler thump the spare tire well.
- Mid-pipe near center brace: a shifted system taps a brace or tunnel edge.
- Over-axle section (if present): suspension compression brings pipe close to axle or bump-stop brackets.
- Heat shields: bent shields become the first contact and then rattle.
This is why diagnosis is not just “replace the nearest hanger.” You’re restoring a geometric relationship: exhaust centerline must sit inside a clearance envelope across the full suspension travel.
How Do You Fix an Exhaust Hanger Clunk Over Bumps (DIY Step-by-Step)?
The best method is a 6-step fix sequence—confirm contact, restore clearance, realign the exhaust, replace worn rubber isolators, secure brackets/clamps, and retest—so the exhaust can move slightly without ever striking the body again.
To begin, treat this like a controlled alignment job: you’re “centering” a hanging system, not just swapping one rubber part.
Step 1: Confirm the contact point
- Identify rub marks or reproduce the noise with a shake test.
- Mark the suspected hit area with chalk/tape so you can verify improvement later.
Step 2: Support the exhaust before loosening anything
- Use a jack stand (with wood pad) or a helper to hold the muffler’s weight.
- This prevents the system from dropping suddenly and changing alignment.
Step 3: Restore clearance first
- If the exhaust is touching a heat shield: gently reshape the shield for clearance.
- If the pipe sits too close to the floor pan: plan to realign and/or replace isolators.
Step 4: Realign the exhaust
- Loosen clamp(s) enough to allow rotation and slight position change.
- Center the system so it has even clearance around braces and shields.
Step 5: Replace the rubber isolator(s)
- Replace any isolator with cracks, tears, or elongated holes.
- Use a silicone-safe lubricant or soapy water to slide hangers on/off (avoid petroleum on rubber if you can).
Step 6: Tighten, then retest
- Tighten clamps/brackets in a stable, supported position.
- Drive over the same bumps and re-check your chalk marks.
If you want a quick visual walkthrough, this video shows the basic process of replacing rubber exhaust hangers/isolators:
How Do You Re-Align the Exhaust to Restore Proper Clearance?
Re-aligning the exhaust means loosening the joint(s), repositioning the system so it sits centered in the tunnel with consistent clearance, then re-tightening while the exhaust is supported at the correct height.
Specifically, use this “center-and-lock” routine:
- Locate adjustment points: slip joints, band clamps, flange connections, or mid-pipe clamps.
- Loosen just enough: you want controlled movement, not a full drop.
- Set the height: support the muffler so tips sit level and the pipe clears the underbody.
- Clock and center: rotate the pipe slightly to maximize clearance from braces and shields.
- Snug and check: lightly tighten, shake test, inspect clearances, then fully tighten.
A powerful trick: after you tighten, do a short shake test again. If the exhaust “walks” into a contact point, a bracket or joint is still allowing movement.
Evidence: According to a study by The Ohio State University from the Graduate Program in Mechanical Engineering, in 2015, exhaust isolator bracket design targets often focus on the 100–500 Hz range where vibration transfer into the cabin becomes significant.
When Should You Replace the Rubber Isolator vs Adjust the Hanger Rod?
Replacing the rubber isolator wins when the rubber is cracked, torn, oil-softened, or stretched (loss of elastic control), while adjusting the hanger rod is best when the rubber is healthy but the exhaust geometry is off due to bending or installation position.
Meanwhile, use a simple decision rule:
- Replace isolator if: holes are oval, rubber is split, the hanger rod can “clack” inside the isolator, or the exhaust visibly sags at that point.
- Adjust hanger rod if: rubber looks intact but the exhaust sits too close to the body on one side or the tip height is uneven after a repair.
Be cautious with bending hanger rods:
- Bend small amounts.
- Re-check clearances after each adjustment.
- Avoid creating pre-load that twists the rubber too far at rest (it accelerates wear).
If you’re building durability and comfort for daily driving, quality rubber isolators typically provide better vibration isolation than stiffer alternatives.
What If the Clunk Started After an Exhaust Replacement or Repair?
A post-repair exhaust clunk is usually caused by misalignment, rotated joints, or hardware/clamp issues because a newly installed system can sit a few millimeters off-center—enough to lose clearance and bang the body over bumps.
In addition, a “new parts” situation can be misleading: the rubber may be new, but geometry and clamping are what decide clearance.
Is This a Fitment Issue (Aftermarket) or an Installation Issue (Alignment/Torque)?
Aftermarket fitment is the usual culprit when hang points or bends differ slightly from OEM, while installation issues are more likely when the system was tightened while “pulled” to one side or supported at the wrong height.
However, you can separate them quickly:
- Fitment issue signs: one specific section always sits too close even after re-centering; hangers feel “forced”; tips don’t sit symmetrically unless you push the system.
- Installation issue signs: clearance improves dramatically when you loosen clamps; system shifts into a better position with minimal effort; clunk disappears temporarily before reappearing after a few drives.
Practical fix path:
- Loosen clamps.
- Support the exhaust at correct height.
- Re-center.
- Tighten gradually while holding position.
If you can’t achieve clearance without forcing components, you may need a different hanger length, a small spacer, or a fitment correction.
Could a Loose Clamp or Rotated Joint Be Letting the Exhaust “Swing” Into the Chassis?
Yes, a loose clamp or rotated slip joint can let the exhaust swing because the joint becomes a pivot point, and bumps turn that small rotational freedom into a large muffler movement at the tail end.
More importantly, this explains why some clunks:
- Change with temperature (thermal expansion changes the pipe’s resting position)
- Appear after a few days (clamps settle and lose preload)
- Happen on one type of bump (the exhaust swings in a specific direction)
Fix it like a stability problem:
- Re-index the joint so clearance is maximum.
- Use a quality clamp type appropriate for the joint.
- Re-check after a short drive cycle.
When Is an Exhaust Hanger Clunk a Safety or Repair-Shop Problem?
Yes, an exhaust hanger clunk can become a safety or shop-level issue because (1) the system can drop and contact the road, (2) impacts can crack pipes and create exhaust leaks, and (3) loose brackets/welds may require welding or fabrication rather than simple parts replacement.
Especially when a noise becomes a “movement” problem, you want to know where the DIY boundary is.
Is It Unsafe to Drive With a Clunking Exhaust Hanger?
Yes, it can be unsafe to drive with a clunking exhaust hanger because repeated impacts can break hangers, stress joints, and eventually create leaks or a dragging exhaust—plus it may be masking other issues in the broader Car Symptoms picture.
Besides, watch for these red flags that should stop your drive and trigger an inspection:
- Exhaust visibly hanging low
- Strong exhaust smell in cabin (possible leak)
- Loud change in exhaust tone (new crack or separation)
- Contact near fuel/brake lines or heat-sensitive areas
- Metallic scraping under acceleration or turns
If any of these occur, treat it as urgent. Exhaust components are heavy and hot; if they drop, they can damage the underbody or become a road hazard.
Do You Need Welding or Fabrication to Fix a Broken Hanger Bracket?
Yes, you may need welding or fabrication when a hanger bracket tears from the body, a welded hanger rod breaks, or corrosion has removed the metal structure that the isolator attaches to—because replacement rubber alone won’t restore the mounting point.
To better understand, look for:
- Cracked weld beads on hanger rods
- Missing bracket tabs (rusted away)
- Elongated bolt holes in brackets that let hardware shift
This is also where misdiagnosis happens: the rubber looks fine, but the mounting system is failing. If the bracket is compromised, a shop fix can be cheaper than repeated DIY attempts that don’t hold.
How Can You Prevent Exhaust Hanger Noises From Coming Back?
Prevention wins by keeping controlled movement and clearance over time through (1) correct isolator choice, (2) periodic clearance checks, and (3) managing heat expansion and joint settling—so you avoid the “fix today, clunk tomorrow” cycle.
Next, use prevention as the antonym of repair: instead of reacting to impact, you maintain isolation and geometry so impact never happens.
Should You Choose OEM Rubber or Polyurethane Exhaust Hangers for Noise Control?
OEM rubber wins in vibration isolation and comfort, polyurethane is best for durability and reduced movement, and “mixed” setups are optimal when you want tighter control at one hanger location but still want cabin comfort elsewhere.
However, choose based on what your car does most:
- Daily driver / comfort priority: OEM-style rubber
- Performance exhaust / reduced motion priority: polyurethane in high-movement zones (with careful NVH expectations)
- Problem spot fix: stiffer isolator at the contact-prone location only
Remember: stiffer isn’t “better” if it transfers vibration into the cabin. In many everyday applications, rubber mounts are preferred because they isolate noise and vibration effectively.
Why Would the Noise Happen Only When Cold or Only When Hot?
Temperature-dependent exhaust noise happens because rubber stiffness changes with temperature and metal pipes expand as they heat, shifting clearances so contact occurs only in one thermal state.
More specifically:
- Cold-only clunk: rubber is stiffer, so impacts transmit more sharply; the exhaust may sit slightly differently before full expansion.
- Hot-only clunk: expanded pipe reduces clearance and “grows” into a contact point; softened rubber may allow more swing.
If your clunk is temperature-linked, re-check clearances both cold and fully warm. A system with “barely enough” clearance cold may have not enough clearance hot.
Evidence: According to a study by The Ohio State University from the Graduate Program in Mechanical Engineering, in 2015, exhaust isolator dynamics in the 100–500 Hz range can depend heavily on factors like preload and operational temperature, which is why clearance and isolator condition matter across real driving conditions.
What Quick Checks Can You Do During Oil Changes to Catch Hanger Wear Early?
You can catch hanger wear early by doing a 3-minute checklist: visual rubber inspection, quick movement test, and clearance scan—so you spot sag and contact marks before the first hard clunk.
To illustrate, use this mini-routine:
- Rubber check: cracks, tears, elongation, oil saturation
- Movement check: push muffler gently; confirm smooth resistance and no metal contact
- Clearance scan: look for shiny rub marks and bent shields
If you maintain this habit, you’ll also get better at recognizing other undercar Car Symptoms before they become expensive repairs.
What Other “Opposite” Problems Mimic a Hanger Clunk (Suspension vs Exhaust)?
Suspension clunks win when the sound is tied to wheel movement and steering load, while exhaust clunks are best explained by body contact and can often be reproduced with a shake test when the vehicle is stationary.
On the other hand, here are common “look-alikes” you should rule out:
- Sway bar links/bushings: clunk on small repetitive bumps, often one side
- Shock/strut mounts: thud on larger impacts, sometimes with bounce
- Loose spare tire/jack: hollow bang from trunk area
- Brake hardware: single click/clunk during braking
If you’re investigating brake-related noises, the phrase Loose brake hardware and caliper clunk causes belongs on your checklist—because worn anti-rattle clips, guide pins, or loose caliper bolts can produce a distinct clunk that seems like suspension or exhaust at first.
If you’re budgeting, build a simple Repair cost estimate for common clunks list (exhaust isolators, sway links, brake hardware kits) so you can decide when DIY makes sense and when a shop inspection saves money.