Solve Car Noise Diagnosis: Pinpoint Causes, Not Guesswork
Car noise diagnosis is the fastest way to turn a worrying sound into a clear, testable cause—so you can decide whether to keep driving, schedule service, or stop immediately for safety. Instead of chasing random parts, you’ll match the sound’s timing, location, and behavior to the systems that can actually produce it.
To make that process easier, this guide uses the same logic a technician uses for auto noise diagnosis: verify the symptom, narrow the condition, then confirm with simple checks before you replace anything.
You’ll also learn how to describe noises with consistent language (pitch, rhythm, load-dependence) so your findings stay reliable even when the sound changes from day to day.
Giới thiệu ý mới: below are practical questions and step-by-step checks that help you move from “I hear something” to “I know what to inspect next” with confidence.
Entities you’ll recognize in this guide: engine accessories, belts and pulleys, exhaust and heat shields, suspension joints, wheel bearings, brakes, tires, mounts, drivetrain components, steering joints, and interior trim—all evaluated through conditions (idle, acceleration, braking, turning, bumps, speed).
What does car noise diagnosis mean, and what does it actually solve?
Definition: Car noise diagnosis is a structured method to identify the most likely mechanical (or trim) source of a sound by linking the noise to a driving condition, location, and repeatable test—so you fix the cause, not the symptom. Next, you’ll see how that structure prevents expensive guesswork.

To understand what “diagnosis” really means, separate it from “repair.” A repair is a part change or adjustment. A diagnosis is the reasoning that proves which part (or system) should be repaired. If you skip diagnosis, you can easily replace a noisy part that wasn’t the source—especially when vibrations travel through the chassis and make sounds seem like they come from the wrong place.
For example, a vibration at the front can be caused by a tire issue, but you may hear it in the dashboard. A metallic rattle under the vehicle may be a loose heat shield, but it can sound like an engine problem from inside the cabin. So the core job of diagnosis is not “identify the sound” in isolation; it’s to connect the sound to conditions that only a small group of components can satisfy.
To keep terminology consistent, describe noises by: (1) pitch (high/low), (2) character (squeal, rattle, thump, hum), (3) rhythm (constant, pulsing, once-per-rotation), and (4) trigger (cold start, bumps, braking, turning, speed). That language becomes your “map,” and every check you do should either confirm or eliminate one branch of that map.
Next, we’ll build that map by grouping noises in a way that immediately narrows suspects—without needing special tools.
How can you group vehicle noises to narrow the suspects quickly?
Grouping: There are six main noise groups in car noise diagnosis—idle, acceleration/load, braking, turning, bumps, and steady-speed—because each group points to a different set of rotating or moving parts. Next, you’ll learn the simple rule that tells you which group matters most.

The fastest rule is: the trigger is the clue. A noise that appears only while braking is rarely caused by the engine. A noise that appears only while turning is rarely caused by the exhaust. A noise that scales with vehicle speed (not engine RPM) usually lives in the wheels, tires, bearings, or driveline.
Here’s how each group narrows suspects:
- Idle / stationary: engine accessories (belts, pulleys), mounts, cooling fans, internal engine issues, or exhaust leaks near the engine bay.
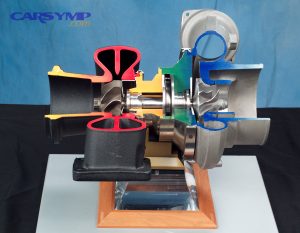
- Acceleration / load: drivetrain (CV joints, driveshaft), engine knock under load, turbo/boost-related noises, mounts, exhaust contact, or accessory slip when RPM rises.
- Braking: pads, rotors, calipers, backing plates, dust shields, hardware, wheel bearings (sometimes), or tire tread noise changing under weight transfer.
- Turning: CV joints, wheel bearings, steering joints, strut bearings, tire rub, power steering components.
- Bumps / road impacts: suspension links, bushings, ball joints, struts, sway bar components, loose exhaust hangers, loose underbody panels.
- Steady-speed cruising: wheel bearings, tires, aerodynamic noises, drivetrain harmonics, or exhaust resonance.
Next, we’ll add a safety filter—because some noises mean “stop now,” while others mean “monitor and plan.”
Is it safe to keep driving when you hear a new noise?
Boolean: Sometimes yes, but sometimes no—because a new noise can signal (1) imminent brake or steering risk, (2) overheating or fluid loss, or (3) a rotating component failure that can worsen fast. Next, you’ll use a quick triage checklist to decide your next move.

Use this triage approach before you do any deeper testing:
- Stop immediately if the noise is paired with: loss of braking, steering pull, burning smell, smoke, rapid overheating, severe vibration, or a loud bang followed by change in drivability.
- Limit driving and plan service if the noise is repeatable but the car drives normally—especially if it changes with braking, turning, or bumps.
- Monitor if the noise is faint, intermittent, and does not change with key actions—while you still log conditions and check fluids/tires.
Two fast driveway checks help you decide safety: (1) walk around and look for a dragging item (plastic shield, loose exhaust hanger), and (2) inspect tires for bulges, cords, or embedded debris. If you find anything unsafe, do not “test drive” to confirm—your confirmation is already the physical evidence.
Next, you’ll move from triage to a repeatable workflow that makes the sound easier to reproduce on purpose—because repeatability is what makes diagnosis accurate.
What is a step-by-step driveway workflow for auto noise diagnosis?
How-to: Use one core method with 7 steps—capture, classify, localize, reproduce, isolate, inspect, and confirm—so you can move from a vague noise to a small list of suspects. Next, you’ll learn the single most important step: controlled reproduction.
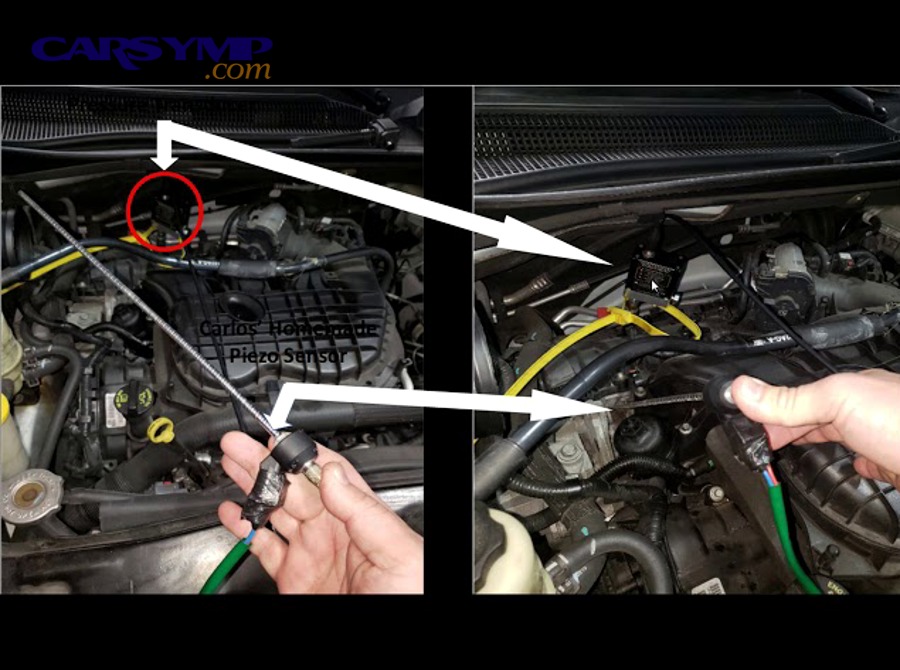
Step 1: Capture the sound. Record audio/video from inside and outside the vehicle if safe. Note weather, temperature, and how long the car had been running.
Step 2: Classify the sound. Choose a primary character (squeal, rattle, knock, hum, thump) and note pitch and rhythm.
Step 3: Localize it. Is it front/rear, left/right, under the floor, or from the engine bay? Use “where you feel it” too—pedal, steering wheel, seat, or floor.
Step 4: Reproduce it with controlled actions (the most important step). Do short, safe tests: light braking vs. hard braking, gentle turn vs. full lock, smooth road vs. small bumps, constant speed vs. acceleration. If the noise only happens randomly, diagnosis slows dramatically—so your goal is to make it happen on command.
Step 5: Isolate variables. Separate engine RPM from vehicle speed: hold a steady speed in a low gear vs. a higher gear; if the noise follows RPM, suspect engine-side. If it follows speed, suspect wheels/driveline.
Step 6: Inspect likely areas. Look for shiny rub marks, missing clips, loose fasteners, cracked bushings, torn boots, uneven pad wear, or leaking fluid.
Step 7: Confirm with a simple proof. Tighten/secure a shield, swap front tires to rear, remove a small stone from a tread groove, or test with the brakes lightly applied—then see if the noise changes as predicted.
Next, we’ll apply this workflow to the engine bay, where high-pitched noises and load changes often create the most confusion.
How do you diagnose noises that seem to come from the engine bay?
How-to: Diagnose engine-area noises by matching them to RPM, temperature, and accessory load—then inspecting belts, pulleys, mounts, and nearby exhaust shields—because these parts can create loud sounds without triggering a warning light. Next, you’ll learn how to separate belt slip from internal engine issues.
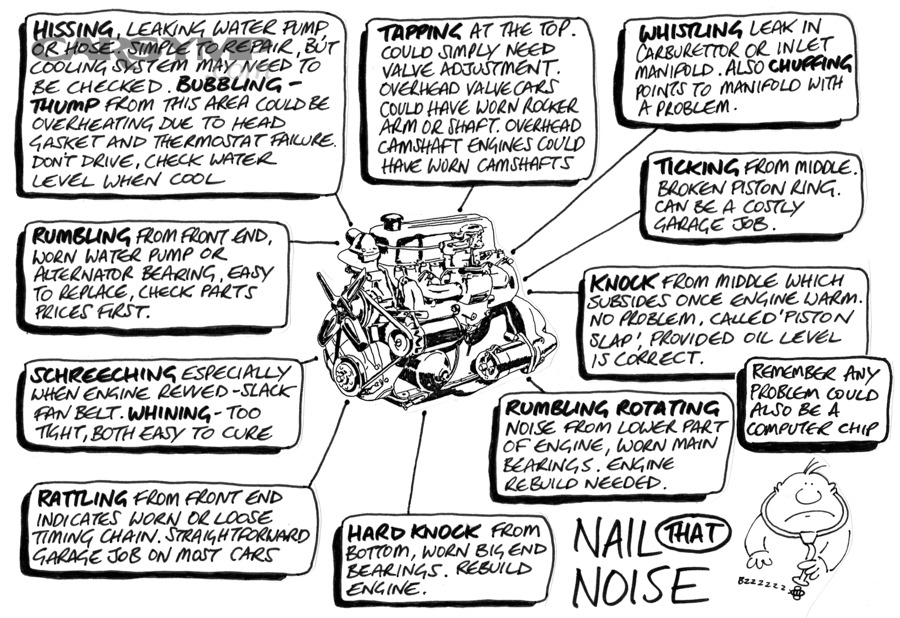
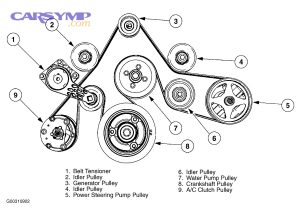
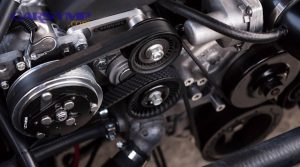
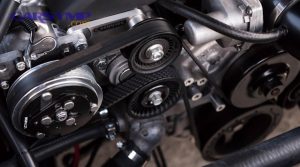
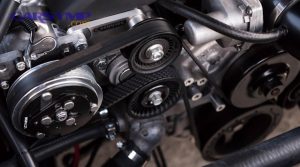
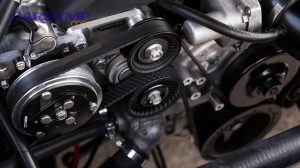
A classic pattern is a high-pitched tone that rises and falls with RPM. Drivers often describe a whining noise from engine when revving, especially on cold starts or when turning on electrical loads (A/C, headlights, defrost). In many cases, that “whine” is external—belt slip, a failing idler pulley, alternator bearings, or a tensioner that no longer maintains proper belt force.
Start with the RPM test: in park/neutral (when safe), gently raise RPM in small steps. If the noise follows RPM while stationary, you’ve likely narrowed it to engine accessories, mounts, cooling fans, or the exhaust near the engine.
What checks confirm belt-and-pulley problems without special tools?
How-to: Confirm belt/pulley issues by observing belt condition, listening near each accessory, and checking for wobble or rough rotation—because a worn belt or failing bearing changes sound under load. Next, you’ll link these observations to the exact component to inspect first.
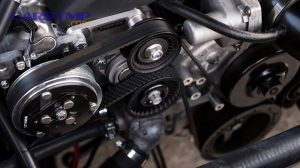
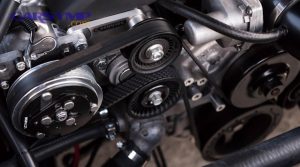
Look for glazing (shiny belt), cracking, frayed edges, or rubber dust around pulleys. A healthy belt system runs smoothly; a failing bearing often produces a dry, gritty sound that changes with RPM. If you can safely access the belt path with the engine off, gently spin idler pulleys by hand—roughness or play is a strong clue. This is where terms like belt squeal diagnosis become practical: belt squeal tends to be sharp and may worsen with moisture or sudden load changes, while a bearing whine is often steadier.
When should you suspect mounts or exhaust contact near the engine?
Boolean: Yes—suspect mounts or exhaust contact if the noise appears on start-up, during gear changes, or when blipping the throttle, because engine movement can make parts touch that never touch at steady cruise. Next, you’ll check for telltale rub marks and shifted clearances.
Mount issues often create thuds or clunks during transitions (reverse to drive, acceleration to decel). Exhaust contact near the engine can create a metallic tick or buzz that seems “inside” the cabin. Look for shiny metal spots, heat shield gaps, or bent brackets that show contact points. If the noise disappears when the engine is warm, thermal expansion may be changing clearances—an important clue you’ll revisit later in the supplementary section.
How can you avoid mislabeling engine knock vs. accessory noise?
How-to: Avoid confusion by testing under load and listening for rhythm—because true knock often appears under acceleration and has a deep, sharp character, while accessory noise often appears at idle or changes with electrical/AC load. Next, you’ll use controlled load to sharpen the distinction.
Drivers sometimes search for knocking noise diagnosis when they hear a hard tapping. Not all “knocks” are internal. An exhaust leak near the manifold can tick like a valve issue. A loose heat shield can mimic a rapid metallic knock. True engine knock typically correlates with load (accelerating uphill) and may reduce when you ease off the throttle. Accessory noises often respond to turning the A/C on/off or changing electrical load. The key is to reproduce the sound with one variable at a time.
Next, we’ll move under the vehicle—where loose shields, exhaust hangers, and suspension joints create noises that echo and mislead your ears.
How do you diagnose noises that seem to come from under the car?
How-to: Diagnose underbody noises by checking for loose shields, exhaust movement, and suspension play—because many under-car sounds are caused by simple looseness that resonates at certain speeds. Next, you’ll learn how to spot resonance clues that point to a shield or panel.

If you notice a rattling noise under car, start with the simplest suspects: heat shields, loose undertrays, exhaust hangers, and stones trapped in a guard or bracket. Underbody rattles often appear at a narrow RPM or speed range because the vehicle hits a resonance frequency—so the sound may vanish above or below that range.
Do a safe visual sweep (engine off, parking brake on): look for missing fasteners, bent heat shields, and underbody plastic that can flap. Then do a gentle “tap test” with your hand (when the exhaust is cool). If a shield buzzes easily, it can buzz far louder while driving.
What signs point to exhaust-related contact or loose hardware?
Definition: Exhaust contact noise is a vibration-induced metallic buzz or clank caused by the exhaust pipe, muffler, or shield touching another component or moving excessively on worn hangers. Next, you’ll confirm it by observing movement and rub marks.
Check hangers for tearing, stretching, or missing rubber isolators. Look for shiny marks where pipes or shields have been rubbing. If the sound is worse on acceleration or when shifting, exhaust movement under torque is a strong factor.
How do you distinguish underbody rattles from suspension knocks?
Comparison: Rattles are usually higher-pitched and rapid, while knocks are deeper and impact-related; in contrast, suspension knocks often appear specifically over bumps or transitions, while exhaust rattles can appear at steady cruise. Next, you’ll use bump-only testing to separate them.
Choose a route with small, repeatable bumps. If the noise appears only when the wheels hit bumps, prioritize suspension joints and bushings. If it appears even on smooth roads at a certain speed/RPM, prioritize shields and exhaust. This single separation often cuts your suspect list by more than half.
Next, we’ll focus on turning-related noises—one of the clearest “condition clues” in diagnosis.
How can turning-related sounds help you identify steering or driveline issues?
How-to: Turning noises are highly diagnostic because they load one side of the car and change joint angles—so you can pinpoint wheel bearings, CV joints, and steering components faster than with random driving. Next, you’ll use left-vs-right tests to isolate the side.

A common symptom is a clicking noise when turning, especially during low-speed turns or full steering lock. This often points to outer CV joint wear on front-wheel-drive vehicles, but it can also come from steering joints, strut bearings, or even a loose wheel cover that shifts under lateral load.
Use the side-loading test: in a safe area, make a steady left turn and then a steady right turn at similar speed. If the noise gets louder when turning left, you’re often loading the right-side wheel bearing and suspension; if louder turning right, you load the left side. This is not perfect, but it is a powerful directional clue.
What quick checks confirm or reduce suspicion of CV joints?
How-to: Confirm CV joint suspicion by checking torn boots, grease fling, and repeatable clicking on tight turns—because boot failure allows contamination and rapid wear. Next, you’ll decide whether the issue is urgent or monitorable.
Inspect CV boots for tears and grease on nearby components. A torn boot doesn’t always mean immediate failure, but it does mean the joint is at risk. If clicking is consistent on tight turns, service planning should move up your priority list.
When do turning noises indicate a wheel bearing rather than a joint?
Comparison: Bearings often produce a growl or hum that changes with vehicle speed and gets louder when side-loaded, while joints tend to click during tight turns and acceleration. Next, you’ll connect “speed vs. angle” behavior to the correct suspect.
If the sound is present on gentle curves at higher speed and feels like a steady growl, suspect bearings. If it’s a rhythmic click at low speed and tight steering angle, suspect CV joints or steering components. The best clue is whether the sound depends more on steering angle or on speed.
Next, we’ll move to braking—where noise can range from harmless to urgent, and where the right description saves time and money.
How do you diagnose braking-related noises without guessing?
How-to: Diagnose braking noises by linking them to brake application (light vs. firm), temperature (cold vs. hot), and pedal feel—then inspect pads, rotors, hardware, and shields—because brake systems create distinct sound patterns. Next, you’ll separate “maintenance noise” from “stop-now noise.”
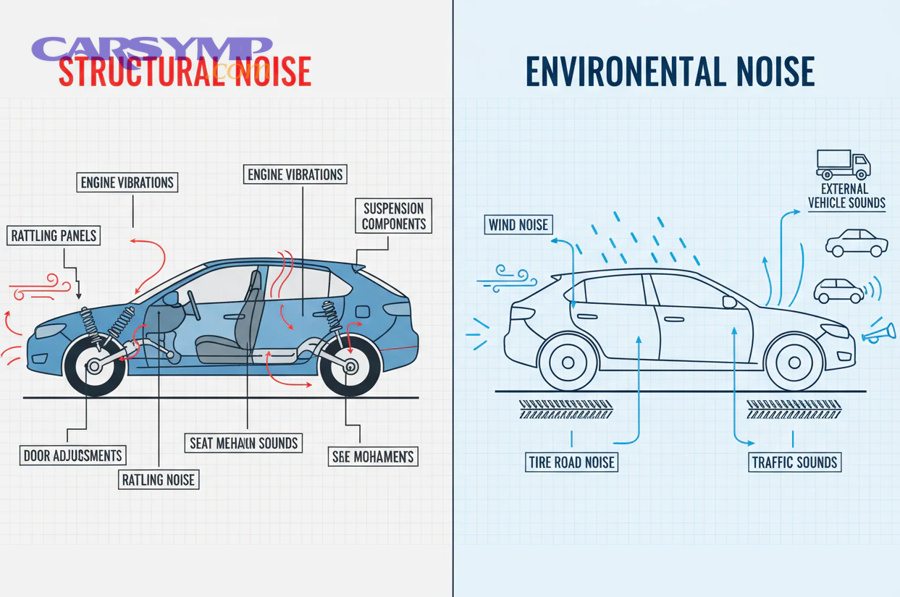
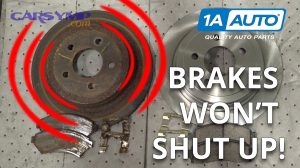
Two phrases matter because they point to different risks: brake squeal diagnosis and the more severe grinding noise when braking. Squeal can be caused by pad material, glazing, vibration, or missing shims; it can be annoying but not always dangerous. Grinding, however, often indicates pad material is gone and metal is contacting metal—raising the risk of rotor damage and reduced braking performance.
Start with the pedal test: does the noise happen only when you apply the brakes, and does it change with pressure? Light-pressure squeal that disappears with firm braking can indicate pad vibration. Noise that worsens with firm braking can indicate hardware issues, uneven pad contact, or rotor surface problems.
What does a high-pitched squeal usually mean, and how do you verify it?
Definition: Brake squeal is a high-frequency vibration caused by friction interaction and hardware resonance; it often appears at light pedal pressure and low speed. Next, you’ll verify it by checking pad thickness, shims, and rotor surface condition.
Check pad thickness and rotor condition. Look for uneven wear, heat spots, or scoring. Confirm caliper hardware is intact and properly seated. Sometimes a small stone caught between rotor and dust shield creates a sharp scraping that mimics more serious issues—so inspect the shield clearance too.
When is braking noise urgent even if the car still stops?
Boolean: Yes—braking noise is urgent if it’s paired with vibration in the pedal, longer stopping distance, pulling to one side, burning smell, or visible scoring, because these signs suggest loss of consistent friction or hardware failure. Next, you’ll decide whether to stop driving or schedule immediate service.
If you suspect grinding or feel brake performance has changed, reduce driving and seek service immediately. A “still stops” brake system can still be unsafe, especially if one corner is doing less work than it should.
Next, we’ll switch to speed-related hums and drones—sounds that often get misattributed to the engine.
What does a speed-related hum or drone usually indicate?
Grouping: There are three common sources for speed-related hums—tires, wheel bearings, and drivetrain/aerodynamics—because they scale with vehicle speed more than engine RPM. Next, you’ll use two tests to tell tire noise from bearing noise.
Drivers often report a humming noise at speed that gets louder on the highway and quieter at low speeds. This pattern strongly suggests rotating components at the wheels or airflow-related resonance rather than internal engine problems.
Use the “RPM vs speed” separation again: maintain the same speed in different gears (where possible and safe). If the pitch doesn’t track RPM changes, suspect tires/bearings. Then use the gentle lane-change test: on a safe road, very gently steer left then right. If the hum changes when the car’s weight shifts side-to-side, wheel bearings become more likely.
How do tires create noise that mimics mechanical failure?
Definition: Tire noise is a rhythmic or droning sound produced by tread pattern, uneven wear, cupping, or internal belt issues; it often changes with road surface. Next, you’ll confirm it by inspecting tread wear and rotating tires.
Uneven wear (cupping) can create a helicopter-like thrum. Aggressive tread patterns can hum even when healthy. Inspect for scalloping, feathering, and unusual wear patterns. If rotating tires changes the sound location or intensity, that’s a strong confirmation that tires are at least part of the cause.
What distinguishes wheel bearing noise from tire noise?
Comparison: Bearing noise tends to be a steady growl that changes with side-loading, while tire noise often changes significantly with pavement type and may have a repeating “waw-waw” pattern. Next, you’ll pick the most telling confirmation test for your case.
Bearings can also produce subtle vibration felt in the steering wheel or floor. If the noise increases when turning one direction and decreases when turning the other, bearings move higher on your suspect list than tires.
Next, we’ll address impact-related clunks—sounds that usually point to looseness or worn suspension links.
How do you diagnose clunks and thuds that happen over bumps?
How-to: Diagnose bump-related clunks by checking for looseness in sway links, control arm bushings, struts, and mounts—because clunks are typically caused by free play that becomes audible during impact. Next, you’ll learn how to separate suspension clunks from cabin rattles.

A clunking noise over bumps often sounds dramatic but can come from small parts: sway bar end links, worn bushings, loose top mounts, or even a spare tire or jack moving in the trunk. The key is to confirm whether the sound is chassis-related or cargo/interior-related.
Start with the “empty cabin” test: remove loose items from the cabin and trunk, and ensure the spare and tools are secured. Then drive slowly over small bumps. If the noise remains, focus on suspension and underbody components.
Which suspension parts most commonly create clunks, and what do they sound like?
Grouping: There are four common clunk sources—links, bushings, struts/mounts, and loose hardware—because each introduces play that “snaps” during movement. Next, you’ll match the clunk’s timing to the part type.
- Sway bar end links: sharp clunk on small bumps, often at low speed.
- Control arm bushings/ball joints: deeper thud and sometimes wandering steering feel.
- Strut mounts/bearings: clunk during turning and bumps, sometimes accompanied by creaking.
- Loose hardware: random clunk that changes after recent repairs or tire service.
How can you do a simple “play” inspection safely?
How-to: Do a basic inspection by checking visible bushings for cracks, looking for leaking struts, and gently rocking the vehicle to reproduce the sound—because visible deterioration and repeatable clunks often align. Next, you’ll decide what requires a lift versus what you can confirm visually.
Look for torn bushings, missing link boots, or metal-on-metal contact marks. Leaking struts can indicate loss of damping, which can worsen impacts and noises. While a full diagnosis may require lifting the vehicle, you can still identify many obvious causes with a flashlight and careful observation.
Next, we’ll tackle squeaks—sounds that feel minor but can be incredibly persistent, and often depend on temperature and moisture.
How do you diagnose squeaks, chirps, and light rubbing noises while driving?
How-to: Diagnose squeaks by identifying whether they are friction-based (rubber on metal), trim-based (plastic movement), or rotational (belt or wheel-related)—then reproduce them with moisture, steering input, or body roll. Next, you’ll learn why the “when” matters more than the “loudness.”
A squeaking noise when driving can come from suspension bushings, brake hardware, interior trim, or belt slip. Because squeaks are often high frequency, they can seem to “move” around the cabin as sound reflects off glass and panels.
Start by tying the squeak to one action: steering, braking, accelerating, or simply rolling over uneven pavement. If it happens during body roll (like entering a driveway), bushings and mounts become more likely. If it happens only at startup or with accessory load, belt-related issues rise in probability.
This is also where consistent terms help: if your “squeak” is actually a sharp chirp that rises with RPM, it’s closer to a belt event. If it’s a short squeak paired with suspension movement, it’s closer to bushing friction.
How do you isolate interior trim noises from mechanical noises?
How-to: Isolate cabin noises by pressing on panels while driving over a known bump (with a passenger), listening for changes, and checking for loose items—because trim noises change when you damp or support the vibrating part. Next, you’ll use this method to stop chasing mechanical parts for a cabin rattle.
If lightly pressing a door panel, dash trim, or seat frame changes the sound, the source is likely interior. Also check seat rails, headrests, and anything in cupholders or door pockets. A mechanical noise rarely disappears because you press a plastic panel; trim noise often does.
What if the “squeak” is actually brake-related or belt-related?
Comparison: Brake squeal appears mainly during brake application, while belt squeal appears during RPM changes or accessory load; in contrast, trim squeaks correlate with body flex and bumps. Next, you’ll use one-variable tests to categorize the sound correctly.
If you hear the sound only when applying the brakes, treat it like a brake inspection first. If the sound appears on cold starts and fades, revisit belt-related checks. The labels matter because they determine your inspection path—and they keep your diagnosis from becoming a random checklist.
Contextual border: At this point, you can diagnose most common noises by condition and basic inspection. Next, we’ll go one level deeper into the “rare but real” behaviors—intermittent sounds, temperature dependence, and resonance—so you can handle tricky cases that don’t reproduce easily.
Why do some car noises appear only sometimes, and how do you diagnose intermittent cases?
Definition: Intermittent noises are sounds that require a specific combination of temperature, load, moisture, or resonance to occur, which is why they disappear during “perfect” test drives. Next, you’ll learn four patterns that explain most intermittent noise behavior.

How does temperature change clearances and create noise?
How-to: Use temperature clues by comparing cold-start vs warm behavior—because thermal expansion can tighten or loosen shields, brackets, bushings, and mounts. Next, you’ll log time-to-noise to identify heat-related triggers.
Metal expands as it warms, rubber softens, and fluids thin. A heat shield might rattle when cold but quiet down when hot because expansion changes its tension. A bushing might squeak when cold but quiet when warm because rubber becomes more compliant. Logging “noise starts after 8 minutes” is more diagnostic than “sometimes it happens.”
How does moisture change friction noises and squeals?
How-to: Diagnose moisture-driven noises by noting rain, car washes, or morning dew—because water changes friction and belt grip, and can temporarily damp or amplify vibration. Next, you’ll use weather correlation as a reliable elimination tool.
Moisture can trigger belt slip, change brake friction behavior briefly, and damp certain trim vibrations. If the noise appears only after rain and vanishes after a few minutes of driving, friction and surface conditions are likely involved.
What is resonance, and why does it make a small problem sound huge?
Definition: Resonance is when vibration frequency matches a component’s natural frequency, amplifying sound dramatically even if the underlying looseness is minor. Next, you’ll use “narrow speed band” behavior to identify resonance-driven noises.
Resonance explains why a vehicle can sound terrible at 38–42 mph but quiet at 35 or 50. Shields, panels, exhaust sections, and even cabin trim can resonate. If your noise appears only in a narrow speed range, prioritize parts that can vibrate freely—shields, panels, hangers, and loose brackets.
How do you document and communicate noise symptoms clearly to a shop?
How-to: Communicate clearly by providing a short recording, a condition list (speed/RPM/action), and what changes the noise—because precise context reduces labor time and prevents wrong parts. Next, you’ll use a simple script to describe what you hear.
Use this structure: “Noise type + trigger + location + changes with X.” Example: “A high-pitched squeal on cold start, front passenger side of engine bay, worse with A/C, improves after 3 minutes.” This is far more useful than “my car makes a weird sound.”
FAQ
What should I write down the first time I hear a new noise?
Record the sound if safe, then write: speed, RPM (approximate), gear, road type, temperature, and what action triggered it (braking, turning, accelerating, bumps). These details make the noise reproducible, and reproducibility is the core of accurate diagnosis.
Why does the noise sound like it’s in the front when the problem is in the rear?
Sound reflects and travels through the chassis and cabin structure. Tires, bearings, and exhaust components can transmit vibration forward or upward, making location misleading. That’s why condition-based testing (speed vs RPM, turning vs straight, braking vs coasting) is more reliable than “where it seems to be.”
Can I diagnose noises without lifting the car?
You can narrow most issues significantly using controlled driving tests, visual inspection, and basic checks (tires, shields, belt condition). However, confirming suspension play, bearing roughness, or underbody hardware sometimes requires lifting the vehicle safely and properly.
What’s the fastest way to avoid replacing the wrong part?
Follow the workflow: reproduce the noise, isolate one variable at a time, and look for a confirmation that must change the noise if your suspect is correct (tighten a shield, rotate tires, change brake pressure, change steering load). If the noise doesn’t change as predicted, your suspect is probably wrong.
How should I describe this in terms of Car Symptoms without being vague?
Use symptom language tied to conditions: “noise only when braking,” “noise only when turning,” “noise only over bumps,” or “noise rises with speed.” Then add character (squeal, hum, clunk) and location (front left, under floor, engine bay). This turns general Car Symptoms into actionable diagnostic data.