Diagnose & Fix a Clunking (Knocking) Noise Over Bumps: Suspension Checklist for Car Owners
A clunking (knocking) noise over bumps usually means a part in your suspension, steering, brakes, or mounting hardware has developed play—and the bump is simply the trigger that makes that looseness “announce itself.” The fastest way to solve it is to match the noise pattern to the most likely parts, then confirm the culprit with a short, safe checklist.
The next step is learning which components fail most often and how their clunks sound different in real driving. That matters because the “same” noise can come from a sway bar link, a strut mount, a worn bushing, or even brake hardware—each with a different fix and urgency.
Then, you need a practical, repeatable way to locate the noise without guesswork. A structured home inspection can narrow the problem to one corner of the car and one system, so you don’t replace good parts.
Introduce a new idea: once you can identify where the clunk originates and what triggers it, you can also decide when it’s safe to keep driving and when you should stop and inspect immediately.
What does a clunking (knocking) noise over bumps usually mean?
A clunking (knocking) noise over bumps is a symptom of mechanical play—a joint, bushing, mount, or fastener is moving more than it should, and a bump forces it to “tap” against its neighbor.
Next, that idea becomes useful when you treat the sound like evidence: you can narrow the cause by how it clunks, when it clunks, and where it clunks.
Is a clunk over bumps always a suspension problem?
No—clunking noise over bumps is not always a suspension problem, and three common reasons are loose brake hardware, exhaust/heat shield movement, and powertrain or subframe mounting play.
However, you can sort this quickly by checking what else changes with the sound.
Reason 1: Brake hardware can knock like suspension.
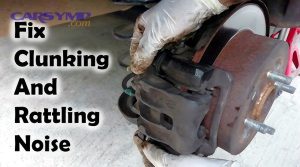
Loose pad hardware, weak anti-rattle clips, or sticky caliper slide pins can let the pad or caliper shift when the wheel hits a bump—especially at low speed. A classic clue is: the noise gets quieter or disappears with light braking. That’s why the linked phrase Loose brake hardware and caliper clunk causes matters: the brake pedal can “preload” the moving parts and temporarily silence them.
Reason 2: Exhaust and heat shields can “thunk” on bumps.
A torn exhaust hanger, loose heat shield, or bracket can smack the body under vertical movement. The sound often feels like it comes from the middle or rear of the car, and it may change when you load the trunk or add passengers. This is exactly the scenario described by Exhaust hanger clunk under bumps—the bump makes the exhaust swing and hit.
Reason 3: Mounts and fasteners can imitate suspension clunks.
Engine/trans mounts, subframe bolts, and even skid plates can loosen and create a dull thud over road impacts. You may also feel a “tap” during on/off throttle transitions, not just bumps.
To keep your terminology consistent during your car noise diagnosis, treat “clunk” as impact noise from looseness, then test which system the bump is loading.
What’s the difference between a clunk, knock, thud, and rattle over bumps?
Clunk wins for “loose joint impact,” knock is best for “repeated tapping,” and rattle is optimal for “lightweight hardware vibration,” while a thud usually points to bushing/mount bottoming or heavier contact.
Specifically, the sound character helps you prioritize what to inspect first.
Here’s a practical sound-to-cause guide (use it as a listening map before you lift the car):
- Clunk (single, heavier “clop”): often a joint that shifts once per bump—common in sway bar links, control arm bushings, or strut mounts.
- Knock (rapid “tap-tap”): often repeated play or a component bouncing—can occur with loose end links, rack mount movement, or brake pads tapping.
- Rattle (light “chatter”): frequently brake clips, heat shields, plastic undertrays, or loose hardware.
- Thud (deep “boom”): can suggest a worn bushing letting an arm hit its limit, a failed mount, or a shock/strut that’s no longer controlling motion well.
To illustrate the differences clearly, this quick comparison table shows what each sound typically “means” mechanically:
| Sound | What’s physically happening | Most common system suspects |
|---|---|---|
| Clunk | One larger part shifts and hits once | links, bushings, mounts |
| Knock | Repeated small impacts during bounce | steering play, brake pad knock |
| Rattle | Light parts vibrate rapidly | clips, shields, undertrays |
| Thud | Larger movement reaches a stop/contact | bushings, mounts, bottoming |
Evidence: According to a study by Politecnico di Milano from the Department of Mechanical Engineering, in 2010, measuring forces/moments at suspension-chassis joints (up to 0–100 Hz) was shown to be an effective way to understand suspension vibration/harshness behavior.
Which parts most commonly cause clunking noises over bumps?
There are 4 main groups of clunk causes—suspension links/bushings, struts/shocks and mounts, steering joints, and non-suspension hardware—based on which system experiences impact load over bumps.
Then, you can use that grouping to build a prioritized inspection order instead of chasing random parts.
What suspension components commonly clunk over bumps, and how can you spot them?
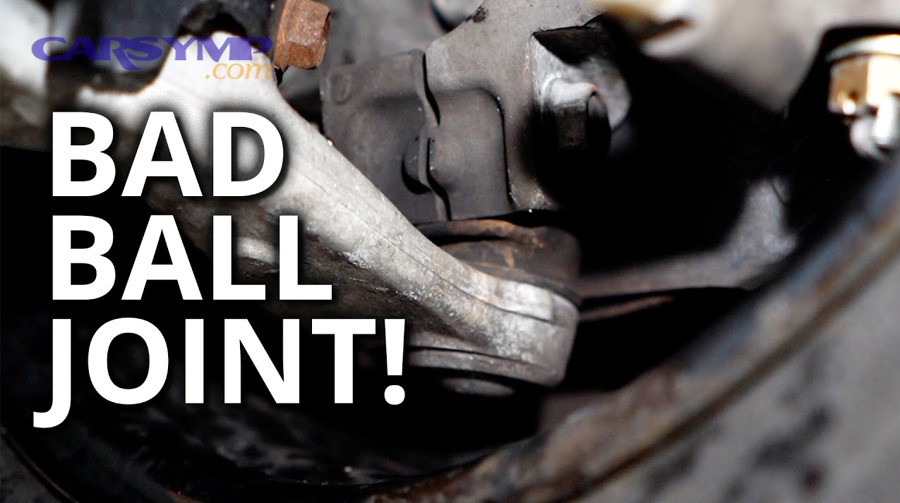
Suspension clunks most often come from sway bar links, sway bar bushings, control arm bushings, ball joints, and strut/shock mounts, and you can spot them by looking for torn boots, cracked rubber, leaking dampers, or shiny “witness marks.”
More specifically, each of these parts creates a slightly different “trigger pattern.”
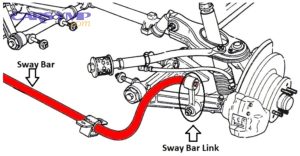
Sway bar links (end links):
- Typical sound: sharper clunk/knock on small repetitive bumps (like rippled pavement).
- Why: the link’s ball-and-socket wears; bumps make it “click” as load reverses.
- What to look for: torn boots, rust at the joint, visible play when you tug the link.
Sway bar bushings:
- Typical sound: duller thud during body roll transitions (driveway angle, turning into a parking lot).
- Why: the bar shifts in the bushing when loaded.
- What to look for: cracked rubber, bar not centered, grease washout (if greasable).
Control arm bushings:
- Typical sound: deeper clunk that often appears with braking + bumps (because the arm is loaded forward/back).
- Why: the bushing lets the arm “step” under impact.
- What to look for: cracks, separation, fluid leakage (hydraulic bushings), metal sleeve movement. This connects directly to Control arm bushing clunk symptoms—the bushing can look “okay” until it’s loaded.
Ball joints:
- Typical sound: clunk with steering input + bumps; sometimes a creak before a clunk.
- Why: joint clearance increases; impact makes the stud shift in the socket.
- What to look for: torn boot, grease leakage, measurable play.
What steering components can cause a clunk over bumps?
Steering-related clunks commonly come from outer/inner tie rods, steering rack mounts, and sometimes the intermediate steering shaft, and you can identify them by play at the wheel and noise changes with tiny steering inputs.
Moreover, steering clunks tend to show up on small bumps because the wheel is “jiggling” left-right, not just moving vertically.
Use these steering-specific clues (and weave them into your Steering rack and tie rod clunk signs):
- Clunk changes when you lightly “saw” the wheel left-right at low speed: points to tie rod or rack movement.
- Steering feels vague or wandering: suggests looseness, not just a noisy bushing.
- One-sided clunk with road crown: can happen when one tie rod is looser than the other.
A quick driveway check (later in the checklist): hold the tire at 3 and 9 o’clock and gently rock—if you feel a “click” and see tie rod movement, you’ve got a strong lead.
Can brakes, mounts, or exhaust cause a clunk over bumps?
Yes—clunking noise over bumps can come from brakes, mounts, or exhaust, and three reasons are pad/caliper movement, mounting bushing collapse, and hanger or shield contact.
In addition, these causes are often cheaper to fix than suspension arms—so they’re worth checking early.
- Brakes: look for missing anti-rattle clips, worn pad ears, loose caliper bracket bolts, and dry slide pins. If light braking reduces the noise, brakes move up your suspect list.
- Mounts: a collapsed mount lets the engine/trans “shift” and tap on impacts; you might also hear it during on/off throttle.
- Exhaust: torn hangers and loose shields create a metallic slap; push the tailpipe (when cool) to see if it contacts anything.
Evidence: According to a study by the University of Alabama from the Center for Advanced Public Safety, in 2024, brake-related defects represented a major share of vehicle-defect crash factors in their dataset, with brake failure noted at 42.02% among the specific defects described in the study’s descriptive statistics.
How can you diagnose where the clunk is coming from using a step-by-step checklist?
Use a 5-step Suspension clunk diagnosis checklist—(1) reproduce safely, (2) localize front vs rear, (3) isolate braking/steering influence, (4) do a visual check, (5) test for play—so you can identify the most likely component without guesswork.
To better understand the noise, you’ll treat it like a controlled experiment: change one condition at a time and watch what the sound does.
Does the clunk happen in the front or rear—and does that change the likely causes?
Front clunks win for strut mounts, tie rods, and control arm issues, while rear clunks are best explained by end links, shock mounts, and exhaust contact, based on where the impact load transfers into the body.
However, you should confirm location before ordering parts because sound travels through the chassis.
Front-biased suspects (common):
- Sway bar end links / bushings
- Strut mount or spring seat movement
- Control arm bushings or ball joints
- Inner/outer tie rods or rack mounts
Rear-biased suspects (common):
- Rear end links / bushings
- Shock upper mounts (especially if rubber is split)
- Trailing arm bushings (platform-dependent)
- Exhaust hangers and shields near the rear axle/subframe
A simple localization trick: drive slowly over the same small bump while a passenger listens near the footwell (front) vs rear seat area. It’s not perfect, but it often reveals “front-left” vs “rear-right.”
Can you reproduce the clunk at low speed with simple tests at home?
Yes—most clunking noise over bumps can be reproduced at low speed, and three reasons are the suspension still cycles, impacts are slower and easier to hear, and you can repeat the same trigger consistently.
Then, repeatability becomes your best diagnostic tool.
Try these safe, low-speed reproductions:
- Parking lot ripple test: 5–15 mph over mild ripples; listen for repeated knock.
- Driveway angle test: slowly enter at an angle; body roll loads sway bar bushings/links.
- Light brake test: repeat the same bump with light braking—if it changes, brakes move up the list.
- Gentle steering input test: slight left-right wiggle on the same rough patch—if it changes, steering/tie rods/rack mounts move up.
If you want a structured internal link point, this is where Suspension clunk diagnosis checklist fits naturally: you’re building a controlled sequence, not random guessing.
What is a quick DIY inspection checklist you can do safely in your driveway?
There are 6 main at-home checks you can do—based on visual condition and measurable play—to identify the most likely clunk source without special tools.
Next, the key is doing it safely and in the right order, which aligns with How to inspect suspension at home safely.
Safety basics (non-negotiable):
- Work on level ground.
- Use wheel chocks.
- If lifting the car, use jack stands; never rely on a jack alone.
- Keep hands clear of pinch points.
Checklist (fast → focused):
- Visual scan (wheels on): look for broken sway bar links, missing bolts, torn boots, leaking struts/shocks.
- Bounce test: push down hard on each corner; listen for clunks and note excessive bouncing.
- Wheel play test (lifted):
- 12 & 6 o’clock: can reveal ball joint or bearing play.
- 3 & 9 o’clock: often indicates tie rod play.
- Link/bushing feel test: grasp sway bar link (if accessible) and try to move it; worn joints often “click.”
- Brake hardware quick check: inspect anti-rattle clips, pad fit, and slide pin smoothness (if comfortable removing the wheel).
- Exhaust/heat shield shake test (cool exhaust): push gently to see if it contacts the body.
For readers looking for symptom mapping, sprinkle in Car Symptoms as a conceptual hub: noise + trigger + location are the “symptom triad” that narrows the fault.
When should you stop driving and get a professional inspection immediately?
Yes—clunking noise over bumps can be unsafe to drive when it signals loss of steering control risk, possible joint separation, or braking instability, and you should stop driving if any of those are present.
More importantly, this is the exact decision point behind When clunking is unsafe to drive.
Stop and inspect (or tow) if you notice:
- The car wanders or requires constant correction.
- The steering wheel changes position suddenly after bumps.
- You hear metal-on-metal grinding with the clunk.
- You feel a hard clunk + pull during braking.
- You see a torn ball joint boot with obvious looseness (or any component visibly separating).
Evidence: According to a study by the University of Alabama from the Center for Advanced Public Safety, in 2024, vehicles older than 10 years made up 67.06% of the vehicles involved in the defect-related crash dataset described in their analysis, supporting the idea that unresolved defects can accumulate with age and increase risk.
How do you fix a clunking noise over bumps once you find the culprit?
Fixing a clunking noise over bumps typically means one of three actions—tighten/secure, replace the worn part, or restore correct preload/alignment—and the right choice depends on whether the issue is looseness or wear.
Specifically, you want the repair that removes play and prevents it from returning.
Should you tighten or replace the part causing the clunk?
Replace it when wear causes the play, and tighten it when a fastener caused the play, because worn joints/bushings won’t regain original tolerance once material has degraded.
However, you can decide correctly by checking for repeatable movement versus loose hardware.
Tighten/secure (when appropriate):
- Loose sway bar link nut (but only if the joint is still tight)
- Loose caliper bracket bolts
- Loose undertray/skid plate fasteners
- Loose exhaust clamps or heat shield screws
Replace (when wear is present):
- End links with loose ball sockets
- Bushings with cracks/separation or sleeve movement
- Ball joints with measurable play
- Strut mounts that clunk or bind
- Tie rods with looseness at the joint
If you’ve had recent work done and a clunk started immediately afterward, prioritize “installation variables” first—this is the logic behind Clunk after recent suspension work causes (loose top nut, mis-torqued end link, incorrect preload, missing clips).
Do you need an alignment after fixing clunking suspension parts?
Yes—after fixing many clunk-related suspension or steering parts, you often need an alignment, and three reasons are changed geometry, new bushing positions, and toe/camber shifts that cause tire wear and instability.
Besides, alignment is the cheapest way to protect the repair and your tires.
You should strongly consider alignment after:
- Control arm replacement (bushings set geometry)
- Tie rod replacement (toe changes)
- Strut replacement (camber/toe can shift)
- Subframe movement or loosening (alignment can drift)
If you only replaced sway bar links or sway bar bushings, alignment is often not required—but you should still verify steering feel and tire wear patterns.
To set expectations for readers, add a realistic cost range in the context of your market, and connect it to Repair cost estimate for common clunks:
- End links: usually lower labor, moderate parts
- Control arms/ball joints: higher labor, alignment likely
- Struts/mounts: higher labor, alignment likely
Evidence: According to a study by Politecnico di Milano from the Department of Mechanical Engineering, in 2010, repeatable indoor testing that measured suspension forces and accelerations up to 100 Hz helped analyze how road irregularities and wheel/tire imbalance affect suspension behavior—reinforcing why correct assembly and controlled geometry matter after repairs.
What if it’s not a clunk—how do you diagnose clicking, squeaking, or grinding over bumps instead?
Clicking wins for rotational/turning-related joints, squeaking is best for dry rubber contact, and grinding is optimal for metal-to-metal contact that may be urgent, based on the sound’s friction mechanism.
Next, this “sound family” approach expands your diagnosis beyond clunks while keeping the same logic: trigger → mechanism → likely parts.
How is a clunk different from a clicking noise over bumps or on turns?
A clunk usually reflects impact from looseness, while clicking often reflects repeating motion in a rotating or steering-loaded joint, such as a CV joint or a joint with fine play.
To illustrate, clicking that gets louder during turns points you toward driveline/outer joint issues more than sway bar links.
Common clicking patterns:
- Clicks mainly on turns: suspect CV joint wear.
- Clicks on bumps plus steering input: suspect tie rods or rack movement.
- Clicks at very low speed with braking changes: suspect brake pad movement or hardware.
What does squeaking over bumps suggest compared to clunking?
Squeaking over bumps suggests friction, not impact, and three common reasons are dry bushings, rubber isolators rubbing, and dust boots/insulators moving under load.
Meanwhile, clunking is more about clearance and collision between parts.
Squeak clues that are different from clunk clues:
- Temperature/humidity influence (squeaks often change with weather)
- Long, rubbery “eeek” sound rather than a single impact
- Noise may appear during slow body roll (driveway angle) more than sharp hits
If you want micro-semantic breadth without keyword stuffing, keep it practical: squeaks often respond to correcting the failing bushing/isolator rather than “spraying everything,” because temporary lubrication can mask a worn component.
Is grinding over bumps a “stop driving” symptom?
Yes—grinding over bumps can be unsafe to drive, and three reasons are possible brake backing plate contact, wheel bearing or rotor shield interference, and metal-to-metal suspension contact that can escalate quickly.
More importantly, grinding suggests active damage, not just noise.
Stop-and-check triggers for grinding:
- Grinding that changes with braking (brake shield/pad/rotor contact)
- Grinding that increases with speed (bearing risk)
- Grinding paired with vibration or heat smell
Do coilovers, lift kits, or oversized wheels make clunking more likely?
Yes—modifications can make clunking noise over bumps more likely, and three reasons are changed end-link angles, incorrect preload/torque sequencing, and reduced clearance that creates contact points.
Especially after a suspension change, the “same” bump can now hit a different geometry and create a new sound.
Practical post-mod checks:
- Confirm sway bar end links are not binding at ride height
- Verify top-hat/strut mount torque with the suspension loaded (as specified by the platform)
- Check for tire-to-liner contact at full lock and compression
- Look for shiny witness marks where parts touch under movement
This is the safest place to connect back to the earlier concept: a bump doesn’t “create” the problem—it reveals it.
Evidence: According to a study by the University of Alabama from the Center for Advanced Public Safety, in 2024, their crash dataset analysis highlighted how common vehicle defects (including brakes and tires) appear repeatedly in defect-related crash contexts—supporting the idea that ignoring abnormal noises can allow defects to persist and compound.