


A coolant leak location is easiest to identify when you stop chasing the puddle and start tracing the leak origin—the highest point where fresh coolant first appears—because coolant can travel along plastics, brackets, splash shields, and airflow before it drips.
Next, you’ll get a prioritized checklist of the most common cooling-system leak points (hoses/clamps, radiator, reservoir, water pump, thermostat housing, cap area) so you can inspect the highest-probability spots first instead of searching randomly.
Then, you’ll follow a fast inspection sequence that uses simple confirmation cues—fresh wetness, dried crust, drip mapping, and pressure-only leak behavior—to pinpoint the leak location even when it’s hard to see.
Introduce a new idea: once you can locate the leak confidently, you can decide whether it’s a small external seep you can address soon, or a high-risk leak pattern that should stop you from driving.
What does “coolant leak location” mean, and why can the drip spot be misleading?
A coolant leak location is the true origin point where coolant escapes the cooling system, not the place where coolant finally lands on the ground, because coolant often moves downhill and downwind before it drips.
To better understand why your driveway spot can lie to you, focus on how coolant behaves after it leaves the leak origin: it clings, it spreads, it collects, and only then it falls.
Is the puddle under your car always directly beneath the leak source?
No—the puddle under your car is not always directly beneath the leak source for at least three reasons: gravity-runoff, airflow smear, and splash-shield pooling.
First, gravity pulls coolant down whatever surface it touches. A small seep at the thermostat housing can run along the engine block, follow a bolt ridge, and exit near the oil pan edge—making it look like the leak started low.
Second, airflow can smear coolant backward while driving. A leak that begins at the front of the engine (like a radiator seam) may end up dripping farther rearward on the subframe once air pressure pushes the liquid along undertrays.
Third, splash shields and under-covers can pool coolant and release it later. You might park, see nothing, and then notice a puddle ten minutes later because coolant collected on a shield and finally overflowed.
Practical takeaway: treat the puddle as a clue for zone mapping, not proof of the leak origin. Use the puddle location to decide where to start looking under the car, then trace upward to the first wet point.
What quick clues identify coolant vs other fluids in minutes?
There are 5 fast clues that identify coolant versus other fluids: color behavior, sweet odor, slick feel, crystal residue, and coolant level correlation.
- Color behavior: modern coolants can be green, orange, pink, blue, yellow, or purple. The key is not the exact shade—it’s that the fluid often looks watery with a dyed tint, not thick like oil.
- Sweet odor: ethylene glycol-based coolant often smells sweet. That smell is strongest near the leak origin in the engine bay, not at the puddle.
- Slick feel (carefully): coolant feels slippery, but usually less oily than motor oil. Use a paper towel, not your bare fingers, and wash hands afterward.
- Crystal residue: dried coolant commonly leaves white/colored crust or chalky trails around fittings, seams, and hose ends.
- Level correlation: the most decisive clue is the coolant reservoir level dropping over time. A slow leak often shows up as a “mystery top-off” pattern.
If these clues point to coolant, you’re ready for the next step: check the highest-probability leak points first.
Where are the most common coolant leak points you should check first?
There are 6 main groups of coolant leak points—hose ends/clamps, radiator, reservoir, water pump, thermostat housing/pipe joints, and cap/overflow path—based on where seals, seams, and moving shafts commonly fail.
Below, you’ll work from easiest to inspect to most diagnostic value, because speed comes from smart order, not rushing.
Which hose and clamp locations fail most often (upper/lower radiator hoses, heater hoses)?
The most common hose-and-clamp leak locations are hose ends at necks, quick-connect fittings, and rub-through points, because hoses age, soften, and lose sealing force at the highest stress areas.
Start here:
- Upper radiator hose ends (engine-side and radiator-side)
- Look for wetness right under the clamp band and a shiny “clean path” where coolant washed away dust.
- Lower radiator hose ends
- These often drip onto splash shields. Use a flashlight to check the underside of the hose neck.
- Heater hoses at the firewall
- The firewall fittings are easy to miss because leaks can run down behind the engine.
- Small bypass/bleeder hoses (if equipped)
- Small hoses crack sooner and can spray fine mist that dries into crust.
- Clamps themselves
- Spring clamps can weaken; worm-gear clamps can be overtightened and cut into hoses.
Fast confirmation move: wipe the suspected area with a paper towel, then recheck after a short warm-up. Fresh coolant reappearing at the same edge is a strong leak-origin signal.
Are radiator and reservoir leaks usually cracks, seams, or caps?
Radiator and reservoir leaks are usually seams in plastic tanks, hairline cracks in plastic bodies, or cap/neck sealing failures, and each pattern leaves a different trail.
- Seam leak (radiator end tank to core): often shows as a damp line along the crimped seam, with dried crust that follows the seam length.
- Cracked plastic tank/reservoir: commonly appears as a wet spot that spreads outward in a spider pattern, especially on aging reservoirs.
- Cap/neck issue: may not look like a “leak” at first; it can push coolant into the overflow path when pressure rises, leaving wetness around the cap area or overflow hose.
Quick comparison:
- A seam leak tends to be linear and consistent.
- A crack can widen with heat and show intermittent behavior.
- A cap problem often correlates with higher temps, hard hoses, or coolant smell after shutdown.
Does a leaking water pump always drip from the same place?
No—a leaking water pump does not always drip from the same place for at least three reasons: weep-hole signaling, gasket edge seep, and pulley fling pattern.
- Weep hole leak: many pumps have a small drain hole that lets coolant escape when the internal seal starts failing. The leak often appears as a drip or crust directly below the pump snout or housing.
- Gasket seep: coolant may seep from the pump-to-engine mating surface and run down the block.
- Pulley fling: if coolant contacts the pulley/belt area, it can spray outward and leave a fan-shaped splatter that makes the origin harder to see.
Best practice: inspect the area below and around the pump with a light, looking for a concentrated wet spot or crust near the weep-hole zone, then trace upward.
How do you identify the leak location fast with a step-by-step inspection sequence?
The fastest method is a 6-step leak-location inspection sequence—identify coolant, map the drip zone, inspect cold, warm the system, trace the highest wet point, and confirm with a simple test—so you can find the leak origin without dismantling parts.
Next, follow the same order every time; consistency is what turns a frustrating search into a repeatable diagnostic routine.
Should you inspect the cooling system only when the engine is cold?
No—you should not inspect the cooling system only when the engine is cold, for three reasons: some leaks appear under pressure, heat expands cracks, and warm airflow reveals spray patterns.
That said, start cold for safety and clarity:
- Cold inspection (safer): you can touch hoses, see dried residue, and avoid pressurized coolant burns.
- Warm inspection (more revealing): small cracks and marginal seals may leak only when the system builds pressure and parts expand.
Safe approach: do a thorough cold check first; if nothing obvious appears, warm the engine while watching from a safe distance—never remove a cap on a hot system.
What is the fastest “trace method” to find the highest wet point?
The fastest trace method is: start high, follow gravity lines, and stop at the first fresh wetness, because the highest fresh wet spot is usually closest to the leak origin.
Use this micro-sequence:
- Start at the reservoir/cap area
- Look for wetness around the cap seat, overflow hose, and neck.
- Follow upper hose runs
- Check both ends and the midpoint where hoses rub or rest on brackets.
- Inspect the thermostat housing and adjacent joints
- Look for wetness at gasket edges and sensor ports.
- Check the radiator seam and corners
- Corners and end-tank seams often show crust first.
- Move to the water pump zone
- Look below the snout and along the gasket line.
Speed trick: use a clean paper towel to dab suspected edges. Coolant transfers immediately and shows you the wet boundary.
Can cardboard or paper under the car help pinpoint the leak location?
Yes—cardboard or paper under the car can help pinpoint the leak location for three reasons: it captures drip timing, reveals drip position, and shows multiple drip sources.
Do it like this:
- Park on level ground.
- Slide a large piece of cardboard under the engine bay area and extend it toward the middle of the car.
- Mark the cardboard’s orientation (front/back/left/right).
- Check it after 30–60 minutes, and again the next morning.
What you learn from the pattern:
- A drip near the front center often correlates with radiator, pump, or thermostat zones.
- A drip closer to the firewall can correlate with heater hoses or rear coolant passages.
- Two distinct drip spots can indicate more than one leak point or a split runoff path.
This drip map doesn’t replace tracing— it simply tells you where to aim your flashlight first.
What leak locations point to bigger problems (heater core, head gasket) vs simple fixes?
Some coolant leak locations point to simple external sealing issues, while others suggest hidden cabin leaks or internal engine leaks, and the fastest way to tell is to compare the leak’s symptoms, location, and system behavior.

In addition, recognizing “red flag” patterns early prevents you from driving a car that is losing cooling capacity faster than the gauge can warn you.
Do cabin symptoms (sweet smell inside, fogging windows, wet carpet) indicate a heater core leak?
Yes—cabin symptoms can indicate a heater core leak for at least three reasons: coolant evaporates into the HVAC airflow, it mists the glass, and it soaks the passenger-side floor area.
Here’s what to look for—these are classic Heater core leak symptoms:
- Sweet smell inside the cabin, especially when the heater is on
- Persistent window fogging that doesn’t clear normally
- Damp carpet (often front passenger side) or sticky residue near the HVAC case
- Coolant loss with no obvious external puddle
- Weak heat output if the core is leaking or partially clogged
Leak-location logic: a heater core leak originates inside the dash HVAC box, so coolant may not drip outside the car until it overflows through drains—meaning the “puddle test” can fail you here.
What signs suggest an internal coolant leak rather than an external one?
There are 5 main signs of an internal coolant leak: unexplained coolant loss, white exhaust that persists, milky oil contamination, rough cold starts/misfires, and pressurization behavior that doesn’t match external leaks.
- Unexplained coolant loss: you keep topping off, but you rarely see drips.
- Persistent white exhaust: steam that continues after warm-up can indicate coolant entering combustion.
- Milky or frothy oil: coolant mixing with oil changes its appearance and reduces lubrication protection.
- Rough starts or misfires: coolant in a cylinder can disrupt combustion, especially on first start.
- Abnormal pressure behavior: hoses get rock-hard quickly, or bubbles appear in the reservoir repeatedly.
Important caution: these signs are not a DIY “verdict” by themselves. They are risk indicators that should push you toward proper confirmation (pressure testing, combustion gas testing, professional diagnosis).
Which is more urgent: an external hose leak or an internal head-gasket-type leak?
An external hose leak is often urgent but manageable, while an internal head-gasket-type leak is usually more urgent, because it can reduce cooling capacity and damage engine components quickly if the car is driven while overheating.
Here’s the practical comparison:
- External hose leak (often visible):
- You can often see and locate the leak origin.
- The risk rises when the leak rate increases under pressure.
- Immediate danger depends on how fast the reservoir drops and whether temperatures climb.
- Internal leak (often hidden):
- You may not see a puddle.
- The engine can overheat unexpectedly, and the cooling system can behave unpredictably.
- Damage risk is higher because you can lose cooling effectiveness without obvious external warning.
According to a study by Kharkiv National Automobile and Highway University from the Automobile Transport department, in 2021, researchers found that thermal damage to the cylinder head can occur within about 10–15 seconds after a sudden cooling failure from coolant loss. (researchgate.net)
That is why “I’ll just drive it a little” is a bad strategy when the leak pattern suggests rapid coolant loss.
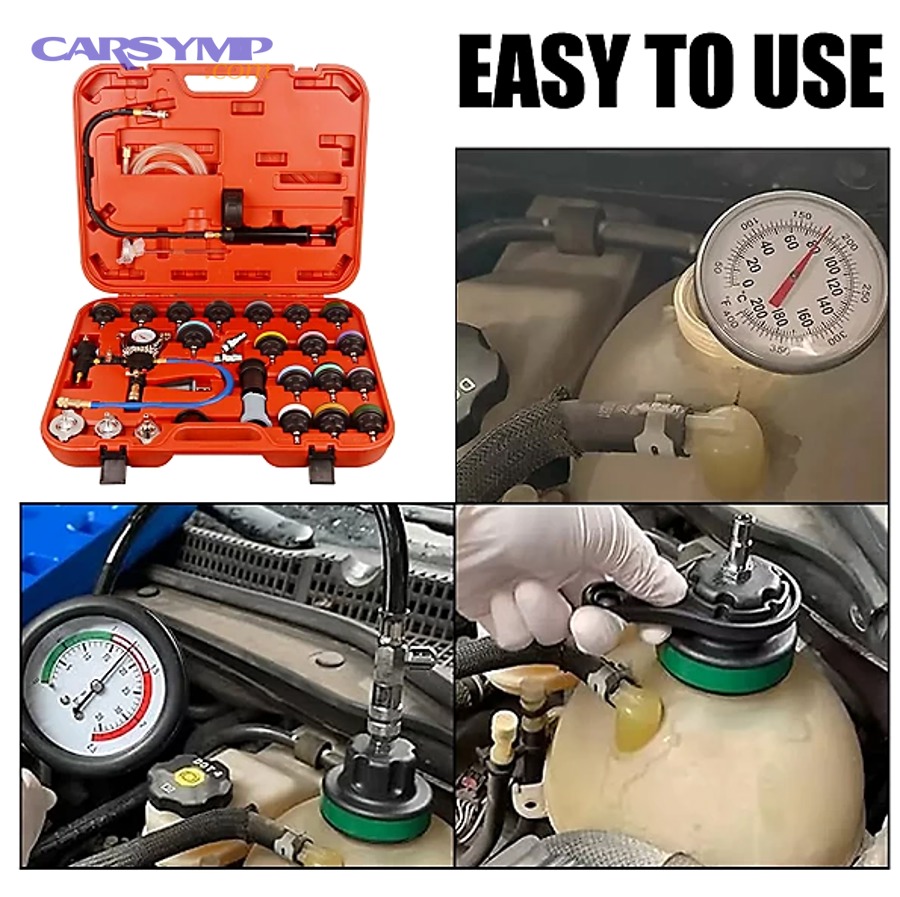
How do you confirm the exact leak point when it’s not visible?
When the leak point isn’t visible, you confirm it by using pressure-based confirmation and trace-based confirmation—because leaks that hide at idle often reveal themselves when the cooling system is pressurized or when a tracer shows the exact path.
Below, the goal is not to become a technician overnight; it’s to choose the fastest confirmation method that fits your situation and risk level.
Does a cooling-system pressure test find leaks faster than visual inspection alone?
Yes—a cooling-system pressure test often finds leaks faster than visual inspection alone for three reasons: it simulates operating pressure, it forces seepage to appear, and it holds the system steady so you can watch one area without the engine shaking or airflow moving liquid around.
Why pressure helps:
- Some leaks only show when seals are loaded (gaskets, seams, small cracks).
- You can watch the leak origin form without the distraction of belts, fans, or road airflow.
- A slow seep becomes obvious when a dry paper towel suddenly dampens at a specific edge.
When pressure testing may be less revealing:
- Leaks that occur only at high temperature expansion (some plastics).
- Leaks that spray only when the engine is revved or under specific vibration.
- Overflows caused by cap behavior rather than a true leak at a seam.
Rule of thumb: if you can smell coolant or lose coolant but can’t find the origin with a cold/warm inspection, pressure-based confirmation becomes the fastest path to certainty.
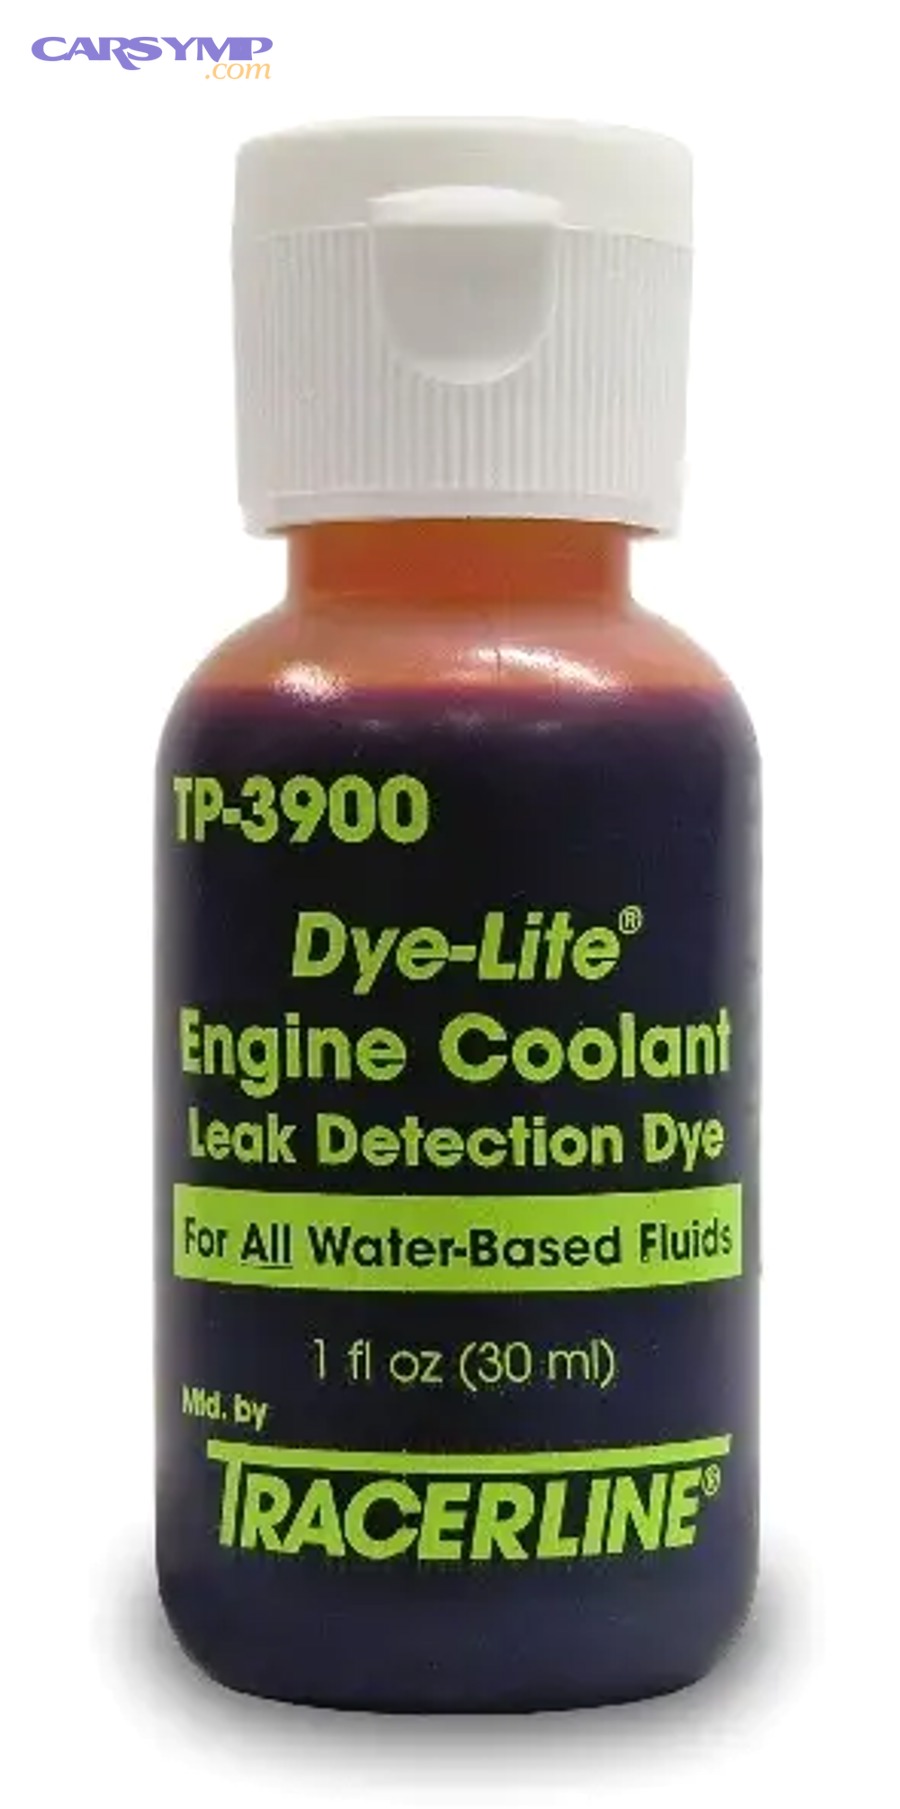
Is UV dye worth using for tiny or intermittent leaks?
Yes—UV dye is worth using for tiny or intermittent leaks for three reasons: it highlights hairline paths, it marks the leak origin clearly, and it separates old residue from fresh leakage.
UV dye shines when:
- You see crust everywhere and can’t tell what’s old vs new.
- The leak is so small it evaporates before dripping.
- The coolant travels along complex surfaces and hides the origin.
To get clean results:
- Wipe heavily crusted areas before testing so you’re not reading history.
- Drive or warm the engine enough for the leak to occur.
- Scan methodically from high to low, because the first bright trace is usually the origin.
Once you can confirm the leak origin, you’re ready to shift from “find it” to “what to do next”—without drifting into guesswork.
What should you do after you find the coolant leak location (and what should you avoid)?
After you find the coolant leak location, you should stabilize the situation, choose the right repair path, and avoid actions that hide the problem, because the wrong next move (like ignoring a leak or using the wrong stop-leak product) can turn a small leak into overheating and engine damage.

Next, treat the next steps as a decision tree: Is it safe to drive? Is it a simple external seal? Is it a higher-risk hidden/internal pattern? That structure keeps your decisions consistent.
Is it safe to drive with a small coolant leak if you keep topping off?
No—it is not automatically safe to drive with a small coolant leak even if you keep topping off, for three reasons: the leak rate can increase suddenly under pressure, the system can pull in air and overheat, and you can lose coolant faster than you notice.
A more accurate answer is conditional:
- Lower-risk scenario (still not ideal): slow seep at a hose clamp, stable temperatures, minimal loss over days, no overheating history, and you can monitor level closely.
- Higher-risk scenario (do not drive): any overheating, rapid coolant loss, steam, hard hoses quickly, heater stops working while temp rises, or leak patterns suggesting heater core/internal loss.
If you must move the vehicle a short distance, the safest approach is to keep RPM and load low, watch temperature continuously, and stop immediately if temps climb. But the moment “monitoring” becomes your plan, you’re already beyond the intent of quick identification—you’re in risk management.
What temporary fixes are commonly used, and when are they a bad idea?
Temporary fixes can help in a pinch, but they become a bad idea when they mask the leak origin, clog small passages, or delay a needed part replacement.
Common temporary tactics and the real tradeoffs:
- Tightening a clamp:
- Works if the clamp loosened and the hose isn’t damaged.
- Fails if the hose is swollen, cracked, or cut under the clamp.
- Trimming and re-seating a hose end:
- Works when the hose end is deformed but the hose has enough extra length.
- Fails if the hose is aged and stiff throughout.
- Stop-leak products:
- Can slow some minor radiator seeping.
- Can also create deposits in narrow passages (heater core, small coolant ports) and complicate future coolant leak repair decisions.
Avoid this trap: if your leak origin is uncertain, temporary sealants can spread residue everywhere and make later confirmation harder. Confirm first, then choose the least risky fix.
Which repairs are typically DIY-friendly vs shop-level (labor-heavy) once the location is known?
There are two main groups of repairs—DIY-friendly external sealing tasks and shop-level labor-heavy repairs—based on access difficulty, tool needs, and how much disassembly is required.
Often DIY-friendly (when you’re confident in the leak origin):
- Hose replacement and clamp replacement
- Reservoir replacement (if accessible)
- Radiator cap replacement
- Some thermostat housing gasket replacements (varies by engine layout)
This is where DIY hose clamp and hose replacement basics matter: you want clean hose necks, correct clamp type and placement, and a secure seal without cutting the hose.
Often shop-level (or advanced DIY with time/tools):
- Water pump replacement (can involve belts, timing components, or tight access)
- Heater core replacement (dash disassembly on many vehicles)
- Head gasket / internal leak diagnostics and repair
- Hidden crossover pipes or rear-of-engine coolant passages
Decision logic: if the repair requires removing major components or if the leak pattern suggests internal loss, the cost of a wrong DIY attempt is often higher than the cost of a correct diagnosis.
How can you prevent repeat leaks after repair (coolant type, clamps, pressure issues)?
You prevent repeat leaks by restoring proper sealing, proper coolant condition, and proper pressure control, because leaks return when the system keeps cycling through heat and pressure with weak points still present.
Focus on:
- Correct coolant and mixture: use the coolant type specified for your vehicle and avoid mixing incompatible chemistries unless the product is explicitly universal.
- Clean sealing surfaces: dried crust on a hose neck can prevent a full seal.
- Correct clamp selection and placement: clamp behind the hose bead, not on the bead; avoid over-tightening worm clamps that cut rubber.
- Healthy pressure control: a weak cap can cause boil-over and overflow behavior that looks like a leak.
- Air removal after opening the system: trapped air can create hot spots and pressure spikes that stress seals.
Once you combine accurate leak-origin identification with the right repair level, you move from “chasing coolant” to maintaining a stable cooling system that stays dry under pressure.