


Engine overheating is rarely “bad luck”—it’s usually a predictable outcome when coolant level, coolant quality, or coolant flow stops doing its job. Proper coolant maintenance prevents overheating by keeping heat transfer efficient, raising boiling protection, and reducing internal corrosion that quietly blocks passages over time.
Next, you’ll learn a simple cooling-system checklist you can run in minutes, so you can catch small issues (low level, weak cap, soft hoses, clogged fins) before they become a roadside overheat. This checklist is designed for everyday drivers, not technicians.
Then, you’ll see how to tell when coolant is due for service based on time, mileage, appearance, and test results—plus what changes after repairs like radiator replacement or a water-pump job. Those decision rules matter because “old but full” coolant can still cause overheating.
Introduce a new idea: once you understand coolant condition and flow, you can choose the right coolant type and mixture, avoid compatibility mistakes, and recognize the problems that maintenance can’t fix—so you know when to troubleshoot parts instead of blaming the coolant.
Can proper coolant maintenance really prevent overheating?
Yes—proper coolant maintenance can prevent overheating because it (1) keeps heat transfer efficient, (2) raises boiling-point protection under real operating conditions, and (3) prevents scale/corrosion that restricts coolant flow and traps heat. Then, to see why these three reasons matter, follow the chain from “coolant quality” to “coolant flow” to “heat rejection” at the radiator.

Why coolant condition directly affects heat transfer
Coolant is not just colored liquid—it’s a heat-transfer medium plus a chemistry package. When inhibitors deplete, metals corrode and solids form. Those solids don’t need to be dramatic to be dangerous: they can coat internal surfaces like insulation and reduce how fast heat leaves the engine.
A clear mental model helps:
- The engine makes heat every combustion event.
- Coolant carries heat from the block and head to the radiator.
- Airflow removes heat from the radiator fins.
- If any link weakens, temperature climbs.
When coolant is old or contaminated, two overheating triggers appear:
- Reduced heat transfer inside the engine (film, sludge, scale).
- Reduced flow (blocked passages, partially clogged radiator tubes, sticky thermostat from deposits).
In practical terms, an engine can overheat even if the coolant level looks “fine,” because quality and circulation matter as much as quantity.
Why boiling protection is an overheating “multiplier”
Overheating becomes much worse when coolant starts to boil locally. Boiling creates vapor pockets; vapor does not carry heat well; metal temperatures spike; and the gauge rises fast. That’s why coolant mixture and system pressure (cap health) matter.
A major reason correct mixture helps is that glycol concentration increases boiling protection. According to a study by Nahrain University from the College of Engineering (Chemical Engineering), in 2007, experimental results showed the boiling point increases as the weight percent of ethylene glycol increases in an ethylene glycol/water mixture.
Why corrosion/scale can cause overheating even before leaks appear
The most deceptive overheating cause is internal restriction: it grows slowly, stays invisible, and suddenly becomes obvious in hot weather, towing, or stop-and-go traffic.
A useful real-world benchmark: According to a report by the University of Alaska Fairbanks Sea Grant Marine Advisory Program, in 2001, scale buildup as little as a quarter inch can reduce heat transfer dramatically—enough to contribute to overheating.
What is the simplest cooling-system checklist for preventing overheating?
There are 7 core cooling-system checks that prevent most overheating issues: coolant level, leak evidence, radiator cap health, hose condition, radiator airflow, fan operation, and temperature trend monitoring. Next, use this checklist as a repeating routine—because consistency catches problems while they’re still cheap.
1) Is the coolant level correct when cold?
Check the reservoir level at the “COLD” mark (or MIN/MAX). Low level reduces the system’s ability to carry heat and often introduces air pockets that trigger hot spots.
Quick rule: if you add coolant more than once, assume there’s a leak until proven otherwise.
2) Do you see evidence of leaks or dried residue?
Look for:
- Pink/white crust at hose joints or radiator seams
- Dampness around the water pump area
- Wet carpet or sweet smell inside (heater core)
- Coolant drops under the car after parking
Even slow leaks become overheating under load because the system can’t maintain pressure and circulation.
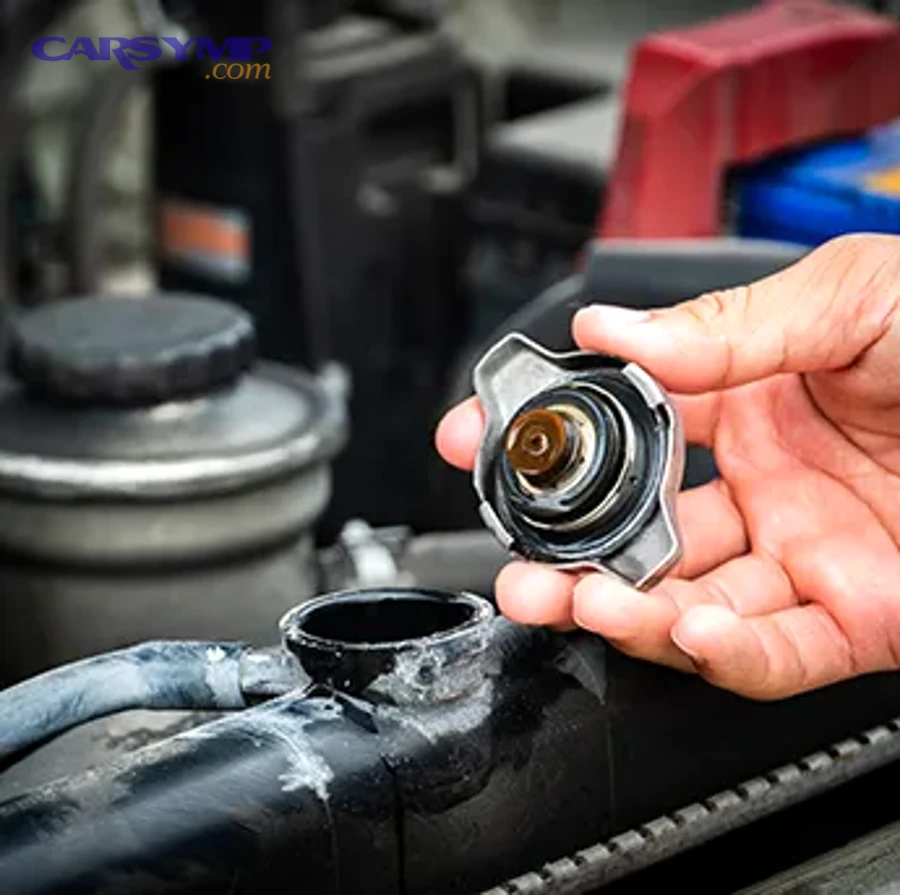
3) Is the radiator cap the correct rating and in good condition?
The cap isn’t decorative; it controls pressure and recovery flow. A weak cap lowers boiling protection and can push coolant out early.
Simple signs of trouble:
- Cracked rubber seal
- Corrosion on sealing surfaces
- Coolant smell after driving with no visible leak
- Overflow after normal driving
4) Are hoses firm—not soft, swollen, or cracked?
Squeeze upper and lower radiator hoses (engine cold). They should feel resilient, not mushy. Soft hoses can collapse under suction at higher rpm, reducing flow and triggering overheating that “comes and goes.”
5) Is radiator airflow unobstructed?
Overheating in traffic often comes from airflow issues:
- Bugs/debris stuck in fins
- Bent fins reducing airflow
- Plastic bags or road debris lodged between condenser and radiator
Clean gently with low-pressure water from the back side (engine off and cool).
6) Do the fans turn on at the right time?
Electric fans should cycle when coolant temp rises (often after idling). If the A/C is on, many cars force at least one fan on.
Common fan-related overheating pattern: fine on highway, hot at idle.
7) Are you watching the trend, not just the number?
A healthy system stabilizes. A system heading toward overheating often shows:
- Slow climbing over several minutes in traffic
- Spikes after a hard pull (hill, towing)
- Heater output suddenly turning cool (air pocket or low level)
If you want a driver-friendly place to compare symptoms and patterns, you can cross-check common overheating scenarios on carsymp.com.
Evidence: According to a report by the University of Alaska Fairbanks Sea Grant Marine Advisory Program, in 2001, cooling-system maintenance is repeatedly linked to preventing catastrophic overheating and corrosion-related damage.
How do you know when to flush or replace coolant to prevent overheating?
Use a time/mileage schedule plus condition checks: replace coolant when it reaches the manufacturer interval, shows contamination, fails a test (freeze/boil/pH/inhibitors), or after major cooling-system repairs—because old coolant can overheat even when the level is correct. Then, instead of guessing, follow a decision ladder: interval → appearance → test result → repair history.
Manufacturer interval vs real-world interval
Start with your owner’s manual. But real life can shorten intervals:
- Hot climates
- Heavy towing
- Frequent short trips (more condensation/acid formation)
- Mixed metals (aluminum head, iron block) that increase corrosion risk
Visual signs coolant is overdue
Coolant should look clear and consistent. Warning signs include:
- Rusty/brown tint
- Oily film
- Sludge at reservoir bottom
- Floating particles
- Strong burnt smell
If you see these, the safest assumption is that cooling efficiency and corrosion protection are compromised.
Test-based triggers that matter more than color
Color is not a reliable indicator of chemistry. Use measurable checks:
- Freeze/boil protection (refractometer is best)
- pH (acidity accelerates corrosion)
- Inhibitor strength (test strips on some formulations)
- Contamination signs (combustion gases, oil)
A practical service decision: if freeze/boil protection is off and pH/inhibitors are off, replacement is justified even if the interval isn’t “due” yet.
When service is mandatory after repairs
Replace coolant (or at minimum drain/refill) after:
- Radiator replacement
- Water pump replacement
- Thermostat housing leaks opened up
- Heater core replacement
- Head gasket work
Repairs introduce air and debris, and mixing old coolant back in can reduce inhibitor strength.
Where “coolant flush” fits
A coolant flush is most useful when you suspect contamination, sludge, wrong coolant type, or unknown history. It’s also useful when switching formulations, because partial mixing can create gel-like deposits in worst cases.
If you want an at-home approach, follow DIY coolant flush steps and safety guidelines: cool engine, use proper capture containers, avoid opening a hot cap, and dispose of waste properly.
Evidence: According to a report by the University of Alaska Fairbanks Sea Grant Marine Advisory Program, in 2001, coolant conditioners/inhibitors become depleted with use and coolant should be tested periodically because deposits and corrosion can contribute to overheating.
Which coolant type and mixture help prevent overheating the most?
No single coolant “wins” for every car: the best coolant is the manufacturer-specified chemistry, mixed correctly with proper water—because compatibility, inhibitor design, and boiling protection must match your engine’s materials and service conditions. However, you can still compare types by what they’re designed to protect and how they behave when mixed incorrectly.
Coolant family overview (what matters for overheating)
Here’s a practical table showing what each type is trying to do. This table helps you match chemistry to the engine’s materials and avoid mixing mistakes that reduce heat transfer.
| Coolant family (generic) | Typical inhibitor style | Best fit (general) | Overheating risk if wrong/mixed |
|---|---|---|---|
| IAT (Inorganic Additive Technology) | Silicates/phosphates (older style) | Many older vehicles designed for it | Faster inhibitor depletion; mixing can create deposits |
| OAT (Organic Acid Technology) | Organic acids (long-life) | Many modern vehicles designed for long intervals | Wrong OAT or mixing may reduce protection; some are brand-specific |
| HOAT (Hybrid OAT) | Organic + specific inorganics | Many OEM-specific formulas | Compatibility errors can cause sludge or reduced protection |
Key takeaway: “universal” claims are not the same as “correct for your engine.”
Mixture ratio: why 50/50 is a default (and when it isn’t)
Many engines run well on a 50/50 mix, because it balances:
- Heat transfer
- Freeze protection
- Boiling protection
- Corrosion inhibitor concentration
But extremes can backfire:
- Too much water → lower boiling protection, more corrosion risk if water quality is poor
- Too much glycol → reduced heat transfer, potentially higher running temps under load
According to a study by Nahrain University from the College of Engineering (Chemical Engineering), in 2007, the boiling point of ethylene glycol/water mixtures increased as ethylene glycol concentration increased, which supports why correct mixture matters when preventing local boiling.
Water quality matters more than most people think
If you top off repeatedly with hard water, minerals can contribute to deposits. Distilled/deionized water is a safer default when mixing concentrate, unless your coolant is premixed.
“Coolant types and compatibility” rules that prevent expensive mistakes
Use these rules to stay safe:
- Match the spec, not the color.
- Don’t mix types unless the coolant manufacturer explicitly allows it.
- If history is unknown, service it instead of topping off blindly.
- After switching types, ensure the system is clean to avoid leftover chemistry conflicts.
Evidence: According to a report by the University of Alaska Fairbanks Sea Grant Marine Advisory Program, in 2001, coolant should prevent scale/sludge, inhibit corrosion, and be compatible with hoses and seals—because these factors directly affect overheating risk and system durability.
What are the most common cooling-system problems that coolant maintenance won’t fix by itself?
There are 6 common overheating causes that coolant maintenance alone can’t solve: failed thermostat, failing water pump, blocked radiator airflow, inoperative fans, combustion-gas intrusion (head gasket), and internal radiator blockage that requires repair or replacement. Next, use these categories to decide whether you’re dealing with chemistry (coolant condition) or hardware (parts that control flow and airflow).
1) Thermostat stuck closed or sticking
A thermostat that doesn’t open properly restricts flow to the radiator. Symptoms:
- Rapid overheat after warm-up
- Upper hose stays cool while gauge climbs
- Heater output changes unpredictably
Coolant replacement won’t fix a mechanical thermostat failure.
2) Water pump impeller damage or bearing failure
If the pump can’t move coolant, temperature rises under load. Symptoms:
- Overheats at higher rpm
- Coolant leak near pump (weep hole area)
- Grinding noise (bearing)

3) Radiator airflow restriction (external)
If fins are blocked or the condenser is clogged, the radiator can’t shed heat. Coolant can be perfect and the car will still overheat in traffic.
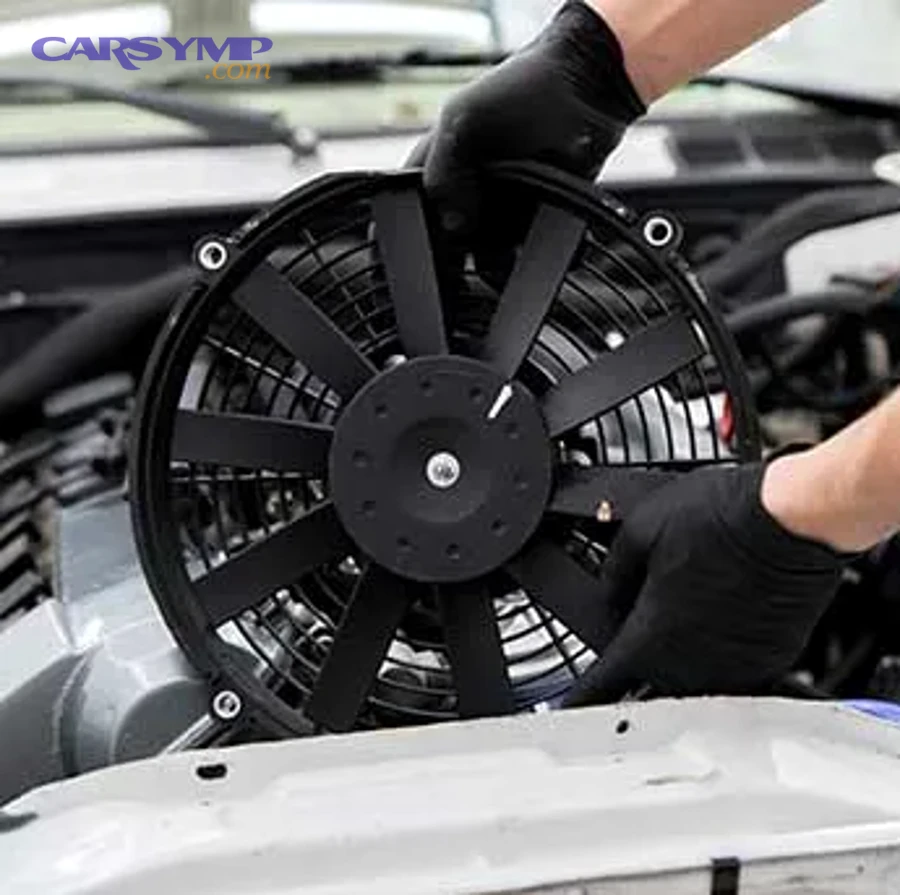
4) Fan, relay, or sensor failures
Fans are essential at low speed. Typical pattern:
- Normal on highway
- Overheats at idle or slow driving
- A/C performance changes when overheating begins
5) Head gasket or combustion gas intrusion
If exhaust gases enter the cooling system, they create pressure spikes and hot spots. Signs:
- Persistent bubbles in reservoir
- Coolant pushed out repeatedly
- Overheating plus coolant loss with no visible leak
- Oil/coolant mixing (not always)
This requires diagnosis and repair, not just coolant service.
6) Internal radiator blockage beyond cleaning
If tubes are restricted internally, you may see:
- Overheating under load
- Uneven radiator temperature (cold spots)
- Heater performance changes
Sometimes flushing helps; sometimes replacement is the real fix.
Evidence: According to a report by the University of Alaska Fairbanks Sea Grant Marine Advisory Program, in 2001, deposits and scale can clog passages and diminish heat transfer—yet mechanical faults like pump seal failure or pressure-cap issues can also cause coolant loss and overheating, which requires component repair.
What should you do if your engine starts overheating on the road?
Use a 6-step emergency method: reduce load, increase heat rejection, watch the gauge, stop safely, avoid opening the cap hot, and decide between topping off (only if safe) or towing—so you prevent engine damage while restoring control. Then, treat this as a priority sequence: stabilize temperature first, troubleshoot second.
Step 1) Reduce engine load immediately
- Turn off A/C
- Ease off throttle
- Downshift on climbs to keep airflow and water pump speed up (if safe)
Step 2) Increase heat rejection
If the gauge is climbing but not pegged, turning the cabin heater to HOT can pull some heat away from the engine. It’s uncomfortable, but it can buy time.
Step 3) Watch for “red zone” behavior
If the needle hits red, or the warning light flashes, assume severe overheating risk. Continuing to drive can warp components quickly.
Step 4) Pull over safely and shut down
- Put hazards on
- Stop where safe
- Shut the engine off
If you must keep it running briefly to move to safety, do so only long enough to prevent danger.
Step 5) Do not open the radiator cap hot
Opening a hot, pressurized system can cause violent coolant release. Wait until the system cools significantly.

Step 6) Decide: simple top-off vs tow
Only consider topping off if:
- Engine is cool
- You have the correct coolant (or emergency water as a temporary measure)
- You can see an obvious minor leak (like a loose clamp) that you can safely address
Tow if:
- Coolant dumps rapidly
- Gauge pegs repeatedly
- You see steam from the engine bay
- The heater blows cold suddenly (possible low coolant/air pocket)
- You suspect head gasket symptoms (bubbling, repeated overflow)
Evidence: According to a report by the University of Alaska Fairbanks Sea Grant Marine Advisory Program, in 2001, some temperature sensors may not show overheat if coolant level drops below the sensor—meaning coolant loss can lead to severe overheating without an immediate warning, reinforcing why stopping early is critical.
What advanced coolant maintenance practices can prevent overheating in high-stress driving?
There are 4 advanced practices that reduce overheating risk in towing, mountains, track days, and extreme heat: pressure-testing and cap-testing, airflow and fin optimization, temperature verification with spot checks, and coolant analysis/interval tuning based on real conditions. Next, these practices sharpen “good maintenance” into “high-stress reliability,” where small weaknesses show up fast.
1) Pressure-test the system (and cap-test, too)
A pressure test finds leaks you won’t see when cold. Cap-testing verifies the cap holds rated pressure; a weak cap can lower boiling protection and cause overflow behavior that looks like a mystery leak.
2) Verify radiator/condenser fin condition and airflow path
For high-stress use, airflow is everything:
- Clean fin stack thoroughly
- Ensure undertray/ducting is intact where applicable
- Confirm fans reach full speed (some cars have multi-speed control)
3) Use temperature spot checks to confirm flow and radiator performance
An infrared thermometer can reveal:
- Thermostat opening behavior (hose temp changes)
- Radiator cold spots (internal restriction)
- Uneven cooling across the core
4) Tune service intervals based on real operation and testing
If you tow often or operate in extreme heat, test results can justify earlier service:
- Freeze/boil protection
- pH/inhibitor health (where applicable)
- Signs of contamination
Evidence: According to a study by Nahrain University from the College of Engineering (Chemical Engineering), in 2007, glycol concentration measurably changes boiling behavior in ethylene glycol/water mixtures—supporting why mixture verification and condition-based service help prevent localized boiling under high-stress driving.