
Complete Radiator Replacement Cost Guide: DIY vs Professional Installation for Car Owners
Radiator replacement costs typically range from $400 to $1,826, with the total depending on your vehicle type, radiator quality, and whether you choose DIY or professional installation. The price breaks down into parts ($100-$1,000+) and labor ($150-$800), making the DIY versus professional decision a critical cost factor that could save you hundreds of dollars if you have the right skills and tools.
Beyond just understanding the price tag, knowing when to replace your radiator yourself versus hiring a mechanic requires evaluating your mechanical experience, available time, and vehicle complexity. DIY replacement can take 3-5 hours for home mechanics but offers substantial labor cost savings, while professional installation typically completes in 2-4 hours with warranty protection and expert diagnosis included.
The replacement process itself involves draining your cooling system, disconnecting hoses and electrical connections, removing the old radiator, installing the new unit, and properly refilling and bleeding the system. Each step requires specific tools and careful attention to avoid damaging surrounding components or creating air pockets that compromise cooling efficiency.
Understanding the signs of radiator failure helps you act before minor leaks escalate into catastrophic engine damage. Next, this guide will walk you through every aspect of radiator replacement—from accurate cost estimation to step-by-step installation instructions—so you can make an informed decision that protects both your vehicle and your wallet.
How Much Does Radiator Replacement Cost?
Radiator replacement costs range from $400 to $1,826 for most vehicles, with the national average falling between $765 and $1,245 depending on your car’s make, model, and the radiator type you select. This total includes both the radiator itself and professional installation labor, though DIY approaches can significantly reduce your out-of-pocket expenses.
To better understand where your money goes, let’s break down the two primary cost components. The radiator part itself typically accounts for 50-60% of the total bill, ranging from under $100 for basic economy car radiators to over $1,000 for luxury vehicles, high-performance models, or trucks requiring enhanced cooling capacity. Meanwhile, labor charges vary by region and shop type, with independent mechanics generally charging $150-$400 and dealerships commanding $337-$800 for the same work.

Several vehicle-specific factors influence where your replacement falls within this price spectrum. Economy cars like Honda Civics or Toyota Corollas typically see the lower end of the range ($400-$600 total), while mid-range sedans and SUVs average $600-$900. Luxury vehicles—BMWs, Mercedes-Benz, Audis—often exceed $1,200 due to specialized OEM parts and complex engine bay configurations requiring additional labor time. Pickup trucks with towing packages frequently need radiators with integrated transmission coolers, pushing costs toward the higher end as well.
The table below shows typical Radiator replacement cost estimate across different vehicle categories:
| Vehicle Type | Parts Cost | Labor Cost | Total Cost Range |
|---|---|---|---|
| Economy Car | $100-$300 | $150-$300 | $400-$600 |
| Mid-Size Sedan/SUV | $200-$500 | $200-$400 | $600-$900 |
| Luxury Vehicle | $400-$1,000+ | $337-$800 | $900-$1,826 |
| Pickup Truck (with tow package) | $300-$700 | $250-$500 | $700-$1,200 |
| Performance/Sports Car | $500-$1,200 | $300-$600 | $1,000-$1,800 |
According to data compiled by RepairPal in 2024, the average radiator replacement costs $1,245 to $1,466, with parts averaging $908-$972 and labor ranging from $337-$494 across their network of certified repair shops nationwide.
What Factors Affect Radiator Replacement Cost?
Five primary factors determine your radiator replacement cost estimate: vehicle make and model, radiator type and material, geographic location and shop selection, additional components needed, and integrated cooling features. Understanding each factor helps you anticipate your specific costs and identify potential savings opportunities.
Vehicle Make and Model
Your vehicle’s manufacturer and model directly impacts parts availability and labor complexity. Domestic brands (Ford, Chevrolet, Dodge) generally offer the most affordable radiator options due to high production volumes and aftermarket competition. Import vehicles from Honda, Toyota, and Nissan fall in the mid-range, while European luxury brands command premium prices—a BMW 5-Series radiator might cost $800-$1,200 for parts alone, compared to $200-$400 for a Ford F-150.
The model year also matters significantly. Newer vehicles (2015+) often feature more compact engine bays with complex component placement, requiring additional Radiator replacement labor time to access the radiator. Older models (pre-2010) typically provide easier access but may require universal radiator retrofitting if original equipment parts are discontinued, adding fabrication costs.
Radiator Type and Material
Modern radiators come in three primary configurations affecting price. Single-core radiators represent the basic option for small engines in mild climates, costing $100-$300. Two-core and three-core radiators provide increased cooling capacity for larger engines, towing applications, or hot climates, ranging from $250-$600. Performance aluminum radiators—fully welded aluminum construction rather than aluminum cores with plastic tanks—cost $400-$1,200 but offer superior durability and heat dissipation.
Material composition impacts both initial cost and longevity. The most common modern design uses aluminum cores with plastic end tanks, balancing affordability ($150-$500) with adequate performance for most applications. Full aluminum radiators cost more upfront ($400-$900) but resist corrosion better and can potentially be repaired rather than replaced if damaged. Copper-brass radiators, now rare except in classic car restorations, run $300-$800 and excel in repairability but weigh significantly more.
Labor Rates by Region and Shop Type
Geographic location creates substantial cost variations in radiator replacement labor time charges. Metropolitan areas like New York City, Los Angeles, and San Francisco see labor rates of $120-$180 per hour, while rural areas and smaller cities typically charge $80-$120 per hour. Since most radiator replacements require 2-3 hours of labor, this geographic difference alone can account for $80-$180 in total cost variation.
Shop type matters equally. Dealership service centers charge premium rates ($130-$180/hour) but provide manufacturer-trained technicians, OEM parts, and warranty coverage that transfers with your vehicle. Independent mechanics offer competitive rates ($80-$120/hour) with comparable expertise for routine work like radiator replacement. Chain shops (Midas, Pep Boys, Firestone) fall in the middle ($90-$140/hour) and often run promotional discounts, though parts quality may vary.
Additional Components Needed
Rarely does radiator replacement involve only the radiator itself. Most mechanics recommend—and good practice dictates—Replacing hoses and clamps during radiator job since you’ve already drained the cooling system and accessed these components. New radiator hoses cost $20-$80 per hose (you’ll need at least upper and lower), and quality clamps add another $10-$30. This adds $50-$150 to your parts cost but prevents hose failure shortly after your radiator replacement.
A Cooling system flush with new radiator is strongly recommended unless your coolant was recently changed. Old coolant may be contaminated with debris, transmission fluid (if the old radiator’s internal cooler failed), or rust particles. Fresh coolant costs $20-$50 for concentrate or pre-mixed solution, and the flush service adds $50-$100 to professional installation costs. Skipping this step risks premature failure of your new radiator.
Your thermostat and water pump should be inspected during the replacement. If either shows wear, addressing them during the radiator job saves substantial labor costs since they’re already accessible. A new thermostat runs $15-$50, while water pump replacement adds $150-$400 total if needed, but replacing them separately later could cost $300-$600 due to duplicated labor for draining and refilling the cooling system.
Integrated Transmission Cooler
Vehicles with automatic transmissions often feature radiators with integrated transmission coolers—internal heat exchangers that use engine coolant to regulate transmission fluid temperature. These specialized radiators cost $100-$300 more than standard versions but are essential for proper transmission operation. If your vehicle requires this feature, you’ll also need to account for transmission fluid replacement ($50-$150 including fluid and filter) and potential transmission lines that may need replacement ($30-$100).
According to automotive repair data from Consumer Affairs published in January 2025, vehicles with towing packages see 25-40% higher radiator replacement costs compared to identical models without towing equipment, primarily due to larger radiators with integrated coolers and higher coolant capacities.
Is Repairing a Radiator Cheaper Than Replacing It?
Yes, repairing a radiator is cheaper than replacing it, with repair costs averaging $250-$750 compared to replacement costs of $400-$1,826, but repair is only viable for specific damage types like small leaks, damaged hoses, or faulty caps rather than extensive corrosion or cracked cores. The decision hinges on damage extent, radiator age, and long-term reliability considerations.
However, not all radiator problems can be fixed through repair. To determine whether repair makes financial sense, you need to understand which failures are repairable versus those requiring full replacement.
When Radiator Repair Is Possible
Minor external leaks often respond well to repair, costing significantly less than replacement. A leaking radiator hose replacement runs $50-$150 per hose including labor—a simple fix taking 30-60 minutes. Faulty radiator caps that fail to maintain proper system pressure cost just $15-$35 to replace and take minutes to swap. Small external seam leaks can sometimes be addressed with specialized sealants or brazing for $100-$300, though this repair’s longevity varies based on damage severity.
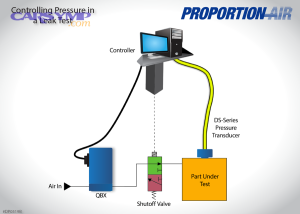
Clogged radiators causing overheating may benefit from professional radiator flushing services ($75-$150), which remove internal deposits and restore coolant flow. This works when blockage stems from mineral buildup or contamination rather than physical core damage. A thorough Leak check and pressure test after install or repair costs $50-$100 and confirms your cooling system holds proper pressure without leaks.

When Replacement Is Necessary
Large cracks in the radiator core or tanks require replacement because they compromise structural integrity beyond repair. Modern radiators with plastic end tanks commonly develop cracks as the plastic ages and becomes brittle—these failures spread quickly under pressure and temperature cycling. Repair attempts on cracked plastic tanks typically fail within weeks or months, making replacement the only reliable solution.
Extensive internal corrosion that creates blockages throughout the core passages cannot be adequately cleaned. When coolant turns brown or rusty, or when flushing fails to restore proper flow, internal deterioration has progressed too far. Continuing with a corroded radiator risks future cooling system repair needs and potential engine damage from inadequate heat dissipation.
Physical impact damage from road debris, accidents, or improper installation typically warrants replacement. Even if a damaged radiator can be patched temporarily, compromised fin structure reduces cooling efficiency by 30-50%, and weakened areas create additional failure points. The cost to repair extensive damage often approaches replacement cost anyway, making new parts the smarter investment.
Cost-Benefit Analysis Timeline
When deciding between repair and replacement, consider your vehicle’s age and how long you plan to keep it. For vehicles you’ll own for several more years, replacement provides better long-term value despite higher upfront costs. A new radiator typically lasts 8-10 years or 80,000-100,000 miles under normal conditions, while repairs might extend an aging radiator’s life by 1-3 years at best.
For older vehicles (15+ years) you plan to sell soon, a repair that buys 1-2 more years might make financial sense if costs stay under $300-$400. However, for daily drivers you depend on, replacement offers peace of mind and reliability that repairs cannot match. Failed cooling systems can cause $3,000-$8,000 in engine damage, making the $400-$900 replacement cost a wise preventive investment.
According to research from the Automotive Aftermarket Suppliers Association, radiator repairs have a 40-60% reoccurrence rate within 24 months, while quality replacements show a failure rate under 5% during the same period, demonstrating the reliability advantage of replacement over repair for most scenarios.
Should You Replace Your Radiator Yourself or Hire a Professional?
DIY radiator replacement saves $150-$800 in labor costs but requires 3-5 hours, basic mechanical skills, proper tools, and careful attention to detail, while professional installation costs more upfront but includes expert diagnosis, warranty coverage, and completion in 2-4 hours with guaranteed results. Your decision should weigh cost savings against skill requirements, time availability, and potential risks.
This comparison becomes clearer when you examine the specific advantages and disadvantages of each approach. Let’s explore what each option entails so you can make the choice that best fits your situation and capabilities.
What Are the Pros and Cons of DIY Radiator Replacement?
DIY radiator replacement offers substantial cost savings of $150-$800 in avoided labor charges and provides valuable mechanical knowledge, but demands significant time investment (3-5 hours minimum), requires specific tools and workspace, carries risk of installation errors, and may void warranties. The decision to tackle this job yourself depends on your skill level, available resources, and comfort with cooling system work.
Advantages of DIY Radiator Replacement
The most compelling reason to replace your radiator yourself is the money you’ll save. Professional labor for radiator replacement typically runs $150-$800 depending on your location and vehicle, money that stays in your pocket when you do the work. For someone comfortable with automotive repairs, this represents a substantial discount—potentially cutting your total costs in half. Those savings can be redirected toward higher-quality parts, additional cooling system components, or other vehicle maintenance needs.
Beyond financial benefits, DIY replacement builds mechanical competence and self-sufficiency. Understanding your vehicle’s cooling system demystifies one of its most critical functions and prepares you to handle future cooling issues with confidence. You’ll learn to identify cooling system components, understand how coolant flows, and recognize warning signs of problems before they become emergencies. This knowledge transfers to other automotive work, making future repairs less intimidating.
Scheduling flexibility represents another significant advantage. Professional shops require appointments, often meaning days or weeks of wait time during busy seasons. When you tackle the replacement yourself, you work on your timeline—evenings, weekends, or whenever your schedule permits. You’re not pressured to rush decisions or authorize additional work you didn’t plan for, and you control the pace to ensure quality results.
DIY work also lets you select exactly the parts you want. While mechanics often use parts providing them the best profit margins, you can research and choose the specific radiator brand, material, and quality level that fits your needs and budget. This control extends to related components—you decide whether to replace hoses, thermostat, and other items rather than accepting a shop’s recommendations that may include unnecessary services.
Disadvantages of DIY Radiator Replacement
Time commitment poses the primary challenge for DIY radiator replacement. While experienced mechanics complete the job in 2-4 hours, first-time DIYers should budget 3-5 hours minimum, and complications can extend this to a full day. This assumes you have all necessary tools and parts ready—additional time goes toward research, parts acquisition, and potential troubleshooting. For those with limited free time, spending an entire Saturday under the hood may not be practical.
The job requires specific tools many home garages lack. Basic radiator replacement needs floor jacks and jack stands (or ramps), various wrenches and sockets, a coolant drain pan, pliers for hose clamps, and potentially specialized tools for fan clutch removal or electrical connectors. Purchasing these tools can cost $150-$300 if you don’t own them, partially offsetting your labor savings. While these tools serve for future repairs, the upfront investment deters some DIYers.

Risk of installation errors presents real consequences. Improperly installed radiators can leak coolant, create air pockets causing overheating, or damage surrounding components during installation. Cross-threaded bolts, over-tightened hose clamps that crack plastic connections, or electrical connections made incorrectly can lead to immediate failure or damage that appears days later. These mistakes potentially cost more to fix professionally than the original labor would have cost.
Warranty considerations matter significantly. Most radiator manufacturers require professional installation to honor their warranty, meaning DIY installation might void coverage on a $200-$800 part. If your new radiator fails prematurely due to a manufacturing defect, you’ll need to purchase a replacement out-of-pocket. Professional installations typically include both parts and labor warranties (commonly 12-36 months), protecting you from defective parts and installation errors.
Vehicle complexity varies dramatically. Some cars feature easily accessible radiators requiring minimal component removal—perhaps just disconnecting hoses, unbolting the radiator, and lifting it out. Others bury the radiator behind bumper covers, grilles, fan assemblies, and air conditioning condensers, requiring extensive disassembly. Certain modern vehicles include active grille shutters, multiple electrical connectors, and integrated components making DIY replacement extremely challenging without service manuals and experience.
When DIY Makes Sense
DIY radiator replacement works best for mechanically inclined individuals who have successfully completed similar repairs, such as brake jobs, suspension work, or other fluid system maintenance. If you own a relatively common vehicle (Honda, Toyota, Ford, Chevrolet) from model years 2000-2015, parts availability and online documentation make the process straightforward. Vehicles with simple engine bay layouts and front-mounted radiators with minimal obstructions also suit DIY approaches.
You should feel confident working with automotive fluids, understand basic cooling system operation, and have patience for troubleshooting if things don’t go as planned. Access to a workspace with adequate lighting, ventilation, and room to maneuver around your vehicle is essential. Most importantly, you need time flexibility—the ability to pause work if complications arise without leaving your vehicle inoperable for extended periods.
What Are the Pros and Cons of Professional Radiator Replacement?
Professional radiator replacement provides expert installation with warranty protection, faster completion times (2-4 hours), and accurate diagnosis of underlying issues, but costs $150-$800 more in labor and creates scheduling dependencies with less control over parts selection. This option suits those prioritizing reliability, time efficiency, and professional accountability over cost savings.
Advantages of Professional Installation
Expertise and experience top the list of professional advantages. Trained technicians replace radiators regularly, making them familiar with common challenges specific to your vehicle make and model. They know which bolts tend to seize, which electrical connectors are fragile, and which surrounding components need careful handling. This experience translates to efficient work with fewer risks of damaging surrounding parts or making installation errors that cause problems later.
Warranty coverage provides substantial peace of mind. Reputable shops offer warranties on both parts and labor, typically ranging from 12 months/12,000 miles to 36 months/36,000 miles. If your new radiator develops leaks, the cooling system doesn’t perform correctly, or installation errors cause problems, the shop fixes these issues at no additional cost. This protection proves invaluable if you encounter a defective radiator or hidden cooling system problems that surface after installation.
Professional diagnosis often identifies additional issues you might miss. When mechanics remove your old radiator, they inspect related components—water pump condition, thermostat function, hose deterioration, and coolant contamination. Catching a failing water pump during radiator replacement saves significant money versus addressing it separately later, since both jobs require draining and refilling the cooling system. Professional techs also perform proper Bleeding air after radiator replacement, preventing air pockets that cause overheating.
Speed and convenience matter considerably for daily drivers. Professional installations typically complete in 2-4 hours, getting your vehicle back on the road the same day. You avoid spending your weekend wrenching in the garage, and your vehicle isn’t occupying your driveway or garage for an extended period. For those without backup transportation, this quick turnaround is essential. Additionally, if complications arise—seized bolts, damaged mounting brackets, or unexpected issues—the shop has resources to solve them immediately rather than leaving you stuck mid-project.
Professional shops handle disposal responsibly. Old coolant is toxic and requires proper disposal at hazardous waste facilities—something professionals manage routinely. They also deal with the messy coolant spills, handle hot components safely, and use proper lifts rather than floor jacks, reducing safety risks associated with working under a vehicle.
Disadvantages of Professional Installation
Cost represents the obvious disadvantage—you’re paying $150-$800 for labor that DIY eliminates. For those on tight budgets, this cost may strain finances or delay necessary repairs. The total bill including parts and labor often reaches $600-$1,200 or more, a substantial expense compared to $250-$500 for DIY parts-only costs.
You sacrifice control over parts selection when using professional shops. While you can request specific brands or part types, mechanics often prefer parts they stock or have relationships with suppliers to source. These parts may not be your first choice in terms of quality or price. Some shops mark up parts significantly—charging $400 for a radiator you could buy for $200 online. You can typically supply your own parts, but many shops refuse installation of customer-supplied parts or limit warranties when you do.
Scheduling dependencies create inconvenience. Popular shops book days or weeks ahead, meaning you might need temporary transportation while waiting for your appointment. Even with an appointment, unexpected complications or busier-than-expected days can extend your wait. You’re working around the shop’s schedule rather than your own, potentially taking time off work or arranging rides.
Potential for upselling represents a legitimate concern. While many mechanics operate honestly, some shops push unnecessary services—complete cooling system flushes when not needed, “recommended” additional part replacements with questionable necessity, or other add-ons that inflate your bill. Lacking mechanical knowledge makes it difficult to distinguish legitimate recommendations from profit-driven upselling.
When Professional Installation Is Strongly Recommended
Certain scenarios make professional installation the clear choice regardless of cost savings potential. If you’ve never worked on automotive cooling systems, lack mechanical aptitude, or feel uncomfortable working with automotive repairs, professional installation eliminates risks of costly mistakes. The learning curve for radiator replacement is steeper than many realize, and errors can cause engine damage far exceeding labor cost savings.
Complex vehicles nearly demand professional work. Luxury brands (BMW, Mercedes-Benz, Audi), performance vehicles, and modern designs with tightly packaged engine bays often require special tools, extensive disassembly, and specific procedures that challenge even experienced DIYers. If your vehicle’s radiator sits behind numerous components requiring professional-grade tools to remove, attempting DIY work may prove impractical.
Lack of proper workspace, tools, or time makes professional installation the pragmatic choice. If you don’t own floor jacks, jack stands, and basic hand tools, or lack a safe place to work on your vehicle, buying equipment specifically for one job doesn’t make financial sense. Similarly, if your schedule doesn’t accommodate several uninterrupted hours for the repair, professional service provides the convenience you need.
When your vehicle serves as your only transportation, the risk of a failed DIY repair leaving you stranded justifies professional costs. If something goes wrong during DIY installation and you can’t complete the repair, you’ll still need professional help—now at higher cost because mechanics must undo your work. For daily commuters without backup vehicles, professional installation’s reliability and warranty coverage provide essential security.
According to a 2024 survey by the Automotive Service Association, 73% of vehicle owners who attempted DIY radiator replacement without prior cooling system experience encountered complications requiring professional assistance, ultimately spending 15-30% more than original professional quotes due to duplicated parts costs and additional labor charges.
How Do You Replace a Car Radiator Yourself?
Replacing a car radiator yourself involves draining the cooling system, disconnecting hoses and electrical connections, removing mounting bolts, extracting the old radiator, installing the new unit, reconnecting all components, refilling with fresh coolant, and bleeding trapped air from the system—a process taking 3-5 hours for most DIYers. Success requires methodical work, proper tools, and careful attention to detail throughout each step.
To approach this project confidently, you need the right tools and materials prepared before starting, followed by systematic execution of each installation phase. Let’s break down exactly what you’ll need and how to proceed through the replacement process.
What Tools and Materials Do You Need for Radiator Replacement?
You need basic hand tools (wrenches, sockets, pliers), a floor jack with jack stands, a large drain pan, the new radiator, fresh coolant, and safety equipment to complete radiator replacement successfully. Having everything ready before starting prevents mid-project trips to the auto parts store and ensures efficient workflow.
Essential Hand Tools
Your tool collection for radiator replacement should include a socket set covering sizes from 8mm to 19mm (or 5/16″ to 3/4″ for SAE), along with ratchets and extensions. You’ll need both shallow and deep sockets for different bolt access situations. A combination wrench set in matching sizes provides backup for stubborn bolts or tight spaces where sockets don’t fit. Adjustable wrenches (6-inch and 10-inch) help with odd-sized fittings or rounded-off bolt heads.
Pliers are essential for hose clamp removal and manipulation. Slip-joint pliers and channel locks work for spring clamps and worm-gear clamps respectively. Needle-nose pliers help disconnect small electrical connectors and retrieve dropped hardware from tight spaces. Hose clamp pliers designed specifically for spring-type clamps make removal significantly easier if your vehicle uses this style.
Screwdrivers in various sizes—both flathead and Phillips head—access different fasteners throughout the engine bay. Some radiator fan shrouds attach with plastic clips requiring flathead removal, while electrical ground connections may use Phillips screws. A trim panel removal tool set ($10-$20) proves invaluable if your vehicle requires bumper cover or grille removal to access the radiator.
Vehicle Lifting and Support Equipment
A quality floor jack rated for your vehicle’s weight (typically 2-3 tons for cars, 3-4 tons for trucks and SUVs) is mandatory since you’ll work underneath the vehicle to access drain plugs and lower mounting points. Never rely on the vehicle jack that comes with your spare tire—these are emergency equipment only, not suitable for repair work.
Jack stands rated appropriately for your vehicle weight (sold in pairs or sets of four) provide critical safety. Always use jack stands whenever working under a raised vehicle. Position them under designated lifting points per your owner’s manual specifications. Wheel chocks placed behind the rear tires (if lifting the front) or front tires (if lifting the rear) prevent unexpected vehicle movement. Engage the parking brake as an additional safety measure.
Coolant Collection and Disposal
A large drain pan with at least 3-gallon capacity (5+ gallons preferred) collects old coolant during draining. Most vehicles hold 10-16 quarts of coolant, but the drain pan only needs to catch what drains from the radiator and upper hoses initially. Oil drain pans work adequately if you don’t have a dedicated coolant pan. Some DIYers use large plastic storage containers—anything that holds liquid and won’t crack under minimal weight works.
Plan for proper coolant disposal since pouring it down drains or on the ground is illegal and environmentally harmful. Old coolant is toxic to animals and children but smells sweet, making accidental poisoning a real risk. Most auto parts stores, oil change facilities, and municipal hazardous waste centers accept used coolant for recycling. Store drained coolant in sealed containers (such as empty coolant jugs or milk jugs) until you can dispose of it properly.
New Radiator and Related Parts
Your new radiator is obviously essential—verify you’ve ordered the correct part for your specific vehicle year, make, model, and engine size. Radiators vary even within the same model based on engine options, transmission types (manual versus automatic), and whether the vehicle has a towing package. The wrong radiator won’t mount properly or may lack necessary connections for transmission cooler lines.
Budget for new upper and lower radiator hoses even if your current hoses look acceptable. Hoses deteriorate from inside over time, developing microscopic cracks invisible externally. Since you’re draining the system anyway, replacing hoses and clamps during radiator job costs minimal additional labor and prevents hose failure shortly after completing the radiator work. New hoses run $20-$40 each, and quality worm-gear clamps cost $2-$5 each.
Fresh coolant in the correct type and quantity is mandatory. Check your owner’s manual or existing coolant reservoir cap for specifications—some vehicles require specific formulations (extended-life, Asian-formula, European-formula). You’ll need enough to fill your entire cooling system, typically 2-3 gallons depending on vehicle size. Some DIYers prefer concentrated coolant mixed 50/50 with distilled water for precise concentration control, while others choose pre-mixed coolant for convenience.
Safety Equipment
Quality safety gloves protect your hands from sharp metal edges, hot components, and coolant exposure. Nitrile or chemical-resistant gloves work better than standard work gloves since they resist coolant penetration. Keep multiple pairs available since coolant-soaked gloves become uncomfortable quickly.
Safety glasses or goggles prevent coolant splashes during drain and fill operations. Coolant under pressure can spray unexpectedly when disconnecting hoses, particularly if the system hasn’t fully depressurized. Eye protection is non-negotiable—coolant in your eyes requires immediate medical attention.
Old towels or shop rags manage spills and wipe components clean. Coolant makes surfaces extremely slippery, creating fall hazards. Keep your work area as clean and dry as possible. Some mechanics spread cardboard under the work area to absorb spills and provide cushioning when lying under the vehicle.
According to the National Institute for Automotive Service Excellence, having all necessary tools and materials prepared before starting saves an average of 45-90 minutes on DIY radiator replacement projects, with interrupted projects taking 40% longer to complete due to workflow disruption and repeated setup time.
What Are the Step-by-Step Instructions for Radiator Replacement?
The Radiator replacement steps overview includes seven main phases: preparation and safety, coolant draining, component disconnection and removal, old radiator extraction, new radiator installation, system refilling and bleeding, and final testing—a systematic process that ensures complete and proper replacement when followed carefully. Each phase builds on the previous one, making order and thoroughness essential.
Phase 1: Preparation and Safety Measures
Begin by parking your vehicle on level ground in a well-ventilated area with adequate space to work around it. Ensure the engine is completely cold—never attempt cooling system work on a warm engine, as pressurized coolant can cause severe burns. Waiting 4-6 hours after the engine last ran eliminates this risk. Disconnect the negative battery terminal using the appropriate wrench to prevent electrical shorts or accidental fan activation while working.
Raise the vehicle’s front end using your floor jack, positioning it under manufacturer-specified lift points (typically marked on the frame or pinch welds). Raise the vehicle high enough to comfortably access the radiator’s bottom—usually 12-18 inches off the ground. Immediately place jack stands under the proper support points and lower the vehicle onto them. Give the vehicle a firm shake to verify stability before working underneath it. Place wheel chocks behind the rear wheels and engage the parking brake for additional security.
Locate your vehicle’s cooling system drain plug or petcock, typically found on the bottom driver-side or passenger-side of the radiator. Consult your service manual if you cannot locate it, as positions vary by vehicle. Position your large drain pan directly underneath this drain point. Some vehicles lack radiator drain plugs entirely—on these models, you’ll disconnect the lower radiator hose to drain coolant instead.
Phase 2: Draining the Cooling System
Remove the radiator cap or coolant reservoir cap to vent the system, allowing coolant to drain freely rather than creating a vacuum that slows drainage. Opening this cap releases any remaining pressure and lets air enter as coolant exits. If your vehicle has a pressurized coolant reservoir, remove that cap instead of the radiator cap.
Open the radiator drain plug by turning it counterclockwise, or loosen the lower radiator hose clamp and slide it back several inches if your vehicle lacks a drain plug. Coolant will flow steadily into your drain pan. This process takes 5-15 minutes depending on radiator size. While draining, inspect the old coolant’s condition—brown or rust-colored coolant indicates internal corrosion, while milky or frothy coolant suggests head gasket failure or transmission fluid contamination from a failed transmission cooler.
If draining via the lower hose, be prepared for a surge of coolant when you pull the hose off the radiator nipple. Have your drain pan positioned carefully and expect some spillage. You may need to wiggle and twist the hose to break it free if it’s been in place for years—rubber tends to stick to metal after heat cycling thousands of times.
Phase 3: Component Disconnection
Once coolant stops draining, disconnect the upper radiator hose from the radiator by loosening its clamp and sliding it down the hose several inches. Twist the hose while pulling to break the seal between rubber and metal—it should slide off relatively easily. If the hose resists despite clamp removal, carefully insert a thin flathead screwdriver between the hose and radiator nipple to break the seal. Avoid forcing it, as you might crack plastic radiator tanks.
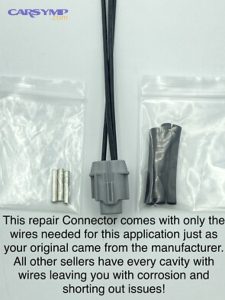
Disconnect any electrical connections to the radiator, typically including the electric cooling fan connector and possibly sensors for transmission coolers or auxiliary fans. Press the release tab on each connector while gently pulling it apart—don’t yank on wires. Some connectors have safety clips that must be flipped up before the connector releases. Take photos of electrical connections before disconnecting them to reference during reassembly.
If your vehicle has an automatic transmission, disconnect the transmission cooler lines from the radiator. These metal lines thread into fittings on the radiator tank, usually requiring a flare nut wrench to prevent rounding off the fittings. Have a small container ready to catch residual transmission fluid—expect 1-4 ounces to drain from the lines. Some mechanics plug the open transmission lines with rubber caps to prevent contamination during the replacement process.

Phase 4: Fan and Shroud Removal
Most modern vehicles mount the electric cooling fan and shroud to the radiator as a single assembly. These typically secure with 3-6 bolts around the perimeter accessible from above or below. Remove these bolts using the appropriate socket, supporting the fan assembly as you remove the final bolt to prevent it from falling. The fan and shroud may be heavy (10-25 pounds), so maintain good grip and posture when lifting them out.
Some vehicles, particularly trucks and older models with mechanical fan clutches, require different procedures. Mechanical fans attach to the water pump pulley with a large nut that may require special fan clutch tools. Electric fan and shroud transfer considerations vary significantly by vehicle—some shrouds come out only after tilting at specific angles due to surrounding component placement.
Set the removed fan assembly aside in a clean area where it won’t be damaged. You’ll reinstall this on the new radiator, so handle it carefully. Inspect the fan blades for cracks or damage—now is the ideal time to replace a damaged fan before installation rather than discovering issues after everything is reassembled.
Phase 5: Radiator Removal
Remove the mounting bolts or brackets securing the radiator to the vehicle’s frame or radiator support. Most radiators mount with 2-4 bolts on top brackets and sometimes lower mounting points. These bolts may be rusty or tight after years of exposure to heat and weather—penetrating oil applied 15-30 minutes before removal helps. Once fasteners are removed, carefully lift the radiator straight up and out of the engine bay.
Radiators are typically secured by plastic or rubber mounting pins that slide into grommets or brackets on the radiator support. Lift evenly to avoid bending the delicate fins or stressing mounting points. The radiator usually comes out with a combination of lifting upward and tilting backward slightly—work carefully to avoid snagging on surrounding components like air conditioning lines or wiring harnesses. If the radiator binds up, lower it and check for missed fasteners or snagged connections before forcing it.
Once free, set the old radiator aside for disposal or core exchange if you paid a core deposit on your new radiator. Many auto parts stores require return of the old radiator within 30 days to refund core charges of $20-$50. Clean the radiator mounting area on the vehicle’s radiator support, removing any debris, leaves, or insect nests that accumulated over time.
Phase 6: New Radiator Installation
Transfer the electric fan and shroud from your old radiator to the new one if necessary. Most radiators come without fans, requiring you to move your existing assembly. Bolt the fan and shroud to the new radiator using the same mounting points, ensuring secure attachment. Verify that fan blades don’t contact the shroud by manually spinning them—any interference causes noise or damage once the engine runs.
Install new rubber mounting grommets or cushions if provided with your new radiator. These isolate the radiator from vibration and provide secure mounting. Lower the new radiator into position, aligning the mounting pins with their corresponding holes or brackets. The radiator should sit evenly without forcing—if it doesn’t drop into place easily, check for proper alignment and any obstructions.
Install and tighten the radiator mounting bolts or brackets. Tighten these snugly but don’t overtighten—most require only 10-15 ft-lbs of torque. Excessive tightening can crack plastic mounting tabs or distort the radiator support. Once mounted, verify the radiator sits level and secure by gently attempting to rock it—minimal movement is normal, but excessive play indicates improper mounting.
Phase 7: Reconnection and Refilling
Reconnect all hoses using new clamps if you purchased them. Slide the lower radiator hose onto its nipple until it bottoms out, then position the clamp 1/4 inch from the hose end and tighten it securely. Repeat with the upper hose. For worm-gear clamps, tighten until snug—you should feel resistance but not need to strain excessively. Over-tightening can cut through the hose or crack plastic radiator nipples.
Reconnect transmission cooler lines if applicable, tightening the fittings with a flare nut wrench until snug, then adding an additional 1/4 turn. Don’t overtighten transmission line fittings—they seal with metal-to-metal contact and threads can strip easily. Reconnect all electrical connections, pressing them together until they click securely. Reference your installation photos to ensure correct connector routing.
Close the radiator drain plug or reconnect the lower radiator hose if you used it for draining. Begin filling the cooling system with your prepared 50/50 coolant mixture through the radiator opening or coolant reservoir, depending on your vehicle’s design. Fill slowly to allow air to escape as coolant enters the system. Many vehicles hold 10-16 quarts total, though the radiator and hoses only hold a portion of this—the engine block contains the rest.
Phase 8: Bleeding Air from the System
Bleeding air after radiator replacement prevents overheating caused by air pockets that disrupt coolant circulation. Start the engine with the radiator cap or reservoir cap removed, allowing the engine to warm to operating temperature while idling. Watch the coolant level—it will drop as coolant circulates through the engine and air escapes. Add more coolant as needed to maintain proper level.
Some vehicles have dedicated bleed screws on the cooling system, typically located at high points like the thermostat housing or heater core feed lines. Open these bleed screws until coolant flows out without bubbles, then close them securely. Consult your service manual for specific bleeding procedures—some vehicles require very specific steps to ensure complete air removal.
Run the engine until the cooling fans cycle on and off at least once, indicating the system has reached full operating temperature and the thermostat has opened. Squeeze the upper radiator hose several times while the engine runs—this helps dislodge air pockets and encourage coolant circulation. Continue adding coolant as air escapes and levels drop.
Once the engine maintains stable temperature, the fans cycle normally, and no more air bubbles emerge from the radiator or reservoir, shut off the engine. Allow it to cool for 30-60 minutes, then check the coolant level again—it typically drops slightly as everything cools and contracts. Top off to the proper level, then install the radiator cap or reservoir cap securely.
Phase 9: Final Testing and Verification
Reconnect the negative battery terminal. Start the engine and let it idle for 5-10 minutes while carefully monitoring the temperature gauge and watching for leaks. Inspect all connection points—hoses, transmission lines, drain plug—for any seepage. Even small leaks under pressure become larger problems quickly, so address any drips immediately by tightening connections or replacing defective clamps.
Take a test drive around your neighborhood, monitoring the temperature gauge continuously. The gauge should remain in the normal range even during acceleration or hill climbing. Overheating during this test indicates incomplete air bleeding, insufficient coolant level, or other issues requiring immediate attention. After the test drive, let the engine cool completely and recheck coolant levels one final time, topping off if necessary.
According to data from DIY automotive forums and instructional sources, properly executed radiator replacement using this systematic approach achieves success rates above 85% for first-time DIYers with basic mechanical aptitude, while rushed or incomplete procedures see failure rates exceeding 40% due to air pockets, leaks, or improper connections.
What Are the Signs You Need Radiator Replacement?
Five primary signs indicate radiator replacement needs: consistent engine overheating, visible coolant leaks creating puddles beneath your vehicle, constantly low coolant levels despite frequent refilling, discolored or rusty coolant indicating internal corrosion, and physical damage like cracks, dents, or corroded fins. Recognizing these symptoms early prevents catastrophic engine damage costing thousands in repairs.
Understanding why these symptoms matter helps you respond appropriately. Modern engines tolerate very little temperature deviation—even brief overheating episodes can warp cylinder heads, blow head gaskets, or crack engine blocks. These repairs often exceed $3,000-$8,000, making the $400-$900 cost of radiator replacement seem modest by comparison. Acting on warning signs protects your engine investment.
Engine Overheating Consistently
Repeated overheating episodes point to radiator failure as a common culprit. Your temperature gauge climbing into the red zone, steam emerging from under the hood, or the check engine light illuminating alongside a temperature warning all signal overheating. While various cooling system components can cause overheating, a failing radiator loses its ability to dissipate heat effectively, making it incapable of maintaining safe engine temperatures.
Internal radiator blockages develop over years as mineral deposits, rust particles, and coolant breakdown products accumulate within the narrow cooling passages. These blockages restrict coolant flow, reducing the radiator’s heat transfer capacity by 30-70%. External fin damage from road debris, pressure washing, or corrosion also reduces cooling efficiency by limiting airflow through the radiator core. Either condition makes overheating inevitable, especially during demanding conditions like highway driving, towing, or hot weather operation.
If your vehicle overheats consistently—not just once during extreme conditions but repeatedly under normal use—suspect radiator issues. Temporarily patching the problem by refilling coolant or adding stop-leak products only delays the inevitable replacement while risking serious engine damage. Professional diagnosis can confirm whether the radiator, thermostat, water pump, or another component is the root cause.
Visible Coolant Leaks
Puddles of bright green, orange, yellow, or pink liquid under your vehicle after it’s been parked indicate coolant leaks—the color depends on coolant type. Radiators develop leaks in several locations: at the seams between aluminum cores and plastic tanks, from corroded tubes within the core, at connection points where hoses attach, or from physical damage puncturing the radiator. Small leaks may only appear as damp spots or minor seepage, while larger failures gush coolant rapidly.
Leaks starting small typically worsen progressively as corrosion spreads or cracks expand under temperature cycling and pressure. What begins as occasional drips can become a significant leak in weeks or months. The location of the leak matters—external seam leaks on plastic-tanked radiators cannot be reliably repaired and require replacement. Small pinhole leaks in aluminum cores might temporarily respond to sealants, but these repairs rarely last more than a few months before failing again.
Check underneath your vehicle regularly, particularly if you notice your coolant level dropping between checks. Fresh coolant puddles indicate active leaking requiring immediate attention. Even small leaks are problematic—losing coolant gradually means you’re driving with less than optimal cooling capacity, and eventually you’ll lose enough to cause overheating and potential engine damage.
Constantly Low Coolant Levels
If you find yourself adding coolant weekly or even monthly, your cooling system has a leak somewhere. The radiator is one of the most common leak sources due to its exposure to road debris, temperature extremes, and pressure cycling. Normal coolant consumption is essentially zero—a properly functioning sealed cooling system maintains its coolant level for months or years between routine maintenance.
Regular coolant loss without visible external leaks might indicate internal leaks where coolant escapes through failed head gaskets into the combustion chamber (where it burns with the fuel) or into the engine oil. However, if you can see dampness, residue, or staining on or around the radiator, external leaks are likely culprits. The radiator’s location at the front of the vehicle makes it vulnerable to stone chips and corrosion from road salt, creating leak paths over time.
Don’t ignore dropping coolant levels by simply topping off regularly. Operating with low coolant creates air pockets in the cooling system, reducing heat transfer efficiency and potentially causing localized hot spots that damage engine components. Moreover, repeatedly adding coolant without addressing the leak source means you’re wasting money on coolant and increasing the risk of being stranded by sudden major coolant loss.
Discolored or Rusty Coolant
Fresh coolant exhibits bright, translucent coloring—typically green, orange, yellow, or pink depending on type. When coolant turns brown, rust-colored, or muddy looking, internal radiator corrosion has progressed significantly. This discoloration comes from rust particles and corrosion products circulating through the cooling system, contaminating the coolant. Advanced corrosion creates blockages that impede coolant flow and reduce cooling efficiency.
Rusty coolant indicates the protective inhibitors in the coolant have broken down, allowing the cooling system’s metal components to corrode. Once corrosion starts, it accelerates—rust begets more rust. The radiator, being constructed of relatively thin aluminum or copper, corrodes faster than thicker engine components. Brown coolant is a clear signal that radiator replacement should be considered, as corrosion-damaged radiators rarely return to full function even after coolant replacement.
Check your coolant condition by opening the reservoir when the engine is cold and observing its color. You can also catch some in a clear container for better inspection. If it looks rusty or contains visible particles floating in it, your cooling system has deteriorated beyond where a simple flush will restore it. At this point, replacing the radiator—the component most likely to be compromised—alongside a complete cooling system flush gives you the best chance of restoring proper cooling function.
Physical Damage: Cracks, Corrosion, or Dents
Visual inspection reveals many radiator problems. Cracks in the plastic end tanks, particularly at seams or around mounting points, indicate structural failure requiring replacement. These cracks typically start small but spread rapidly under pressure and temperature cycling—what looks like a hairline crack today becomes a gushing leak tomorrow. Cracks cannot be reliably repaired since plastic loses its structural integrity once fractured.
Significant dents in the radiator core from impacts with road debris or accidents compromise cooling efficiency by blocking airflow through affected areas. While small dents (affecting less than 10% of the core area) may not cause noticeable problems, larger impacts or multiple dents reduce cooling capacity by 20-40%. Dented areas also concentrate stress, making those locations prone to developing leaks over time.
External corrosion appears as white, green, or brownish deposits on the radiator’s exterior, particularly around seams, connection points, and the bottom where moisture accumulates. Advanced corrosion eats through aluminum or copper, creating pinhole leaks that expand into larger failures. Once corrosion becomes visible externally, internal corrosion has typically progressed even further. Preventing radiator failures through regular coolant changes (every 30,000-50,000 miles or per manufacturer recommendations) minimizes corrosion risk.
Bent or damaged cooling fins reduce heat dissipation efficiency. While fin damage affecting small areas (under 15-20% of total fin area) may not noticeably impact performance, extensive fin damage from pressure washing, impacts, or corrosion degrades cooling ability significantly. Fins can sometimes be straightened using a fin comb tool, but severely damaged fins indicate an aging radiator likely approaching the end of its service life anyway.
According to automotive cooling system research published by the Society of Automotive Engineers, radiators showing two or more failure signs simultaneously have a 78% probability of complete failure within the next 6,000 miles of driving, making proactive replacement significantly more cost-effective than emergency roadside repairs or engine damage from catastrophic cooling system failure.
Can You Drive with a Failing Radiator?
No, you should not drive with a failing radiator because doing so risks severe engine damage costing $3,000-$8,000 or more from overheating, far exceeding the $400-$1,826 radiator replacement cost. Even short trips with marginal cooling capacity can cause permanent damage to head gaskets, cylinder heads, or engine blocks that require extensive repairs or complete engine replacement.
However, understanding the nuances of this answer helps you respond appropriately in emergency situations. Let’s examine when driving becomes absolutely impossible versus when limited, careful operation might be temporarily acceptable.
Why Driving with Radiator Failure Causes Engine Damage
Modern engines operate within narrow temperature ranges—typically 195-220°F under normal conditions. Engine designers optimize clearances, metallurgy, and lubrication properties for these temperatures. When overheating occurs, metal components expand beyond design specifications, creating excessive wear, warping, or even structural failure. Aluminum cylinder heads are particularly vulnerable, warping at temperatures just 40-60°F above normal operating range.
Head gasket failure ranks among the most common overheating-related damages. The head gasket seals between the engine block and cylinder head, containing combustion pressures and preventing coolant and oil mixing. Extreme heat causes the gasket to fail, allowing combustion gases into the cooling system (creating pressure and air pockets) or coolant into the combustion chamber or oil. Head gasket replacement typically costs $1,500-$3,000 including labor, making it far more expensive than radiator replacement.
Continued driving after initial overheating compounds damage exponentially. The first overheating episode might cause minor head gasket compromise or slight cylinder head warping. However, subsequent overheating while damage already exists leads to complete gasket failure, severe warping requiring cylinder head machining or replacement, or even cracked cylinder heads that cannot be repaired. What could have been a $1,500 head gasket job becomes a $4,000-$6,000 cylinder head replacement.
Engine block damage represents the worst-case scenario. Extreme overheating can crack cylinder bores or main bearing areas in the engine block—damage that typically requires complete engine replacement. Such repairs often exceed the vehicle’s value, especially for older models. Engine replacement costs $4,000-$10,000+ depending on vehicle type and whether you choose used, rebuilt, or new engines.
Emergency Measures and Limitations
If you must drive a vehicle with cooling system issues—perhaps to reach a repair shop or get home—certain emergency measures can buy limited driving time. First, turn off the air conditioning immediately, as the AC system adds significant heat load that the compromised cooling system cannot handle. Second, turn on the heater full blast, which transfers heat from the engine coolant into the passenger cabin, providing supplemental cooling. Yes, you’ll be uncomfortably hot, but this can lower engine temperature 10-20°F in emergency situations.
Drive only at low speeds with minimal acceleration. Highway speeds generate more engine heat and require more cooling capacity. Stick to residential streets if possible, keeping speeds under 35-40 mph. Avoid idling in traffic when possible—moving air through the radiator provides cooling that stagnant air cannot. If forced to stop at long traffic lights, consider shifting to neutral and gently increasing engine RPM to 1,500-2,000 to improve coolant circulation (though this only helps if the water pump is functioning).
Monitor your temperature gauge constantly. At the first sign of climbing temperature, pull over immediately, shut off the engine, and let it cool for at least 30 minutes before attempting to continue. Never remove the radiator cap while the engine is hot—pressurized coolant can cause severe scalding burns. Once cooled, check coolant level and add water if safe to do so. Using plain water temporarily is better than driving with no coolant, though you should replace it with proper coolant mixture as soon as possible.
When Driving Becomes Impossible
Certain radiator failures make any driving impossible without guaranteed engine destruction. Major coolant leaks that drain the entire cooling system in minutes leave no time to reach safety before severe overheating occurs. If you start your vehicle and see coolant gushing from the radiator, shut it off immediately—even idling without coolant will destroy an engine in 5-10 minutes.
Complete radiator blockage from internal corrosion or debris makes coolant circulation impossible. The engine will overheat almost immediately regardless of driving conditions since no coolant reaches the radiator for cooling. Steam emerging from under the hood signals coolant boiling—a clear indicator that temperatures have exceeded safe limits and further operation will cause damage. Stop immediately if you see steam.
If your temperature gauge reaches the red zone, pull over and shut off the engine within seconds. Continuing to drive even 30 seconds at red-line temperatures risks permanent damage. Some modern vehicles automatically enter “limp mode” when overheating is detected, drastically limiting engine power to prevent damage—heed this warning and stop driving immediately.
The Financial Reality
The mathematics are straightforward: Radiator replacement costs $400-$1,826 and takes a few hours to a day, getting your vehicle back on the road safely. Engine damage from overheating costs $3,000-$8,000+ and takes days or weeks to repair, assuming repairs are even economical versus replacing the entire vehicle. The choice to drive with a failing radiator trades certain, manageable repair costs for potential catastrophic expense and extended vehicle downtime.
For complete peace of mind and detailed technical guidance, resources like carsymp.com provide extensive diagnostic information helping vehicle owners identify cooling system issues before they become emergencies. Professional evaluation at the first sign of radiator problems typically costs $80-$150 for diagnosis—a small investment that potentially saves thousands in prevented engine damage.
What Should You Know About Different Types of Radiators?
Understanding radiator types involves knowing the distinctions between OEM and aftermarket quality levels, aluminum versus plastic construction materials, integrated transmission cooler requirements for automatic transmissions, and core density configurations affecting cooling capacity—each factor influencing cost, longevity, and performance for your specific application. Your selection should balance budget constraints with reliability needs and vehicle demands.
The radiator market offers numerous options at various price points and quality levels. Making informed decisions requires understanding what separates premium radiators from budget alternatives, and which features truly matter for your driving conditions and vehicle requirements.
What’s the Difference Between OEM and Aftermarket Radiators?
OEM radiators are manufactured by or for the original vehicle maker, guaranteeing exact fit and specifications that match your factory radiator, typically costing 20-50% more than aftermarket alternatives but offering assured compatibility and often longer warranties. Aftermarket radiators come from third-party manufacturers at various price points and quality levels, ranging from economy options at 30-60% of OEM cost to premium performance radiators exceeding OEM prices with enhanced cooling capacity.
OEM Radiator Advantages and Characteristics
Original Equipment Manufacturer radiators match factory specifications precisely because they’re either made by the same supplier who produced your original radiator or manufactured to exact OEM specifications. This ensures perfect fit without modifications—all mounting points align correctly, hose connections match exactly, and integrated features like transmission coolers are properly configured. You won’t encounter clearance issues, wrong-sized connections, or missing mounting brackets that sometimes plague ill-fitting aftermarket parts.
Quality consistency represents another OEM advantage. Vehicle manufacturers maintain strict quality standards for components wearing their brand, meaning OEM radiators undergo rigorous testing and quality control. Manufacturing processes, materials, and construction methods meet the standards that allowed the original radiator to function for years or decades. This consistency reduces the variability found in aftermarket markets where different manufacturers produce vastly different quality levels.
Warranty coverage for OEM parts typically spans 12-36 months and often transfers if you sell your vehicle, maintaining resale value. Dealerships readily warranty OEM parts they install, and most honor warranties even if you purchase the OEM part elsewhere and install it yourself (though some dealers require their installation for warranty activation). This warranty protection provides peace of mind that aftermarket warranties may not match.
The premium pricing for OEM radiators reflects these benefits but also includes dealer markup. OEM radiators typically cost $300-$1,000 depending on vehicle type, though you can often purchase genuine OEM parts from online OEM parts suppliers at 20-40% below dealership prices. Despite the higher cost, OEM makes sense for newer vehicles still under warranty, high-value vehicles where resale matters, or situations where perfect fit is critical due to tight engine bay packaging.
Aftermarket Radiator Quality Spectrum
The aftermarket radiator market spans from budget economy options to premium performance upgrades exceeding OEM specifications. Economy aftermarket radiators ($100-$250) target cost-conscious consumers, using thinner materials, lighter-duty construction, and sometimes lower-grade aluminum or plastic. These budget options work adequately for older vehicles with lower value where matching original longevity isn’t critical, but expect shorter service life—perhaps 4-6 years versus 8-10+ years for quality radiators.
Mid-tier aftermarket radiators ($250-$500) from reputable manufacturers like Spectra Premium, Denso, or Mishimoto offer OEM-equivalent quality at lower prices. These companies specialize in cooling systems and often supply OEM manufacturers, meaning their aftermarket versions use similar materials and construction as OEM parts. Quality mid-tier aftermarket radiators deliver reliability approaching OEM levels at 30-40% cost savings, making them excellent values for most vehicle owners.
Premium performance aftermarket radiators ($500-$1,200+) target enthusiasts, off-roaders, towers, and performance applications requiring cooling beyond stock specifications. These radiators feature full aluminum construction (no plastic tanks), increased core thickness, higher fin density, and enhanced tube designs for maximum heat transfer. Brands like CSF, Mishimoto, and Griffin produce radiators with 15-40% greater cooling capacity than stock, essential for modified engines, racing applications, or extreme-duty use.
OEM vs Aftermarket Radiator Quality Comparison
When comparing OEM and aftermarket options, evaluate several quality indicators beyond price. Construction materials reveal much about longevity—OEM and quality aftermarket use substantial aluminum cores with either aluminum or high-grade nylon plastic tanks, while budget aftermarket may use thinner gauge aluminum and cheaper plastic prone to cracking. Examine the welds and seams where tanks connect to cores—quality pieces show consistent, clean welding or bonding.
Core density and fin spacing impact cooling efficiency and durability. Count fins per inch (FPI) on the core surface—quality radiators typically feature 10-16 FPI, while budget options might use 8-10 FPI to save material costs. Higher fin density increases surface area for heat dissipation but requires more delicate handling since finer fins bend or damage more easily. For most street driving, 10-12 FPI provides excellent balance between cooling and durability.
Included accessories indicate manufacturer attention to detail. Quality radiators include new mounting hardware, rubber isolation bushings, and sometimes even new radiator cap. Budget options ship bare with no accessories, requiring you to reuse old hardware that may be worn. Drain plugs made of brass (preferred) versus plastic (budget) signal overall quality philosophy—manufacturers cutting costs on small visible items likely cut corners on internal components too.
Warranty terms reflect manufacturer confidence. Premium aftermarket and OEM radiators offer 2-3 year warranties, while economy aftermarket often provide 1 year or less. Lifetime warranties sound appealing but usually carry restrictive terms making claims difficult. Focus on practical coverage duration—2-3 years protects you through the critical early failure period.
According to industry research by the Automotive Aftermarket Industry Association, quality aftermarket radiators from established manufacturers demonstrate failure rates within 3% of OEM equivalents during the first 5 years of service, while budget-tier aftermarket radiators show failure rates 15-25% higher than OEM during the same period, with most failures occurring in years 3-5.
What’s the Difference Between Aluminum and Plastic Radiators?
Modern radiators use aluminum cores with plastic end tanks as the standard design combining aluminum’s heat transfer efficiency with plastic’s corrosion resistance and lower cost, while full aluminum radiators offer superior durability and repairability at higher prices, and older copper-brass radiators provide excellent heat transfer but weigh considerably more and cost more to manufacture. Material selection impacts cooling performance, longevity, repairability, and overall cost.
Aluminum Core with Plastic Tank Design
The hybrid aluminum-plastic design dominates modern automotive radiators because it balances performance with affordability. Aluminum forms the core where coolant flows and heat transfer occurs, leveraging aluminum’s excellent thermal conductivity (second only to copper among common metals). Thin aluminum tubes carry coolant through the core while aluminum fins between tubes maximize surface area exposed to airflow, creating efficient heat dissipation.
Plastic end tanks on each side of the aluminum core serve as coolant reservoirs where hoses connect and coolant enters/exits the core. These tanks use reinforced nylon or composite plastics designed to withstand 15-20 PSI cooling system pressure and temperature extremes from freezing to 230°F+. Plastic offers several advantages over metal tanks: it never corrodes (a major failure mode for older all-metal radiators), weighs less, costs less to manufacture, and allows complex shapes for hose connections and integrated features.
The primary vulnerability of plastic-tanked radiators is crack development after years of thermal cycling and pressure stress. Plastic becomes brittle with age and UV exposure, developing cracks typically at seams where tanks bond to the core or around mounting bosses. Most plastic tank failures occur after 7-12 years of service—a reasonable lifespan but shorter than quality all-aluminum radiators achieve. Once cracks develop, repair is generally impractical since plastic welding or epoxy rarely withstands cooling system pressure long-term.
This design serves most passenger vehicles excellently, providing adequate cooling capacity, reasonable longevity (8-10 years typical), and affordable replacement costs. For daily drivers in normal conditions without extreme demands, aluminum-plastic radiators represent the optimal value proposition. They’re the default choice for OEM installations and mid-tier aftermarket replacements.
Full Aluminum Radiator Benefits
Premium all-aluminum radiators eliminate plastic tanks entirely, using welded or brazed aluminum end tanks integrated with the aluminum core. This construction creates a fully metal assembly offering several performance and durability advantages. Aluminum tanks eliminate crack-related failures plaguing plastic tanks, extending potential service life to 12-15+ years under normal use. The continuous aluminum construction also allows repairs—punctures or leaks can be welded or brazed by radiator specialists, potentially saving hundreds versus complete replacement.
Heat dissipation improves slightly with aluminum tanks since aluminum conducts heat better than plastic. While the core does most of the cooling work, eliminating plastic tanks removes a thermal insulator from the coolant path. Real-world impact is modest (perhaps 3-5% cooling improvement), but every bit helps for high-performance applications, racing, or heavy-duty use where maximum cooling capacity matters.
Aluminum radiators handle physical abuse better than plastic-tanked versions. Minor impacts that would crack plastic tanks might only dent aluminum tanks, potentially remaining functional even after damage. This durability benefits off-road vehicles, trucks in commercial use, or any application where radiator damage risks are elevated. The downside is weight—all-aluminum radiators weigh 20-40% more than equivalent aluminum-plastic designs.
Cost represents the main deterrent to aluminum radiators. Quality all-aluminum units cost $400-$1,200 compared to $150-$500 for aluminum-plastic equivalents. This premium makes sense for high-value vehicles you plan to keep long-term, performance applications requiring maximum cooling, or commercial vehicles where downtime costs justify extra durability. For typical passenger vehicles driven normally, the extra cost rarely proves worthwhile.
Copper-Brass Radiator Characteristics
Older vehicles originally equipped with copper-brass radiators present unique replacement considerations. Copper-brass construction uses copper tubes and brass tanks with copper or brass fins, creating highly efficient heat exchangers. Copper’s thermal conductivity exceeds aluminum by about 60%, making copper-brass radiators extremely effective at heat dissipation. They’re also highly repairable—almost any radiator shop can solder or braze copper-brass radiators, extending service life through multiple repair cycles.
However, copper-brass radiators carry significant disadvantages by modern standards. Weight is the primary issue—copper-brass radiators weigh 2-3 times as much as aluminum equivalents, negatively impacting fuel economy and handling. Cost has also increased dramatically as copper prices rose; new copper-brass radiators cost $400-$900 for common applications where aluminum equivalents run $200-$400. Most manufacturers abandoned copper-brass for passenger vehicles by the 1980s-1990s.
For classic car restorations where originality matters, copper-brass radiators maintain aesthetic authenticity and period-correct appearance. Some owners prefer copper-brass for antique vehicles due to superior repairability—important for vehicles where replacement parts become scarce. Modern aluminum radiators can be retrofit to most classic vehicles, offering weight savings and lower cost, though purists may object to the modification.
Do You Need a Radiator with an Integrated Transmission Cooler?
Yes, you need a radiator with an integrated transmission cooler if your vehicle has an automatic transmission, as most automatics rely on engine coolant circulation through the radiator to regulate transmission fluid temperature between 180-220°F, preventing overheating that causes transmission damage. Manual transmission vehicles and some vehicles with separate external transmission coolers do not require integrated coolers.
How Integrated Transmission Coolers Function
Integrated transmission coolers consist of a separate heat exchanger built into one of the radiator’s tanks, typically the lower or side tank depending on design. Transmission fluid circulates from the transmission through metal lines to this cooler where it flows through small tubes surrounded by engine coolant. Heat transfers from the hotter transmission fluid (which can reach 250-300°F under heavy load) to the cooler engine coolant (195-220°F), bringing transmission temperature down to optimal operating range.
This system works effectively under normal driving conditions because engine coolant actively cools via the main radiator, maintaining relatively cool temperatures that can absorb heat from transmission fluid. The integrated cooler provides adequate cooling for most daily driving—commuting, highway cruising, light towing within vehicle ratings. Transmission fluid temperatures staying below 220°F maximize transmission longevity, as excessive heat rapidly degrades transmission fluid and damages internal seals and clutches.
The integrated cooler design offers packaging efficiency and cost savings compared to separate external coolers. Manufacturers include integrated coolers as standard equipment on most automatic transmission vehicles, eliminating the need for additional components, mounting hardware, and cooling lines. The radiator performs double duty, cooling both engine and transmission with a single component at lower cost and weight than separate systems.
Vehicles Requiring Integrated Transmission Coolers
Virtually all vehicles with automatic transmissions since the 1980s feature radiators with integrated transmission coolers as original equipment. If your vehicle has an automatic transmission and you’re replacing the radiator, verify your replacement includes the transmission cooler—many aftermarket radiators offer versions with and without integrated coolers, often at $50-$100 price difference. Installing a radiator lacking the cooler when your vehicle requires one will cause transmission overheating and failure within days or weeks.
Vehicles with factory towing packages frequently include upgraded radiators with larger integrated coolers or dual cooling circuits to handle the increased heat generation from towing loads. When replacing radiators on tow-capable vehicles, ensure your replacement provides equivalent or greater transmission cooling capacity. Performance vehicles and sports cars may also feature enhanced transmission cooling for track use or aggressive driving.
Some vehicles use hybrid cooling systems combining small integrated coolers with external auxiliary transmission coolers, particularly heavy-duty trucks and performance applications. These vehicles still require radiators with integrated coolers—the external cooler supplements rather than replaces the integrated unit. If you’re unsure whether your vehicle requires an integrated transmission cooler, check your owner’s manual, examine your current radiator for transmission line connections, or consult your auto parts supplier using your vehicle’s VIN for exact specifications.
Installation Complexity and Additional Costs
Radiators with integrated transmission coolers add complexity to installation compared to cooling-only radiators. You must disconnect and reconnect transmission cooler lines—typically two metal lines running from the transmission to fittings on the radiator tank. These connections use threaded or quick-disconnect fittings that must be properly sealed to prevent transmission fluid leaks. Take care not to bend or kink transmission lines during radiator removal and installation, as damaged lines cause leaks or restrict flow.
After radiator installation, you must check transmission fluid level and top off as needed since several ounces drain from the lines and cooler during replacement. Some vehicles require specific transmission fluid types (Dexron, Mercon, CVT-specific formulas), so verify the correct fluid before refilling. Running an automatic transmission low on fluid causes slipping, overheating, and potential damage, making proper refilling critical.
Consider flushing transmission lines during radiator replacement if the old radiator’s integrated cooler failed and mixed transmission fluid with coolant. Cooler failure allows transmission fluid into the coolant (turning it pink or milky) or coolant into the transmission (causing transmission damage). If this contamination occurred, transmission lines contain contaminated fluid requiring flushing, and the transmission itself may need servicing. Professional transmission shops handle this specialized cleaning.
How Do Single-Core and Multi-Core Radiators Compare?
Single-core radiators feature one layer of coolant tubes through the core, offering adequate cooling for small engines in moderate climates at the lowest cost ($100-$300), while two-core and three-core radiators use multiple tube layers for 30-60% greater cooling capacity, serving larger engines, hot climates, towing applications, or performance use at $250-$600+. Core count directly impacts cooling capacity, with more cores providing progressively better heat dissipation at increased cost, weight, and thickness.
Core Configuration and Cooling Capacity
Core count refers to the number of tube layers stacked through the radiator’s depth. Single-core radiators have one layer of vertical coolant tubes running from top to bottom tank with fins between them. Two-core radiators feature two layers of tubes with fins between each layer, essentially doubling the cooling surface area within the same height and width. Three-core and four-core radiators continue this progression, though diminishing returns make cores beyond three rare for street applications.
Cooling capacity increases roughly proportionally with core count under similar conditions. A two-core radiator provides approximately 40-60% more cooling than equivalent single-core design, while three-core adds another 30-40% over two-core. These gains come from increased coolant volume flowing through the radiator and greater surface area for heat transfer. However, gains aren’t perfectly linear because thicker cores restrict airflow somewhat, and additional cores add weight and cost.
The trade-offs become apparent when comparing designs. Single-core radiators measure 1-1.5 inches thick, while two-core versions span 1.5-2.5 inches, and three-core radiators reach 2.5-3+ inches thickness. This added thickness may create clearance issues in tightly packaged engine bays where space between the radiator and engine components is limited. Heavier radiators (three-core versions can weigh 50-75% more than single-core) also stress mounting points more.
Application-Specific Recommendations
Single-core radiators suit compact cars with small displacement engines (1.5-2.5L typically) in moderate climates where cooling demands remain modest. These vehicles generate less waste heat and operate primarily in conditions where cooling requirements stay within single-core capacity. Budget considerations also favor single-core selection—if you’re maintaining an older economy vehicle without special cooling needs, spending $400+ on a three-core radiator makes little sense when a $150 single-core provides adequate function.
Two-core radiators represent the sweet spot for most mainstream vehicles. Mid-size sedans, smaller SUVs, and vehicles with 2.5-4.0L engines benefit from the enhanced cooling capacity without excessive cost or bulk. Two-core designs handle towing moderate loads (3,000-5,000 lbs), driving in hot climates (desert states, southern regions), and provide headroom for aging engines running slightly hotter than when new. The moderate price premium ($100-$150 over single-core typically) delivers worthwhile cooling improvement for most applications.
Three-core radiators serve performance vehicles, heavy-duty trucks, large SUVs towing near maximum capacity, and any application generating exceptional heat. Engines over 5.0L, turbo or supercharged motors, diesel engines, and modified motors with increased power output benefit from maximum cooling capacity. Race cars, off-road vehicles, and commercial trucks working in extreme conditions also justify three-core investment. The $400-$800 typical cost makes sense when inadequate cooling risks engine damage far exceeding radiator costs.
Climate considerations matter significantly. Vehicles operated predominantly in northern climates with mild summers often function adequately with single or two-core radiators, while those in southwest desert regions or southern states experiencing 95-110°F summers should upgrade to higher core counts. Hot climates tax cooling systems maximally, making enhanced capacity worth the investment. As a reference point, most OEM radiators for vehicles sold nationally use two-core designs as a compromise serving various conditions adequately.
According to cooling system engineering data published by the Society of Automotive Engineers, upgrading from a two-core to three-core radiator improves cooling capacity by 25-35% under identical operating conditions, while upgrading from single-core to two-core provides 40-55% improvement, making the single-to-two-core jump the most cost-effective cooling enhancement for vehicles experiencing marginal overheating issues.
This complete radiator replacement cost guide has covered everything from accurate cost estimation and the DIY versus professional decision to detailed installation steps and radiator type selection. Armed with this information, you can confidently approach your radiator replacement project with realistic expectations, appropriate preparation, and the knowledge to make choices that protect your vehicle and your budget. Whether you choose professional installation for peace of mind or tackle the job yourself for cost savings, understanding the complete process ensures successful radiator replacement that keeps your engine running cool for years to come.