

Bleed Brakes How-To for Drivers: Purge Air, Not Guesswork
To bleed brakes correctly, you remove trapped air from the hydraulic system so pedal travel shortens, pedal feel firms up, and braking response becomes predictable again.
Beyond a basic “pump-and-hold,” the real goal is consistency: the right fluid, the right sequence, and a method that avoids pulling new air into the lines.
Many brake problems that feel like “bad pads” are actually hydraulic issues—air, moisture-contaminated fluid, or an ABS module that still holds bubbles after parts were replaced.
Giới thiệu ý mới: the sections below walk you through preparation, step-by-step bleeding, order choices by vehicle layout, ABS-specific scenarios, and the checks that confirm you’re done.
What does bleeding brakes actually do, and when is it necessary?
Bleeding brakes is a how-to process that removes compressible air (and often old fluid) so hydraulic pressure transfers cleanly from the master cylinder to each caliper or wheel cylinder. Next, you’ll identify the situations where bleeding is mandatory and where it’s optional.

Air belongs nowhere in brake lines because it compresses, causing a spongy pedal and delayed clamp force at the pads or shoes. You typically need to bleed when:
- You replaced a caliper, wheel cylinder, brake hose, hard line section, or master cylinder.
- The reservoir ran low and likely sucked air into the master cylinder ports.
- You opened a bleeder screw for any reason (even briefly) and the pedal feel changed.
- You’re flushing old, dark fluid and want fresh fluid throughout the system.
However, “necessary” also depends on symptoms. If the pedal sinks with steady pressure, that can be internal bypass in the master cylinder rather than air. In contrast, a pedal that feels springy and improves after repeated pumps often points to air or excessive caliper flex.
To connect cause to action, look for the classic Signs of air in brake lines: longer pedal travel, a soft pedal that firms up after pumping, inconsistent bite, and increased stopping distance under repeated braking. From there, it becomes critical to choose a bleeding method that matches your setup and your tools.
How do you prepare to bleed brakes safely and cleanly?
Preparation is a how-to checklist: stabilize the vehicle, protect paint, confirm fluid spec, and set up a “no-air” workflow so every step moves fluid in one direction. Next, you’ll stage tools and protect the master cylinder from running dry.
Even for experienced DIY work, brake bleeding punishes shortcuts. Before you touch a bleeder screw:
- Stabilize the vehicle on level ground with wheel chocks; use jack stands, not just a jack.
- Protect paint with towels and water spray nearby—brake fluid can damage finishes.
- Confirm the correct fluid from the cap or manual (DOT 3, DOT 4, DOT 5.1, etc.).
- Clean the reservoir cap area so dirt can’t fall in when opened.
- Pre-loosen bleeders carefully; if one is seized, plan for repair before you start moving fluid.
To keep air out, the most important habit is this: never let the reservoir level drop below the “MIN” line. Once the master cylinder ingests air, you can bleed for hours and still chase a soft pedal.
In the context of DIY car repair, the safest approach is to work slowly, keep fluid bottles sealed until needed, and avoid reusing old fluid that sat open. Next, you’ll learn exactly how to set up the bleeder hose and bottle so you can see bubbles and confirm progress without guessing.
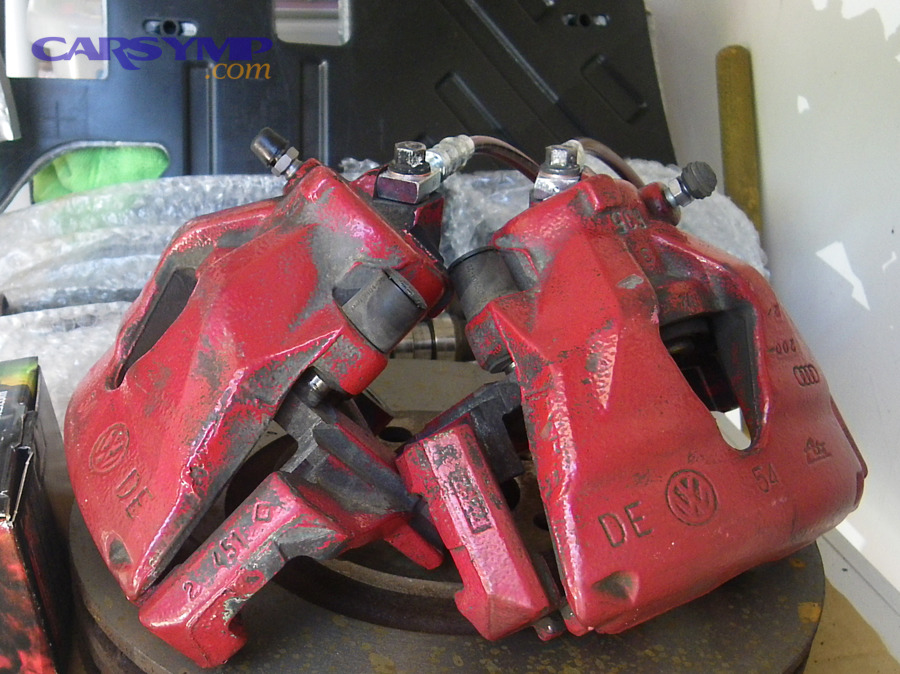
How do you locate and use the bleeder screw correctly?
The bleeder screw is a meronym of the brake assembly: it’s the small valve at the caliper or wheel cylinder that lets air and fluid escape when opened under pressure. Next, you’ll learn how to avoid stripping it and how to seal the hose connection.

A bleeder screw is usually on the highest point of the caliper body because air rises. If a caliper is installed on the wrong side, the bleeder may sit low—making bleeding frustrating or nearly impossible. Confirm the bleeder is at the top when the caliper is mounted.
Set up the bleed path like this:
- Use a snug, clear hose that fits tightly over the bleeder nipple.
- Route the hose into a catch bottle with a small amount of clean brake fluid at the bottom so the hose end stays submerged.
- Keep the bottle lower than the bleeder so gravity helps flow and bubbles travel out.
Important technique: crack the bleeder only enough to allow flow. Over-opening increases the chance of drawing air past the threads, especially with vacuum methods. If the screw feels delicate, use a line wrench or a correct-size flare nut wrench rather than an adjustable wrench.
Next, you’ll apply this setup in the most common approach: the two-person pedal method, which is reliable when done with strict “down–open–close–up” timing.
How do you bleed brakes with the classic two-person pedal method?
The two-person method is a how-to sequence of controlled pedal strokes that pushes air out wheel by wheel while preventing backflow through an open bleeder. Next, you’ll follow a repeatable cycle and learn the timing that keeps air from re-entering.
Use this strict cycle for each wheel:
- Top off the reservoir and leave the cap loosely set (to prevent splashes) unless your vehicle specifies otherwise.
- Helper presses the pedal slowly 3–5 times, then holds firm pressure down.
- You open the bleeder briefly (about a quarter turn) to let fluid and bubbles exit.
- You close the bleeder before the helper releases the pedal.
- Helper releases pedal slowly; you re-check reservoir level and top off.
- Repeat until you see clear fluid with no bubbles for multiple cycles.
Common timing error: letting the pedal come up while the bleeder is open. That can suck air back through the bleeder threads or the hose connection, undoing progress and creating the illusion of “endless bubbles.”
To make the method more consistent, ask the helper to use clear verbal calls like “Down” and “Holding” so you only open the bleeder when pressure is steady. Also, avoid slamming the pedal to the floor on older vehicles—this can push the master cylinder piston into rusty or unused bore areas and damage seals.
To reinforce the workflow visually, here’s a short reference video you can follow while working:
Next, you’ll learn How to bleed brakes without a helper—useful when you’re alone or want tighter control over air entry points.
How can you bleed brakes by yourself without special equipment?
You can bleed brakes solo by using one-way flow control—either a check-valve hose, a submerged-hose bottle setup, or gravity bleeding—so air can’t travel back into the caliper between pedal strokes. Next, you’ll choose the safest solo approach for your vehicle.
Three solo-friendly options work well when you respect their limitations:
- Submerged-hose bottle method: Keep the hose end under fluid in the catch bottle, then do slow pedal strokes. It reduces back-suck risk, but you still must close the bleeder at the right times.
- Gravity bleed: Open the bleeder and let fluid drip while you keep the reservoir topped. This is gentle and low-risk for master cylinder seals, but it can be slow and may not clear stubborn air pockets.
- One-way check valve bleeder hose: A simple inline valve allows fluid/air out but blocks return. It’s convenient, yet the hose must seal tightly to prevent air entry at the nipple.
If you’re doing solo bleeding as part of DIY car repair, the key is patience: slow pedal movement prevents aeration, and frequent reservoir checks prevent the single most catastrophic mistake—introducing air at the master cylinder.
Next, you’ll see how a pressure bleeder or vacuum bleeder changes the process, and why method choice affects the kind of air you fight (true air in lines vs. air drawn at threads).
Which bleeding method should you choose for your situation?
The best method depends on control and sealing: pressure bleeding excels at pushing bubbles out consistently, vacuum bleeding is convenient but can pull “false bubbles,” and pedal bleeding is reliable if timing is perfect. Next, you’ll match the method to the job and tools available.

Here’s how to decide in practical terms:
- After replacing a caliper or hose: Start with a quick gravity bleed to prime, then use two-person pedal bleeding to finish. This reduces the chance of pushing a large air slug into an ABS block.
- Full fluid flush: Pressure bleeding is usually fastest and most consistent, especially on vehicles with long lines or complex routing.
- Chasing a persistent soft pedal: Use pedal bleeding first to confirm true bubbles, then consider a pressure bleeder and ABS cycle if needed.
- Working alone: A check-valve hose or a pressure bleeder prevents backflow better than trying to coordinate pedal timing by yourself.
Important nuance: vacuum bleeding often shows bubbles even after the system is clear because air can be drawn past bleeder threads. That does not always mean air is still inside the brake lines. To distinguish, watch the pedal feel and the consistency of bubble size; thread-drawn bubbles are often tiny and continuous, while true trapped air tends to appear in larger intermittent bursts that diminish over cycles.
Next, you’ll decide the correct wheel order—because sequence matters, and it changes by vehicle layout and brake system design.
What is the correct wheel order for bleeding brakes on different vehicles?
Bleeding order is a how-to rule that prioritizes pushing air from the longest hydraulic path first, but the “right” sequence can change by vehicle type and the way circuits are split. Next, you’ll use a simple decision process to pick an order confidently.
Many vehicles follow the “furthest-to-nearest” idea, but modern brake circuits complicate it. Use this practical framework:
- Most rear-wheel-drive with a single master cylinder feeding front/rear circuits: typically start at the wheel farthest from the master cylinder, then move closer.
- Many front-wheel-drive cars with diagonal split circuits: order may alternate corners because each circuit feeds one front and the opposite rear.
- Vehicles with specific manufacturer procedures: always follow the service manual if it specifies an order or requires ABS cycling.
A safe default when you don’t have factory guidance is: start with the farthest wheel, then the next farthest, and finish closest. However, if your system is diagonally split, you may get a faster, firmer result by bleeding one diagonal circuit completely before the other.
Also consider component changes: if you replaced only one caliper or hose, you can often bleed that corner first to remove the largest air pocket, then perform a quick system bleed in the recommended order to ensure no bubbles migrated.
Next, you’ll tackle fluid selection—because even perfect technique can be undermined by the wrong brake fluid type or improper mixing.
Which brake fluid should you use, and what mixing should you avoid?
Use the fluid type specified for your vehicle because brake fluid chemistry affects boiling point, seal compatibility, and moisture behavior; mixing the wrong types can create performance issues and makes bleeding harder to validate. Next, you’ll learn compatibility rules that prevent costly mistakes.
Most passenger vehicles use DOT 3, DOT 4, or DOT 5.1 (glycol-based). DOT 5 is silicone-based and typically not interchangeable with glycol fluids. Practical rules:
- DOT 3 / DOT 4 / DOT 5.1: generally compatible in an emergency because they’re glycol-based, but blending changes overall boiling point and performance characteristics.
- DOT 5 (silicone): do not mix with DOT 3/4/5.1; it can cause seal and performance issues and makes moisture management unpredictable.
- Use fresh, sealed fluid: once opened, fluid absorbs moisture from the air over time, which reduces boiling margin.
Moisture matters because brake fluid is designed to handle extreme heat near calipers and rotors; as water content increases, boiling risk increases and pedal feel can become inconsistent under repeated braking. Theo nghiên cứu của National Library of Medicine (NIH) từ PubMed Central, vào 03/2024, sự hiện diện 2% nước có thể làm giảm điểm sôi của DOT 4 khoảng 45°C.
That’s why a “flush while you bleed” is often smart when the fluid is dark or unknown: you’re not only removing air but also restoring thermal performance.
Next, you’ll address ABS-specific bleeding—because some systems trap air inside the hydraulic control unit where normal bleeding can’t fully clear it.
When do you need extra steps for ABS-equipped brake systems?
ABS-equipped systems sometimes require additional cycling of valves and pumps because air can be trapped inside the hydraulic control unit, and standard wheel bleeding may not purge it completely. Next, you’ll recognize the scenarios where ABS intervention is likely necessary.
Not every ABS vehicle needs special steps every time, but consider ABS-related bleeding when:
- You replaced the master cylinder, ABS module, or hard lines near the ABS unit.
- The reservoir ran dry and you suspect air entered upstream of the ABS block.
- You still have a soft pedal after multiple thorough wheel bleeds with no visible bubbles.
- You experienced an ABS event (hard stop on loose surface) during/after service and pedal feel changed.
Some ABS designs can isolate internal passages unless the solenoids are commanded open. That means you can get a pedal that’s “almost right” but never fully firm, especially after major hydraulic work.
Next, you’ll learn when and how a scan tool is used—not as a gimmick, but as a controlled way to move trapped air out of the ABS unit into the lines where normal bleeding can remove it.
How do you decide whether a scan tool ABS bleed procedure is required?
A scan tool ABS bleed is a how-to diagnostic choice: you use it when conventional bleeding can’t restore a firm pedal, or when the service manual specifies electronic cycling after the system was opened upstream. Next, you’ll apply a decision rule and a safe workflow.
Use this decision rule:
- Do a full conventional bleed first (correct order, no reservoir drop, no visible bubbles).
- Assess pedal behavior with the engine off (to remove booster effects) and then with the engine on.
- If the pedal remains spongy or travel is still excessive, especially after upstream work, proceed to ABS cycling.
A typical safe workflow is:
- Connect a battery maintainer if available; ABS cycling can draw power.
- Use a scan tool function that performs the automated ABS bleed procedure for your vehicle.
- After cycling, re-bleed the wheels because the procedure often moves air into the lines.
This is also where many home jobs fail: people cycle ABS and assume the pedal will instantly be perfect without re-bleeding at the corners. In practice, ABS cycling is often a “move the air” step, not the final removal step.
Next, you’ll learn the most Common mistakes that introduce air—so you can prevent the failure modes that cause “endless bleeding” and wasted fluid.
What are the most common mistakes that introduce air during bleeding?
Most bleeding failures come from a few repeatable mistakes: letting the reservoir run low, releasing the pedal with an open bleeder, poor hose sealing, and using the wrong method for the system design. Next, you’ll learn prevention tactics that make your results repeatable.
Watch for these high-impact errors:
- Reservoir dips below MIN: this can pull air into the master cylinder, multiplying the time needed to recover.
- Bleeder open on pedal release: air can be drawn back in through threads or the hose connection.
- Over-opening the bleeder: especially with vacuum methods, it can pull air past threads and create “false bubbles.”
- Fast pedal pumping: aggressive strokes can aerate fluid and create tiny bubbles that take longer to purge.
- Skipping caliper orientation check: a bleeder below the piston bore traps air above it.
- Reusing old open fluid: moisture-contaminated fluid lowers boiling margin and can change pedal feel under heat.
If you’re focusing on Safety tips for brake bleeding at home, the cleanest safety win is to keep your hands and tools dry: brake fluid on gloves can transfer to paint, and spilled fluid can make a work area slippery. Also, keep a dedicated catch bottle and dispose of used fluid responsibly—don’t pour it onto the ground.
Next, you’ll diagnose what “air still in the system” really feels like and how to confirm whether you should keep bleeding or look for a different root cause.
How can you confirm whether air is still trapped, or something else is wrong?
You confirm trapped air by combining pedal feel patterns with leak checks and consistent bleeding results; if the pedal remains soft without bubbles and without leaks, the issue may be master cylinder bypass, hose expansion, or caliper flex rather than air. Next, you’ll run a quick diagnosis flow.
Use these checks to separate common causes:
- Pedal firms up after pumping: strongly suggests air or pad knock-back; recheck for rotor runout and caliper slide issues if air is ruled out.
- Pedal slowly sinks under steady pressure: can indicate internal master cylinder bypass or an external leak.
- Wetness at fittings/hoses/calipers: any leak can mimic air because it prevents pressure from building.
- Soft pedal only with engine running: can be a booster/vacuum interaction; test engine-off pedal firmness to isolate hydraulics.
For “Signs of air in brake lines,” focus on repeatability: if you bleed a wheel and the pedal improves, then degrades again after a short drive, you may have a slow leak, a loose banjo bolt washer, or a bleeder screw that isn’t sealing cleanly. Re-check torque and sealing washers where applicable.
Next, you’ll perform the final verification step that many people skip: post-bleed checks that confirm pedal feel, safety, and real-world braking behavior before normal driving.
What checks should you do after bleeding before you drive normally?
Post-bleed verification is a how-to routine: confirm pedal feel at rest, confirm no leaks, confirm consistent bite at low speed, and recheck fluid level after settling; these steps ensure the work is safe, not merely “finished.” Next, you’ll walk through a strict confirmation sequence.
Do these checks in order:
- Engine off: press the pedal firmly; it should feel solid and not slowly sink.
- Inspect every corner: look for fresh fluid at bleeders, banjo bolts, hose crimps, hard line unions, and around the master cylinder.
- Engine on: the pedal may drop slightly as the booster assists, but it should still feel firm and controllable.
- Low-speed test: in a safe area, do gentle stops first, then moderate stops, listening for abnormal noises and confirming straight tracking.
- Recheck reservoir level: after the first drive, top to the correct mark—do not overfill.
This is where Post-bleed pedal feel checks matter most: if the pedal is firm in the garage but becomes long after a few stops, you may have remaining micro-bubbles, moisture-heavy fluid, or pad knock-back from rotor runout. In that case, re-bleed and re-inspect rather than “hoping it seats.”
Next, you’ll cross the contextual border into deeper, less obvious details—like rare vehicle-specific quirks, method tradeoffs, and why some jobs keep producing bubbles even when the system is actually clear.
Extra details that make brake bleeding easier and more reliable
These details don’t change the core steps, but they often decide whether your bleed is clean and quick or frustrating and repetitive. Next, you’ll use these refinements to reduce false bubbles, prevent rework, and handle tricky configurations.
How can you reduce “false bubbles” when using vacuum methods?
False bubbles usually come from air pulled past bleeder threads, not from inside the brake line; tightening the hose fit, opening the bleeder minimally, and sealing threads can make the bubble stream match reality. Next, you’ll stabilize the vacuum setup.
To minimize thread-drawn air, open the bleeder only slightly, keep vacuum steady rather than pulsing, and ensure the hose is tight on the nipple. Some technicians lightly coat bleeder threads with grease (avoiding the fluid path) to reduce air ingress, but keep it clean and conservative so grease can’t contaminate the system.
Additionally, compare pedal feel before and after: if pedal improves while bubbles persist at a constant rate, you’re likely seeing thread bubbles rather than trapped air.
Why does bleeding order sometimes differ from “rear-right first”?
Bleeding order changes because circuit design changes; diagonal split systems and some stability-control layouts move fluid paths in ways that make a fixed rule inaccurate. Next, you’ll let system design, not tradition, decide your order.
Many modern vehicles split circuits diagonally for safety, so one circuit feeds left-front with right-rear, and the other feeds right-front with left-rear. In these cases, bleeding one circuit end-to-end can be more efficient. When in doubt, follow the service information for your exact vehicle type, especially if it includes stability control and electronic brake-force distribution.
When does ABS cycling become non-negotiable?
ABS cycling becomes mandatory when you open the system upstream of the ABS unit or replace components that allow air into the hydraulic control unit; without cycling, some air remains trapped and pedal feel never fully recovers. Next, you’ll confirm by symptom and service history.
If you replaced the master cylinder, ABS module, or the system ran dry, treat ABS bleeding requirements as likely rather than optional. Even a “mostly firm” pedal can hide air in the ABS block that only shows up during panic stops—exactly when you need full performance.
How do you bleed brakes without a helper when the pedal feels inconsistent?
If solo bleeding yields inconsistent pedal feel, switch to one-way control (check valve hose) or a pressure bleeder so the system never backflows during pedal return. Next, you’ll make solo bleeding behave like a controlled two-person cycle.
Solo attempts fail when the bleeder stays open too long or the hose connection isn’t perfectly sealed. A pressure bleeder keeps fluid moving outward under steady positive pressure, making it easier to clear stubborn micro-bubbles and reducing the chance of air being pulled in at the bleeder threads.
FAQ
Should you pump the brakes quickly to bleed faster?
No—fast pumping can aerate fluid and make tiny bubbles that are harder to purge; slow, deliberate strokes create more reliable bubble evacuation. Next, prioritize control over speed.
Use steady pressure, keep the reservoir topped, and focus on repeatable cycles. If time is an issue, switching to pressure bleeding usually saves more time than pumping harder.
Is it okay to reuse fluid that came out during bleeding?
No—used fluid can contain moisture and debris, and reintroducing it undermines the purpose of bleeding and flushing. Next, treat fresh fluid as a safety-critical consumable.
Collect used fluid in a clean container and dispose of it properly according to local regulations or recycling programs.
Why is the pedal still soft even when no bubbles appear?
If no bubbles appear and the reservoir never ran low, a soft pedal may indicate master cylinder bypass, flexible hose expansion, caliper flex, or ABS air that requires cycling. Next, re-check for leaks and consider ABS procedures.
Test engine-off pedal hold, inspect every fitting, and if upstream components were replaced, run the ABS bleed function and re-bleed the wheels.
How often should brake fluid be replaced if you’re not opening the system?
Fluid replacement intervals vary, but many vehicles benefit from periodic fluid refresh because moisture absorption reduces boiling margin over time. Next, treat fluid condition as part of brake performance, not just maintenance.
If the fluid is dark, unknown, or the pedal feel changes under heat, a flush during a bleed-style procedure can restore consistent braking behavior.
 1")


