Decide & Do Fuel Injector Cleaning: Flush vs Additive Guide for DIY Car Owners (Symptoms, Cost, When to Skip)
Fuel injector cleaning is worth doing only when you can connect it to a real problem—like drivability changes, confirmed injector-related symptoms, or a fuel-quality history that makes deposits likely—because the “right” method depends on how severe the restriction is and what your engine can safely tolerate.
Then, to make that decision confidently, you’ll need to recognize Injector clog symptoms and separate them from look-alike issues (spark, air leaks, sensors), so you don’t waste money or time chasing the wrong fix.
Moreover, you’ll want a realistic Injector cleaning cost estimate and a clear value test—DIY additive, on-car cleaning, or professional bench service—so your next step feels like smart engine service, not guesswork.
Introduce a new idea: once you know what injector cleaning can and can’t fix, you can choose between methods, reduce DIY injector cleaning risks, and verify results instead of hoping for them.
What is fuel injector cleaning, and what problem does it actually solve?
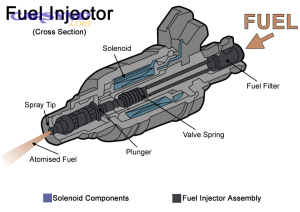
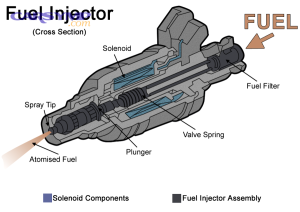
Fuel injector cleaning is a fuel-system maintenance and repair step that removes or reduces deposit buildup on injector tips and internal passages, restoring spray quality, flow consistency, and mixture control that deposits gradually disrupt.
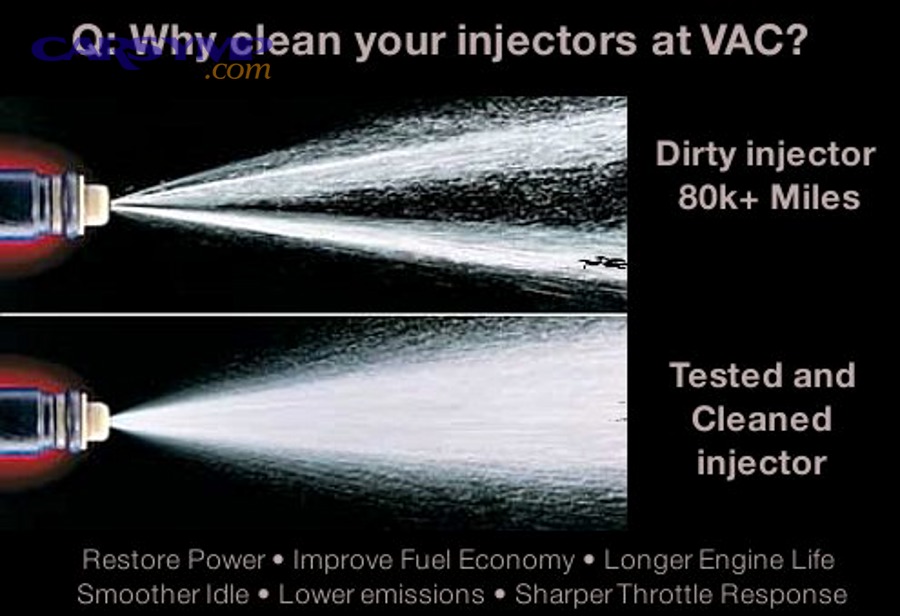
To better understand why that matters, it helps to picture what “dirty injectors” actually do inside the engine: they don’t just “make less power”—they change how fuel enters the cylinder, which can create uneven air-fuel ratios between cylinders and drive roughness, hesitation, and higher emissions.
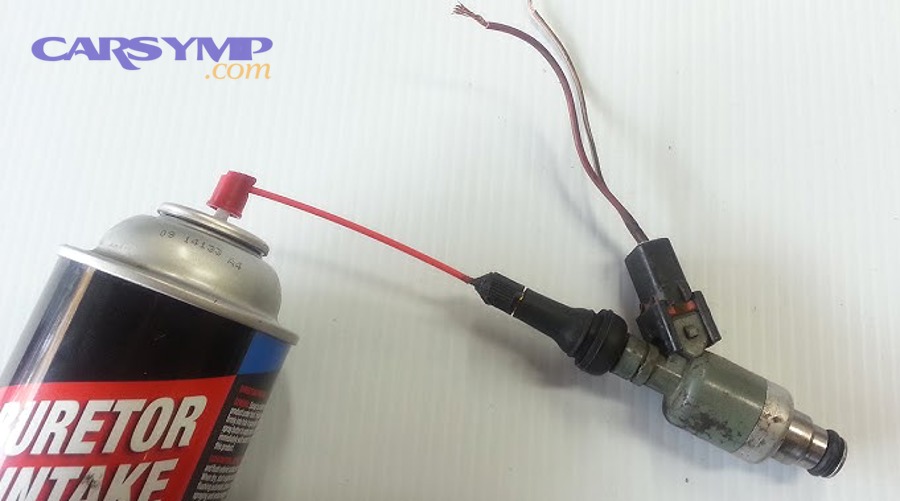
What “injector cleaning” actually targets
Injector deposits form as fuel components oxidize and leave varnish-like residues, especially at hot injector tips. Over time, those residues can:
- Narrow tiny flow paths (reducing fuel delivery at a given pulse width)
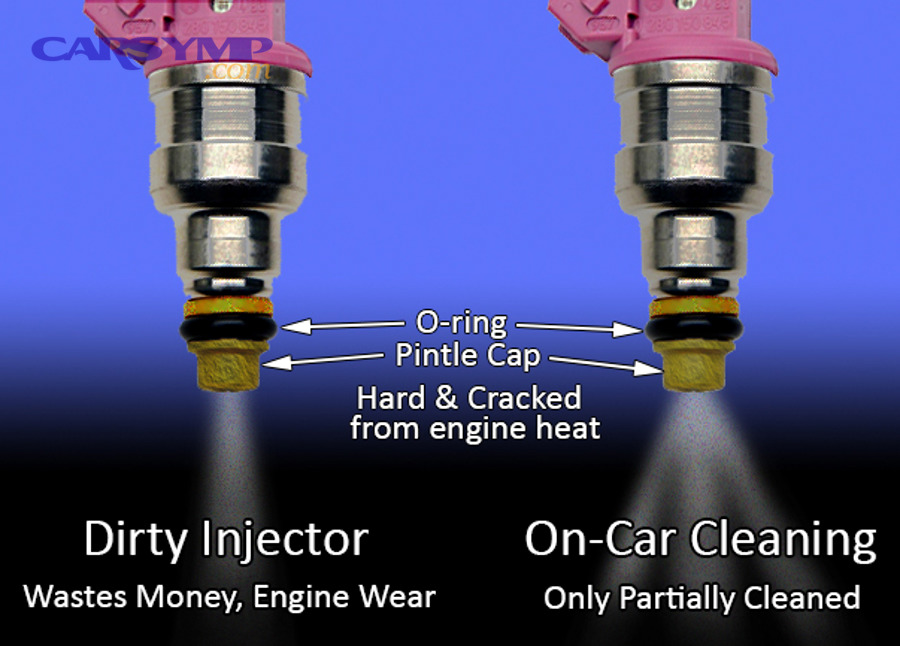
- Distort spray pattern (poor atomization and uneven mixture distribution)
- Increase cylinder-to-cylinder imbalance (one cylinder runs leaner/richer than others)
That’s why Misfire and rough idle linked to injectors is a real pattern: a cylinder that can’t get consistent fuel becomes harder for the ECU to keep perfectly balanced, especially at idle where airflow is low and mixture stability is sensitive.
What injector cleaning does not fix
This is the most common reason people feel “cleaning didn’t work”: the issue was never deposits.
- A failing ignition coil or worn spark plug can mimic injector problems.
- A vacuum leak can create lean codes and rough idle that feels like fueling trouble.
- Low fuel pressure from a weak pump or clogged filter can look like “dirty injectors,” but cleaning the injectors won’t restore pressure.
- On many direct-injection engines, intake valve deposits can cause similar drivability issues, even if injectors are fine.
In short, injector cleaning solves deposit-driven fueling and spray issues—not electrical injector failures, air leaks, or pressure supply problems.
Evidence: According to a study by University of Birmingham from the School of Mechanical Engineering, in 2015, injector deposits were shown to reduce injector fuel flow rate and alter spray characteristics, contributing to drivability issues and misfire risk in direct-injection applications.
Do you really need fuel injector cleaning right now?
No—fuel injector cleaning is not needed right now for most vehicles because modern gasoline already contains detergents, many “injector-like” symptoms come from other faults, and unnecessary cleaning adds cost and avoidable risk to the fuel system.
Next, the practical way to decide is to treat injector cleaning like a diagnosis-driven action: confirm symptom patterns, check quick indicators, and choose the lightest method that matches the likely deposit severity.
Are your symptoms consistent with dirty injectors—or more likely something else?
Injector-related symptoms tend to be repeatable, load-sensitive, and often tied to lean correction (fuel trims) rather than random, one-off stumbles. Specifically:
- More injector-likely: persistent hesitation under light acceleration, rough idle that improves slightly with RPM, intermittent lean misfire on one cylinder, or long crank on hot restart.
- More likely something else: rough idle that changes when you turn the steering wheel (vacuum load), misfire that appears only under heavy load (ignition breakdown), or stumble that disappears after you unplug a faulty MAF.
A quick DIY check that guides your decision:
- Scan for codes (misfire, lean condition, fuel pressure).
- Observe fuel trims (if you have a scan tool): large positive trims can suggest fuel delivery shortfall—though it can also be unmetered air.
- If only one cylinder repeatedly misfires, injector deposits are possible, but so are spark plugs/coils and compression issues.
Is injector cleaning preventive maintenance or a problem-fix for your case?
Injector cleaning is preventive mainly when your fuel history makes deposits more likely, while it becomes a problem-fix when symptoms already point to restricted flow or poor spray. Here’s the dividing line:
Preventive cleaning makes sense when:
- You’ve used low-detergent fuel for long intervals
- The vehicle sits for weeks/months (fuel oxidation risk)
- You have moderate mileage and want Fuel quality and injector health tips to keep performance stable
Problem-fix cleaning makes sense when:
- You have repeatable drivability issues and no obvious ignition/air leak cause
- The engine feels uneven at idle and during light throttle
- Your trims/codes suggest the ECU is compensating for mixture imbalance
This is where Fuel injector cleaning methods compared becomes important: a mild preventive approach is usually an additive; a symptom-driven approach might justify a stronger on-car or bench method.
What are the most common signs of clogged or dirty fuel injectors?
There are 4 main types of Injector clog symptoms—idle instability, low-load hesitation, performance loss under demand, and start/restart issues—based on when fuel delivery and spray quality matter most to combustion stability.
Then, once you group symptoms by driving condition, you can match them to the least risky cleaning method and avoid treating unrelated problems as “injector issues.”
Which symptoms show up at idle vs under load?
Idle-focused signs (common with mild restriction or imbalance):
- Rough idle that feels like a “shaky” engine
- Intermittent stumble at stoplights
- Slight RPM hunting as the ECU trims fuel to stabilize combustion
Low-load / cruise signs (often deposit-related):
- Hesitation when gently accelerating from 20–40 mph
- Surging at steady throttle (engine feels like it can’t decide on power)
- MPG drop without a clear mechanical change
Under-load signs (can be injector-related, but also ignition/pressure-related):
- Flat power delivery during passing
- Stumble that becomes more frequent with heat or longer drives
A helpful nuance: injector deposits often show up first during light-throttle drivability, because small fuel errors matter more when the engine is operating near lean limits and is highly sensitive to spray quality.
What symptoms are “red flags” that cleaning probably won’t fix?
These indicators suggest you should shift quickly from “cleaning” to diagnosis, repair, or replacement:
- Consistent single-cylinder misfire that returns immediately after clearing codes
- Injector circuit codes (electrical faults) rather than mixture-related codes
- Fuel smell, wetness, or visible leak near rails/injectors (safety issue first)
- Low fuel pressure codes or confirmed low pressure at the rail
- No-start conditions (unless you have strong evidence of varnish after long storage)
If you’re seeing these, focus on When injector replacement is better than cleaning and prioritize proper testing, because deposits are only one of many injector failure modes.
What’s the difference between injector “flush” and in-tank additive cleaning?
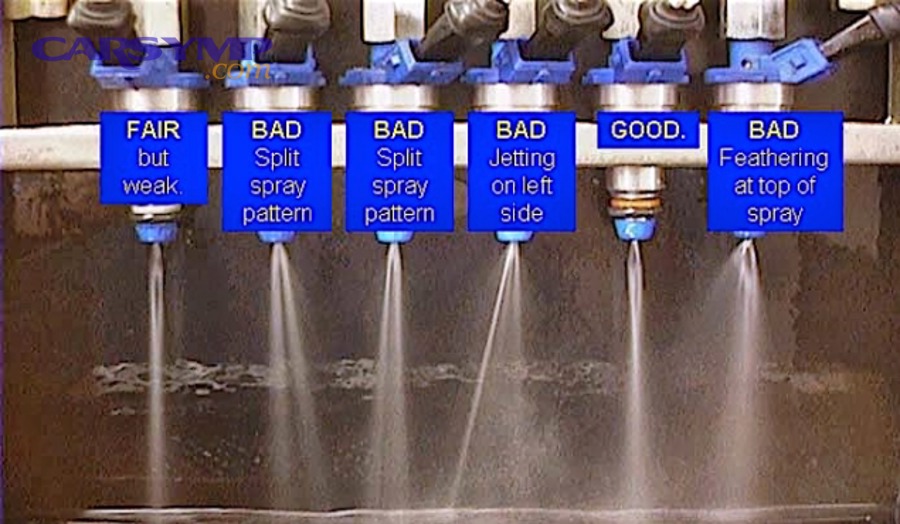
A pressurized on-car flush wins in cleaning strength, an in-tank additive is best for simplicity and low risk, and ultrasonic bench cleaning is optimal for verification and precision when symptoms are severe or persistent.
Below, that comparison matters because “cleaning” is not one thing; Fuel system additives: what works and what doesn’t depends on chemistry, contact time, and how restricted the injector actually is.
Is an in-tank additive cleaner enough for mild symptoms?
Yes—an in-tank additive cleaner can be enough for mild fuel injector cleaning needs because it’s low-risk for DIY use, it gradually dissolves light deposits with sustained contact, and it can improve idle and light-throttle response when restriction is minor.
However, “mild” is the key constraint. In-tank additives work best when:
- The engine still runs reasonably well (no hard misfire)
- Symptoms are early-stage (slight hesitation, mild rough idle)
- You’re also improving fuel habits (Top Tier or higher-detergent fuel)
Where people go wrong is expecting an additive to fix a serious imbalance quickly. Additives are often a maintenance lever more than an emergency repair.
Is a pressurized flush more effective for noticeable drivability issues?
Yes—a pressurized flush is often more effective for noticeable fuel injector cleaning problems because it delivers a stronger solvent concentration directly through the rail, it works faster under controlled flow conditions, and it can address deposits that an in-tank dilution may never reach effectively.
On the other hand, it comes with higher DIY injector cleaning risks:
- Mistakes around fuel pressure can be dangerous
- Wrong adapters or procedures can damage seals or lines
- If the vehicle has a complex high-pressure DI system, DIY flushing may be inappropriate
This is the practical bridge to On-car cleaning vs ultrasonic bench cleaning: if symptoms are persistent or localized, bench service may be the best “confidence” option because it can verify flow and spray pattern.
How do you use an in-tank fuel injector cleaner correctly (DIY steps)?
Using an in-tank cleaner correctly follows 5 steps—choose the right chemistry, dose accurately, time it with a fuel fill, drive a consistent cycle, and verify changes—so you get measurable improvement instead of guesswork.
Specifically, good DIY results come from treating this as controlled maintenance rather than pouring in a bottle and hoping.
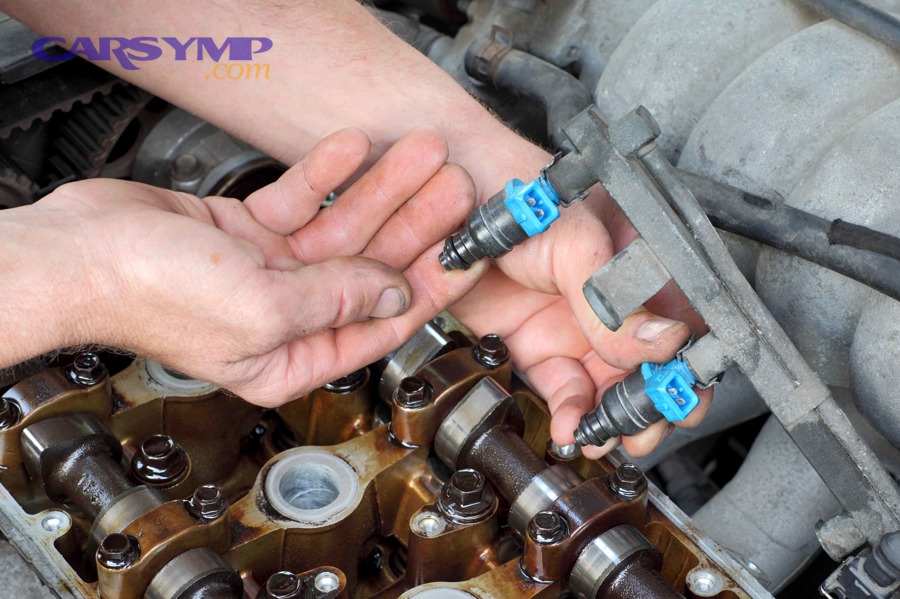
How do you choose the right cleaner type without guessing?
There are 3 practical “types” of aftermarket injector cleaners—detergent-focused, solvent-heavy, and multi-system blends—based on what they emphasize and how they behave in modern fuel systems.
To illustrate what Fuel system additives: what works and what doesn’t looks like in real life:
- Detergent-focused cleaners (often PEA-based in many formulations) are generally favored for deposit control and cleanup over time.
- Solvent-heavy cleaners may provide quick “feel” changes but can be harsher and less targeted.
- Multi-system blends combine detergents with stabilizers and lubricity agents, sometimes useful for storage or older fuel concerns.
A simple selection rule for DIY car owners:
- Prefer products with clear dosing instructions and compatibility statements.
- Avoid “miracle” claims that promise instant horsepower gains with no diagnostic context.
- Choose a cleaner that matches your goal: maintenance vs symptom correction.
How do you confirm it worked (and avoid placebo)?
Verifying improvement after cleaning should include (1) symptom tracking, (2) objective measurements if available, and (3) a repeatable drive loop, because subjective “it feels better” can be misleading.
A practical verification routine:
- Write down baseline symptoms before you clean: idle roughness, hesitation points, cold start behavior, MPG estimate.
- Repeat the same drive loop after half a tank and again after a full tank: same route, similar conditions.
- Check fuel trims if you can: a meaningful reduction in excessive positive trims can support a real fueling improvement.
- Monitor misfire counters (if your tool supports it) to see if random misfires decrease.
If you don’t see any measurable improvement after one properly dosed cycle, don’t keep stacking bottles. Move to diagnosis or stronger cleaning methods based on the symptom severity.
Evidence: According to a study by University of Birmingham from the School of Mechanical Engineering, in 2015, ethanol-blended fuel was reported to suppress injector deposit formation in cited dirty-up testing, reducing injector flow-rate loss from 4% to 1.5% in one referenced comparison.
How do you do a safer DIY “injector flush” without damaging your fuel system?
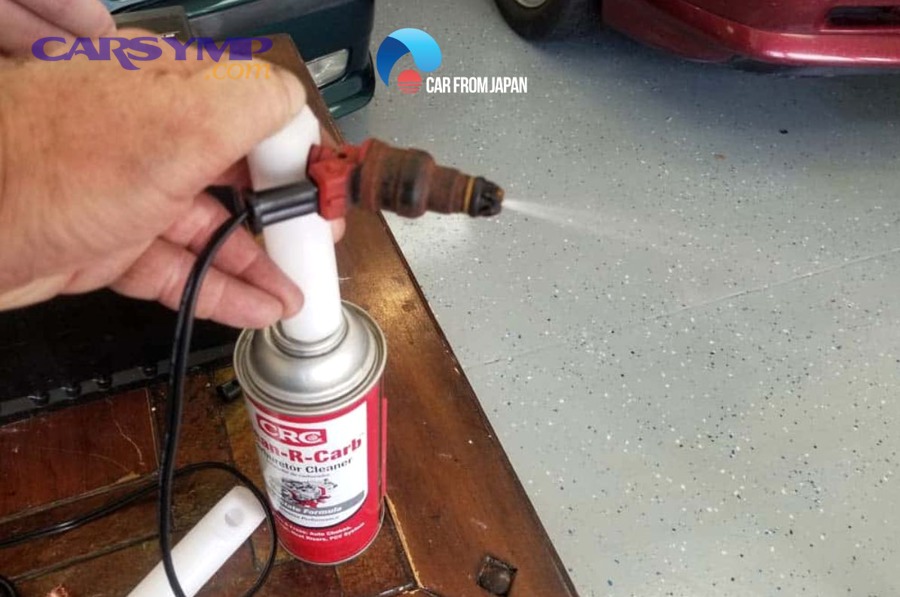
A safer DIY injector flush is a controlled on-car cleaning process with 4 critical controls—pressure safety, correct connection, stable flow time, and post-checks—so you clean effectively without creating leaks or ignition hazards.
More importantly, you should only attempt it when your engine and fuel system design make it appropriate, because the biggest DIY injector cleaning risks come from using a one-size-fits-all approach.
What safety steps matter most when working around fuel pressure?
There are 5 non-negotiable safety steps—based on fire risk and pressure control—when you perform any on-car fuel injector cleaning service:
- Depressurize the system correctly before disconnecting anything
- Work in a ventilated area away from open flames, heaters, or sparks
- Use eye protection and gloves because fuel spray can cause injury
- Contain spills immediately and keep absorbent materials ready
- Have a suitable fire extinguisher nearby and know how to use it
These steps aren’t optional “extra caution.” Fuel is volatile, and pressurized fuel can atomize into a flammable mist.
When should you avoid DIY flush and use a professional service instead?
Yes—you should avoid DIY flush and use professional service for fuel injector cleaning when your system is high-pressure direct injection, you lack the correct adapters and procedures, or you already have leaks/codes suggesting pressure or electrical faults that cleaning won’t solve.
In practical terms, escalate when:
- The engine uses a complex high-pressure pump and rail design
- You’re not confident you can reconnect everything leak-free
- The vehicle has persistent misfires that may require cylinder-specific testing
- You suspect injector leakage, not just restriction
At that point, a shop can offer a safer workflow—or a bench service that confirms injector performance rather than guessing.
How much does fuel injector cleaning cost—and when is it worth it?
Fuel injector cleaning is worth paying for when the method’s cost matches your symptom severity, because additives are cheapest but mild, on-car cleaning is mid-cost and faster, and ultrasonic bench cleaning is highest value when you need proven flow and spray restoration.
Next, a clear Injector cleaning cost estimate helps you stop spending at the right point—before “maintenance” becomes an expensive loop.
Before choosing, the table below summarizes common cost tiers and what you typically get for your money.
| Method | Typical cost range (USD) | Best for | Main limitation |
|---|---|---|---|
| In-tank additive | $10–$30 per treatment | Preventive cleaning, mild symptoms | Slow, may not fix significant restriction |
| On-car pressurized cleaning (“flush”) | $100–$250 (typical shop range varies) | Noticeable drivability issues | Riskier DIY, depends on correct procedure |
| Ultrasonic bench cleaning + flow test | $20–$40 per injector (often plus removal labor) | Severe/persistent issues, cylinder imbalance | Removal labor can raise total cost |
DIY vs shop: what are you paying for in a professional cleaning?
On-car shop cleaning can be worth it because you’re paying for controlled equipment, correct fittings, and often a basic diagnostic check that reduces trial-and-error. In other words, it should feel like structured engine service, not a random upsell.
What a good shop service often includes:
- Confirming symptom pattern and scanning codes
- Using proper adapters to run cleaner through the rail safely
- Checking for leaks and validating idle stability afterward
For bench service, you pay for measurable verification:
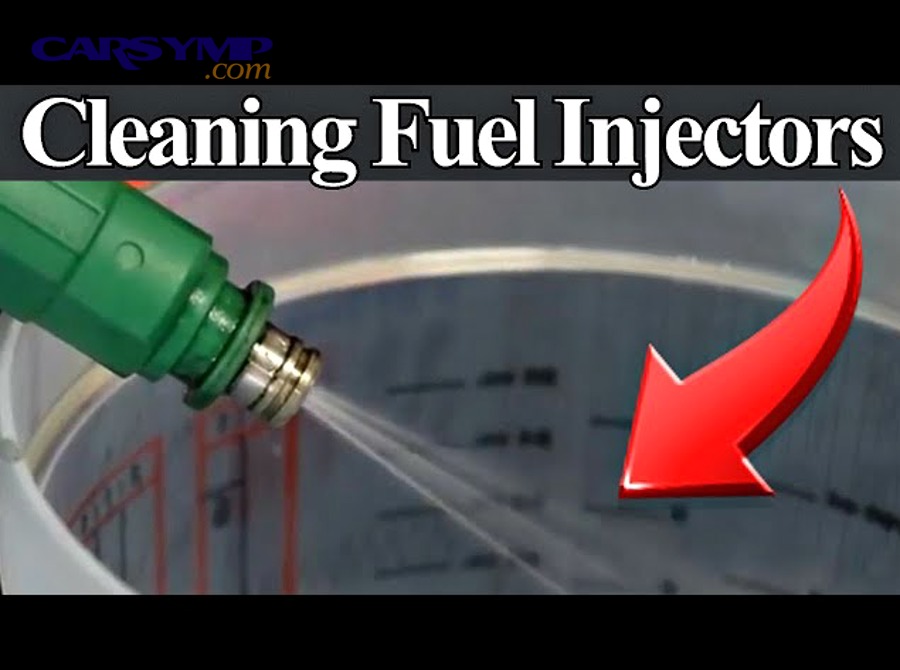
- Flow-rate comparison across injectors
- Spray pattern observation
- Cleaning until results stabilize
That “verification” is why On-car cleaning vs ultrasonic bench cleaning isn’t just about strength—it’s about confidence.
What’s a reasonable “stop point” before you spend more money?
A reasonable stop point is one properly executed step per severity level, because repeating the same method multiple times rarely fixes a non-deposit problem.
A practical escalation ladder:
- Mild symptoms: one quality additive cycle + improved fueling habits
- Moderate symptoms: one professional on-car cleaning (or carefully executed DIY if appropriate)
- Persistent or cylinder-specific symptoms: bench test/cleaning or diagnostic testing
If step 1 shows zero change, don’t keep buying bottles. If step 2 shows no meaningful improvement, move to testing. This keeps spending aligned with the likelihood that deposits are the real cause.
When should you skip injector cleaning and choose repair, testing, or replacement instead?
Yes—you should skip fuel injector cleaning and move to repair/testing/replacement when symptoms are severe or repeatable on one cylinder, diagnostics indicate electrical or pressure faults, and cleaning attempts don’t produce measurable improvement.
Then, once you accept that deposits aren’t the only injector failure mode, your next step becomes simpler: test what matters and replace what’s failed.
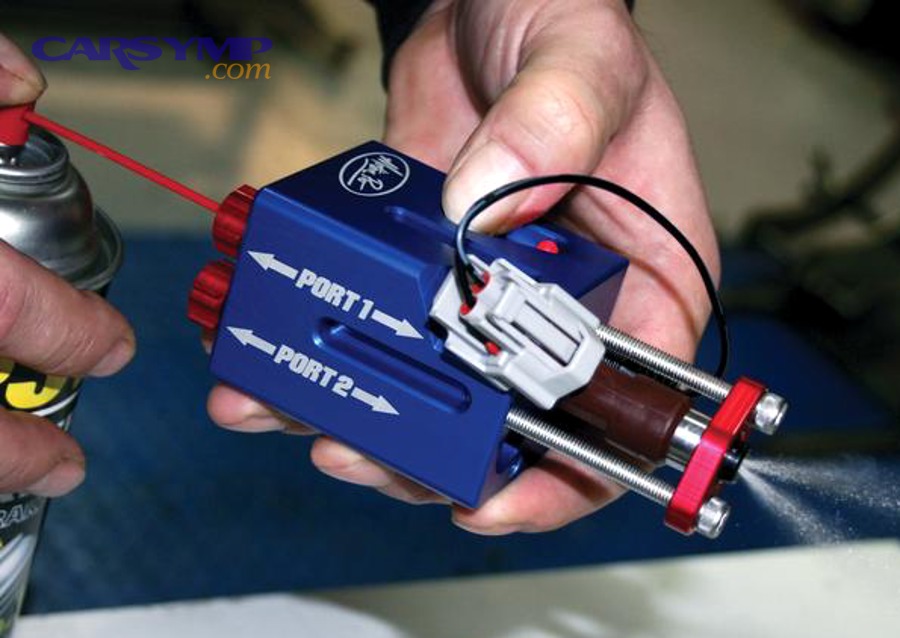
Is replacing an injector better than cleaning in your situation?
Yes—replacing an injector is better than cleaning when the injector has an electrical fault, it leaks or dribbles fuel, it fails a flow test, or the engine’s symptoms point to a single-cylinder problem that persists after proper cleaning.
This is the heart of When injector replacement is better than cleaning:
- Electrical failure: cleaning can’t repair a dead solenoid or wiring issue
- Leaking injector: cleaning doesn’t reliably fix mechanical sealing problems
- Flow imbalance confirmed: replacement (or matching) restores balance fastest
- Recurring misfire on one cylinder: especially if you’ve ruled out plug/coil
In many real cases, “cleaning vs replacing” is decided by one simple question: Do you have evidence that deposits are the cause, or evidence the injector itself is failing?
What should you check first if cleaning doesn’t help?
There are 6 common checks—based on likelihood and diagnostic clarity—when injector cleaning doesn’t change anything:
- Spark plugs and coils: the most common causes of misfire and roughness
- Air leaks: intake boots, vacuum hoses, PCV faults
- MAF/MAP sensor plausibility: incorrect airflow estimates change fueling
- Fuel pressure supply: pump health and filter restrictions
- Compression/leak-down: mechanical health that no cleaner can fix
- Cylinder balance tests: confirms if one cylinder is fueling differently
This is also where the phrase Misfire and rough idle linked to injectors should be treated carefully: injectors can be responsible, but misfires are multi-cause by default. A disciplined check order prevents wasted effort.
Evidence: According to a study by University of Birmingham from the School of Mechanical Engineering, in 2015, severe injector deposit issues were associated with drivability problems and misfire risk in the reviewed direct-injection research context.
What changes for direct-injection (GDI) engines and “fuel system cleaning” services?
Direct-injection changes the game because GDI deposit problems can involve injector tips and intake valve carbon, so injector cleaning wins for deposit control at the injector, while broader fuel system cleaning services may address additional components but vary widely in value.
Below, this matters because many drivers buy “fuel system cleaning” expecting one fix, when the real need is method-specific—especially for GDI engines.
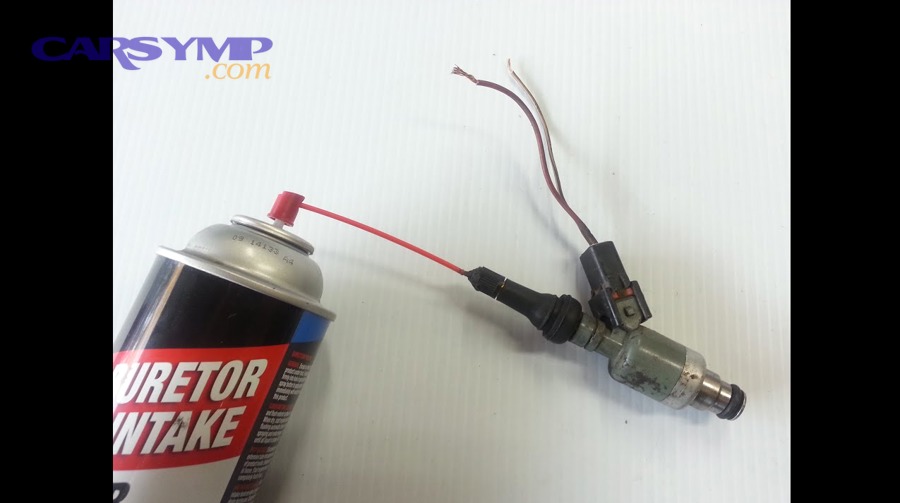
Does injector cleaning fix intake valve carbon on GDI engines?
No—injector cleaning does not reliably fix intake valve carbon on many GDI engines because the fuel does not wash the back of the intake valves, the deposits form from oil vapor and blow-by rather than injector spray alone, and the cleaning method required is often different (e.g., intake cleaning).
This is a classic “antonym” relationship in practice: cleaning injectors is not the same as cleaning intake valves, even though symptoms can overlap.
What is ultrasonic injector cleaning and flow testing, and when is it the best option?
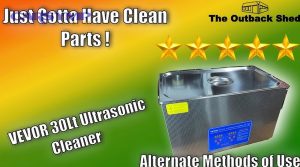
Ultrasonic injector cleaning and flow testing is an off-car service that uses controlled agitation and measured output to remove stubborn deposits and confirm restored performance, making it ideal when symptoms persist, cylinder balance matters, or you need proof rather than hope.
Specifically, On-car cleaning vs ultrasonic bench cleaning comes down to verification:
- Bench services can measure and compare injector output across cylinders
- They can reveal an injector that’s weak, uneven, or leaking
- They can justify replacement if cleaning fails to normalize results
Should you replace injector seals or filters when injectors are removed?
Yes—you should replace injector seals (and related small filters/baskets when applicable) during removal-based fuel injector cleaning because old seals can leak after disturbance, fresh seals improve reliability under pressure, and reassembly errors create drivability and safety problems.
A small leak may not show up immediately, but it can:
- Cause fuel odors
- Trigger mixture faults
- Create real fire risk in worst cases
Treat seals as cheap insurance when you’re already doing removal labor.
Is “fuel system cleaning” the same as injector cleaning—or a broader package?
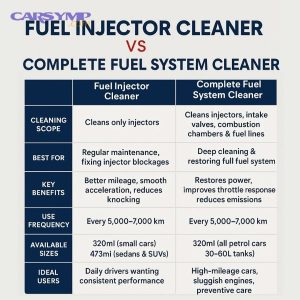
Fuel system cleaning is broader than injector cleaning because it may include injector treatment plus intake/throttle body cleaning, combustion chamber deposit reduction steps, and sometimes fuel rail service—yet the value depends on whether each component actually addresses your diagnosed issue.
Here’s the practical way to evaluate a shop recommendation:
- Ask what components are included and why they match your symptoms
- Ask how results are verified (idle stability, trims, misfire counters)
- Avoid “package selling” when you only need injector-specific work
To sum up, the best outcome happens when you treat injector cleaning as a targeted fix: choose the lightest method that fits the evidence, reduce risk, and commit to Verifying improvement after cleaning so you know whether to stop—or escalate to testing and replacement.