


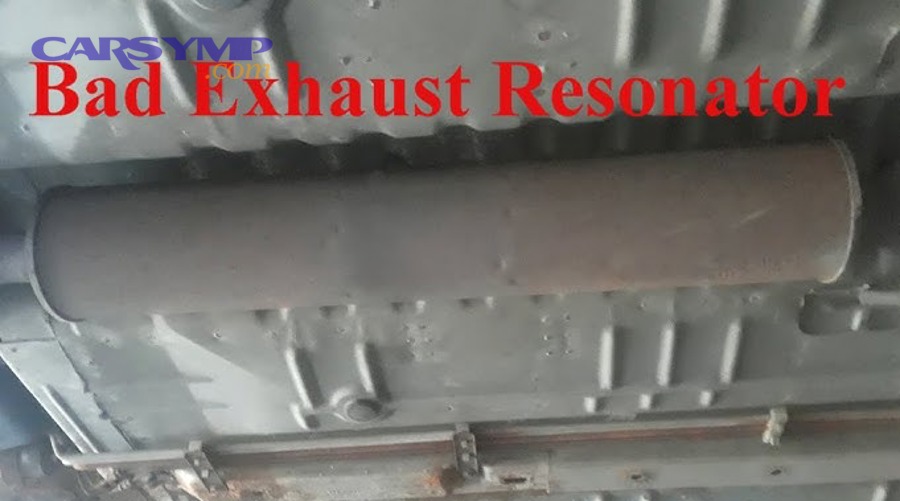
A failing exhaust resonator displays seven distinct warning signs: rattling noises from loose internal components, excessive exhaust volume changes, check engine light activation, reduced engine performance, poor fuel economy, unusual exhaust odors from leaks, and engine stalling in severe cases. These symptoms emerge when the resonator’s internal baffles corrode, external housings crack, or complete structural collapse restricts exhaust flow, creating dangerous back pressure that forces your engine to compensate inefficiently.
Beyond identifying these warning signs, understanding what your resonator actually sounds like when it fails helps you distinguish between minor annoyances and critical problems requiring immediate attention. The acoustic signature of resonator failure ranges from subtle high-frequency buzzing at specific RPM ranges to aggressive rattling that worsens over bumpy roads, each sound pattern revealing different internal damage stages that mechanics use for accurate diagnosis.
The performance consequences of ignoring these symptoms extend far beyond annoying noises—a collapsed resonator chokes your engine’s ability to expel exhaust gases, triggering oxygen sensor misreadings that illuminate your dashboard warning lights while simultaneously degrading fuel efficiency by 5-15%. This cascading failure progression transforms what starts as a $200 resonator replacement into potential engine damage costing thousands when exhaust restrictions force components to operate outside their designed parameters.
Proper diagnosis separates resonator issues from muffler failures, catalytic converter problems, or other exhaust system malfunctions that produce similar symptoms but require completely different repair approaches. Let’s explore each critical symptom in detail so you can accurately identify resonator failure, understand the urgency level, and make informed decisions about repair timing before minor exhaust issues escalate into major engine damage.
What Are the Signs of a Failing Exhaust Resonator?
There are seven primary signs of a failing exhaust resonator: rattling or metallic noises from loose internal components, excessive exhaust volume or unusual sound characteristics, check engine light activation from exhaust system sensors, noticeable reduction in engine performance especially during acceleration, decreased fuel economy from engine compensation efforts, strong exhaust odors or visible fumes from housing leaks, and engine stalling or hard starting in advanced failure stages. These symptoms typically progress from subtle acoustic changes to severe performance degradation as internal resonator structures deteriorate through corrosion, impact damage, or thermal stress cycles.
Understanding how these symptoms manifest helps you catch problems early when repairs remain simple and affordable. The resonator sits in your exhaust system between the catalytic converter and muffler, tuning sound frequencies while maintaining proper exhaust flow—when it fails, both acoustic control and engine breathing suffer simultaneously.

How Do You Know If Your Resonator Is Going Bad?
Early warning signs include subtle changes in your vehicle’s exhaust note—a slightly different tone during acceleration or occasional light rattling over rough pavement. These initial symptoms often appear intermittently, occurring only under specific operating conditions like cold starts or when traversing uneven road surfaces. Pay attention to any new sounds that weren’t present before, even if they seem minor.
Moderate symptoms become more consistent and noticeable. You’ll hear persistent rattling regardless of road conditions, experience a measurable decrease in throttle response, or notice your fuel gauge dropping faster than usual. The exhaust note changes from the manufacturer’s intended sound profile to something noticeably louder or more drone-like, especially during highway cruising. These moderate indicators suggest internal resonator damage has progressed beyond superficial corrosion.
Severe indicators demand immediate attention. Loud, aggressive rattling or buzzing that passengers comment on, strong exhaust smell entering the cabin, visible check engine light, difficulty starting the engine, or complete loss of power during acceleration all signal advanced resonator failure. At this stage, the resonator may have collapsed internally or developed significant external breaches that leak unfiltered exhaust gases.
Self-diagnostic checklist for non-mechanics:
- Listen for new sounds during different driving conditions (acceleration, deceleration, idle)
- Check for visible damage underneath the vehicle (rust holes, separated seams, hanging components)
- Monitor fuel economy for unexplained decreases
- Note any check engine light activation coinciding with exhaust noise changes
- Smell for exhaust fumes inside the cabin while driving
- Feel for power loss during acceleration or hill climbing
Red flags requiring immediate professional attention include any combination of loud exhaust noise plus check engine light, exhaust smell inside the cabin, or engine performance problems severe enough to affect drivability. These combinations indicate the resonator failure has progressed to a point where continued driving risks catalytic converter damage or engine harm from excessive back pressure.
What Does a Bad Exhaust Resonator Sound Like?
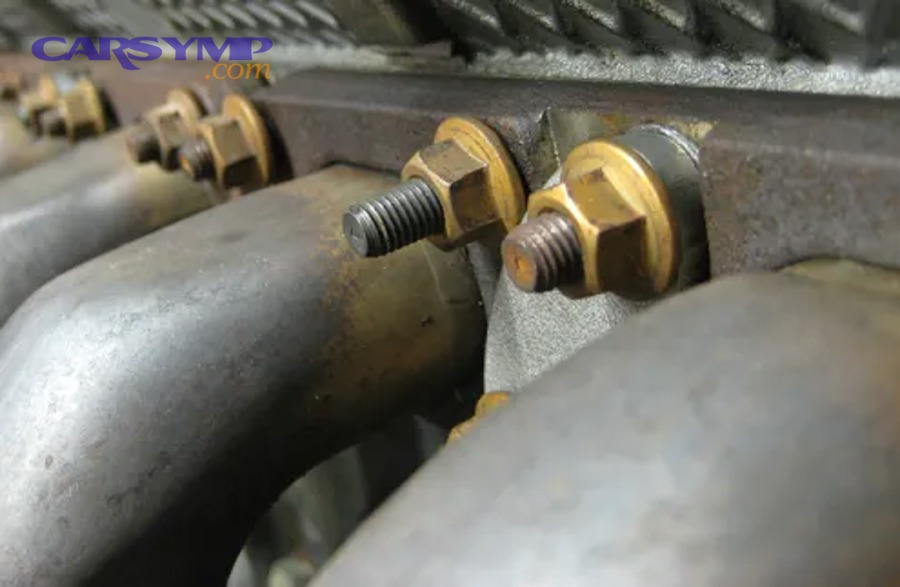
A bad exhaust resonator produces distinctive rattling, buzzing, or droning sounds that differ significantly from normal exhaust notes—rattling occurs when internal baffles break loose and vibrate against housing walls, high-frequency buzzing emerges at specific RPM ranges (typically 1500-2500 RPM) from disrupted sound wave patterns, and excessive droning creates cabin noise during highway speeds when the resonator can no longer cancel problematic frequencies. The acoustic signature varies based on failure type, with internal component failures producing metallic clanking while external cracks or holes create raw, unmuffled exhaust roar.
Sound serves as your primary diagnostic tool because resonator problems almost always announce themselves audibly before performance degradation becomes severe. The specific characteristics of these sounds reveal what’s happening inside the component and help you communicate problems clearly to mechanics.
Why Does a Failing Resonator Make Rattling Noises?
Rattling noises originate from the resonator’s internal construction breaking down. Inside the resonator housing, perforated tubes and metal baffles are welded or pressed into position to create chambers that control sound wave resonance. When corrosion weakens these welds or road impacts jar components loose, internal parts vibrate freely against each other and the outer shell, producing metallic rattling sounds.
The intensity and frequency of rattling depends on operating conditions. Cold starts may produce louder rattling as metal components contract and expand at different rates, creating gaps that allow movement. As the exhaust system heats up, thermal expansion sometimes temporarily reduces rattling by tightening component fit. Road condition influences are significant—smooth highway driving may produce minimal noise while rough, potholed streets amplify rattling as vibrations shake loose internal parts.
Corrosion represents the most common cause of internal component failure. Road salt, moisture accumulation, and acidic exhaust condensation attack welds and thin metal sections from both inside and outside the resonator. Once corrosion compromises structural integrity, normal exhaust pulses and road vibrations complete the separation process. Poor quality repairs, aftermarket resonators with inadequate welds, or impacts from speed bumps and road debris can also shake internal baffles loose prematurely.
When rattling indicates imminent complete failure, you’ll notice the sound becoming constant rather than intermittent, increasing in volume over days or weeks, and eventually accompanied by performance changes or check engine lights. At this advanced stage, loose internal components may partially block exhaust flow or create additional cracks in the housing.
What Causes High-Frequency Buzzing or Droning Sounds?
High-frequency buzzing occurs when the resonator can no longer properly tune exhaust sound frequencies, allowing specific harmonics to pass through unmodified or creating new problematic frequencies through damaged internal structures. Healthy resonators use their chamber design to cancel undesirable sound frequencies through destructive interference—when this tuning fails, certain engine RPM ranges produce pronounced buzzing as exhaust pulses resonate at frequencies the damaged resonator amplifies rather than cancels.
The typical RPM zones for buzzing fall between 1500-2500 RPM during steady-state cruising or light acceleration. This range corresponds to common highway driving speeds where exhaust gas velocity and pressure create ideal conditions for resonance. Some vehicles exhibit buzzing specifically at 1800 RPM or 2200 RPM—these precise frequency points relate to the resonator’s original tuning design and reveal where damage has disrupted that tuning.
Acceleration versus deceleration produces different sound characteristics. During acceleration, increasing exhaust volume and pressure intensify buzzing as more gas flows through compromised structures. Deceleration with engine braking may reduce buzzing or shift it to different RPM ranges as exhaust flow decreases and internal pressure dynamics change. This variation helps diagnose whether the problem stems from flow restriction or purely from disrupted acoustic tuning.
Interior cabin drone versus external exhaust note represents an important distinction. A failing resonator often creates excessive interior drone—low-frequency vibration felt and heard inside the vehicle—during highway speeds. This happens because the resonator no longer cancels frequencies that vibrate the floorpan and chassis. Meanwhile, external exhaust note might sound normal to observers outside the vehicle, making the problem particularly frustrating since it affects driver and passenger comfort without obvious external signs.
Vibration-induced frequency changes occur when loose components flutter at specific exhaust flow rates. Think of it like a reed instrument—exhaust pulses cause partially detached baffles to vibrate, generating frequencies unrelated to normal engine harmonics. These sounds often have a metallic, tinny quality distinct from deeper exhaust tones.
Can a Bad Resonator Cause Engine Performance Problems?
Yes, a bad resonator can cause significant engine performance problems through three primary mechanisms: collapsed internal structures that restrict exhaust flow create excessive back pressure forcing the engine to work harder expelling gases, this restriction prevents proper cylinder scavenging reducing power output by 10-20% in severe cases, and oxygen sensors misread the disrupted exhaust flow as lean conditions triggering check engine lights and fuel trim adjustments that further degrade performance. The severity ranges from barely noticeable power loss with minor resonator damage to complete engine stalling when total collapse blocks exhaust flow.
The connection between exhaust restriction and engine output is direct and measurable. Your engine operates as an air pump—intake stroke draws in air/fuel mixture, combustion stroke generates power, and exhaust stroke expels burned gases. When the resonator restricts exhaust flow, cylinders cannot fully evacuate spent gases, leaving residual exhaust that dilutes incoming fresh mixture and reduces combustion efficiency.

Performance degradation typically follows a timeline. Initial resonator damage may cause no noticeable performance change—the engine control unit (ECU) compensates through minor fuel trim adjustments. As restriction worsens over weeks or months, you’ll notice sluggish acceleration, reduced top speed, and hesitation during passing maneuvers. Severe restriction causes dramatic power loss, rough idle, and potential stalling.
Will a Collapsed Resonator Prevent Your Car From Starting?
A completely collapsed resonator can prevent your car from starting by creating back pressure levels that exceed the engine’s ability to expel exhaust gases, though this represents an extreme scenario typically preceded by weeks of worsening symptoms. When internal resonator components collapse inward, they can create near-complete exhaust blockage similar to stuffing a rag in your tailpipe—the engine may crank normally but cannot sustain combustion because cylinders fill with trapped exhaust rather than fresh air.
Internal collapse mechanics involve the resonator’s perforated inner tubes or baffles crushing under their own weight after corrosion destroys structural integrity. Unlike gradual restriction from partial blockage, collapse happens relatively suddenly—often following a hard impact from a speed bump or pothole that provides the final mechanical shock to already-weakened structures. The collapsed components fold inward, reducing the effective exhaust passage diameter from perhaps 2.5 inches to less than 1 inch.
Oxygen sensor lean readings from excessive back pressure create a diagnostic puzzle for mechanics unfamiliar with collapsed resonators. The sensors detect less oxygen than expected because exhaust gases aren’t flowing properly, triggering “system too lean” trouble codes (P0171/P0174). The ECU responds by adding fuel, which doesn’t solve the underlying restriction problem and may cause rough running or difficulty maintaining idle.
Hard start versus no-start conditions depend on collapse severity. Partial collapse allows the engine to start but causes immediate stalling when throttle is applied, or creates a situation where the engine only runs with aggressive throttle input to overcome back pressure. Complete collapse prevents sustained operation—the engine may fire briefly then immediately die as back pressure builds.
Real-world case examples include vehicles that mysteriously won’t start after going over a particularly rough section of road, or cars that run fine until reaching operating temperature then suddenly stall. These scenarios often involve resonators weakened by years of corrosion that finally collapse when subjected to thermal expansion or mechanical shock. One documented case involved a vehicle that wouldn’t start after hitting a pothole—removing the resonator revealed internal baffles had collapsed into a ball blocking 90% of the exhaust passage.
Does a Faulty Resonator Reduce Fuel Economy?
A faulty resonator reduces fuel economy by 5-15% on average because the engine control unit compensates for restricted exhaust flow by adjusting fuel delivery, ignition timing, and other parameters that sacrifice efficiency for drivability. When exhaust restriction increases back pressure, the ECU detects decreased oxygen sensor readings and responds by enriching the fuel mixture—essentially burning more gasoline to maintain power output despite inefficient combustion from trapped exhaust gases.
ECU compensation mechanisms involve complex feedback loops. The engine computer continuously monitors oxygen sensor data, manifold absolute pressure (MAP), mass airflow (MAF), and other inputs to calculate optimal fuel delivery. When a restricted resonator disrupts normal exhaust flow patterns, the ECU interprets this as requiring more fuel. Short-term fuel trims adjust first, followed by long-term fuel trim adaptations if the restriction persists. These compensations keep the vehicle running but at the cost of burning 5-20% more fuel depending on restriction severity.
Measurable MPG decrease typically follows this pattern: minor resonator damage might reduce highway fuel economy by 1-2 MPG (roughly 5-7% decrease), moderate restriction drops efficiency by 3-4 MPG (10-12% decrease), and severe restriction can reduce fuel economy by 5+ MPG (15%+ decrease). City driving sees smaller percentage decreases because frequent stops and starts already limit efficiency, while highway cruising—where steady exhaust flow matters most—shows the largest impact.
Long-term cost calculation makes resonator replacement economically sensible even before performance problems emerge. Consider a vehicle averaging 25 MPG that drops to 22 MPG from resonator restriction (12% decrease). Driving 12,000 miles annually with gas at $3.50/gallon means fuel costs increase from $1,680 to $1,909—an extra $229 yearly. A resonator replacement typically costs $200-500 depending on vehicle model and labor rates, paying for itself within 1-2 years through fuel savings alone.
Highway versus city driving impact differs because highway operation maintains steady exhaust flow rates where restriction matters most. City driving involves frequent throttle transitions, idle periods, and low-load operation where moderate resonator restriction has minimal effect. This explains why drivers often notice fuel economy problems primarily during long highway trips while city MPG remains relatively stable.
According to automotive efficiency research published by the Society of Automotive Engineers, exhaust system restrictions reducing flow capacity by 30% can decrease fuel economy by up to 12% while reducing power output by 15%, with the combined effect costing vehicle owners hundreds of dollars annually in wasted fuel.
Why Does the Check Engine Light Turn On With Resonator Failure?
The check engine light activates with resonator failure because modern exhaust systems integrate oxygen sensors and pressure sensors that detect abnormal exhaust flow patterns, triggering diagnostic trouble codes when sensor readings fall outside expected parameters—specifically, restricted flow from a collapsed resonator causes lean fuel mixture codes (P0171/P0174), while exhaust leaks from cracked resonators trigger catalyst efficiency codes (P0420/P0430). The illuminated warning light indicates the engine control unit has detected performance degradation requiring attention, though pinpointing the resonator as the root cause often requires systematic diagnosis since multiple exhaust components can trigger similar codes.
Modern vehicles employ multiple sensors throughout the exhaust system to monitor emissions compliance and performance. Upstream oxygen sensors before the catalytic converter measure oxygen content in raw exhaust, while downstream sensors after the catalyst verify proper converter operation. When a resonator fails, it disrupts the exhaust flow dynamics these sensors monitor, creating readings the ECU interprets as malfunctions.

The specific sensor triggers depend on failure mode. A collapsed resonator creating back pressure causes the ECU to detect lean conditions because exhaust gases aren’t evacuating properly—oxygen sensors read higher oxygen content than expected, prompting lean fuel mixture codes. Conversely, a cracked resonator leaking exhaust before it reaches the downstream oxygen sensor makes the catalyst appear less efficient, triggering catalyst efficiency warnings even though the catalytic converter itself functions properly.
What Error Codes Indicate Resonator Problems?
Diagnostic trouble codes P0420 and P0430 (Catalyst System Efficiency Below Threshold—Bank 1 and Bank 2) commonly appear with resonator failures because exhaust leaks from cracked resonator housings allow fresh air to enter before the downstream oxygen sensor, creating false readings that make the catalytic converter appear inefficient. Codes P0171 and P0174 (System Too Lean—Bank 1 and Bank 2) indicate resonator restriction causing excessive back pressure that prevents proper exhaust evacuation, though these codes can also originate from vacuum leaks or fuel delivery issues requiring careful differential diagnosis.
P0420/P0430 codes specifically monitor how well the catalytic converter processes emissions by comparing upstream and downstream oxygen sensor readings. A properly functioning catalyst shows different oxygen levels between sensors—the downstream sensor should read steadier with less oxygen variation. When a resonator cracks between these sensors, outside air infiltrates, causing the downstream sensor to read unexpectedly high oxygen levels. The ECU interprets this as catalyst failure when the actual problem is the resonator leak contaminating sensor data.
P0171/P0174 lean condition codes arise from the ECU’s attempts to compensate for exhaust restriction. When a collapsed resonator creates back pressure, combustion efficiency drops and oxygen sensors detect richer-than-expected exhaust (less oxygen). The ECU reduces fuel delivery to compensate, but if restriction is severe, it eventually runs out of adjustment range and sets a lean code despite actually running rich—a counterintuitive situation that confuses many technicians.
Reading codes with an OBD-II scanner provides the starting point for diagnosis, not the conclusion. Connect the scanner to your vehicle’s diagnostic port (usually under the driver’s side dashboard), turn ignition to “on” without starting the engine, and navigate to “Read Codes” or “Scan for DTCs.” Write down all codes present, including pending codes that haven’t yet triggered the check engine light. These pending codes often provide early warning of developing problems.
Distinguishing resonator codes from catalytic converter failure requires additional testing. If P0420/P0430 appears, perform a visual exhaust inspection for cracks or holes in the resonator—finding physical damage confirms the resonator as the culprit. If the resonator appears intact, monitor live oxygen sensor data while revving the engine; erratic downstream sensor readings with visible resonator damage indicate the resonator leak, while smooth sensor response with no visible damage suggests actual catalyst problems.
When multiple codes appear together, they tell a story. P0420 combined with P0171 suggests a resonator that’s both leaking (P0420) and restricting flow (P0171). P0300 (Random Misfire) appearing with P0171/P0174 indicates severe restriction affecting combustion in all cylinders. This code pattern analysis helps experienced technicians quickly isolate resonator problems from other issues.
What Causes Exhaust Fumes or Unusual Odors From a Bad Resonator?
Exhaust fumes or unusual odors from a bad resonator result from cracks, holes, or separated seams in the resonator housing that allow unfiltered exhaust gases to escape before reaching the muffler and tailpipe—these breaches release concentrated exhaust containing carbon monoxide, nitrogen oxides, and unburned hydrocarbons that create a strong, acrid smell often described as sulfurous or rotten egg-like. The health hazards escalate beyond unpleasant odors since carbon monoxide is an odorless, deadly poison that can accumulate in vehicle cabins through ventilation systems, making exhaust leaks a serious safety concern requiring immediate repair.
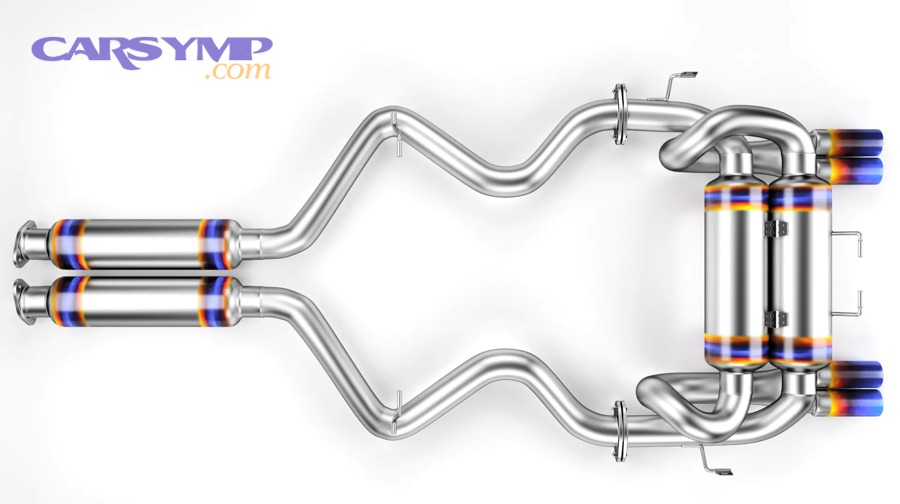
The chemical composition of unfiltered exhaust explains why leaked exhaust smells so distinct and unpleasant. Normal exhaust exiting the tailpipe has passed through the catalytic converter (reducing harmful emissions) and muffler (cooling gases and reducing velocity), emerging relatively diluted. Exhaust leaking from a failed resonator bypasses these downstream treatments, remaining hot, concentrated, and chemically potent. Sulfur compounds in gasoline combustion products create the characteristic rotten egg smell, particularly noticeable with low-quality fuel.
Leak formation typically occurs at specific vulnerable points. The resonator’s longitudinal seam where the housing halves are welded together represents the most common failure location—corrosion attacks this weld line from both exterior road salt and interior exhaust condensation. Inlet and outlet connection points where the resonator joins exhaust pipes also develop cracks from vibration and thermal cycling. Impact damage from road debris, speed bumps, or bottoming out creates puncture holes or dents that crack when stressed by thermal expansion.
How Can You Identify Exhaust Leaks Visually?
Visual exhaust leak identification requires inspecting the resonator when the exhaust system is completely cool to avoid burn injuries, looking specifically for black soot streaking patterns on surfaces near cracks or holes, rust-through corrosion creating visible perforations in the housing, separated longitudinal seams showing gaps between metal sections, and using soapy water or professional smoke testing to reveal small leaks not immediately visible. These inspection methods work best with the vehicle safely raised on jack stands or ramps providing clear access to the entire exhaust system underneath.
Safe inspection procedures start with ensuring the vehicle has cooled for at least one hour after operation—exhaust systems reach 400-600°F during normal driving and remain dangerously hot for extended periods. Park on level ground, engage the parking brake, and use appropriate jack stands rated for your vehicle’s weight if raising it. Never work under a vehicle supported only by a jack. Wear safety glasses to protect eyes from falling rust and debris.
Black soot streaking provides the most obvious visual evidence of exhaust leaks. Hot exhaust gases escaping from cracks deposit carbon on surrounding surfaces, creating distinctive black streaks or “flames” pointing in the direction of gas flow. These soot patterns often extend several inches from the leak source and may appear on the resonator itself, nearby heat shields, or even the vehicle underbody. Fresh soot appears black and slightly oily; older deposits turn gray and dry.
Rust-through holes and seam separation occur progressively as corrosion weakens metal. Small rust spots grow into pinhole perforations, then expand into quarter-sized holes over months or years. The longitudinal seam separates in stages—first showing a hairline crack, then gradually opening into a visible gap running several inches along the resonator length. Advanced corrosion makes metal appear flaky, scaly, or completely disintegrated in affected areas.
Soapy water testing involves mixing dish soap with water in a spray bottle, then spraying suspect areas while the engine runs at idle. Small leaks produce bubbles as exhaust gases escape through the soapy film. This method works best for tiny leaks invisible to the naked eye. Apply soapy water liberally around seams, welds, and any corroded areas, watching carefully for bubble formation.
Professional smoke testing provides the most comprehensive leak detection. Mechanics inject non-toxic smoke into the exhaust system through the tailpipe or oxygen sensor port, then watch for smoke escaping from leaks. This method reveals even the smallest cracks and works regardless of whether the engine runs. Many repair shops offer smoke testing as part of exhaust diagnosis, typically costing $50-100.
Common failure points to inspect include:
- Longitudinal seam running the resonator’s length
- Inlet pipe connection where the resonator attaches to upstream exhaust
- Outlet pipe connection joining the resonator to the muffler
- Welded end caps on cylindrical resonators
- Any dents, scrapes, or impact damage areas
- Locations where rust discoloration appears most severe
Photo examples would show soot streaking (black marks radiating from a crack), rust perforation (holes with orange corrosion around edges), and seam separation (visible gap in the weld line). However, since I cannot provide actual photos here, search online for “resonator exhaust leak soot” or “exhaust resonator rust hole” to see clear examples of these failure modes.
How Do You Diagnose a Failing Exhaust Resonator?
Diagnosing a failing exhaust resonator requires a systematic four-step process: start with visual underbody inspection for obvious cracks, rust holes, or hanging components; perform sound diagnosis by listening for rattling, buzzing, or unusual exhaust tones during various engine speeds; conduct physical tests including tapping the resonator with a rubber mallet to detect loose internal components and checking for excessive movement at mounting points; and if initial tests prove inconclusive, use professional diagnostic equipment including exhaust gas analyzers, back pressure gauges, and smoke machines to identify internal failures or subtle leaks. Professional diagnosis typically costs $80-150 but provides definitive answers when DIY methods prove insufficient, especially important before committing to Resonator replacement labor time averaging 1-2 hours.
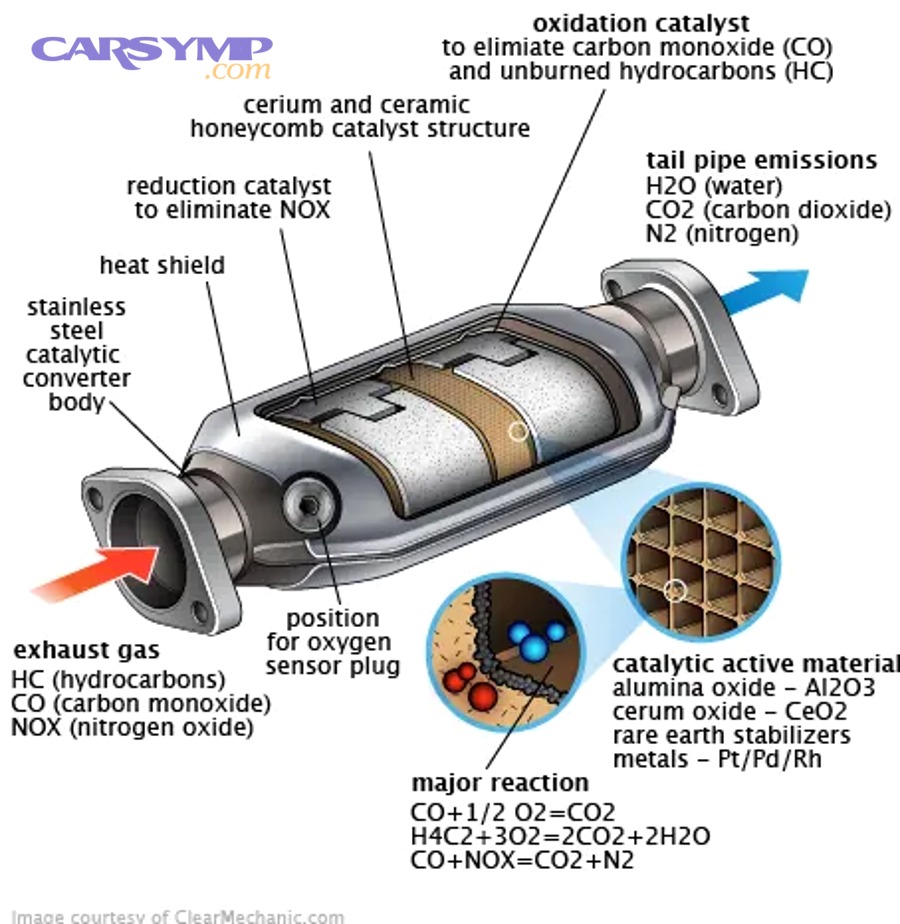
The diagnostic workflow should progress from simple, free methods toward more complex or costly approaches. Beginning with basic observation costs nothing and reveals obvious problems approximately 60-70% of the time. Physical testing catches another 20-25% of issues. Professional diagnostics capture the remaining subtle failures that resist simple detection methods.
Cost considerations influence the diagnostic approach. If your vehicle is older with high mileage and visible resonator corrosion, you might reasonably skip extensive diagnosis and proceed directly to replacement—the combined cost of diagnosis plus repair often equals or exceeds replacement cost. Conversely, newer vehicles or those with aftermarket exhaust systems warrant thorough diagnosis since the resonator may not actually be the problem despite similar symptoms.
Can You Test a Resonator Without Removing It?
Yes, you can test a resonator without removing it through visual inspection from underneath the vehicle for cracks, rust holes, or separated seams; sound-based diagnosis listening for rattling during various driving conditions; tap testing by striking the resonator housing with a rubber mallet to hear loose internal components clinking; vibration checks feeling for excessive movement at connection points; and flashlight-plus-mirror inspection to view hidden surfaces around the resonator’s backside. These non-invasive methods successfully identify 75-80% of resonator failures without the time and expense of removal, though internal collapse or subtle internal damage may require removal and sectioning for confirmation.
Visual underbody inspection techniques start with proper vehicle positioning. Raise the front or rear (depending on resonator location) enough to comfortably slide underneath, ensuring stable support with jack stands. Use a bright flashlight or work light to illuminate all resonator surfaces, paying special attention to areas that face upward (collecting water and salt) and the longitudinal seam where the housing halves join.
Sound diagnosis methods involve systematic listening during different operating conditions:
- Cold start: Listen at idle for any rattling or unusual tones
- Gradual acceleration: Note what RPM ranges produce buzzing or droning
- Steady cruise: Monitor for highway drone between 55-70 MPH
- Deceleration with engine braking: Detect rattling that appears only during reduced throttle
- Engine off: Listen for loose components settling with gravity
Tap test procedure uses a rubber mallet or similar soft striking tool to gently tap the resonator housing while listening for internal loose components. A properly functioning resonator produces a solid “thunk” sound. A failing resonator creates a distinctive rattling or tinkling as loose baffles move inside. Work around the entire resonator, tapping top, bottom, and sides to localize where internal components have failed.
Vibration and movement checks assess whether the resonator has separated from its mounting points or if connecting pipes have loosened. Grab the resonator (when cool) and attempt to move it side-to-side and up-and-down. Minimal movement (1/4 inch or less) is normal from rubber hangers. Excessive movement indicates broken hangers, separated welds, or corroded mounting brackets. Check connection points where pipes enter and exit the resonator for gaps or loose clamps.
Flashlight and mirror inspection reveals surfaces invisible from directly underneath. A telescoping inspection mirror or smartphone camera allows viewing the resonator’s top surfaces, backside, and areas near the vehicle body. Look specifically for:
- Soot streaking indicating exhaust leaks
- Active rust creating holes
- Dents or scrapes from road debris
- Separated welds at seams
- Moisture accumulation indicating low spots where water collects
When removal becomes necessary despite these tests, symptoms include: continued problems with no visible external damage, persistent check engine lights without obvious cause, performance issues suggesting internal restriction but no visible collapse, or the need to confirm warranty coverage requiring proof of internal failure. Professional removal and inspection typically adds 0.5-1 hour of labor costs but provides definitive answers.
When Should You Take Your Car to a Mechanic?
You should take your car to a mechanic for resonator diagnosis when symptoms include loud exhaust noises combined with check engine lights, when exhaust fumes enter the passenger cabin indicating dangerous leaks, when engine performance degrades to the point of affecting safe driving capability, when visual inspection reveals damage but you’re uncertain whether repair or replacement is most appropriate, or when you lack the tools, safety equipment, or physical ability to perform proper underbody inspection. Professional evaluation costs $80-150 for diagnosis but prevents misdiagnosis that wastes money on incorrect repairs and ensures safety issues receive proper attention.
Symptoms beyond DIY capability include intermittent problems that don’t manifest during stationary testing, check engine lights with multiple diagnostic codes suggesting complex interactions between exhaust components, suspected internal resonator collapse with no external evidence, and any situation where carbon monoxide poisoning risk exists from cabin exhaust infiltration.
Specialized diagnostic equipment benefits justify professional service for complex cases. Mechanics use:
- Exhaust gas analyzers measuring oxygen, carbon monoxide, and hydrocarbon levels to detect improper combustion from restriction
- Back pressure gauges inserted into oxygen sensor ports quantifying restriction severity
- Smoke machines revealing even microscopic leaks invisible to other methods
- Four-post lifts providing safe, comprehensive access to the entire exhaust system
- Digital inspection cameras viewing internal resonator conditions without removal
- Scan tools with live data monitoring oxygen sensor response in real-time during test drives
What to communicate to your mechanic maximizes diagnostic efficiency and prevents misunderstandings. Provide:
- Specific symptom descriptions: “Rattling between 2000-2500 RPM during acceleration”
- Timeline: “Started two weeks ago, getting progressively worse”
- Operating conditions: “Only when engine is fully warmed up” or “Worse on rough roads”
- Recent work: “Had catalytic converter replaced three months ago”
- Diagnostic codes if you’ve scanned them: “Showing P0420 and P0171”
Expected diagnostic process and costs typically follow this pattern:
- Initial inspection (15-30 minutes): Visual examination, sound evaluation while running
- Test drive (10-15 minutes): Experiencing symptoms under real conditions
- Detailed inspection (30-45 minutes): Lift-based examination, tap testing, smoke testing if needed
- Computer diagnosis (15-30 minutes): Scan codes, review sensor data, check manufacturer TSBs
- Total time: 1-2 hours at $80-150 shop rate
Questions to ask during professional evaluation:
- “Can you show me the damaged area?”
- “Is this a safety issue requiring immediate repair?”
- “What caused this failure?” (helps prevent recurrence)
- “Do you recommend OEM or aftermarket replacement?”
- “What’s the estimated resonator replacement labor time?”
- “Are there any other exhaust components needing attention?”
- “Will this repair include new gaskets and hardware?”
- “What warranty covers this work?”
Understanding Exhaust drone diagnosis and fixes helps you evaluate whether the mechanic’s recommendations address your specific concerns. If the primary complaint is interior cabin drone during highway speeds, ensure the repair plan includes resonator replacement rather than just patching external leaks—drone comes from acoustic properties that require proper resonator function, not merely intact housing.
What Happens If You Ignore Resonator Failure Symptoms?
Ignoring resonator failure symptoms leads to progressive damage escalating from minor exhaust noise annoyance to catalytic converter damage costing $1,000-2,500, potential engine harm from chronic back pressure requiring $3,000-5,000+ repairs, and safety hazards including carbon monoxide exposure that can cause headaches, dizziness, unconsciousness, or death in enclosed spaces. Repair costs escalate dramatically over time—a simple $200-400 resonator replacement becomes $500-800 when delayed weeks allow connection pipe corrosion, then $1,500-3,000 when catalytic converter damage occurs, and potentially $5,000+ if engine components fail from prolonged restriction.
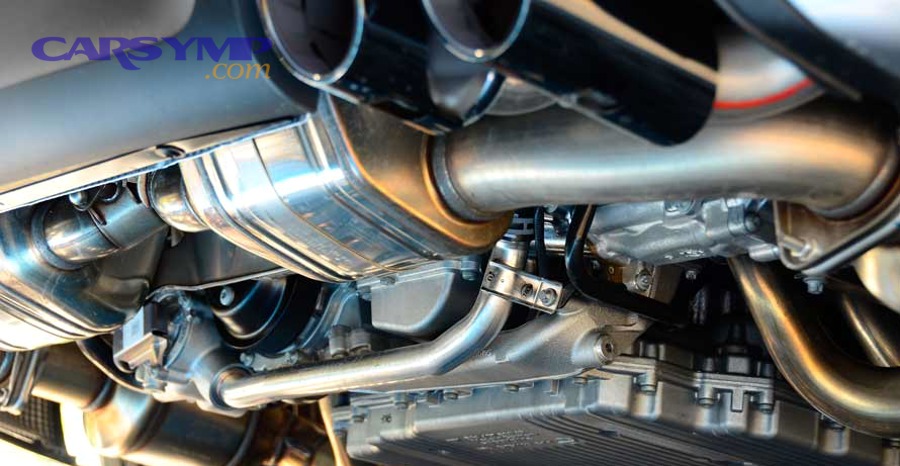
The cascading nature of exhaust system failures means problems rarely remain isolated. A cracked resonator leaking exhaust begins modestly but creates conditions accelerating adjacent component deterioration. Hot, corrosive exhaust gases escaping from resonator cracks attack nearby pipes, heat shields, and hangers. Back pressure from restricted resonators forces exhaust to linger longer in the catalytic converter, elevating temperatures beyond design limits and degrading the expensive catalyst substrate.
Safety implications transcend financial concerns. Carbon monoxide poisoning from exhaust leaks poses lethal risks, particularly dangerous because CO is odorless and colorless—victims often don’t recognize exposure until symptoms become severe. Small resonator cracks allowing exhaust to escape near floor pan seams can introduce toxic gases into the passenger cabin through ventilation systems or gaps around doors and windows.
How Quickly Does Resonator Damage Progress?
Resonator damage typically progresses from initial failure to complete breakdown over 3-12 months depending on corrosion acceleration factors including road salt exposure, climate humidity, driving frequency, and the original failure mode—small cracks from vibration stress may remain stable for 6-12 months before expanding significantly, while rust-through perforations from corrosion accelerate rapidly growing from pinhole to quarter-size within 2-3 months, and impact damage from bottoming out can cause immediate complete failure or create weaknesses that collapse within weeks. Environmental factors and driving patterns dramatically influence this timeline, with vehicles in coastal salt-air regions or snow-belt states where road salt is used experiencing 2-3 times faster deterioration than vehicles in dry, temperate climates.
Corrosion acceleration factors compound exponentially rather than linearly. A small rust spot on the resonator housing allows moisture penetration that spreads corrosion from both outside-in (road salt spray) and inside-out (exhaust condensation). This pincer attack rapidly enlarges the affected area. Once the housing breaches completely, the hole edges provide fresh surfaces for aggressive corrosion while hot exhaust gases escaping from the hole attack surrounding intact metal.
Impact damage severity varies dramatically. A minor scrape from a speed bump might crack the outer housing without affecting internal components—this crack may remain stable for months, slowly growing through thermal cycling and vibration. Severe impacts that crush or dent the resonator can collapse internal baffles immediately, causing instant complete failure. Medium-severity impacts create fractures that appear minor initially but propagate quickly as stress concentrates around the damaged area.
Typical lifespan with minor damage depends on usage patterns. A vehicle driven daily in stop-and-go traffic exposes the exhaust to frequent heat cycles (thermal expansion and contraction) that accelerate crack propagation—expect 3-6 months before minor cracks become major problems. Weekend-only vehicles might see minor cracks remain stable for 12+ months since less frequent use means fewer stress cycles, though corrosion continues regardless of driving frequency.
Environmental factors create dramatic differences in progression rates:
- Road salt exposure: Vehicles in northern states with heavy winter salting experience 3-5 times faster corrosion than southern vehicles
- Coastal salt air: Ocean proximity introduces airborne salt accelerating corrosion 2-4 times compared to inland areas
- Humidity: High-humidity climates promote rust formation; dry climates slow corrosion significantly
- Temperature cycling: Extreme temperature swings (cold winters, hot summers) stress metal through expansion/contraction cycles
- Rainfall: Frequent rain washes road grime but also introduces moisture; drainage issues accelerate corrosion
When to repair immediately versus monitor includes these decision factors:
- Immediate repair required: Strong exhaust smell in cabin, check engine light with performance loss, loud rattling affecting vehicle control, visible through-holes in housing, stalling or hard starting
- Repair within 2-4 weeks: Moderate rattling, minor performance decrease, check engine light without other symptoms, small cracks with soot streaking
- Monitor and plan repair: Occasional light rattling, very minor surface rust without holes, slight exhaust note changes without other symptoms
The point where resonators become catastrophic failure risks occurs when structural integrity degrades to where complete collapse is imminent. Warning signs include: loud rattling that suddenly becomes much worse, visible sagging or misalignment of the resonator housing, or the appearance of a check engine light combined with significant performance loss after weeks of minor symptoms. At this stage, the resonator could completely block exhaust flow at any time, potentially leaving you stranded or causing engine damage from extreme back pressure.
According to exhaust system engineering studies, corrosion rates in highway vehicles with daily road salt exposure can reduce exhaust component thickness by 0.5-1.0mm per year, with resonator housings typically manufactured at 1.5-2.0mm thickness meaning a 2-3 year lifespan before structural integrity becomes compromised in the harshest conditions.
How Does a Resonator Differ From a Muffler and Why Does It Matter?
A resonator differs from a muffler in that the resonator tunes exhaust sound by canceling specific problematic frequencies through destructive wave interference in echo chambers while allowing desired frequencies to pass, whereas the muffler reduces overall exhaust volume through sound-absorbing materials and directional flow changes without frequency selectivity—this functional distinction matters for accurate diagnosis because resonator failures produce characteristic droning and buzzing at specific RPM ranges while muffler failures create broad-spectrum exhaust loudness across all engine speeds. Understanding these differences prevents misdiagnosis where mechanics replace the wrong component, wasting your money on unnecessary muffler replacement when the resonator actually failed, or vice versa.
The complementary nature of these components means modern exhaust systems employ both to achieve acceptable sound levels while maintaining performance. Each addresses different acoustic challenges—resonators handle frequency-specific problems like drone, while mufflers tackle overall volume reduction.
What Is the Function of an Exhaust Resonator?
An exhaust resonator functions as a tuned echo chamber that cancels undesirable exhaust sound frequencies through destructive interference by creating a chamber where sound waves bounce and overlap with inverted phases, causing specific frequencies to cancel while allowing other frequencies to pass through unaffected. This frequency-selective filtering allows engineers to eliminate problematic drone and buzzing without restricting exhaust flow or reducing desirable sporty exhaust notes, improving cabin comfort during highway cruising while maintaining the vehicle’s intended acoustic character.
Sound wave tuning versus volume reduction represents the fundamental distinction between resonators and mufflers. Think of a resonator as an equalizer on a stereo system—it adjusts specific frequency bands without affecting overall volume. A muffler functions more like the volume knob—it reduces all sounds relatively equally regardless of frequency. This explains why removing a resonator makes the exhaust sound drone-ier but not necessarily louder, while removing a muffler makes it dramatically louder across all RPMs.
Echo chamber physics and frequency cancellation work through wave interference principles. When a sound wave enters the resonator chamber, it bounces off the walls and internal baffles, creating reflected waves. These reflections are timed (through chamber dimensions) to arrive back at the outflow point exactly out-of-phase with incoming waves of the target frequency. When two identical sound waves meet 180 degrees out of phase, they cancel each other—destructive interference. Frequencies that don’t match the chamber’s resonant dimensions pass through relatively unaffected.
Pre-conditioning sound before the muffler provides efficiency benefits for the entire exhaust system. By removing problematic frequencies early in the exhaust path (the resonator typically sits between the catalytic converter and muffler), the muffler can focus on general volume reduction without needing to address specific frequency issues. This allows smaller, more efficient mufflers that maintain better exhaust flow.
Performance benefits beyond sound control include minor improvements in scavenging efficiency. A well-designed resonator creates beneficial exhaust pulse reflections that help evacuate cylinders during the valve overlap period when intake and exhaust valves open simultaneously. While this effect is small compared to purpose-built performance headers, it contributes to optimized engine breathing.
Why engineers include both components relates to comprehensive acoustic management requirements. Vehicles must meet noise regulations while delivering the sound character customers expect for the vehicle type—luxury sedans require near-silence, sports cars demand aggressive exhaust notes, and trucks fall somewhere between. Achieving these diverse goals requires multiple acoustic treatment approaches. The resonator addresses frequency-specific problems (drone at 2200 RPM), while the muffler reduces overall loudness (from 110 dB to 75 dB at idle), and together they create the final exhaust note.
Can You Tell the Difference Between Muffler and Resonator Failure?
Yes, you can tell the difference between muffler and resonator failure through symptom patterns: resonator failure produces frequency-specific droning or buzzing at certain RPM ranges (typically 1500-2500 RPM during cruising) with interior cabin noise being particularly bothersome, while muffler failure creates loud, raw exhaust noise across all RPM ranges that’s equally obvious inside and outside the vehicle. The location in the exhaust system also differs—resonators typically sit forward between the catalytic converter and muffler (sometimes integrated into the same housing), while mufflers occupy the rear position before the tailpipe, making visual inspection location-specific.
The side-by-side symptom comparison reveals distinct failure profiles:
| Symptom | Resonator Failure | Muffler Failure |
|---|---|---|
| Primary noise characteristic | Buzzing, droning, humming | Loud, aggressive roar |
| RPM sensitivity | Specific RPM ranges (1500-2500) | All RPM ranges equally |
| Interior vs exterior | Interior drone worse | Both equally loud |
| Rattle type | Metallic tinkling | Deep rumbling |
| Performance impact | Moderate (back pressure) | Minimal (usually none) |
| Exhaust smell | Sometimes (if cracked) | Sometimes (if cracked) |
| Visual failure mode | Cracks, separated seams | Rust holes, blown baffles |
This table compares the distinct symptoms of resonator failure versus muffler failure to help diagnose which component has failed.
Location in the exhaust system provides a straightforward identification method. Slide under the vehicle and trace the exhaust path from the engine backward. The first large component after the catalytic converter (sometimes integrated with it) is typically the resonator. The rearmost component before the tailpipe is the muffler. Some vehicles have multiple resonators or mufflers, and some integrate both functions in one assembly, complicating identification.
Sound characteristic differences are diagnostic. Record a video of your exhaust at idle, during gentle acceleration, and during highway cruising. Resonator problems manifest most clearly during the cruising portion—a constant droning hum that intensifies at specific speeds. Muffler problems sound loudest during acceleration—an aggressive roar that makes the vehicle sound like it has an aftermarket performance exhaust when it shouldn’t.
Performance impact distinctions help separate the two. Resonator failures frequently cause back pressure issues leading to check engine lights and reduced power. Muffler failures rarely affect performance because the muffler sits at the end of the exhaust path where restriction has minimal effect on engine breathing. If you have loud exhaust noise plus performance problems, suspect the resonator; loud exhaust without performance issues suggests muffler failure.
Visual identification on vehicles requires knowing typical design patterns. Many modern vehicles use a pre-muffler resonator—a smaller, simpler canister before the main muffler. This pre-muffler often has a straight-through design with perforated tubes, while the main muffler has internal baffles directing exhaust through multiple chambers. If you see two cylindrical or oval components under the vehicle, the forward one is likely the resonator.
Why correct diagnosis matters for repair stems from cost and effort differences. Resonator replacement costs $200-500 depending on the vehicle, while muffler replacement runs $150-800 for similar labor but different part costs. Installing the wrong component wastes money without fixing the problem—you’ll still hear the unpleasant noise and need another repair. Additionally, resonators and mufflers use different attachment methods; some resonators are welded into the exhaust system requiring pipe cutting and welding for replacement, while many mufflers bolt on with clamps allowing simpler replacement.
Is It Safe to Drive With a Resonator Delete or Straight Pipe?
Driving with a resonator delete or straight pipe is mechanically safe in that it won’t directly damage your engine or exhaust system, but creates legal compliance issues as most states and municipalities have noise ordinances limiting vehicle exhaust sound levels to 75-95 decibels making resonator deletes illegal in many jurisdictions, causes severe interior cabin drone between 60-75 MPH that becomes physically fatiguing on long trips, and may void vehicle warranties or cause emissions inspection failures in states requiring exhaust system integrity verification. While popular in aftermarket performance communities, resonator deletion trades acoustic comfort for minimal or zero performance gains in naturally aspirated engines.
Legal noise ordinances vary by jurisdiction but typically fall between 75-95 dB measured from a specific distance (often 50 feet). A vehicle with resonator delete but functioning muffler might measure 85-92 dB, exceeding limits in strict jurisdictions. Law enforcement in residential areas increasingly cite loud exhaust violations, with fines ranging from $50-500 depending on location. Some states also require annual safety and emissions inspections that include exhaust system integrity checks—missing resonators can fail inspection even if emissions remain compliant.
Emissions testing implications depend on testing methodology. States using tailpipe sniffing (measuring actual emissions) typically won’t detect resonator deletion since the catalytic converter handles emissions reduction. However, states employing visual inspections or OBD-II scans may fail vehicles with modified exhaust systems regardless of emissions compliance. California and states adopting California standards are particularly strict, often requiring exhaust components to match manufacturer specifications.
Interior cabin drone represents the most immediate practical concern. The resonator’s primary function is canceling frequencies that create cabin pressure oscillations during cruising. Without it, these frequencies intensify, causing a penetrating hum that resonates through the vehicle structure. Passengers report headaches, fatigue, and difficulty concentrating during long drives. The drone typically peaks between 60-75 MPH—precisely the speed range for highway travel.
Performance gains from resonator deletion remain minimal to non-existent on street vehicles. While removing restrictions theoretically improves exhaust flow, factory resonators are designed with minimal restriction—they tune sound through chamber design, not flow blockage. Independent testing shows 0-3 horsepower gains from resonator deletion on naturally aspirated engines, an increase drivers cannot perceive in normal driving. Turbocharged engines show similarly minimal gains since boost pressure overcomes minor restrictions.
When deletion is acceptable versus replacement mandatory depends on your priorities and circumstances:
Deletion may be acceptable when:
- You have a track-only vehicle never driven on public roads
- Your jurisdiction has no noise ordinances or emissions inspections
- You’re willing to tolerate severe cabin drone
- You’re installing a complete aftermarket exhaust system designed to function without a resonator
- Budget constraints make even used resonator replacement impossible temporarily
Replacement is mandatory when:
- You drive daily on highways (cabin drone becomes unbearable)
- Your state requires emissions/safety inspections
- You value resale value (most buyers won’t want a drone-prone vehicle)
- Passengers (especially children) complain about noise fatigue
- You live in noise-restricted communities with HOA regulations
- Your vehicle is under warranty (modifications void warranty)
Insurance and warranty considerations add another layer. Most auto insurance policies don’t specifically address exhaust modifications, but if your loud exhaust contributes to an accident (driver distraction, failure to hear emergency vehicles), insurers might question coverage. Manufacturer warranties explicitly exclude damage caused by modifications—if resonator deletion contributes to catalytic converter overheating or oxygen sensor failure, expect warranty denial for those repairs costing thousands.
What Causes Exhaust Resonator Failure?
Exhaust resonator failure stems from five primary causes: corrosion from road salt and coastal salt air attacks the thin steel housing creating rust-through holes and separated seams, physical impact damage from speed bumps, potholes, and road debris crushing or cracking the low-hanging resonator, thermal stress from repeated heating and cooling cycles fatiguing metal and weakening welds, manufacturing defects including inadequate welds or substandard materials that fail prematurely, and age-related material degradation as exhaust heat and chemical exposure progressively weaken the resonator structure over 5-10 years. Understanding these root causes helps prevent recurrence through informed vehicle operation and maintenance decisions.
Corrosion mechanisms operate through electrochemical processes accelerated by salt exposure. Road salt (sodium chloride or calcium chloride) creates an electrolyte on metal surfaces that promotes oxidation—the conversion of iron to iron oxide (rust). This process attacks from the exterior as road spray coats the resonator underside. Simultaneously, exhaust contains sulfuric and nitric acid compounds formed during combustion that condense into liquid in cooler sections of the exhaust system, attacking from the interior. This dual attack explains why resonators corrode faster than many other vehicle components.
Road salt impact in northern climates cannot be overstated. States in the snow belt apply millions of tons of road salt annually, creating a corrosive environment that reduces exhaust component lifespan by 50-70% compared to salt-free regions. Vehicles driven in these areas during winter typically need resonator replacement every 5-7 years, while vehicles in southern states might see 10-15 year resonator lifespans.
Coastal salt air creates similar but constant corrosion pressure. Ocean proximity introduces airborne sodium chloride that deposits on all metal surfaces. Unlike road salt that washes off during summer months, coastal salt air attacks year-round. Vehicles parked within 5 miles of saltwater coastlines experience accelerated corrosion rates, with resonators showing significant rust after just 3-4 years in service.
Physical impact damage typically occurs during low-speed maneuvers where ground clearance becomes critical. Modern vehicles often have 5-7 inches of ground clearance, positioning the exhaust system just inches above pavement. Speed bumps approached too quickly, sharp-edged potholes, parking block overruns, and off-road excursions all risk impact damage. The resonator, being larger in diameter than connecting pipes, presents a prime target.
Impact severity ranges from superficial scrapes to catastrophic crushing:
- Minor: Scrapes removing protective coating, creating corrosion initiation points
- Moderate: Dents compressing the housing, potentially touching internal components
- Severe: Punctures or tears creating immediate exhaust leaks
- Catastrophic: Crushing that collapses internal baffles, creating instant flow restriction
Thermal stress and heat cycling cause microscopic metal fatigue over thousands of heating cycles. Each drive cycle heats the exhaust from ambient temperature (potentially -20°F in winter) to operating temperature (400-600°F). This 400-600°F temperature swing causes metal expansion and contraction. At weld joints where dissimilar metals meet or where stress concentrates, this cycling gradually creates microcracks that propagate into full cracks.
Manufacturing defects occasionally cause premature failures. Quality control in exhaust component production has improved dramatically, but defects still occur:
- Inadequate welds: Insufficient penetration or porosity creating weak seams
- Thin materials: Cost-cutting using thinner steel that corrodes faster
- Poor assembly: Improperly installed internal components that work loose
- Design flaws: Resonators with inadequate drainage allowing water accumulation
Age and mileage expectations vary by quality and conditions. OEM (original equipment manufacturer) resonators typically last 5-10 years or 75,000-150,000 miles in moderate climates with normal driving. Aftermarket resonators show wider variation—premium brands match OEM longevity while budget options may fail in 3-5 years. In harsh corrosive environments, even quality resonators struggle to exceed 5-7 years.
Vehicle-specific vulnerabilities include ground clearance and resonator placement decisions by manufacturers. Sports cars and lowered vehicles suffer more impact damage due to reduced clearance. Vehicles with resonators positioned ahead of the rear axle (exposed to more road spray and debris) corrode faster than those with rear-positioned resonators. Trucks and SUVs with higher ground clearance generally experience fewer impact-related failures.
Prevention strategies to extend resonator life include:
- Regular undercarriage washing: Remove salt and debris especially after winter driving
- Rust prevention spraying: Annual application of rust inhibitor to exhaust components
- Careful driving: Slow approach to speed bumps, avoiding potholes and curbs
- Garage parking: Keeps the vehicle dry, slowing corrosion significantly
- Quality replacement: Invest in stainless steel or aluminized resonators with better corrosion resistance
- Prompt leak repair: Small cracks grow into large holes—repair early
According to corrosion engineering studies published by NACE International, exhaust system components in road salt environments experience corrosion rates 4-7 times higher than in salt-free environments, with resonator housings showing measurable thickness reduction of 0.5-1.0mm annually under severe exposure conditions.
Final Word
Recognizing exhaust resonator failure symptoms early protects your wallet, your engine, and your safety. The seven critical warning signs—rattling noises, unusual exhaust sounds, check engine lights, performance reduction, fuel economy drops, exhaust odors, and stalling—provide clear indicators that intervention is needed. Don’t ignore these warnings hoping the problem resolves itself; exhaust issues only worsen, transforming $300 repairs into $3,000 catastrophes.
When symptoms appear, start with systematic diagnosis using the methods outlined above. Many resonator problems reveal themselves through simple visual inspection or sound diagnosis costing nothing but a few minutes under your vehicle. For complex cases or safety-critical symptoms like cabin exhaust infiltration, professional diagnosis provides peace of mind and accurate answers.
Remember that resonator replacement represents preventive maintenance rather than optional repair—the modest investment today prevents cascading failures tomorrow. Whether you choose OEM quality or select aftermarket options, prioritize corrosion-resistant materials like aluminized or stainless steel, especially if you live in harsh environments. Your engine, your passengers, and your future self will thank you for addressing resonator failure symptoms before they evolve into expensive emergencies.