


A suspension clunk diagnosis checklist helps you narrow a clunk to a specific component by checking the easiest, most common causes first, then validating play or movement before you buy parts. That’s the fastest way to turn a vague noise into a confident diagnosis.
Next, you’ll need to understand what “clunk” really signals compared with other noises, because a knock can come from suspension, steering, brakes, drivetrain, or even exhaust hardware depending on when it happens.
Then, you’ll set up your inspection the right way—basic tools, safety steps, and a repeatable test drive—so you can reproduce the sound and locate which corner of the car creates it.
Introduce a new idea: once you can consistently reproduce the noise, the checklist becomes a decision path that eliminates guesswork and prevents the most expensive mistake—replacing the wrong part.
Is a suspension clunk/knock noise always a suspension problem?
No—suspension clunk diagnosis checklist results often point outside the suspension because (1) loose wheel/brake hardware can mimic a suspension knock, (2) steering joints can clunk under load, and (3) exhaust or drivetrain parts can bang against the body on impacts.
Next, the key is to treat a clunk as a load-and-contact problem: something is shifting and hitting when forces change.
Can you keep driving with a clunk over bumps?
A clunk over bumps is sometimes “driveable for now,” but you should reduce risk immediately by changing how you use the car until you confirm the cause. Use this practical rule:
- Okay to drive short distances (with caution): the clunk is mild, unchanged for weeks, and you have no steering wander, braking pull, vibration, or sudden handling changes.
- Not okay to keep driving: the clunk is getting louder quickly, appears during braking/turn-in, or is paired with steering looseness, sudden pull, wheel wobble, or a sensation that the car “shifts” on bumps.
To keep the diagnosis honest, note whether the sound is a single thud (often a mount, bushing, or exhaust contact) or rapid clunking noise over bumps (often a joint/link repeatedly moving).
Can a loose wheel or brake part mimic a suspension clunk?
Yes—this is one of the most common “false suspension” diagnoses. Before you blame control arms, check for:
- Lug nuts not torqued evenly
- A wheel with a damaged seat or incorrect lug hardware
- Brake caliper bolts (or slide pins) loose
- Pads shifting in the bracket (especially after a brake job)
- A bent dust shield tapping the rotor on bumps
These issues often produce a sharp, metallic knock that seems like it’s in the suspension because it travels through the knuckle.
When should you stop driving and tow?
Stop and tow if you detect any of the following during your test drive or a basic inspection:
- The steering wheel suddenly goes off-center after a bump
- The car pulls hard left/right when braking or accelerating
- You can see the wheel leaning in/out (camber change)
- You feel a “clunk + snap” sensation (possible joint shift)
- There is obvious play in a wheel when you shake it by hand
If the clunk is paired with Steering rack and tie rod clunk signs (like a dead spot on-center, wandering, or a clack when changing direction), treat it as higher priority.
What does a suspension clunk/knock mean and how is it different from a rattle or squeak?
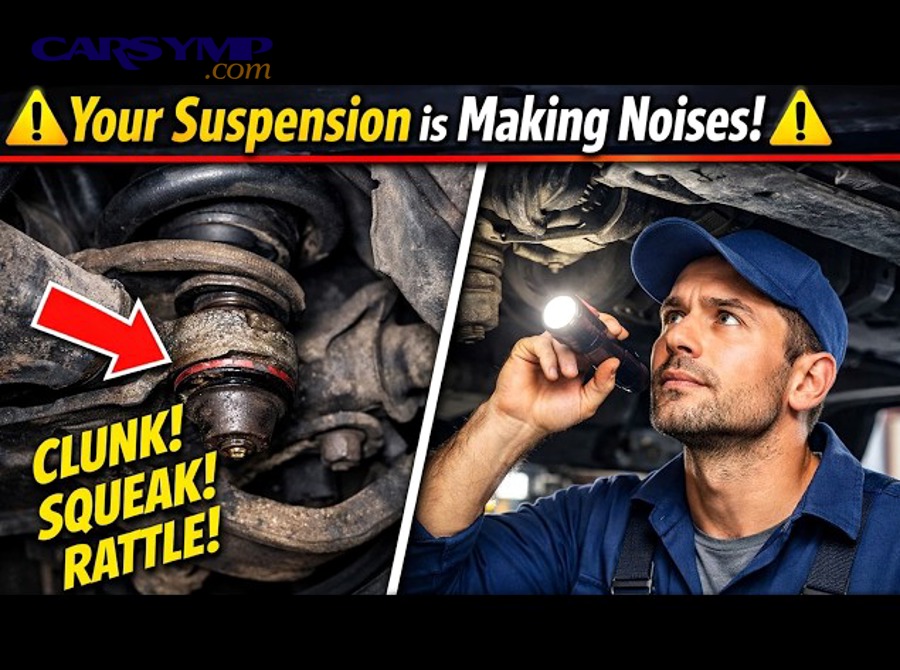
A suspension clunk/knock is an impact noise caused by clearance or movement under load, typically from a joint, bushing, mount, or loose fastener; it differs from rattles (many small impacts) and squeaks (friction noise) by its single-hit character and timing.
Then, you’ll use sound + timing to predict which parts deserve attention first.
What does a clunk/knock sound like compared with a rattle or squeak?
Use this quick “sound translator”:
- Clunk / Knock: one heavier “thud” when load changes (bump, brake, turn-in, shift from D↔R).
- Rattle: lighter, repeated tapping over small road texture; often heat shields, sway links, pad hardware, or interior items.
- Squeak / Creak: rubber friction or dry bushings; often worsens in heat and at low speed.
- Pop: a sudden release of tension; can be a strut mount bearing, spring seat, or CV/driveline bind.
If you hear a clunking noise over bumps that is louder on one side and repeats quickly on washboard roads, sway bar links/bushings or loose hardware jump to the top of the list.
What driving conditions make each noise worse?
Timing is a diagnostic tool. Ask: when does the noise happen?
- Only on bumps (straight line): sway links/bushings, shock/strut mounts, loose exhaust hangers, loose spare tire/jack.
- Only when turning into a driveway (twist + bump): control arm bushings, ball joints, subframe movement, strut top mounts.
- On braking/acceleration transitions: control arm rear bushings, engine/trans mounts, loose caliper bracket bolts.
- At full steering lock: CV joints, strut bearings, spring binding.
If the noise changes with braking, treat it as a “load reversal” clue—parts that locate the wheel fore/aft (control arms, bushings) become more suspect than purely vertical dampers.
Evidence: According to a study by Universidad Carlos III de Madrid from the Instituto para la Seguridad de los Vehículos Automóviles (ISVA), in 2008, the authors reported that a shock absorber with a damping ratio below 0.12 can reduce tire-road adherent force under dynamic loading—supporting why worn damping can worsen impacts and control on uneven surfaces.
What tools and prep do you need for a DIY suspension clunk diagnosis checklist?
There are 3 main tool groups you need for a suspension clunk diagnosis checklist: safety gear, inspection tools, and leverage/measurement tools, because the outcome depends on stable lifting, clear viewing, and controlled force to reveal hidden play.
Specifically, the better your setup, the more “repeatable” your diagnosis becomes.
What basic hand tools and safety gear are required?
Minimum kit for safe, credible results:
- Floor jack and jack stands (or ramps)
- Wheel chocks
- Lug wrench + torque wrench (critical for rule-outs)
- Flashlight or headlamp
- Gloves + safety glasses
- Pry bar (medium length is enough for most checks)
- Flat screwdriver/pick (to probe boots/bushings)
- Marker or chalk (to mark suspected contact points)
Safety note: do not work under a vehicle supported only by a jack—clunk diagnosis often involves pulling and levering parts, which can shift the car.
What optional tools make diagnosis faster?
These aren’t required, but they turn “maybe” into “yes/no” faster:
- Mechanic’s stethoscope (or long screwdriver as a listening probe)
- Dial indicator with magnetic base (for wheel bearing or joint play)
- Infrared thermometer (to identify dragging brakes that mask clunks)
- Phone camera for undercar “video scouting”
- Rubber mallet (to reproduce light knock without prying)
If you can’t reproduce the noise in the driveway, a smartphone recording near the suspected corner can help you compare “left vs right” frequency and impact timing.
How should you prepare the car for inspection?
Preparation is part of the checklist:
- Clear the cabin and trunk (loose items create fake rattles).
- Confirm tire pressures and remove hubcaps that might tap.
- Choose a repeatable test route: small bumps + one driveway ramp + one braking zone.
- If lifting: loosen lug nuts slightly before raising the car.
- Inspect with suspension loaded (on ramps) when checking some bushings; inspect with suspension unloaded (on stands) when checking wheel bearing/joint play.
The goal is consistency: same route, same speed, same steering input.
How do you pinpoint the side and location of the clunk before inspecting parts?
You pinpoint the clunk by reproducing it under controlled conditions in 3 steps—test drive triggers, localization tests, and inspection priority—so you can identify the corner (LF/RF/LR/RR) and the system (suspension/steering/brakes/exhaust).
More specifically, you’re converting a sound into a map.
How do you reproduce the noise on a test drive?
Use repeatable “triggers”:
- Small bumps at 15–25 mph: highlights sway links, strut mounts, loose hardware
- Single speed bump at 5–10 mph: highlights heavy mounts/bushings
- Light braking over a bump: highlights control arms, bushings, caliper shift
- Quick left-right weave (safe area): loads sway bar links/bushings
If the clunk is strongest when one wheel hits first (diagonal bumps), it often points to that side’s link/joint rather than both sides equally.
How do you localize the noise using bounce, steering, and braking tests?
Try these driveway checks:
- Bounce test: push down hard on the fender and release. A clunk at the top can suggest strut mount/top bearing; a clunk at the bottom can suggest lower joints or sway links.
- Steering rock test (engine on): small left-right steering inputs while stationary; listen for a clack near the firewall or subframe (steering rack/tie rods).
- Brake-tap test: gentle brake application as you roll over a small bump. If the noise changes dramatically, suspect caliper/bracket movement or control arm bushings.
This is where you start separating “vertical suspension” from “fore/aft locating” parts.
How do you mark findings and prioritize checks?
Write down a simple pattern:
- When: over bumps / braking / turning / shifting
- Where: front-left / rear-right / center
- Character: single thud / rapid tapping / metallic ping
Then prioritize checks by likelihood + safety:
- wheels/brakes hardware
- sway links/bushings
- tie rods/rack play
- ball joints/control arm bushings
- strut mounts/shocks
- subframe/body/exhaust contact
That priority becomes your checklist flow in the next section.
What is the step-by-step suspension clunk diagnosis checklist (from easiest to hardest checks)?
Use this suspension clunk diagnosis checklist in 4 passes—external fasteners, contact/rattle sources, steering & suspension joints, then mounts/dampers—to go from “easy rule-out” to “confirmed culprit” without skipping the high-probability basics.
Next, treat each pass like a gate: don’t move on until you’ve ruled out the earlier one.
To make the checklist scannable, the table below summarizes symptom patterns → likely sources. Use it to pick which sub-check to run first.
| Symptom pattern (what you feel/hear) | Most likely area | First parts to check |
|---|---|---|
| Single thud when one wheel hits a bump | Corner-specific suspension | Sway link, strut mount, control arm bushing |
| Rapid tapping on small bumps | Light contact/rattle | Heat shields, brake hardware, exhaust hangers |
| Clunk when braking over bumps | Fore/aft locating | Control arm rear bushing, caliper bracket bolts |
| Clack when changing steering direction | Steering system | Outer/inner tie rods, rack mounts |
| Pop/click on full lock | Drivetrain articulation | CV joints, strut bearing, spring bind |
What are the fastest exterior checks (wheels, lug nuts, splash shields)?
Start here because it costs nothing and catches “danger now” problems:
- Lug torque check: verify all lugs are present and properly torqued.
- Wheel/tire inspection: look for cupping (suggests damping issues), sidewall bubbles, or a bent wheel lip.
- Splash shields & liners: tug on liners and undertrays; broken clips slap on bumps and sound like suspension.
- Brake shield clearance: ensure dust shield isn’t touching rotor.
- Loose jack/spare: confirm the spare tire and tools are secured.
These items often produce what people describe as a clunk over bumps, especially after recent tire or brake work.
What suspension joints and bushings most often cause clunks?
Now move to high-probability wear items:
- Sway bar end links: check boots, looseness, and play by hand; they commonly cause clunking noise over bumps when the ball/socket wears.
- Sway bar bushings: look for dry cracking, shiny rub marks, or bar movement in the bushing saddle.
- Control arm bushings: inspect for tears and separation; then lever gently to see if the arm shifts excessively.
- Ball joints: check for torn boots, rust dust, and measurable play (especially vertical play).
Tip: compare left vs right. If one side shows torn boots or obvious movement and the other doesn’t, you’ve likely found the culprit zone.
What steering components cause clunks (rack, tie rods)?
Steering-related clunks feel “closer” to the cabin and often show up as a directional clack.
Look for Steering rack and tie rod clunk signs such as:
- A clack when you go from left steer → right steer
- Steering that feels loose on-center
- A knock transmitted into the floor or pedals
- Visible movement of the rack housing when someone rocks the wheel
Checks:
- Outer tie rod: grab tire at 3 and 9 o’clock; wiggle; watch the joint.
- Inner tie rod: if outer is tight but movement persists, feel for knock at the rack boot area.
- Rack mounts/bushings: have a helper rock steering while you watch the rack body for shifting on the subframe.
What strut, shock, and top-mount issues cause clunks?
If the noise is more vertical (especially on a speed bump), check the damper stack:
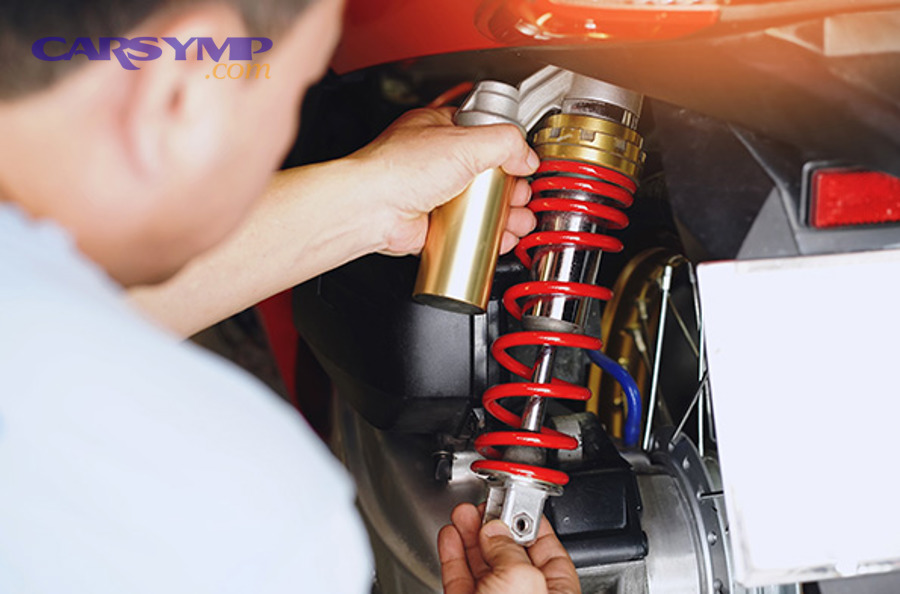
- Leaking shock/strut: oil on the body suggests failure; weak damping lets the suspension “top out” and thud.
- Top mount/bearing: a worn bearing can clunk on rebound or pop while steering.
- Spring seat / isolator: missing isolators can create metal-to-metal contact.
- Loose strut pinch bolts or top nuts: after repairs, loose hardware is a frequent clunk source.
How do you confirm the culprit and avoid replacing the wrong part?
Confirming the culprit takes 3 validation methods—measured play, isolation tests, and left/right comparison—so you replace the one failing part (not the entire front end) and eliminate the clunk with the first repair.
However, you must distinguish “normal bushing flex” from “excessive movement with impact.”
How do you verify play with pry-bar and dial indicators?
Use controlled force, not brute strength:
- Ball joint check: lift the wheel safely; use a pry bar under the tire and lift to detect vertical play while watching the joint.
- Control arm bushings: lever the arm near the bushing; watch for separation or a “snap” movement rather than smooth rubber flex.
- Wheel bearing check: use a dial indicator at the hub if you suspect bearing play; by-hand shake alone can be misleading on some vehicles.
A confirmed diagnosis is one you can see (movement), feel (knock), or measure (play).
How do you use “swap tests” and isolation (remove sway bar links) safely?
Isolation is powerful when done safely:
- If you strongly suspect a sway bar link, you can temporarily disconnect one end link (follow safe procedures, secure loose parts, short low-speed test) to see if the noise disappears on small bumps.
- Left/right comparison: if both links are the same age, sometimes replacing the noisier side confirms the diagnosis—but be cautious; some vehicles mask the true side.
Never do “tests” that risk losing control—avoid high-speed driving, aggressive turns, or highway tests during isolation.
How do you avoid false positives from normal bushing flex?
Rubber bushings are designed to move. The giveaway is impact:
- Normal: smooth, damped movement; returns quietly.
- Fault: movement followed by a hard stop, metal contact, or “snap back” that produces a knock.
Also, torque matters: many control arm bushings must be tightened at ride height. Tightening at full droop can preload the bushing and create noise later.
What fixes are appropriate after diagnosis (tighten, replace, align), and what should you do next?
There are 3 main fix types after a suspension clunk diagnosis checklist: re-torque/secure, replace the worn component, and correct geometry (alignment) afterward—because clunks come from looseness, wear, or mispositioned parts.
In addition, the “next step” is always a controlled road test to confirm the sound is gone under the original trigger.
When is tightening/re-torquing enough?
Tightening works when the part is not worn, just loose or improperly seated:
- Lug nuts, wheel spacers (if used), caliper bracket bolts
- Sway bar bracket bolts
- Strut pinch bolts or top mount hardware
- Subframe bolts (rare, but possible after major repairs)
If the noise started immediately after service, re-torque is especially high yield.
When should you replace parts and in what order?
Replace when you have confirmed play, torn boots, or obvious separation.
A sensible replacement order (most common → less common):
- Sway bar end links / bushings
- Outer tie rods (and alignment afterward)
- Control arm bushings or complete arm assembly
- Ball joints (or complete arm if integrated)
- Struts/shocks + top mounts (as needed)
- Rack mounts or steering rack (only after confirmation)
Avoid “parts cannon” repairs. Replace what you validated, then retest on the same bumps.
When do you need an alignment and road test afterward?
You typically need an alignment after:
- Tie rod replacement
- Control arm replacement
- Subframe loosening/realignment
- Strut removal (many vehicles)
Even if alignment isn’t strictly required after sway link replacement, a road test is non-negotiable: repeat the same bump route, same speed, same steering inputs.
What is the Repair cost estimate for common clunks?
Costs vary by vehicle and region, but you can estimate by “part class.” The table below gives a practical planning range (parts + typical labor).
| Common clunk source | Typical fix | Typical cost range (parts + labor) |
|---|---|---|
| Sway bar end link | Replace link(s) | Low to moderate |
| Sway bar bushings | Replace bushings | Low to moderate |
| Outer tie rod | Replace + alignment | Moderate |
| Control arm (bushings/joint) | Replace arm + alignment | Moderate to high |
| Strut/shock + mount | Replace in pairs | Moderate to high |
| Steering rack mounts/rack | Replace mounts or rack | High |
Use this as budgeting guidance, then request a quote once you’ve identified the likely culprit. A good shop will confirm your diagnosis with a physical test before selling parts.
What else can sound like a suspension clunk, and how do you rule out rare causes?
There are 4 main non-suspension sources that can imitate a suspension clunk—exhaust contact, drivetrain joints, mounts/body movement, and interior/loose cargo—so you should rule them out after the primary checklist to avoid chasing the wrong system.
Especially if your suspension checks look tight, this section prevents a “no fault found” dead end.
Could it be the exhaust (Exhaust hanger clunk under bumps)?
Yes—Exhaust hanger clunk under bumps is extremely common after hanger rubber ages or a heat shield loosens. Look for:
- Exhaust pipe close to a crossmember
- Torn rubber hangers letting the pipe swing
- Heat shields buzzing or tapping
Test: with the car cool, push the exhaust side-to-side by hand. If it taps anything, you’ve found a likely source.
Could it be drivetrain or CV joint issues?
A drivetrain clunk often appears on takeoff or gear changes, while a CV issue is often a click/pop on turns.
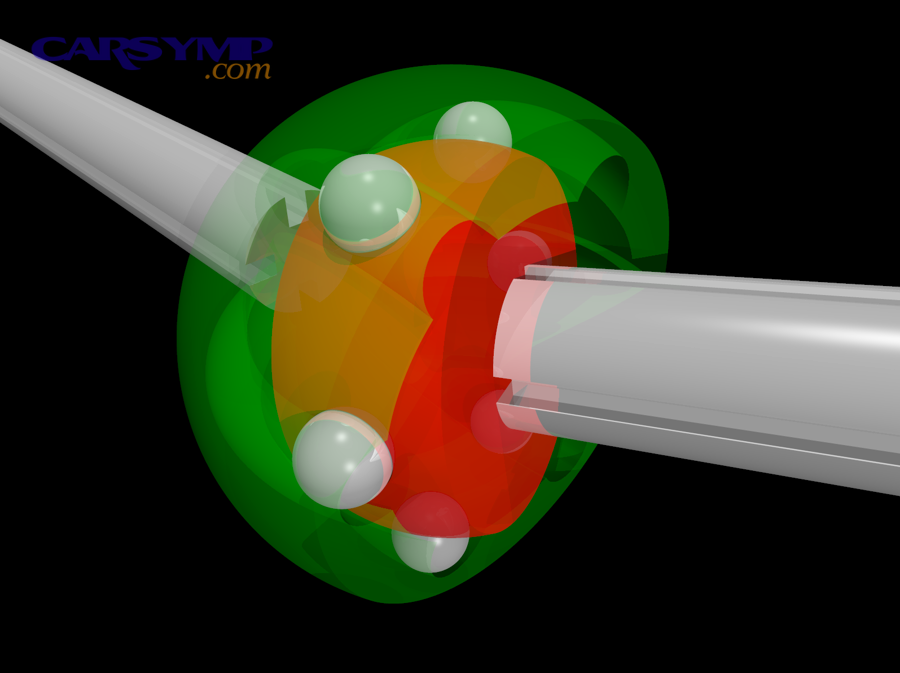
- CV joint problems: clicking at full lock, especially accelerating in a turn
- Driveshaft/axle issues: clunk when shifting D↔R or on throttle on/off
The CV diagram below helps explain why angle + load changes can create sound when wear develops.
Could it be body/engine mounts or interior?
Body and powertrain mounts can create a dull thud that feels like suspension:
- Engine/trans mounts: clunk on throttle tip-in or shifting
- Subframe bushings: thud when one wheel hits a bump
- Interior: loose seat tracks, spare tire, jack, trunk trim clips
Quick rule: if the sound happens even when the suspension barely moves (like a shift from Park to Drive), suspect mounts/drivetrain/exhaust first.
How do you differentiate rare causes from suspension clunks?
Rare causes usually have a “signature condition”:
- Only on temperature changes → bushings/isolators/heat shields
- Only at one speed band → resonance/contact
- Only under heavy load (passengers/cargo) → exhaust contact, mounts, bump stops
- Only after rain → water-lubricated bushings changing friction/noise
If you’ve completed the core checklist and still can’t find play, the best next move is to have a technician reproduce the noise on a lift with chassis ears (microphones) to pinpoint the exact location.