Diagnose Brake Noise for Drivers: Squeal vs Grind How-To
Brake noise diagnosis is the fastest way to separate “normal wear signals” from “unsafe friction” so you can decide whether to keep driving, inspect at home, or stop immediately.
Most noises come from a small set of mechanical events—pad-to-rotor contact changes, hardware movement, or shielding interference—so the goal is to match the sound to the condition, then confirm with a few targeted checks.
Because noise can appear only in certain moments (cold start, light braking, bumps, reversing), your best results come from capturing when it happens, where it comes from, and how it changes with speed, steering, or pedal pressure.
Tiếp theo, “Giới thiệu ý mới”: you’ll use a sound-based map, a quick road test, and a wheel-by-wheel inspection flow to pinpoint the most likely cause without guessing.
What do different brake sounds usually indicate?
Most brake noises point to a small category of contact problems—light pad vibration, metal-to-metal friction, loose hardware, or something touching the rotor—so identifying the sound type is your first shortcut. Tiếp theo, you’ll match the sound to a likely source and then verify with simple checks.
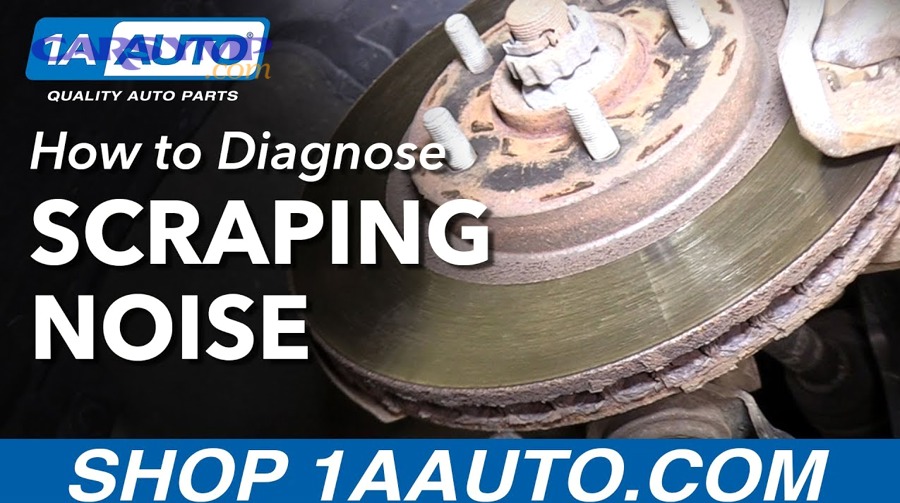
Start by classifying the noise using three descriptors: pitch (high/low), pattern (constant/pulsing/one-time), and trigger (braking/turning/reversing/bumps). This prevents “parts cannon” repairs and keeps your inspection focused.
- High-pitched squeal: often pad vibration at light braking, pad glazing, dusty surfaces, or a wear indicator approaching its limit.
- Low, harsh grind: typically metal-on-metal contact or severe debris scoring; treat as urgent until proven otherwise.
- Clicking/ticking: can be pad movement, loose hardware, or rotor shield contact that changes with rotation.
- Thump/knock: may involve caliper bracket looseness, missing hardware, wheel bearing play, or suspension overlap that “sounds like brakes.”
Is it safe to drive when you hear brake noise?
No, not always—some sounds are early warnings, but others suggest reduced braking margin or heat damage, so you must triage risk first. Sau đây, you’ll use a “stop-now vs inspect-soon” rule set to protect safety and avoid rotor or caliper destruction.

Use this quick safety triage before any deep troubleshooting:
- Stop driving and tow/repair now if you hear grinding that gets worse with braking, the pedal feels soft or sinks, the car pulls hard to one side, you smell burning, or you see smoke/heat discoloration near a wheel.
- Drive only to a safe inspection spot if the noise is a new loud scrape, a rhythmic metal tick that speeds up with wheel speed, or a loud clunk when you press the pedal.
- Inspect soon if the sound is a brief squeak at first stop in the morning, a mild chirp only at very low speed, or a light squeal that disappears after a few moderate stops.
Even “minor” noise becomes high-risk if it’s paired with reduced braking feel, vibration, or heat. For example, repeated high heat can glaze pads and reduce friction consistency, which may lengthen stopping distance under stress.
To keep your notes objective, record a 10–15 second audio clip and write down: outside temperature, speed range, pedal pressure, and whether it happens on left/right turns. Bên cạnh đó, look for warning lights and check brake fluid level as a quick sanity check.
How do you pinpoint whether the noise is front or rear?
You can usually localize brake noise by combining a controlled road test with heat and visual checks, which reveals the wheel most likely producing the sound. Tiếp theo, you’ll use steering input, light braking, and a temperature comparison to narrow the corner.

Road-test localization (safe, low-traffic road):
- At 15–25 mph, apply very light pedal pressure and listen for a squeal onset.
- Repeat while turning slightly left, then slightly right. Noise that changes with steering can suggest a corner-specific issue.
- Perform one moderate stop (not panic), then coast and listen for a scrape that continues without the pedal (often indicates dragging contact).
After the drive, do a cautious heat check: without touching hot metal, compare wheel temperatures indirectly (back of your hand near the wheel, or an infrared thermometer if available). A single wheel that’s significantly hotter can indicate dragging pads or seized components.
To confirm without tools, look through the wheel spokes: uneven pad thickness side-to-side or a rotor face that looks heavily scored can reveal the problem area. Ngoài ra, check if the parking brake affects the noise—if pulling the parking brake slightly changes the sound (on vehicles where it actuates the rear brakes), the rear becomes more suspect.
Why do brakes squeal at low speed or light pedal pressure?
Low-speed squeal is often vibration-related: the pad lightly contacts the rotor and resonates, especially when surfaces are glazed, dusty, or hardware damping is weak. Tiếp theo, you’ll inspect friction surfaces and anti-rattle features that control resonance.

Common vibration-driven causes and what they mean:
- Glazed pads: shiny, hardened surface from heat; squeal appears during gentle braking and may fade during firm stops.
- Light surface rust on rotors: especially after rain or washing; squeal can occur for the first few stops.
- Dust and contamination: road dust or brake dust changes friction behavior; noise often intermittent.
- Hardware damping loss: worn shims, missing clips, or dried lubricant at contact points causes the pad to “sing.”
To verify, remove the wheel and inspect the pad face: if it looks glassy or cracked, replacement is safer than sanding. Cụ thể, check that the pad backing plate seats squarely and that any shim stack sits flat without bending.
For a practical next step, lightly chamfered edges and proper damping hardware reduce resonance, but avoid improvising with grease on friction surfaces. Hơn nữa, if squeal comes with vibration in the steering wheel or pedal, shift suspicion toward rotor thickness variation or uneven transfer film rather than “normal squeak.”
What does a grinding noise during braking mean?
Grinding usually means severe friction—often metal-to-metal—or hard debris trapped between pad and rotor, so treat it as urgent until inspection proves otherwise. Tiếp theo, you’ll look for lining loss, rotor scoring, and caliper alignment problems.

Grinding patterns help identify severity:
- Grinding only while pressing the pedal: pad material may be gone or a backing plate is contacting the rotor.
- Grinding that continues when coasting: something may be dragging—stuck caliper, seized slide pins, or a rotor shield contact that stays engaged.
- Rhythmic grind once per wheel rotation: rotor may have a high spot, a stone embedded, or a localized damage area.
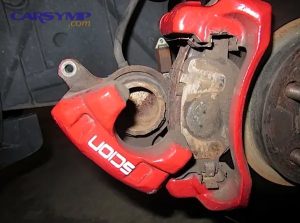
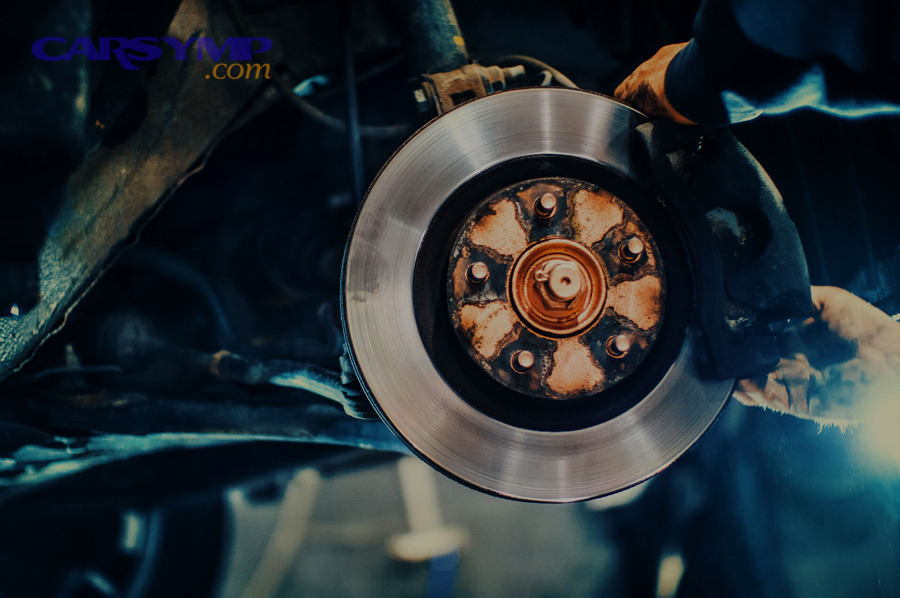
Inspection priorities (wheel off): measure pad thickness visually (don’t guess through a tiny window), check rotor faces for deep grooves, and look for blue/purple heat spots that suggest overheating. Đặc biệt, inspect the inner pad too—many severe wear cases happen on the inside where you can’t see through the wheel.
If you see scoring deep enough to catch a fingernail or pads worn near the backing plate, replacement is usually the sensible path. Tổng kết lại, grinding is the sound that most reliably signals “do not delay” because continued driving can destroy rotors and overheat the caliper.
How can you tell if the pad wear indicator is the sound?
Wear indicators typically create a consistent high-pitched squeal that appears as pads approach minimum thickness, often more noticeable at light braking and sometimes disappearing under heavy pressure. Tiếp theo, you’ll confirm by checking pad thickness and locating the indicator tab.

Many pads include a small metal tab designed to touch the rotor when the pad is near its wear limit. The result is a squeal that is:
- High-frequency and fairly steady during light braking
- Directionally consistent (often from one wheel) unless both sides are low
- Not strongly tied to bumps (unlike loose hardware clicking)
Verification steps:
- Safely lift the car and remove the wheel.
- Identify the indicator tab on the pad edge near the rotor face.
- Measure pad material visually; if it’s near minimum, plan replacement rather than “quieting” tricks.
To avoid misdiagnosis, remember that some pads squeal without indicators due to compound and resonance. However, if the noise began gradually over weeks and matches one corner, the indicator becomes a top suspect. Ngoài ra, if you recently replaced pads and hear an immediate squeal, suspect installation/hardware before assuming wear.
Why does brake noise happen only when reversing?
Reverse-only brake noise often comes from pad edge geometry, hardware movement, or rotor surface directionality, because the force path flips and can make a loose or sharp edge speak up. Tiếp theo, you’ll check pad leading edges, clip seating, and rotor lips that “catch” in reverse.

When you reverse, the pad’s “leading edge” becomes the opposite side. If that edge is sharp or the pad can shift slightly, it may squeak or groan only in reverse. Key suspects include:
- Pad edge catching on a rotor lip (a ridge at the outer edge of the rotor)
- Loose anti-rattle clips allowing pad chatter when load reverses
- Backing plate contact that changes with direction
- Parking brake mechanisms (on rear assemblies) that move differently in reverse maneuvers
To confirm, inspect rotor edges for a pronounced lip and check whether pads show uneven taper. Cụ thể, push the pads in their bracket by hand (with the caliper supported): they should slide smoothly with minimal free play and return to a stable seated position.
If the sound is a groan during the first reverse stop of the day, light surface rust can also be the culprit. Hơn nữa, if reverse-only noise comes with vibration, look for rotor surface irregularities rather than assuming it’s “normal.”
How do rotor condition problems create noise?
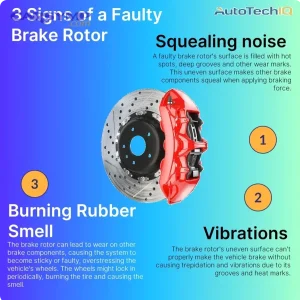
Rotor surface and geometry issues can create squeal, scrape, or pulsation-linked noise by changing friction stability and forcing pads to follow an uneven surface. Tiếp theo, you’ll identify scoring, heat spots, and thickness variation indicators that correlate with noise.
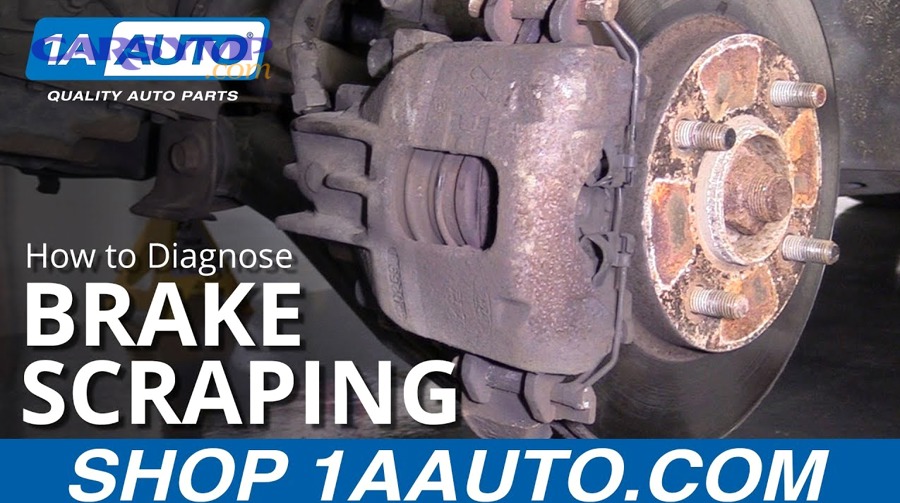
Rotors don’t just “spin quietly”—they must present a stable surface for pads. Noise often appears when rotors have:
- Heavy scoring: grooves that produce a scraping sound and accelerate pad wear.
- Heat checking: fine surface cracks from overheating that can chirp or create roughness.
- Uneven transfer film: patchy friction material deposits that cause intermittent squeal or vibration.
- Edge lip/ridge: creates reverse-only squeak or a light scrape.
Practical checks without specialized tools: run a fingertip along the rotor edge (once cool) to feel for a sharp ridge; visually compare inner vs outer rotor face; and look for blue/purple discoloration. Bên cạnh đó, if noise coincides with pedal pulsation, you should suspect thickness variation or uneven deposits and consider machining/replacement based on rotor minimum thickness specs.
To help you connect symptoms to likely rotor conditions, this table summarizes common pairings. This table contains a quick sound-to-rotor-condition map to guide what you inspect first.
| Sound pattern | When it happens | Rotor-related suspects | What to check |
|---|---|---|---|
| Light squeal | Low speed, gentle braking | Patchy transfer film, minor glazing interaction | Surface sheen, pad glazing, uneven rotor appearance |
| Harsh scrape | Any braking, louder over time | Deep scoring, debris embedment | Grooves, embedded stones, inner face damage |
| Rhythmic scraping | Once per wheel rotation | Localized high spot, rust ridge, damaged section | Rotor face for one damaged arc, edge ridge |
| Noise + pulsation | Moderate braking from speed | Thickness variation or uneven deposits | Rotor runout check (shop), visual hot spots |
Tóm lại, rotors create noise when their surface stops being a predictable partner for the pad—your job is to spot the “surface story” before replacing parts blindly.
What should you inspect around caliper hardware and shims?
Loose, missing, or mis-seated hardware is a top cause of clicking, rattling, and intermittent squeal, because pads can shift or vibrate when the damping system is compromised. Tiếp theo, you’ll inspect clips, abutment contact points, and shim alignment to restore stability.

Think of brake hardware as a “noise control system” that also ensures smooth pad movement. When it fails, you may hear:
- Clicking on first pedal press as pads shift into position
- Rattle over bumps that disappears when braking lightly
- Squeal that changes suddenly after hitting a pothole or after a wheel removal
Inspection checklist at the caliper bracket:
- Confirm anti-rattle clips are present, seated, and not deformed.
- Check pad ears/abutment points for corrosion buildup that prevents smooth sliding.
- Verify shims sit flat against pad backing plates and are not rubbing the rotor.
- Inspect slide pin boots for tears and look for uneven pin movement or binding.
For best results, clean abutment areas to bare metal where specified, then apply appropriate high-temperature brake lubricant only at approved metal-to-metal contact points (never on friction faces). Ngoài ra, if one slide pin is dry or seized, the pad can drag and produce both noise and heat.
When you want a repeatable workflow, document each corner with a photo before disassembly so you can confirm clip orientation during reassembly—small mistakes here often create big noise. Hãy cùng khám phá: hardware alignment is one of the highest leverage “fixes” because it can eliminate noise without changing major components.
How do you check for shield or non-brake contact scraping?
Scraping that changes with wheel rotation can come from thin metal components touching the rotor, not from pads, so you should always rule out external contact before assuming friction material failure. Tiếp theo, you’ll inspect clearances around the rotor and look for shiny rub marks.

Thin metal shields behind the rotor can bend from road debris, improper wheel handling, or prior service, creating a constant or intermittent scrape. Because the material is light, the noise can sound “tinny” and may:
- Get louder when turning (rotor flex and knuckle movement change clearance)
- Change after driving through snow/mud (packed debris shifts)
- Persist even when not pressing the brake pedal
Verification steps:
- Lift the car safely and spin the wheel by hand (with transmission in neutral where safe and appropriate).
- Listen for a scrape and look for a consistent point in the rotation.
- Inspect the shield edge for shiny rub marks and check clearance around the full rotor circumference.
If the scrape is present while coasting with no pedal input, external contact becomes highly likely. Cụ thể, a gentle reshaping to restore clearance is usually enough, but be careful not to crack or weaken the shield.
In longer diagnostic logs, record whether the scrape disappears after a few minutes—packed debris can fall away and “self-fix,” which is a clue you’re not dealing with pad wear. Quan trọng hơn, always confirm wheel fasteners are correctly torqued because a slightly mis-seated wheel can change rotor-to-shield alignment.
How can you perform a structured DIY inspection without missing key clues?
A structured inspection works best when you follow the same sequence on every wheel, because it prevents confirmation bias and makes differences between corners obvious. Tiếp theo, you’ll use a repeatable checklist that moves from easy observations to deeper component checks.

Use this repeatable flow (one wheel at a time) to support accurate brake noise diagnosis:
- Visual through spokes: check pad thickness estimate, rotor surface condition, and obvious leaks or damage.
- Wheel-off inspection: check pad thickness inner/outer, rotor face inner/outer, and hardware presence.
- Movement checks: test pad fit in bracket, slide pin movement, and caliper bracket security.
- Surface clues: look for uneven wear, taper, glazing, and heat discoloration.
- Spin test: rotate hub/rotor (where feasible) to listen for rub points without braking.
To avoid overcorrecting, treat each clue as a probability signal. For example, uneven inner pad wear plus a hot wheel strongly supports a sticking slide pin or caliper issue; a tinny scrape with shiny shield marks supports external contact. Bên cạnh đó, if both front wheels show similar wear but only one makes noise, suspect hardware or localized rotor surface issues rather than “all pads are bad.”
Safety reminder: support the vehicle on stands, keep hands clear of pinch points, and do not work under a car held only by a jack. Tóm lại, a consistent sequence improves accuracy more than any single “magic trick.”
How do you distinguish squealing, grinding, and clicking in real time?
You can distinguish common brake noises by linking sound texture to the mechanical motion behind it: vibration (squeal), abrasive contact (grind), or component movement (click). Tiếp theo, you’ll use a short decision tree so your diagnosis stays consistent even when the noise is intermittent.
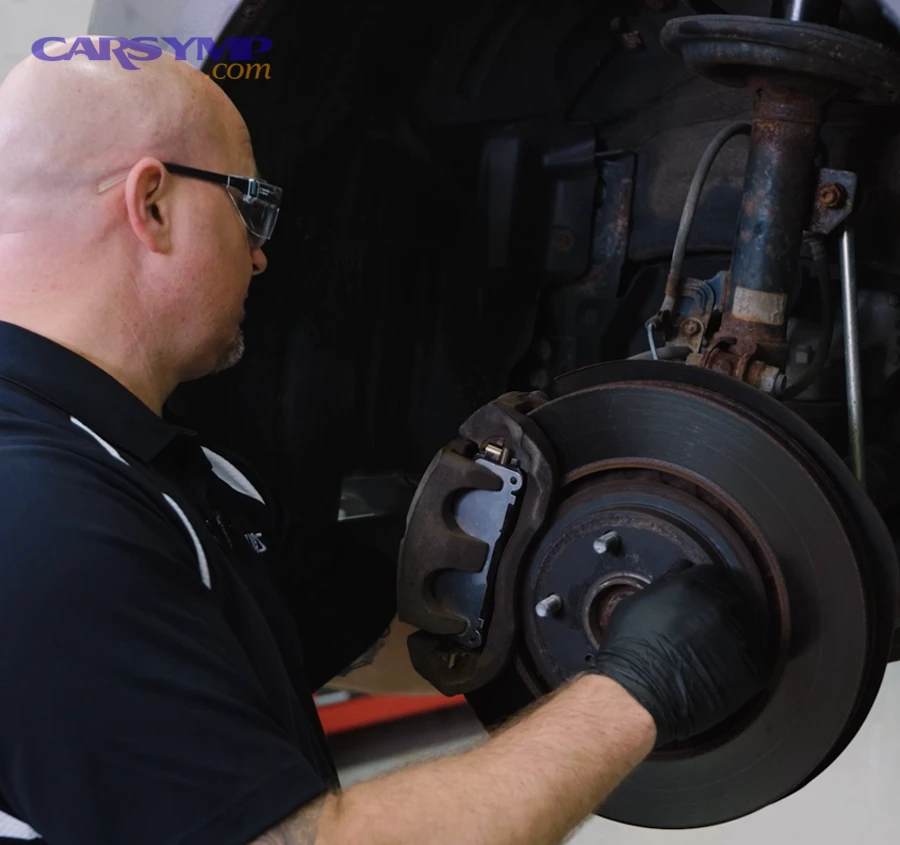
Use this practical decision tree during a safe road test:
- If the sound is high and steady and appears mainly during light braking → treat as vibration/resonance and inspect pad surface + damping hardware first.
- If the sound is harsh and rough and grows louder with pedal pressure → treat as severe friction and inspect pad thickness + rotor scoring immediately.
- If the sound is discrete clicks especially at the start/end of braking → suspect pad shift, missing clips, loose fasteners, or abnormal bracket play.
Now refine with context:
- Noise disappears with firm braking: often resonance or light contamination, not necessarily catastrophic.
- Noise increases with heat: can indicate dragging contact or glazed surfaces that worsen as temperature rises.
- Noise happens on bumps, then disappears when braking lightly: often hardware looseness rather than friction surface damage.
For documentation, label each event: “start-of-brake click,” “low-speed squeal,” “post-stop scrape,” etc. Hơn nữa, if you share these labels with a technician, you improve the chance of a fast confirmation rather than a generic recommendation.
When should you involve a shop, and what might diagnosis cost?
If your checks point to severe wear, dragging, or you lack safe lifting tools, a professional inspection is the smarter move because brake faults can escalate quickly. Tiếp theo, you’ll learn how to describe symptoms clearly and what factors influence inspection pricing.

There are two practical reasons to involve a shop: verification with measuring tools (rotor runout, thickness, caliper pressure behavior) and safe corrective work (hardware replacement, machining, bleeding). In many regions, a noise complaint may be handled as part of an inspection fee or folded into service labor if repairs proceed.
To communicate efficiently, bring a short “symptom brief” that includes:
- Sound type (squeal/grind/click) and whether it’s constant or intermittent
- Speed range, temperature sensitivity, and whether reversing changes it
- Which corner seems hottest or most affected
- Any recent tire/wheel removal or brake work
In your conversation, you can reference a structured vocabulary: the phrases “Shop diagnosis cost for brake noise,” “Pad wear indicator sound identification,” and “When noise means unsafe to drive” help technicians understand your intent and urgency without ambiguity.
For readers building an information hub, Car Symp can store your symptom brief template so users can copy/paste it before visiting a shop, reducing wasted time and improving trust. Tổng kết lại, a shop visit is most valuable when it confirms measurements you can’t easily validate at home.
FAQ
These quick answers clarify common edge cases so you don’t misread normal conditions as failures, or ignore dangerous clues. Tiếp theo, each answer includes a practical verification step you can perform safely.

Can brand-new pads make noise even if installed correctly?
Yes—new pads can squeal during bedding-in or when transfer film is uneven, and some compounds are naturally more vocal. Cụ thể, verify clip seating, ensure proper torque, and perform a controlled bedding procedure appropriate for your pad type.
Why does noise disappear after a few stops?
Because surface conditions change quickly: light rust scrubs off, moisture evaporates, and pad temperature stabilizes friction. Ngoài ra, if the noise returns after rain or car washes, suspect surface rust rather than immediate mechanical failure.
Why does noise get worse after a wheel rotation or tire service?
Because small alignment and clearance changes matter: a shield can be bumped, hardware can be disturbed, or a wheel may not be perfectly seated. Đặc biệt, re-check torque, inspect rotor-to-shield clearance, and listen for scrape while spinning by hand.
Is a single chirp when stopping normal?
Sometimes—a brief chirp can be a resonance event at the moment of clamp, especially with dusty surfaces. Tuy nhiên, if it becomes consistent, grows louder, or pairs with vibration, inspect hardware and rotor condition.
Contextual Border: Beyond identifying the cause, the next section focuses on micro-level guidance—how to choose the right corrective approach, prevent repeat noise, and translate findings into a clear repair plan.
How do you fix the cause and prevent brake noise from returning?
The best prevention is matching the fix to the specific noise mechanism: reduce vibration for squeal, restore clearance for scraping, and stabilize hardware for clicking—then confirm with a repeatable post-repair test. Tiếp theo, you’ll apply targeted actions, avoid common mistakes, and lock in long-term quiet performance.
What’s the right corrective action for squeal vs grind vs click?
Squeal needs damping and surface correction, grind needs immediate friction restoration, and click needs retention stability. Cụ thể, squeal often improves with correct shims/hardware, clean abutments, and proper bedding; grinding typically requires pad/rotor replacement and inspection of caliper alignment; clicking usually requires replacing missing clips, correcting pad fit, and verifying fasteners.
To keep terminology consistent in your notes, you can explicitly write: “Grinding vs squealing vs clicking diagnosis” and map each to the fix you performed. That makes future troubleshooting much faster if the noise returns.
How do you address scraping from contact that isn’t pad wear?
Restore clearance and remove trapped debris by locating the rub point, correcting alignment, and confirming no continued contact during rotation. Ví dụ, a thin shield can be gently repositioned, and packed stones can be removed after safely lifting the vehicle. If your notes include “Brake dust shield rubbing fix,” you’ll remember to confirm clearance through a full rotation before reassembling.
What maintenance habits reduce the chance of noise coming back?
Clean contact points, correct lubrication, and consistent inspection intervals reduce noise recurrence because they keep pads moving freely and prevent corrosion binding. Ngoài ra, saving a “DIY brake inspection checklist” helps you repeat the same checks every few months—pad thickness, rotor surface, hardware integrity, and slide pin boot condition.
Include “Caliper hardware and shims inspection” in your routine notes so you don’t skip the small parts that often cause big noises.
How do you confirm success after repairs or adjustments?
Re-test under the original trigger conditions: same speed range, same pedal pressure, and (if relevant) the same reversing maneuver. Đặc biệt, repeat your earlier localization method—light braking, mild steering input, and a cautious heat comparison—so you can confidently say the mechanism is resolved, not merely masked.
For documentation and user education, you can store a short post-repair script in Car Symp that prompts drivers to record the before/after sound and the conditions. If you also mention “brake service” in your notes, you create a consistent maintenance trail that helps future diagnosis and resale records.
Tóm lại, effective brake noise diagnosis is not just identifying the sound—it’s pairing that sound with a verified mechanism, applying the right correction, and proving the fix with the same test that revealed the problem in the first place.