

How to Replace Brake Pads for Drivers: Symptoms vs Wear
Brake pad replacement is the practical, safety-first way to restore consistent stopping power when friction material is worn, contaminated, or heat-damaged—because pads are the part designed to wear so your rotor and caliper don’t have to.
Beyond “changing parts,” the real intent is getting predictable pedal feel, stable braking distances, and quiet operation across daily conditions like rain, traffic, and highway heat cycles.
You’ll also want to understand what “normal” looks like—pad wear patterns, rotor contact surfaces, and hardware movement—so you can avoid repeat noise, uneven wear, and premature replacement.
Giới thiệu ý mới: below is a step-by-step, intent-driven guide that connects inspection, decision-making, and installation so your next
What is brake pad replacement, and why does it matter for stopping safety?
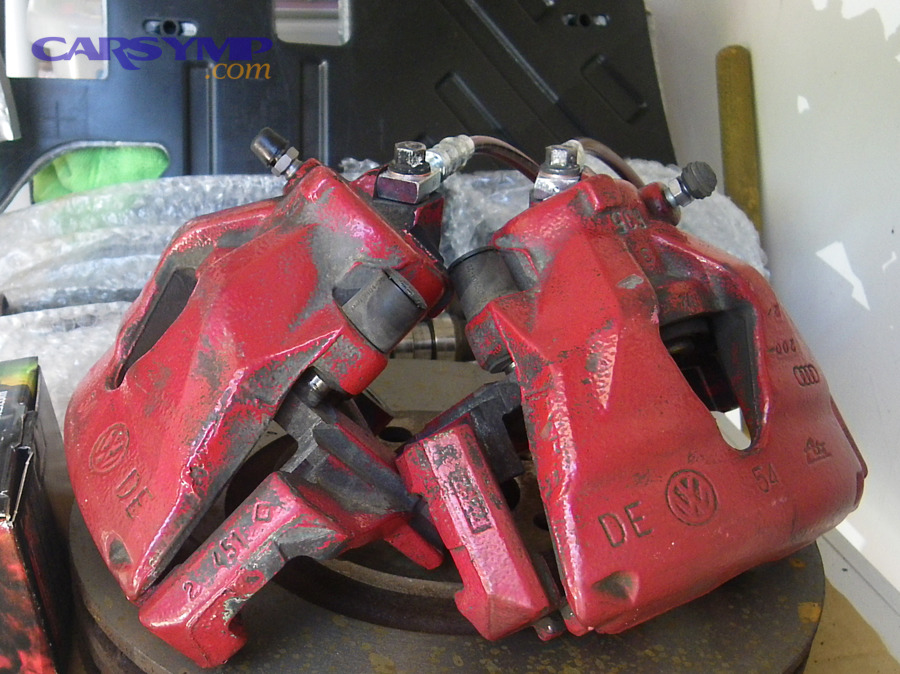
Brake pad replacement is the process of swapping worn friction pads for new ones so the caliper can clamp the rotor with the correct friction, heat handling, and contact stability.
To begin, it helps to picture the system as a controlled friction “sandwich”: the caliper squeezes pads against a spinning rotor, converting speed into heat. When pad material thins or becomes glazed, stopping becomes less predictable, especially during repeated braking.
Specifically, good pads maintain a stable friction coefficient and resist fade; worn pads can overheat faster, transfer uneven material to the rotor, and increase pedal effort. In real driving, that can show up as longer stops, vibration, or a pedal that feels “hard but not strong.”
For evidence-based context, you can think of braking performance as a tribology problem (friction + wear). Theo nghiên cứu của một nhóm tác giả công bố trên tạp chí khoa học thuộc NLM/NIH (PMC), vào 07/2022, vật liệu ma sát đĩa–má phanh có hành vi mài mòn và ma sát khác nhau theo nhiệt và tải, ảnh hưởng đến độ ổn định và độ tin cậy của hệ thống phanh.
Next, once you understand pads as the “wear sacrificial layer,” the key becomes timing: replacing before metal-to-metal contact saves rotors, calipers, and your budget.
How do you know you need brake pad replacement soon?
You likely need brake pad replacement when friction material is near its minimum thickness, when wear indicators begin contacting the rotor, or when braking behavior changes in a repeatable way.
After that headline answer, the most reliable approach is to use a “triangulation” method: listen, feel, and visually confirm. Sound alone can be misleading, but patterns matter—noise that appears only under braking, increases with speed, or worsens after rain can point to the pad/rotor interface.

Here’s a practical checklist of signals that should push you from “monitor” to “act”:
- Indicator noise or scraping: Many pads include a small metal tab that squeals when pads are near end-of-life; a grinding sound can mean the friction layer is gone.
- Pedal feel shift: More pedal travel, a “wooden” feel, or inconsistent bite can indicate glazing, contamination, or uneven transfer film.
- Pulling or uneven braking: Not always pads, but uneven pad wear can contribute—especially if hardware is stuck or slides are dry.
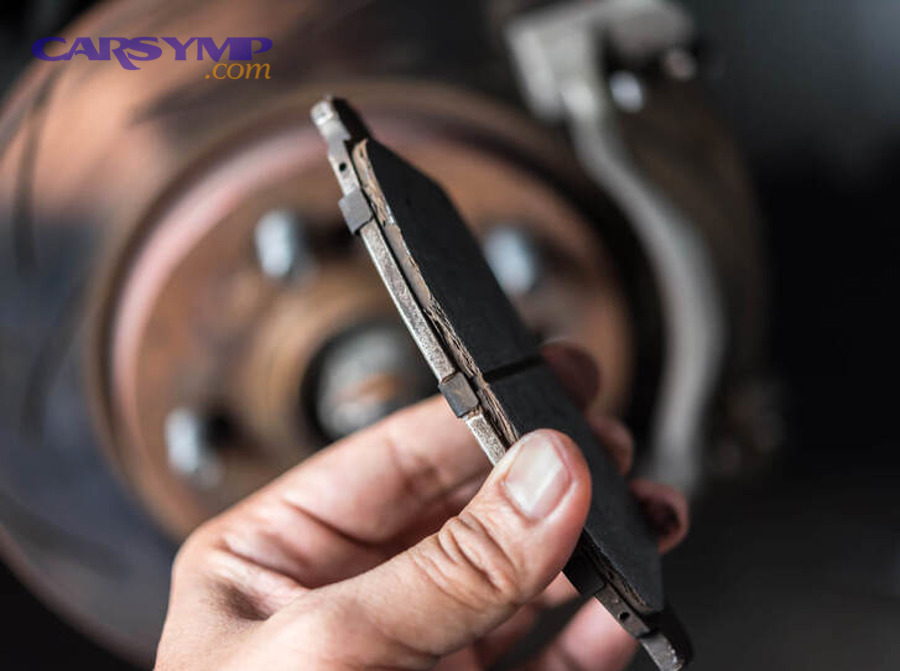
- Visible thin pads: If you can see only a narrow strip of friction material, it’s time to measure and decide.
To connect this to real-world shop language, technicians often document Brake pad wear symptoms alongside rotor condition, caliper slide movement, and fluid status in a single inspection note—because the system fails as a chain, not as isolated parts.
Next, if you want to be more objective than “it sounds bad,” focus on thickness and wear pattern, then tie that to how you drive.
How long do brake pads last, and what factors change the interval?
Brake pad replacement intervals vary widely because pad life depends on heat cycles, vehicle weight, traffic patterns, terrain, and pad compound—not just mileage.
To explain it clearly, think in three main groups of usage profiles: mostly highway (long life, fewer heat spikes), mixed commuting (moderate life), and heavy stop-and-go or mountain driving (shorter life due to repeated high temperatures).
More specifically, these attributes tend to shorten pad life:
- Frequent hard stops: High-energy braking increases pad wear and can glaze surfaces.
- Riding the brakes downhill: Sustained heat builds faster than it can dissipate.
- Heavy loads / towing: More kinetic energy must be converted to heat at each stop.
- Sticking hardware: A dragging caliper or seized slide pins keep pads in light contact, wearing them constantly.
At a micro level, the friction interface can form a “transfer layer” on the rotor that stabilizes friction once established. Theo nghiên cứu của Alliance Automotive Group (TechMate Guides), vào 09/2021, quá trình bedding-in tạo lớp vật liệu từ má phanh chuyển lên bề mặt đĩa, giúp tăng độ “grabby” và ổn định hệ số ma sát khi lớp chuyển vật liệu đủ đồng đều.
Next, once you understand what accelerates wear, you can decide whether you’re replacing early for safety/consistency—or waiting until indicators tell you it’s urgent.
Can you keep driving until the pads make noise?
No, you shouldn’t rely on noise alone to time brake pad replacement, because some pads are quiet at end-of-life while others squeal early due to dust, humidity, or hardware vibration.
To illustrate, wear indicators are a helpful “last call,” not a perfect schedule. Some manufacturers even document cases where squeal can be normal or expected at certain conditions, while still indicating worn pads when the indicator contacts the rotor.
More importantly, there are three safety reasons not to wait:
- Rotor damage risk: Once friction material is gone, the metal backing plate can grind the rotor, increasing repair scope.
- Heat management: Thin pads can overheat faster, raising fade risk on long descents or repeated stops.
- Unpredictable braking: Uneven wear or contamination can change bite from stop to stop.
As a “móc xích” step, the next question most drivers ask is budget: what does a normal job cost, and why does it vary so much?
How much does brake pad replacement cost, and what drives the price?
Brake pad replacement cost depends on axle count, pad type, rotor condition, vehicle class, and labor rates, so the same job can range from a budget refresh to a full brake overhaul.
To begin, separate the cost into three buckets: parts (pads + hardware), labor (inspection + installation + cleaning/lube), and add-ons (rotors, caliper service, fluid work). Many shops will quote an axle-based package that includes inspection and basic hardware cleanup.
Below is a quick planning table that helps you estimate scope before you call a shop. This table contains common scenarios and what they usually include, so you can compare quotes apples-to-apples.
| Scenario | What’s Included | Why It Costs More/Less |
|---|---|---|
| Pads only (best-case) | New pads, basic hardware cleaning, caliper slide lube | Lowest parts cost; requires good rotors and healthy hardware |
| Pads + rotors (common) | Pads, new rotors, hardware service | More parts cost; often chosen to eliminate pulsation/noise risk |
| Full axle refresh | Pads, rotors, hardware kit, caliper pin boots, deeper cleaning | More time + parts; improves longevity and consistency |
To make your conversation with a shop more efficient, ask for a line-item Brake pad replacement cost estimate that states whether rotors are being replaced, resurfaced, or reused and what hardware steps are included.
Time also matters. In many cars, Brake pad replacement labor time rises when rust, seized slide pins, electronic parking brake procedures, or tight wheel clearance is involved. So the “same pads” can take very different time depending on condition and design.
Next, the biggest fork in the road is rotor condition—because that decision changes both cost and outcome.
Do you need new rotors during brake pad replacement?
Sometimes yes: you need new rotors during brake pad replacement when rotors are below spec thickness, deeply scored, cracked, heat-spotted, or produce vibration that can’t be corrected safely.
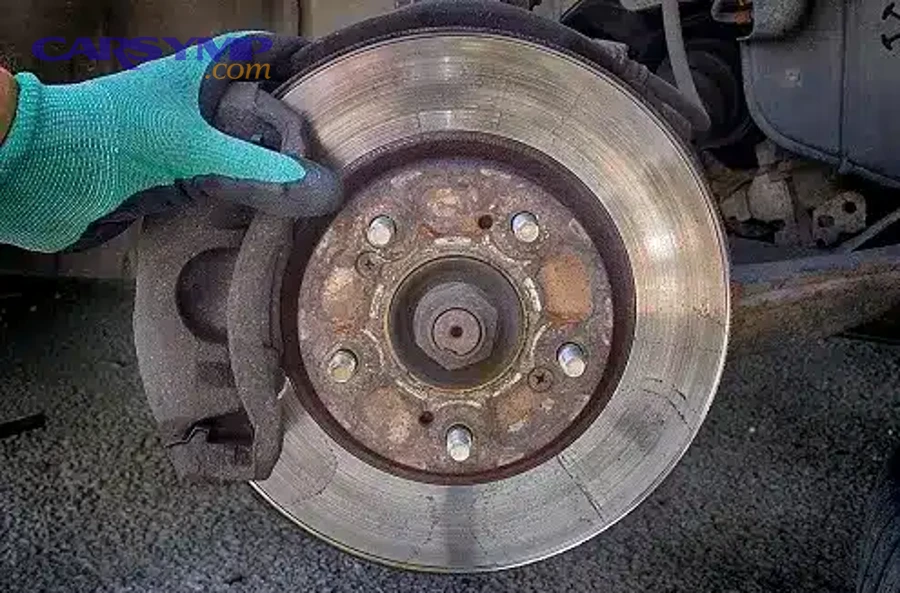
To begin, understand the rotor’s job: it’s a heat sink and friction surface. If its surface is uneven or its thickness varies, new pads may not bed evenly, leading to noise, pulsation, or rapid pad wear.
Here are clear “replace now” triggers:
- Below minimum thickness: Measure rotor thickness and compare to the stamped minimum specification.
- Cracks or heavy heat checking: Heat damage can compromise structural integrity and friction consistency.
- Deep grooves: If grooves catch a fingernail or reduce pad contact area significantly, bedding becomes inconsistent.
- Persistent pulsation: Thickness variation or runout can cause vibration even with new pads.
In shop terms, this decision is often summarized as When rotors must be replaced with pads—because installing new pads on marginal rotors is one of the fastest ways to create comebacks (noise, pulsation, uneven wear).
Next, if rotors are reusable, the most important variable becomes execution: clean surfaces, correct torque, and hardware movement.
How can you prepare for brake pad replacement without mistakes?
You prepare for brake pad replacement by confirming parts fitment, securing safe lifting, inspecting hardware movement, and planning the job steps before you remove anything.
To begin, treat preparation as the part that prevents problems: most noise, uneven wear, and “soft pedal” complaints start from rushed setup—incorrect pad type, missing hardware clips, contaminated friction surfaces, or improper torque.
Before you turn a wrench, do these high-impact checks:
- Confirm axle and pad shape: Front and rear pads often differ; match new pads to removed pads.
- Inspect slide pins and boots: Pins must move smoothly; torn boots invite rust and sticking.
- Check rotor surface and thickness: Decide reuse vs replace before you’re mid-job.
- Plan torque and tools: Lug torque and caliper bolt torque matter; use correct specs.
If you’re coordinating with a shop, this is also when you align expectations on what “complete” means in a brake service: cleaning hub faces, lubricating contact points (not friction surfaces), and verifying free pad movement in the bracket.
Next, once prep is done, the installation becomes straightforward—especially if you follow a disciplined sequence.
How do you do brake pad replacement step by step?
You do brake pad replacement by lifting safely, removing the wheel, retracting the caliper piston, swapping pads and hardware, lubricating correct contact points, reassembling to torque, then verifying pedal feel before driving.
To begin, the key is controlled order: you’re managing safety (vehicle support), cleanliness (no grease on friction faces), and geometry (pads must slide freely while the caliper clamps squarely).
Here is a practical sequence that works across most passenger vehicles. Use it as a map, then adapt to your exact caliper design:
- Secure and lift: Park on level ground, chock wheels, loosen lugs slightly, then lift and support on jack stands.
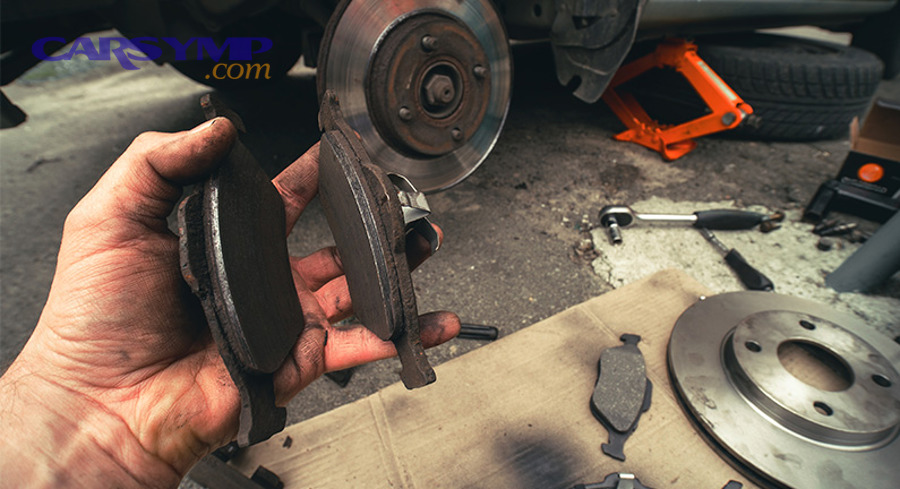
- Remove wheel and inspect: Look for leaks, torn boots, uneven pad wear, or rotor scoring before disassembly.
- Remove caliper: Unbolt caliper and support it; never let it hang by the brake hose.
- Remove old pads and hardware: Note clip orientation and where any wear indicators were positioned.
- Service the bracket: Clean pad abutments; replace hardware clips if corroded; ensure pads slide smoothly.
- Compress piston carefully: Use a piston tool or clamp; open reservoir cap if needed and monitor fluid level.
- Install new pads: Apply brake-safe lubricant to correct metal-to-metal contact points only.
- Reassemble and torque: Tighten caliper bolts to spec; reinstall wheel; torque lugs properly.
- Restore pedal: Pump pedal until firm before moving the vehicle; confirm no warning lights.
Many DIY guides label this as DIY brake pad replacement steps, but the difference between “it works” and “it lasts” is the hidden work: bracket cleaning, correct lubrication, and ensuring hardware isn’t binding.
To make the process easier to visualize, here’s a short video demonstration you can follow alongside your own service manual:
Next, once pads are installed, your job isn’t done—the first checks and first miles determine whether the system beds evenly and stays quiet.
What should you check immediately after brake pad replacement?
Immediately after brake pad replacement, you should verify a firm pedal, confirm free wheel rotation (no dragging), recheck fluid level, and perform a cautious test drive to confirm straight stops and stable bite.
To begin, the single most common post-job mistake is forgetting to seat the pistons by pumping the pedal before driving. The first pedal press can go to the floor if the piston hasn’t moved back to pad contact.
Use this quick post-install checklist:
- Pedal pump and hold: Pump until firm; hold pressure and confirm it doesn’t sink rapidly.
- Fluid level check: Compression can raise reservoir level; make sure it’s within max/min marks.
- Wheel spin check: A light brush is normal; heavy drag suggests stuck pins, twisted boots, or misseated pads.
- Visual leak scan: Look around caliper, hose, and bleeder area.
- Torque confirmation: Recheck lug torque after a short drive if your manual recommends it.
For deeper durability, you’ll want to follow a controlled break-in approach. Many technicians refer to a Bedding-in new brake pads procedure to build a uniform transfer layer, reducing noise and improving consistency over the first heat cycles.
Next, even when everything is installed correctly, some drivers notice sound changes—so let’s connect noise to the most likely causes without guessing.
Why does noise happen after brake pad replacement?
Noise after brake pad replacement usually comes from vibration at the pad–rotor interface, improper hardware contact, rotor surface issues, or uneven material transfer—not from “bad pads” alone.
To begin, brakes are designed to slide, clamp, and release repeatedly; any looseness, corrosion, or wrong lubricant placement can create a small vibration that turns into squeal. This is why hardware condition matters as much as pad material.
Common causes to evaluate in order:
- Missing or incorrect hardware clips: Pads can chatter if they don’t sit tightly in the bracket.
- Dry or seized slide pins: Uneven clamping pressure can create noise and tapered pad wear.
- Rotor surface mismatch: Grooved or glazed rotors can prevent smooth bedding and trigger squeal.
- Contamination: Grease or fingerprints on friction surfaces can change friction and create hotspots.
- Improper torque: Loose fasteners can amplify vibration; over-torque can distort parts.
Many troubleshooting notes summarize this as Squeal after pad replacement causes, and it’s best handled with a repeatable diagnostic routine rather than part swapping.
For an evidence-backed angle, some manufacturer service bulletins describe noise caused by pad retainers or caliper components with insufficient rigidity, where movement during braking can deform retainers and cause interference.
Next, if you’re picking pads (or planning the next service), material choice and axle differences become the “unique attributes” that drive comfort and longevity.
FAQ about brake pad replacement
These quick answers cover the most common questions drivers ask right before scheduling or doing a brake pad replacement.
Is it normal for new pads to smell or smoke slightly at first?
Yes, mild odor during initial heat cycles can be normal as resins cure and surfaces stabilize, but heavy smoke, severe smell, or pulling should be treated as a stop-and-inspect situation.
Next, if the smell appears with poor pedal feel, inspect for dragging calipers or incorrectly seated pads.
Do you always need to replace pads in pairs?
Yes, replace pads on both wheels of the same axle to keep braking balanced and predictable, then confirm the vehicle stops straight during a cautious test drive.
Next, if one side wore much faster, investigate slide pins, hoses, or caliper piston movement before you assume it’s “just wear.”
What thickness is “too thin” for pads?
As a general safety guideline, many sources recommend replacing around 3–4 mm, though exact minimums depend on vehicle design and manufacturer specs; commercial regulations can specify minimum lining thickness values in certain contexts.
Next, the most accurate approach is to measure and compare to your service manual’s minimum specification.
Can a wear indicator light be wrong?
Yes, some vehicles use electronic wear sensors or configuration settings, and faults or misconfiguration can affect warning behavior; always verify pad thickness visually if symptoms or mileage suggest wear.
Next, combine the light with inspection so you don’t rely on a single signal.
Contextual Border
How do you choose pads that match your driving and avoid repeat problems?
You choose pads that match your driving by balancing heat tolerance, noise control, dust levels, rotor friendliness, and pedal feel—then confirming the choice fits your axle and hardware design.
How should you compare pad materials without overpaying?
A practical way to decide is to anchor your choice to your priority: quiet daily commuting, heavy-duty heat tolerance, or low dust for clean wheels. Many guides frame this as a Ceramic vs semi-metallic pad comparison, where ceramics often emphasize lower noise/dust while semi-metallic options can handle heat well but may be noisier depending on design and rotor pairing.
Next, once you pick a material category, confirm the pad set includes proper shims/clips or budget for a quality hardware kit.
Why do front and rear pad jobs feel different?
Front brakes usually handle more stopping load, so front pads can wear faster and show heat effects more clearly; rear designs can include integrated parking brake mechanisms or electronic parking brake procedures that change the workflow.
Technicians often note Front vs rear brake pad differences when explaining why rear service may require special tools or scan-tool retraction on some vehicles.
Next, once you understand axle roles, you can plan parts and time more accurately.
What’s the simplest way to confirm thickness and uneven wear?
Use a flashlight and measure pad friction material (not the backing plate) at multiple points to spot tapering; if access is tight, remove the wheel for a clear view. Many DIYers label this check as How to measure pad thickness, and the key is consistency: measure both inner and outer pads because they can wear differently.
If you track inspection notes in a symptoms-first system like Car Symp, log thickness, wear pattern, and any noise/feel triggers together—because those correlations help predict the next interval more accurately.
Next, once thickness and wear shape are confirmed, the final durability lever is break-in discipline.
How do you build stable braking feel in the first miles?
Follow a controlled series of moderate stops to gradually heat the pads and rotor, allowing an even transfer layer to form without overheating. This is the purpose of a Bedding-in new brake pads procedure: it reduces the chance of uneven deposits that can cause vibration and noise later.
Next, if you still experience vibration after proper bedding, re-check rotor condition and wheel torque, because those two factors often masquerade as “pad issues.”


