


Vibration when braking causes usually trace back to uneven friction surfaces, runout, or looseness somewhere in the wheel–brake–hub stack, and the fastest way to diagnose it is to match the vibration’s “feel” (speed-related, brake-pressure-related, or intermittent) to the component that creates that pattern.
Many drivers describe the same symptom as brake shudder, but the root cause can differ depending on whether the shake is felt in the steering wheel, the seat, or the whole body.
Beyond the obvious rotor and pad issues, the “hidden” contributors are mounting and hardware problems, wheel and tire defects, and suspension play that only shows itself under braking load.
To begin, keep one idea in mind: braking magnifies small imperfections. After that, we can separate what’s normal (brief ABS events) from what’s not (repeatable vibration) and then follow a clear, step-by-step diagnostic flow.
What does vibration during braking usually indicate at a high level?
It most often indicates an uneven braking interface or a loose/variable clamping surface, because braking force repeats every wheel rotation and turns small thickness or alignment errors into a steady shake. Next, use “where you feel it” to choose the right inspection path.
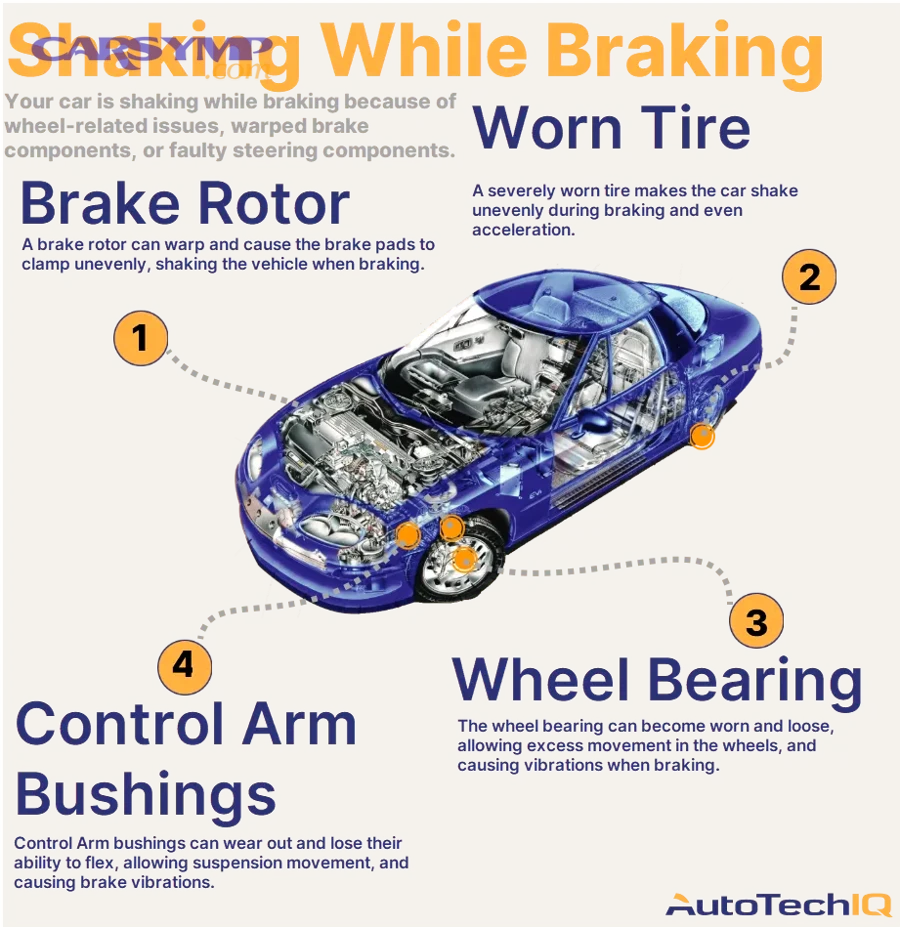
Why the steering wheel vs seat sensation matters
If the steering wheel shakes most, the issue commonly originates at the front axle (front rotors, front hubs, front tires, or front suspension play). After that, if the seat or floor vibrates more than the wheel, suspect rear rotors/drums, rear tires, or driveline mounts that react under deceleration.
- Steering wheel shake: front brake rotor face variation, front wheel balance/tire defects, front hub/bearing runout, or front control-arm/bushing play.
- Seat/floor shake: rear brake issues, rear tire defects, rear hub runout, or rear suspension geometry changes under braking.
- Whole body shudder: multiple contributors stacking up (tires + brakes + mounting) or severe runout/looseness.
Speed-related vs pressure-related vibration clues
If vibration grows with road speed even before you press the pedal, tires/wheels are primary suspects; if it appears only when braking and scales with pedal force, brakes/mounting are more likely. Next, combine those clues with a quick “repeatability” check: does it happen every time at the same speed band?
- Happens only while braking: rotor thickness variation, pad deposits, caliper slide issues, or hub/rotor mounting errors.
- Happens while coasting and braking: wheel balance, tire belt shift, out-of-round tire, or bent wheel.
- Comes and goes randomly: loose hardware, intermittent caliper sticking, or ABS/traction events on rough surfaces.
Why do rotors “feel warped” even when they measure straight?
They often “feel warped” because of friction variation and thickness variation rather than true mechanical warping, which creates pulsing force at the pads each rotation. Next, focus on what changes friction: surface deposits, heat patterns, and pad condition.
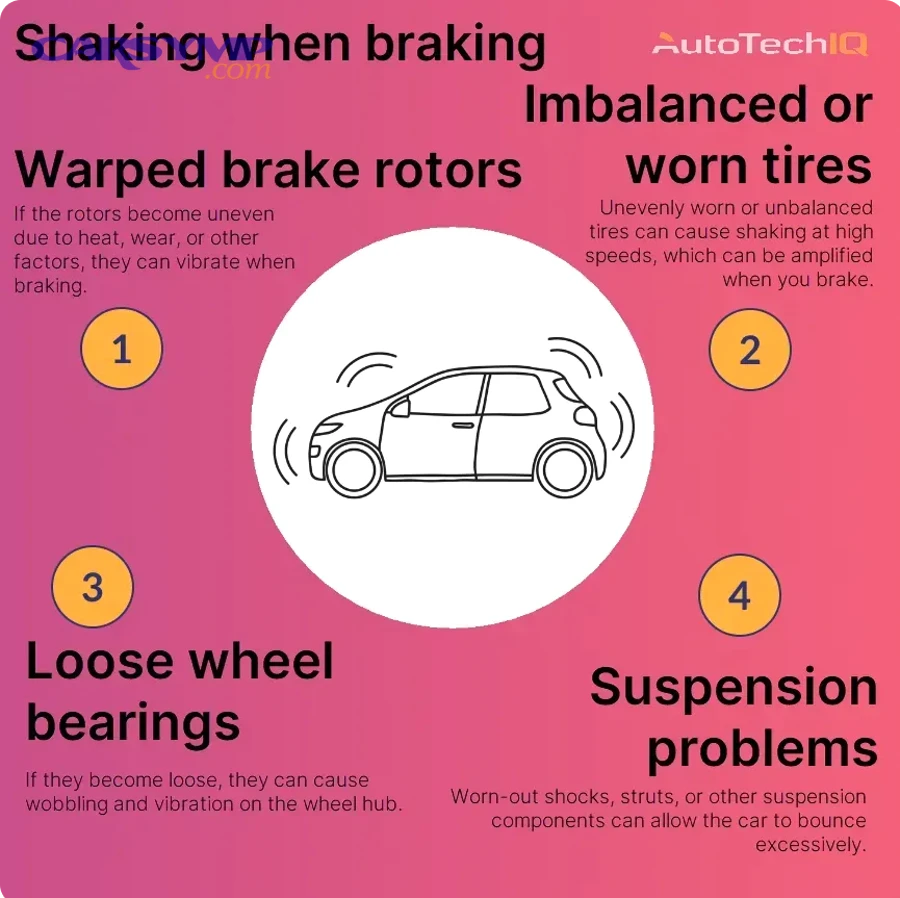
Thickness variation and pad material transfer
Brake torque is not just “rotor straightness”; it’s also how evenly the pads grip. After that, understand the common chain reaction: overheated pads smear material onto the rotor, the pad then grabs harder on those spots, and the car shakes under braking.
- Uneven pad deposits: often triggered by repeated hard stops, holding the pedal at a stop with hot brakes, or bedding-in done poorly.
- Hot spotting: localized heating changes friction and can accelerate uneven transfer.
- Glazing: hardened pad surface reduces consistent bite, increasing micro-slip and vibration.
Runout vs thickness variation: two different problems
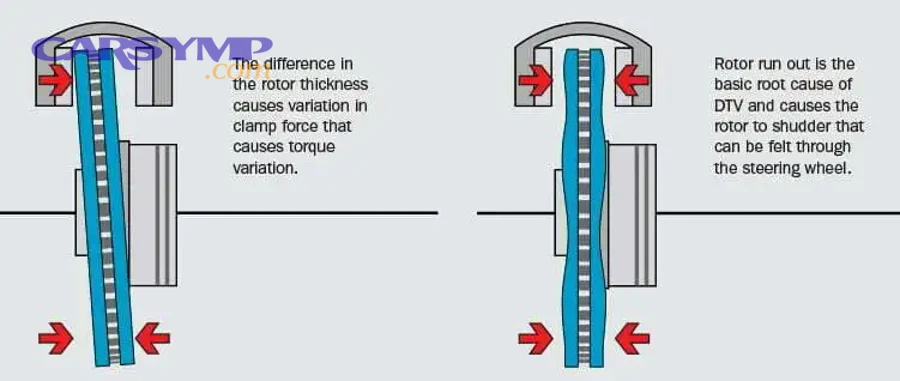
Runout is the rotor wobbling side-to-side; thickness variation is the rotor being slightly thicker/thinner around its circumference. Next, note the practical outcome: runout can create thickness variation over time because the pads “kiss” high spots more often.
- Runout drivers: rust on the hub face, debris between hub and rotor, bent hub flange, or rotor not seated flat.
- Thickness variation drivers: pad deposits, uneven wear, or prolonged contact from dragging calipers.
Heat cycles and the “new parts” surprise
New rotors and pads can still shudder if they were installed on a rusty hub, torqued unevenly, or bedded aggressively too soon. Next, treat installation as part of diagnosis: the symptom starting right after brake service is a major clue.
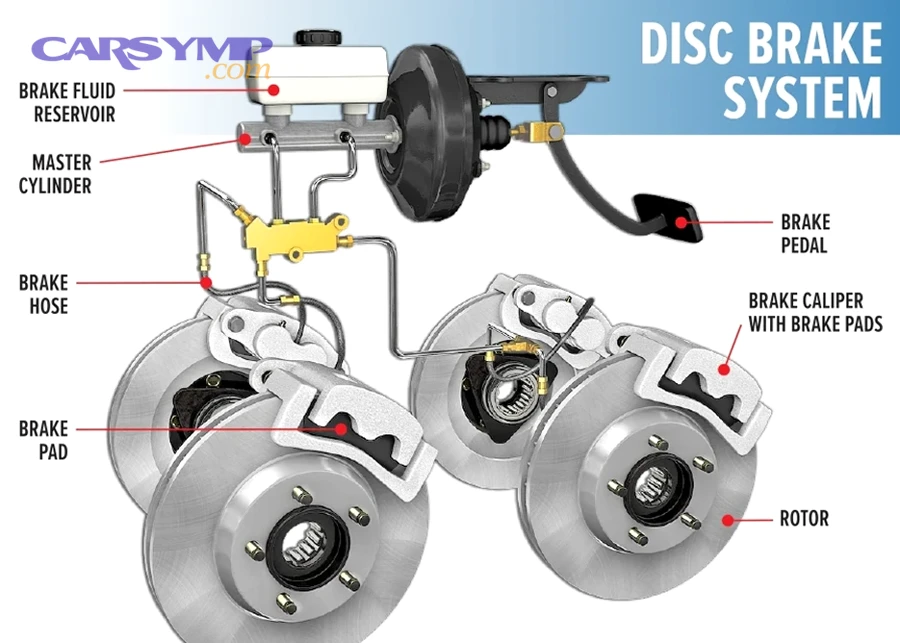
When does brake shudder point to front brake hardware or caliper problems?
Brake shudder often points to front brake hardware when the shake appears under moderate pedal force and the steering wheel is the loudest “messenger,” because front brakes do most stopping. Next, verify caliper movement and pad contact before blaming the rotor alone.
Sticky caliper slides and uneven clamping
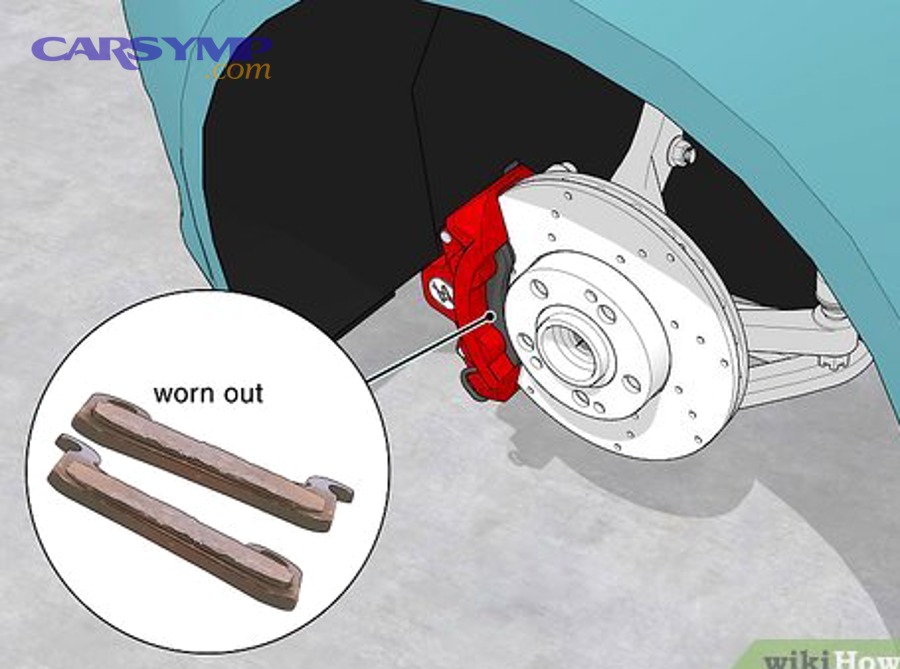
If slide pins bind or dry out, the caliper can’t center itself and one pad does most work, building uneven deposits and heat. After that, look for telltale patterns: one pad worn much thinner than its mate, or tapered wear.
- Symptoms: pulling under braking, hot smell near one wheel, uneven pad thickness side-to-side.
- Typical causes: torn pin boots, wrong grease, corrosion in the bracket bores, or seized hardware clips.
Pad hardware fitment and anti-rattle clips
Pads must move freely in the bracket without being loose; if they bind, release becomes uneven and vibration can build. Next, confirm the “golden middle”: no sticking, no rattling, and clean abutment surfaces.
- Binding pads: rust jacking under stainless clips, paint/powdercoat thickness on pads, or wrong hardware kit.
- Loose pads: missing clips/shims can allow chatter that feels like vibration at low speeds.
Rotor resurfacing vs replacement decisions
If thickness is near minimum or surface damage is severe, resurfacing may not restore stable braking for long. Next, prioritize safety and longevity: a rotor that can’t meet thickness specs or has deep heat checking should be replaced, not “saved.”
How can hub mounting, rust, and fastener torque create vibration after brake service?
They can create vibration by preventing the rotor from sitting perfectly flat against the hub, which introduces runout that later becomes thickness variation. Next, treat the hub face like a precision surface, not just “where the rotor sits.”
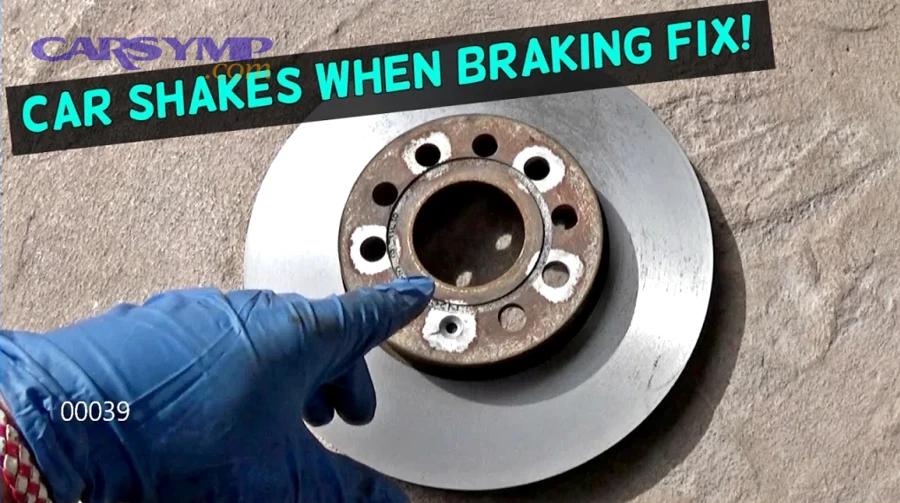
Hub face cleanliness and rotor seating
A thin ring of rust or debris can tilt the rotor enough to be felt at the pedal. After that, the fix is often simple but meticulous: clean, measure, and re-check.
- Clean the hub face: remove rust scale, old anti-seize lumps, and stuck debris around the center pilot.
- Check the pilot fit: a rotor that doesn’t seat fully on the hub’s center bore can “hang” slightly.
- Re-check after tightening: seating can change as fasteners are torqued.
Uneven lug tightening patterns and clamping distortion
Over-tightening or uneven tightening can distort the rotor hat or wheel interface, especially on thin rotors. Next, tighten in a star pattern and use a torque wrench to reduce “stack-up” distortion.
In real-world complaints, a common thread is Wheel lug torque issues after brake work—the vibration begins immediately after service and changes if the wheels are re-torqued correctly.
Rotor-to-hub indexing as a troubleshooting tool
If measurements show runout, rotating (indexing) the rotor on the hub can sometimes reduce it by canceling high spots. Next, if indexing helps but doesn’t solve it, suspect the hub flange itself.
- Indexing tip: mark rotor and hub positions so you can compare before/after changes.
- Hub suspicion: if runout persists with multiple rotors, the hub/bearing flange may be bent or worn.
What braking vibrations come from tires, wheels, or alignment instead of brakes?
They come from rotating mass imperfections—out-of-round tires, belt shifts, bent wheels, or imbalance—that become more noticeable when weight transfers forward under braking. Next, test whether the vibration exists while coasting at the same speeds.
Out-of-round and belt-related tire problems
A tire with internal belt separation can feel like a brake vibration because deceleration loads the contact patch differently. After that, look for: vibration that’s speed-specific, and sometimes worse after the tires warm up.
- Clues: vibration at a narrow speed range, steering wheel wobble even without braking, visible tire bulges or scalloped wear.
- Quick check: move front tires to the rear (or vice versa) and see if the sensation location changes.
Wheel balance vs bent wheel
Imbalance tends to be smooth and speed-dependent; a bent wheel can create a more “thumping” rhythm that braking amplifies. Next, inspect inner rims where bends hide, especially on low-profile tires.
- Imbalance: usually improves after balancing; may be worse at highway speeds.
- Bent wheel: may persist despite balancing; can cause uneven brake pad contact because the wheel wobbles.
Alignment and suspension geometry under braking
Alignment issues rarely create pedal pulsation, but worn components can shift alignment under load and feel like shudder. Next, if the car darts or wanders only when braking, inspect bushings and joints—not just rotors.
How do suspension and steering components amplify vibration when braking?
They amplify vibration because looseness lets the wheel change toe or camber under braking force, turning a small brake irregularity into a larger shake. Next, verify mechanical tightness before repeatedly replacing brake parts.
Control arm bushings and compliance steer
Worn bushings allow the wheel to move rearward or inward when brakes clamp, creating a shimmy that mimics brake shudder. After that, notice the “feel”: steering may twitch or the car may pull inconsistently depending on road crown.
- Front lower control arm bushings: common cause of braking shimmy in many vehicles.
- Subframe movement: loose subframe bolts or worn mounts can cause unpredictable shake under load.
Tie rods and steering rack play
Any free play becomes obvious when braking loads the front end, because the tire forces feed directly into steering components. Next, check for clunks, uneven tire wear, and a wandering feel over bumps.
- Outer tie rod wear: can add steering-wheel shake during braking and at speed.
- Inner tie rod/rack wear: can feel like “loose” steering plus braking vibration.
Wheel bearings and hub flange runout
A worn bearing can let the rotor wobble microscopically under braking load, creating a pulsing sensation. Next, if you hear a humming noise that changes with turns, combine bearing checks with rotor runout checks.
How do you tell ABS events from a mechanical vibration?
ABS events are usually brief, rapid, and tied to low traction or rough surfaces, while mechanical vibration is repeatable at the same speeds and grows smoothly with braking force. Next, reproduce the symptom on a clean, dry road to compare behavior.

ABS “buzz” characteristics vs rotor/pad pulsation
ABS typically feels like a fast chatter and may include audible pumping; rotor/pad issues feel like a slower, rhythmic pulse that tracks wheel rotation. After that, note context: ABS often triggers when you brake hard on gravel, wet paint lines, potholes, or icy patches.
- ABS-like: rapid vibration, pedal “kicks back,” often short-lived and situation-dependent.
- Mechanical: repeatable at certain speeds, often worsens as brakes heat up, and can persist on dry pavement.
Sensor tone ring issues and false ABS activation
Damaged tone rings, rusty sensor seats, or contaminated sensors can cause unintended ABS activation at low speeds. Next, if the pedal chatters right before stopping and only sometimes, consider scanning for ABS codes and inspecting wheel speed sensors.
When diagnosing, some technicians frame it as Warped rotors vs ABS activation diagnosis—but the key is the pattern: repeatable pulse (mechanical) versus intermittent chatter (control event).
What are the safest steps to troubleshoot vibration when braking at home?
Use a simple sequence—confirm repeatability, isolate axle/location, inspect visible hardware, and test for wheel/tire contribution—so you don’t replace parts blindly. Next, stop immediately if you notice severe pulling, grinding, or a sinking pedal.
Step 1: Confirm the pattern and where you feel it
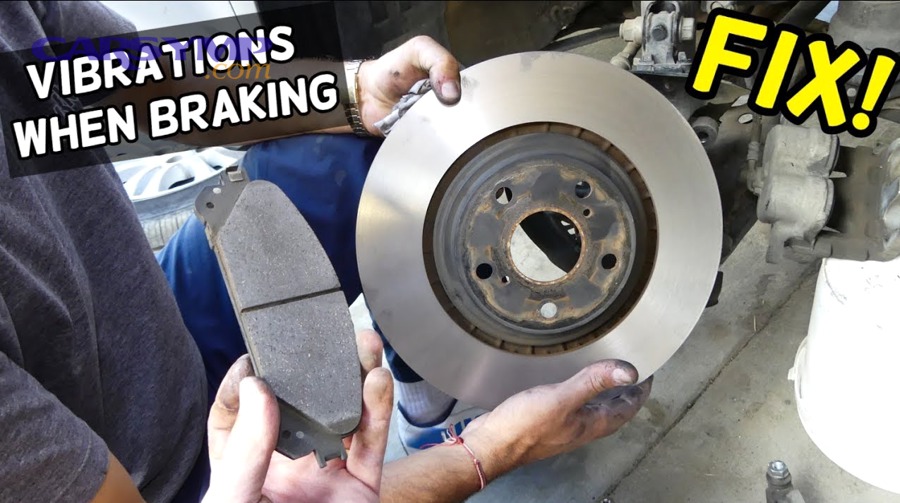
Drive on a smooth, straight road and brake lightly, then moderately, noting speeds and whether the steering wheel or seat shakes more. After that, do one more run after the brakes warm up, because heat can intensify deposit-related shudder.
- Light braking test: does it start immediately or only with more pedal force?
- Speed band test: does it peak at a specific speed range?
- Warm vs cold: is it worse after a few stops?
Step 2: Visual inspection without disassembly
Look through the wheel spokes for obvious rotor discoloration, heavy grooves, or uneven pad contact marks. Next, check tires for bulges and the wheel for missing weights.
- Rotor face: blue spots, patchy sheen, or heavy scoring suggests uneven friction.
- Tire tread: scalloping/cupping can mimic braking vibration.
- Wheel weights: missing weights can create speed-related shake amplified by braking.
Step 3: Re-torque wheels and re-test
Improper torquing is a common, fixable cause of newly introduced vibration. After that, re-test the same road and speeds to see whether the symptom changes.
As a practical safety note, perform a Safety check if pedal pulsates by confirming lug tightness, looking for leaks, and ensuring braking remains straight and controllable before continuing normal driving.
Step 4: Decide what needs measurement by a shop
If the pattern strongly suggests runout or thickness variation, a shop can measure rotor runout, hub flange runout, and brake torque variation more precisely. Next, ask for measurements—not just parts replacement—so the repair addresses the root cause.
Which repairs actually fix brake shudder long-term?
Long-term fixes match the cause: correct runout and mounting first, restore even friction surfaces second, and address looseness or tire defects third. Next, prioritize the “foundation” steps—hub prep and torque—before upgrading parts.
Mounting correction before parts replacement
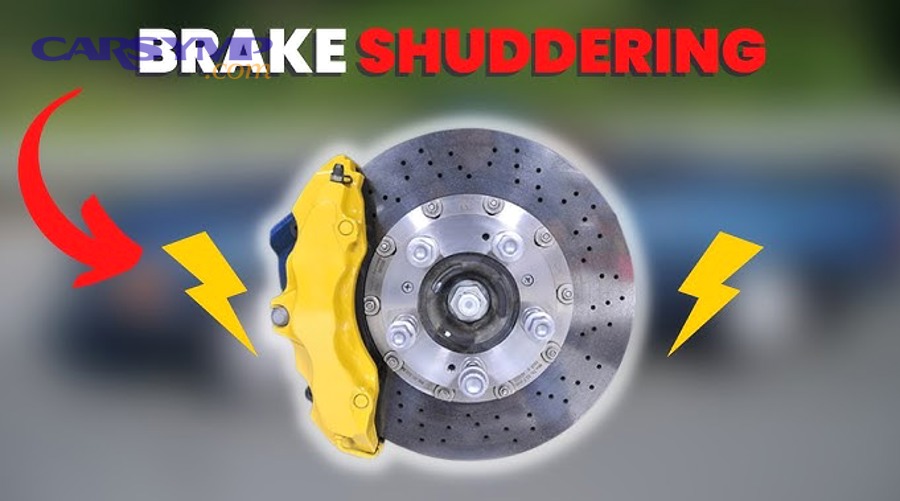
Cleaning the hub face, verifying proper seating, and torquing correctly can solve vibration even with otherwise good rotors. After that, if measurements still show excessive runout, correct the hub/rotor interface or replace the offending component.
- Best value: hub cleaning + correct torque + re-check runout.
- When needed: hub replacement or bearing/hub assembly if flange is out of spec.
Friction surface restoration: pads, rotors, and bedding
If deposits or thickness variation are present, replacing or machining rotors (when within spec) and installing quality pads can restore smooth braking. Next, complete a controlled bedding-in procedure so the new surfaces mate evenly.
- Pad choice: match pad compound to driving (daily vs towing vs performance) to reduce overheating and deposits.
- Rotor choice: quality metallurgy and consistent machining help stabilize friction.
- Bedding: moderate stops with cooling intervals help prevent uneven transfer.
Address the amplifiers: tires and suspension
Even perfect brakes can still feel “rough” if tires are out-of-round or bushings are worn. After that, align the system: rotate/balance tires, replace worn bushings, and confirm steering tightness.
How can you prevent vibration when braking from returning?
Prevention comes down to heat management, proper installation practices, and periodic checks that keep the rotor–hub–wheel stack flat and stable. Next, treat every brake job like a precision assembly, not a quick swap.
Heat management habits that reduce deposits
Brake deposits often start with repeated heavy stops and then holding the pedal while the rotor is extremely hot. After that, build small habits that keep surfaces even.
- After a hard stop: if safe, roll slightly or ease off the pedal at a stop to reduce imprinting on one spot.
- Downhill driving: use engine braking and avoid riding the brakes continuously.
- Towing/loads: ensure brakes are sized and pads are appropriate for higher heat.
Installation practices that keep runout low
Clean hub faces, verify rotor seating, use correct hardware, and torque lugs in a star pattern to spec. Next, re-check torque after a short drive if your manufacturer recommends it.
- Hub prep: remove rust scale and ensure a flat mating surface.
- Hardware: replace worn clips and lubricate slide pins with the correct brake grease.
- Torque discipline: avoid impact-gun “final tightening” without a torque wrench.
Routine checks that catch issues early
Early detection prevents severe thickness variation and secondary wear. After that, schedule checks around tire rotations, because the wheels are already off.
- Every tire rotation: inspect pad thickness, rotor face condition, and caliper boot integrity.
- Annually: check for suspension play, especially in bushings and tie rods.
- After brake work: confirm no dragging brakes by checking for unusual heat at one wheel.
Contextual Border: From here, we move beyond the most common root causes into less obvious, vehicle-specific contributors and diagnostic edge cases that can mimic brake vibration.
What rare or vehicle-specific issues can mimic braking vibration?
Rare causes include driveline or mount reactions, rear drum eccentricity, and brake control anomalies that present like shudder even when rotors look fine. Next, consider these when standard brake and tire checks don’t match the symptom.
Drivetrain mounts reacting under deceleration
Worn engine or transmission mounts can let the powertrain shift during braking, creating a “whole-car” vibration that feels like brakes. After that, look for clunks on throttle transitions and vibration that changes with gear selection.
Rear brake drum or parking brake hardware irregularities
Out-of-round drums or loose parking brake hardware can create a low-speed pulse or rumble under braking. Next, if the symptom is strongest at low speeds and felt more in the seat, inspect rear brake assemblies closely.
Wheel hub-centric vs lug-centric fitment mismatches
Aftermarket wheels without proper hub-centric rings can introduce centering errors that show up during braking. After that, confirm the wheel centers on the hub correctly and that the mating surfaces are clean and true.
Brake system control quirks on uneven surfaces
Some vehicles react more aggressively to rough pavement with stability control, producing a sensation that resembles mechanical vibration. Next, compare smooth-road behavior versus rough-road behavior to separate control intervention from hardware faults.
FAQ: Vibration when braking causes
This section answers common questions drivers ask when they feel pulsing, shaking, or brake shudder, so you can decide what’s normal, what needs inspection, and what deserves immediate attention. Next, use the answers to prioritize safe troubleshooting steps.
Is a slight pulse in the pedal always dangerous?
No, a brief rapid pulse during low-traction braking can be normal, but a repeatable rhythmic pulse on dry pavement usually indicates uneven friction or runout and should be inspected. After that, treat any vibration combined with pulling, grinding, or longer stopping distances as urgent.
Can new rotors still cause vibration right away?
Yes—if the hub face wasn’t cleaned, the rotor didn’t seat flat, or lug torque was uneven, runout can be introduced immediately. Next, re-torque properly and ask for runout measurements before replacing parts again.
Why is the vibration worse at certain speeds?
Because the vibration frequency ties to wheel rotation and resonance: certain speeds match the natural frequency of the suspension/steering system and amplify the shake. After that, use that repeatable speed band as a diagnostic clue for tires/wheels versus brakes.
What if the shaking is only in the steering wheel?
That pattern commonly points to the front axle—front brakes, front tires, or front suspension play. Next, inspect front rotors/pads/calipers and then verify tire condition and steering/suspension joints.
What should I tell a shop to avoid guesswork?
Ask them to measure rotor runout and thickness variation, check hub flange runout, verify caliper slide function, and document lug torque and hub surface condition. After that, request a root-cause explanation that connects measurements to the symptom, not just a parts list.
- vibration when braking causes
- brake shudder
- rotor runout
- brake torque variation
- hub face rust
- caliper slide pins
- tire out-of-round
- lug torque star pattern