

Fix & Adjust Parking Brake Repair (E-Brake/Emergency Brake) — Step-by-Step Troubleshooting for Car Owners
A parking brake that won’t hold—or won’t release—usually isn’t “mysterious.” You can diagnose it logically, fix the root cause, and confirm it’s holding safely without creating drag, using a step-by-step troubleshooting path that matches how the system actually works.
Next, you’ll learn how to spot the most common failure patterns (weak hold, long travel, stuck on, dragging) and follow Weak parking brake adjustment steps that restore proper engagement without overtightening or masking worn parts.
Then, you’ll learn when “adjustment” is enough versus when you’re really looking at worn shoes, seized cables, or rear brake hardware that needs replacement—plus a clear Parking brake cable replacement overview so you know what that job typically involves.
Introduce a new idea: once you can reliably diagnose and fix a manual cable system, you’ll also understand where the Electronic parking brake changes the rules—especially around EPB service mode and brake work precautions—so you don’t accidentally create a bigger problem during brake work.
What is a parking brake (e-brake/emergency brake), and what does it actually do?
A parking brake (also called an e-brake or emergency brake) is a dedicated braking system designed to hold a parked vehicle by mechanically applying rear braking force, using a lever/pedal or an electronic switch to tension cables or drive actuators.
To better understand why parking brake repair is different from normal brake service, it helps to separate “holding” from “stopping.” Your service brakes are optimized for repeated deceleration and heat management. The parking brake is optimized for static clamping force that remains applied even when the engine is off. That’s why a parking brake can feel “fine” while driving but still fail a hill-hold test: the mechanism that applies and maintains tension (cables, levers, shoe hardware, or EPB motors) is its own chain of parts.

Key takeaway for Car Symptoms: if the handle/pedal travel changes, the vehicle rolls on a slope, or one rear wheel feels hotter after a short drive, those are parking-brake-system problems—not “generic brake pad” problems.
Is it safe to drive with a weak, stuck, or dragging parking brake?
No—driving with a parking brake problem is not safe, because it can (1) allow vehicle rollaway when parked, (2) overheat and damage rear brakes if it drags, and (3) hide bigger rear-brake issues you’ll only discover when you need the brake to hold.
Below, the risk depends on which symptom you have, so the smartest move is to identify the symptom first and match it to the correct repair path.
Reason 1: Rollaway risk when parked
A weak parking brake can let a vehicle move after you step out—especially on slopes, uneven pavement, or when the transmission isn’t fully securing the car. NHTSA’s non-traffic surveillance reports highlight that rollaway vehicles (unattended with no driver in control) contribute to injuries and fatalities in off-roadway incidents. (Source: crashstats.nhtsa.dot.gov)
Reason 2: Heat + damage from dragging
If the parking brake doesn’t fully release, it can create continuous friction on one or both rear wheels. That leads to heat-soak, premature wear, warped components, and the classic Car Symptoms: burning smell, vibration, reduced power, or a wheel that’s noticeably hotter than the others after a short drive.
Reason 3: Unpredictable handling or sudden lock
A stuck mechanism can release suddenly or grab unevenly. Even if it doesn’t “lock the wheel,” any uneven drag side-to-side can pull the car or amplify rear brake imbalance.
Practical guidance: if you suspect Grinding or dragging rear brakes from parking brake, avoid long drives until you’ve confirmed the parking brake fully releases and the wheels spin freely when lifted safely.
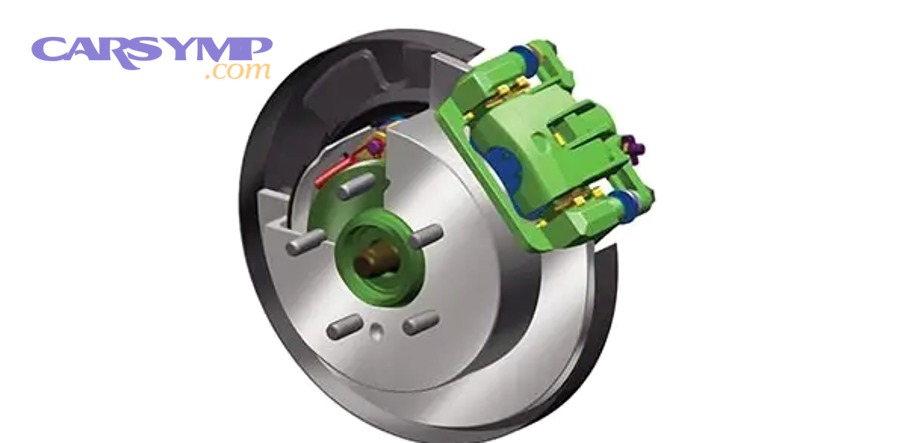
What symptoms tell you your parking brake needs repair or adjustment?
There are 4 main symptom groups that signal parking brake repair is needed: (1) weak/long travel, (2) stuck on, (3) won’t release/dragging, and (4) warning light or electronic fault—based on how the system applies force and whether it returns to its rest position.
Specifically, treat symptoms as a diagnostic shortcut: they narrow the “fault location” to the lever/pedal, cables, rear mechanisms, or electronics.
Is your parking brake weak or does the lever/pedal travel too far?
Yes—if the lever/pedal travel suddenly increases, the parking brake is weak, and the top three causes are (1) out-of-adjustment shoes/mechanism at the rear, (2) cable stretch or slack at the equalizer, and (3) worn or seized rear hardware that prevents full shoe movement.
More specifically, long travel is usually the system “spending” movement taking up slack instead of clamping. Start with a simple check:
- If the travel is long but the rear wheels still drag slightly when engaged, you may need shoe adjustment.
- If the travel is long and nothing changes at the wheels, you may have cable slack, a disconnected cable, or a seized lever at the rear brake.
In practice, most successful repairs follow this order: set rear brake baseline first, then adjust the cable. That’s why Weak parking brake adjustment steps appear later as a full procedure.

Is your parking brake stuck on or not fully releasing?
Yes—if the vehicle feels sluggish, smells hot, or a rear wheel is hotter than the other, the parking brake may be stuck on, and the top three causes are (1) seized cable or contaminated cable housing, (2) seized parking brake lever at the rear mechanism, and (3) rusted shoe contact points or broken return springs.
Then, confirm the symptom safely:
- Park on level ground, chock the front wheels, and ensure the parking brake is fully released.
- After a short, cautious drive, feel near (not directly on) the rear wheels for abnormal heat. One hot corner is a strong clue of a single-side drag fault.
This pattern often maps to Parking brake stuck on causes like corrosion, salt exposure, or infrequent use that allows parts to seize in place.
Does the parking brake warning light stay on or behave oddly?
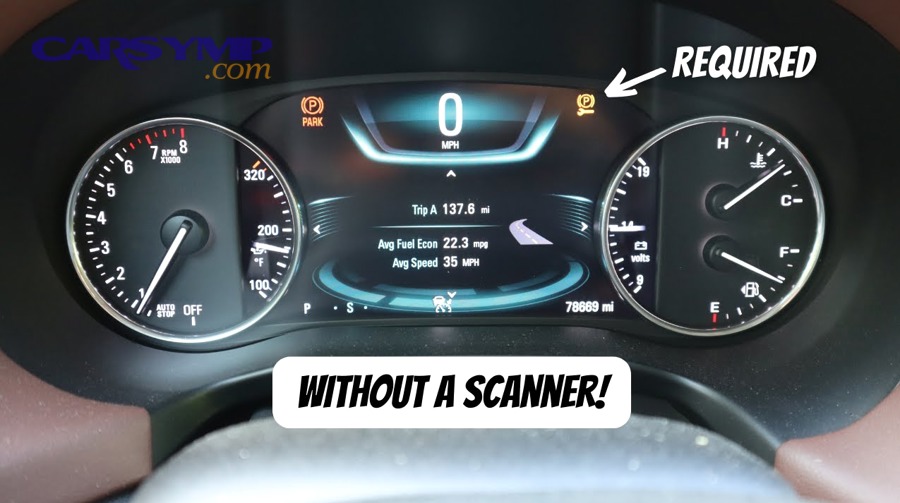
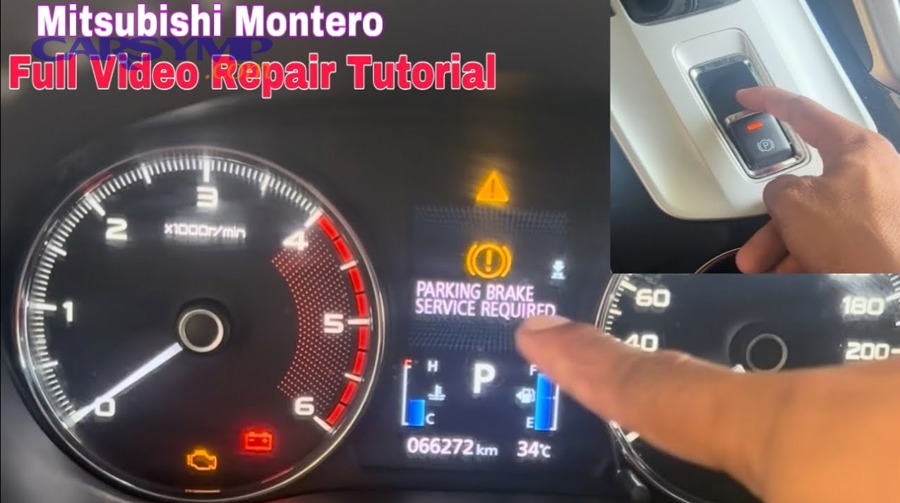
A parking brake warning light that stays on is usually either (1) a switch/sensor issue or (2) a system fault that prevented full release, depending on whether you have a manual brake or an Electronic parking brake.
In addition, treat Parking brake warning light causes differently by system type:
- Manual lever/pedal: a simple switch at the lever/pedal can stick or misadjust.
- Electronic parking brake: the light may reflect a stored fault code, actuator issue, or incomplete release event.
If the light is paired with drag symptoms, prioritize freeing the brake and verifying release before chasing electrical causes.
Which type of parking brake system do you have (cable, rear drum, drum-in-hat, or electronic)?
There are 4 main types of parking brake systems—manual cable with rear drums, manual cable with rear discs (integrated mechanism), drum-in-hat parking brake, and Electronic parking brake—based on the rear brake design and how application force is generated.

Next, identification matters because “adjustment” lives in different places. Some vehicles adjust at the rear shoes, others at the cable equalizer, and some require an EPB service mode.
How can you tell if it’s cable-operated or electronic (EPB)?
A system is likely manual cable-operated if you have a lever or foot pedal that physically tensions a cable. It’s likely EPB if you have a dashboard/console switch with a “P” icon and you hear motors actuating at the rear.
To illustrate:
- Manual: lever/pedal feel changes with tension; cables run to the rear.
- EPB: switch command; actuators (often on rear calipers) apply force; the system may auto-apply.
EPB design and control strategies are a deep topic in engineering literature, but for owners, the practical takeaway is simple: EPB repairs often require mode changes or scan-tool procedures before rear brake work. (Source: sciencedirect.com)
Do you have rear drums or rear rotors with a “drum-in-hat” parking brake?
There are 2 common rear layouts for non-EPB vehicles: classic rear drums (where the parking brake uses the same shoes/drum) and rear discs with a separate mini-drum inside the rotor hat (drum-in-hat).
More importantly, drum-in-hat systems are famous for:
- Shoe delamination or contamination
- Hardware corrosion
- Adjustment that’s ignored because the service brakes still “work fine”
That’s why parking brake repair often shows up as a surprise: you don’t notice until the vehicle won’t hold on a slope.
What causes a parking brake to fail to hold, stick, or drag?
There are 5 main cause groups: (1) slack/out-of-adjustment, (2) seized or stretched cables, (3) worn/contaminated shoes and hardware, (4) seized rear levers or caliper mechanisms, and (5) electronic actuator/control faults—based on where the force chain breaks down.

Besides the obvious “old parts,” the most overlooked cause is this: the parking brake is a system of levers, and small friction points (rusted pivots, dry shoe pads, corroded backing plates) can steal most of your applied force.
Which parts most commonly fail (cables, shoes, hardware, calipers, equalizer)?
The most common failures follow a predictable pattern:
- Cable stretch or corrosion
Stretch shows up as extra travel and weak hold. Corrosion shows up as delayed return, partial release, or complete seizure. - Shoe wear or contamination (especially drum-in-hat)
Worn/contaminated shoes clamp poorly even when properly adjusted. - Hardware fatigue
Return springs weaken or break, shoe guides corrode, and shoe contact pads develop grooves that stop smooth movement. - Rear parking lever/caliper mechanism binding
A lever that doesn’t fully return can create continuous drag. - Equalizer imbalance
Uneven tension can cause one wheel to hold/drag while the other barely engages.
According to a study by Universiti Teknologi Malaysia from the Faculty of Mechanical Engineering, in 2013, a drum-type parking brake model showed good correlation with test bench results and highlighted how system geometry and friction factors directly influence holding performance—meaning small mechanical losses can materially reduce effective brake torque. (Source: researchgate.net)
Can weather, rust, or heat make a parking brake stick?
Yes—weather and corrosion can make a parking brake stick, because (1) moisture can freeze in cable housings, (2) rust can bond shoes to drum surfaces, and (3) heat cycles can accelerate corrosion and change clearances.
More specifically, use Winter freezing parking brake tips when temperatures dip:
- If your parking brake is cable-based and you park after driving through slush/water, consider leaving the parking brake off on flat ground and relying on wheel chocks and transmission parking position (follow your owner’s manual and local conditions).
- Apply and release the parking brake periodically to keep linkages moving.
- Inspect cable boots and housings for cracks that invite moisture.
How do you diagnose the problem step-by-step before you start replacing parts?
The best diagnostic method is a 7-step inspection and isolation sequence that confirms the symptom, locates the loss point in the force chain, and verifies whether adjustment will work—so you avoid replacing parts you don’t need.
To begin, treat diagnosis like a map: you’re tracking force from the lever/switch → cable/actuator → rear mechanism → wheel hold.
Step 1: Identify the exact symptom
Weak hold? Long travel? Stuck on? One side dragging? Warning light?
Step 2: Confirm full release
Ensure the lever/pedal is fully down and returns freely, or the EPB indicates release.
Step 3: Check rear wheel behavior (safe lift)
On level ground, use proper jack points and stands. With the brake released, rear wheels should rotate freely with minimal resistance (some driveline resistance can exist depending on vehicle design; compare side-to-side).
Step 4: Engage parking brake and compare both sides
If one side locks and the other doesn’t, suspect cable branch imbalance or a seized mechanism on the weak side.
Step 5: Inspect visible cable/equalizer movement
Have a helper apply and release while you watch the equalizer (if accessible). No movement or delayed return is a clue.
Step 6: Inspect rear mechanism
On drum/drum-in-hat, look for rusted contact pads and weak springs. On integrated caliper levers, confirm the lever returns to its stop.
Step 7: Decide: adjust vs repair vs replace
If parts move freely and shoes have life: adjust. If parts bind or cables don’t return: repair/replace.
What quick tests confirm “adjustment needed” vs “parts failure”?
Adjustment wins when the system moves smoothly but has excess slack; parts failure wins when the system doesn’t move freely or can’t return to rest.
However, here are practical “tell” tests:
- Travel increases gradually over months: often adjustment or wear.
- Travel changes suddenly: often broken hardware, cable damage, or a slipped connection.
- One wheel hot: often a seized cable branch or binding rear lever/shoe hardware.
- Lever feels gritty or doesn’t return: often cable housing corrosion.
How do you pinpoint whether the issue is at the handle/pedal, cable, or rear brakes?
You pinpoint location by checking what changes when force is applied:
- If the lever/pedal feels normal but rear wheels don’t react: suspect cable disconnect, equalizer failure, or rear lever seizure.
- If the lever/pedal feels loose and you can’t build tension: suspect cable stretch/slack or broken linkage.
- If tension builds but holding is weak: suspect rear shoe condition/adjustment or mechanism geometry.
- If it holds but won’t release: suspect return springs, rear lever binding, or cable seizure.
This logic keeps your brake service efficient and prevents “random parts swapping.”
How do you fix and adjust a weak parking brake so it holds again?
The most reliable repair method is (1) restore rear brake baseline, (2) adjust the rear mechanism, (3) adjust cable tension, and (4) verify hold and release, which typically fixes weak hold without creating drag.
Then, execute the Weak parking brake adjustment steps in the correct order—because cable-only adjustment can mask worn shoes and often creates the exact problem you don’t want: Grinding or dragging rear brakes from parking brake.
Safety setup (do not skip):
- Level ground, wheel chocks, proper jack stands
- Eye protection and gloves
- Avoid working under a vehicle supported only by a jack

How do you adjust the parking brake cable and equalizer correctly?
Cable/equalizer adjustment should be the final tuning step, not the first.
General method (varies by vehicle):
- Release the parking brake fully.
- Confirm rear mechanisms move freely and return to stops.
- Adjust the rear shoes/mechanism first (where applicable).
- Tighten the cable at the equalizer/adjuster until slack is removed.
- Stop as soon as the brake engages firmly within normal travel—do not “crank it tight.”
- Verify both rear wheels apply evenly when engaged and spin freely when released.
Common mistakes that cause repeat problems:
- Tightening cable to “compensate” for worn shoes
- Over-tightening until the brake drags at rest
- Ignoring one-side imbalance (equalizer not centered)
If you’re planning a Parking brake cable replacement overview job, note that a new cable often changes required adjustment because the old cable may have stretched or corroded internally.
How do you adjust rear drum brakes or drum-in-hat shoes for proper clearance?
Drum and drum-in-hat systems typically use a star wheel or adjuster mechanism. The goal is minimal clearance with no drag when released.
A common approach:
- Remove the wheel and access the adjuster (through backing plate slot or with rotor removed on drum-in-hat).
- Expand shoes until you feel light drag when turning by hand.
- Back off slightly until drag is just barely present or disappears (depending on spec).
- Reassemble and test holding power with the parking brake applied.
If you have drum-in-hat and the rotor won’t come off easily, the shoes may be over-adjusted or stuck. Forcing removal can break hardware—slow down and correct the adjustment first.
When should you replace parking brake cables, shoes, or hardware instead of adjusting?
Replacement is the better choice when:
- The cable does not return smoothly (seized housing, frayed cable strands)
- The rear lever/caliper mechanism binds or won’t return
- Shoes are contaminated, cracked, or delaminating
- Hardware is rusted, weak, or broken
- The backing plate contact pads are grooved enough to trap the shoe
At that point, adjustment becomes temporary. That’s where a Parking brake cable replacement overview helps: cable replacement typically involves routing, clip removal, equalizer setup, and final adjustment—plus careful checks to prevent binding at suspension travel.
How do you free a stuck parking brake and prevent it from sticking again?
To free a stuck parking brake, use a controlled release and inspection process—(1) confirm it’s stuck, (2) identify whether the cable or rear mechanism is seized, and (3) correct the binding point—so you avoid damaging the rear brakes by forcing movement.

Next, understand the difference between “stuck on” and “won’t release fully.” Both can cause drag, but a fully stuck system often requires parts replacement.
Common Parking brake stuck on causes:
- Frozen moisture inside cable housings
- Rust bonding shoes to the drum surface
- Seized rear parking lever
- Broken/weak return springs
What should you do if the cable is seized or the lever won’t return?
If the cable is seized, the correct fix is usually cable replacement, not aggressive lubrication. Lubricants may temporarily improve motion but don’t reverse internal corrosion, and they can attract grit.
Practical steps:
- Confirm the lever/pedal is fully released.
- Check the equalizer—does it return to neutral?
- At the rear mechanism, look for a lever that isn’t returning to its stop.
- If the lever won’t return even with cable disconnected, the rear mechanism is binding.
- If the lever returns when cable is disconnected, the cable/housing is the culprit.
This is where Parking brake cable replacement overview matters most: a seized cable is a safety issue, not a “nice-to-have” fix.
What should you do if only one rear wheel is dragging?
If only one wheel drags, the system is imbalanced. The top three culprits are:
- one seized cable branch,
- one binding rear lever/shoe assembly,
- uneven hardware wear or adjustment.
Correct path:
- Compare left vs right cable movement and return
- Inspect that side’s shoe pads and springs (drum/drum-in-hat)
- Confirm integrated caliper parking lever returns fully (disc-integrated)
- Adjust for balanced engagement—don’t “solve” it by overtightening the whole system
How do you verify the repair worked (and didn’t create drag)?
Verification is a 4-part checklist—(1) release test, (2) engagement test, (3) heat/drag test, and (4) re-check after a short drive—which ensures the parking brake holds securely without causing unintended rear brake drag.
More importantly, verification is where you prevent repeat comebacks. Many DIY repairs “feel better” but quietly create low-grade drag that eats rear brakes.
Safety checks after parking brake repair (checklist):
- With brake released, both rear wheels rotate similarly
- With brake applied, both rear wheels resist rotation firmly
- Lever/pedal travel is within a reasonable range and feels consistent
- No grinding, scraping, or metallic noises after reassembly
- No burning smell after a short drive
- Wheel temperatures are similar side-to-side
Can you test the parking brake on a hill safely at home?
Yes—you can test it safely on a hill if you use (1) a low-traffic area, (2) a mild slope, and (3) a controlled procedure with a backup plan.
Safe method:
- Position the vehicle on a gentle slope with ample runoff and no traffic.
- Apply the parking brake fully.
- Keep your foot on the service brake while you shift into park/neutral according to your transmission type.
- Slowly ease off the service brake and confirm the vehicle does not move.
- If it creeps, stop immediately and reassess adjustment or component condition.
What are the signs you over-adjusted and created brake drag?
Over-adjustment shows up as:
- Rear wheels don’t spin freely when lifted
- Hot smell or smoke after a short drive
- Reduced fuel economy, sluggish acceleration
- Grinding or dragging rear brakes from parking brake (noise that changes with speed)
- Rear brake components wear unusually fast
If you suspect drag, back off adjustment, confirm rear mechanisms return to stops, and re-run the verification checklist.
Should you DIY parking brake repair or take it to a shop?
DIY wins in basic adjustment and visible mechanical fixes; a shop is best when corrosion, seized mechanisms, or Electronic parking brake procedures increase risk—so the “best choice” depends on tools, vehicle type, and safety constraints.

However, here’s a clean decision rule:
- DIY is reasonable if you can safely lift the car, identify the system type, and confirm release/hold without guessing.
- A shop is smarter if you have EPB faults, severe corrosion, broken hardware, or repeated drag/overheat symptoms.
Also consider your time: parking brake repair can be quick (adjustment) or time-consuming (drum-in-hat hardware replacement on rusted vehicles).
If you’re budgeting, a Parking brake repair cost estimate varies heavily by:
- System type (drum-in-hat and EPB tend to cost more)
- Corrosion level
- Whether parts are replaced or only adjusted
- Labor time for cable routing and rear disassembly
Do you need special tools or scan tools for electronic parking brakes (EPB)?
Yes—many EPB systems require special procedures, because (1) the actuator can clamp unexpectedly, (2) pads/rotors service may require a retract/service mode, and (3) the control module may store faults if steps are skipped.
This is where EPB service mode and brake work precautions matter:
- Use the correct service mode procedure before rear brake work (often via scan tool or vehicle menu sequence)
- Never force caliper pistons without confirming EPB state
- Follow the correct re-initialization after reassembly
Engineering research on EPB modeling/control emphasizes the need to maintain desired clamping force under varied conditions, which is why systems rely on feedback strategies and controlled actuation rather than purely manual tension. (Source: sciencedirect.com)
What does a shop typically do during a parking brake repair?
A competent shop brake service typically includes:
- System identification (manual vs EPB, drum/drum-in-hat vs integrated)
- Inspection for seized cables, worn shoes, damaged hardware
- Adjustment of rear mechanism and cable (in correct order)
- Replacement if needed (cables, shoes, hardware, calipers/actuators)
- Verification (hold test + release/drag check)
- Diagnostics for warning lights if EPB is involved
If you arrive with clear Car Symptoms—like “one rear wheel hot” or “stuck on after rain”—you help the shop narrow the cause quickly.
How does an electronic parking brake (EPB) repair differ from a cable e-brake?
Electronic parking brake repair differs because the system replaces manual cable tension with motorized actuation and software logic, so diagnosis emphasizes actuator behavior, fault states, and correct service procedures—not just mechanical slack.

In addition, EPB can be integrated with features like auto-hold and hill assist, which means a “simple rear brake job” can trigger faults if the system isn’t put into the correct mode first.
What are the most common EPB failure modes (motor, switch, module, caliper mechanism)?
Common EPB failure modes include:
- Actuator motor issues (won’t apply/release, noisy operation)
- Switch failure (intermittent command)
- Module or wiring faults (stored codes, warnings)
- Mechanical binding at the caliper mechanism (actuator works but force doesn’t translate)
If the vehicle both warns and drags, treat it as urgent: verify the system is releasing, then diagnose the electronic cause.
When do you need EPB service mode or a scan tool, and what happens if you skip it?
Yes—you often need EPB service mode, because skipping it can (1) prevent piston retraction, (2) damage internal mechanisms, and (3) trigger persistent warnings that require a reset.
Treat “service mode” as part of the repair procedure, not an optional step. The safest approach is always to follow the vehicle’s service instructions for rear brake work and EPB initialization.
Can EPB problems mimic a weak cable parking brake?
Yes—EPB problems can mimic a weak parking brake, because the symptoms (poor holding force, warning light, intermittent apply) can look like cable slack when the real issue is insufficient actuator clamping or a system fault preventing full application.
Use observation to differentiate:
- Manual cable: travel changes are a big clue.
- EPB: audible motor behavior, warning messages, and apply/release consistency are key clues.
What preventive habits reduce repeat parking brake issues (rust, sticking, drag)?
Prevention is mostly about keeping mechanisms moving and avoiding corrosion traps:
- Use the parking brake regularly so linkages don’t seize
- After heavy wet/salt exposure, avoid parking with a hot, wet drum-in-hat if your region freezes overnight
- Address early drag symptoms immediately (heat and smell are your warning signs)
- If you’ve had a seized cable before, inspect housings and boots periodically
And if your car lives in snow/ice climates, keep Winter freezing parking brake tips in mind: moisture + inactivity is the fastest path to a stuck system.
Evidence (if any)
According to a study by Universiti Teknologi Malaysia from the Faculty of Mechanical Engineering, in 2013, validated a drum-type parking brake model against test-bench measurements and showed that parking-brake holding performance is strongly dependent on system parameters such as friction behavior and geometry—reinforcing why small mechanical losses can noticeably reduce real-world holding torque. (Source: researchgate.net)


