How-To Cabin Air Filter Replacement for Drivers: HVAC Intake Filter
Cabin air filter replacement is the fastest way to restore clean airflow inside your vehicle, reduce musty odors, and keep ventilation working as intended—especially when dust, pollen, and road grime build up in the filter media.
Beyond comfort, a timely filter change can help your climate system move air more efficiently, which matters during hot summers, cold winters, and rainy days when you rely on steady airflow to keep windows clear.
In this guide you’ll learn how to recognize a clogged filter, locate it by vehicle layout, choose the right filter type, and replace it safely—without breaking trim clips or installing the filter backward.
To begin, let’s start with what the cabin filter actually does and why this small part can create big symptoms when it’s overdue.
What is cabin air filter replacement, and what does the filter actually do?
Cabin air filter replacement is the process of removing the old HVAC intake filter and installing a new one so incoming ventilation air is filtered before it reaches the cabin vents.
To connect this to real-world symptoms, think of the cabin filter as a “gatekeeper” between outside air and your nose: as it loads with debris, it restricts airflow and can trap moisture and odors.
Most vehicles pull air through a cowl intake near the windshield, then route it through the HVAC box. The cabin filter sits in that path and captures dust, soot, pollen, and leaves before air passes through the blower and across the heater core or evaporator. In other words, the filter is a protective layer for both passengers and the HVAC components downstream.
Root function: it reduces particulate load entering the cabin and helps keep internal HVAC surfaces cleaner. A cleaner HVAC box can mean fewer stale smells over time because there’s less organic material available to hold moisture.
Key practical detail: cabin filters are directional. Many have an “airflow” arrow. Installing it backwards can reduce efficiency and create fitment gaps that let air bypass the media.
When should you plan cabin air filter replacement based on real driving conditions?
You should plan cabin air filter replacement when airflow drops, odors increase, or your mileage/time interval suggests the filter is loaded—especially if you drive in dust, traffic, construction zones, or heavy pollen.
To make this decision easier, use a “conditions-first” approach: the same car can need earlier changes in a dusty city than on clean highways.
Condition-based triggers often beat calendar rules. If you notice weaker air coming from vents at the same fan setting, that restriction may be the filter. If your vents smell musty after rain or after using recirculation, moisture and trapped debris can be contributing.
Seasonal pattern: many drivers feel the biggest change after spring pollen season and after fall leaf drop. Those are the times the intake path tends to load up fastest.
Cabin comfort clue: if you need higher fan speeds than usual to feel the same airflow, your filter may be adding resistance, which can also increase perceived HVAC noise because the blower works harder.
- Replace sooner if you drive behind diesel traffic, in wildfire smoke regions, on unpaved roads, or park under trees.
- Replace on schedule if your driving is mostly suburban/highway with moderate pollution.
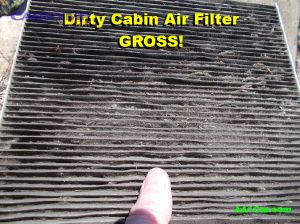
- Inspect first if you’re unsure: a quick peek at the filter edge can reveal heavy loading, leaves, or mold spots.
Next, let’s translate “overdue” into symptoms you can feel and verify in minutes.
What symptoms point to an overdue cabin air filter replacement?
The most common symptoms are reduced airflow, musty or dusty odors, louder fan noise, and quicker window fogging—because the HVAC system struggles to move and condition air smoothly.
To link symptoms to a clear check, you can compare airflow at the same fan setting before and after replacing the filter.

Airflow drop is usually the first sign. A clogged filter behaves like a partially blocked straw: the blower may spin, but the volume of air reaching the vents is reduced.
Odors can come from organic debris in the filter (leaves, pollen, dust) holding moisture. If the smell is strongest right when you turn the fan on—then fades—your filter or HVAC box may be the source.
Fan noise changes can happen when the blower is forced to operate at higher speeds to compensate. Sometimes the noise is simply “more whoosh,” but it can also be a higher-pitched strain sound.
Window fogging can worsen because defogging relies on steady airflow across glass. When airflow is limited, clearing moisture takes longer, especially in humid weather.
- Weak airflow even on high fan speed
- Dusty smell, musty smell, or “old sock” odor
- More visible dust settling on interior surfaces
- Foggy windows that take longer to clear
Now that you know what to look for, the next step is finding the filter in your specific vehicle layout.
Where is the cabin filter located for different vehicle designs?
Cabin filters are typically located behind the glove box, under the dashboard, or near the windshield cowl—depending on whether the HVAC box is packaged in the dash or fed from an external intake path.
To narrow it down quickly, start with the glove box area because it’s the most common placement on modern passenger cars.
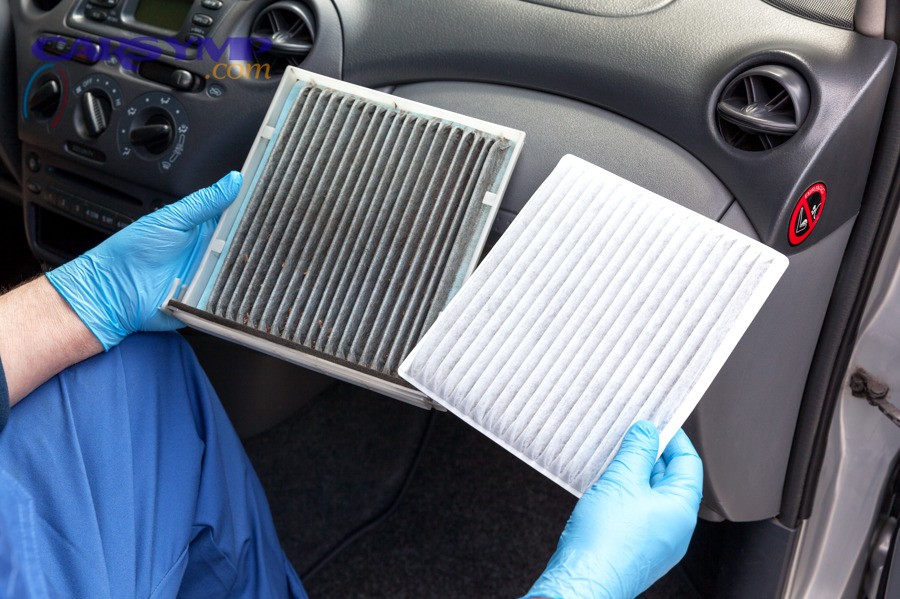
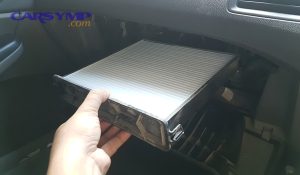
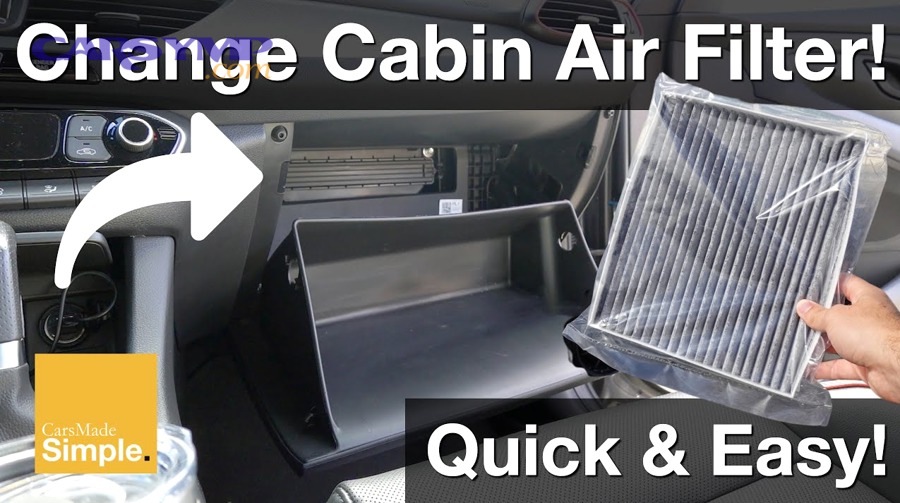
Behind the glove box (common): you drop the glove box door, release the dampener strap, and access a small rectangular filter door. This design is popular because it’s easy to service without lifting the car.
Under the passenger dash (common on some trucks/SUVs): the filter may sit low, near the blower motor housing. Access sometimes requires removing a trim panel or under-dash cover.
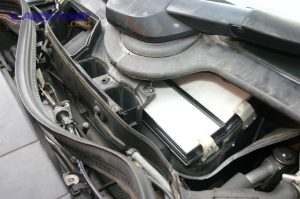
Cowl area or engine-bay edge (less common): some vehicles place the filter near the base of the windshield under a plastic cowl cover. This can be quick, but debris accumulation is often heavier because leaves collect in the cowl.
- Compact cars: frequently glove-box mounted for simple access.
- Large SUVs/trucks: may use under-dash packaging to fit larger HVAC housings.
- Some European models: can use cowl-side access with a sealed lid and gasket.
Next, let’s walk through a safe, repeatable replacement method that avoids broken tabs and misalignment.
How do you do cabin air filter replacement step by step without breaking trim?
The safest method is to access the filter door, remove the old filter slowly to avoid dumping debris, clean the housing lightly, and install the new filter in the correct airflow direction—then reassemble trim in reverse order.
To make this easier, prepare your workspace first: good lighting and a small vacuum prevent a messy spill into the blower area.

Step 1: Prepare — Park on level ground, turn the ignition off, and open the passenger door wide for access. Place a towel under the glove box area so any loose debris lands on the towel, not carpet.
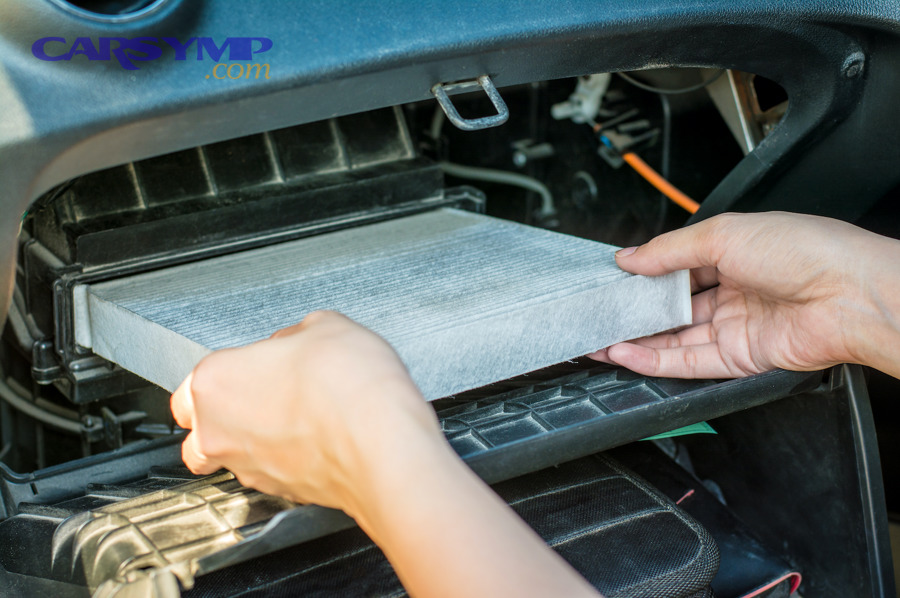
Step 2: Access the filter cover — If it’s behind the glove box, empty the glove box first. Release the side stops (often you squeeze the glove box inward) and unhook the dampener arm if present. Locate the rectangular filter cover and release its tabs gently.
Step 3: Remove the old filter carefully — Slide it out slowly. If it’s packed with leaves, pull it out in small increments so debris doesn’t fall into the housing.
Step 4: Clean the housing lightly — Use a soft brush and a vacuum hose near (not inside) the blower opening. Avoid pushing debris deeper into ducts. A dry microfiber wipe is usually enough.
Step 5: Install the new filter correctly — Match the “airflow” arrow to how air moves through the HVAC box. If your filter is marked “UP,” respect orientation. Ensure the filter edges seat evenly so air doesn’t bypass the media.
Step 6: Reassemble and verify — Reinstall the cover, reattach dampener, return glove box stops, and run the fan at a mid setting. Confirm airflow feels stronger and no rattles appear.
DIY cabin air filter replacement steps are often simple, but small mistakes cause most post-install problems. To help you estimate effort before you start, the table below summarizes common access styles, typical difficulty, and what you’ll need.
This table helps you predict whether you’ll need only basic hand tools or extra time for trim panels and tight access.
| Access style | Typical tools | Common difficulty | What to watch for |
|---|---|---|---|
| Behind glove box | Usually none | Easy | Glove box stops, dampener strap |
| Under passenger dash | Trim tool, small socket | Medium | Limited space, panel clips |
| Cowl area | Clip tool, screwdriver | Medium | Leaf debris, cover seal alignment |
For a visual walkthrough, this embedded video demonstrates the general process and the key “slow pull” technique to avoid dumping debris into the HVAC box.
Next, let’s cover the installation errors that create new noises, weak airflow, or recurring smells right after the job.
What are the signs of incorrect installation after cabin air filter replacement?
Incorrect installation usually shows up as persistent weak airflow, whistling noises, a loose or rattling filter door, or a filter that looks bent or collapsed when you recheck it.
To keep the flow logical, diagnose by category: direction, sealing, and reassembly—because each category has a distinct symptom pattern.

Wrong direction (airflow arrow reversed): the filter may not seat correctly, and filtration performance can drop. Some filters also have a support layer designed to face the pressure side; reversing it can cause the media to deform.
Poor seal or misfit: if the filter is not the correct size or the edges aren’t seated, air will bypass the filter. This can make the cabin dusty even with a new filter installed.
Cover not fully latched: a slightly open door can create a whistle at higher fan speeds. It can also rattle on bumps, which drivers sometimes misdiagnose as a blower problem.
- New whistling sound that changes with fan speed
- Rattle behind glove box or under dash on bumps
- Filter looks wrinkled, crushed, or bowed when removed
- Dust still blowing out shortly after replacement
Now that you can avoid common mistakes, the next decision is choosing the right filter type for your needs and budget.
Which filter type fits your needs during cabin air filter replacement?
The best filter type depends on what you want to optimize: standard particle filtration for value, activated carbon for odor control, or high-efficiency media for fine particle reduction—balanced against airflow and cost.
To choose confidently, compare the media and the tradeoff: higher filtration often means higher resistance, so quality and fit matter.
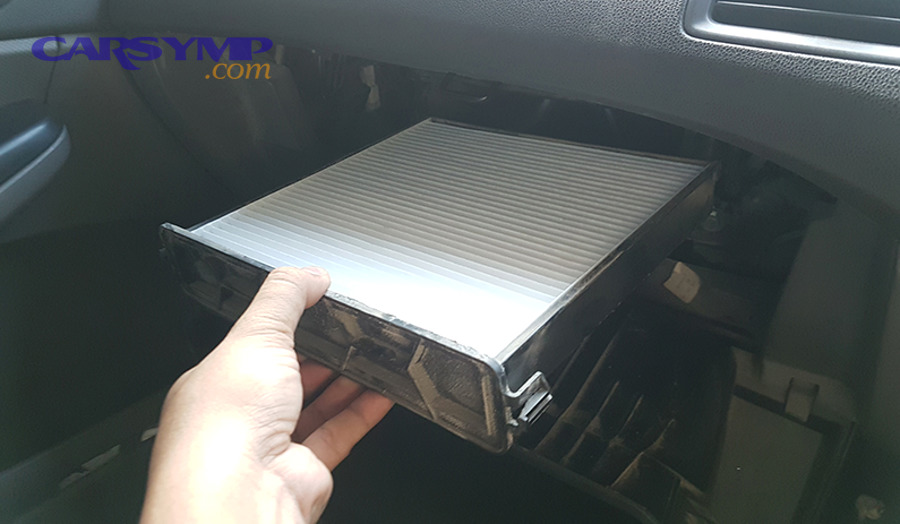
Standard particulate filters capture common dust and pollen at a reasonable airflow level. They’re a solid default when you want consistent performance with minimal restriction.
Activated carbon (charcoal) filters add an odor-adsorbing layer that can help with exhaust smells, smoke odors, and general “city air” funk. This can be especially helpful if you commute in traffic or park in garages where odors linger.
High-efficiency media can reduce finer particles more effectively, but the real-world result depends on the specific filter design, the sealing quality, and whether the vehicle’s blower can maintain airflow without excessive strain.
- HEPA vs charcoal cabin filter comparison: HEPA-style media focuses on finer particle capture, while charcoal targets odor molecules; some premium filters combine both layers.
- In dusty conditions, prioritize fit and sealing over marketing claims.
- If airflow is already marginal, avoid filters that feel overly dense unless the vehicle supports them well.
Next, let’s connect filter choice to comfort outcomes you’ll actually notice—airflow strength, vent smell, and how “fresh” the cabin feels day to day.
Does cabin air filter replacement change airflow, comfort, and defogging performance?
Yes—cabin air filter replacement can noticeably improve airflow and cabin comfort because a clean filter reduces restriction, letting the blower move more air through vents at the same fan setting.
To keep the diagnosis practical, verify improvement with a simple before/after test: same fan speed, same vent mode, same temperature setting.
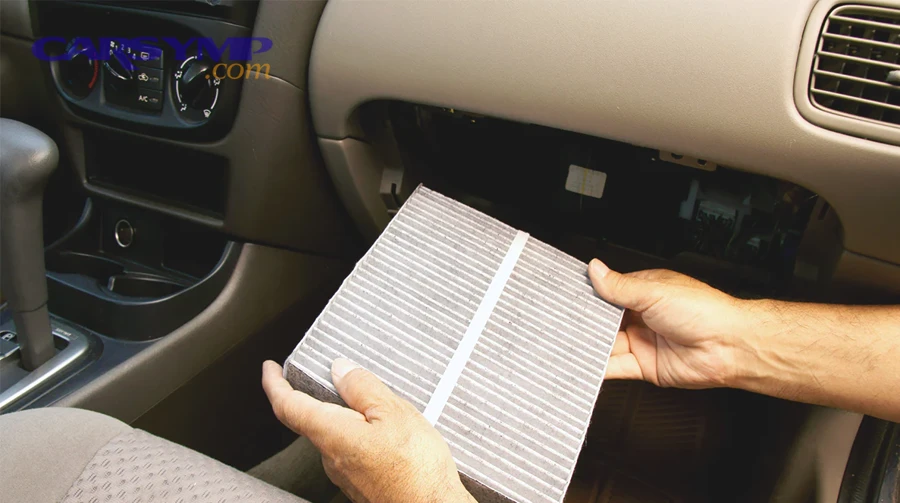
When restriction drops, you often feel stronger air at the vents immediately. That can reduce the need to run the fan at maximum, which can make the cabin quieter and more pleasant on long drives.
Stronger airflow also helps in humid weather because clearing fog relies on moving conditioned air across the glass. If the filter was severely clogged, the improvement can feel “night and day,” especially during rain.
Inside the HVAC box, smoother airflow can reduce turbulence and odd resonances that sometimes sound like faint whistles at mid fan speeds.
AC and heater performance impact can be noticeable in daily comfort because the system can deliver the conditioned air more effectively when airflow is not choked at the intake.
Next, let’s talk money—what you might pay at a shop, what factors change the price, and when DIY makes more sense.
What does cabin air filter replacement typically cost, and what changes the price?
Cabin air filter replacement cost is usually driven by filter type, vehicle access difficulty, and labor rates—so the same job can be inexpensive on a glove-box design and higher on tight under-dash or cowl-access setups.
To estimate intelligently, split the price into parts: the filter itself and the labor to access and reassemble components.
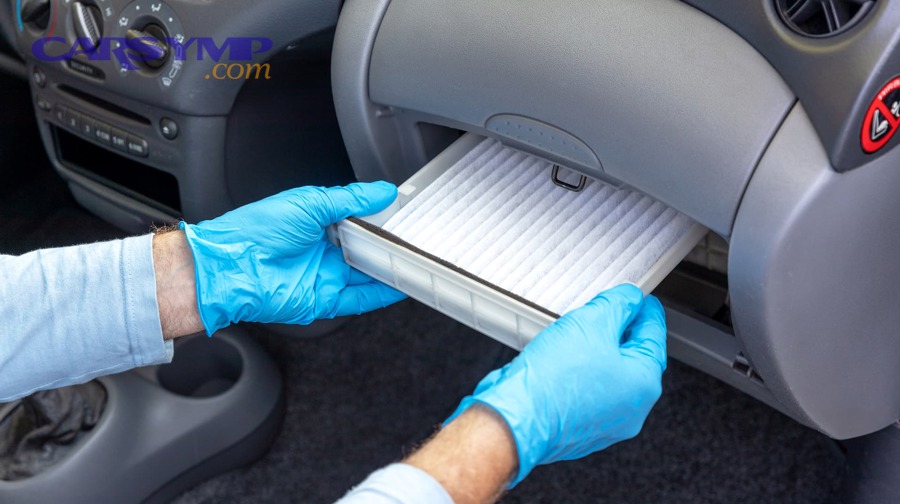
Filters range from basic particulate media to premium multi-layer designs. Access time matters: if the filter is behind a simple door, labor is minimal; if trim panels or tight spaces are involved, labor climbs.
Shops may also bundle the service with multi-point inspections or seasonal HVAC checks. This can be useful if you want a quick overall health snapshot, but it can also inflate the bill if you only needed the filter.
Cost to replace cabin air filter at a shop depends heavily on local labor rates and the complexity of access, so the best estimate comes from comparing quotes that specify both the filter type and labor time.
- Filter choice: standard vs odor-control vs high-efficiency media
- Access design: glove box (easy) vs under-dash/cowl (more labor)
- Labor market: local rate differences can outweigh the filter price
- Bundling: extra inspections can add cost and value—depending on what you need
Next, let’s shift from cost to value: how a clean filter can improve the cabin environment for sensitive passengers.
How does cabin air filter replacement support cleaner cabin air for sensitive passengers?
Cabin air filter replacement supports cleaner cabin air by reducing incoming dust and pollen, which can lessen irritation for sensitive passengers—especially during high-allergen seasons and in heavy traffic environments.
To connect comfort to a measurable habit, think in “exposure windows”: every minute you run ventilation without effective filtration is another minute the cabin can accumulate irritants.

A clean filter helps keep the cabin smelling fresher and can reduce the fine dust film that settles on dashboards and seats. It’s not a medical treatment, but it is a practical step that can improve perceived air quality during daily commuting.
Odor-control filters can help in stop-and-go traffic or near industrial areas where smells linger. High-efficiency filters can be appealing for people who frequently drive in smoke or dusty environments, as long as airflow remains acceptable.
Allergies and air quality benefits are often noticed most when you compare your typical commute during peak pollen season before and after a filter change, especially if you previously needed recirculation just to feel comfortable.
Next, let’s address the common question: if the filter is “just for the cabin,” why does it sometimes relate to blower noise and long-term HVAC health?
Can a clogged cabin filter increase blower noise or strain over time?
Yes—when a cabin filter is heavily clogged, the blower may need higher speed to achieve the same airflow, which can increase noise and perceived strain even if the blower motor is still functioning normally.
To keep this practical, compare fan noise at the same airflow goal: if you now need higher fan settings than before, restriction is a likely culprit.
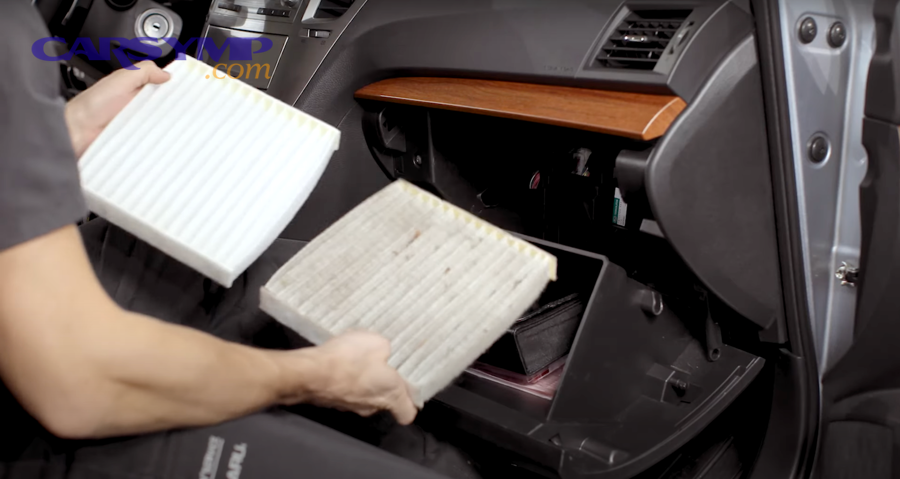
Restriction changes the pressure the blower works against. In mild cases you’ll simply notice weaker airflow; in severe cases you may hear more pronounced “whooshing” as air tries to squeeze through loaded media.
If debris bypasses the filter because of poor fit, that debris can settle in the blower housing or HVAC box. Over time this may contribute to noise, imbalance, or contamination smells.
Preventing blower motor strain with clean filters is a sensible maintenance mindset: reducing unnecessary restriction can help the system operate at lower fan speeds for the same comfort level.
Next, let’s close the main section with quick clarifications to the most common questions drivers ask before buying a filter or starting DIY.
Frequently asked questions about cabin air filter replacement
These quick answers address the most common “should I,” “which one,” and “what if” questions so you can decide fast and avoid repeat work.
To keep the flow helpful, each answer includes a simple check you can perform without special tools.
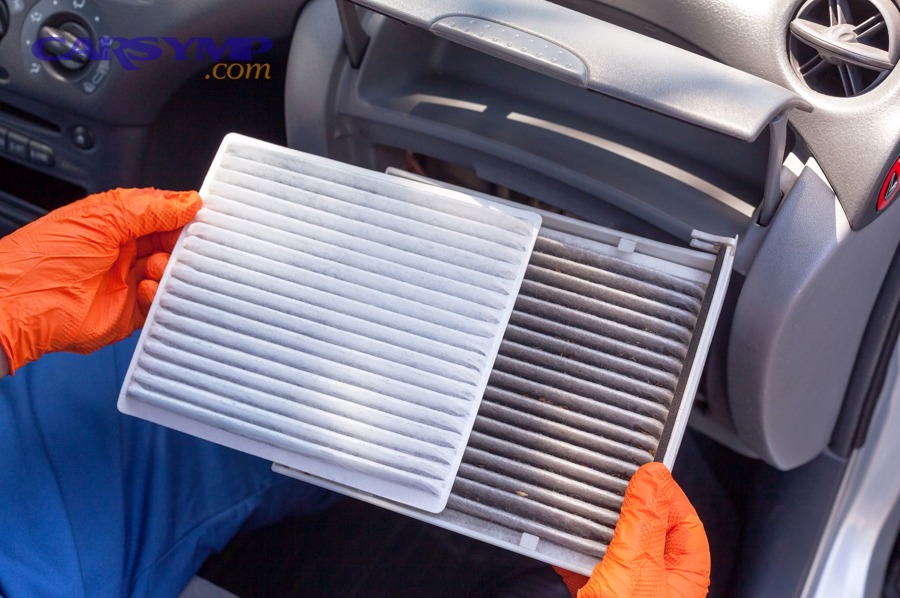
Do you need tools for most cabin air filter replacement jobs?
Usually no—many vehicles use glove-box access with simple tabs, though some under-dash designs need a trim tool or small socket. To confirm, check for a visible filter door behind the glove box and look for tool-free latches.
Is it okay to vacuum and reuse a cabin filter?
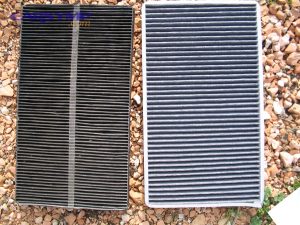
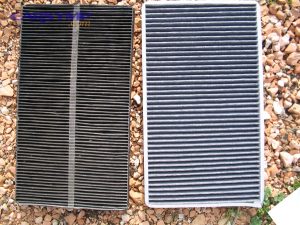
Vacuuming can remove loose surface dust but won’t restore the filter’s internal capacity or remove embedded fine particles. To decide, inspect the pleats: if they’re dark, packed, or damp, replacement is the better choice.
Should you replace the filter if you mostly use recirculation?
Yes, because most systems still mix some outside air, and recirculation can trap humidity and odors if the filter and HVAC box are dirty. To check, smell the vents on first start and look for faster fogging or mustiness.
What if the new filter makes airflow worse?
That often indicates wrong size, wrong direction, or a very dense premium filter that your system doesn’t tolerate well. To fix it, confirm the part number, recheck the airflow arrow, and verify the filter isn’t buckling in the slot.
Contextual Border
Below is a focused expansion on long-term habits and edge cases that improve results after replacement, without changing the core how-to steps above.
Long-term habits that keep your cabin filter cleaner between replacements
Long-term results come from reducing what reaches the intake and keeping the HVAC box dry and clean, so your filter loads slower and odors are less likely to return.
To apply these habits effectively, pick the ones that match your environment—trees, dust, city traffic, or seasonal allergens.
How can you reduce debris entering the cowl intake during leaf and pollen seasons?
Start by clearing leaves from the cowl area and windshield base regularly, because that’s where organic debris accumulates before it can get pulled toward the HVAC intake. To make it routine, do a quick sweep every time you wash the car or after parking under trees.
Cabin air filter location by car type matters here: if your design uses a cowl-side filter, debris management at the windshield base becomes even more important for both airflow and odor prevention.
What simple checks help you catch airflow restriction early without disassembly?
Use a “same-setting” test: set the fan to a fixed speed and vent mode, then note airflow feel at the vents each month. If airflow gradually drops, the filter is loading. This is also a practical way of Preventing blower motor strain with clean filters because you’ll replace before restriction becomes severe.
When should you consider broader HVAC service instead of only replacing the filter?
If odors persist after replacement, or airflow remains weak with a clean filter and clear vents, the issue may be deeper in the HVAC box, blower wheel, or doors. In those cases, professional diagnosis may overlap with car AC repair work—especially if you also notice inconsistent temperatures or unusual noises.
How do you track replacement intervals so you don’t forget?
Log the date and mileage in your notes app or on a small card in the glove box. Then tie the next check to an easy anchor, like an oil change interval. How often to replace cabin air filter varies by environment, so tracking your own pattern is usually more accurate than a one-size rule.