


A brake caliper clunk or rattle is usually diagnosable at home because the sound typically comes from one of three places: loose pad hardware, loose caliper slide hardware, or loose caliper bracket bolts—and each has a repeatable test that confirms it before you buy parts.
Next, once you identify the exact loose component, the fix is rarely mysterious: re-seat or replace the hardware kit, clean and lubricate slide pins correctly, and torque fasteners to spec so the caliper can’t shift under load.
Then, you also need a safety filter, because some noises are annoying but low-risk, while others can indicate fasteners backing out or the caliper moving enough to stress the brake hose, which should change your “drive vs park it” decision immediately.
Introduce a new idea: even when the noise feels like it’s “definitely brakes,” you can still rule out look-alike suspension clunks with a couple of controlled comparisons—so you stop chasing the wrong problem and fix the right one the first time.
Is the clunk or rattle actually coming from loose brake hardware?
Yes—brake caliper clunk from loose brake hardware is very likely if (1) the sound changes with light braking, (2) it appears over bumps at low speed, and (3) it’s localized to one corner near the wheel.
To reconnect this to your symptoms, the goal is to prove the noise reacts to brake loading, because that separates loose brake hardware from most suspension noises.
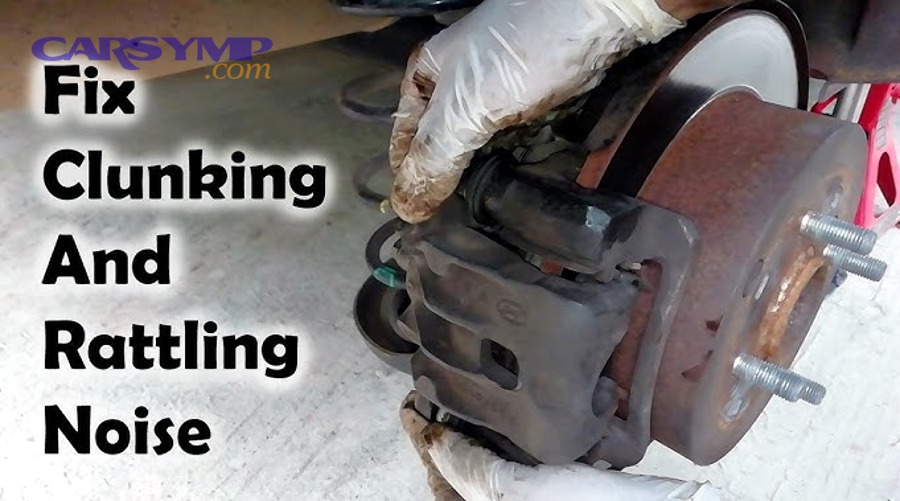
Can light brake pedal pressure make the noise disappear?
Yes—if light brake pedal pressure stops the caliper clunk, it usually means the pads or caliper are moving freely until the pads are lightly clamped, and that clamp temporarily removes the play.
More specifically, light pressure is a “diagnostic clamp”: it takes up clearance between pad ears and abutment clips, presses the pad stack against the bracket lands, and reduces caliper rock on the slide pins.
Use this quick test safely:
- Drive at parking-lot speed on a flat surface.
- Create the noise (small bumps, driveway lip, or a gentle lane change).
- Apply just enough brake to feel the car “drag” slightly—not a full stop.
- Note whether the noise stops, reduces, or changes pitch.
What the result typically means:
- Noise stops completely: high odds of pad-to-bracket movement (wrong/missing abutment clips, loose anti-rattle clip, pad ears too loose).
- Noise reduces but doesn’t stop: could be slide pin clearance or a mixed issue (hardware + pin wear).
- Noise unchanged: either the brake isn’t the source, or it’s a brake-adjacent issue (bearing/hub movement causing knock-back, or a separate suspension clunk).
Transitioning from that test, you now want to match when the noise happens, because timing patterns are the fastest way to narrow the culprit.
Does the noise happen mostly over bumps vs only when braking?
Bumps-only clunks point more toward loose pad hardware, braking-only clunks point more toward bracket or caliper movement under torque, and bumps-plus-braking clunks often indicate multiple clearances stacking together.
However, you’ll get the cleanest interpretation when you describe the sound in a simple timeline:
- “clunking noise over bumps” at low speed that quiets with light braking: classic loose hardware signature (pads/abutment clips/anti-rattle clip).
- Single heavy clunk when you first brake or first reverse/drive transition: often bracket shift or fastener issue.
- Rhythmic click that matches wheel rotation: can be hardware contact or something rotating (shield, bearing, axle, tire).
A practical way to capture the pattern is to record a 10–15 second audio clip while you recreate the noise twice: once with no brake and once with light brake. If the “braked” version is quieter, you’ve strengthened the case for loose brake hardware.
Evidence: According to a study by the University of Wisconsin–Madison from the Department of Industrial & Systems Engineering, in 2014, observed acceptable torque error ranges in automotive fastening can be broad (from about 4% up to greater than 30%), which helps explain how “almost tight” fasteners can still allow small movements that become noise over time.
What does “brake caliper clunk” mean mechanically?
Brake caliper clunk is a low-frequency impact noise caused by physical clearance in the brake assembly—usually pads, caliper, or bracket shifting—most noticeable when road inputs or braking torque suddenly load and unload the parts.
To better understand why that matters, you’ll get faster diagnosis if you map the sound to the moving interface.
What’s the difference between a brake “clunk,” “rattle,” and “click”?
Clunk wins for “large clearance + sudden load,” rattle is best described as “small clearance + repeated vibration,” and click is optimal for “intermittent contact that can track rotation or direction changes.”
Meanwhile, each sound has a mechanical “fingerprint”:
- Clunk (one or two heavier knocks):
Usually bracket/caliper shift or pad stack movement that “hits a stop.”
Common triggers: first brake application, reverse-to-drive, pothole edge, hard steering input. - Rattle (rapid, lighter tapping):
Usually pad ears vibrating in the bracket, weak clips, or loose hardware springs.
Common triggers: washboard pavement, small repetitive bumps, low-speed chatter. - Click (sharp, single, repeating):
Can be pad edges contacting clips, a backing plate edge, a shield, or a rotating-related issue.
Common triggers: slow turns, wheel rotation, light brake drag.
If your noise is a true clunk, don’t treat it like squeal. Clunk is about clearance and impact, not friction resonance.
Transitioning from sound labels to physical parts, the next step is to identify which components can actually move enough to make that impact.
Which parts can physically move enough to create a clunk?
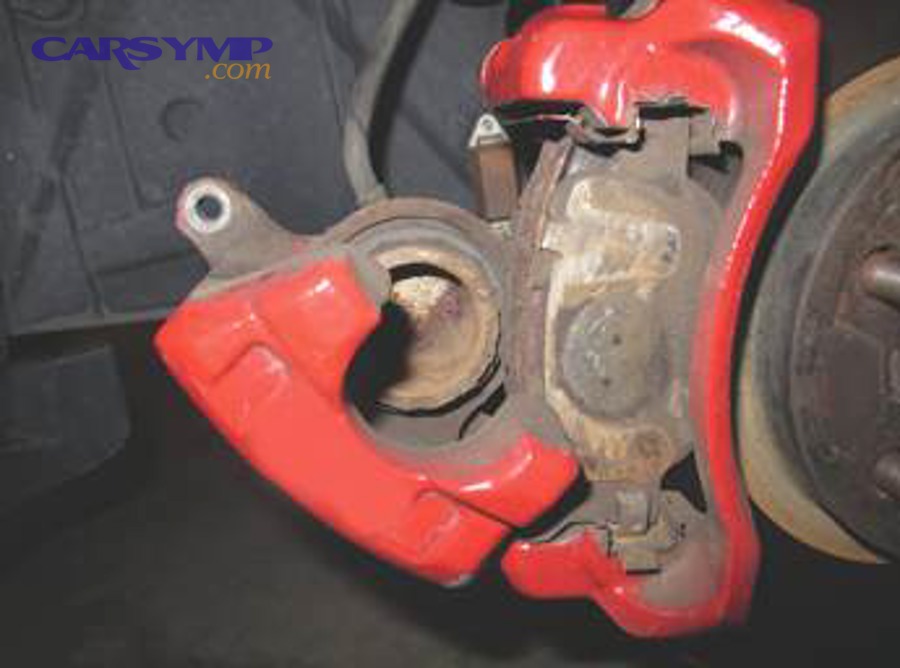
There are 3 main movement zones that create brake caliper clunk: (A) pad-to-bracket movement, (B) caliper-to-bracket movement on slide pins, and (C) bracket-to-knuckle movement at mounting bolts.
Specifically, think of the assembly as stacked layers:
- Pads & hardware layer (pad ears, abutment clips, shims, anti-rattle clip):
If the pad ears can slide or hop in the bracket lands, you’ll hear it most over bumps. - Caliper sliding layer (guide pins/slide pins, pin bushings, pin bores, boots):
If pins are worn or loose, the caliper can rock, especially during directional torque changes. - Bracket mounting layer (caliper bracket bolts, threads, washers, threadlocker):
If bolts lose clamp load, the entire bracket can shift, producing a heavier, more alarming clunk.
Evidence: According to a study by the University of Northern Iowa from the Department of Technology, in 2014, torque control and auditing practices were emphasized as necessary to ensure torque-controlled tooling remains accurate over time—supporting the idea that repeatable, verified torque is central to preventing fastener-related movement and noise.
Which loose brake hardware parts most commonly cause caliper clunk & rattle?
There are 4 main groups of loose brake hardware that cause caliper clunk & rattle—(1) anti-rattle/abutment clips, (2) pad shims and pad “fit” surfaces, (3) slide/guide pin hardware, and (4) caliper bracket bolts—based on where clearance exists in the assembly.
To make this actionable, you want a ranked checklist that starts with the highest-probability, lowest-cost fixes.
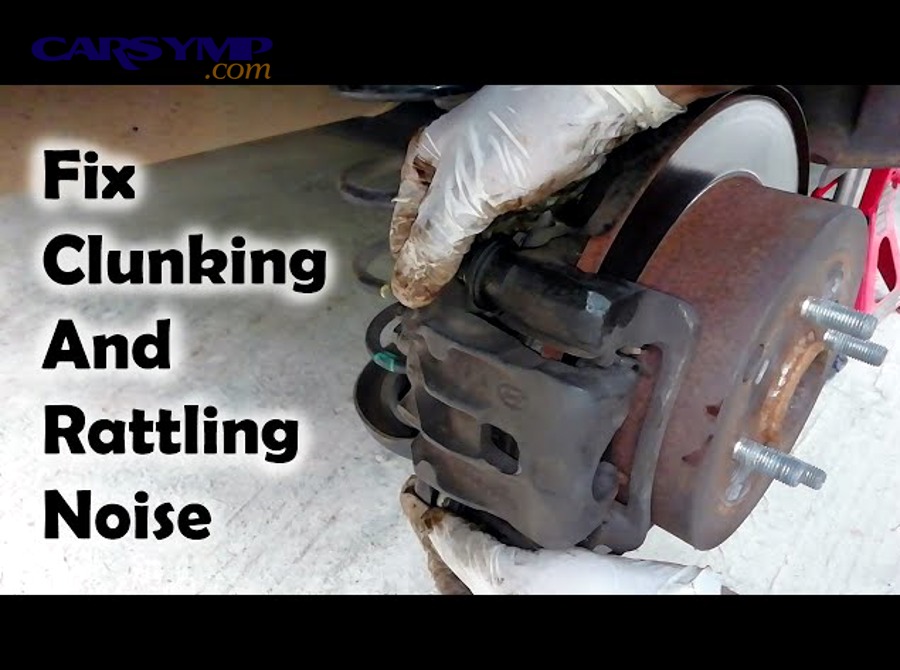
Before you dive into details, here’s a quick diagnostic table you can use to match symptoms to likely loose parts (this table summarizes common patterns so you can choose the next inspection step).
| What you feel/hear | When it happens | Most likely loose part group | Why it fits |
|---|---|---|---|
| Light rattle that stops with light braking | Bumps at low speed | Abutment/anti-rattle clips | Braking clamps pads, removing pad-ear vibration |
| Heavier clunk on first brake | First brake after coasting | Bracket bolts or caliper rock | Braking torque loads bracket/caliper suddenly |
| Double clunk when shifting D↔R | Direction changes | Slide pins or pad fit | Caliper/pads reverse torque direction |
| Metallic tap over washboard | Rapid small bumps | Pad shims/clips | Repeated vibration excites loose springs |
Are anti-rattle clips or pad abutment clips loose, missing, or wrong?
Yes—loose or incorrect anti-rattle/abutment clips are a top cause of caliper rattle because (1) they set pad “preload,” (2) they center pads in the bracket, and (3) they prevent pad ears from vibrating on bumps.
More importantly, clips fail in predictable ways:
- They lose spring tension after heat cycles.
- They rust and lift the pad, creating uneven clearance.
- They’re misinstalled (upside down, wrong side, not fully seated).
What to look for with the wheel off:
- Clip not snapped fully into the bracket land.
- Shiny “hammer marks” where pad ears have been striking the bracket.
- One pad that slides in and out too easily compared to the other side.
Common mistake that creates noise fast: reusing old clips with new pads. New pads often have tighter paint/coating, which changes how the pad ear sits; old clips may no longer preload correctly.
Transitioning from clips to pad fit, remember that even perfect clips can’t fix a pad that simply doesn’t fit tightly where it should.
Are the slide/guide pins sticking, dry, worn, or loose in their bores?
Yes—slide/guide pin issues can cause caliper clunk because (1) worn pins allow rocking clearance, (2) dry pins create stick-slip release, and (3) torn boots let corrosion enlarge clearances over time.
Specifically, sliding calipers are designed to move, but only in a controlled way. The pin system should allow smooth sliding without sideways slop.
Fast checks:
- Pull the pins: they should be smooth and consistent in diameter (no pitting bands).
- Check the boots: they should seal tightly at both ends.
- Insert the pin dry (no grease) briefly: it should feel snug, not wobbly.
If one pin is “tight” and the other is “loose,” the caliper can twist under braking and then snap back over bumps, producing a clunk that feels like it’s “inside the wheel.”
Transitioning to the most critical fasteners, don’t ignore bolts simply because they “look fine”—bolt looseness can be hard to spot until it’s dangerous.
Are caliper bracket bolts loose or improperly torqued?
Yes—loose caliper bracket bolts can cause a heavier clunk because (1) the entire bracket can shift, (2) braking torque amplifies even tiny movement, and (3) repeated vibration can reduce clamp load if torque or thread condition is wrong.
More specifically, bracket bolts are structural fasteners. When they loosen, the noise often becomes:
- A single heavy knock when braking.
- A scrape or rub if the caliper/bracket contacts the wheel.
- A “changing” noise that gets worse quickly.
If you suspect bolt looseness:
- Do not keep driving “to see if it goes away.”
- Inspect immediately, because a loose bracket can also stress the brake hose.
Transitioning from bracket bolts to pad fit, there’s one more common source of rattle that’s subtle: the pads themselves.
Do the pads have excess play in the bracket or backing plate?
Yes—excess pad play causes rattle because (1) pad ears can bounce in the bracket lands, (2) missing shims remove damping, and (3) some aftermarket pads have looser tolerances that reduce preload from the hardware.
Specifically, watch for these pad-fit problems:
- Wrong pad shape (nearly identical pads can differ by millimeters).
- Pad ears filed or ground too aggressively.
- Missing or mispositioned shims that normally damp movement.
A simple “fit test” with the caliper removed: slide the pads into the bracket with the clips installed. You want firm, smooth movement—not loose freeplay and not binding.
Evidence: According to a study by the University of Michigan from the Department of Mechanical Engineering (published through SAE technical literature), in 2007, pad rattle was identified as a significant brake-noise category with measurable dynamics, supporting the idea that even small clearances in pad retention can create customer-noticeable noise.
How do you diagnose loose brake hardware step-by-step (wheel-on and wheel-off)?
Diagnosing loose brake hardware is a repeatable inspection method that starts with symptom confirmation and ends with hands-on clearance checks—using wheel-on tests to localize the corner and wheel-off checks to pinpoint the exact clip, pin, pad, or bolt.
Below, the key is to move from “sound” to “source” without randomly replacing parts.
What checks can you do without removing the wheel?
There are 5 main wheel-on checks: (1) light-brake silencing test, (2) reverse-to-drive clunk test, (3) corner localization by speed and steering, (4) visual clip/boot scan through spokes, and (5) heat/drag comparison after a short drive—based on safety and speed of confirmation.
Specifically, do them in this order:
- Light-brake silencing test (safe, fast):
If noise reduces with light braking, you’re likely in pad/hardware territory. - Reverse-to-drive “torque flip” test:
A clunk that appears exactly when torque direction flips often suggests pad/caliper shift. - Steering input test at low speed:
If noise changes when turning left vs right, you might be loading one corner differently (still could be brakes). - Quick visual scan:
Look for torn boots, missing anti-rattle clip, or a shiny spot where metal is contacting. - Heat/drag check (carefully):
After a short drive, a significantly hotter wheel can indicate a sticking pin or binding hardware (use caution; wheels can burn).
If, during any wheel-on check, the noise becomes a grind, scrape, or you feel pulsation, stop the test and move to inspection.
Transitioning to wheel-off inspection, you’re now trying to answer one question: “Which interface has measurable play?”
What checks require wheel removal, and what movement is “too much”?
Wheel-off checks define “too much movement” as any pad, pin, or bracket play you can feel or see without brake pressure—because properly assembled hardware should be snug, guided, and repeatable, not loose or wobbly.
More specifically, use this wheel-off sequence:
- Secure the car safely (flat surface, chocks, jack stands).
- Inspect the anti-rattle clip (if present externally): confirm it’s seated and springy.
- Check caliper rock by hand: small controlled movement is normal; a clear knock is not.
- Remove caliper and check slide pins: smooth sliding, no wobble, boots intact.
- Check pad fit in bracket with clips installed: firm movement, no free rattle.
- Check bracket bolt tightness and thread condition: look for witness marks or movement.
A practical rule: if you can tap the caliper or pad with your hand and reproduce the same metallic sound you hear on the road, you have likely found the source.
Evidence: According to a study by the University of Wisconsin–Madison from the Department of Industrial & Systems Engineering, in 2014, fastening accuracy and torque variability were influenced by multiple factors—highlighting why “feel tight” isn’t diagnostic and why a torque-based verification step is important when checking bracket bolts.
How do you fix each cause of brake caliper clunk without guessing?
There are 4 fix pathways for brake caliper clunk without guessing: (1) restore pad retention with the correct hardware kit, (2) restore controlled caliper sliding by servicing pins/boots, (3) restore clamp load by correcting bolt torque/thread condition, and (4) restore pad fit by correcting mismatched or modified pads—based on which interface had play.
Next, you’ll apply the fix that matches the confirmed source, not the loudest symptom.
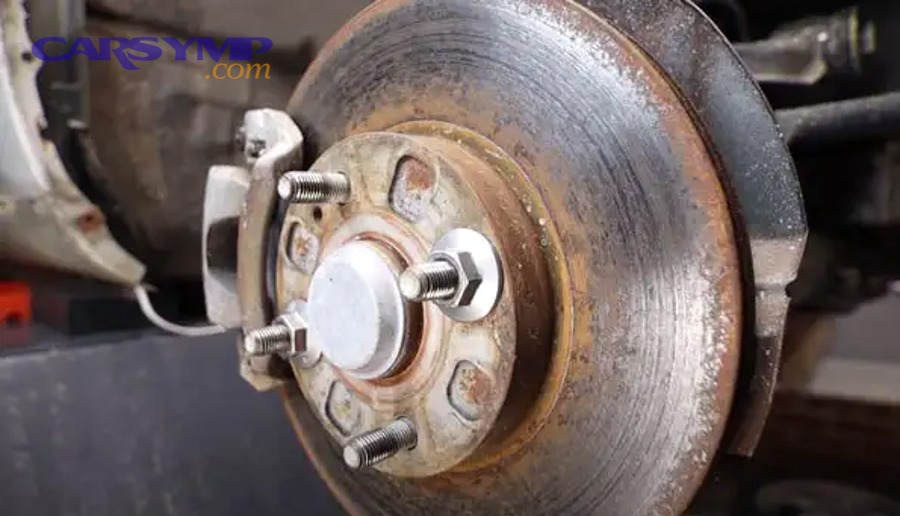
Should you replace the hardware kit every time you replace pads?
Yes—replacing the hardware kit is usually the best practice because (1) clips lose spring tension with heat cycles, (2) corrosion changes pad fit and preload, and (3) new pads often require fresh clip surfaces to avoid rattle or binding.
More specifically, the kit matters most when:
- You’re already hearing rattle/clunk.
- The old clips show rust, blueing, or loss of shape.
- The pad ears show shiny impact marks.
The “no guessing” approach:
- Install the new clips.
- Test pad fit in the bracket before putting the caliper back.
- If the pads bind, clean the bracket lands and confirm the clip is fully seated.
- If the pads are loose, verify correct kit and pad part number.
Transitioning to slide pins, hardware kits won’t fix a caliper that can rock because the pin system is worn or seized.
What lubrication is correct—and what lubrication causes noise or safety issues?
Correct lubrication wins on slide pins and specified contact points, “no lubrication” is best for friction surfaces, and incorrect lubrication is optimal only for creating noise, drag, or reduced braking performance.
However, the right lube in the wrong place can be as bad as no lube.
Use this safe lubrication logic:
- Slide/guide pins: use brake-rated silicone or synthetic grease as specified; coat evenly, don’t pack boots full.
- Pad ears/contact points (if specified): light film where metal slides on clips—only if the design calls for it.
- Never on pad friction material or rotor surface: any contamination can reduce friction.
Noise vs safety tradeoffs:
- Too much grease can migrate and attract grit, turning into abrasive paste that increases clearance over time.
- Too little grease can cause pin stick, leading to uneven pad wear and “release clunk.”
Transitioning to parts replacement decisions, there’s a point where cleaning and lubricating isn’t enough.
When do you need new caliper pins, a new bracket, or a reman caliper?
There are 3 main replacement thresholds: replace pins when they’re pitted or undersized, replace the bracket when lands/bores are worn or damaged, and replace the caliper when the piston/boot or casting issues prevent controlled movement—based on permanent loss of fit.
Use these decision cues:
- New pins + boots:
Choose this when pins show rust bands, pitting, or measurable looseness, but the bracket bores are still snug. - New bracket (carrier):
Choose this when pad lands are deeply grooved, clip seats are deformed, or the pin bores are ovalized. - Reman/new caliper:
Choose this when the piston boot is torn, piston movement is rough, bleeder or threads are damaged, or the caliper body flexes/rocks due to wear.
Evidence: According to a study by the University of Northern Iowa from the Department of Technology, in 2014, establishing a torque control plan and auditing timeline for torque-controlled tooling was a key objective—supporting the practical point that repeatable torque and verified tool accuracy reduce recurrence of fastener-related brake movement after repairs.
Is it safe to drive with a caliper clunk or rattle?
No—driving with a brake caliper clunk is not automatically safe because (1) loose bracket bolts can progress to caliper movement, (2) movement can stress the brake hose or wheel area, and (3) the underlying issue can reduce braking consistency or cause rapid wear.
More importantly, your decision should be based on symptom severity and fastener risk, not how “new” the pads look.
What symptoms mean “stop driving and tow”?
There are 6 main “stop driving” symptoms: (1) grinding/scraping that persists, (2) brake fluid leak signs, (3) sudden pulling under braking, (4) burning smell or smoke at a wheel, (5) brake pedal change (soft/sinking), and (6) visible loose/missing caliper or bracket bolts—based on immediate safety risk.
Use these as hard lines:
- Grinding that doesn’t stop: could be pad backing contacting rotor or caliper/bracket contact.
- Fluid leak (wet behind wheel, low reservoir): brake hose or caliper may be compromised.
- Pulling: clamping imbalance could worsen quickly.
- Smoke/burning smell: a sticking pin or binding pad can overheat components.
- Pedal feels wrong: hydraulic integrity may be at risk.
- Any missing or finger-loose bracket bolt: treat as urgent.
This is the moment to apply the linked decision phrase “When clunking is unsafe to drive” in your own mind: if the noise is paired with any braking performance change, you’re past “diagnose later.”
Transitioning from emergency symptoms to “maybe safe” noises, you still want to understand how looseness can affect performance even if the car stops “fine” today.
Can loose hardware increase stopping distance or cause uneven wear?
Yes—loose brake hardware can increase stopping distance or cause uneven wear because (1) sticking pins reduce clamp effectiveness on one side, (2) pad knock-back can delay initial bite, and (3) misaligned pads wear tapered and reduce consistent friction contact.
Specifically:
- A sticking pin can leave one pad dragging while the other does most of the work.
- Excess clearance can cause a brief delay until the pad stack settles under pressure.
- Uneven wear can lead to vibration, noise, and reduced effective pad area.
Evidence: According to a study by the University of Wisconsin–Madison from the Department of Industrial & Systems Engineering, in 2014, fastening accuracy and torque variability were shown to be sensitive to tool and process factors—supporting why correct torque (not “tight enough”) is central to maintaining clamp load and avoiding movement that can affect braking consistency.
If it’s not loose brake hardware, what else can mimic a caliper clunk?
Suspension joints win as the most common “brake-like” clunk when braking doesn’t change the noise, hub/rotor runout is best for clunks that appear after bumps with a momentary pedal feel change, and caliper design differences are optimal for explaining why fixed vs sliding setups sound and fail differently.
Below, you’ll expand your diagnosis beyond brakes only after you’ve completed the brake hardware confirmation checks—so you don’t drift away from the primary problem too early.
Could suspension or steering joints be the real source if the noise doesn’t change when braking?
Yes—if braking doesn’t change the noise, suspension or steering joints become a strong suspect because (1) they’re excited by bumps regardless of braking, (2) they often clunk more while turning, and (3) they can transmit sound through the chassis making it feel “wheel-end.”
Specifically, this is where the linked phrase “How to inspect suspension at home safely” belongs in your workflow: you’re moving from brake-loaded tests to suspension-loaded tests.
Start with a simple rule-out set:
- If the noise is identical on throttle, coast, and light brake, suspect suspension.
- If turning left makes it louder on the right (or vice versa), suspect the loaded side.
- If the noise is a dull thud rather than metallic, suspect bushings/mounts.
At this point, you can deliberately do a Sway bar link vs strut mount noise comparison:
- Sway bar link clunk: sharper, more “tap-like,” often on small bumps, can change quickly with temperature or wet conditions.
- Strut mount clunk: duller, can happen on steering input, driveway transitions, or when the suspension “twists.”
Transitioning from suspension joints to brake-adjacent mechanics, there’s a “middle zone” where brakes aren’t loose, but the brake system still reacts to other movement.
Can rotor/hub runout or wheel bearing play cause pad knock-back that feels like a clunk?
Yes—rotor/hub runout or bearing play can create pad knock-back because (1) the rotor/hub can push the pads back during cornering or bumps, (2) the next brake application has a brief settle-in, and (3) that settle can feel like a light clunk or delayed bite.
More specifically, pad knock-back often shows up as:
- A slightly longer pedal on the first brake after a bump or corner.
- A faint tick/clunk that coincides with the first pad contact.
If you suspect this:
- Check for bearing play (wheel off the ground; rock at 12 and 6 o’clock).
- Inspect rotor seating and hub rust.
- If you have the tools, measure runout; if not, look for uneven pad deposits and rotor wobble clues.
Transitioning to design differences, your next diagnostic step depends on what type of caliper you have.
Do fixed calipers and sliding calipers fail differently when they make noise?
Sliding calipers win for “hardware/slide-pin rattle and rock,” fixed calipers are best for “pad retention and spring/clip issues,” and both are optimal candidates for clunks when fasteners or pad fit are incorrect.
Specifically:
- Sliding calipers rely on pins; any looseness or stick creates movement and noise.
- Fixed calipers don’t slide; noise is more often pad retention, springs, or pad-to-caliper clearance.
If your car has fixed calipers and you hear a rattle over bumps, focus more on pad springs/clips and pad fit than on slide pins (because there may not be any).
Transitioning to prevention, once you solve the noise, you want it to stay solved.
How can you prevent brake hardware clunk from coming back after a pad job?
Preventing brake hardware clunk is a maintenance strategy that combines correct parts fitment, clean bracket lands, controlled lubrication, and verified torque—so the brake assembly stays preloaded and guided instead of gradually regaining clearance.
A prevention checklist that actually holds up:
- Use the correct hardware kit for your exact trim and brake package.
- Clean bracket lands until clips seat fully and pads slide smoothly.
- Lube only where specified, in thin controlled amounts.
- Torque fasteners to spec with a known-good tool, and recheck after a short bedding drive if the service manual recommends it.
Evidence: According to a study by the University of Northern Iowa from the Department of Technology, in 2014, torque-control planning and scheduled auditing were emphasized to maintain fastener consistency over time—supporting the practical takeaway that repeatable, verified torque is a prevention tool, not just a “final step.”