


Understanding radiator pressure test results is essential for accurately diagnosing cooling system failures and preventing costly engine damage. When you perform a pressure test on your vehicle’s cooling system, the gauge readings, pressure hold time, and rate of pressure drop all provide critical diagnostic information that reveals whether you’re dealing with a minor hose leak, a failing radiator cap, or a catastrophic head gasket failure. This comprehensive guide decodes every aspect of pressure test results, from normal operating ranges to the specific indicators that distinguish external leaks from internal engine problems.
Interpreting what different pressure readings mean is the foundation of effective cooling system diagnosis. A system that holds steady pressure between 13-16 PSI for at least two minutes typically indicates a healthy cooling system, while a slow pressure drop suggests minor seepage from hoses or clamps. Rapid pressure loss points to major component failures, and the inability to build pressure at all often signals catastrophic damage like a blown head gasket or severe radiator rupture.
Identifying the exact location of cooling system leaks requires systematic visual inspection combined with understanding component-specific failure patterns. External leaks manifest as visible coolant drips, wet spots around hose connections, or steam rising from the radiator, while internal leaks into the combustion chamber produce symptoms like milky oil, white exhaust smoke, and coolant-contaminated spark plugs. Each leak location tells a different story about the severity and urgency of repairs needed.
Beyond basic pressure interpretation, knowing when your radiator cap is functioning properly versus when it needs replacement can prevent misdiagnosis and unnecessary repairs. A properly functioning cap should hold its rated pressure for approximately one minute during isolated testing, releasing pressure only when the system exceeds its design specifications. Next, we’ll explore exactly what your pressure test is measuring and why these readings matter for your vehicle’s health.
What Does a Radiator Pressure Test Measure?
A radiator pressure test measures the cooling system’s ability to maintain sealed pressure, revealing leaks and component failures by simulating the pressurized conditions that occur when your engine reaches normal operating temperature. The test evaluates three critical parameters: the maximum pressure the system can achieve (typically 13-16 PSI for most vehicles), how long the system maintains that pressure without dropping, and the rate at which any pressure loss occurs.
To better understand the diagnostic value of pressure testing, consider how your cooling system functions during normal operation. When your engine heats up, the coolant expands and builds pressure within the sealed cooling system, which raises the coolant’s boiling point from 212°F to approximately 257°F at 15 PSI. This pressurization is essential because it allows the coolant to absorb more heat without boiling and evaporating. The pressure test replicates these conditions artificially by pumping air into the system while the engine is cold, making any weaknesses or failures immediately visible without the danger of working around hot coolant.
What Is the Normal Pressure Range for Cooling Systems?
Most modern vehicle cooling systems operate between 13-16 PSI (pounds per square inch), with the specific rating stamped or printed on top of the radiator cap. This pressure range represents the industry standard because it effectively raises the coolant’s boiling point by approximately 45 degrees Fahrenheit without placing excessive stress on system components like hoses, clamps, and radiator seams. Some high-performance vehicles or heavy-duty trucks may use caps rated at 18-23 PSI to handle more extreme operating conditions, while older vehicles occasionally use lower 7-10 PSI caps.
The pressure rating isn’t arbitrary—it’s carefully engineered to balance cooling efficiency against component durability. When you perform a pressure test, you should pump the system up to the pressure rating shown on your radiator cap, but never exceed 18 PSI unless your vehicle specifically requires a higher rating. Over-pressurizing during testing can damage already-weakened components or create false failures in parts that would otherwise function normally under proper operating pressure.
Your vehicle’s cooling system maintains this pressure through a sealed loop that includes the radiator, engine block water jackets, cylinder head passages, hoses, heater core, and the pressure-regulated radiator cap. The cap contains a spring-loaded valve that acts as a pressure relief mechanism—when pressure exceeds the cap’s rating during normal operation, the valve opens briefly to release excess pressure into the coolant overflow reservoir. During a pressure test, you’re checking whether this entire sealed system can hold pressure, which confirms that all seals, gaskets, and connections remain intact.
How Long Should the System Hold Pressure?
A healthy cooling system should maintain test pressure for a minimum of two minutes without any noticeable gauge drop, though many technicians prefer to monitor the system for 10-15 minutes to detect very slow leaks. Industry standards established by automotive service organizations recommend that after reaching the specified test pressure, the gauge needle should remain completely stable or drop no more than 1-2 PSI over a 10-minute observation period, accounting for minor temperature-related pressure variations and tiny losses through test equipment connections.
The hold time reveals crucial information about leak severity and helps you differentiate between normal system integrity and problematic conditions. If pressure drops immediately after you stop pumping (within the first 30 seconds), you’re dealing with either a major leak or an improperly sealed pressure tester connection—always verify your tester attachment before concluding you have a significant failure. A gradual pressure decline over 5-10 minutes indicates a small leak such as seepage through a pinhole in a hose or a barely perceptible weep from a water pump seal, while pressure that holds rock-solid for 20-30 minutes confirms the system is completely sealed and healthy.
Professional mechanics often extend test duration when diagnosing intermittent problems or when initial results seem inconclusive. A 30-minute extended test can reveal hairline cracks in plastic radiator tanks that only leak under sustained pressure, or microscopic head gasket seepage that takes time to manifest. However, for routine diagnostic purposes, a stable two-minute hold provides sufficient confirmation that the cooling system maintains its integrity under operating conditions.
What Do Different Pressure Test Results Mean?
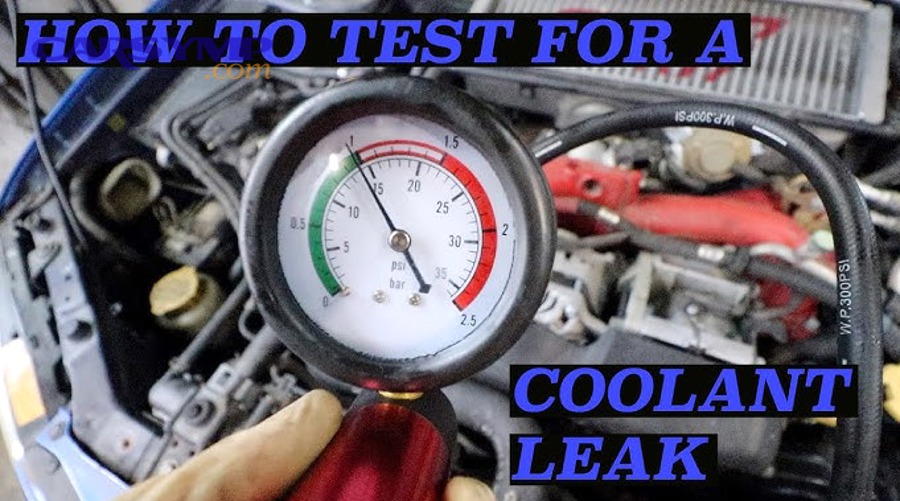
Pressure test results fall into four distinct categories that each indicate specific cooling system conditions: stable pressure with no drop signals a healthy system, slow pressure decline over several minutes points to minor leaks, rapid pressure loss within 1-2 minutes reveals major component failures, and inability to build or maintain any pressure indicates catastrophic damage. Understanding these patterns allows you to quickly assess repair urgency and identify which components require inspection.
Reading the pressure gauge correctly requires you to observe both the initial pressure build-up and the behavior of the needle over time. When you pump the pressure tester, a functioning system will show steadily increasing pressure that peaks at or near the cap rating, then either holds completely steady or exhibits only minimal drift. The rate and pattern of any pressure drop provides the diagnostic clue—think of it as taking your cooling system’s blood pressure, where the numbers and their behavior over time tell the complete health story.
What Does It Mean When Pressure Holds Steady?
When pressure holds steady at your target PSI for 10-15 minutes with no gauge movement, your cooling system is sealed and functioning correctly with no detectable leaks. This result confirms that all critical components—the radiator, water pump seals, hoses, clamps, head gasket, and heater core—are maintaining their integrity under operating pressure. You can consider this a “passing grade” that indicates your cooling system requires no immediate leak-related repairs.
However, even with steady pressure, you should still complete a visual inspection of your entire cooling system while it remains pressurized. Look carefully at all hose connections, the radiator seams, water pump weep hole, and heater core connections at the firewall. Sometimes very slow seepage creates damp spots without causing measurable pressure drops—these minor issues won’t fail your pressure test but may develop into larger problems over time. Additionally, a successful pressure test only confirms the system is sealed; it doesn’t verify that your coolant is clean, your thermostat opens properly, or your water pump circulates efficiently.
Some minor pressure fluctuation—typically 1-2 PSI over a 10-minute period—can be considered acceptable, especially if you’re testing in changing ambient temperatures or using a lower-quality pressure tester with slight gauge drift. This minimal variation doesn’t indicate a leak; it reflects normal physics of gases under varying conditions and small imperfections in testing equipment. If you’re concerned about whether a 1-2 PSI drop is acceptable, perform the test again with extra attention to your tester connection—often these tiny pressure losses occur at the tester seal rather than within the actual cooling system.
What Does a Slow Pressure Drop Indicate?
A slow pressure drop—typically losing 2-5 PSI over a 10-15 minute period—indicates a small leak somewhere in your cooling system, such as seepage through a pinhole in a hose, a loose clamp connection, a hairline crack in a plastic radiator tank, or minor weeping from a water pump seal. These gradual leaks are often invisible during normal operation because the coolant evaporates before forming drips, making pressure testing the only reliable detection method.
The diagnostic challenge with slow pressure drops lies in locating the exact source. Start your inspection at the most common failure points: squeeze each coolant hose while the system is pressurized, looking for damp spots or tiny mist formation, then examine all hose clamps for proper tightness and positioning. Move to the radiator itself, inspecting the plastic end tanks for stress cracks (especially near mounting points) and checking the seams where plastic meets metal for any moisture. Don’t forget the heater core connections at the firewall—these often develop slow leaks that are difficult to see but leave telltale white crusty residue or faint coolant smell inside the vehicle.
Time-based monitoring helps quantify the leak severity. If you lose 3 PSI over 15 minutes, you’re dealing with approximately a 20% pressure loss per hour under test conditions, which translates to slow but steady coolant loss during normal driving. This type of leak typically requires repair within a few weeks to a month, but rarely leaves you stranded immediately. You can often continue driving carefully while monitoring coolant levels and scheduling repairs, though topping off the reservoir regularly becomes necessary. Car Symptoms associated with slow leaks include gradually declining coolant levels, occasional overheating in extreme conditions like stop-and-go traffic, and possibly a faint sweet coolant smell.
What Does a Rapid Pressure Drop Mean?
A rapid pressure drop—losing 5 PSI or more within the first 1-2 minutes after reaching test pressure—signals a major leak requiring immediate attention, such as a split hose, severely corroded radiator, compromised heater core, or significant head gasket breach. These substantial failures allow coolant to escape quickly, creating visible leaks, steam, or in the case of internal failures, contamination of your engine oil or combustion chambers.
Rapid pressure loss produces obvious physical evidence that makes diagnosis straightforward once you know where to look. With the system still pressurized, you’ll typically see coolant actively dripping or streaming from the failure point—water pump seals will drip visibly from the weep hole, split hoses spray coolant in a fine mist, and corroded radiators develop steady drips from pinhole leaks or separation at the tank seams. The urgency escalates significantly compared to slow leaks because these failures allow substantial coolant loss during normal driving, creating immediate overheating risk and potential engine damage if you continue operating the vehicle.
Internal rapid leaks present differently than external ones and require different diagnostic approaches. If your pressure drops rapidly but you see no external coolant, suspect head gasket failure allowing compression pressure to enter the cooling system or coolant to enter the combustion chambers. Remove the spark plugs and inspect them—coolant-contaminated plugs appear steam-cleaned or show white crusty deposits. Check your engine oil for a milky, chocolate-milk appearance indicating coolant contamination. Rusty coolant and internal corrosion signs often accompany head gasket failures because combustion gases contaminate the cooling system, accelerating corrosion and creating acidic conditions.
Major radiator problems symptoms that accompany rapid pressure drops include dashboard temperature gauge climbing into the red zone, steam pouring from under the hood, visible coolant puddles under the parked vehicle, and a rapidly dropping coolant reservoir despite being filled recently. These dramatic symptoms make the failure obvious and demand immediate repair before you risk warping the cylinder head or cracking the engine block from severe overheating.
What Does No Pressure Build-Up Indicate?
When you cannot build or maintain any pressure during testing—the gauge rises slightly then immediately drops back to zero—you’re facing either catastrophic cooling system damage or a problem with your pressure tester connection. Before diagnosing a major failure, always verify your tester is properly attached and sealed to the radiator neck or coolant reservoir, as an improperly installed adapter creates the identical symptom of pressure immediately escaping.
Assuming your pressure tester is correctly attached, inability to pressurize indicates one of several severe conditions. A completely blown head gasket creates an open path between the combustion chamber and cooling passages, allowing pressure to escape into the cylinders or crankcase as fast as you pump it in. A severely cracked cylinder head or engine block similarly prevents pressure build-up because the cooling passages are no longer sealed. A radiator with a major rupture—such as a large split in a plastic tank or a crushed core with multiple broken tubes—cannot contain pressure. In each case, the damage is so extensive that sealed system integrity no longer exists.
Diagnosing which catastrophic failure you’re experiencing requires systematic inspection. Start the engine briefly (only if it hasn’t overheated severely) and watch your coolant reservoir—if you see bubbles constantly rising or the coolant level surging rhythmically, combustion gases are entering the cooling system through a blown head gasket. Remove the oil fill cap and check for coolant contamination. Inspect the radiator carefully for obvious physical damage like crushed areas, large cracks, or separated seams. If you recently overheated severely, a warped or cracked cylinder head becomes the primary suspect.
The Repair vs replace radiator decision often arises when testing reveals catastrophic failure. If your radiator is old and shows signs like Clogged radiator symptoms (poor heat dissipation, excessive engine temperatures), external corrosion, or you’ve experienced multiple cooling system issues, replacement makes more economic sense than attempting repairs on a compromised unit. However, if you have a relatively new radiator and the failure stems from impact damage to one isolated area, professional repair might be viable depending on your radiator’s construction—aluminum radiators can often be welded, while plastic tank radiators typically require replacement when cracked.
How Do You Identify Where the Leak Is Located?
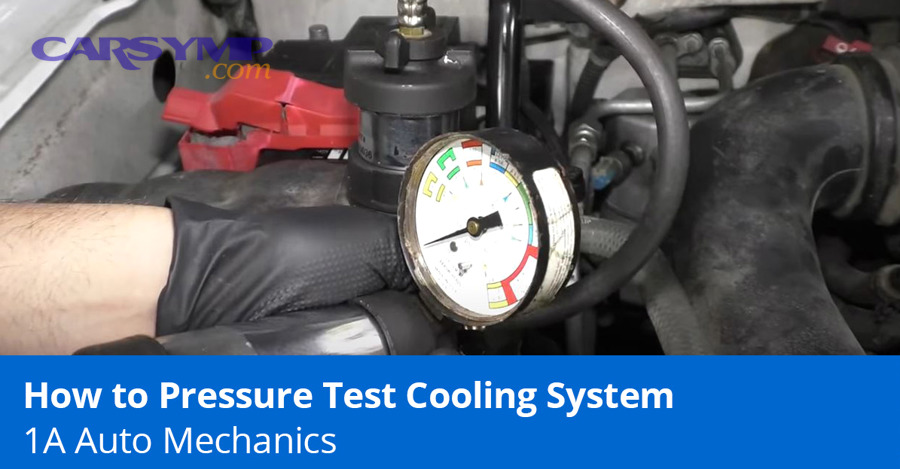
Identifying leak location requires systematic visual inspection of all cooling system components while the system remains pressurized, starting with the most accessible external components before moving to harder-to-reach areas and finally investigating internal engine leaks. The pressurized system makes leaks visible that would otherwise remain hidden during normal operation, allowing you to trace coolant back to its source by following wet spots, drips, or steam.
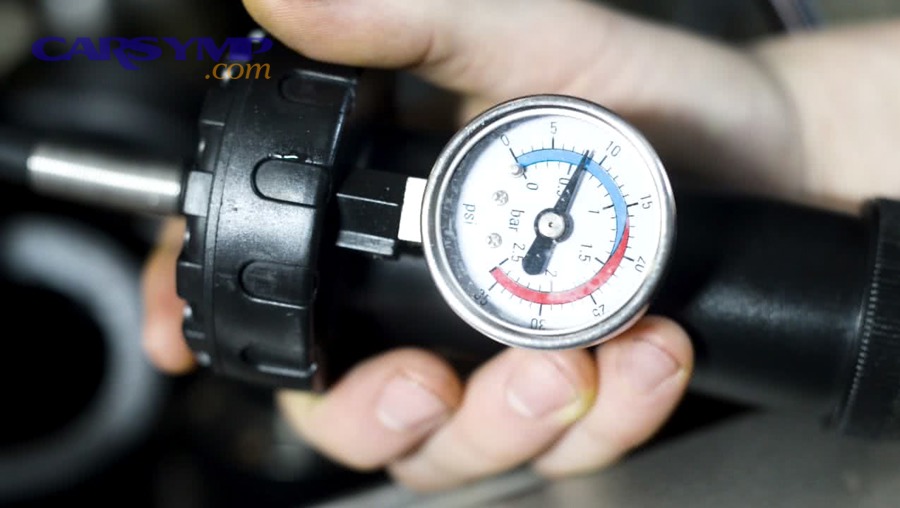
Your inspection strategy should follow a logical progression from simple to complex. Begin with external components that are easy to see and access—radiator, upper and lower hoses, thermostat housing—then move to components requiring more effort to inspect like the water pump, heater core connections at the firewall, and intake manifold gaskets. Only after ruling out all external leak possibilities should you suspect internal leaks requiring engine disassembly to repair. This methodical approach prevents wasted time and unnecessary parts replacement.
What Are the Signs of External Cooling System Leaks?
External cooling system leaks manifest as visible coolant drips, damp areas, crusty white or green residue deposits, or steam rising from components when the engine is hot. During a pressure test, external leaks become dramatically more obvious because the artificial pressure forces coolant through any weakness in hoses, clamps, gaskets, or radiator seams that might only seep slowly under normal operating conditions.
Start your external leak inspection at the radiator itself, examining all four sides and both plastic end tanks (if equipped). Look for wetness along the seam where the plastic tank meets the aluminum core—this junction is a common failure point on modern radiators as the plastic becomes brittle with age and heat cycling. Clogged radiator symptoms sometimes accompany leak development because internal corrosion that blocks coolant flow also weakens radiator construction. Check the drain petcock at the bottom of the radiator, as these plastic valves frequently crack or fail to seal completely after being opened.
Move next to all coolant hoses, squeezing each one while the system is pressurized. Healthy hoses feel firm but pliable; deteriorated hoses feel either mushy (internal breakdown) or rock-hard (excessive age and heat exposure). Examine the hose ends where they connect to the engine, radiator, and heater core—weeping often starts here when clamps loosen or hoses develop cracks at connection points. The upper and lower radiator hoses are large and obvious, but don’t overlook smaller hoses running to the heater core, throttle body coolant passages, and turbocharger cooling lines if equipped.
The water pump is another frequent external leak source, designed with a “weep hole” that allows minor coolant seepage to escape rather than entering the bearing area. A healthy water pump shows no wetness around this weep hole, while a failing pump drips coolant or shows green/white crusty buildup below the hole. The heater core connections at the firewall often leak slowly, with coolant dripping onto the ground near the passenger side or creating damp spots on the firewall insulation. Interior symptoms accompany heater core leaks—coolant smell in the cabin, oily film on the windshield, or wet carpeting on the passenger floor.
How Do You Detect Internal Engine Leaks?
Internal engine leaks occur when head gasket failure, cracked cylinder heads, or damaged engine blocks allow coolant to enter combustion chambers or mix with engine oil, producing symptoms like milky oil, white exhaust smoke, coolant-contaminated spark plugs, and rapid coolant loss without visible external leaks. These failures are more serious than external leaks because they indicate internal engine damage requiring significant disassembly to repair.
The most distinctive symptom of internal coolant leaks is milky, chocolate-colored engine oil visible on the dipstick or under the oil fill cap. This appearance results from coolant mixing with oil, creating an emulsion that looks similar to a chocolate milkshake. Check your oil level regularly when you suspect internal leaks—the level may actually rise as coolant enters the crankcase, diluting and contaminating the oil. This contaminated oil loses its lubricating properties, accelerating wear on bearings, camshafts, and other critical engine components. If you discover milky oil, stop driving immediately to prevent catastrophic engine damage.
White or sweet-smelling exhaust smoke indicates coolant burning in the combustion chambers after entering through a head gasket breach or cracked cylinder head. Unlike blue oil smoke or black rich-fuel smoke, coolant smoke appears thick and white, similar to steam, and produces a distinctive sweet smell. The smoke may appear constantly or only during specific conditions—some head gasket leaks only open when the engine reaches full operating temperature, making the smoke intermittent. Perform a cold-engine test by removing spark plugs and inspecting each combustion chamber with a flashlight or borescope; coolant-contaminated cylinders show clean, steam-washed appearance or visible liquid pooling.
Pressure testing with internal leaks produces characteristic results that help confirm the diagnosis. If pressure drops rapidly but you see no external coolant, suspect internal leakage. With spark plugs removed, pressurize the system and watch each spark plug hole—coolant leaking from the head gasket into cylinders will seep or pour out of the affected plug holes. Alternatively, start the engine with the pressure tester still attached (possible on some vehicles); if the gauge shoots up dramatically above normal operating pressure, combustion pressure is entering the cooling system through a head gasket breach.
What Do Different Leak Locations Tell You About the Problem?
Each leak location provides specific diagnostic information about failure causes, repair urgency, and cost implications. Hose and clamp leaks typically result from normal aging and represent the least expensive repairs, while radiator leaks indicate either age-related deterioration or impact damage requiring radiator replacement. Water pump leaks signal bearing seal failure requiring pump replacement, and head gasket leaks reveal serious engine problems demanding immediate attention to prevent catastrophic damage.
Hose connection leaks concentrate at high-stress points where rubber meets metal fittings, particularly on curves and near clamps. These failures accelerate when mechanics over-tighten clamps during previous service, crushing and weakening the hose material, or when they under-tighten clamps, allowing movement that abrades the rubber. The repair is straightforward—replace the affected hose and install new clamps properly torqued—with typical costs of $50-150 depending on hose location and accessibility. Consider this a routine maintenance repair that doesn’t indicate broader cooling system problems.
Radiator leaks tell a different story depending on their nature. Gradual seepage from tank seams or pinhole leaks in the core typically indicates age-related deterioration—radiators last approximately 8-12 years before internal corrosion and heat cycling compromise their integrity. Sudden radiator failure with large cracks or separated tanks often follows impact damage from road debris, collision, or improper installation of fan assemblies. Modern radiators with plastic tanks rarely justify repair when they leak; replacement costs $200-600 depending on vehicle make and model. When making the repair vs replace radiator decision, factor in the radiator’s age, overall condition, and whether you’ve experienced recurring cooling system issues suggesting broader problems.
Internal leaks at the head gasket or cylinder head level represent the most serious diagnostic finding, indicating either manufacturing defects, improper previous repairs, or overheating damage that warped sealing surfaces. Head gasket replacement requires removing the cylinder head, machining the sealing surface flat if warped, and reassembling with new gaskets and proper torque specifications—expect costs of $1,500-3,000 depending on engine configuration (inline-4 versus V6/V8). This repair urgency is absolute; continuing to drive with a blown head gasket guarantees additional engine damage that can multiply repair costs exponentially.
Is Your Radiator Cap Working Properly?
Your radiator cap works properly if it holds its rated pressure for approximately one minute during isolated testing and releases pressure only when the system exceeds its design specification, preventing both under-pressurization (which lowers coolant boiling point) and over-pressurization (which can burst hoses or damage components). The cap contains two critical valves—a pressure valve that opens when system pressure exceeds the rating and a vacuum valve that allows coolant to return from the overflow reservoir when the engine cools—and both must function correctly to maintain cooling system health.
Testing the radiator cap separately from the cooling system is essential because a faulty cap can produce symptoms identical to genuine system leaks. Many pressure tester kits include a dedicated cap adapter that allows you to test the cap in isolation. This simple test takes only a few minutes but can save hours of unnecessary leak diagnosis and prevent replacement of components that aren’t actually failing. A properly functioning cap is critical to your cooling system—it’s not just a simple cover but rather a precision pressure-regulating device that controls system performance.
How Do You Test the Radiator Cap Separately?
Testing the radiator cap separately requires attaching it to your pressure tester using the proper adapter sleeve, then pumping pressure while monitoring when the cap’s relief valve opens. Mount the cap on the tester adapter with the same orientation it would sit on the radiator, ensuring the rubber seal faces the adapter to create a proper seal. Pump pressure slowly while watching the gauge—a functioning cap should allow pressure to build until reaching its rated pressure (stamped on top of the cap), at which point the pressure relief valve should open and prevent further pressure increase.
The cap should hold at its rated pressure for approximately 60 seconds without dropping, demonstrating that both the valve and seals function correctly. During this one-minute hold, the gauge needle should remain stable at the cap’s rated pressure—for example, a 15 PSI cap should hold steady at 15 PSI, neither climbing higher nor dropping lower. After the minute passes, slowly release pressure from the tester and watch how the cap behaves; it should release pressure smoothly through the relief valve as you depressurize the tester.
Common cap failures include opening too early (below rated pressure), opening too late (well above rated pressure), or failing to hold pressure at all. An early-opening cap reduces cooling system efficiency because the coolant boils at a lower temperature than designed, potentially causing overheating in hot weather or under heavy loads. A late-opening or stuck-closed cap is more dangerous—it allows excessive pressure buildup that can burst your radiator, blow hoses off connections, or rupture the heater core. A cap that won’t hold any pressure usually has a deteriorated rubber seal or a stuck-open relief valve, rendering it completely non-functional.
What Are Signs of a Faulty Radiator Cap?
Signs of a faulty radiator cap include recurring coolant loss with no visible leaks, overheating despite adequate coolant level, collapsed radiator hoses when the engine cools, excessive pressure causing hoses to bulge or blow off, and coolant overflow even when the system isn’t critically hot. These symptoms often puzzle car owners because they mimic serious cooling system problems while actually resulting from a simple $10-20 component failure.
The most common cap failure mode is pressure seal deterioration—the rubber gasket on the cap’s underside hardens and cracks with age and heat exposure, preventing the cap from sealing properly when installed on the radiator. This allows pressure to escape prematurely, reducing system pressure below design specifications. Your coolant then boils at a lower temperature (around 212°F instead of 257°F), causing overheating symptoms particularly during hot weather, idling, or climbing long grades. You’ll find yourself frequently adding coolant to the reservoir, yet pressure testing shows no leaks elsewhere in the system.
A stuck-closed pressure relief valve creates the opposite problem—excessive pressure buildup that the system wasn’t designed to handle. This typically results from corrosion or coolant residue jamming the valve mechanism. Early warning signs include bulging radiator hoses when the engine is hot (they feel rock-hard when squeezed), coolant forcing past the cap threads and overflowing onto the radiator neck, or sudden hose failures as pressure exceeds safe limits. If you notice these symptoms, replace the cap immediately before the over-pressurization damages more expensive components like the radiator itself.
The vacuum relief valve on the cap’s bottom allows coolant to return from the overflow reservoir as the system cools and contracts. When this valve sticks closed, it creates a vacuum in the cooling system that can collapse soft rubber hoses (particularly the upper radiator hose) and prevent proper coolant circulation. Inspect your hoses when the engine is completely cold—if they appear sucked inward or flattened, your cap’s vacuum valve has failed. This condition also prevents the cooling system from drawing replacement coolant from the overflow reservoir, resulting in low coolant levels even though the reservoir remains full.
How Do You Differentiate Between Minor and Major Cooling System Failures?
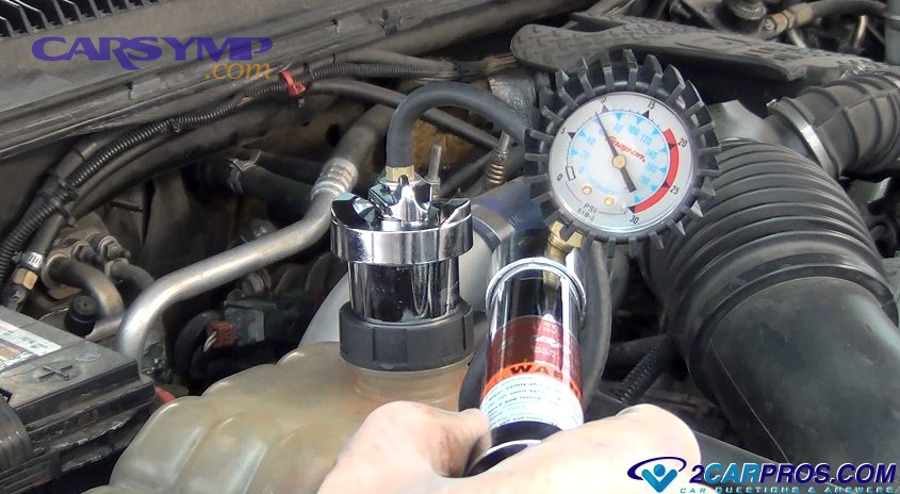
You differentiate between minor and major cooling system failures by analyzing pressure drop rate, leak visibility, symptom severity, and potential for engine damage—minor failures lose pressure slowly over 10-15 minutes with visible external leaks and limited overheating risk, while major failures drop pressure within 1-2 minutes, show internal contamination symptoms, and create immediate engine damage potential. This distinction determines repair urgency, whether you can continue driving, and expected repair costs.
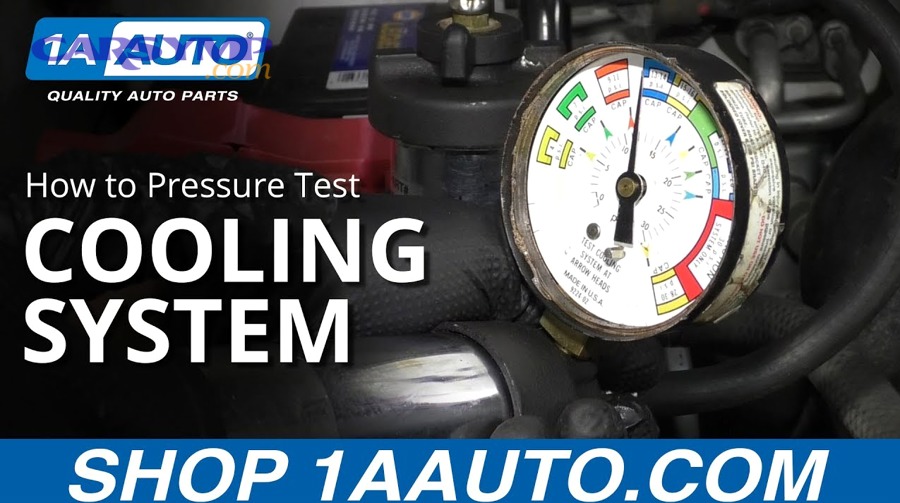
The severity assessment starts with your pressure test results but extends to broader car symptoms and system condition. Consider the complete diagnostic picture: test results plus visual evidence plus performance symptoms plus coolant condition. A holistic evaluation prevents both under-reacting to serious problems that require immediate attention and over-reacting to minor issues that allow continued safe operation while you schedule repairs at your convenience.
What Test Results Indicate a Minor Repair Need?
Test results indicating minor repairs include slow pressure drops of 2-5 PSI over 10-15 minutes, visible external seepage from hoses or clamps, stable coolant level requiring only occasional top-offs, and normal engine temperature except perhaps in extreme conditions. These findings suggest deteriorating components nearing replacement time but not yet critically failed, allowing you to plan repairs around your schedule and budget without immediate urgency.
Common minor failures include aging radiator hoses that seep at connection points, loose or corroded hose clamps allowing slow weeping, minor water pump seal seepage showing slight wetness at the weep hole but no active dripping, small pinhole leaks in radiator tubes that drip only when pressurized, and worn thermostat housing gaskets causing minor coolant seepage. Each of these conditions allows the cooling system to function essentially normally while gradually losing small amounts of coolant over days or weeks. You’ll notice yourself adding a cup or two of coolant to the reservoir every few weeks, but the vehicle doesn’t overheat and shows no other concerning symptoms.
The repair timeline for minor issues typically allows 2-4 weeks to schedule service without significant risk, assuming you monitor coolant levels regularly and top off as needed. You can continue normal driving including highway trips, though you should avoid extreme conditions like towing heavy loads in hot weather or extended idling in stop-and-go traffic that might push marginal cooling system performance into overheating territory. Keep a gallon of premixed coolant in the trunk for emergency top-offs, and watch your temperature gauge carefully during the repair postponement period.
Repair costs for minor cooling system failures remain reasonable—hose replacement runs $50-150 per hose including labor, clamp replacement costs $30-75, water pump seal replacement (usually requires full pump replacement) costs $300-600, and small radiator leak repairs (if repairable) run $150-300. These repairs prevent more expensive failures while the component is still partially functional, making timely repair economically smart even when immediate urgency doesn’t exist. Additionally, catching problems at the minor stage prevents the consequential damage that occurs when small leaks progress to major failures—for example, replacing a $75 hose now prevents the $3,000 head gasket replacement that results from overheating when that hose eventually bursts.
What Test Results Mean You Need Immediate Repair?
Test results demanding immediate repair include rapid pressure loss of 5+ PSI within 1-2 minutes, inability to build or maintain any pressure, internal leak symptoms like milky oil or white exhaust smoke, severe overheating episodes, or massive coolant loss requiring frequent refilling. These critical findings indicate failures that risk catastrophic engine damage if you continue driving, making immediate repair or towing mandatory to prevent exponentially more expensive damage.
Major failures requiring immediate attention include blown head gaskets allowing combustion gases into the coolant or coolant into cylinders, severely split radiator hoses spraying coolant, completely failed water pumps with bearings making grinding noises, radiators with large cracks or separated tanks dumping coolant rapidly, and compromised heater cores leaking inside the vehicle cabin. Each condition creates immediate engine damage risk because the cooling system cannot maintain proper temperature control when so severely compromised. Operating the engine even briefly in these conditions can warp the cylinder head, crack the engine block, or seize pistons in their cylinders—damage that often totals the vehicle economically.
The definitive test for immediate repair necessity is whether you can drive the vehicle safely without overheating. If your temperature gauge climbs into the red zone within 5-10 minutes of normal driving, or if you see steam pouring from under the hood, or if coolant is actively spraying or pouring onto the ground, do not drive the vehicle. Call for a tow truck instead. Attempting to “nurse it home” or drive to a repair shop almost always causes additional damage that multiplies repair costs. A head gasket replacement that might cost $1,800 when caught early becomes a $5,000+ cylinder head replacement if you continue driving with severe overheating.
Cost implications of immediate-repair failures are substantially higher than minor issues. Head gasket replacement ranges from $1,500-3,000 depending on engine type, cylinder head replacement adds another $1,000-2,500 if the head is warped or cracked, radiator replacement costs $250-800, water pump replacement runs $300-750, and heater core replacement can reach $800-1,500 due to difficult dashboard access. While these costs are significant, they’re still far less than complete engine replacement ($4,000-8,000) or vehicle replacement, making immediate repair the economically rational choice even when the initial diagnosis sticker shock is substantial. According to data from automotive repair cost databases compiled by RepairPal in 2024, cooling system failures account for 9% of catastrophic engine damage cases, with 73% of those cases involving delayed repairs that allowed minor problems to escalate into major failures.
What Other Tests Should You Perform If Pressure Test Results Are Inconclusive?
When pressure test results are inconclusive—showing borderline pressure drops, inconsistent readings, or symptoms that don’t match test outcomes—you should perform combustion gas testing using block test fluid, compression testing to check for cylinder leaks, coolant analysis for contamination, and infrared temperature scanning to identify flow blockages. These supplementary diagnostic methods provide additional evidence that confirms or rules out specific failure modes when pressure testing alone doesn’t produce a definitive diagnosis.
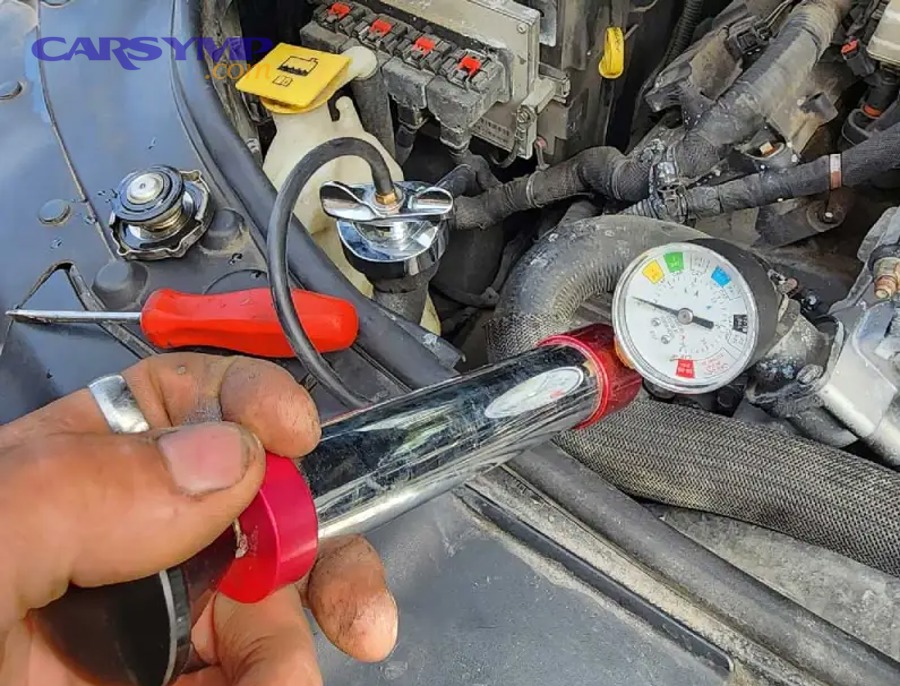
Inconclusive pressure tests occur most commonly with intermittent head gasket failures that only leak under specific conditions (full operating temperature, high engine load) not replicated during cold pressure testing. They also occur with internal radiator blockages that don’t cause pressure loss but dramatically reduce cooling efficiency, or with micro-cracks in components that seep so slowly they appear as borderline pressure drops difficult to distinguish from test equipment variability. Rather than guessing or replacing parts unnecessarily, additional testing provides the evidence needed for accurate diagnosis.
When Should You Perform a Combustion Gas Test?
You should perform a combustion gas test when pressure testing suggests internal leaks (rapid pressure drop with no external leaks visible), when you observe symptoms like bubbling in the coolant reservoir or surging coolant level, or when engine oil appears contaminated despite passing a basic pressure test. The combustion gas test uses chemical indicator fluid (typically blue) that changes color to yellow when exposed to combustion gases, definitively confirming whether exhaust gases are entering the cooling system through head gasket failure.
The test works by placing a block tester tool—a plastic chamber containing indicator fluid—over the radiator or coolant reservoir opening and drawing coolant vapors through the fluid using a hand pump. If combustion gases are present in the cooling system due to head gasket breach, the chemical fluid changes from blue to yellow within 30 seconds to 2 minutes. The color change is definitive and impossible to misinterpret—blue means no combustion gases present (head gasket intact), yellow means combustion gases detected (head gasket failed). This test eliminates diagnostic uncertainty when pressure test results are borderline or symptoms don’t clearly indicate internal versus external leaks.
Perform combustion gas testing specifically when you experience these symptom combinations: rapid coolant loss with no visible external leaks plus overheating; bubbles constantly rising in the coolant reservoir when the engine runs; pressure test shows rapid drop but thorough visual inspection reveals no external coolant; or white exhaust smoke appears but spark plugs show no coolant contamination. The test costs approximately $30-50 for the indicator fluid if you purchase your own block tester tool, or repair shops typically perform it for $75-150 as part of diagnostic service.
Timing matters for combustion gas testing accuracy—perform the test with the engine at full operating temperature, as some head gasket failures only open when the cylinder head expands with heat. Start with a cold engine and pressure test first, then warm the engine to operating temperature and perform the combustion gas test. This protocol catches both constant leaks (visible during cold pressure testing) and thermal expansion leaks (only detectable when hot). False negatives can occur if you test a completely cold engine with a heat-activated head gasket leak, while false positives are extremely rare with proper testing technique.
How Does a Compression Test Complement Pressure Testing?
A compression test complements pressure testing by measuring cylinder sealing integrity from the opposite direction—it pressurizes the combustion chamber to test whether gases can escape into the cooling system, while a cooling system pressure test pressurizes the cooling passages to test whether coolant can escape into the cylinders. Together, these tests provide complete diagnostic coverage of head gasket integrity and cylinder sealing.
Perform a compression test by removing all spark plugs, disabling the fuel system, and cranking the engine while a compression gauge measures the peak pressure each cylinder develops. Healthy cylinders typically show compression readings between 140-180 PSI (specific to engine design), with no more than 10% variation between cylinders. When a head gasket fails between adjacent cylinders, both affected cylinders show low and equal compression readings. When a head gasket fails between a cylinder and coolant passage, that cylinder shows significantly lower compression than its neighbors, often accompanied by air bubbles visible in the radiator when cranking the engine with the cap removed.
The diagnostic power emerges from comparing compression test results with pressure test results. If your cooling system pressure test shows rapid pressure loss with no external leaks, but compression testing reveals all cylinders show good compression with less than 10% variation, the internal leak isn’t through the head gasket—look instead at intake manifold gaskets (on some engines where coolant passages run through the intake), hidden external leaks behind the engine, or heater core leaks inside the dashboard. Conversely, if pressure testing is borderline but compression testing shows one cylinder 25% lower than the others, the head gasket is compromised even though the pressure test didn’t definitively reveal the problem.
Advanced diagnostic technicians sometimes perform a “leak-down test” as a more sensitive alternative to compression testing. This test pressurizes each cylinder individually with shop air and measures how quickly pressure escapes, identifying whether leaks are past valves, piston rings, or head gasket. The leak-down test is particularly valuable when compression testing shows borderline results that don’t clearly indicate head gasket failure, providing percentage-based leak quantification that compression testing alone cannot deliver.
What Can Coolant Analysis Reveal About System Failures?
Coolant analysis reveals contamination from combustion gases (acidic pH indicating head gasket failure), oil mixing (indicating intake manifold gasket or other seal failures), metallic corrosion products (indicating internal component degradation), and coolant degradation (indicating insufficient maintenance), each pointing to specific failure mechanisms or preventive maintenance needs. Laboratory analysis or even simple at-home testing strips provide this diagnostic information when visual inspection and pressure testing don’t explain symptoms.
Start with visual coolant inspection when you drain the system or open the radiator cap. Healthy coolant appears bright green, orange, or pink (depending on coolant type) with clear, transparent liquid. Rusty coolant and internal corrosion signs appear as brownish or muddy coolant coloration, indicating extensive steel component corrosion from acidic conditions or old deteriorated coolant that no longer provides corrosion protection. Rusty coolant often accompanies head gasket failures because combustion gases acidify the coolant, accelerating corrosion throughout the cooling system—seeing rusty coolant should prompt both head gasket testing and full system inspection for corroded components needing replacement.
Oil contamination in coolant creates a muddy brown or chocolate-milk appearance distinct from rust discoloration. This indicates a failed seal allowing engine oil and coolant to mix—common locations include intake manifold gaskets on engines with coolant passages through the intake, oil cooler failures (on engines so equipped), and severe head gasket failures that breach both oil and coolant passages. When you see oil in coolant, check the engine oil for coolant contamination (milky appearance)—bidirectional contamination suggests head gasket failure, while only oil entering coolant might indicate intake gasket failure or oil cooler breach.
Professional coolant analysis measures additional parameters including glycol concentration (should be 50-70% for proper freeze and boil protection), pH level (should be 7.5-11.0; below 7.0 indicates acidic conditions from combustion gas contamination or severely deteriorated coolant), and metallic contamination levels (elevated iron indicates steel corrosion, elevated aluminum indicates aluminum component degradation). These tests cost $25-75 at automotive laboratories and provide early warning of problems before they cause complete component failures. According to research by Valvoline laboratories published in their 2023 Coolant Analysis Study, coolant pH below 7.5 correlates with 4.2 times higher probability of subsequent cooling system component failure within 12 months, making pH testing a valuable predictive diagnostic tool.
When Should You Use an Infrared Thermometer for Diagnosis?
You should use an infrared thermometer when pressure testing shows the system is sealed (holds pressure) but you still experience overheating, suggesting internal flow blockages, stuck thermostat, or localized hot spots that pressure testing cannot detect. The infrared thermometer maps temperature distribution across cooling system components, revealing flow problems, blockages, air pockets, and thermostat malfunctions that don’t cause pressure changes but severely impact cooling performance.
The diagnostic technique involves checking temperatures at multiple cooling system points with the engine at operating temperature: radiator inlet and outlet (should show 10-20°F difference indicating coolant flow), both sides of the thermostat housing (should show large difference when closed, small difference when open), cylinder head at various points (should show relatively even temperatures), and radiator core surface (should show mostly uniform temperature across the core). Temperature deviations from these patterns indicate specific problems—a cold radiator inlet with hot engine suggests stuck thermostat or clogged radiator inlet, uneven radiator core temperatures indicate internal radiator blockage (clogged radiator symptoms), and localized hot spots on the cylinder head may indicate combustion chamber hot spots from lean fuel mixture or cooling passage blockages.
Clogged radiator symptoms confirmed through infrared diagnosis include significantly cooler radiator outlet temperature compared to inlet (suggesting insufficient coolant flow through restricted passages), patches of cool temperature on the radiator core surface indicating blockage in those sections, and overall lower radiator surface temperature despite engine overheating (indicating coolant isn’t circulating through the radiator adequately). These findings support the repair vs replace radiator decision—extensively clogged radiators with mineral deposits and corrosion typically require replacement rather than attempting to flush them clear, particularly if they’re more than 8-10 years old.
Infrared thermometry also helps verify repair success after component replacement. After installing a new thermostat, radiator, or water pump, use the infrared thermometer to confirm proper temperature patterns and coolant flow. The inlet hose should warm up as the thermostat opens, the radiator surface should show uniform temperature distribution, and the outlet hose should measure 10-20°F cooler than the inlet, confirming proper coolant circulation and heat transfer. This post-repair verification prevents customer comebacks from incomplete repairs or incorrectly diagnosed problems.
Understanding how to read radiator pressure test results transforms you from someone confused by cooling system problems into a diagnostic-capable car owner who can accurately assess repair needs, distinguish between minor and major failures, and make informed decisions about repair urgency and spending. The pressure gauge readings, hold times, and leak patterns provide a complete diagnostic story when you know how to interpret them correctly.
Remember that pressure testing is just one tool in comprehensive cooling system diagnosis—supplement it with visual inspection, combustion gas testing when internal leaks are suspected, compression testing for head gasket verification, coolant condition analysis, and infrared temperature mapping when flow problems are indicated. This multi-faceted diagnostic approach eliminates guesswork, prevents unnecessary parts replacement, and ensures you address the actual problem rather than its symptoms.
Most importantly, act on your diagnostic findings promptly and appropriately. Minor issues caught early through pressure testing remain minor with timely repair, while delayed attention allows them to progress into major failures requiring exponentially more expensive repairs. Your cooling system protects your engine’s substantial investment—give it the diagnostic attention and maintenance it deserves based on what your pressure test results reveal.