


A sweet smell and steam from the front of your car almost always indicates a coolant leak, typically caused by radiator damage, worn hoses, water pump failure, heater core leaks, blown head gaskets, faulty radiator caps, or overflow reservoir issues. This distinctive maple syrup-like odor comes from ethylene glycol in your coolant vaporizing as it contacts hot engine components, creating visible steam that warns of potentially catastrophic engine damage if ignored.
Understanding the specific source of your coolant leak determines both the urgency and cost of repairs. Minor issues like a loose radiator cap cost under $50 and take minutes to fix, while serious problems like blown head gaskets require $1,500-$3,000 in repairs and immediate professional attention. The key difference lies in recognizing whether you’re seeing external leaks with puddles under your car or internal leaks producing white exhaust smoke—each scenario demands a different response timeline.
Safety concerns make coolant leaks particularly urgent because continued driving risks complete engine seizure, potentially causing accidents, and the toxic ethylene glycol poses serious health threats to children and pets attracted to its sweet taste. Knowing whether you can safely drive to a mechanic or need to pull over immediately depends on symptom severity, coolant reservoir levels, and temperature gauge readings.
Beyond immediate repairs, preventing future coolant system failures requires understanding proper maintenance intervals, compatible coolant types, and early warning signs that develop before leaks become critical. Next, let’s examine exactly what that sweet smell means and why it appears alongside steam from your engine compartment.
What Does Sweet Smell and Steam From Front of Car Actually Mean?
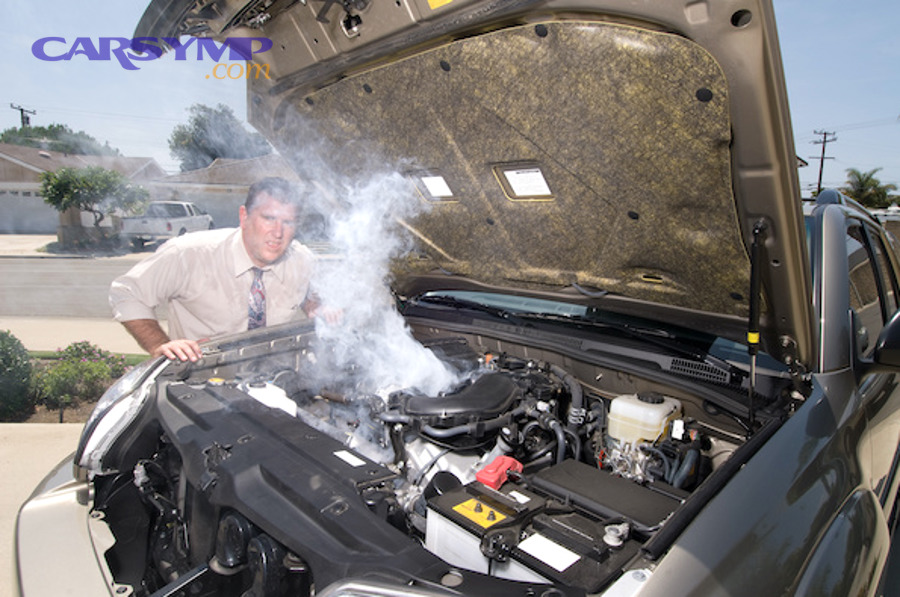
Sweet smell and steam from the front of your car means coolant containing ethylene glycol is leaking and vaporizing on hot engine surfaces, creating a distinctive maple syrup or butterscotch odor accompanied by visible white vapor. This combination specifically identifies a cooling system breach rather than other automotive fluids, making it one of the most recognizable diagnostic indicators for drivers.
The chemical composition of coolant creates this unmistakable sensory signature. Specifically, ethylene glycol—the primary ingredient in most antifreeze formulations—produces an intensely sweet aroma when heated that many drivers compare to pancake syrup, caramel, or baked goods. This sweetness serves as an evolutionary warning system, though ironically the pleasant smell masks the fluid’s extreme toxicity. When coolant escapes from your pressurized cooling system and contacts components like the exhaust manifold, engine block, or radiator, temperatures exceeding 200°F instantly vaporize the liquid into steam carrying that sweet scent throughout your engine bay and into the cabin through ventilation systems.

The steam itself differs significantly from normal engine condensation. True coolant steam appears as thick, white vapor clouds that persist even after your engine warms fully, often accompanied by a slight chemical smell mixing with the sweetness. Normal condensation, by contrast, produces thin wisps that disappear quickly within the first few minutes of operation, especially on cold mornings. Coolant steam also tends to originate from specific points—near the radiator, hose connections, or from under the dashboard if your heater core is failing—rather than dispersing evenly across the entire engine compartment.
Why Does Coolant Smell Sweet?
Coolant smells sweet because ethylene glycol molecules contain hydroxyl groups that interact with human olfactory receptors similarly to sugar compounds, creating a perception of sweetness despite being a toxic alcohol derivative. This molecular structure makes coolant one of the few automotive fluids with a pleasant rather than acrid or petroleum-based odor, which unfortunately increases ingestion risks for curious children and animals.
The concentration of ethylene glycol determines smell intensity. Modern coolant formulations typically contain 95% ethylene glycol mixed with water, corrosion inhibitors, and dyes, with the ethylene glycol component dominating the aroma profile. When heated, these molecules volatilize more readily than water, meaning the first vapors your nose detects carry concentrated sweetness before dilution with steam. Some manufacturers have begun adding bittering agents like denatonium benzoate to discourage ingestion, though these additives don’t eliminate the characteristic sweet smell that identifies coolant leaks.
Different coolant types produce subtle variations in odor. Traditional green coolant using Inorganic Additive Technology (IAT) tends toward a more straightforward sweet smell, while newer orange and pink coolants using Organic Acid Technology (OAT) or Hybrid OAT formulations may carry slightly different undertones—some describe them as having hints of vanilla or burnt sugar mixed with the primary sweetness. Regardless of formulation, however, any sweet smell from your engine compartment warrants immediate investigation as all antifreeze types contain ethylene glycol or the less-sweet but still dangerous propylene glycol alternative.
Is the Steam From My Car Dangerous?
Yes, steam from your car is dangerous because it indicates coolant escaping from a pressurized system at temperatures exceeding 200°F, potentially causing severe burns if you open the hood prematurely, while inhaling coolant vapor exposes you to toxic ethylene glycol fumes. Beyond immediate physical hazards, the steam signals cooling system failure that can destroy your engine within minutes if coolant levels drop critically low.
The temperature and pressure factors create immediate burn risks. Your cooling system operates under 15-20 PSI of pressure, allowing coolant to remain liquid at temperatures up to 250°F without boiling. When this superheated coolant suddenly escapes through a leak, it explosively converts to steam, creating a scalding cloud that can cause second or third-degree burns on exposed skin. This explains why mechanics universally warn against removing radiator caps on hot engines—even a small leak that seems manageable can hide dangerous pressure buildup waiting to release.
Coolant vapor inhalation presents less obvious but real health concerns. Ethylene glycol fumes irritate respiratory passages, causing coughing, throat burning, and breathing difficulties with prolonged exposure. While brief encounters with coolant steam won’t cause lasting damage to healthy adults, anyone with asthma or respiratory sensitivities faces increased risks. The greater danger comes from enclosed spaces—if steam enters your cabin through the ventilation system, as happens with heater core leaks, you’re continuously breathing these toxic vapors during every drive.
The steam’s appearance tells you about leak severity and engine overheating progression. Light wisps of steam suggest a small leak where coolant slowly seeps onto hot surfaces, giving you time to address the problem before catastrophic failure. Heavy billowing clouds, especially when accompanied by your temperature gauge entering the red zone, indicate either a massive leak or complete cooling system failure requiring immediate engine shutdown. If you see steam combined with engine performance issues—rough idling, loss of power, or unusual noises—your engine may already be overheating to damaging levels. According to automotive engineering studies, engine temperatures exceeding 240°F for more than five minutes begin causing permanent damage to cylinder head gaskets, warping metal components, and breaking down lubricating oils that protect moving parts.
What Are the 7 Main Causes of Sweet Smell and Coolant Steam?
The seven main causes of sweet smell and coolant steam are radiator cracks, worn coolant hoses, failed water pumps, heater core leaks, blown head gaskets, faulty radiator caps, and overflow reservoir problems, with each source producing distinct symptoms that help identify the specific failure point. Understanding these individual causes allows you to assess severity, estimate repair costs, and determine whether you’re facing a roadside emergency or a scheduled maintenance issue.
These seven causes represent virtually all coolant leak scenarios drivers encounter, accounting for the overwhelming majority of cooling system failures across all vehicle makes and models. To better understand each cause, let’s examine their unique characteristics, diagnostic indicators, and repair implications.
1. Radiator Cracks or Damage – How to Identify
Radiator cracks or damage create coolant leaks identifiable by bright green, orange, or pink puddles directly under the front center of your vehicle, accompanied by visible moisture on the radiator surface and rising temperature gauge readings during extended driving. Physical inspection reveals corrosion patterns, impact damage from road debris, or thin cracks between cooling fins where aluminum or plastic components have degraded over time.
The radiator’s location at your vehicle’s front makes it especially vulnerable to damage. Road debris, stones kicked up by other vehicles, and minor collisions with parking blocks or curbs all crack radiator cores or puncture cooling fins. Additionally, radiators using plastic end tanks—common in vehicles manufactured after 2000—develop stress cracks where plastic meets aluminum cores, particularly after five to seven years of thermal cycling between hot and cold temperatures. These plastic-to-metal joints expand and contract at different rates, eventually failing at their weakest points.

Puddle characteristics help confirm radiator problems. Fresh coolant creates slippery, slightly viscous puddles with distinctive coloring—bright green for traditional IAT coolant, orange for Dexcool formulations, or pink for some European specifications. These puddles appear within minutes of parking and concentrate directly below the radiator rather than further back under the engine. If you place cardboard under your parked car overnight, you’ll find a circular stain pattern roughly eight to twelve inches in diameter positioned at the front-center of the vehicle.
Temperature behavior provides additional confirmation. Radiator leaks worsen as coolant heats and system pressure increases, meaning symptoms intensify during highway driving or after twenty minutes of city traffic. Your temperature gauge may read normal during short trips but climb toward the hot zone during extended driving as coolant volume depletes below effective levels. Some drivers notice their gauge fluctuating—reading normal, then climbing, then dropping back—as the radiator alternately loses coolant through cracks and receives fresh coolant from the overflow reservoir.
Rusty coolant and internal corrosion signs appear in radiators nearing failure. If you inspect your coolant and find it brown, rust-colored, or containing floating particles rather than its original bright color, internal corrosion has begun destroying radiator tubes. This corrosion creates pinhole leaks invisible during casual inspection but large enough to allow significant coolant loss. The rust itself comes from steel components within the cooling system oxidizing due to old coolant that’s lost its corrosion-inhibiting properties.
2. Worn or Loose Coolant Hoses – Common Failure Points
Worn or loose coolant hoses cause leaks at connection points and along deteriorated sections, producing sweet smells and steam near the upper radiator hose, lower radiator hose, heater hoses, or bypass hoses where rubber has become brittle and cracked after years of heat exposure. Visual inspection reveals swollen sections, soft spots, surface cracks, or loosened clamps that no longer maintain proper seal pressure.
Rubber coolant hoses face brutal operating conditions that gradually destroy their integrity. These hoses must withstand coolant temperatures reaching 220°F, pressure cycling from 0 to 20 PSI thousands of times per year, and exposure to engine bay heat, oil contamination, and ozone that all attack rubber compounds. Most hoses begin showing age-related deterioration after five years, with failure rates increasing dramatically beyond seven years regardless of mileage. The rubber hardens, loses flexibility, and develops internal cracks invisible from outside until sudden catastrophic failure occurs.
Connection points represent the highest-stress zones. Where hoses attach to the radiator, engine block, heater core, or thermostat housing, constant thermal expansion and contraction work against hose clamps, gradually loosening connections or tearing rubber at the attachment lip. Upper radiator hoses fail most frequently because they carry the hottest coolant directly from the engine, while lower hoses face pressure spikes when thermostats suddenly open. Heater hoses, though smaller, run through confined spaces where heat buildup accelerates degradation.
Specific failure patterns help diagnosis. Look for coolant seeping at clamp locations—visible as white or colored crusty deposits around metal clamps. Squeeze hoses with the engine cold; healthy hoses feel firm and springy, while failing hoses feel either rock-hard or mushy-soft. Check for bulging sections that indicate internal reinforcement fabric has separated, creating weak spots prone to rupture. Surface checking—fine cracks in the outer rubber resembling dried mud—signals advanced deterioration requiring replacement even if no leak currently exists.
The progression from minor seepage to catastrophic failure can happen suddenly. Small leaks at connection points often worsen during temperature changes as metal and rubber expand at different rates. A hose that seeps a few drops during cold starts might spray coolant explosively once pressure builds during highway driving. Many drivers experience this as sudden temperature spikes accompanied by massive steam clouds when a deteriorated hose finally bursts, leaving them stranded with an empty cooling system.
3. Failed Water Pump – The Hidden Culprit
A failed water pump causes coolant leaks from its weep hole or shaft seal, producing sweet smells near the front-bottom of the engine accompanied by coolant deposits on the pump housing, timing cover, or accessory drive belts that indicate bearing wear or seal failure. Water pump leaks often develop gradually, starting as minor seepage that evaporates on contact with hot surfaces before progressing to visible drips and eventual complete failure.
The water pump’s design incorporates a weep hole specifically intended to warn of impending failure. This small drain opening sits between the pump’s coolant chamber and bearing assembly, remaining dry during normal operation but beginning to drip coolant when the shaft seal degrades. Early-stage weep hole leaks produce the characteristic sweet smell without obvious puddles because small amounts of coolant evaporate immediately on hot pump housings. As seal wear progresses, dripping increases until coolant trails down the engine block or collects on crossmembers below the pump.

Bearing failure accompanies seal problems in most pump failures. The pump shaft rides on sealed bearings that allow the impeller to spin at engine speed—often 3,000 to 6,000 RPM—while maintaining a seal against pressurized coolant. When these bearings wear, the shaft develops play or wobble that breaks the seal, allowing coolant to escape through the weep hole. You can sometimes detect bearing failure before visible leaks by listening for grinding or squealing noises from the pump area or feeling roughness when manually rotating the pump pulley with the engine off and belt removed.
Coolant on accessory belts provides another diagnostic clue. If your serpentine belt becomes contaminated with coolant from a leaking water pump, it squeals during acceleration, slips under load, and develops a glazed appearance with visible coolant residue. This contamination also shortens belt life dramatically, potentially causing belt failure that leaves you stranded without power steering, alternator charging, or water pump circulation—a compounding emergency.
Typical costs for radiator problems pale compared to water pump replacement expenses. While radiator repairs might run $400-900 depending on whether you need repair or replacement, water pump jobs typically cost $300-750 including parts and labor. The wide price range reflects access difficulty—some engines allow quick pump replacement in under two hours, while others require removing timing belts, timing chains, or multiple accessory components, pushing labor to six or more hours. Pumps on interference engines (where pistons contact valves if timing slips) demand extra care, often necessitating timing belt replacement during pump service to prevent catastrophic engine damage.
Recognizing early water pump failure prevents roadside breakdowns. If you notice coolant smell without finding obvious puddles, inspect the water pump area specifically. Look for crystallized coolant deposits colored green, orange, or pink around the pump body or on the engine block below the pump. Check accessory belts for contamination and glazing. Most importantly, don’t ignore coolant smell just because you can’t find large leaks—water pump seepage often hides until complete failure occurs during highway driving when you’re far from assistance.
4. Heater Core Leak – Inside Your Dashboard
A heater core leak produces sweet coolant smell inside your cabin, often accompanied by oily film on the windshield, wet passenger-side carpet, and reduced heating performance as the miniature radiator hidden behind your dashboard fails. Unlike external coolant leaks, heater core failures release vapors directly into passenger compartment air, creating noticeable symptoms during defroster or heater operation when blower fans distribute coolant-contaminated air throughout the cabin.
The heater core functions as a small radiator mounted inside your dashboard, transferring engine heat to cabin air when you activate climate controls. Hot coolant flows from the engine through heater hoses into this compact heat exchanger where a blower fan pushes air across its fins, warming your interior. When this core develops leaks—typically from corrosion, vibration stress, or coolant acidity degrading thin aluminum or copper tubes—pressurized coolant escapes into the HVAC housing, immediately vaporizing on contact with warm air.
Windshield fogging provides one of the earliest warnings. Coolant vapor from a leaking heater core condenses on the inside of your windshield as an oily, slightly greasy film that smears when you try wiping it away with standard cleaning. This film differs from normal condensation fogging because it resists clearing and often carries a faint sweet smell. The fogging typically worsens when you first start the heater after the engine warms, as increased coolant pressure forces more fluid through the leak.
Carpet wetness concentrates on the passenger side front floor in most vehicles since manufacturers position heater cores toward the passenger footwell. The wetness feels slightly slippery or oily rather than pure water and may appear pink, green, or orange depending on your coolant type. Unlike water from clogged air conditioning drains, which produces clear puddles, heater core leaks create colored stains with that distinctive sweet smell. Some drivers first notice this when their shoes stick to the carpet or when wet spots persist even after dry weather eliminates other moisture sources.
Heating performance degradation accompanies advanced heater core failure. As the core clogs with corrosion or loses coolant flow through leaking tubes, it transfers less heat to cabin air, leaving you with weak heat output even when the engine reaches full operating temperature. You might notice inconsistent heating—strong on one side, weak on the other—if only some core tubes remain functional. This symptom distinguishes heater core problems from thermostat failures or air pockets, which affect overall engine temperature rather than just cabin heating.
Repair costs for heater core replacement rank among the most expensive cooling system repairs because dashboard removal requires extensive labor. Most heater core jobs cost $500-1,500, with $800-1,000 representing the typical range for mainstream vehicles. The parts themselves only cost $50-150, but labor dominates because technicians must remove steering wheels, instrument panels, climate control systems, and sometimes entire dashboards to access the heater core buried deep within the HVAC assembly. Some vehicles notoriously require 8-12 hours of labor, pushing costs toward the upper end of that range.
5. Blown Head Gasket – The Serious Problem
A blown head gasket causes sweet smell combined with white smoke from the exhaust, rough engine performance, and often overheating as combustion gases mix with coolant through a breach in the seal between cylinder head and engine block. This represents the most serious coolant leak scenario because internal leaks allow coolant into combustion chambers or oil passages, creating engine damage beyond just cooling system failure.
The head gasket’s critical function makes its failure catastrophic. This multi-layer metal or composite gasket seals the junction between your engine block and cylinder head, maintaining separation between combustion chambers, coolant passages, oil galleries, and the external environment. When this seal fails—typically from overheating, improper installation, or simple wear on high-mileage engines—various fluids mix in ways that rapidly cause severe engine damage. Coolant entering combustion chambers produces white exhaust smoke, coolant contaminating oil creates a milky substance visible on the dipstick, and combustion gases entering the cooling system cause rapid pressure buildup and overheating.

White exhaust smoke provides the clearest diagnostic indicator. This smoke appears thick, white, and continuous rather than the thin wisps of normal condensation that disappear after engine warmup. The smoke smells sweet from vaporized coolant and often persists regardless of engine temperature or operating conditions. Heavy white smoke billowing from the exhaust on startup or during acceleration signals coolant burning in the combustion chambers, confirming internal head gasket failure rather than external leaks.
Engine performance problems accompany head gasket breaches. You might experience rough idling, misfires on specific cylinders, loss of power, or difficulty starting as coolant accumulates in combustion chambers, preventing proper fuel ignition. The engine may run unusually rough when cold but smooth out slightly as it warms, or vice versa, depending on exactly where the gasket failed. Some vehicles enter a cycle where they overheat, cool down overnight, start normally, then overheat again after minutes of driving as combustion gases pressurize the cooling system.
Coolant loss without visible external leaks points toward head gasket failure. If your coolant reservoir constantly needs refilling but you find no puddles under the vehicle and no steam from the engine compartment, the coolant is likely burning internally through head gasket breaches. This internal consumption can reach surprising rates—some blown gaskets consume a quart of coolant every few days or even faster depending on breach size and driving conditions.
The cooling system pressure test confirms head gasket failure. Mechanics pressurize your cooling system to operating pressure (typically 15 PSI) and watch for pressure drops indicating leaks, but with head gasket failures, pressure often increases abnormally as combustion gases enter the coolant. Alternatively, a block test uses special fluid that changes color when exposed to combustion gases, definitively identifying internal breaches even when other symptoms seem ambiguous.
Repair costs make head gasket failure the most expensive cooling system issue. Professional head gasket replacement typically costs $1,500-3,000, with some vehicles requiring $4,000 or more if machine shop work (head resurfacing or replacement) becomes necessary. The job demands removing the cylinder head, inspecting for warping or cracks, often machining the head surface flat, replacing the gasket with proper torque specifications, and reassembling with new head bolts and fresh fluids. This 8-15 hour job requires mechanical expertise beyond most DIY capabilities.
Prevention emphasizes never ignoring early cooling system problems. Most head gasket failures result from previous overheating events that warped heads or weakened gasket materials. If your engine overheats even once, it may sustain damage that leads to head gasket failure weeks or months later. Maintaining proper coolant levels, replacing coolant according to manufacturer schedules, and immediately addressing any cooling system leaks prevents the overheating that destroys head gaskets.
6. Faulty Radiator Cap – The Simple Fix
A faulty radiator cap fails to maintain proper cooling system pressure, causing coolant to boil at lower temperatures and escape through the overflow tube while producing sweet smell and visible steam from the reservoir area. This represents one of the cheapest and easiest fixes for coolant-related problems since radiator cap replacement costs only $15-50 and takes seconds to complete without tools or mechanical expertise.
The radiator cap’s pressure-maintenance function proves crucial for cooling efficiency. Modern cooling systems operate at 15-20 PSI pressure, which elevates coolant’s boiling point from 212°F to approximately 250°F, providing critical temperature margin for safe engine operation. The radiator cap contains a spring-loaded valve that opens at the specified pressure rating, releasing excess pressure to the overflow reservoir while maintaining this elevated boiling point. When the cap’s spring weakens, seal deteriorates, or pressure valve fails, your system can’t maintain pressure, allowing coolant to boil prematurely and creating steam even though your engine hasn’t actually overheated.
Visual inspection reveals many radiator cap failures. Remove the cap when the engine is completely cold and examine its rubber seal for cracks, hardening, or compression set (permanent flattening). The seal should feel soft and springy with no visible damage or deformation. Check the underside for corrosion, coolant deposits, or damage to the pressure valve mechanism. Even a cap that looks acceptable externally might have a weakened spring invisible without disassembly.
Symptoms suggesting cap failure include seeing coolant in the overflow reservoir when the system cools, hearing gurgling or bubbling sounds from the radiator with the engine running, or smelling coolant without finding leaks elsewhere. The temperature gauge may fluctuate unpredictably or climb higher than normal even though no actual overheating is occurring—simply because reduced pressure lowers the boiling point. Some drivers notice their heater works intermittently as air pockets form when the system can’t maintain proper pressure.
Testing radiator cap pressure requires a specialized tool found at auto parts stores that measures the actual pressure the cap holds before its relief valve opens. Many auto parts stores test caps for free, pressurizing the cap to verify it holds rated pressure without leaking. This simple test confirms whether your cap maintains specification or needs replacement.
Radiator cap replacement solves pressure problems immediately. Purchase a cap matching your system’s pressure rating (stamped on the original cap or listed in your owner’s manual—typically 13-20 PSI depending on vehicle) and simply thread or snap it into place. Never use a higher-pressure cap than specified thinking it provides extra cooling margin; excessive pressure can rupture hoses or damage the radiator itself. Conversely, lower-pressure caps allow premature boiling that overheats the engine.
This simple fix prevents far more expensive repairs. A failing radiator cap causes repeated overheating episodes that eventually warp cylinder heads, blow head gaskets, or crack engine blocks. The $15-50 spent on a quality replacement cap potentially saves thousands in engine damage while immediately eliminating coolant smell and steam from pressure-related boiling. If you’ve recently had cooling system work performed and suddenly notice coolant smell, check whether the mechanic properly reinstalled or replaced the radiator cap—this simple oversight causes many post-repair cooling problems.
7. Overflow Reservoir Issues – Overfilling or Cracks
Overflow reservoir issues cause coolant spillage when the plastic reservoir develops cracks from age or when improper filling exceeds maximum levels, allowing expanding hot coolant to overflow and vaporize on surrounding engine components. These problems typically produce intermittent sweet smell and steam during warmup periods when coolant expands rather than the continuous symptoms associated with other cooling system failures.
The overflow reservoir (also called expansion tank or coolant recovery tank) serves as a pressure relief and storage system for coolant that expands when heated. As your engine warms from 70°F to 200°F+, coolant volume increases by roughly 10%, forcing excess fluid through the radiator cap into this reservoir. When the engine cools, partial vacuum draws coolant back into the radiator, maintaining proper fill levels. The reservoir features minimum and maximum markings indicating proper cold and hot fill levels.
Overfilling causes spillage during thermal expansion. If someone fills coolant above the “MAX” or “FULL HOT” line, the expanding hot coolant has nowhere to go and overflows from the reservoir cap or overflow tube. This excess coolant drips onto engine surfaces, immediately vaporizing and creating sweet smell and steam that alarms drivers despite representing no actual leak in the sealed cooling system. The symptom typically appears five to ten minutes after starting a cold engine as coolant temperature rises and expansion occurs.

Reservoir cracks develop from age and environmental stress. The plastic reservoirs endure years of thermal cycling from cold to hot, vibration from engine operation, and exposure to coolant chemicals and engine bay heat. After eight to ten years, stress cracks commonly form at mounting points, around the cap threads, or along seam lines where plastic was welded during manufacturing. These cracks may be nearly invisible hairline fractures that only leak under pressure when coolant is hot, making them difficult to diagnose.
Diagnosing reservoir problems requires careful inspection. First, verify coolant level sits between the minimum and maximum marks when the engine is cold. If it exceeds the maximum, overfilling is the problem—solution involves carefully removing excess coolant with a turkey baster or similar tool until proper level is achieved. For crack detection, clean the reservoir thoroughly and inspect while squeezing it to flex the plastic and reveal stress cracks. Alternatively, pressurize the cooling system with the engine cold and watch for leaks around the reservoir; cracks often reveal themselves as seeping coolant under pressure that would go unnoticed otherwise.
Reservoir replacement costs little but requires care. Replacement reservoirs cost $30-80 depending on vehicle, with installation requiring only basic tools to disconnect hoses and remove mounting bolts. However, take care during hose disconnection to prevent coolant spillage and avoid breaking brittle plastic hose connections that may snap if forced. After installation, properly fill and burp the cooling system to remove air pockets, following manufacturer procedures that often involve running the engine with the radiator cap off until the thermostat opens and trapped air escapes.
Preventive maintenance includes checking reservoir integrity during routine service and maintaining proper coolant levels. Replace any reservoir showing stress cracks, cloudiness, or discoloration before failure occurs. When adding coolant, always reference the cold fill line and never overfill. Use only the correct coolant type specified by your manufacturer, as mixing incompatible coolants or using tap water instead of distilled water accelerates reservoir degradation and cooling system corrosion.
Should I Keep Driving If I Smell Sweet Coolant and See Steam?
No, you should not keep driving if you smell sweet coolant and see steam because continued operation with low coolant levels causes rapid engine overheating that can warp cylinder heads, crack engine blocks, or seize moving parts within minutes, turning a repairable leak into catastrophic engine failure costing thousands to replace. The specific decision depends on leak severity, coolant level, and temperature gauge readings, but prioritizing immediate shutdown always provides the safest course of action.
To better understand when driving becomes too dangerous, consider three severity scenarios. If you detect faint sweet smell with no visible steam and your temperature gauge reads normal, you likely have a minor leak allowing time to carefully drive to a nearby mechanic while monitoring temperature constantly. When you see light steam with sweet smell and your gauge approaches the hot zone, immediate shutdown is critical—pull over safely, turn off the engine, and call for towing rather than risking permanent damage. If heavy steam billows from under the hood with rapidly climbing temperature, you’re experiencing active overheating requiring emergency shutdown regardless of location; continued operation even for thirty seconds can destroy your engine.
The economic calculation strongly favors conservative action. A tow truck costs $75-150, while a replacement engine costs $3,000-8,000 installed. If your temperature gauge enters the red zone even briefly, you’ve likely already damaged the head gasket or warped the cylinder head, but shutting down immediately might limit damage to repairable levels. Running an overheating engine “just a few more minutes” to reach a preferred location frequently converts a $500 repair into a $5,000 replacement.
What Happens If I Ignore a Coolant Leak?
Ignoring a coolant leak leads to progressive engine overheating that causes head gasket failure, cylinder head warping, engine block cracks, and ultimately complete engine seizure as inadequate coolant allows metal components to expand beyond design tolerances and destroy themselves. The progression from minor leak to catastrophic failure can occur over weeks for small leaks or within minutes for major breaches, with repair costs escalating from hundreds to thousands of dollars as damage accumulates.
The physics of engine overheating explains this progression. Your engine generates tremendous heat from controlled explosions in combustion chambers—temperatures can exceed 2,000°F during combustion. The cooling system must continuously remove this heat, maintaining engine temperature around 195-220°F where metals maintain proper tolerances and oils lubricate effectively. When coolant levels drop, remaining fluid heats faster than the system can dissipate, causing temperatures to spike. Once temperatures exceed 240°F, your engine enters the danger zone where damage begins.
Initial damage appears in the head gasket and cylinder head. The gasket—designed for specific temperature ranges—begins degrading when temperatures exceed design limits, with its metal or composite layers oxidizing, compressing, or burning away. The aluminum cylinder head expands more than the cast iron engine block, causing warping that breaks the head gasket seal even further. This creates a cascading failure where coolant leaks internally, reducing cooling capacity, which increases temperatures, which causes more warping and leaking.
Oil degradation compounds mechanical damage. Modern motor oils maintain lubricating properties within a specific temperature range, but overheating breaks down oil additives and reduces viscosity. This degraded oil fails to properly lubricate bearings, piston rings, and valve train components, causing increased friction that generates additional heat. The combination of excessive heat and poor lubrication creates wear patterns normally requiring 100,000 miles in just hours of operation.
Engine seizure represents the terminal failure. As components expand beyond tolerances, clearances between moving parts disappear. Pistons may scuff cylinder walls, bearings may weld to crankshaft journals, or valve stems may stick in guides. The engine first develops rough running and knocking sounds, then suddenly stops turning as metal-to-metal contact creates fusion welds stronger than the engine’s turning force. A seized engine generally requires complete replacement rather than rebuild, with costs reaching $4,000-8,000 including labor.
The cost escalation timeline illustrates why early intervention matters. A leaking hose costing $75 to replace becomes a $500 water pump replacement if the leak causes overheating that damages the pump bearings. Ignoring this creates a $1,500 head gasket job when repeated overheating warps the head. Continue driving and you’re facing a $3,000 cylinder head replacement. Final negligence results in a $6,000 engine replacement after complete seizure. Each delay increases costs exponentially while decreasing the likelihood of successful repair.
According to automotive repair data compiled by RepairPal in 2024, engines subjected to severe overheating events face an 80% likelihood of requiring major repairs within six months, even if initial damage seems minor. The same data shows that immediate repairs at first signs of coolant leaks cost an average of $280, while repairs after overheating events average $1,850—a 560% cost increase for delay.
How Long Can I Drive With a Coolant Leak?
You can drive with a minor coolant leak for approximately 50-100 miles if the leak is slow, you maintain frequent coolant refills, monitor temperature constantly, and avoid highway speeds or stop-and-go traffic, though this represents an emergency measure only, not a safe long-term solution. Major leaks producing visible steam or rapid coolant loss permit zero safe driving distance, requiring immediate shutdown and towing to prevent engine damage.
Leak severity determines safe driving distance. A minor seep losing a few ounces per day allows time to schedule convenient repairs while monitoring levels between drives. These small leaks—perhaps from a slightly loosened hose clamp or early-stage water pump weep hole drip—permit several days or even weeks of careful operation if you check and refill coolant before each trip. However, you’re gambling that the small leak won’t suddenly worsen, and most mechanics consider even minor leaks urgent because predicting when they’ll escalate remains impossible.
Moderate leaks losing significant coolant during each drive demand same-day repair. If you notice your coolant reservoir drops from full to minimum during a typical commute, you’re losing roughly a quart per trip. This rate allows completing essential trips—getting to work, reaching a repair shop—but prohibits discretionary driving. Before each trip, verify coolant level and plan your route to include escape routes where you can safely pull over if overheating begins. Keep gallon jugs of coolant in your vehicle and check levels before restarting after any stop.
Severe leaks require immediate shutdown. If coolant pours from underneath your vehicle, steam billows from the engine compartment, or your temperature gauge climbs into the red zone, turn off the engine immediately regardless of your location. These symptoms indicate cooling system failure where the engine generates heat faster than remaining coolant can absorb it. Continuing operation—even moving the vehicle 100 feet to a better parking spot—risks permanent engine damage. Call for towing and wait; the $100 tow cost is trivial compared to engine replacement.
Emergency driving techniques extend safe distance when you must reach shelter or safety. If caught in dangerous weather, heavy traffic, or unsafe neighborhoods when your leak suddenly worsens, these methods buy precious minutes. First, maximize coolant circulation by turning the heater to maximum heat and fan to highest speed—this uses your heater core as an auxiliary radiator, removing extra heat from the engine. Second, avoid acceleration and maintain steady 35-45 mph speeds that minimize heat generation. Third, shut off the air conditioning compressor, which adds heat to the cooling system. Fourth, if the temperature gauge climbs despite these efforts, turn the engine off and coast with key in “on” position to maintain power steering and brakes; allow the engine to cool for five minutes, then restart and continue.
Coolant level monitoring provides crucial guidance. Before driving with a known leak, mark your current coolant level in the reservoir. After driving, immediately check the level again while the engine is still hot to see exactly how much coolant you lost. This measurement tells you whether the leak is stable, worsening, or (rarely) improving as sealant products or corrosion buildup temporarily close small breaches. Calculate your coolant loss rate per mile: if you lose one quart over fifty miles, you know you can safely drive another twenty miles before reaching the critical minimum level that risks overheating.
The temperature gauge becomes your primary safety instrument. In normal operation, the gauge should reach its mid-point (typically marked with a single notch or positioned halfway between cold and hot) and remain there steadily. Any reading approaching three-quarters toward hot or entering the red zone demands immediate engine shutdown. Some vehicles display temperature numerically—normal operating temperature ranges from 195°F to 220°F, with 230°F representing the danger threshold requiring shutdown. Modern vehicles may illuminate a temperature warning light before gauge movement—this light always means stop driving immediately.
Risk factors multiply during certain conditions. Stop-and-go traffic generates maximum heat with minimum airflow across the radiator, accelerating overheating. Summer temperatures reduce cooling efficiency and decrease the margin between operating temperature and danger zones. Towing trailers, carrying heavy loads, or climbing mountain grades all increase heat generation, shortening safe driving distances dramatically. If your coolant leak coincides with these high-stress conditions, your safe driving distance drops from miles to mere feet.
How Do I Diagnose Where the Coolant Leak Is Coming From?
You diagnose where coolant leaks originate by systematically inspecting the cooling system when the engine is cold, looking for puddles underneath the vehicle, checking all hose connections and components for moisture or coolant stains, and observing where steam appears when the engine heats. This methodical approach identifies leak sources ranging from obvious radiator damage to hidden heater core failures, allowing you to assess repair urgency and costs before consulting a mechanic.
Professional diagnosis combines visual inspection with pressure testing and dye tracing for difficult leaks, but home mechanics can successfully locate most coolant leaks using only careful observation and basic knowledge of cooling system components. The key lies in checking specific high-failure areas in logical sequence rather than randomly searching the entire engine bay.
Visual Inspection Checklist for Coolant Leaks
Visual inspection locates most coolant leaks through careful examination of the vehicle’s underside, all hose connections, the radiator surface, and the water pump area for puddles, moisture, or coolant residue appearing green, orange, or pink. Start this inspection with a completely cold engine to safely touch components and prevent burns from pressurized coolant.
Begin underneath the vehicle where gravity collects leaking coolant. Place clean cardboard or paper towels under the engine overnight, then examine the placement and color of any stains in the morning. Bright green, orange, or pink spots confirm coolant rather than oil (dark brown), transmission fluid (red), or water (clear). The stain location indicates the approximate leak source: front-center suggests radiator, slightly back and centered points to water pump, further back indicates engine block or head gasket, and passenger side front suggests heater core hoses.
Hose connections represent the most common leak points. With the engine cold, trace every coolant hose from end to end, feeling for moisture at connection points. Check where hoses attach to the radiator, engine block, thermostat housing, heater core, and overflow reservoir. Look for white or colored crusty deposits around clamps—this crystallized coolant proves seepage even if no active drip appears during inspection. Squeeze hoses to verify they remain flexible; hard, brittle hoses will soon crack and leak even if currently intact.
The radiator requires thorough examination from multiple angles. Stand in front of your vehicle and visually scan the radiator surface for damage, looking for bent fins, punctures, or moisture on the core. Use a flashlight to inspect between cooling fins where small cracks hide easily. Check both plastic end tanks for stress cracks at the corners or along seams where plastic meets aluminum cores. Moisture around the radiator cap indicates either cap failure or overfilling, while moisture at the top or bottom tanks suggests tank or core breach.
Water pump inspection demands specific attention to the weep hole and pump seals. Locate your water pump (usually at the front of the engine, driven by the serpentine belt) and examine its underside using a mirror if necessary. The weep hole will show coolant staining or crystallized deposits if the pump seal is failing. Check the pump pulley by trying to wiggle it with the engine off; any play indicates bearing wear that will soon cause seal failure. Look at your accessory belts for coolant contamination—glazed appearance or green/orange tinting confirms pump seepage.
Heater core leaks require interior inspection. Check passenger-side carpet for dampness, feeling deep into the padding where moisture collects but remains invisible on the surface. Examine the windshield for oily film that resists normal cleaning. Turn on the heater with the engine warm and smell the air from the vents—strong sweet smell confirms heater core issues. Look under the dashboard passenger side for dripping coolant or moisture on visible HVAC housing components, though many heater cores hide too deeply for visual confirmation without dash removal.
When Do I Need a Professional Pressure Test?
You need a professional pressure test when visual inspection fails to reveal obvious leaks despite persistent coolant loss, sweet smell, or overheating symptoms, or when you suspect internal leaks like head gasket failure that don’t produce external drips. Pressure testing applies 15-20 PSI to the cooling system, simulating operating conditions that force coolant through leaks too small to detect otherwise and confirming whether the system holds proper pressure.
The pressure test procedure uses a specialized pump tool that connects to your radiator opening. With the engine cold, the mechanic pumps the system to its rated pressure (stamped on the radiator cap), then watches gauges and inspects all components while pressure is applied. Leaks that seep slowly during normal operation become active drips under pressure testing, revealing their exact locations. The test also identifies failing radiator caps that can’t maintain pressure and checks for internal leaks by observing whether pressure drops abnormally fast or whether coolant appears in the combustion chambers.
Internal leaks require specialized testing beyond pressure checks. When head gaskets fail, combustion gases enter the cooling system, contaminating coolant and creating pressure that normal pressure tests don’t detect. Mechanics use chemical block tests that draw air from the radiator through special test fluid; if combustion gases are present, the fluid changes color from blue to yellow or green, confirming head gasket breach even without visible symptoms. Alternatively, exhaust gas analyzers can detect hydrocarbons in radiator air space, providing electronic confirmation of internal leaks.
Cylinder leak-down testing pinpoints which cylinder has head gasket failure. This test pressurizes each cylinder individually with compressed air while monitoring where that air escapes. If you hear hissing from the radiator or see bubbles in the coolant when a specific cylinder is pressurized, you’ve identified exactly which area of the head gasket has failed, information that helps mechanics plan repairs and assess whether head machine work will be necessary.
Cost considerations make DIY pressure testing attractive for mechanically inclined owners. Pressure test kits cost $30-60 to purchase or many auto parts stores loan them free with deposit. However, interpreting results requires experience—knowing the difference between normal seepage and significant leaks, understanding pressure drop rates, and correctly identifying leak sources saves money versus misdiagnosing problems. If you’re uncertain about your findings, having a shop verify with their professional equipment ($75-100 diagnostic fee) prevents expensive incorrect repairs.
The pressure test value extends beyond leak detection. It confirms repair success after fixing coolant leaks, verifies that replacement components seal properly, and identifies marginal parts like radiator caps before they cause roadside failures. Many mechanics include pressure testing as standard procedure during cooling system service, catching problems before they strand drivers.
What Are the Repair Options and Costs for Coolant Leaks?
Repair options for coolant leaks range from simple DIY radiator cap replacement costing $15-50 to complex head gasket rebuilds requiring $1,500-3,000 professional service, with most common fixes—hose replacement, water pump installation, and radiator repair—falling in the $200-900 range depending on parts accessibility and labor requirements. Your specific repair path depends on leak location, severity, and whether temporary fixes suffice or permanent solutions are necessary.
Understanding the repair landscape helps you make informed decisions when mechanics present options. Some fixes legitimately qualify as DIY weekend projects requiring only basic tools, while others demand professional expertise, specialized equipment, and precise procedures to avoid causing additional damage.
Quick Fixes vs. Permanent Solutions – What’s Worth It?
Quick fixes like stop-leak additives provide temporary relief for minor coolant seepage costing $15-40 and buying weeks or months of driving time, while permanent solutions involving component replacement cost hundreds more but eliminate recurring problems and maintain vehicle reliability. The decision between temporary and permanent repairs depends on your vehicle’s value, your budget limitations, and whether you’re keeping the car long-term or need it running briefly before replacement or sale.
Stop-leak products work by circulating particles through your cooling system that accumulate at breach points, forming temporary seals. These products—brands like Bar’s Leaks, K-Seal, or Blue Devil—suspend ceramic particles, sodium silicate, or other compounds that solidify when contacting air at leak points. For very small seeps in radiators or water pump seals, stop-leak can work surprisingly well, halting leaks for months or even years in lucky cases. However, these products also risk clogging narrow passages in radiators or heater cores, potentially creating worse problems than they solve.
Appropriate stop-leak use requires following strict guidelines. Use these products only for seepage, never for drips or streams—if you can see coolant actively flowing, stop-leak won’t seal the breach. Apply exactly the recommended amount, never more thinking it will work better; excess product definitely clogs components. Choose products designed for your specific problem: radiator stop-leak differs from head gasket formulations, with each optimized for different temperatures and breach sizes. Never use stop-leak as long-term solution on valuable vehicles; consider it emergency transportation medicine only.
Tightening hose clamps represents the simplest effective repair. If inspection reveals loose clamps at hose connection points, tightening them with a screwdriver or socket wrench often stops leaks immediately at zero cost beyond five minutes of effort. However, if hoses have already deformed or rubber has hardened, tightening just crushes brittle rubber without creating proper seal. In these cases, replace both the hose and clamp rather than accepting temporary fixes destined to fail during your next highway trip.
Radiator cap replacement qualifies as a quick fix that’s actually permanent. A failing cap costs $15-50 to replace and takes thirty seconds with no tools. This fix genuinely solves pressure-maintenance problems rather than temporarily masking them, making it one of the few quick fixes mechanics universally recommend. Always replace radiator caps with exact pressure rating specified for your vehicle—higher pressure risks rupturing components while lower pressure allows premature boiling.
The quick-fix temptation becomes dangerous when it delays necessary repairs. If your water pump weep hole is dripping, no amount of stop-leak will prevent the inevitable bearing failure that leaves you stranded. When heater core leaks make your car smell sweet inside, breathing those toxic vapors while hoping stop-leak will fix it jeopardizes your health. Major leaks demand proper repair—temporary measures only extend the time until catastrophic failure, often resulting in more expensive repairs than addressing the original problem promptly.
Vehicle value guides the repair decision. On a car worth $15,000 where you plan years of ownership, spending $800 for proper water pump replacement makes sense. On a car worth $3,000 that you’re driving until it dies, using $20 stop-leak to extend its life another six months represents smart economics. On a car you’re selling next month, quick fixes are ethically questionable—disclose any temporary repairs to buyers and adjust price accordingly rather than concealing known problems.
Average Repair Costs by Leak Source
Average coolant leak repair costs vary dramatically by component, with radiator cap replacement averaging $15-50, coolant hoses running $50-200, water pumps costing $300-750, radiator replacement requiring $400-900, heater cores demanding $500-1,500, and head gasket jobs ranging from $1,500-3,000 including parts and labor. These ranges reflect differences between mainstream vehicles and luxury brands, accessibility challenges, and whether related repairs become necessary during service.
The cost breakdown for specific repairs reveals where your money goes. A table illustrates typical expenses:
| Repair Type | Parts Cost | Labor Cost | Total Range | Time Required |
|---|---|---|---|---|
| Radiator Cap | $15-50 | $0 | $15-50 | 1 minute (DIY) |
| Coolant Hoses | $20-75 | $50-150 | $50-200 | 0.5-1.5 hours |
| Radiator Flush | $15-30 | $75-125 | $90-150 | 1-2 hours |
| Thermostat | $15-50 | $75-200 | $90-250 | 1-2 hours |
| Water Pump | $75-250 | $200-500 | $300-750 | 2-4 hours |
| Radiator Replacement | $150-500 | $200-400 | $400-900 | 2-3 hours |
| Heater Core | $80-300 | $400-1,200 | $500-1,500 | 4-8 hours |
| Head Gasket | $100-400 | $1,400-2,600 | $1,500-3,000 | 8-15 hours |
This table illustrates typical repair costs across various cooling system components, helping drivers budget for necessary repairs.
Labor rates significantly impact total costs. Independent shops charge $75-125 per hour in most regions, while dealerships command $125-200 hourly rates. High cost-of-living areas like California or New York add another 25-40% to these rates. The labor time required determines your final bill more than parts costs in most cases—a $75 water pump becomes a $600 job because replacing it requires four hours of labor.
Parts quality affects both immediate cost and long-term reliability. Original Equipment Manufacturer (OEM) parts from your vehicle’s manufacturer cost 20-40% more than aftermarket alternatives but guarantee exact fit and typically include better warranties. Budget aftermarket parts save money initially but may fail prematurely, requiring repeated repairs that exceed OEM costs over time. For critical components like water pumps and thermostats, most mechanics recommend OEM quality, while hoses and simple parts work fine as quality aftermarket units.
Related repairs often accompany coolant leak fixes. When replacing a water pump, smart mechanics recommend simultaneously replacing the serpentine belt, thermostat, and all coolant hoses since these components share similar lifespans and the engine’s already partially disassembled. While adding these items increases immediate costs by $150-300, it prevents returning weeks later for additional repairs requiring identical disassembly procedures. Similarly, head gasket jobs should include cylinder head resurfacing and valve inspection since the head is already removed—the machine work adds $200-400 but ensures proper sealing.
Timing belt replacement coincides with water pump service on interference engines. Many vehicles use the timing belt to drive the water pump, making pump replacement impossible without timing belt removal. Since timing belts require replacement every 60,000-100,000 miles regardless, combining both jobs saves hundreds in labor costs. If your timing belt is approaching its service interval when water pump fails, replace both simultaneously—the belt alone costs $400-800 including labor, but adding the water pump increases the total by only $100-200 since the engine’s already disassembled.
DIY repairs dramatically cut costs for mechanically capable owners. Replacing coolant hoses yourself requires only basic tools and saves the $75-150 labor charge, turning a $150 shop repair into a $30 parts purchase. Water pump replacement demands more skill but still falls within experienced DIYer capabilities, potentially saving $300-400 in labor. However, head gasket replacement requires precision torque specifications, machine shop access, and expertise beyond most home mechanics—attempting this repair without professional knowledge risks permanent engine damage exceeding professional repair costs.
Getting multiple repair quotes prevents overpaying. Call at least three shops describing your symptoms (not your diagnosis) and request written estimates. Quotes varying by more than 30% warrant investigation—either the low bidder is cutting corners or the high bidder is overcharging. Ask what parts they’ll use (OEM vs aftermarket), what warranty they provide (typically 1-2 years), and whether the estimate includes all necessary related repairs or just the minimum fix.
How Can I Prevent Coolant Leaks and Cooling System Failures?
You prevent coolant leaks and cooling system failures through regular coolant flushes every 30,000-50,000 miles, periodic hose inspections replacing components at first signs of deterioration, using manufacturer-specified coolant types, maintaining proper coolant levels, and addressing small leaks immediately before they worsen. Preventive maintenance costs a fraction of emergency repairs while extending cooling system lifespan from 5-7 years to 10-12 years or more with proper care.
The preventive approach recognizes that cooling systems gradually degrade through normal operation. Coolant loses its anti-corrosive properties over time, hoses become brittle from heat cycling, and metal components develop corrosion from chemical reactions. By addressing these gradual changes through scheduled maintenance rather than waiting for failures, you avoid roadside breakdowns and expensive emergency repairs. Moreover, preventing overheating episodes protects your entire engine since head gaskets, pistons, and bearings all suffer damage from excessive heat.
What Type of Coolant Should I Use in My Car?
You should use the coolant type specified by your vehicle manufacturer, typically either Inorganic Additive Technology (IAT) green coolant, Organic Acid Technology (OAT) orange or pink coolant, or Hybrid OAT (HOAT) yellow coolant, with each formulation containing different corrosion inhibitors optimized for specific engine metals and designs. Using incorrect coolant types or mixing incompatible formulations causes accelerated corrosion, gasket degradation, and cooling system component failures within months instead of years.
Coolant chemistry has evolved significantly since the early days when all antifreeze was green and virtually universal. Modern engines use different metal alloys—aluminum heads, cast iron blocks, brass fittings—requiring specific corrosion inhibitors. IAT coolant (the traditional green type) uses silicate and phosphate corrosion inhibitors that protect older cast iron engines but create abrasive deposits in modern aluminum systems. OAT coolants replace these with organic acids providing longer-lasting protection specifically for aluminum components. HOAT formulations combine both technologies, offering broad compatibility across different metals.
Your vehicle’s manual specifies which type to use. Look in the maintenance section for language like “Use only OAT coolant meeting specification ABC” or similar wording that identifies the required type. Never assume green coolant works in all cars—many European vehicles require specific long-life OAT formulations while Asian vehicles often need HOAT blends. Using the wrong type may not cause immediate problems, but within 6-12 months you’ll see accelerated corrosion, gasket deterioration, and component failures the wrong chemistry promotes.
Color coding provides rough guidance but shouldn’t be trusted absolutely. Green usually indicates IAT, orange or pink suggests OAT, and yellow hints at HOAT, but manufacturers sometimes dye coolants different colors for branding purposes despite identical chemistry. Rely on the specification stated on the coolant bottle—look for language like “meets Ford specification WSS-M97B44-D” matching your vehicle’s requirements rather than trusting color alone.
Mixing different coolant types creates serious problems. When IAT silicates combine with OAT organic acids, they react to form gel-like sludge that clogs narrow radiator passages, heater cores, and thermostat housings. This sludge restricts coolant flow, causing localized hotspots, uneven engine heating, and eventual component failures. If you must add coolant in an emergency without knowing what’s in your system, use plain distilled water temporarily—it won’t provide freeze protection or corrosion inhibition, but it also won’t create damaging chemical reactions. Then schedule complete system flush and refill with correct coolant as soon as possible.
Coolant service intervals depend on the formulation. Traditional IAT green coolant requires replacement every 24,000-36,000 miles or 2-3 years because its corrosion inhibitors deplete relatively quickly. Extended-life OAT coolants last 100,000-150,000 miles or 5 years before requiring complete replacement. HOAT formulations typically need service at 50,000-100,000 miles. These intervals represent complete drain-and-refill service; you should check coolant levels monthly and top off between services, always using the same coolant type already in your system.
The universal coolant myth deserves debunking. Some manufacturers market “universal” coolants claiming compatibility with all vehicles and coolant types. While these products undergo extra testing and use buffered formulations attempting broad compatibility, they still represent compromises—providing acceptable but not optimal protection. If you’re maintaining a vehicle for long-term ownership, use the exact coolant specified by the manufacturer for best protection. Save universal coolants for emergencies when proper coolant is unavailable.
How Often Should Coolant Be Flushed and Replaced?
Coolant should be completely flushed and replaced every 30,000-50,000 miles for traditional green coolant or every 100,000-150,000 miles for extended-life coolants, with exact intervals specified in your owner’s manual based on coolant chemistry and operating conditions. Flushing removes accumulated rust, scale, and depleted additives that reduce cooling efficiency and cause component corrosion even though the coolant still appears clean.
The flushing process differs from simply draining and refilling. Complete flush involves draining old coolant, adding flushing agent, running the engine to circulate cleaner through all passages, draining again, and refilling with fresh coolant mixed to proper concentration. This removes deposits from radiator tubes, engine water jackets, heater cores, and thermostat housings that simple draining leaves behind. Professional flush services use specialized equipment forcing clean coolant through the system under pressure, thoroughly purging all contaminated fluid and deposits.
Coolant condition between service intervals provides early warning of problems. Check your coolant at least seasonally by opening the reservoir when the engine is cold and examining color and clarity. Healthy coolant appears translucent with bright coloring—green, orange, pink, or yellow depending on type. Coolant turning brown, rust-colored, or murky indicates corrosion occurring inside your cooling system, warranting immediate flush regardless of mileage since service. Floating particles, oily film, or sludge appearance signal severe contamination requiring professional attention.
Operating conditions accelerate coolant degradation. Severe service includes trailer towing, frequent short trips preventing full engine warmup, extreme climates (sustained temperatures above 100°F or below -20°F), or dusty/dirty conditions. If your driving fits these categories, cut recommended service intervals in half—flush traditional coolant every 15,000-25,000 miles and extended-life formulations every 50,000-75,000 miles. The added expense prevents the more costly repairs contaminated coolant causes.
DIY flushing saves money but requires proper procedure. Purchase complete cooling system flush kit ($25-40 including cleaner, flush connector, and fresh coolant) and follow all instructions meticulously. Key steps include: running the flush cleaner for the specified duration (typically 10-30 minutes of engine operation), thoroughly rinsing with water until discharge runs clear, and mixing fresh coolant to proper concentration (typically 50/50 coolant and distilled water for most climates). Never use tap water—minerals cause scale buildup. Dispose of old coolant properly at recycling centers as it’s toxic to animals and illegal to pour into storm drains.
Bleeding air pockets after refilling prevents overheating. When you drain and refill cooling systems, air becomes trapped at high points like the thermostat housing or heater core connections. These air pockets prevent proper coolant circulation and cause localized overheating. Most vehicles require specific bleeding procedures: some use bleeder screws you open while filling, others need the radiator cap left off while the engine runs until the thermostat opens, and some European vehicles require special scanning tools commanding the water pump to purge air. Consult your repair manual for your vehicle’s specific bleeding procedure—skip this step and you’ll fight overheating issues despite fresh coolant.
What Are the Warning Signs Before a Coolant Leak Develops?
Warning signs before coolant leaks develop include fluctuating temperature gauge readings, slight sweet smell during warmup, minor coolant level drops requiring monthly top-offs, visible coolant stains or deposits near hoses and clamps, and white or rust-colored residue around the radiator cap or overflow reservoir. These early indicators appear weeks or months before catastrophic failures, providing opportunity for scheduled repairs rather than roadside emergencies.
Temperature gauge behavior reveals cooling system deterioration. Watch for inconsistent readings where the gauge normally sits at mid-point but occasionally climbs higher before returning to normal. This fluctuation suggests air pockets forming from minor leaks, partially clogged passages reducing coolant flow, or a thermostat starting to fail. Similarly, if your gauge takes unusually long to reach operating temperature or shows different patterns than normal (like taking longer on cold mornings than previously), cooling system efficiency has degraded enough to warrant inspection.
Coolant consumption patterns provide diagnostic clues. All cooling systems lose tiny amounts of coolant through evaporation from the reservoir—perhaps a few ounces over thousands of miles. If you’re adding coolant more frequently than once every six months, you have a leak even if you can’t see it. Track consumption by marking the reservoir level with a grease pencil and checking weekly. Losing a half-inch per month indicates small but persistent leakage requiring diagnosis before it worsens. Sudden increases in consumption—going from stable levels to weekly additions—signal leak progression demanding immediate attention.
Visual warning signs appear before leaks become severe. During regular oil changes or when checking fluids, inspect all visible coolant hoses for surface checking (fine cracks in rubber), soft spots that compress excessively when squeezed, bulging sections indicating internal reinforcement failure, or hardening where rubber loses flexibility. Check hose clamps for rust or looseness by trying to rotate them by hand—they shouldn’t move if properly tight. Look for white crusty deposits on engine surfaces near coolant components; this crystallized coolant proves seepage even if no active drip appears.
radiator problems symptoms include visible corrosion on tanks or core, bent or damaged cooling fins, discoloration (white or green staining) on the radiator surface, or coolant odors from the engine bay after driving. These symptoms often appear gradually—first a faint smell after highway trips, then visible staining developing over months, finally progressing to active leaks. Addressing the issue during the early stages when you just notice slight odor or staining prevents the eventual complete radiator failure.
Clogged radiator symptoms differ from leak symptoms but indicate similar preventive maintenance needs. If your engine runs hotter than normal despite full coolant levels, heater output decreases, or you notice coolant flowing quickly through your overflow reservoir suggesting restricted circulation, your radiator may be clogging internally. This restriction forces cooling system pressure higher, stressing gaskets and hoses until they develop leaks. Preventive flush and radiator inspection during early clogging stages prevents the component failures restricted flow eventually causes.
Seasonal changes stress cooling systems, making pre-season inspections valuable. Before summer, when cooling demands peak, inspect hoses for deterioration and verify coolant concentration provides adequate boiling protection. Before winter, confirm antifreeze concentration prevents freezing (typically -35°F protection for most climates) and inspect for leaks that will worsen when thermal stress increases. These semi-annual checks catch developing problems before they strand you in extreme weather.
Is Coolant Toxic to Pets and Children?
Yes, coolant is extremely toxic to pets and children because ethylene glycol—the primary ingredient in most antifreeze—causes fatal kidney failure in amounts as small as half a teaspoon for cats, one tablespoon for dogs per ten pounds of body weight, and 2-4 ounces for children depending on body weight. The sweet taste and smell that help drivers detect leaks also attracts curious pets and children to consume spilled coolant, making proper handling, cleanup, and storage critical for household safety.
The toxicity mechanism explains why such small amounts prove lethal. When ingested, ethylene glycol initially acts like alcohol, causing intoxication symptoms—stumbling, vomiting, appearing drunk. Within hours, the liver metabolizes ethylene glycol into glycolic acid and oxalic acid, which crystallize in kidneys, destroying nephrons (kidney cells) and causing acute kidney failure. Without emergency treatment including antidote administration within 8-12 hours of ingestion, kidney damage becomes irreversible, leading to death within 24-72 hours.
Early symptoms of coolant poisoning in pets include vomiting, appearing drunk or disoriented, excessive thirst and urination, seizures, and lethargy progressing to coma. In children, similar symptoms appear along with nausea, back pain, rapid breathing, and loss of coordination. If you suspect coolant ingestion, seek emergency medical care immediately—inform medical providers about the exposure since specific antidotes (fomepizole or ethanol) counteract ethylene glycol toxicity if administered promptly. Every minute counts because permanent kidney damage progresses rapidly once metabolism begins.
Proper cleanup prevents exposure. When coolant spills, immediately soak it up with absorbent materials like cat litter, sand, or commercial absorbent pads before it puddles where pets or children might contact it. Don’t just wipe with paper towels—coolant seeps into concrete, asphalt, and soil where residue remains accessible. After absorbing the bulk, scrub the area with soapy water and rinse thoroughly. Dispose of contaminated materials in sealed bags in your regular trash, and wash your hands thoroughly with soap since even skin contact with contaminated hands that later touch food can transfer small amounts.
Storage requirements keep unopened and partially used coolant containers secure. Store coolant in its original labeled container on high shelves in locked garages or storage areas where children and pets can’t access it. Never transfer coolant to unmarked containers, especially those that previously held beverages—the familiar container shape may encourage children to taste the contents. Ensure caps seal tightly since even fumes from open containers concentrate in enclosed spaces where pets explore.
Safer alternatives exist but come with tradeoffs. Propylene glycol-based coolants offer reduced toxicity—labeled “pet-safe” or “non-toxic”—requiring roughly 3-4 times the volume for lethal doses compared to ethylene glycol. While better than standard coolant, propylene glycol still causes illness in sufficient quantities and shouldn’t be considered completely safe. These alternative coolants also cost 20-40% more and provide slightly less effective freeze protection, limiting use to mild climates. If your household includes curious pets or young children, the extra cost and minor performance reduction may prove worthwhile for the safety improvement.
Even with pet-safe coolant, treat all antifreeze as dangerous. The reduced toxicity of propylene glycol doesn’t eliminate poisoning risk—it simply provides a larger margin before lethal doses. Continue practicing proper cleanup, storage, and handling regardless of coolant type. The sweet taste that makes ethylene glycol attractive also characterizes propylene glycol formulations, meaning pets and children remain drawn to tasting spills.
Vehicle maintenance around pets requires extra precautions. When checking or adding coolant, prevent pets from accessing your work area. Even brief exposure to fresh coolant drips on garage floors allows licking and ingestion. After completing coolant service, inspect your entire work area for spills, checking under your vehicle where drips may have fallen. Consider placing cardboard under your car during coolant work to catch all drips, then properly disposing of the cardboard afterward. Never allow pets to drink from puddles in driveways or garages where coolant may have leaked from vehicles.
Community responsibility extends to leak repairs. If your vehicle drips coolant in parking lots, driveways, or streets, you’re creating poisoning hazards for neighborhood pets. The combination of leak visibility (bright colors on pavement) and attractive sweet smell draws animals from remarkable distances. Beyond your own vehicle’s mechanical health, prompt coolant leak repairs protect community pets and wildlife from accidental poisoning. According to the ASPCA Animal Poison Control Center, ethylene glycol poisoning represents one of the most common automotive-related pet fatalities, with thousands of dogs and cats poisoned annually from consuming coolant found in driveways, parking lots, and roadways.
Sweet smell and steam from the front of your car signals cooling system failure requiring immediate diagnosis and repair to prevent catastrophic engine damage. By understanding the seven main causes, recognizing warning signs, and practicing preventive maintenance, you protect both your vehicle’s longevity and your family’s safety from toxic coolant exposure. Whether you face simple repairs like radiator cap replacement or complex fixes like head gasket service, addressing coolant leaks promptly always costs less than the engine replacement that delayed repairs ultimately require.