How to Replace Your Air Filter: Complete DIY Guide for Homeowners & Car Owners
Replacing your air filter is a straightforward maintenance task that takes 5-20 minutes and requires minimal tools, whether you’re changing a home HVAC filter or a vehicle engine filter. This essential DIY car repair prevents expensive system damage, improves air quality, and maximizes energy efficiency by ensuring clean airflow through your heating, cooling, or combustion systems. Most homeowners can replace HVAC filters monthly to quarterly, while car owners should swap engine air filters every 12,000-15,000 miles or annually.
Understanding when to replace your air filter saves money and prevents performance issues. Signs of a clogged air filter include reduced airflow, higher utility bills, sluggish vehicle acceleration, and visible dirt accumulation that blocks light transmission through the filter material. Recognizing these indicators helps you maintain optimal system function before minor issues escalate into costly repairs.
The replacement process differs slightly between home and vehicle applications, but both follow simple step-by-step procedures. Homeowners locate their return air intake, measure the existing filter, and slide in a new one with arrows pointing toward the ductwork. Vehicle owners open the air filter housing in the engine compartment, remove the old filter, and install a fresh one matching their make and model specifications.
Choosing between DIY replacement and professional service depends on your comfort level and time availability, though both applications are beginner-friendly tasks. The Cost to replace engine air filter professionally ranges from $50-100 including labor, while DIY replacement costs just $10-60 for the filter itself. Below, we’ll walk through every step of the replacement process for both home and vehicle air filters, covering location identification, sizing, installation techniques, and timing recommendations.
What is an Air Filter and Why Does It Need Replacement?
An air filter is a porous barrier designed to capture airborne particles before they enter your HVAC system or vehicle engine, preventing dust, pollen, debris, and contaminants from damaging sensitive components or degrading indoor air quality. Air filters accumulate trapped particles over time, which restricts airflow and forces systems to work harder, leading to reduced efficiency, increased energy consumption, and potential mechanical failure if not replaced regularly.
To better understand this essential component, let’s examine how air filters function in both residential and automotive applications.
How Do Home HVAC Air Filters Work?
Home HVAC air filters sit in the return air pathway where air gets pulled back into your heating and cooling system for reconditioning. As your furnace or air handler draws air through the return vents, the filter media captures particles ranging from large dust clumps to microscopic allergens before the air reaches the blower motor and heat exchanger. The pleated or fibrous material creates a maze-like structure that traps contaminants while allowing air molecules to pass through, though this filtration efficiency decreases as the filter loads with debris.
The filtration process relies on three main mechanisms: interception (particles follow airstreams and contact filter fibers), impaction (larger particles cannot navigate around fibers and collide directly), and diffusion (tiny particles move erratically and eventually contact fibers). Most residential filters feature a cardboard or plastic frame supporting layers of synthetic fibers, paper, or woven material arranged to maximize surface area contact with passing air.
When filters become saturated with trapped particles, the pressure drop across the filter increases dramatically. Your HVAC system must generate stronger suction to pull the same volume of air through the clogged media, causing the blower motor to run longer cycles and consume more electricity. Eventually, restricted airflow can cause the system to overheat, freeze evaporator coils, or shut down completely as safety mechanisms activate.
How Do Vehicle Engine Air Filters Work?
Vehicle engine air filters prevent abrasive particles from entering the combustion chambers where they would score cylinder walls, damage piston rings, and accelerate engine wear. Internal combustion engines require massive volumes of air—a typical car engine inhales over 10,000 gallons of air for every gallon of fuel burned—and all that air passes through the engine air filter first. The accordion-pleated design maximizes filtration surface area within the compact housing space, using paper or cotton media to trap particles as small as 5-10 microns.
Clean air mixing with precisely metered fuel creates the optimal air-fuel ratio for complete combustion, typically around 14.7 parts air to 1 part gasoline. When the air filter clogs, airflow restriction leans out this mixture by reducing the air volume entering the intake manifold. The engine control computer attempts to compensate by adjusting fuel delivery, but severe restrictions overwhelm these adjustments, causing rough idling, hesitation during acceleration, and reduced power output.

Beyond Performance and MPG impact of air filter condition, contaminated filters allow fine particles past their compromised media. These abrasive contaminants act like sandpaper inside your engine, creating microscopic scratches that accumulate over thousands of miles and reduce engine longevity. Regular replacement prevents this gradual deterioration and maintains the precise tolerances required for efficient combustion.
How Often Should You Replace Your Air Filter?
You should replace home HVAC filters every 30-90 days and vehicle engine air filters every 12,000-15,000 miles or 12 months, though specific intervals depend on environmental conditions, usage patterns, and filter quality. These recommended schedules prevent the performance degradation and system damage that occur when filters become saturated with trapped contaminants and can no longer maintain proper airflow.
Understanding the factors that influence replacement timing helps you optimize this Engine air filter replacement interval for your specific situation.
What is the Recommended Replacement Schedule for Home HVAC Filters?
The standard home HVAC filter replacement schedule ranges from monthly for basic fiberglass filters to quarterly for high-quality pleated filters, with most manufacturers recommending inspection every 30 days regardless of expected lifespan. Basic 1-inch fiberglass filters capture only large particles and require monthly replacement, while premium pleated filters with higher MERV ratings last 60-90 days under normal conditions. Media filters and whole-home electronic filters may function effectively for 6-12 months before requiring service.
Your actual replacement frequency depends on continuous system operation rather than calendar time. Systems running year-round in climates requiring constant heating or cooling accumulate filter debris faster than systems used seasonally. A home in Phoenix running air conditioning 8-10 months annually needs more frequent changes than a home in San Diego with milder temperatures and less HVAC runtime.
Filter thickness also impacts replacement intervals. Standard 1-inch filters have less surface area and shorter lifespans than 4-inch or 5-inch media filters, which can trap more particles before airflow restriction becomes problematic. If your system accommodates thicker filters, upgrading from 1-inch to 4-inch filters extends replacement intervals while improving filtration efficiency.
The most reliable approach involves monthly visual inspections rather than rigid calendar schedules. Pull out your filter after 30 days and hold it up to a light source—if you can’t see light clearly through the media, the filter has captured sufficient particles to warrant replacement. This simple test accounts for variable conditions better than arbitrary time intervals.
What is the Recommended Replacement Schedule for Car Engine Filters?
Most vehicle manufacturers specify engine air filter replacement at 12,000-15,000 mile intervals or annually, whichever occurs first, though severe driving conditions may require more frequent changes at 6,000-7,500 mile intervals. Modern engines with electronic sensors and precise fuel management systems are particularly sensitive to airflow restrictions, making adherence to these schedules important for maintaining factory performance specifications and fuel economy.
The vehicle owner’s manual provides the definitive replacement schedule for your specific make and model, often distinguishing between “normal” and “severe” service conditions. Severe service includes frequent short trips (less than 5 miles in normal temperatures or 10 miles in freezing conditions), extensive idling, driving in dusty conditions, or operating in extreme temperatures. These conditions accelerate filter contamination and justify shortened replacement intervals.
Turbocharged engines require especially vigilant filter maintenance because the turbocharger compresses incoming air, amplifying any restriction caused by a dirty filter. The turbo must work harder to achieve target boost pressure when pulling air through a clogged filter, increasing turbine temperatures and accelerating wear on the turbocharger’s bearings and seals.
Performance-oriented drivers who frequently use high RPMs and wide-open throttle should inspect their air filters more frequently, as maximum airflow demand occurs at peak engine speeds. A filter that flows adequately at cruising speeds may still restrict airflow during aggressive acceleration, costing horsepower and response.
What Factors Affect How Often You Should Change Your Air Filter?
Seven primary factors accelerate air filter contamination and necessitate more frequent replacement than baseline recommendations. Pet ownership stands as the single largest factor for home filters, as dogs and cats constantly shed dander, fur, and tracked outdoor debris that quickly loads filter media. Homes with multiple pets may require filter changes every 20-30 days instead of the standard 60-90 day interval, particularly during seasonal shedding periods.
Household occupancy directly correlates with filter loading because more people generate more dust, skin cells, and activity-related particulates. A single person living alone might extend filter life to 90 days, while a family of five with children creates dust from toys, tracked dirt, and constant movement that warrants 30-45 day replacement cycles.
Geographic and environmental conditions dramatically impact both home and vehicle filter lifespans:
- Dusty environments: Rural areas with unpaved roads, agricultural regions during harvest season, or desert climates expose filters to exponentially higher particle counts
- Wildfire smoke: Seasonal wildfires introduce fine ash particles that rapidly clog filters; replacement within days may be necessary during active fire events
- High pollen areas: Spring and fall pollen seasons in areas with dense tree and grass coverage require more frequent changes
- Urban pollution: Cities with heavy traffic or industrial activity expose vehicle filters to soot, exhaust particles, and airborne debris
- Coastal regions: Salt-laden ocean air accelerates filter saturation, particularly for vehicles driven near beaches
Smoking indoors creates tar and particulate buildup that darkens and clogs home filters within 15-20 days, regardless of filter quality. Even occasional indoor smoking reduces filter life by 30-50% compared to non-smoking households.
Allergy sufferers and individuals with respiratory conditions benefit from shortened replacement cycles of 30-45 days maximum, as even partially loaded filters reduce their effectiveness at capturing smaller allergen particles. Clean filters remove more pollen, mold spores, and dust mite debris than filters nearing the end of their service life.
Home renovation and construction projects generate massive amounts of fine dust that overwhelms standard filter media. During active remodeling, replace filters weekly or install temporary high-capacity filters specifically designed for construction dust capture, then return to normal replacement schedules once work completes.
Vehicle-specific factors include:
- Off-road driving: Dirt roads, trails, and unpaved surfaces introduce far more debris than highway driving
- Stop-and-go traffic: Urban commuting with frequent idling and low-speed operation increases exposure time to particulates
- Following distance: Tailgating vehicles kicks up road debris directly into your air intake
- Seasonal winter conditions: Road salt, sand, and de-icing chemicals become airborne and accelerate filter loading
What are the Signs That Your Air Filter Needs Replacement?
You can identify a filter requiring replacement through visible dirt accumulation blocking light transmission, reduced system performance including decreased airflow or power, higher energy bills or fuel consumption, and unusual noises like whistling from restricted passages. These indicators often appear before scheduled replacement intervals in high-contamination environments, making periodic inspection more reliable than calendar-based maintenance.
Recognizing these warning signs prevents the cascading problems that develop when filters remain in service too long.
How Can You Tell if Your Home Air Filter is Dirty?
A dirty home air filter fails the light transmission test when you hold it toward a bright light source and cannot see the bulb’s glow clearly through the media. This simple visual inspection provides immediate confirmation that the filter has trapped sufficient particles to impair airflow, regardless of how long the filter has been installed. Fresh filters allow light to pass through easily, showing distinct shadows of the pleats or fiber structure, while saturated filters appear opaque with gray or brown discoloration.
Surface debris provides another obvious indicator—dust caking on the upstream side of the filter or dust bunnies collecting around the filter frame confirm heavy particle loading. Run your finger across the filter surface; if you collect a thick layer of dust, debris, or pet hair, replacement is overdue. Filters installed correctly shouldn’t accumulate dust around their edges, so dust rings around the frame perimeter suggest improper sizing or installation gaps allowing unfiltered air bypass.

Performance symptoms that indicate filter restriction include:
- Reduced airflow from vents: Noticeably weaker air movement from supply registers compared to normal operation
- Longer run cycles: The system runs continuously without reaching thermostat setpoint temperatures
- Increased utility bills: Monthly electricity costs rise 5-15% without corresponding weather changes or rate increases
- Uneven room temperatures: Some rooms stay comfortable while others remain too hot or cold
- Frost on air conditioning coils: Ice accumulation on the indoor evaporator coil visible through access panels
- Burning smell: Overheating blower motors struggling against restricted airflow produce electrical odors
Your HVAC system may activate high-limit safety switches that shut down operation entirely when airflow restriction causes dangerous temperature rises. If your furnace cycles on briefly then shuts off before completing a heating cycle, inspect the filter immediately—this short-cycling behavior often indicates critical airflow blockage.
According to the U.S. Department of Energy, dirty filters can increase HVAC energy consumption by 5-15% by forcing the system to work harder to move air through restricted media.
How Can You Tell if Your Car’s Air Filter is Dirty?
A dirty car air filter reveals itself through visual inspection showing dark discoloration, embedded debris, dead insects, leaves, or visible damage to the pleated media. When you remove the filter and hold it toward sunlight, minimal light should penetrate a filter ready for replacement, while a clean filter shows distinct light patterns between the pleats. Tap the filter gently against a hard surface—if clouds of dust fall out, the filter has trapped significant contamination.
Performance symptoms associated with restricted engine airflow include:
- Sluggish acceleration: Delayed throttle response and reduced power during passing maneuvers or highway merging
- Check engine light: The malfunction indicator lamp illuminates due to oxygen sensor readings indicating improper air-fuel mixture
- Reduced fuel economy: MPG decreases by 1-3 miles per gallon as the engine compensates for restricted airflow
- Rough idle: Engine vibration and uneven RPM at stoplights or in park
- Whistling sounds: High-pitched noise from the air intake system during acceleration
- Black smoke from exhaust: Rich fuel mixture from insufficient air creates dark tailpipe emissions
- Engine misfires: Incomplete combustion from improper air-fuel ratio causes stumbling or hesitation
Pay particular attention to acceleration performance compared to when the filter was fresh. If your vehicle feels noticeably slower reaching highway speeds or struggles climbing hills that previously posed no issue, air filter restriction likely contributes to the power loss. This becomes especially apparent in smaller engines with less power reserves to overcome airflow restrictions.
Fuel economy tracking provides quantitative evidence of filter condition. If your calculated MPG drops 10% or more without changes to driving patterns, tire pressure, or fuel quality, inspect the air filter before investigating more complex causes. Modern engines with mass airflow sensors can partially compensate for dirty filters by adjusting fuel delivery, masking performance loss until contamination becomes severe.
The filter housing inspection tips include checking the rubber seal around the filter perimeter for deterioration, examining housing clips for proper engagement, and looking inside the clean side of the housing for any dust accumulation indicating bypass. Dust on the engine side of the housing means unfiltered air has entered your engine, potentially due to a damaged filter, incorrect installation, or housing cracks.
How Do You Replace a Home HVAC Air Filter? (Step-by-Step)
Replace a home HVAC air filter by turning off the system, locating the filter slot in the return air duct or handler cabinet, sliding out the old filter, inserting a new filter with airflow arrows pointing toward the ductwork, and securing the access panel before restarting the system—a process requiring 5-10 minutes with no tools for most installations. Proper installation with correct filter orientation and snug frame fitment ensures filtered air cannot bypass around the edges, maintaining system protection and air quality.
Following the systematic approach below guarantees successful replacement and optimal filter performance.
Where is Your Home Air Filter Located?
Your home air filter typically resides in one of three locations: behind return air grills on walls or ceilings throughout the house, in a dedicated filter cabinet attached to the air handler unit, or inside a slot on the furnace or air handler cabinet itself. Most modern homes centralize filtration at the air handler, consolidating all return air into a single filter cabinet before the blower motor, while older homes may distribute multiple smaller filters across several return vents in different rooms.
To locate your primary filter, start by identifying the large metal duct cabinet containing the blower motor, usually installed in a basement, utility closet, garage, or attic. Look for a 1-4 inch slot along the side, bottom, or return air connection of this cabinet—this slot holds the main filter. Some installations feature a dedicated filter cabinet installed between the return duct and air handler, appearing as a metal box with a hinged or removable access door.
Return air grills serve as alternative filter locations, particularly in homes without accessible air handler areas. These grills appear larger than supply vents (typically 20×20 inches or bigger) and have a flat face with no damper controls. Small metal tabs along the top or sides of the grill face secure the cover, which pulls away to reveal the filter sitting in tracks behind the grill opening.
Multi-story homes or homes with multiple HVAC systems require checking each system independently. A home with basement and attic air handlers needs filter replacement in both units, potentially requiring different filter sizes for each system. Zone-controlled systems may feature multiple filters serving different areas, even when served by a single air handler.
If you’ve searched obvious locations without finding a filter, consult your HVAC installation manual or look for arrows stenciled on ductwork indicating airflow direction—filters always install in the return air path before the blower motor. Homes with return air chases built into wall cavities may have hidden access panels requiring careful inspection to locate.
What Size Air Filter Do You Need for Your Home?
Your home air filter size appears printed along the cardboard or plastic frame edge, typically showing three dimensions in inches such as 16x25x1, 20x20x1, or 20x25x4. The first number represents width, the second indicates height, and the third shows thickness—all measurements must match exactly when purchasing replacements to ensure proper fitment and prevent unfiltered air bypass around gaps.
Before removing your existing filter, use your smartphone to photograph the size printed on the frame, or write these dimensions in a note. This simple step prevents the frustration of arriving at the hardware store without critical sizing information. If the existing filter is missing or illegible, measure the filter slot opening with a tape measure, then measure the depth of the slot to determine thickness.
Homes with multiple return air locations may require different sizes for each location, so inspect every filter access point individually. A common configuration uses 16x25x1 filters in bedroom return vents, 20x25x1 in living areas, and 20x20x1 in hallways—purchasing the wrong size wastes money and delays proper maintenance.
Filter sizing follows nominal measurements rather than exact dimensions. A filter labeled 20x25x1 actually measures approximately 19.5 x 24.5 x 0.75 inches, allowing slight clearance for installation. This explains why a filter appears slightly smaller than the advertised dimensions when measured with calipers. Never force an oversized filter into a slot by bending or compressing the frame, as this damages the media and allows bypass around crimped edges.
Standard filter sizes available at most hardware stores include:
- 14x20x1, 16x20x1, 16x25x1 (common bedroom sizes)
- 20x20x1, 20x25x1 (standard living area sizes)
- 16x25x4, 20x25x4 (media filter sizes for systems with 4-inch slots)
- 14x30x1, 16x30x1 (less common sizes sometimes used in modern construction)
If your system requires unusual dimensions like 17x22x1 or 19x23x1, you may need to special order filters online rather than finding them in stock at local retailers. Consider bulk purchasing when you identify the correct size to avoid future delays.
How Do You Install a New Home Air Filter Correctly?
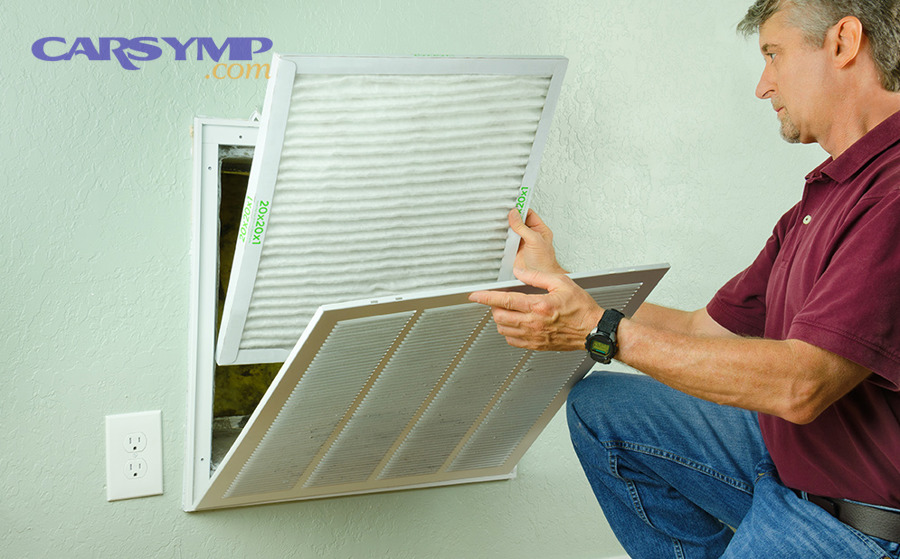
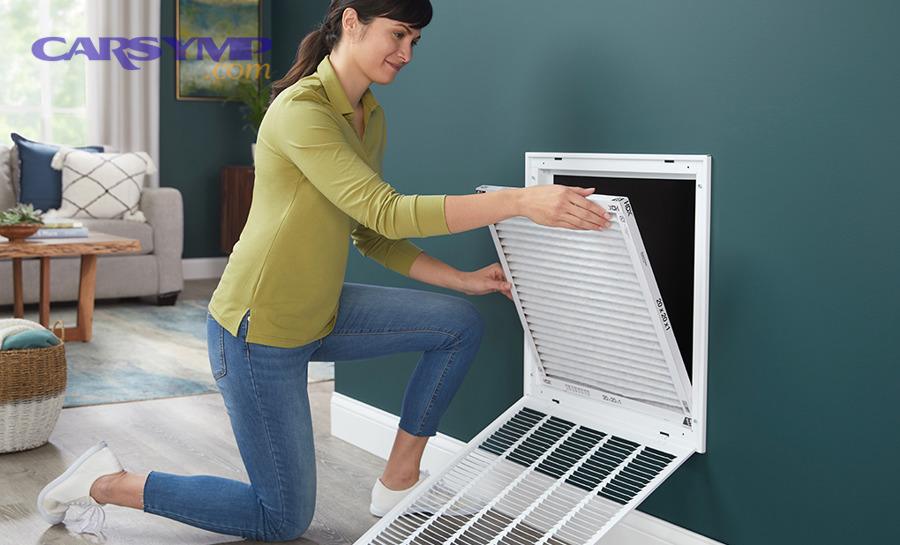
Install a new home air filter by first turning off your HVAC system at the thermostat to prevent the blower from activating during filter changes, then opening the filter access panel, removing the old filter while noting the airflow arrow direction, sliding the new filter into the tracks with arrows pointing toward the ductwork or blower motor, and ensuring the filter seats flush against the frame with no gaps. Correct arrow orientation is critical—arrows must point in the direction air travels through the system, always toward the blower and away from the return vent opening.
The step-by-step installation process follows this sequence:
Step 1: Power Down the System
Turn the thermostat to “OFF” rather than just adjusting temperature, or use the system switch if available. This prevents the blower from cycling on mid-replacement, which could pull dust and debris directly into the system while the filter is removed. Some systems feature a dedicated power switch on or near the air handler cabinet that provides an alternative shutdown method.
Step 2: Access the Filter Compartment
Open the filter access door by releasing spring clips, lifting hinged panels, or removing screws securing the cover plate. Some return air grills require pressing release tabs along the top edge then pulling the grill face away from the wall. Handle access panels carefully to avoid bending flanges that create sealing problems when reinstalled.
Step 3: Remove the Old Filter
Slide the existing filter out of its tracks, pulling straight rather than angling to prevent media tears. Observe which direction the arrows point before removing completely—this shows you the correct orientation for the new filter. Many installers take a quick smartphone photo of the installed filter before removal as a reference.

Avoid shaking or tapping the old filter excessively, as this releases trapped particles into your living space. Place the old filter directly into a garbage bag to contain the accumulated debris—filters cannot be recycled due to contamination and mixed materials.
Step 4: Inspect the Filter Housing
Before installing the new filter, use a vacuum cleaner with a hose attachment or a damp rag to clean dust and debris from the filter tracks and housing interior. Check for any obstructions, damaged tracks, or gaps in the housing that might allow air bypass. This air filter housing inspection identifies problems before they compromise your new filter’s effectiveness.
Step 5: Insert the New Filter
Slide the new filter into the tracks with the airflow arrows pointing toward the blower motor (deeper into the duct system, away from the return opening). The filter should slide smoothly without forcing or bending. If the filter binds, check for packaging materials still attached or reversed orientation.
Most residential filters have arrows printed on the frame sides indicating airflow direction—these arrows should point the same direction air travels through the system. When in doubt, remember that air flows FROM the return vent (where room air enters) TO the blower motor, so arrows point away from living spaces and toward the equipment.
Step 6: Secure the Access Panel
Close and latch the access door firmly, ensuring clips engage fully and panels sit flush against the housing. Gaps around improperly secured panels allow unfiltered air to bypass the filter entirely, defeating the purpose of replacement. Test that the panel doesn’t rattle or vibrate when the system operates.
Step 7: Restore Power and Test
Return the thermostat to normal operating mode and listen for proper blower startup. Stand near supply vents to verify normal airflow—weak airflow after filter replacement suggests incorrect installation or an oversized MERV rating restricting airflow beyond system capabilities.
Common installation mistakes to avoid include installing filters backwards (arrows pointing wrong direction), forcing oversized filters that don’t fit properly, leaving packaging or plastic wrap on new filters, and failing to remove old filters before inserting new ones (yes, this happens more than you’d expect).
What Tools Do You Need to Replace a Home Air Filter?
You need no tools to replace most home HVAC air filters, as the majority of residential systems feature tool-free access panels with spring clips, magnetic closures, or simple lift-off covers that expose the filter slot. This intentional design allows homeowners to perform monthly filter checks and replacements without technical expertise or specialized equipment, making filter maintenance one of the most accessible DIY home tasks.
A small percentage of installations may require:
- Screwdriver (flathead or Phillips): For access panels secured with screws rather than clips, typically found on older systems or custom installations
- Work gloves: Optional protection for hands when handling filters in tight spaces with sharp sheet metal edges
- Flashlight or headlamp: Helpful for poorly lit installation areas in basements, closets, or attics
- Step stool or ladder: Necessary when return air grills install high on walls or in ceiling locations
- Smartphone camera: For photographing filter size and orientation before removal
- Shop vacuum: Useful for cleaning filter tracks and housing interior before new filter installation
The minimalist tool requirements make filter replacement accessible to renters, homeowners without tool collections, and individuals with limited mobility or technical experience. If your system requires tools beyond a basic screwdriver, consider asking your HVAC installer to modify the access method to tool-free operation during the next service visit.
Purchase replacement filters in multi-packs (typically 3, 6, or 12 filters) to maintain supply for future changes without repeated store trips. Storing filters near the air handler or in a designated maintenance closet ensures they’re available when needed and serves as a visual reminder to check filter condition monthly.
How Do You Replace a Vehicle Engine Air Filter? (Step-by-Step)
Replace a vehicle engine air filter by opening the hood, locating the air filter housing near the engine’s front or side, unlatching or unscrewing the housing cover, removing the old filter, installing a new filter matching the housing shape and your vehicle specifications, and securing the cover firmly—completing these DIY engine air filter replacement steps takes 10-20 minutes and requires minimal tools. Proper installation prevents unfiltered air from bypassing the filter and entering the engine through gaps or loose connections.
This systematic approach ensures successful replacement regardless of your vehicle’s specific configuration.
Where is Your Car’s Air Filter Located?
Your car’s air filter sits inside a plastic housing box in the engine compartment, typically positioned near the front or side of the engine bay for easy access to outside air. The housing connects to the engine’s throttle body via an intake duct (the large tube running from the air box toward the engine), making the filter easy to locate by following this duct backward toward its source. Most vehicles position the air filter housing toward the fender area, driver’s side or passenger’s side, though some models place it centrally above the engine.
The air filter housing appears as a large black plastic box, usually rectangular or square-shaped, measuring roughly 12-18 inches on its longest side. Metal clips, plastic latches, or screws secure the housing cover, which you can identify by looking for the fastening mechanisms around the perimeter. Some housings feature integrated connectors for mass airflow sensors or intake air temperature sensors mounted in the housing cover.
To locate your specific vehicle’s air filter:
Follow the intake duct: Trace the large diameter tube (typically 3-4 inches) running from the engine’s throttle body backward toward the fender—this duct connects to the filter housing
Consult your owner’s manual: The maintenance section includes diagrams showing filter location with page references
Check online resources: Enter “[your year] [make] [model] air filter location” into a search engine to find photos and videos showing your specific vehicle
Look for obvious access points: Manufacturers design filter housings for tool-free or simple-tool access, so conspicuous plastic boxes near the engine’s front likely contain the filter
Vehicles with performance intake systems or aftermarket modifications may have relocated filter housings, open-element filters mounted directly on the throttle body, or hidden filters requiring component removal for access. If you’ve purchased a used vehicle with modifications, confirm filter location before assuming it follows factory specifications.
Turbocharged engines sometimes feature multiple intake paths or inter-cooler plumbing that complicates filter location identification. These installations may position the filter remotely in a fender well, behind bumper covers, or in other non-obvious locations requiring careful investigation.
How Do You Remove and Install a Car Air Filter?
Remove a car air filter by unlatching the housing clips or removing the screws securing the cover, lifting the cover carefully to avoid damaging connected sensors, extracting the old filter while noting its orientation, inspecting the housing interior for debris, inserting the new filter matching the original’s directional placement, and re-securing the cover until clips snap firmly or screws tighten snugly. The entire removal and installation process takes 5-15 minutes once you’ve located the housing, with clip-style housings requiring less time than screw-secured versions.
Detailed removal and installation steps:
Step 1: Prepare the Work Area
Park on level ground, turn off the engine, and wait 10-15 minutes for components to cool if you’ve recently driven the vehicle. Set the parking brake and open the hood, propping it securely with the hood strut. Wear gloves if working with sharp plastic edges or if the engine bay is particularly dirty from oil residue or road grime.
Step 2: Identify Fasteners and Sensors
Examine the air filter housing to determine the fastening method. Most modern vehicles use spring-loaded metal clips (typically 4-6 clips around the perimeter) that release by pressing down and pulling outward simultaneously. Older vehicles may use Phillips-head screws, hex bolts, or wing nuts requiring tools for removal. Note any electrical connectors attached to the housing cover for mass airflow sensors or intake temperature sensors.
Step 3: Release Fasteners
For clip-style housings, press each clip’s release mechanism while pulling the clip away from its catch—some clips require squeezing tabs together, while others need prying with a screwdriver tip. Work around the perimeter systematically rather than releasing all clips on one side first, which can warp the housing cover. For screw-secured covers, remove fasteners in a cross-pattern to prevent binding, placing screws in a container so they don’t fall into the engine bay.
Step 4: Disconnect Sensors (If Present)
If wiring connectors attach to the housing cover, press the release tab on the connector and pull gently to separate the wiring harness from the sensor. Never pull on wires directly—always grip the plastic connector body. Some connectors lock with sliding tabs or rotating rings requiring specific release techniques.
Step 5: Open the Housing Cover
Lift the cover straight up or hinge it on its retained side (some covers remain attached via a hinge), exposing the air filter inside. Move slowly to avoid snapping brittle plastic on older vehicles or damaging sensor wiring that may have less slack than expected.
Step 6: Remove the Old Filter
Lift the filter straight out of the housing, noting which side faced upward and how the filter’s shape oriented within the housing. Most filters have arrows or markings indicating airflow direction—photograph or mentally note these before removal. Inspect the old filter for heavy debris, oil contamination, or damage that might indicate other engine problems.

Step 7: Clean the Housing Interior
Use a shop vacuum, compressed air, or a damp rag to remove dust, leaves, dead insects, and debris from inside the housing cavity. Pay special attention to corners and crevices where contamination accumulates. Inspect the rubber seal around the filter housing perimeter for cracks, tears, or deterioration—replace the housing if seals fail, as gaps allow unfiltered air directly into the engine, Avoiding unfiltered air leaks.
Step 8: Inspect Intake System Components
While the housing is open, examine the intake duct for cracks, loose connections, or damage. Check clamps securing the duct to the throttle body and housing—tighten any loose connections. Look inside the clean (engine) side of the housing for any dust accumulation, which indicates the previous filter failed or installed incorrectly, allowing bypass.
Step 9: Install the New Filter
Place the new filter into the housing with the same orientation as the removed filter. Most filters feature a rubber gasket around the perimeter that must seat against the housing bottom to create an air seal—ensure this gasket contacts the housing uniformly around the entire perimeter. The filter should sit flat without forcing or bending.
Confirm the filter’s directional arrows point toward the engine (toward the intake duct connection) if markings are present. Some filters have asymmetrical shapes that only fit one way, preventing incorrect installation, while others require attention to orientation details.
Step 10: Secure the Housing Cover
Lower the cover onto the housing, aligning any locating pins or guides molded into the plastic. Press firmly around the perimeter to seat the cover gasket, then secure clips or install screws. Clips should snap audibly when properly engaged—if clips feel loose or don’t provide resistance, they may be worn and require replacement.
For screw-secured covers, tighten fasteners in a cross-pattern using hand pressure plus 1/4 turn with a screwdriver—over-tightening cracks plastic housing. Screws should feel snug without excessive force.
Step 11: Reconnect Sensors
If you disconnected wiring, push connectors firmly onto sensor posts until you feel or hear the locking tab engage. Pull gently on the connector body to verify secure attachment—loose connections cause check engine lights and performance problems.
Step 12: Verify Installation
Wiggle the housing cover gently to confirm solid attachment with no movement or gaps. Inspect the perimeter seal for uniform contact. Start the engine and listen for any whistling, sucking sounds, or abnormal noises from the intake system—these indicate air leaks requiring immediate attention. Some vehicles require the engine to idle for several minutes to relearn fuel trim values after filter replacement.
Common installation errors include reversed filter orientation, incompletely seated filter gaskets creating bypass gaps, loose housing cover allowing unfiltered air entry, and forgotten sensor reconnection causing check engine lights.
What Tools Do You Need to Replace a Car Air Filter?
You need minimal tools to replace most car air filters—typically just a Phillips or flathead screwdriver for screw-secured housings, though many modern vehicles require no tools at all for clip-style housings. This accessible design lets vehicle owners perform the replacement in parking lots or driveways without shop equipment, making air filter changes among the easiest automotive maintenance tasks for DIY car repair enthusiasts.
Tools and supplies that may be necessary depending on your specific vehicle:
Essential (sometimes):
- Phillips-head screwdriver: For housings secured with cross-head screws, typically #2 size
- Flathead screwdriver: For prying stubborn clips or removing slot-head screws on older vehicles
- Socket wrench with 8mm or 10mm socket: For hex-head bolts on some European vehicles
- Work gloves: Protection from sharp plastic edges, hot engine components, or dirty surfaces
Helpful accessories:
- Shop vacuum or compressed air: Cleaning housing interior before new filter installation
- Flashlight or headlamp: Illuminating dark areas of the engine bay for better visibility
- Shop rags or paper towels: Wiping dust and debris from housing surfaces
- Smartphone camera: Documenting filter orientation and clip positions before disassembly
Replacement parts to have available:
- Correct replacement filter: Match your vehicle’s year, make, model, and engine size
- Replacement clips: If original clips are broken or worn (available at auto parts stores)
- Duct tape: Temporary repair for cracked intake ducts discovered during filter access
Most auto parts stores provide free tool loaner programs for specialized equipment if your vehicle requires unique fasteners. Many stores also offer free installation services when you purchase filters from them, though this service availability varies by location and store policy.
Advanced DIYers working on modified vehicles or aftermarket intake systems may need additional tools for Replacing intake duct clamps and seals, including worm-drive clamp tools, Allen keys for hex-socket fasteners, or specialized tools for push-lock fittings. Performance intake systems sometimes require specific torque specifications for housing bolts, necessitating a torque wrench for proper installation.
How Do You Choose the Right Replacement Air Filter for Your Vehicle?
Choose the right replacement air filter by identifying your vehicle’s year, make, model, and engine size, then selecting a filter specifically designed for that application from a reputable manufacturer, with options ranging from economy OEM-replacement filters to premium high-performance filters depending on your priorities for filtration efficiency, cost, and power delivery. The packaging or online listing should explicitly confirm fitment for your exact vehicle to ensure proper seating in the housing without gaps or bypass issues.
Critical selection criteria:
Vehicle Fitment
The replacement filter must match your vehicle’s application exactly. Auto parts stores and online retailers provide lookup tools where you enter year, make, model, and engine displacement to generate compatible filter part numbers. For example, a 2020 Honda Civic with a 2.0L engine requires a different filter than a 2020 Civic with a 1.5L turbocharged engine, despite identical body styles.
Verify fitment by comparing the new filter’s physical dimensions and shape against your old filter before installation. The filter should match in length, width, height, pleating pattern, and gasket configuration. Even minor size mismatches prevent proper sealing and allow unfiltered air into the engine.
Filter Type Categories
OEM (Original Equipment Manufacturer) Replacement Filters:
These filters replicate the factory-installed filter’s specifications, using paper media similar to what came with the vehicle when new. OEM filters from manufacturers like Honda, Toyota, or Ford cost $15-30 and maintain factory performance specifications without modification. Choose OEM replacements for vehicles under warranty to avoid potential claim issues, or when you want to maintain exact factory specifications.
Economy Replacement Filters:
Budget-friendly options from brands like Fram, Purolator, or store brands cost $8-15 and provide adequate filtration for normal driving conditions. These filters may use slightly less dense media or fewer pleats than premium options, potentially offering less flow restriction but also less fine particle capture. Economy filters work well for commuter vehicles, fleet applications, or budget-conscious owners performing frequent changes.
Premium Replacement Filters:
Higher-quality options from brands like K&N, Bosch, or Mann filter cost $12-25 and feature denser media, more pleating, or advanced materials for improved filtration efficiency and dust-holding capacity. Premium filters often last longer between changes and capture finer particles than economy alternatives.
High-Performance Filters:
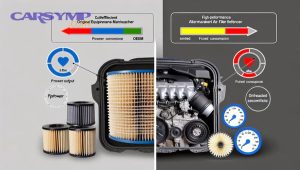
Aftermarket filters designed to increase airflow use oiled cotton gauze, synthetic media, or specialized designs claiming 1-5 horsepower gains through reduced intake restriction. Brands like K&N and AEM offer these washable, reusable filters for $40-70, with OEM vs aftermarket air filter comparison showing performance filters flowing 25-50% more air than paper alternatives.
Performance filters require periodic cleaning and re-oiling using manufacturer-specific kits to maintain filtration properties. These suit enthusiasts prioritizing maximum power over absolute filtration, though modern performance filters still meet engine protection requirements when properly maintained. However, over-oiling can contaminate mass airflow sensors, causing check engine lights and drivability issues.
MERV-Equivalent Ratings
While residential filters use MERV ratings, automotive filters lack standardized rating systems. However, premium automotive filters typically capture particles as small as 5-10 microns (comparable to MERV 8-11), while economy filters may only stop particles above 15-20 microns. Media density, pleat count, and overall surface area determine particle capture efficiency more reliably than marketing claims.
Brand Selection Guidance
Reputable filter manufacturers include:
- OEM brands: Honda, Toyota, GM ACDelco, Mopar, Ford Motorcraft
- Tier 1 suppliers: Bosch, Mann, Mahle, Denso, Fram Ultra
- Performance specialists: K&N, AEM, AFE Power, Injen
- Value brands: Fram Classic, STP, AutoZone Duralast, O’Reilly Auto Parts brand
Avoid ultra-cheap filters from unknown manufacturers, particularly those sold significantly below market rates—these often use inferior media that tears easily or flows too freely while providing inadequate filtration.
Special Considerations
Cold-climate drivers should confirm filters maintain flexibility in sub-zero temperatures, as some media becomes brittle and cracks when frozen. Desert environment operators benefit from filters with higher dust-holding capacity to accommodate increased particle loading between changes.
Diesel engines may require specific filter designs accommodating higher airflow volumes and different intake routing configurations. Forced-induction engines (turbocharged or supercharged) particularly benefit from premium filters, as these powerplants are more sensitive to intake restrictions and particle ingestion damage.
Is Replacing an Air Filter a DIY Task or Should You Hire a Professional?
Replacing an air filter is an ideal DIY task requiring minimal tools, no specialized knowledge, and just 5-20 minutes to complete, making professional service unnecessary for the vast majority of homeowners and vehicle owners. The straightforward nature of filter replacement—simply swapping one component for another in an accessible location—means professionals charge primarily for convenience rather than expertise, with labor costs often exceeding the filter’s price by 300-500%.

Understanding when DIY makes sense versus professional service helps you allocate your maintenance budget effectively.
How Much Does Professional Air Filter Replacement Cost?
Professional HVAC filter replacement costs $50-150 when performed by a technician, though most service companies include this as a complementary service during annual maintenance visits rather than charging separately. Vehicle engine air filter replacement at dealerships or quick-lube shops costs $50-100 for parts and labor combined, with dealerships charging $60-120 and independent shops or quick-lube chains charging $40-80 for the same service.
The cost breakdown reveals why DIY represents such significant savings:
Home HVAC Filter Replacement:
- DIY cost: $8-40 for the filter only
- Professional cost: $50-150 ($40-110 labor + $10-40 filter)
- Savings: $42-110 per change
- Annual savings (4 changes/year): $168-440
Vehicle Engine Air Filter Replacement:
- DIY cost: $10-60 for the filter only
- Dealership cost: $60-120 ($30-60 labor + $30-60 OEM filter)
- Quick-lube cost: $40-80 ($20-40 labor + $20-40 filter)
- Savings: $30-60 per change at quick-lube, $50-60 at dealership
- Annual savings (1 change/year): $30-60
Professional services make financial sense in specific circumstances:
When to Consider Professional Service:
- Physical limitations preventing safe access to filter locations (mobility issues, ladder safety concerns)
- Complex custom installations requiring specialized tools or knowledge
- Uncertainty about filter size, location, or installation procedure despite research
- Bundled with other professional services during annual HVAC maintenance or oil changes
- Warranty requirements specifying professional service (rare for simple filter replacement)
- Commercial properties with multiple HVAC systems requiring bulk filter inventory management
When DIY Clearly Makes Sense:
- Standard residential installations with easily accessible filters
- Vehicles with clip-style air filter housings requiring no tools
- Monthly or quarterly maintenance schedules making professional service costs prohibitive
- Confidence in following basic instructions and using simple hand tools
- Desire to learn basic home and vehicle maintenance skills
Some HVAC service companies offer discounted filter subscription services, delivering correctly sized filters to your door on a schedule you select (monthly, quarterly, etc.). These services cost $15-30 per filter delivered, providing convenience without technician visit costs while ensuring you never forget replacements.
According to a consumer survey by Angie’s List in 2024, homeowners who perform their own HVAC filter changes save an average of $220 annually compared to those hiring professionals for this task.
How Long Does It Take to Replace an Air Filter Yourself?
DIY air filter replacement takes 5-10 minutes for home HVAC filters and 10-20 minutes for vehicle engine filters on your first attempt, with subsequent replacements requiring even less time as you become familiar with your specific installation. This minimal time investment—roughly equivalent to brewing a pot of coffee—makes filter replacement one of the most time-efficient maintenance tasks relative to professional service costs.
Time requirements by application and experience level:
Home HVAC Filters – First Attempt:
- Locating filter access: 2-5 minutes
- Removing old filter: 1 minute
- Installing new filter: 1-2 minutes
- Total time: 4-8 minutes
Home HVAC Filters – Subsequent Attempts:
- Removing old filter: 30 seconds
- Installing new filter: 30-60 seconds
- Total time: 1-2 minutes
Vehicle Engine Filters – First Attempt:
- Locating filter housing: 2-3 minutes
- Releasing clips/screws: 2-4 minutes
- Removing old filter and cleaning housing: 2-3 minutes
- Installing new filter: 1-2 minutes
- Securing housing cover: 2-3 minutes
- Total time: 9-15 minutes
Vehicle Engine Filters – Subsequent Attempts:
- Releasing clips/screws: 1-2 minutes
- Swapping filters: 2-3 minutes
- Securing housing: 1-2 minutes
- Total time: 4-7 minutes
These timeframes assume normal installations without complications. Additional time may be required for:
- Researching filter size and location for unfamiliar systems: 10-30 minutes initially
- Purchasing filters at a store vs having them on hand: 20-60 minutes for shopping trip
- Dealing with broken clips, stuck screws, or damaged housing: 5-30 minutes extra
- Cleaning dusty housing interiors or surrounding areas: 5-10 minutes extra
The time investment comparison strongly favors DIY:
Professional service time commitment:
- Scheduling appointment: 5-15 minutes
- Waiting for appointment date: 1-7 days
- Appointment window: 2-4 hours (even for 10-minute service)
- Total time impact: 2-4 hours plus scheduling delays
DIY time commitment:
- Immediate completion: 5-20 minutes whenever convenient
Beyond time efficiency, DIY filter replacement provides educational value and self-sufficiency. Learning your home’s and vehicle’s systems builds confidence for tackling other maintenance tasks, potentially saving hundreds or thousands annually across all DIY-friendly maintenance items.
For individuals with tight schedules or those who value convenience over cost savings, bundling filter replacement with other professional services (annual HVAC maintenance, oil changes) minimizes inconvenience while still receiving professional service. However, the extreme simplicity and minimal time requirement make filter replacement an ideal first step for beginners interested in basic DIY maintenance.
What Types of Air Filters Are Available and Which Should You Choose?
Five main types of air filters are available—pleated, non-pleated fiberglass, washable/reusable, high-efficiency (HEPA-style), and performance filters—differentiated by media material, filtration efficiency, cost, and lifespan characteristics. Pleated filters using synthetic or cotton-poly blend media offer the best balance of filtration efficiency, airflow, and value for most residential and automotive applications, capturing particles as small as 3-10 microns while maintaining sufficient airflow for system performance.
Understanding these filter variations helps you optimize the balance between air quality, cost, and system protection.
What is the Difference Between Pleated and Non-Pleated Air Filters?
Pleated air filters feature accordion-style folds in the filter media creating 5-10 times more surface area than flat non-pleated filters, allowing more comprehensive particle capture before airflow restriction becomes problematic. Non-pleated fiberglass filters use a single flat layer of loosely woven glass fibers designed primarily to protect HVAC equipment from large debris rather than improving indoor air quality, capturing only particles larger than 10 microns while allowing fine dust, pollen, and allergens to pass through freely.
Pleated Filter Characteristics:
Construction: Multiple folds or pleats in synthetic media, cotton-polyester blends, or paper create expanded surface area within compact dimensions. Pleating density ranges from 7-30 pleats per linear foot, with higher pleat counts generally indicating better filtration and longer service life.
Particle Capture: MERV 8-13 pleated filters trap 45-98% of particles in the 3-10 micron range (pollen, mold spores, dust mite debris) and 85-95% of larger particles. The denser media and increased surface area create more opportunities for particles to contact and adhere to filter fibers.
Lifespan: 60-90 days for standard residential use, potentially extending to 4-6 months with low-dust environments or premium filters. The expanded surface area allows more particle accumulation before critical airflow restriction develops.
Cost: $15-35 per filter for standard residential sizes, making them 3-7 times more expensive than fiberglass alternatives but offering superior air quality improvement.
Applications: Best for homes with allergy sufferers, pets, or air quality concerns; required for homes seeking MERV 11-13 filtration efficiency.
Non-Pleated Fiberglass Filter Characteristics:
Construction: Single flat layer of loosely woven spun fiberglass fibers reinforced with metal grating, creating minimal resistance to airflow but also minimal particle capture capability.
Particle Capture: MERV 1-4 rating capturing only large particles above 10 microns (lint, carpet fibers, visible dust). Essentially transparent to smaller particles including most allergens, bacteria, and fine dust.
Lifespan: 30 days maximum, as the limited surface area loads quickly despite poor particle capture. Monthly replacement prevents the minimal media from becoming saturated and restricting already-limited airflow.
Cost: $1-3 per filter, making them the most economical option for initial purchase but requiring more frequent replacement than pleated alternatives.
Applications: Budget-conscious scenarios where air quality improvement isn’t a priority; protecting rental property HVAC systems at minimum cost; vacation homes with infrequent occupancy.
The performance difference between these filter types is dramatic. A MERV 11 pleated filter capturing 65% of particles in the 1-3 micron range provides over 100 times better submicron particle removal than a MERV 2 fiberglass filter capturing less than 1% of the same particles.
For automotive applications, all modern filters use pleated paper media—non-pleated options don’t exist in the replacement filter market due to insufficient surface area for engine protection. The pleating debate applies only to residential HVAC filters.
What are MERV Ratings and Do They Matter for Home Filters?
MERV (Minimum Efficiency Reporting Value) ratings measure air filter effectiveness on a scale from 1-16, with higher numbers indicating better particle capture across progressively smaller particle size ranges. MERV ratings matter significantly because they quantify a filter’s ability to improve indoor air quality beyond basic equipment protection, helping you select filters matching your specific needs for allergen removal, dust control, or pathogen reduction without creating excessive airflow restriction that damages HVAC equipment.
MERV Rating Categories and Capabilities:
| MERV Rating | Particle Size Captured | Capture Efficiency | Common Applications | Notes |
|---|---|---|---|---|
| 1-4 | >10 microns | 20-45% | Basic fiberglass filters | Minimal air quality improvement |
| 5-8 | 3-10 microns | 35-70% | Standard pleated filters | Good balance for most homes |
| 9-12 | 1-3 microns | 50-85% | Superior residential, light commercial | Excellent allergen capture |
| 13-16 | 0.3-1 microns | 90-95%+ | Hospital-grade, clean rooms | May restrict residential HVAC airflow |
Particle Size Reference Points:
- Human hair: 50-70 microns
- Visible dust: 10+ microns
- Pollen: 10-100 microns
- Mold spores: 3-12 microns
- Pet dander: 0.5-100 microns
- Bacteria: 0.3-60 microns
- Tobacco smoke: 0.01-1 microns
- Viruses: 0.005-0.3 microns
Selecting the Right MERV Rating:
MERV 6-8 filters: Optimal for most residential applications, capturing the majority of common allergens (pollen, mold spores, pet dander) while maintaining sufficient airflow for standard HVAC systems. These filters cost $15-25 and balance air quality improvement against system strain.
MERV 11-13 filters: Recommended for homes with allergy or asthma sufferers, multiple pets, or residents with compromised immune systems. Superior submicron particle capture dramatically improves indoor air quality, though older HVAC systems may struggle with increased airflow resistance. Verify your system can handle MERV 11+ filters before upgrading, as insufficient blower power creates problems.
MERV 1-4 filters: Only appropriate when equipment protection matters more than air quality—budget rentals, vacation properties, or situations where frequent filter changes at higher MERV levels become prohibitively expensive.
MERV 14-16 filters: Generally inappropriate for residential HVAC systems unless specifically designed for high-efficiency filtration. These filters create excessive pressure drop requiring commercial-grade blower motors, and residential equipment often shuts down on safety limits when equipped with these high-resistance filters.
System Compatibility Considerations:
Higher MERV ratings increase air resistance, forcing your HVAC blower to work harder to move air through the denser media. Systems designed for MERV 8 filters but equipped with MERV 13 filters may experience:
- Reduced airflow to living spaces (cooling/heating capacity drops)
- Increased blower motor runtime and electricity consumption
- Premature blower motor failure from continuous high-load operation
- Frozen evaporator coils from insufficient airflow across the cooling coil
- Overheating in heating mode from inadequate air cooling the heat exchanger
Check your HVAC manufacturer’s specifications or consult your installation manual to determine maximum recommended MERV rating. Many residential systems specify MERV 8-11 as the ceiling for safe operation without modifications.
Cost vs. Benefit Analysis:
The incremental air quality improvement diminishes as MERV ratings increase, particularly above MERV 11. A jump from MERV 4 to MERV 8 provides dramatic improvement in particle capture, while a jump from MERV 11 to MERV 13 offers only marginal gains for significantly increased cost and system stress.
For most homeowners, MERV 8-11 filters represent the sweet spot where meaningful air quality improvement occurs without excessive cost or system strain. Individuals with severe allergies or respiratory conditions may justify MERV 11-13 filters if their HVAC system can accommodate the increased resistance.
According to research by the Environmental Protection Agency, MERV 13 filters remove approximately 50-75% of particles in the virus-containing size range (0.3-1.0 microns), compared to less than 20% capture by MERV 8 filters.
Should You Buy Washable Reusable Filters or Disposable Filters?
Disposable filters are better for most homeowners and vehicle owners because they provide superior filtration efficiency, require no maintenance beyond replacement, and eliminate the time and water consumption required for proper cleaning of reusable alternatives. Washable reusable filters suit specific situations including environmentally conscious households willing to invest time in regular cleaning, vacation properties with infrequent use, or performance vehicle applications where airflow optimization outweighs filtration efficiency concerns.
Disposable Filter Advantages:
Convenience: Remove the old filter and discard it—no washing, drying, or storage required. The entire maintenance process takes 2-5 minutes compared to 15-30 minutes for washing and drying reusable filters.
Consistent Performance: Fresh disposable filters provide peak filtration efficiency throughout their service life until particle loading restricts airflow. No risk of degraded performance from incomplete cleaning or damaged media.
Availability: Virtually every hardware store, auto parts store, and home center stocks disposable filters in common sizes, making emergency replacements easy if you forget to purchase backups.
No Cleaning Equipment Required: Eliminates the need for special cleaning solutions, drying racks, or dedicated washing areas. Important for apartment dwellers or homes without suitable cleaning facilities.
Lower Initial Cost: Basic disposable filters cost $8-15, compared to $40-80 for reusable alternatives, reducing upfront investment.
Disposable Filter Disadvantages:
Ongoing Costs: Monthly or quarterly replacement generates continuous expenses—$50-150 annually for HVAC filters, $10-30 annually for vehicle filters.
Environmental Impact: Filters typically contain mixed materials (cardboard, metal, synthetic media) that cannot be recycled, contributing to landfill waste. A household disposing 4-6 HVAC filters annually generates 3-5 pounds of waste.
Requires Regular Purchasing: Must maintain inventory of correctly sized filters and remember to purchase replacements before running out, creating minor inconvenience.
Washable Reusable Filter Advantages:
Long-Term Cost Savings: A $50-80 reusable filter lasting 5-10 years eliminates $250-750 in disposable filter purchases, providing substantial savings despite higher initial cost.
Environmental Benefits: Eliminates filter disposal waste and reduces manufacturing resource consumption associated with continuous production of disposable filters.
Performance Applications: High-performance automotive filters like K&N or AEM use oiled cotton gauze media flowing 25-50% more air than paper alternatives, benefiting modified engines requiring maximum airflow.
Washable Reusable Filter Disadvantages:
Cleaning Time and Effort: How to clean reusable filters properly requires removing the filter, washing with specified cleaning solutions, rinsing thoroughly, allowing complete drying (8-24 hours), and re-oiling (for automotive performance filters)—a process taking 15-30 minutes plus drying time.
Filtration Efficiency Concerns: Many reusable filters capture larger particles effectively but allow more fine particles to pass compared to quality disposable alternatives. MERV equivalency often ranges 6-8 for home reusable filters versus 8-13 for disposable options.
Re-Oiling Requirements: Automotive performance filters require periodic re-oiling to maintain particle capture, and over-oiling can contaminate mass airflow sensors causing check engine lights and drivability issues.
Incomplete Cleaning Risk: Trapped particles in filter media may not fully remove during washing, gradually degrading filtration efficiency over multiple cleaning cycles. Damaged media from aggressive cleaning reduces filter effectiveness.
Water and Energy Consumption: Washing filters consumes water and electricity for drying, partially offsetting environmental benefits. In drought-prone regions, water consumption may present ethical concerns.
Recommendation by Application:
Choose Disposable Filters When:
- Convenience and time savings matter more than long-term cost
- Superior filtration efficiency is priority (allergies, respiratory issues)
- You prefer minimal maintenance involvement
- Storage space for backup filters is limited
- Environmental impact is not a primary concern
Choose Washable Filters When:
- Long-term cost savings justify initial investment and ongoing cleaning effort
- Environmental sustainability is a priority value
- You own performance vehicles benefiting from high-flow filters
- Vacation property or infrequent use makes long filter life advantageous
- You’re comfortable with hands-on maintenance tasks
For most families balancing convenience, cost, and performance, disposable pleated filters in the MERV 8-11 range provide the best overall value. Environmentally conscious households willing to invest cleaning time can justify reusable filters for long-term waste reduction, though they should understand the filtration efficiency tradeoffs involved.
What are High-Performance Air Filters for Vehicles?
High-performance air filters are aftermarket engine air filters designed to increase airflow by 25-50% compared to standard paper filters, using washable oiled cotton gauze or synthetic media that allows more air molecules to pass while maintaining engine protection. Manufacturers claim these filters add 1-5 horsepower at high RPMs by reducing intake restriction, though real-world gains depend heavily on engine modification level, with stock engines seeing minimal benefit while heavily modified engines with upgraded exhaust systems experiencing measurable improvements.
Performance Filter Construction and Design:
Popular performance filter brands including K&N, AEM, AFE Power, and Injen use multiple layers of oiled cotton gauze sandwiched between aluminum wire mesh screens. The oil coating attracts and traps particles while allowing air molecules to flow between cotton fibers more easily than through dense paper media. This design reduces intake restriction measured in inches of water column—performance filters typically create 0.5-1.5 inches of restriction versus 2-4 inches for paper filters at equivalent airflow rates.
Some performance filters use dry synthetic media engineered with larger pore sizes and lower density than paper alternatives, providing similar flow benefits without oil that can contaminate sensors. These dry performance filters appeal to owners concerned about mass airflow sensor contamination or those preferring truly maintenance-free operation.
Performance Claims and Reality:
Manufacturers commonly advertise 1-5 horsepower gains from reduced intake restriction, though independent testing reveals more nuanced results:
- Stock engines: 0-2 horsepower gains, often within testing variance and imperceptible during normal driving
- Mildly modified engines: 2-4 horsepower gains when combined with free-flowing exhaust systems
- Heavily modified engines: 5-10+ horsepower gains on forced-induction or high-RPM applications where intake becomes the limiting factor
The modest power gains occur primarily at high RPMs (5,000+ RPM) where airflow demand peaks. At cruising speeds (1,500-3,000 RPM), airflow restrictions from paper filters create negligible power loss, explaining why stock vehicles show minimal real-world performance improvement.
Fuel economy claims also deserve skepticism—manufacturers suggest 1-2 MPG improvements, though independent testing shows no measurable economy benefit in normal driving conditions. The engine control computer compensates for increased airflow by adjusting fuel delivery, maintaining stoichiometric air-fuel ratios that negate theoretical efficiency gains.
Maintenance Requirements:
Performance filters require cleaning every 25,000-50,000 miles using manufacturer-specific cleaning kits ($10-15) containing detergent, oil, and instructions. The cleaning process involves:
- Spray filter with cleaning solution and let soak 10 minutes
- Rinse thoroughly from clean side toward dirty side
- Air dry completely (never heat dry)
- Apply thin coat of filter oil evenly across media
- Allow 20 minutes for oil to wick into cotton fibers
Over-oiling is the most common mistake, where excessive oil drips onto the mass airflow sensor’s hot-wire elements, causing contamination that triggers check engine lights and poor performance. Under-oiling allows particles to penetrate media, reducing filtration effectiveness.
Cost Analysis:
Performance filters cost $40-70 initially versus $12-30 for premium paper filters, but washable design eliminates replacement costs over the filter’s 500,000+ mile lifespan. The break-even point occurs around 50,000-75,000 miles when you would have purchased 3-5 paper replacements.
Cleaning kit costs ($10-15 every 25,000-50,000 miles) reduce the total cost savings compared to disposable alternatives. Over 100,000 miles, a performance filter costs approximately $60-100 total ($50 filter + 2-3 cleaning kits) versus $60-150 for 6-10 paper replacements, making the long-term savings modest rather than dramatic.
Who Should Consider Performance Filters:
Good Candidates:
- Modified vehicles with upgraded exhaust, ECU tuning, or forced induction where intake becomes a bottleneck
- Track/performance driving enthusiasts maximizing high-RPM power
- Long-term vehicle owners planning to keep vehicles beyond 100,000 miles
- Environmentally conscious drivers willing to clean filters properly
Poor Candidates:
- Stock vehicles seeking fuel economy improvements (negligible benefit)
- Owners unwilling to perform proper cleaning maintenance
- Vehicles with sensitive mass airflow sensors prone to oil contamination
- Drivers prioritizing maximum filtration over maximum flow
Performance filters make sense primarily for enthusiast applications where every horsepower matters and owners understand the maintenance requirements. For daily drivers seeking optimal engine protection with minimal maintenance, premium paper filters from reputable manufacturers provide better filtration efficiency with zero ongoing maintenance beyond periodic replacement.