

Replacing a PCV valve is usually a low-to-moderate-cost repair, and most car owners can expect an installed price that often lands in the low hundreds when the valve is easy to access. RepairPal lists an average PCV valve replacement cost between $112 and $155, while Kelley Blue Book (KBB) cites an average range of $186 to $220—both emphasizing that your exact vehicle and local labor rates can shift the total. (repairpal.com)
Next, the fastest way to avoid an inflated quote is to understand what actually drives the bill: access difficulty, whether the PCV is a standalone valve or built into a bigger assembly, and how much labor time a shop must book to reach it.
Then, if you want a practical “at-home estimate” before calling any shops, you can build a reliable ballpark with a simple checklist: identify your engine variant, predict labor hours by access tier, and include common add-ons like grommets and hoses.
Introduce a new idea: you’ll also make better replacement decisions when you connect cost to consequences—especially when the PCV is causing oil consumption and leaks—because delaying the repair can turn a cheap fix into a messy diagnosis problem.
What does a PCV valve replacement cost in total (parts + labor)?
A PCV valve replacement typically costs about $112–$220 installed for many vehicles, with parts often a small portion of the total and labor varying by access and shop rate. (repairpal.com) Then, to make that number feel real for your car, you need to understand what is included in a quote, how shops group pricing by access difficulty, and why labor can dominate even when the valve itself is inexpensive.

What is included in a “PCV valve replacement price” estimate?
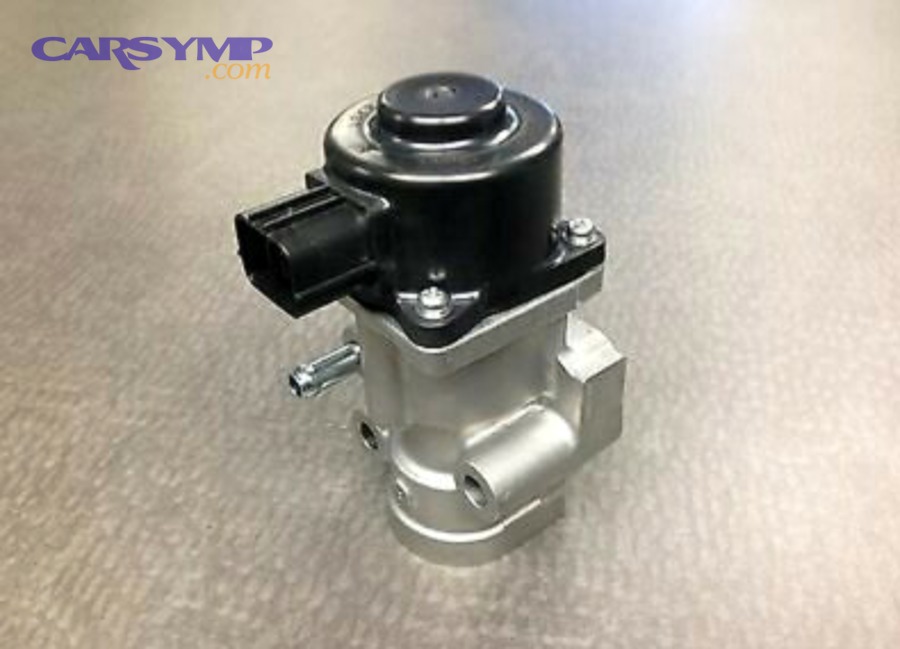
A “PCV valve replacement price” is the installed total a shop expects to charge to remove the old PCV valve (or PCV assembly), install the new part, and confirm normal operation—usually parts + labor, plus taxes/fees depending on location. Specifically, when you read an estimate, look for these line items and understand what each one means:
- Parts
- PCV valve (standalone) or PCV/valve cover assembly (integrated design)
- Grommet/seal (common on many engines and easy to overlook)
- PCV hose(s) or molded vacuum lines (some crack during removal)
- Clamps or quick-connect fittings (occasionally replaced if brittle)
- Labor
- Time to access the valve, remove hoses/engine covers, swap parts, reassemble
- Time to verify idle quality and check for vacuum leaks after installation
- Shop fees
- Shop supplies, environmental/disposal fees (varies by shop)
- Taxes (varies by state/locality)
Here’s the key: many “PCV valve replacement” quotes are not only “swap a tiny valve.” Some engines place the PCV under an intake manifold, behind a throttle body, or inside a valve cover assembly—so the invoice reflects access complexity, not the part’s size.

What are typical price ranges by repair scenario (simple vs moderate vs complex access)?
There are 3 main pricing scenarios for PCV valve replacement based on access difficulty and whether the PCV is standalone or integrated: simple-access, moderate-access, and complex-access. More specifically, think of these tiers as a quick “what kind of engine layout do I have?” filter:
- Simple-access (standalone valve near the top of the engine)
- Typical situation: PCV is on the valve cover with clear hose access
- Common cost profile: parts low; labor short
- What you pay for: convenience, correct fitment, quick verification
- Moderate-access (standalone valve but tight clearance or brittle hoses)
- Typical situation: valve is visible but buried behind covers/ducting
- Common cost profile: labor grows due to disassembly and careful reassembly
- What you pay for: time, not the valve
- Complex-access (PCV integrated into valve cover or requires manifold removal)
- Typical situation: PCV is part of a larger assembly, or reaching it requires removing major components
- Common cost profile: parts higher (assembly/gaskets), labor significantly higher
- What you pay for: the path to the PCV, not just the PCV
This is why two people can both say “PCV valve replacement” yet see very different invoices.
How much do parts vs labor contribute to the total cost?
Parts are often the smaller portion, while PCV valve replacement labor time is the biggest swing factor—because labor changes with access, while parts usually stay within a predictable band for a given engine. However, the balance can flip on engines where the PCV is integrated into a valve cover or separator assembly, because parts can jump from “small valve” to “large assembly + gasket set.”
To keep the math simple, think in this pattern:
- Standalone PCV valve: parts are usually modest; labor drives total
- Integrated PCV assembly: parts can become a major share; labor still matters
RepairPal’s national-style estimator illustrates this split by listing labor and parts ranges separately for the same job type. (repairpal.com)
What factors make a PCV valve replacement cheaper or more expensive?
The PCV valve replacement price changes mainly for three reasons: (1) accessibility and booked labor time, (2) part design (standalone vs integrated), and (3) local shop rate and pricing model. Moreover, once you can name these cost drivers out loud, you can spot whether a quote is reasonable—or padded.

Which vehicle factors affect the price the most (access, engine layout, integrated designs)?
Vehicle factors affect cost most when they force extra disassembly or require a larger assembly instead of a simple valve. To illustrate, here are the vehicle-side drivers that matter most:
- Access path
- Is the PCV right on top of the valve cover, or buried?
- Does the job require removing an intake tube, throttle body, or intake manifold?
- Engine layout
- Some layouts pack components tightly, adding careful step-by-step disassembly
- Integrated PCV design
- Some engines integrate the PCV into the valve cover, oil separator, or breather assembly
- Hose and connector condition
- Brittle hoses and plastic quick-connects can break during removal, adding parts
In practice, the “cheap” PCV job is the one where the mechanic can reach the valve quickly, replace it cleanly, and confirm stable idle without chasing broken connectors.
Dealer vs independent shop vs mobile mechanic—who is usually cheaper and why?
Independent shops are often cheaper than dealers for this repair, while mobile mechanics can be competitive when access is easy—because the biggest variable is labor rate and how the shop prices time. Meanwhile, dealers may cost more due to higher overhead and OEM parts markups, but they may offer stronger model-specific familiarity on certain platforms.
A helpful way to compare:
- Dealer
- Pros: OEM parts, brand-specific procedures, documentation
- Cons: often higher labor rates and part pricing
- Independent shop
- Pros: flexible parts options, competitive labor rates, practical quoting
- Cons: quality varies—choose based on reviews and transparency
- Mobile mechanic
- Pros: convenience; can be cost-effective for simple-access PCV jobs
- Cons: complex-access jobs may be less ideal without full shop equipment
The “best value” is usually the provider who can explain the access tier and expected labor time before they ask you to approve the job.
Does “PCV integrated into the valve cover” usually increase the replacement price? (Yes/No)
Yes—PCV integrated into the valve cover usually increases the PCV valve replacement price for at least three reasons: (1) the part is a larger assembly, (2) gasket/seal replacement becomes more likely, and (3) labor time increases due to extra disassembly and careful sealing. Especially, when the repair becomes “valve cover assembly replacement,” you’re no longer paying for a small valve—you’re paying for a larger component plus the work required to prevent leaks afterward.
This is also where your quote may include add-ons like:
- Valve cover gasket (and sometimes spark plug tube seals)
- Breather hoses
- Intake gaskets if removal is required
OEM vs aftermarket PCV valve—does the part choice meaningfully change total cost?
OEM wins for consistency and fit on many vehicles, while aftermarket can be best for budget—yet the total cost difference is often smaller than people expect because labor is the larger share. On the other hand, part choice matters more when the PCV is integrated into a complex assembly or when known-fitment issues exist on certain aftermarket designs.
Use this decision rule:
- Choose OEM when:
- PCV is integrated or labor access is difficult (you don’t want to redo labor)
- You’ve seen repeated issues reported with non-OEM fitment
- Choose quality aftermarket when:
- PCV is standalone and easy to access
- A reputable brand offers a proven equivalent
How do you estimate your PCV valve replacement cost for your exact car?
You can estimate your PCV valve replacement cost accurately by using 3 steps—identify your exact engine variant, predict labor hours by access tier, and add common parts and fees—to produce a realistic installed total. Below, the goal is not to guess perfectly; it’s to build a quote-ready number you can compare against shops.

What information do you need to build an accurate estimate (year/make/model/engine, access notes)?
You need your year, make, model, engine size/engine code, and a quick idea of whether the PCV is standalone or integrated to make your estimate meaningful. To better understand why this matters, remember: two trims of the same model can have different engines, and the PCV location can change drastically between them.
Collect this information:
- VIN or engine code (often visible on registration paperwork or under the hood label)
- Engine type (inline, V, turbocharged, hybrid variant, etc.)
- PCV location (a quick search like “PCV valve location + engine code” helps)
- Any symptoms (rough idle, oil leaks, oil consumption, check engine light)
Symptoms matter because they can trigger diagnostic time if the PCV failure isn’t obvious.
What are common add-on parts and services that change the invoice total?
There are 4 common add-on categories that can change your total: seals/grommets, hoses/connectors, gasket sets, and diagnostic time. More specifically, add-ons usually appear when the job requires disturbing old rubber/plastic or opening sealed surfaces.
Common add-ons:
- Grommet/seal (cheap, but frequently replaced)
- PCV hose kit (if the original hose is brittle or collapsed)
- Valve cover gasket (if the PCV is integrated or the cover must be removed)
- Intake gaskets (if the intake manifold must come off for access)
- Diagnostic time (if symptoms overlap with vacuum leaks, EVAP, or misfires)
If a shop adds an item, ask one question: “Is this required for access, or is it optional preventive replacement?”
Can you get a reliable estimate without diagnostic testing? (Yes/No)
Yes—you can get a reliable estimate without diagnostic testing when at least three conditions are true: (1) the PCV is a known scheduled replacement or easy-access part, (2) symptoms align strongly with PCV failure, and (3) there’s no evidence of broader vacuum or oil leak problems. However, if symptoms are vague—like intermittent idle issues—you may need a short diagnostic step to avoid replacing the wrong component.
Here’s a practical “estimate confidence” checklist:
- High confidence estimate (often no diag needed):
- PCV is accessible and inexpensive
- You have clear PCV symptoms (e.g., obvious stuck valve behavior)
- No unrelated warning lights or multiple codes
- Lower confidence estimate (diag recommended):
- Multiple codes, misfire, or fuel trim issues
- Oil leaks that could be from multiple sources
- Whistling/hissing that could be any vacuum leak
A simple cost estimator you can do at home
The table below shows what you’re estimating and why each input changes the total. Use it to build a consistent “apples-to-apples” comparison when you call multiple shops.
| Estimator input | What it represents | Why it changes cost |
|---|---|---|
| Parts price | PCV valve or assembly + seals/hoses | Integrated designs and extra hoses raise parts |
| Labor hours | Time to access/replace/verify | Access difficulty is the biggest variable |
| Shop hourly rate | Local labor market + shop model | Dealer vs independent vs mobile rate differences |
| Add-ons | Gaskets, hoses, diagnostics | Prevents leaks or breakage after disassembly |
| Taxes/fees | Local taxes + shop supplies | Location-dependent and shop-dependent |
When should you replace a PCV valve—and what happens if you delay?
You should replace a PCV valve when it fails a basic check or causes consistent symptoms, and delaying can increase the risk of PCV causing oil consumption and leaks, rough idle, and messy diagnosis from vacuum-related problems. In addition, replacement timing is not only about mileage—it’s about function, because a stuck-open or stuck-closed PCV changes crankcase pressure behavior.

What does a PCV valve do, and why does failure affect cost and drivability?
A PCV valve is a crankcase ventilation metering device that routes blow-by gases from the crankcase back into the intake to be burned, using vacuum and flow control to reduce pressure buildup and control oil vapor movement. Specifically, PCV failure affects cost because it can trigger secondary problems—oil seepage, unstable idle, or fuel trim codes—that take time to diagnose and repair.
When PCV flow is wrong, you can see:
- Too much crankcase pressure → oil pushed past seals → leaks
- Too much vacuum draw → oil pulled into intake → consumption and deposits
- Unmetered air effects → rough idle, lean conditions, or drivability complaints
Evidence matters here because PCV flow is closely tied to oil vapor transport. According to a study by MIT from the Department of Mechanical Engineering, in 2004, researchers found oil concentration in blow-by/PCV-related flow increased with engine operating conditions, highlighting how crankcase ventilation relates to oil carried into the intake stream. (dspace.mit.edu)
What are the most common symptoms that trigger replacement or a quote?
There are 6 common symptom groups that lead drivers to seek PCV valve replacement, based on whether the valve sticks, hoses collapse, or crankcase pressure behaves abnormally. More specifically, the symptoms often show up as idle issues, oil issues, or “mystery leak” complaints.
Typical symptoms include:
- Rough idle or hunting idle
- Whistling or hissing near the valve cover (vacuum-related noise)
- Oil leaks around valve cover, seals, or gaskets
- Oil consumption that seems to increase without external leaks
- Check engine light with fuel trim-related codes on some cars
- Sludge or moisture in extreme maintenance/temperature cases
If you notice oil seepage plus idle instability, PCV becomes a high-probability suspect because it touches both pressure control and intake airflow.
Replace as preventive maintenance vs replace after symptoms—what’s the cost tradeoff?
Preventive replacement tends to minimize diagnosis time and collateral repairs, while symptom-driven replacement can be more expensive if the PCV issue has already caused oil leaks or vacuum-related drivability problems. However, preventive replacement only makes sense when the part is known-accessible and the manufacturer’s service pattern supports it.
Tradeoff in plain terms:
- Preventive replacement
- Best when: easy access, low parts cost, history of PCV wear on that engine
- Cost benefit: avoids hours of “chasing” symptoms later
- Symptom-based replacement
- Best when: no clear signs yet, or the PCV is integrated and expensive
- Cost risk: if delayed too long, you may pay for diagnosis + extra gaskets/seals
DIY vs mechanic: which option is more cost-effective for car owners?
DIY wins on pure dollars for simple-access engines, a mechanic is best for complex-access jobs, and mobile service can be optimal when convenience outweighs small savings—because labor time and mistake risk change the true cost. Meanwhile, your best choice depends on whether the PCV is a quick swap or a disassembly-heavy job.

What is the real DIY cost vs the installed shop price?
DIY cost is typically parts-only plus small supplies, while the installed shop price includes labor, verification, and often a warranty on workmanship. Specifically, DIY savings are largest when the valve is accessible in minutes and smallest when you must remove major components.
DIY cost components:
- PCV valve (or assembly) + grommet/seal
- Optional hose replacement
- Consumables (cleaner, shop towels)
- Tool costs if you don’t already have basics
Shop cost components:
- Parts (often marked up)
- PCV valve replacement labor time (the major driver)
- Verification checks and professional liability/warranty
If a shop quotes high labor on a “simple” PCV job, ask them to explain the access path and what must be removed. If their explanation matches a complex-access scenario, the quote may be reasonable.
What tools and skill level are typically needed for DIY replacement?
DIY PCV valve replacement usually requires basic hand tools and careful handling of hoses and connectors, but the skill level jumps when access requires removing intake parts or a valve cover. For example, a simple-access job may require only pliers and a socket set, while a complex-access job may require torque control and gasket replacement discipline.
Common tool list:
- Pliers (for spring clamps)
- Basic socket set and ratchet
- Flathead screwdriver or trim tool (for clips)
- Flashlight and small mirror (to confirm routing)
- Torque wrench (important for valve cover assemblies)
- Replacement clamps (helpful when originals are weak)
Skill checkpoint: if you are comfortable removing and reinstalling intake ducting without creating vacuum leaks, you can handle many simple-access PCV jobs.
Is DIY PCV replacement safe for beginners? (Yes/No)
Yes—DIY PCV valve replacement can be safe for beginners when at least three conditions are met: (1) the PCV is clearly accessible, (2) you can replace brittle hoses without forcing plastic connectors, and (3) you can confirm stable idle and no vacuum leaks afterward. More importantly, beginners should avoid complex-access jobs where mistakes create vacuum leaks, stripped fasteners, or new oil leaks.
A beginner-friendly rule:
- DIY-friendly: top-mounted standalone valve, easy hose routing, no manifold removal
- Not beginner-friendly: integrated valve cover PCV, manifold removal, tight turbo plumbing
After the job, don’t skip the verification step—because a small vacuum leak can create bigger drivability issues than the original PCV problem.
What else can look like a bad PCV valve—and how can you avoid paying for the wrong repair?
PCV symptoms overlap with vacuum leaks and some EVAP-related issues, so you avoid paying for the wrong fix by separating PCV airflow problems from non-PCV air leaks, confirming crankcase behavior, and verifying the repair afterward. Below, the goal is simple: spend money once, not twice.

PCV valve failure vs vacuum leak—how do symptoms and costs differ?
PCV failure tends to show crankcase-pressure-related signs (oil seepage, oil vapor issues) while a vacuum leak more often creates unmetered air symptoms (lean codes, high idle, hissing), and the cost differs because leak detection can add diagnostic time. However, both can cause rough idle, which is why misdiagnosis happens.
Practical distinctions:
- More PCV-leaning signs
- Oil in intake tract
- Repeated oil leaks after gasket replacement
- Strong crankcase pressure/vacuum abnormalities
- More vacuum-leak-leaning signs
- Persistent hissing
- Lean fuel trim codes without oil symptoms
- Idle changes when spraying cleaner near suspected leak points (use caution)
If a shop jumps straight to replacing the PCV without explaining why it’s the cause, ask for a short justification based on observed symptoms or test results.
What quick checks can confirm or rule out PCV issues before getting a quote?
There are 4 quick checks that can raise or lower PCV suspicion before you authorize repairs: hose inspection, valve function check (when applicable), crankcase behavior check, and visual intake/oil inspection. Then, if any check suggests “not PCV,” you can request a different diagnostic path.
Quick checks (vehicle-dependent):
- Inspect PCV hoses for collapse, cracks, oil saturation, or broken connectors
- Check PCV valve behavior (some valves rattle; some designs don’t)
- Observe idle behavior: unstable idle can hint at airflow problems
- Look for oil in the intake tube near the PCV connection (not definitive, but informative)
These checks don’t replace professional diagnosis, but they help you ask better questions and avoid vague upsells.
What is a smoke test, and when is it worth paying for before replacing parts?
A smoke test is a diagnostic method that introduces low-pressure smoke into the intake/vacuum system so leaks show themselves visibly, and it’s worth paying for when idle/fuel-trim symptoms overlap with PCV symptoms and you want to avoid unnecessary parts replacement. To illustrate, smoke testing is especially useful when a “PCV quote” is actually being used as a guess at a broader vacuum issue.
Many automotive diagnostic guides describe smoke testing as an effective way to locate vacuum leaks by making escaping smoke visible. (innova.com)
Which “rare” cases increase cost (valve-cover-integrated PCV, turbo plumbing, sludge/icing)?
Rare cases increase cost when they force extra disassembly, add specialized parts, or require extra verification, and the three most common “rare cost multipliers” are integrated PCV assemblies, turbo/DI plumbing complexity, and sludge/icing-related restrictions. Especially, these edge cases can turn a quick job into a multi-step repair that needs careful rechecks.
Here’s how they raise the bill:
- Valve-cover-integrated PCV
- Higher parts cost + gasket/seal replacement
- More time to prevent leaks after reassembly
- Turbo/DI engines
- More hoses and routing complexity
- Higher sensitivity to vacuum/boost leaks
- Sludge/icing
- Can create intermittent symptoms that look like “random” drivability issues
- May require cleaning and verification beyond a simple swap
After replacement: idle relearn checks
After replacement: idle relearn checks help you confirm the repair worked and prevent a small airflow issue from being mistaken for a bigger engine problem. Then, walk through a short verification routine:
- Start the engine and let it idle without accessories for a few minutes
- Listen for new hissing or whistling near the PCV hose connections
- Check for immediate warning lights and scan codes if you have a reader
- Confirm the engine returns to a stable idle after a short drive cycle
If your vehicle is sensitive to idle adaptation, these checks catch issues early—before you assume the new part “didn’t fix anything.”
Evidence ties back to why this matters: crankcase ventilation quality influences oil transport in the system, and published engineering work has treated oil separation performance in crankcase ventilation as a meaningful contributor to overall oil consumption behavior. According to a study by (SAE technical literature indexed on JSTOR) from engine lubrication/ventilation research, in 1995, researchers discussed how crankcase ventilation oil separation relates to total oil consumption as a measure of separation function quality. (jstor.org)