Replace and Test the PCV Valve: PCV Valve Replacement Guide for DIY Drivers (Bad vs Normal Symptoms)
A PCV valve replacement is usually a quick, high-value engine service because the PCV system controls crankcase pressure and routes blow-by vapors back into the intake to be burned. When the valve sticks, leaks, or plugs up, it can trigger Bad PCV valve symptoms like rough idle, oil leaks, and increased oil consumption—so replacing (or fixing the real restriction upstream) often restores normal operation fast.
Next, you’ll learn whether you actually need a new valve or whether the problem is really a hose, grommet, or separator—because PCV hose and separator issues can mimic a “bad valve” and cause the same drivability and oil problems.
Then, we’ll walk through Testing PCV function at home and the simplest ways to confirm the diagnosis without guessing—especially if you suspect a Rough idle from PCV vacuum leak.
Introduce a new idea: once you understand how the PCV system works (and where it fails), the replacement steps, costs, and post-repair checks become straightforward—and you’ll avoid repeat failures that come from sludge, turbo plumbing complexity, or missed air leaks.
What Is a PCV Valve and What Does It Do in Engine Service?
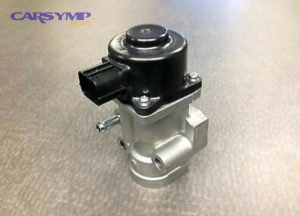
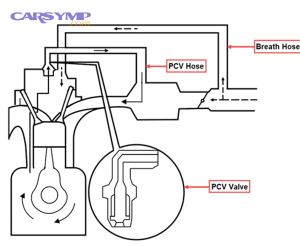
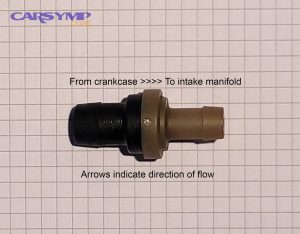
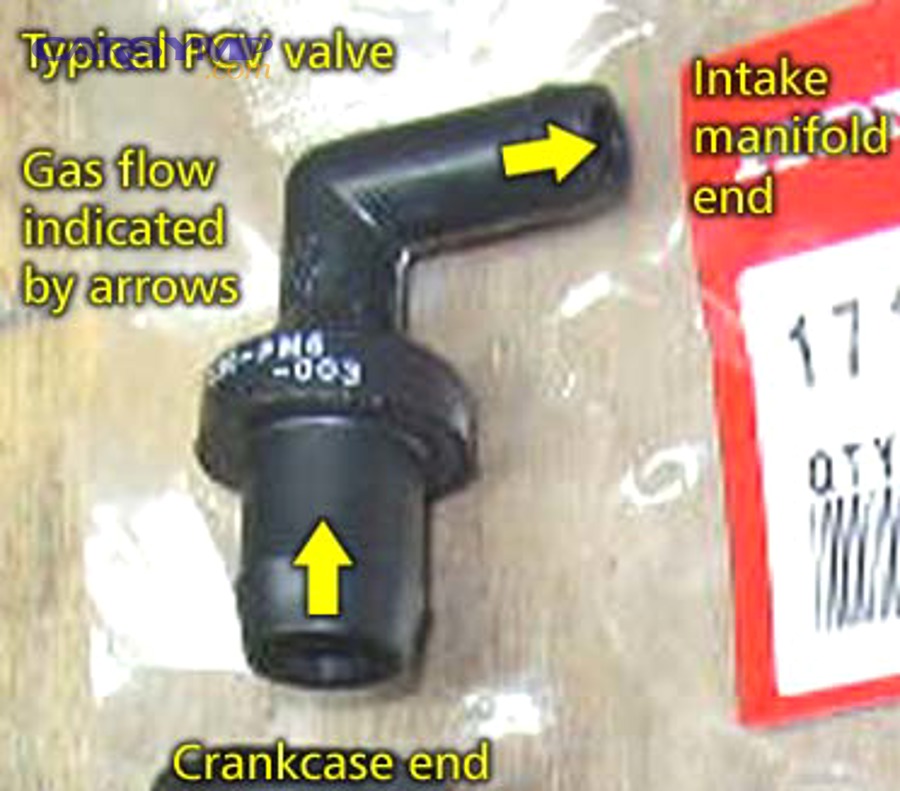
A PCV valve is a one-way, flow-metering check valve in the crankcase ventilation system that regulates how much crankcase vapor is pulled into the intake, preventing pressure buildup while controlling vacuum flow for stable idle and emissions.
To better understand why a simple valve can cause big symptoms, it helps to picture the PCV system as a controlled “breathing circuit” for the engine: the crankcase produces blow-by gases, the PCV path meters and routes them, and the fresh-air side replaces the evacuated volume so seals don’t get pressurized.

How the PCV valve actually controls flow (idle vs cruise vs load)
At idle, intake manifold vacuum is highest, so the PCV valve restricts flow to prevent a major vacuum leak. At cruise, vacuum is moderate and blow-by increases, so the valve allows more flow. Under heavy load (low vacuum), PCV flow reduces and the fresh-air/breather side becomes more important.
Why the PCV system prevents sludge, pressure, and seal failure
When the PCV system is healthy, it continuously evacuates moisture and combustion byproducts from the crankcase. That’s a core part of Preventing sludge with a healthy PCV system, because trapped moisture and fuel dilution accelerate sludge formation—especially with short trips and cold operation.
What failure looks like (stuck open, stuck closed, restricted, leaking)
A stuck-open PCV valve behaves like an internal vacuum leak. A stuck-closed or restricted valve traps pressure. A cracked hose or failed grommet/seal is a classic “leak” failure that acts like a vacuum leak while also reducing the system’s ability to evacuate vapors.

Evidence (if any): According to a study by the University of Windsor from the Department of Mechanical, Automotive & Materials Engineering, in 2014, common road-engine targets keep crankcase pressure about 20–30 hPa below atmospheric to reduce oil leakage risk and stabilize crankcase conditions. (collectionscanada.gc.ca)
Do You Need a PCV Valve Replacement or Can You Clean It?
Yes—many drivers do need a PCV valve replacement, but not always, and the correct decision depends on failure mode: (1) a weak spring/check function that can’t be restored reliably, (2) internal sticking or wear that returns after cleaning, and (3) a system restriction/leak elsewhere where replacing the valve alone won’t fix the symptom.
More specifically, this is where people waste time: they replace the valve, the idle improves for a day, then the root cause (collapsed hose, clogged separator, turbo PCV labyrinth, sludge in the port) brings the problem back.
When replacement is the smarter move than cleaning
Replace the PCV valve when:
- The valve is a sealed unit, or the manufacturer doesn’t recommend service/cleaning.
- The pintle doesn’t move smoothly, or it sticks intermittently (common with varnish).
- The spring feels weak, the valve doesn’t hold direction properly, or the check function fails.
- You’re chasing oil leaks or oil consumption and suspect metering accuracy matters.
This is also where PCV causing oil consumption and leaks becomes real: if crankcase pressure rises (restriction) or vacuum becomes excessive (stuck open in some layouts), seals and rings can behave differently, and oil mist management gets worse.
When cleaning is acceptable (and what “success” looks like)
Cleaning can be reasonable when:
- The valve is accessible and clearly contaminated with light varnish.
- You can confirm the valve regains smooth movement and correct one-way behavior after cleaning.
- The PCV port and hoses are clean and unobstructed.
“Success” isn’t “it looks clean.” Success is: idle trims stabilize, crankcase vacuum/pressure is reasonable, and symptoms don’t return after a few heat cycles.
The real trap: PCV hose and separator issues that mimic a bad valve
Many “bad valve” symptoms are actually:
- Split elbows or hardened hoses that leak only when warm
- A clogged oil separator (or baffle) that restricts flow
- A blocked PCV port in the intake manifold
- A failed valve-cover integrated PCV diaphragm (common on some engines)
Treat the whole system as a circuit: valve + hoses + separator + fresh-air side + ports.
How Can You Diagnose Bad PCV Valve Symptoms at Home?
You can diagnose bad PCV valve symptoms at home by combining three quick checks—sound/idle behavior, simple vacuum/crankcase tests, and targeted hose inspection—so you can tell the difference between a bad valve, a vacuum leak, and a restriction.
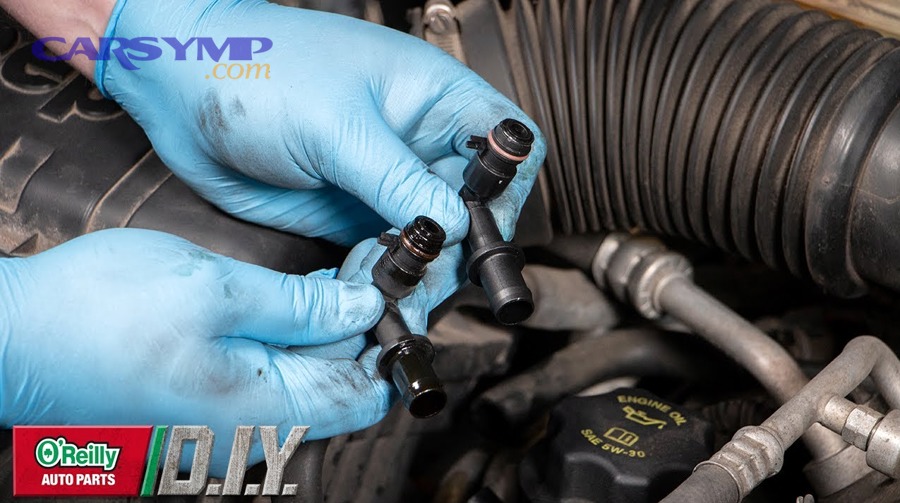
Specifically, the goal is not to “find a rattle.” The goal is to prove whether the PCV system is metering flow correctly and whether it’s sealed.
Testing PCV function at home (safe, simple, repeatable)
Here are practical home tests that actually separate causes:
- Idle-change clamp test (quick vacuum leak check)
- Warm the engine and let it idle steadily.
- Briefly pinch the PCV hose (or temporarily block the PCV port if the layout allows).
- If idle smooths dramatically or fuel trims improve, you likely had excess air entering (stuck-open valve or a leak in the PCV path).
- Oil cap / dipstick behavior check (crankcase pressure clue)
- With the engine idling, carefully loosen the oil cap.
- A mild vacuum sensation can be normal on many engines.
- Strong suction, whistling, or a big idle change can indicate the system is pulling too much air (metering issue or leak path).
- Pressure puffing out can suggest restriction or blow-by volume exceeding system capacity.
- One-way flow test off-car (basic check-valve verification)
- Remove the valve (when accessible).
- Confirm it allows flow in the correct direction and resists flow in reverse.
These checks are not perfect for every modern design (especially integrated PCV), but they’re strong starting points.
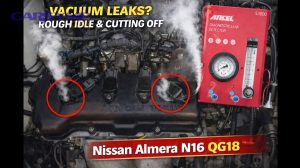
Rough idle from PCV vacuum leak: how to confirm it’s really PCV
A Rough idle from PCV vacuum leak often shows up as:
- Rough idle that improves when you pinch the PCV hose
- A high-pitched whistle near the valve cover/intake area
- Lean codes or positive fuel trims at idle that reduce at higher RPM (classic vacuum leak pattern)
The confirming move is to inspect every rubber elbow, grommet, and quick-connect in the PCV circuit—because the “valve” may be fine while the sealing surfaces are not.
PCV causing oil consumption and leaks: the symptom chain to look for
If the PCV system is restricted or poorly separating oil mist, you may see:
- Oil in the intake tract or intercooler piping (turbo engines especially)
- Wetness around valve cover gaskets, rear main seal area, or dipstick tube
- Increased oil usage without external leaks
That’s where you stop thinking “just replace the valve” and start thinking “fix the circuit” (separator efficiency, hoses, ports, and metering).
How Do You Do a PCV Valve Replacement Step by Step?
A PCV valve replacement is a straightforward process with 7 steps—locate the valve, verify the correct part, remove the hose/retainer, extract the valve, inspect hoses/seals, install the new valve, and verify idle/trim behavior—so you restore correct crankcase ventilation without introducing new vacuum leaks.
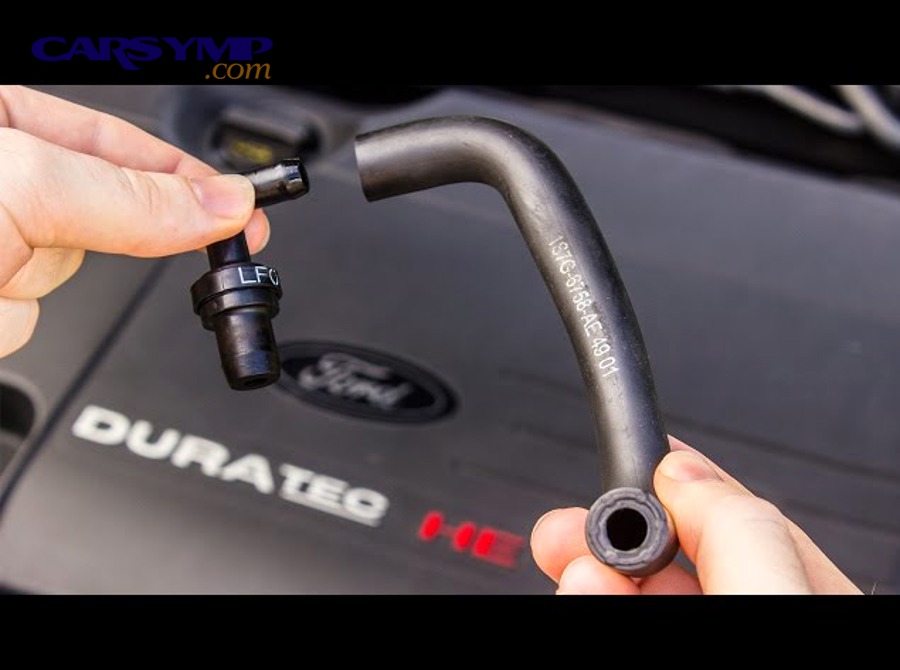
Then, the most important point is this: the replacement only “counts” if you also address brittle hoses, grommets, and separators that caused the failure or will cause the next one.
Tools, parts, and prep (before you touch anything)
Plan for:
- Safety gloves and eye protection
- Pliers or hose clamp pliers
- Pick tool for grommets (if applicable)
- Replacement PCV valve (OEM or equivalent spec)
- Optional: new grommet, hose elbow, or valve-cover seal if hardened
If access is tight, you may be doing light disassembly. On some engines, the valve is trivial; on others (especially under intake manifolds), it isn’t.
Step-by-step: removal and install (common layouts)
Step 1: Identify the PCV valve and flow direction
Confirm which side goes to crankcase and which goes to the intake. A wrong orientation can create instant drivability issues.
Step 2: Remove the PCV hose carefully
Twist gently to break the seal before pulling. Old hoses tear easily.
Step 3: Extract the valve
Grommet style: pull the valve straight out of the rubber grommet. Threaded style: remove carefully and avoid over-torquing on install. Integrated style: you may be replacing a valve-cover assembly or diaphragm unit, not a simple valve.
Step 4: Inspect the entire PCV path
This is where you catch PCV hose and separator issues: cracks at elbows, soft spots, collapsed hose liners, oil pooling where it shouldn’t be, and clogged ports (carbon or sludge).
Step 5: Install the new valve (and new grommet if needed)
A hardened grommet will leak vacuum and undo your work. If the grommet is stiff, replace it.
Step 6: Reconnect hoses and confirm secure fit
Loose connections cause vacuum leaks that look like a bad valve.
Step 7: Verify at idle
Check for whistles, unstable idle, and obvious vacuum leak behavior.
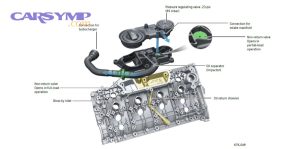
Turbo engines and PCV system complexities (what changes and why it matters)
Turbo engines and PCV system complexities are real because intake pressure can go positive under boost. Many turbo setups use multiple check valves, separate boost and vacuum paths, oil separators and labyrinth passages, and routes to the pre-turbo inlet under boost (instead of the manifold).
So the “PCV valve” might not be a single part. If you replace one component and ignore the rest, you can end up with oil in the intercooler, boost leaks, or persistent pressure issues.
After Replacement: What Checks Should You Do (Including Idle Relearn)?
Yes—after replacement, you should do After replacement: idle relearn checks because (1) a corrected vacuum leak can change idle airflow assumptions, (2) the ECU may need a short adaptation period for fuel trims, and (3) any missed hose leak will show up immediately if you verify correctly.
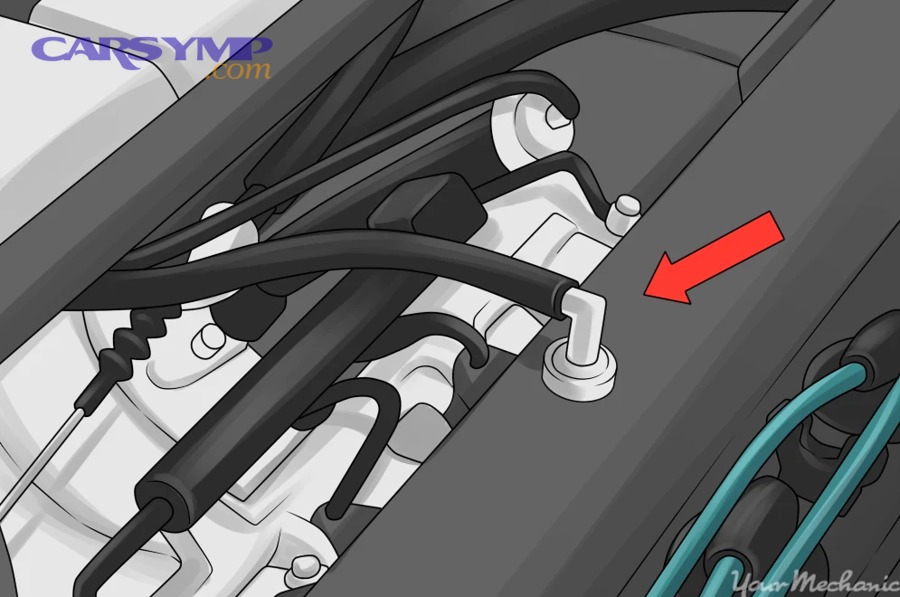
In addition, post-repair checks prevent you from blaming the new part for a problem that’s actually an installation leak or a clogged port.
After replacement: idle relearn checks (what “normal” looks like)
Not every vehicle requires a formal “idle relearn,” but many benefit from a short adaptation routine: let the engine reach full operating temperature, idle for a few minutes with all accessories off, turn on major loads (A/C, headlights) and confirm idle remains stable, then drive through light throttle, steady cruise, and decel so fuel trims can settle.
If the vehicle has a known idle relearn procedure (manufacturer-specific), follow that.
Confirm you fixed the vacuum leak (and didn’t create a new one)
Immediately verify: no hissing/whistling near the valve cover, intake, or PCV hose joints; idle quality improved and stays improved when warm; and no engine light related to lean conditions returns.
This is also the moment to re-check for Rough idle from PCV vacuum leak by briefly pinching the PCV hose again: the “pinch test” should no longer produce a dramatic change if everything is now correct.
Preventing sludge with a healthy PCV system (the maintenance mindset)
If sludge contributed to restriction: short-trip driving + infrequent oil changes are a common combo, a stuck PCV system traps moisture and acids in the crankcase, and once you restore ventilation, keep it healthy with consistent oil service intervals and correct oil spec.
This is where a PCV repair becomes part of long-term engine service, not just a symptom fix.
What Is the PCV Valve Replacement Cost Estimate and Labor Time?
A realistic PCV valve replacement cost estimate typically depends on access: many vehicles are inexpensive and fast, while others require intake removal or additional disassembly—so the same “small part” can produce very different shop quotes.

More importantly, you should always separate part cost from PCV valve replacement labor time, because labor is what swings totals from “cheap” to “surprisingly expensive.”
PCV valve replacement cost estimate (parts + labor ranges)
Repair pricing varies by region and vehicle, but a common industry estimate is in the low hundreds for many cars. For example, RepairPal’s estimator lists an average PCV valve replacement total in the $112–$155 range, with labor and parts broken out. (repairpal.com)
PCV valve replacement labor time (why some jobs balloon)
Labor time increases when the PCV valve is under the intake manifold, the “valve” is integrated into the valve cover or separator assembly, turbo plumbing restricts access, or brittle hoses and connectors break during removal (common on older vehicles).
In those cases, the job becomes “remove components to access PCV,” not “swap a valve.”
A simple cost comparison table (DIY vs shop)
The table below summarizes typical cost components so you can interpret quotes and decide whether DIY makes sense.
| Scenario | What you pay for | Typical cost drivers |
|---|---|---|
| DIY (simple access) | Part + optional hose/grommet | Correct part + avoiding vacuum leaks |
| Shop (simple access) | Part + labor | Labor minimums + diagnostic time |
| Shop (hard access) | Part + higher labor | Intake removal, turbo plumbing, integrated PCV assemblies |
What’s the Difference Between PCV Valves, CCV, and OCV Systems?
There are 3 main “types” of crankcase ventilation approaches—PCV (positive/controlled), CCV (closed crankcase ventilation routing vapors back to intake), and OCV (open crankcase ventilation venting outward)—based on where vapors go and how flow is controlled.
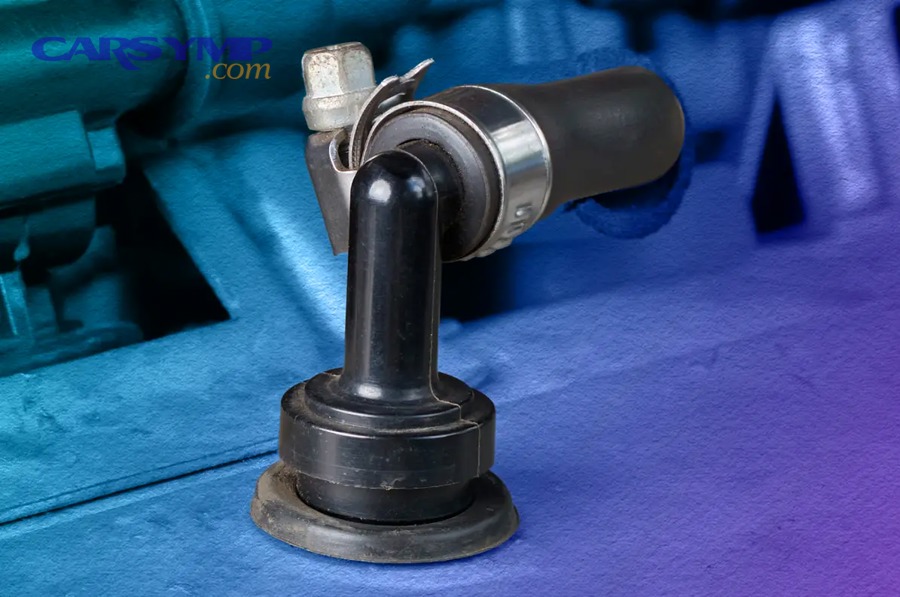
Besides clarifying terminology, this matters because your engine may use a hybrid layout—especially in turbocharged applications—where multiple check valves and separators work together.
CCV vs OCV vs PCV: what each approach means in practice
PCV (positive/controlled ventilation): a metered valve regulates flow using intake vacuum/pressure conditions. CCV (closed crankcase ventilation): routes vapors back into the intake path to be burned, generally with separation/filtration. OCV (open crankcase ventilation): vents vapors to atmosphere (historical/regulated contexts vary).
Why turbo engines complicate the “simple PCV valve” idea
Many turbo engines can’t rely on manifold vacuum under boost, so they may route crankcase vapors differently depending on load and pressure zones—one reason Turbo engines and PCV system complexities are so commonly misdiagnosed as “just a bad valve.”
Why this difference matters for diagnosis and repairs
If you treat a multi-path turbo PCV/CCV system like a simple naturally aspirated PCV valve layout, you can replace the wrong component, miss the separator restriction, create a boost leak or oil carryover path, and chase repeat Bad PCV valve symptoms that are really system-level problems.
Evidence (quick recap of the most decision-useful sources)
- University of Windsor (Department of Mechanical, Automotive & Materials Engineering) thesis notes typical road-engine crankcase pressure targets around 20–30 hPa below atmospheric (useful for understanding why restrictions/leaks matter). (collectionscanada.gc.ca)
- RepairPal provides a widely referenced consumer-facing estimate range for PCV valve replacement costs (useful for quote sanity checks). (repairpal.com)