Diagnose & Fix EVAP System Repair: Purge Valve, Vent Valve, and Gas Cap Guide for DIY Drivers
An EVAP system repair is usually successful when you identify the failing EVAP “part” —most often the gas cap, purge valve, vent valve, hoses, or charcoal canister—then verify the fix with a sealed-system test and readiness monitors.
You’ll get the clearest results when you start with symptoms + codes, because EVAP faults are “logic-driven”: the ECU runs leak checks under specific conditions, then sets a code that hints at where the system can’t hold vacuum/pressure.
You can also reduce wasted money by following a step-by-step DIY diagnostic path—from gas cap and visual checks to purge/vent function tests—before you replace anything.
Introduce a new idea: once the leak is fixed, the job is not done until you confirm it with monitor readiness and a repeatable drive cycle so you can pass emissions testing without the code returning.
What Is an EVAP System and What Does EVAP System Repair Actually Fix?
The EVAP system is a sealed fuel-vapor control system that stores gasoline vapors and routes them to the engine to be burned, so EVAP system repair fixes leaks, stuck valves, or saturated canisters that prevent the system from sealing and purging correctly.
Next, to better understand why a small crack can trigger a warning light, it helps to map the parts and what each one is supposed to do.
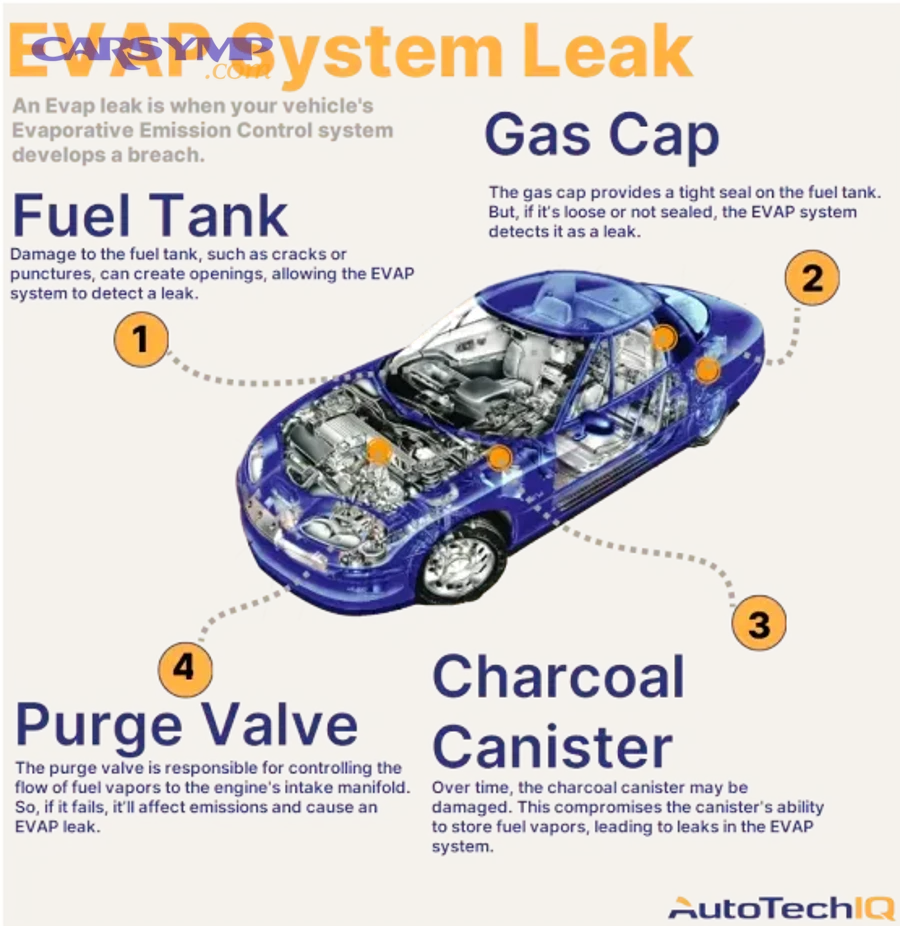
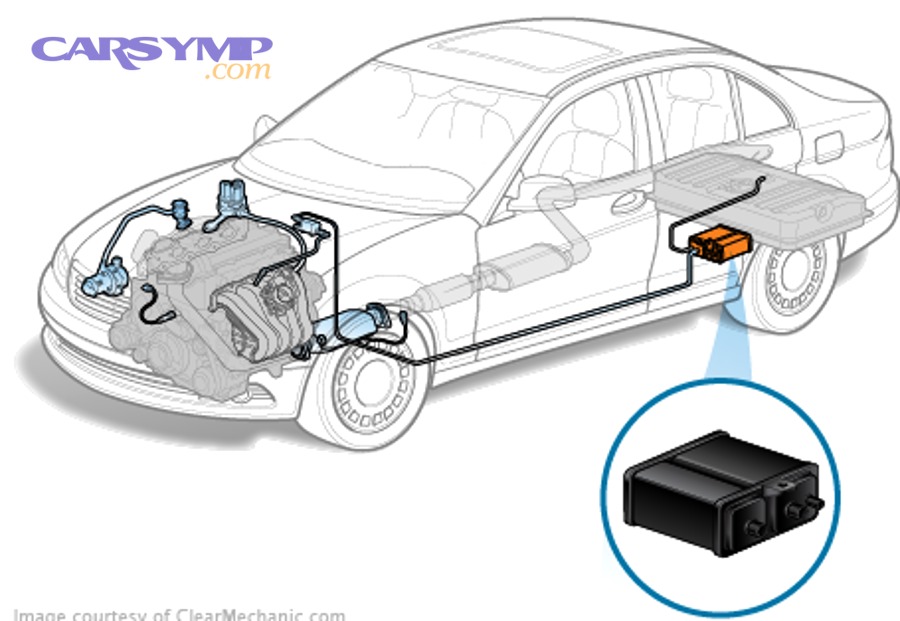
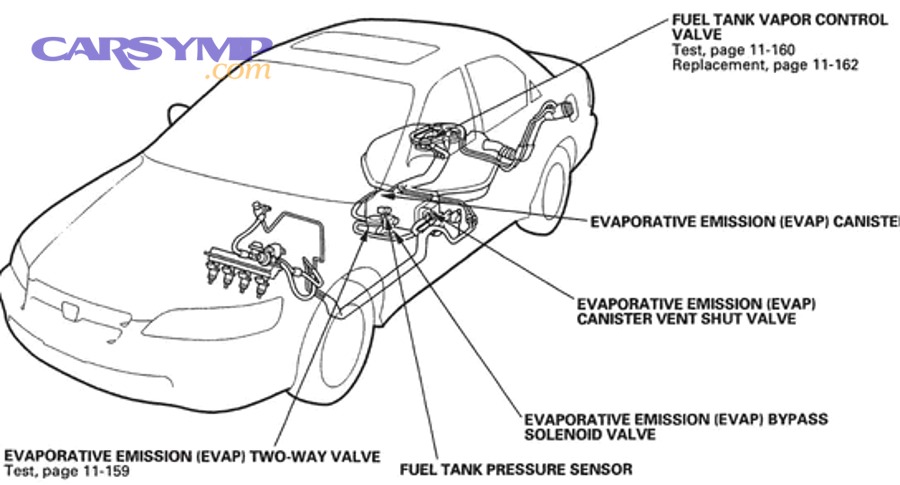
What are the main EVAP components (gas cap, lines, charcoal canister, purge valve, vent valve, pressure sensor)?
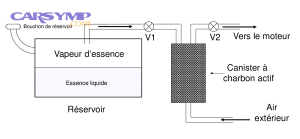
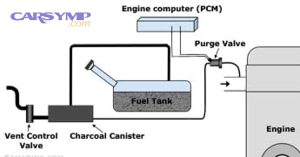
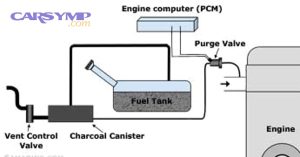
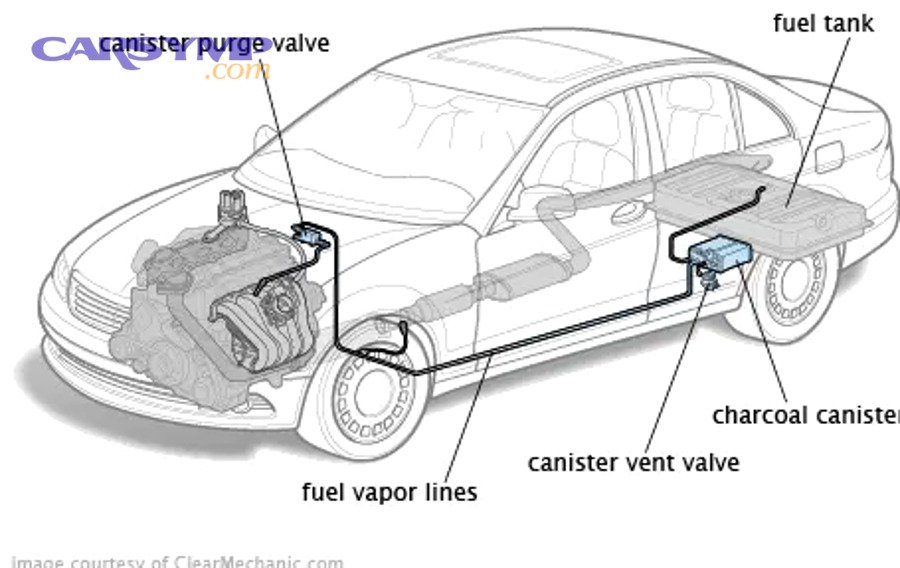
EVAP components work like a controlled “lungs” for the fuel tank: vapors are captured, the system seals when tested, and vapors are purged into the intake when commanded.
- Gas cap / capless seal: The first seal in the system; if it leaks, the system often fails its leak test.
- Filler neck & sealing surface: Rust, dents, or grit can prevent a proper seal even with a new cap.
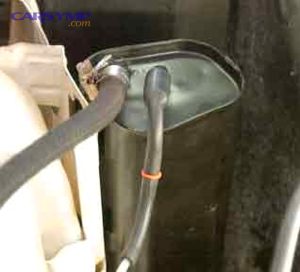
- EVAP lines/hoses: Carry vapor between the tank, charcoal canister, purge valve, and vent path; small cracks are common near bends and clips.
- Charcoal canister: Stores fuel vapors in activated carbon; can crack, clog, or become saturated (especially after repeated “topping off”).
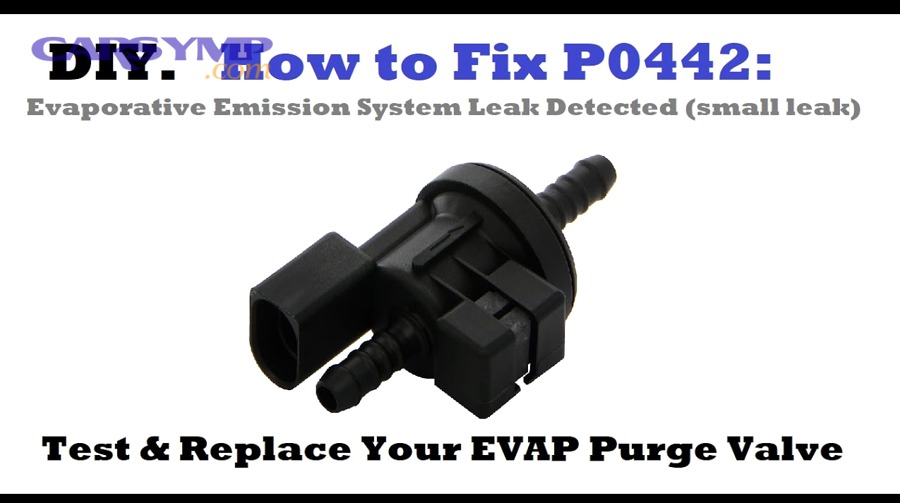
- Purge valve (purge solenoid): Meters vapor from the canister into the intake manifold; if it sticks open, it can cause rough starts after refueling.
- Vent valve (canister vent solenoid): Opens to fresh air during purge and closes during leak testing; if it sticks, it can block venting or prevent the system from sealing.
- Fuel tank pressure sensor (FTPS): Measures vacuum/pressure changes to confirm purge flow and leak tests; a faulty sensor can mimic a leak.
A practical way to think about EVAP is: seal + measure + control. If any of those three fails, you get an EVAP code.
What is a “small leak” vs “large leak” in OBD terms?
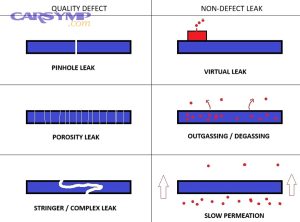
“Small leak” versus “large leak” is the ECU’s estimate of how quickly the EVAP system loses vacuum/pressure during a self-test, which roughly correlates to an “orifice size” leak severity rather than a precise hole measurement.
- Large leak (often P0455): The system can’t build or hold vacuum at all—think loose/missing cap, disconnected hose, broken canister, or a vent valve stuck open.
- Small leak (often P0442/P0456): The system seals “mostly,” but loses vacuum slowly—think cap seal hardened, hairline hose crack, canister seam leak, or tiny leak at a quick-connect.
This is why “EVAP system repair” can be deceptively simple (cap) or annoyingly subtle (micro-crack that only leaks when cold).
What Are the Most Common EVAP Leak Symptoms and Codes Explained?
There are two main groups of EVAP problems—leak/seal failures and flow/control failures—and EVAP leak symptoms and codes explained correctly will tell you which group to test first.
Specifically, once you match the code family to what the ECU was trying to prove, your diagnostic path becomes much shorter.
Which OBD-II codes point to leaks (P0440, P0442, P0455, P0456) and what they usually mean?
Here’s the practical translation drivers want when the scan tool lights up:
- P0440 (General EVAP system malfunction)
A broad “something isn’t right” flag—often paired with another EVAP code that narrows it down. Start with cap + visual inspection, then verify valve function. - P0442 (Small leak detected)
System seals but leaks slowly. Most common real-world causes: cap seal, minor hose crack, canister seam, or marginal vent valve seal. - P0455 (Gross/large leak detected)
System can’t hold vacuum/pressure. Most common causes: cap off/loose, disconnected line, broken canister, vent valve stuck open. - P0456 (Very small leak detected)
Similar to small leak but tighter threshold—often intermittent, temperature-related, or from tiny sealing issues.
A helpful habit: look at freeze-frame data (fuel level, ambient temperature, engine state) when the code set. EVAP tests run only under certain conditions, and that context can point you to “why it only happens sometimes.”
Can EVAP issues affect drivability or fuel economy?
Yes—Can EVAP issues affect drivability depends on the failure mode, because a leak alone is often low-impact while a stuck purge valve can act like a vacuum leak and change fueling.
However, if you notice symptoms beyond a check engine light, you should treat it as more than an emissions annoyance.
Common drivability-linked EVAP failures:
- Stuck-open purge valve: hard start after refueling, rough idle, occasional stalling, fuel odor, sometimes rich/lean fuel-trim swings.
- Blocked vent / stuck-closed vent valve: difficulty refueling (pump clicks off repeatedly), tank pressure issues, and sometimes fueling issues that confuse EVAP tests.
- Severe leaks: usually no drivability change, but strong fuel smell is a safety concern.
Even when drivability feels normal, you can still fail an emissions inspection because the ECU can’t complete EVAP diagnostics.
Should You Drive With an EVAP Leak or Check Engine Light?
Yes, you can usually drive with a minor EVAP leak, but you should not ignore it because it can (1) prevent emissions readiness, (2) cause fuel vapor odor, and (3) hide a purge/vent failure that does affect running.
However, before you decide to “wait it out,” you need to sort low-risk leaks from conditions that require immediate attention.
When it’s low risk vs when you should stop (fuel smell, hard start, stalling)
Low-risk (generally) looks like:
- Only EVAP leak code(s) present, no fuel smell, normal starts, normal idle.
- No “pending” misfire or fuel-trim codes.
- Cap was recently loose and you can confirm it clicks and seals.
Higher-risk—stop and diagnose soon—looks like:
- Strong fuel odor near the vehicle or in the cabin (possible vapor leak near hot surfaces).
- Hard start after refueling (classic purge valve stuck open sign).
- Rough idle or stalling tied to refueling events or warm restarts.
- Visible wetness around the filler neck, tank area, or lines.
If you smell fuel, treat it like a safety issue first: park in a ventilated area and avoid open flames/sparks.
Emissions test and legal implications
Even if the car drives fine, EVAP faults can block your ability to pass inspection because the ECU may keep the EVAP monitor “not ready,” or the MIL will fail you depending on local rules and model year requirements.
More importantly, the repair is often part of broader exhaust & emissions repair, where one unresolved monitor can delay registration renewals in stricter states.
For readiness rules and how monitors are judged in inspection programs, see guidance from Bureau of Automotive Repair. (bar.ca.gov)
How Do You Do a DIY EVAP Troubleshooting Checklist Before Replacing Parts?
A solid DIY EVAP troubleshooting checklist follows a simple method: start at the easiest seal (cap), then inspect hoses and fittings, then test purge/vent operation, and finally verify with pressure/smoke testing for the expected outcome of “system holds.”
To begin, treat EVAP like a sealed container with controlled valves—every shortcut you avoid now saves you from buying the wrong part later.
Gas cap issues and proper testing
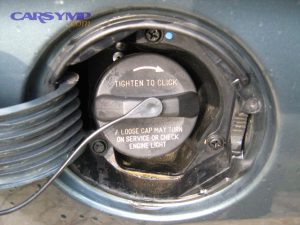
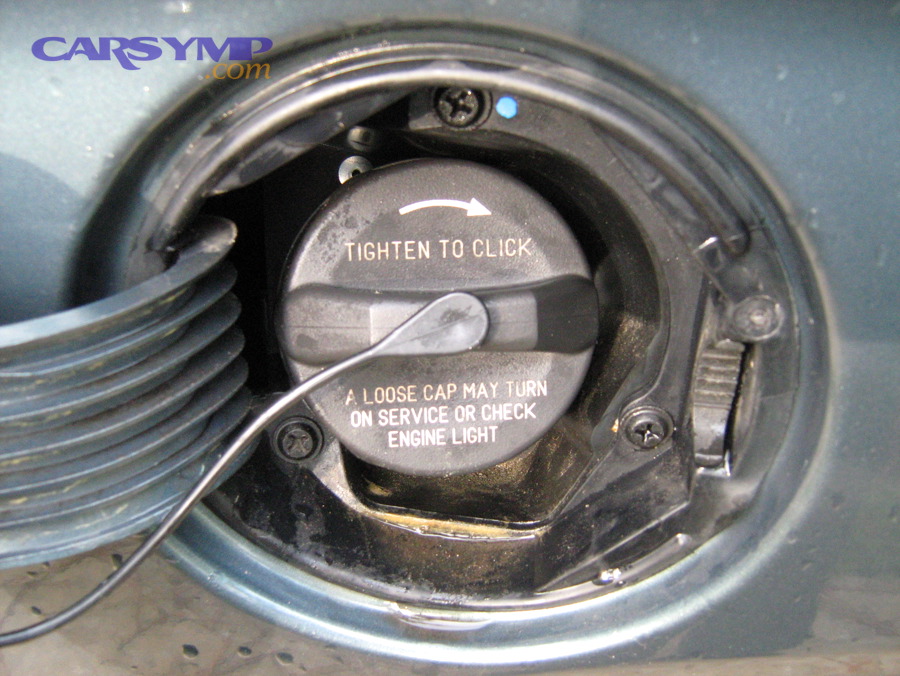
Gas cap issues and proper testing should be your first stop because it’s the most common and cheapest seal failure.
Do this before buying anything:
- Inspect the seal: look for a flattened, cracked, or shiny/hard rubber O-ring.
- Inspect the filler neck: wipe the sealing surface; check for rust pitting or dents.
- Tighten correctly: many caps require “clicks.” Under-tightened caps can set large leak codes.
- Check cap type: aftermarket caps can be wrong depth or venting design on some models.
- Cap test (best): many shops can pressure-test the cap; some DIY hand pumps/adapters can do it too.
Also watch for a real-world clue: if the light appears shortly after refueling, the cap is a prime suspect—but a stuck purge valve can mimic the same timing.
Evidence: According to a study by The University of Tokyo from the Graduate School of Frontier Sciences (Department of Environment Systems), in 2020, measured “puff loss” fuel vapor emissions during refueling were on the order of a few grams per event, highlighting why sealing and vapor control at the filler/cap area matters.
Visual/physical inspection checklist (hoses, canister, filler neck)
After the cap, your eyes can catch what scan data can’t.
Work in this order:
- From the tank forward: follow vapor lines from tank to canister; look for rub-through points and cracks near clips.
- Charcoal canister housing: inspect seams and corners for cracks; check for fuel saturation signs (strong raw fuel smell, wetness, heavy canister).
- Vent filter and vent line: mud, dust, or spider nests can restrict airflow, especially on trucks and off-road use.
- Quick-connect fittings: make sure locks are fully seated; O-rings inside connectors can nick.
- Filler neck: check for rust holes or loose clamps on older vehicles.
Tip: lightly flex hoses—many small leaks open only when the hose is bent.
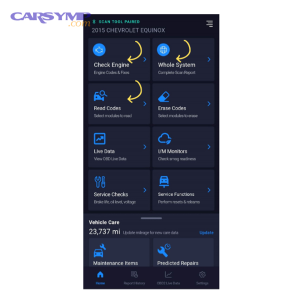
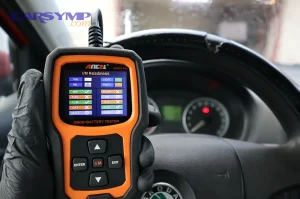
Simple scan-tool checks (freeze frame, purge command, fuel tank pressure)
A basic scan tool can turn “guessing” into “testing.”
Key checks:
- Read freeze frame for the EVAP code: note fuel level and temperature.
- Look at purge command (%) at idle: on many engines, purge is low at hot idle; very high commanded purge at idle can signal compensating behavior.
- Fuel tank pressure sensor (FTPS): with the engine off, it should read near atmospheric baseline; with purge commanded (if your tool supports it), you should see pressure/vacuum respond.
- Pinch test (carefully): pinching a purge hose temporarily can change fuel trims if purge is leaking; this is a clue, not a final diagnosis.
If your tool supports it, run an EVAP functional test: command the vent closed and purge on, and watch whether the system can pull a stable vacuum.
How Does a Smoke Test EVAP System Overview Work and When Do You Need One?
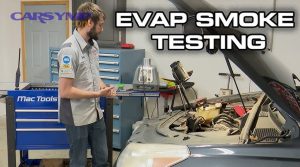
A Smoke test EVAP system overview is simple: you introduce low-pressure, mineral-oil smoke into the sealed EVAP plumbing and watch where smoke escapes, which pinpoints leaks faster than replacing parts blindly.
Besides, when a code says “small leak,” smoke testing is often the only efficient way to find a pinhole or seam crack.
Smoke test setup and safety
A correct smoke test is controlled and safe when you follow these rules:
- Low pressure only: EVAP plumbing isn’t designed for high shop-air pressure.
- Vent control: the system must be sealed (often by commanding the vent valve closed or using a service port adapter).
- Ignition sources: keep away from sparks, hot exhaust components, and open flames.
- Work ventilated: vapors can accumulate near the canister and tank area.
Common smoke entry points:
- EVAP service port (if equipped)
- Line near the purge valve
- Canister line (vehicle-dependent)
Common smoke leak points (cap, vent valve, canister cracks, hoses)
Where smoke most often appears:
- At the gas cap/filler neck: cap seal, rust pits, or a distorted neck.
- Vent valve seat: smoke can drift out the vent filter area if the valve doesn’t seal.
- Canister seam: hairline cracks at molded plastic joints.
- Top-of-tank connections: loose fittings that only leak when the tank shifts.
- Hoses near heat: small splits near the engine bay from heat cycling.
You can combine smoke with scan data: if the ECU couldn’t pull vacuum, command vent closed and watch if smoke immediately vents out—this quickly confirms a sealing failure.
Purge Valve vs Vent Valve Failure Signs: How Do You Tell Which One Is Bad?
Purge valve vs vent valve failure signs differ in a predictable way: purge valve faults usually show up as unwanted vapor flow into the engine, while vent valve faults usually show up as inability to vent or seal the canister side during testing and refueling.
Meanwhile, the fastest way to avoid swapping the wrong solenoid is to match the symptom timing—especially “after refuel” vs “during self-test.”
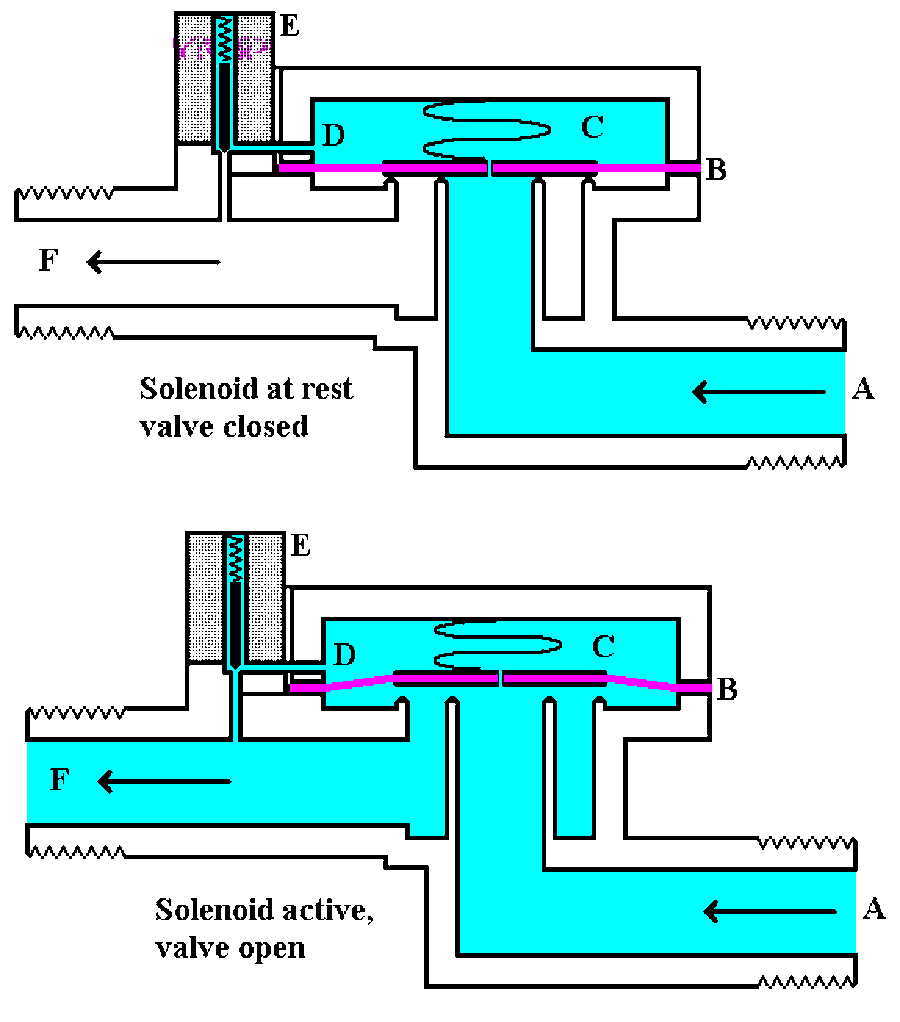
Stuck-open purge valve signs (hard start after refuel, rich codes)
A purge valve stuck open is a classic “it runs fine… until I fill up” failure.
Typical signs:
- Hard start or long crank right after refueling
- Rough idle for 10–60 seconds after a hot restart
- Fuel odor near the intake area
- Fuel trims that swing (the engine is ingesting extra vapor like unmetered fuel)
Why it happens: the canister can dump vapors into the intake when it shouldn’t, temporarily flooding the mixture.
Quick checks:
- At hot idle, remove the purge hose at the intake side—there should not be strong continuous vacuum flow through a closed/commanded-off purge valve on many systems.
- With a scan tool, command purge duty cycle and listen/feel for valve operation (clicking is not proof of sealing, but it’s a clue).
Stuck-closed purge/vent and blocked vent signs (slow fill, whistle)
Vent-side problems often announce themselves at the fuel pump.
Common vent/blocked-vent signs:
- Fuel nozzle clicks off repeatedly while refueling (tank can’t vent)
- Hissing/whistling when opening the cap (excess tank vacuum/pressure)
- EVAP codes that return after rain/mud exposure (vent filter contamination)
- Intermittent failures depending on dust, moisture, or temperature
A vent valve that won’t close can also cause “large leak” behavior during the ECU’s leak test, because the system can’t seal.
Quick bench tests and scan tests
Purge and vent valves are solenoids, so you can test them with a blend of electrical and functional checks:
- Electrical: verify coil resistance is within spec (service manual), and check power/ground control.
- Functional: apply vacuum/pressure with the valve unpowered and powered (as designed) to see if it seals.
- Scan test: command vent closed, command purge on, and watch FTPS response.
The important nuance: a valve can “click” and still leak internally, so sealing tests matter more than sound.
What Is a Fair EVAP Repair Cost Estimate for Parts and Labor?
A fair EVAP repair cost estimate is best predicted by which component failed plus how much diagnostic time is needed, because a gas cap fix can be inexpensive while a hard-to-access vent valve or top-of-tank leak can require significant labor.
More specifically, you’ll get a more accurate estimate when you separate “diagnosis cost” from “repair cost,” since EVAP can be quick or time-consuming depending on leak size.
Typical cost ranges by component
Typical buckets (parts + labor vary by vehicle):
- Gas cap: low cost, quick labor
- Purge valve: moderate cost, usually accessible in the engine bay
- Vent valve / vent filter: moderate cost; access varies (sometimes near rear axle/canister)
- Charcoal canister: higher parts cost; can be easy or moderately difficult access
- Hoses/lines/fittings: ranges widely; small hose is cheap, molded lines can be expensive
- Smoke test / diagnostic fee: can be a separate charge, but often saves money by avoiding wrong parts
If you’re paying for diagnosis, make sure the shop explains the proof: “smoke seen here” or “valve fails seal test,” not just “code says purge.”
What drives cost up (access, rust, diagnostic time, smoke test)
Cost spikes are usually caused by:
- Access difficulty (underbody shields, tight packaging, top-of-tank connections)
- Rusty fasteners and brittle plastic (breakage risk increases labor time)
- Intermittent small leaks (more diagnostic cycles, harder reproduction)
- Multiple failures (a saturated canister plus a sticky vent valve is not rare)
If you’ve had repeated topping-off habits, the canister can saturate and lead to a chain reaction of faults—fixing only one part may not stick.
How Do You Confirm the Fix and How to Pass Emissions With EVAP Fixed?
To confirm the fix and How to pass emissions with EVAP fixed, you need two outcomes: no returning EVAP codes and EVAP readiness completed, which typically means clearing codes correctly and letting the ECU re-run its EVAP monitor under the right conditions.
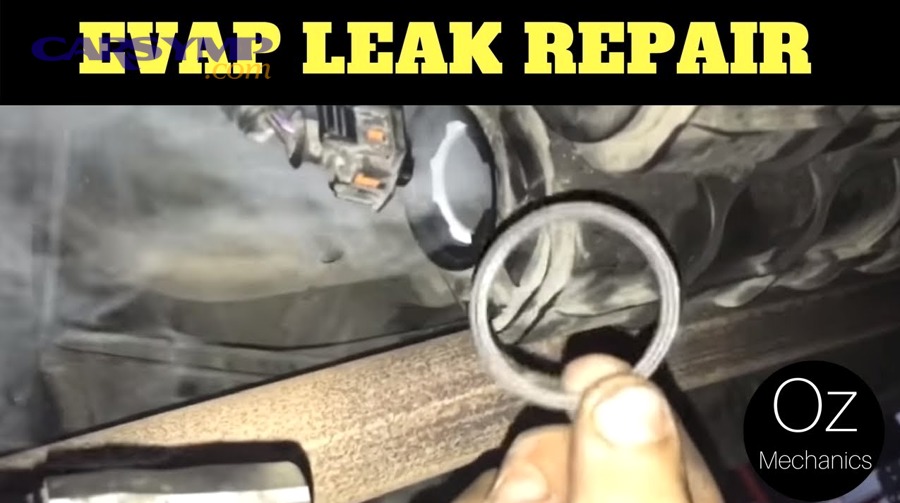
In addition, passing inspection isn’t only about “no light”—it’s also about proving the monitor can complete after the repair.
After repair: clearing codes and monitor readiness
After repair: clearing codes and monitor readiness should follow a deliberate routine:
- Fix first, then clear: clearing without fixing resets data and can hide whether the repair worked.
- Clear codes with a scan tool (or battery disconnect only if you accept losing learned data).
- Check for pending codes after a short drive; pending codes often appear before the MIL returns.
- Verify EVAP data: watch purge command, FTPS response, and ensure no obvious “stuck” valve behavior.
- Re-scan after a few drive cycles.
If the code comes back immediately, the leak is large or a valve is stuck. If it returns days later, suspect intermittent small leaks or readiness conditions not being met.
For why readiness must complete after an emissions-related repair, see (bar.ca.gov).
Drive cycle basics and fuel level requirements
EVAP monitors commonly require a mid-range fuel level and a cold-soak or stabilized temperature window so the ECU can accurately evaluate vapor behavior.
Practical tips that work across many vehicles:
- Keep fuel around ¼ to ¾ when trying to set EVAP readiness.
- Let the vehicle sit long enough for a “cold start” when required.
- Avoid refueling immediately before attempting readiness runs.
- Drive steady speeds and include some idle time, because many monitors need a mix of conditions.
Regulations allow manufacturers to disable or abort EVAP monitoring under certain conditions like high fuel level; for example, guidance in California Air Resources Board OBD regulations discusses fuel-level-related monitor behavior. (ww2.arb.ca.gov)
When to seek professional exhaust & emissions repair support
Seek professional exhaust & emissions repair support when:
- You’ve done cap + visual checks + basic valve tests, but the code persists.
- The leak appears to be top-of-tank or requires specialty access.
- You need a smoke machine and bi-directional scan control to seal/command the system.
- You have multiple EVAP codes plus fuel-trim or drivability complaints.
A good shop will show evidence: smoke location, valve seal test results, or pressure decay data—then explain why that proves the failure.
Small Leak vs Large Leak Diagnosis Approach: Advanced Tips After You’ve Tried the Basics
Small leak vs large leak diagnosis approach should change once you’ve ruled out obvious faults: large leaks are usually found by visual inspection or immediate smoke escape, while small leaks often require temperature-aware testing, connector O-ring checks, and careful vent/purge sealing verification.
More importantly, “small leak” is where you win by being systematic, because the ECU is telling you “I almost sealed—something tiny ruined the test.”
Intermittent leaks (temperature, fuel level, refuel events)
Intermittent EVAP leaks often correlate with:
- Cold weather: rubber seals shrink/harden; tiny cracks open.
- Hot soak: pressure rises in the tank; weak seals vent.
- Fuel level changes: vapor space changes; the ECU may run tests only in certain ranges.
- Refuel events: disturbed seals, cap not clicked, or purge valve dumping vapors afterward.
A strong move here is to reproduce conditions: same fuel level, similar ambient temperature, and similar park/drive pattern as freeze-frame data.
NVLD/ESIM and leak detection pump systems
Different makes use different leak-detection strategies:
- Vacuum decay: ECU seals the system and watches how fast vacuum drops.
- Pump-based: a small pump or reference orifice helps measure leak size.
- Natural vacuum leak detection (NVLD/ESIM): uses temperature/pressure changes after shutdown to infer leak integrity.
When you know which strategy your vehicle uses, you can interpret symptoms better. For example, NVLD-style systems may be especially sensitive to overnight conditions and may set codes after sitting, not while driving.
Avoiding repeat failures (hose routing, cap choice, canister saturation)
Repeat EVAP failures usually happen for three reasons:
- Wrong part or wrong seal: especially gas caps that don’t match OEM depth/valve design.
- Unfixed root cause: a vent filter clogged with dust can cause repeated vent valve issues.
- Canister saturation: repeated topping off can push liquid fuel into the canister, degrading it and leading to persistent faults.
If your pattern is “code returns after refuel,” prioritize purge valve sealing tests and canister condition, not just leak chasing.
Evidence (key sources used):
- The University of Tokyo refueling vapor “puff loss” measurements (2020).
- California Air Resources Board OBD regulation language on EVAP monitor behavior around fuel level/refueling conditions. (ww2.arb.ca.gov)
- Bureau of Automotive Repair explanation of readiness monitors and post-repair readiness expectations (2025). (bar.ca.gov)